Terminal: Warp Terminal features and configuration.
# Terminal appearance overview
Canonical page: [/terminal/appearance/](https://docs.warp.dev/terminal/appearance/)
> Customize Warp's visual appearance, including themes, fonts, prompts, app icons, input position, and pane behavior.
# Custom app icons
Canonical page: [/terminal/appearance/app-icons/](https://docs.warp.dev/terminal/appearance/app-icons/)
> Choose from a palette of built-in app icons to customize Warp's dock appearance on macOS.
## How to change the app icon [Section titled “How to change the app icon”](#how-to-change-the-app-icon) * Navigate to **Settings** > **Appearance** > **Icon** > **Customize your app icon** * Select the desired dock icon from the drop down menu 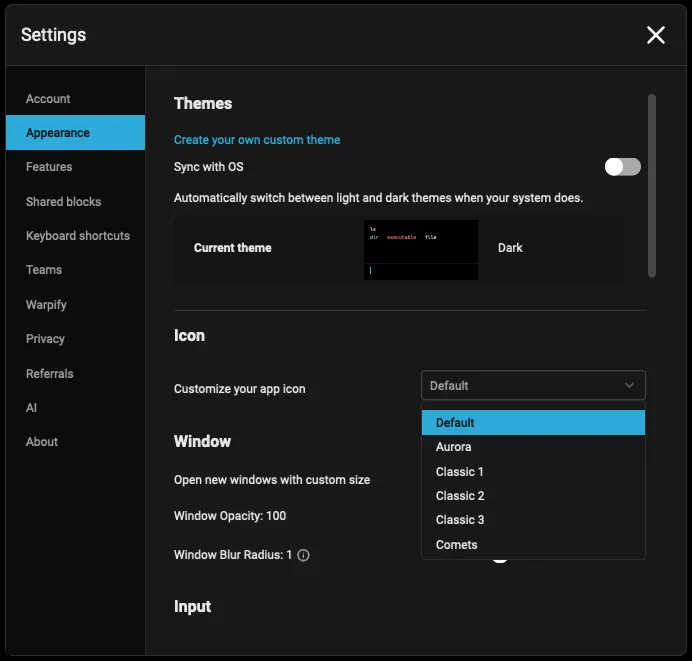 Icon customization drop-down menu. ## Dock icons [Section titled “Dock icons”](#dock-icons) By default, Warp ships with these dock icons:  Default  Warp 1.0  Aurora  Classic 1  Classic 2  Classic 3  Comets  Glass Sky  Glitch  Glow  Holographic  Mono  Neon  Original  Starburst  Sticker
# Blocks Behavior
Canonical page: [/terminal/appearance/blocks-behavior/](https://docs.warp.dev/terminal/appearance/blocks-behavior/)
> Customize Block spacing with Compact mode and toggle Block dividers for a cleaner layout.
## Compact Mode [Section titled “Compact Mode”](#compact-mode) Warp offers the option to enable Compact mode, which condenses the spacing between [Blocks](/terminal/blocks/), enabling more content to be in view. ### How to enable Compact Mode [Section titled “How to enable Compact Mode”](#how-to-enable-compact-mode) Compact mode is disabled by default, but can be toggled in the following ways: * Navigate to **Settings** > **Appearance** > **Blocks** > **Compact Mode**. * Utilize the [Command Palette](/terminal/command-palette/), then search for “Compact mode” to toggle. [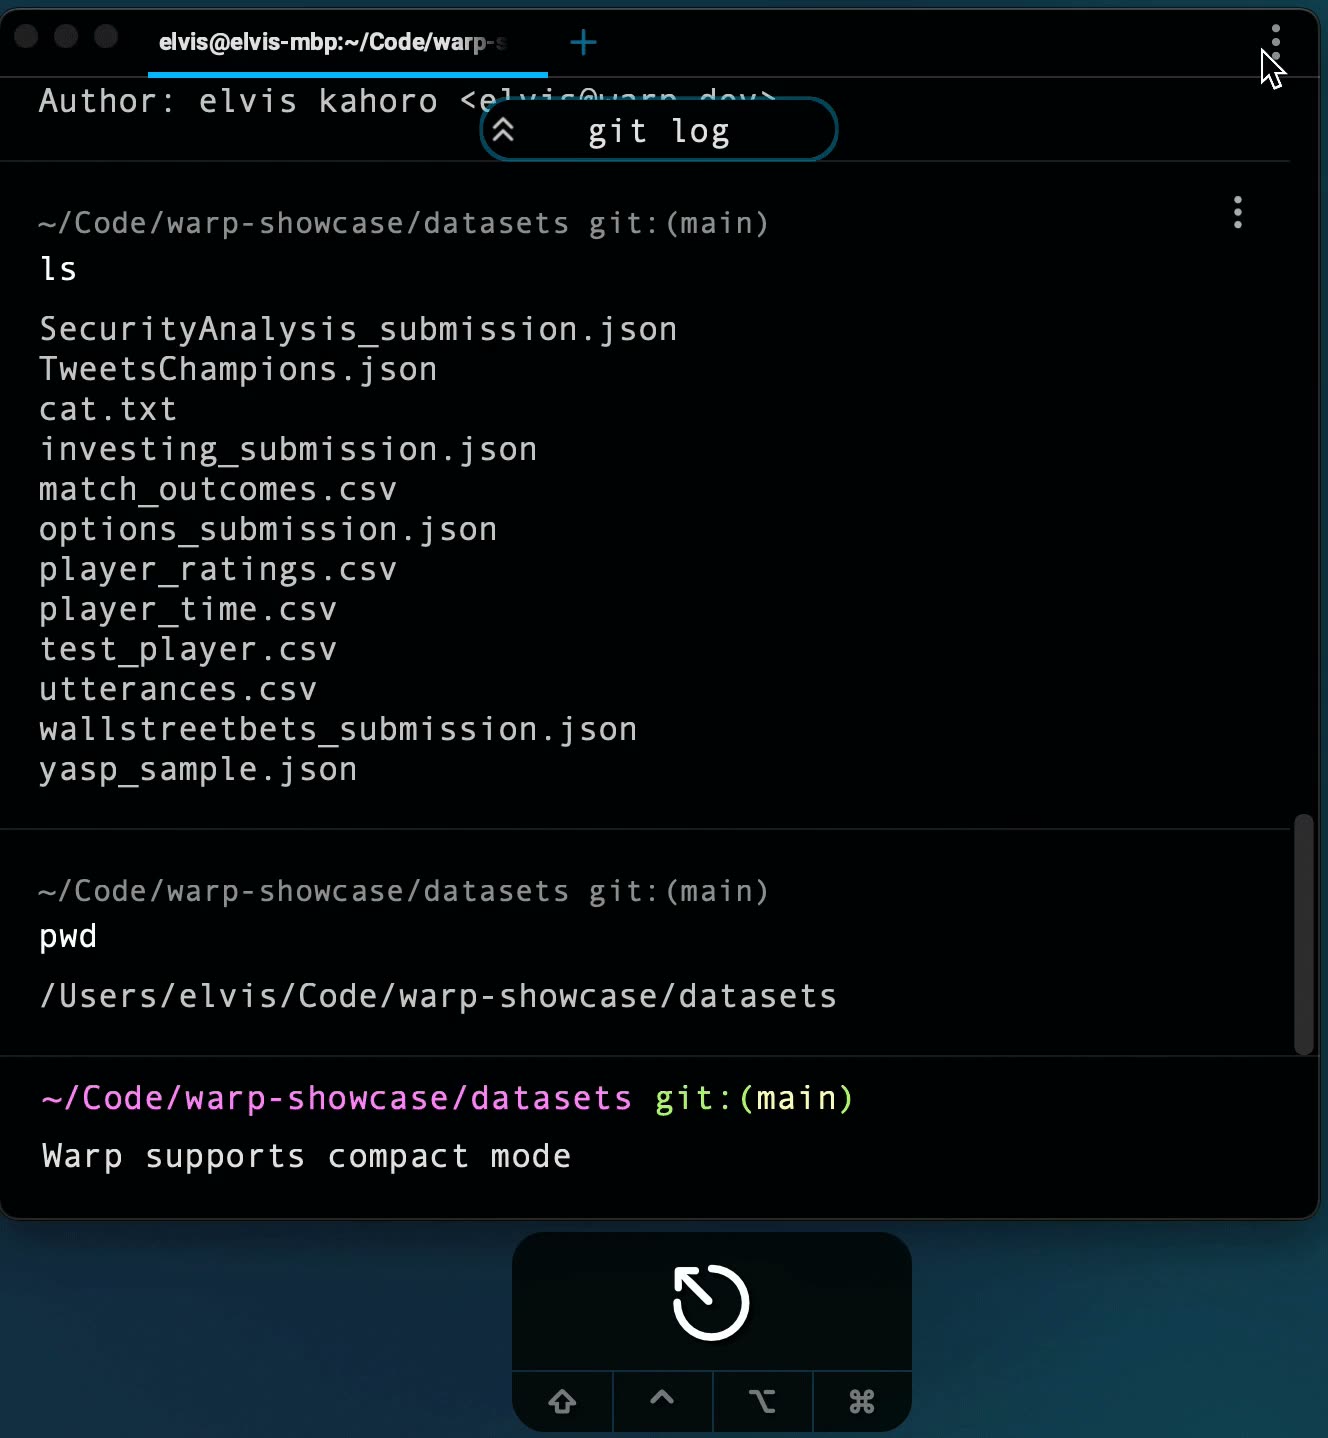](/assets/terminal/compact_mode.mp4) ## Block Dividers [Section titled “Block Dividers”](#block-dividers) Warp [Blocks](/terminal/blocks/) are divided by horizontal lines that separate individual command input and output, they create a visual break between different commands that you run in a session. ### How to toggle block dividers [Section titled “How to toggle block dividers”](#how-to-toggle-block-dividers) Block dividers are enabled by default, but can be toggled in the following ways: * Navigate to **Settings** > **Appearance** > **Blocks** > **Show block dividers**. * Utilize the [Command Palette](/terminal/command-palette/), then search for “Block Dividers”. [](/assets/terminal/block-divider-demo.mp4)
# Custom Themes
Canonical page: [/terminal/appearance/custom-themes/](https://docs.warp.dev/terminal/appearance/custom-themes/)
> Warp supports Custom Themes which can be created manually or downloaded from our repo.
## Warp’s custom theme repository [Section titled “Warp’s custom theme repository”](#warps-custom-theme-repository) We have a [repository of themes hosted on GitHub.](https://github.com/warpdotdev/themes) Each theme has a preview generated in the README. The main difference between “standard” and “base16” themes is that “standard” themes follow the typical color setup, while “base16” themes follow the framework suggested by [@chriskempson](https://github.com/chriskempson/base16). There are 2 ways to install a theme from this repo. 1. Download a single file and follow the steps in the section below. 2. Clone the entire repo into the appropriate location based on your OS below: * macOS ```bash mkdir -p $HOME/.warp cd $HOME/.warp/ git clone https://github.com/warpdotdev/themes.git ``` * Windows ```powershell New-Item -Path "$env:APPDATA\warp\Warp\data\" -ItemType Directory Set-Location -Path $env:APPDATA\warp\Warp\data\ git clone https://github.com/warpdotdev/themes.git ``` * Linux ```bash mkdir -p ${XDG_DATA_HOME:-$HOME/.local/share}/warp-terminal cd ${XDG_DATA_HOME:-$HOME/.local/share}/warp-terminal/ git clone https://github.com/warpdotdev/themes.git ``` Here is a step-by-step YouTube video that goes through these 2 steps for an example theme. Note the location for the files is based on macOS.  ## How do I use a custom theme in Warp? [Section titled “How do I use a custom theme in Warp?”](#how-do-i-use-a-custom-theme-in-warp) 1. To start, create the following directory: * macOS ```bash mkdir -p $HOME/.warp/themes/ ``` * Windows ```powershell New-Item -Path "$env:APPDATA\warp\Warp\data\themes\" -ItemType Directory ``` * Linux ```bash mkdir -p ${XDG_DATA_HOME:-$HOME/.local/share}/warp-terminal/themes/ ``` 2. Add your new custom theme yaml file to this directory: ```bash cp ~/Downloads/my_awesome_theme.yaml {{path_to_your_themes_directory_from_step1}} ``` Your new theme should now be visible on the list of available themes. ## Create your custom theme, manually [Section titled “Create your custom theme, manually”](#create-your-custom-theme-manually) Warp supports creating custom themes using .yaml files. The format is subject to change, but we do our best to avoid breaking changes and maintain forward compatibility. We also plan to support sharing and creating custom themes directly within Warp. A custom theme in Warp has the following `.yaml` structure: ```yaml name: Custom Theme # Name for the theme accent: '#268bd2' # Accent color for UI elements cursor: '#95D886' # Input cursor color (optional; defaults to accent color if omitted) background: '#002b36' # Terminal background color foreground: '#839496' # The foreground color details: darker # Whether the theme is lighter or darker terminal_colors: # Ansi escape colors bright: black: '#002b36' blue: '#839496' cyan: '#93a1a1' green: '#586e75' magenta: '#6c71c4' red: '#cb4b16' white: '#fdf6e3' yellow: '#657b83' normal: black: '#073642' blue: '#268bd2' cyan: '#2aa198' green: '#859900' magenta: '#d33682' red: '#dc322f' white: '#eee8d5' yellow: '#b58900' ``` * `name`: Name for the theme, will show up in the Theme picker. * `accent`: Color used for highlights in Warp’s UI * `cursor`: Color for the input cursor (optional; defaults to accent color if omitted) * `background`: Color of background * `foreground`: Color of foreground * `details`: Color used for detailing options * `darker`: Color used for dark theme * `lighter`: Color used for light-mode theme * `terminal_colors`: Collection of normal & bright colors (16 total) known for other terminal themes (ANSI colors) ## Create your custom theme, automatically [Section titled “Create your custom theme, automatically”](#create-your-custom-theme-automatically) Automatically create new themes based on a background image. Click the **+** button in the theme picker **Settings** > **Appearance** > **Themes** or search `Open Theme Picker` within the [Command Palette](/terminal/command-palette/). ## Browse themes and use the theme creator [Section titled “Browse themes and use the theme creator”](#browse-themes-and-use-the-theme-creator) Browse Warp’s [theme repository](https://github.com/warpdotdev/themes) for ready-made themes, or use the in-app theme creator to generate the appropriate RGB values for your custom theme. Once the YAML file is created, you can edit the file to add the background images or gradients. ## Background images and gradients [Section titled “Background images and gradients”](#background-images-and-gradients) To add a background image you can use this attribute: `background_image:` with the name of the image you want to use as the background. A `.yaml` config looks like this: ```yaml name: Custom Theme accent: '#268bd2' cursor: '#95D886' background: '#002b36' details: darker foreground: '#839496' ############################################################### SEE BELOW background_image: # The path is relative to your platform's themes directory: # macOS: ~/.warp/themes/ # Windows: %APPDATA%\warp\Warp\data\themes\ # Linux: ${XDG_DATA_HOME:-$HOME/.local/share}/warp-terminal/themes/ # For example, on macOS the full path to the picture below is: # ~/.warp/themes/warp.jpg path: warp.jpg # the opacity value is required and can range from 0-100 opacity: 60 ############################################################### SEE ABOVE terminal_colors: bright: black: '#002b36' blue: '#839496' cyan: '#93a1a1' green: '#586e75' magenta: '#6c71c4' red: '#cb4b16' white: '#fdf6e3' yellow: '#657b83' normal: black: '#073642' blue: '#268bd2' cyan: '#2aa198' green: '#859900' magenta: '#d33682' red: '#dc322f' white: '#eee8d5' yellow: '#b58900' ``` To set up a gradient, create a sublevel under accent with two key-value pairs: * “left” and “right” or * “top” and “bottom”. ```yaml accent: top: '#abcdef' bottom: '#fedcba' ``` ```yaml accent: left: '#abcdef' right: '#fedcba' ``` Warp also supports setting a gradient for the background. ```yaml # accent has a gradient accent: left: '#474747' right: '#ffffff' # background has a gradient background: top: '#474747' bottom: '#ffffff' ``` ### Contributing [Section titled “Contributing”](#contributing) Contributions to this repo are greatly appreciated! 1. Fork the project 2. Create your branch with `git checkout -b theme/AwesomeTheme` 3. Regenerate thumbnails 4. Commit and open a pull request Run this script to generate the thumbnails. ```bash # Assuming you're adding the theme to the `standard` directory: python3 ./scripts/gen_theme_previews.py standard ``` ## Community [Section titled “Community”](#community) All other Warp-related things can be discussed, please [contact us](/support-and-community/troubleshooting-and-support/sending-us-feedback/). ## Open source dependencies [Section titled “Open source dependencies”](#open-source-dependencies) We’d like to call out a few of the open-source themes and repositories that helped bootstrap the set of themes for Warp: * [iTerm colors pencil](https://github.com/mattly/iterm-colors-pencil) * [Alacritty-theme](https://github.com/eendroroy/alacritty-theme) * [base16-Alacritty](https://github.com/aarowill/base16-alacritty) * [base16](https://github.com/chriskempson/base16) * [Solarized](https://ethanschoonover.com/solarized/) * [Dracula](https://draculatheme.com/) * [Gruvbox](https://github.com/morhetz/gruvbox)
# Input position
Canonical page: [/terminal/appearance/input-position/](https://docs.warp.dev/terminal/appearance/input-position/)
> Warp gives you the ability to configure the position of your input, which includes both the prompt and the command line.
You can select from three different input positions, which each have different modes of behavior for the flow of input/output Blocks. | Input position | Behavior | | | ------------------------------- | ---------------------------------------------------------------------------------------------------------------------------------------------------------------------------------------------------------------------------------------------------------------------------------------------------------------------------------------------------------------------------------------------------------------------------------- | - | | Start at the top (Classic mode) | When you select “start at the top,” the prompt with input will initiate at the top of the view and move down in the view as you enter commands. Blocks of input/output will stack above the prompt and command input. You can scroll up or navigate up to visit past commands. You can enter `CTRL-L` or the `clear` command at any time to return the input to the top of the screen while still maintaining your scroll history. | | | Pin to the top (Reverse mode) | When you select “pin to the top,” the prompt with input will display pinned to the top of your terminal view. Blocks of grouped input/output will flow down the view in reverse order with your latest results at the top. You can scroll down or navigate down to visit past commands. For long-running commands, you can also click “Lock scrolling at bottom of block” to continue to follow the stdout. | | | Pin to the bottom (Warp mode) | Warp mode starts with input pinned to the bottom of your terminal view. Blocks of grouped input/output flow up and out of view. You can scroll up or navigate up to visit past commands. | | ## How to access it [Section titled “How to access it”](#how-to-access-it) * You can configure your input position by navigating to **Settings** > **Appearance** > **Input**. * You can also choose and set modes from the [Command Palette](/terminal/command-palette/). ### Related commands [Section titled “Related commands”](#related-commands) * macOS * `CMD-K` will clear the entire list of input/output blocks for a clean view * `CTRL-L` will move the list of input/output blocks outside of the view and past the scroll so you have a clean view and the ability to easily visit past commands * For long Blocks, you can press `SHIFT-CMD-UP`/`SHIFT-CMD-DOWN` to Scroll to the top/bottom the selected block. * Windows * `CTRL-SHIFT-K` will clear the entire list of input/output blocks for a clean view * `CTRL-L` will move the list of input/output blocks outside of the view and past the scroll so you have a clear view and the ability to easily visit past commands * For long Blocks, you can press `CTRL-SHIFT-UP`/`CTRL-SHIFT-DOWN` to Scroll to the top/bottom of the selected block. * Linux * `CTRL-SHIFT-K` will clear the entire list of input/output blocks for a clean view * `CTRL-L` will move the list of input/output blocks outside of the view and past the scroll so you have a clear view and the ability to easily visit past commands * For long Blocks, you can press `CTRL-SHIFT-UP`/`CTRL-SHIFT-DOWN` to Scroll to the top/bottom of the selected block. ## How it works [Section titled “How it works”](#how-it-works) 
# Pane Dimming & Focus
Canonical page: [/terminal/appearance/pane-dimming/](https://docs.warp.dev/terminal/appearance/pane-dimming/)
> Warp supports dimming inactive Panes as well as allowing the focus to follow the mouse. This helps you easily see which pane is active and maintain focus.
## How to use it [Section titled “How to use it”](#how-to-use-it) ### Inactive pane dimming [Section titled “Inactive pane dimming”](#inactive-pane-dimming) The panes that aren’t active will be dimmed to better indicate which pane is active. To access it, go to **Settings** > **Appearance** > **Panes** * Toggle on **Dim inactive panes** to enable the feature. ### Mouse focus [Section titled “Mouse focus”](#mouse-focus) The pane with the mouse over it will become active. To access it, go to **Settings** > **Appearance** > **Panes** * Toggle on **Focus follows mouse** to enable the feature. ## How it works [Section titled “How it works”](#how-it-works) [Inactive Pane Dimming Demo](https://www.loom.com/embed/62b84d3c60b34cdbaa340fbe8ce8b1d1)
# Terminal prompt
Canonical page: [/terminal/appearance/prompt/](https://docs.warp.dev/terminal/appearance/prompt/)
> Configure Warp's native prompt with context chips or use your own Shell prompt (PS1).
Warp supports two prompt types: the **Warp prompt** and the **Shell prompt (PS1)**. ## Choosing your prompt type [Section titled “Choosing your prompt type”](#choosing-your-prompt-type) To switch your prompt type: 1. Open **Settings** > **Appearance**. 2. Under **Input**, set **Input type** to **Warp** or **Shell (PS1)**. When using the Warp prompt, you can right-click the prompt area to copy the entire prompt, working directory, current git branch, git uncommitted file count, and more. When using a Shell prompt, you can right-click the prompt area to copy the entire prompt, or select any part of the prompt in previously run blocks in your session. ## Warp prompt [Section titled “Warp prompt”](#warp-prompt) Warp has a native prompt that displays context chips showing information such as your current working directory, git branch, svn status, Kubernetes context, pyenv, date, and time. The Warp prompt is the default when **Input type** is set to **Warp**. To customize which context chips your Warp prompt displays: 1. Right-click the prompt area and select **Edit prompt**. 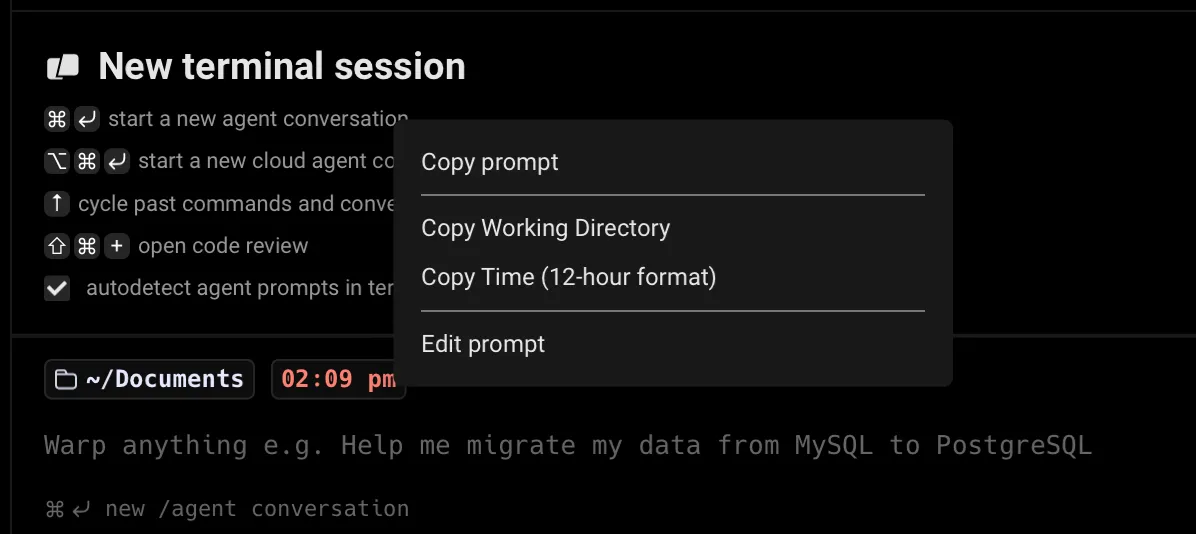 Prompt editing via right-click. 2. Select **Warp Prompt**. 3. Drag and drop context chips to configure which pieces of information your prompt displays. ### Git and Subversion [Section titled “Git and Subversion”](#git-and-subversion) Git and Subversion context chips show which branch you are on locally, as well as the number of uncommitted changed files. This includes any new files, modified files, and deleted files that are staged or unstaged. ### Kubernetes [Section titled “Kubernetes”](#kubernetes) The Kubernetes context chip shows relevant information when you’re using one of the following commands: `kubectl|helm|kubens|kubectx|oc|istioctl|kogito|k9s|helmfile|flux|fluxctl|stern|kubeseal|skaffold|kubent|kubecolor|cmctl|sparkctl|etcd|fubectl` ## Shell prompt (PS1) [Section titled “Shell prompt (PS1)”](#shell-prompt-ps1) You can use a Shell prompt instead of the Warp prompt by configuring the **PS1** variable or installing a supported shell prompt plugin (see [Shell Prompt Compatibility Table](/terminal/appearance/prompt/#shell-prompt-compatibility-table)). To enable the Shell prompt: 1. Open **Settings** > **Appearance**. 2. Under **Input**, set **Input type** to **Shell (PS1)**. 3. Configure your PS1 variable in your shell’s RC file, or install a supported prompt plugin. ### Multi-line and right-sided prompts [Section titled “Multi-line and right-sided prompts”](#multi-line-and-right-sided-prompts) The Shell prompt supports multi-line or right-sided prompts in zsh and fish, not bash. However, you can’t have a multiline right-side prompt, only a multiline left prompt. ## How it works [Section titled “How it works”](#how-it-works) [](/assets/terminal/warp-custom-prompt-demo.mp4) ### Shell prompt compatibility table [Section titled “Shell prompt compatibility table”](#shell-prompt-compatibility-table) | Shell | Tool | Does it work? | | --------------------------- | ------------------------------------------------------------------------- | --------------------------------------------------------------- | | bash \| zsh | [PS1](https://www.warp.dev/blog/whats-so-special-about-ps1) | Working | | bash \| zsh \| fish \| pwsh | [Starship](https://github.com/starship/starship) | [Working\*](/terminal/appearance/prompt/#starship) | | bash \| zsh \| fish \| pwsh | [oh-my-posh](https://github.com/JanDeDobbeleer/oh-my-posh) | Working | | zsh | [Powerlevel10k](https://github.com/romkatv/powerlevel10k) | [Working\*](/terminal/appearance/prompt/#powerlevel10k) | | zsh | [Spaceship](https://github.com/spaceship-prompt/spaceship-prompt) | [Working\*](/terminal/appearance/prompt/#spaceship) | | zsh | [oh-my-zsh](https://github.com/ohmyzsh/ohmyzsh) | Working | | zsh | [prezto](https://github.com/sorin-ionescu/prezto) | [Working\*](/terminal/appearance/prompt/#prezto) | | ssh | | Working | | bash | [oh-my-bash](https://github.com/ohmybash/oh-my-bash) | Not supported | | bash | [bash-it](https://github.com/Bash-it/bash-it) | Not supported | | bash | [SBP](https://github.com/brujoand/sbp) | Not supported | | bash | [synth-shell-prompt](https://github.com/andresgongora/synth-shell-prompt) | Not supported | | bash \| zsh | [Powerline-shell](https://github.com/b-ryan/powerline-shell) | Not supported | | zsh | [zplug](https://github.com/zplug/zplug) | Not supported | | fish | [tide](https://github.com/IlanCosman/tide) | [Not supported](https://github.com/warpdotdev/Warp/issues/3358) | | fish | [oh-my-fish](https://github.com/oh-my-fish/oh-my-fish) | [Not supported](https://github.com/warpdotdev/Warp/issues/3796) | ## Known incompatibilities [Section titled “Known incompatibilities”](#known-incompatibilities) If you’re having issues with prompts, please see below or our [Known Issues](/support-and-community/troubleshooting-and-support/known-issues/#configuring-and-debugging-your-rc-files) for more troubleshooting steps. ### Starship [Section titled “Starship”](#starship) #### Starship Settings [Section titled “Starship Settings”](#starship-settings) Some `~/.config/starship.toml` settings are known to cause errors in Warp. `#` or `DEL` the following lines to resolve known errors: ```plaintext # Get editor completions based on the config schema '' = 'https://starship.rs/config-schema.json' # Disables the custom module [custom] disabled = false ``` For `fish` shell, optional for `bash|zsh`, disable the multi-line prompt in Starship by putting the following in your `~/.config/starship.toml`: ```plaintext [line_break] disabled = true ``` You may also see an error relating to timeout. You can set the `command_timeout` variable in your `~/.config/starship.toml` to fix this. See more in the [starship docs](https://starship.rs/config/#prompt). #### Starship + bash [Section titled “Starship + bash”](#starship--bash) Starship prompt may not render properly if your [default shell](/getting-started/supported-shells/#changing-what-shell-warp-uses) is `/bin/bash`. To [workaround](https://github.com/warpdotdev/Warp/issues/3066#issuecomment-1548643121) the issue, we recommend you upgrade bash, find the path with `echo $(which bash)`, then put the path in **Settings** > **Features** > **Session** > **“Startup shell for new sessions”**. #### Starship + zsh [Section titled “Starship + zsh”](#starship--zsh) If you want to restore the additional line after the Starship prompt on `zsh`, add the following to the bottom of your `~/.zshrc` file: `PROMPT="${PROMPT}"$'\n'` ### Powerlevel10k [Section titled “Powerlevel10k”](#powerlevel10k) When installing the Powerlevel10k (P10k) prompt, we recommend you use the [Meslo Nerd Font](https://github.com/romkatv/powerlevel10k/blob/master/font.md).\ \ P10K may display the arrow dividers as grey instead of color. The color for those chars is rendered grey due to Warp’s minimum contrast setting. To [workaround](https://github.com/warpdotdev/Warp/issues/2851#issuecomment-1605005256) this issue, go to **Settings** > **Appearance** > **Text** > **Enforce minimum contrast** and set it to “Never”.  Example of the grey dividers in p10k. Warp does support [p10k](https://github.com/romkatv/powerlevel10k#installation) version 1.19.0 and above. Ensure you have the latest version installed and restart Warp after the installation/update of p10k. Then enable the custom prompt as stated [above](/terminal/appearance/prompt/#choosing-your-prompt-type) and it should work.  Caution Please note the Installing Powerlevel10k video mentions enabling a custom prompt in **Settings** > **Features** > **Honor users custom prompt (PS1)**, but it’s now in **Settings** > **Appearance** > **Input** > **Classic** > **Current prompt** > **Shell Prompt (PS1)** . ### Spaceship [Section titled “Spaceship”](#spaceship) This prompt can cause an issue with typeahead in Warp’s input editor. To [workaround](https://github.com/warpdotdev/Warp/issues/1973#issuecomment-1340150521) the issue, run `echo "SPACESHIP_PROMPT_ASYNC=FALSE" >>! ~/.zshrc`. ### Prezto [Section titled “Prezto”](#prezto) Although Warp does have support for prezto’s prompt, enabling the [prezto utility module](https://github.com/sorin-ionescu/prezto/blob/master/modules/utility/README.md) in the `.zpreztorc` is not supported as with many other autocompletion [plugins that are incompatible](/support-and-community/troubleshooting-and-support/known-issues/#list-of-incompatible-tools). ### Disabling unsupported prompts for Warp [Section titled “Disabling unsupported prompts for Warp”](#disabling-unsupported-prompts-for-warp) We advise using Warp’s default prompt or installing one of the supported tools, see [Compatibility Table](/terminal/appearance/prompt/#shell-prompt-compatibility-table). You can disable unsupported prompts for Warp as such: ```plaintext if [[ $TERM_PROGRAM != "WarpTerminal" ]]; then ##### WHAT YOU WANT TO DISABLE FOR WARP - BELOW # Unsupported Custom Prompt Code ##### WHAT YOU WANT TO DISABLE FOR WARP - ABOVE fi ``` #### iTerm2 [Section titled “iTerm2”](#iterm2) The iTerm2 shell integration breaks Warp and your custom prompt will not be able to be visible with this on. If you’re coming from iTerm2 please check your dotfiles for it. We advise disabling the integration for Warp like so: ```plaintext if [[ $TERM_PROGRAM != "WarpTerminal" ]]; then ##### WHAT YOU WANT TO DISABLE FOR WARP - BELOW test -e "${HOME}/.iterm2_shell_integration.zsh" && source "${HOME}/.iterm2_shell_integration.zsh" ##### WHAT YOU WANT TO DISABLE FOR WARP - ABOVE fi ```
# Size, Opacity, & Blurring
Canonical page: [/terminal/appearance/size-opacity-blurring/](https://docs.warp.dev/terminal/appearance/size-opacity-blurring/)
> Configure window size, opacity, and background blurring to match your visual preferences.
## How to use it [Section titled “How to use it”](#how-to-use-it) ### Window Size [Section titled “Window Size”](#window-size) To access size settings, go to **Settings** > **Appearance** > **Window**. * Enable “Open new windows with custom size”, Then configure your preferred columns and rows. ### Window Opacity [Section titled “Window Opacity”](#window-opacity) To access it, go to **Settings** > **Appearance** > **Window** * The slider supports setting the opacity value between `1` and `100` where `100` is completely opaque or solid. ### Window Blurring [Section titled “Window Blurring”](#window-blurring) After decreasing Opacity (moving the slider to a value less than `100`), you can also blur the background. * On macOS, this is done using the blur slider. Increasing the slider increases the blur radius that’s applied to the background image. * On Windows, this is done by toggling the Acrylic background texture on or off. Caution On macOS, large blur radiuses may affect performance, especially on Retina displays. On Linux, window blurring is not supported. On Windows, some graphics drivers may not support rendering transparent or translucent windows. See below for troubleshooting tips. ## How it works [Section titled “How it works”](#how-it-works) [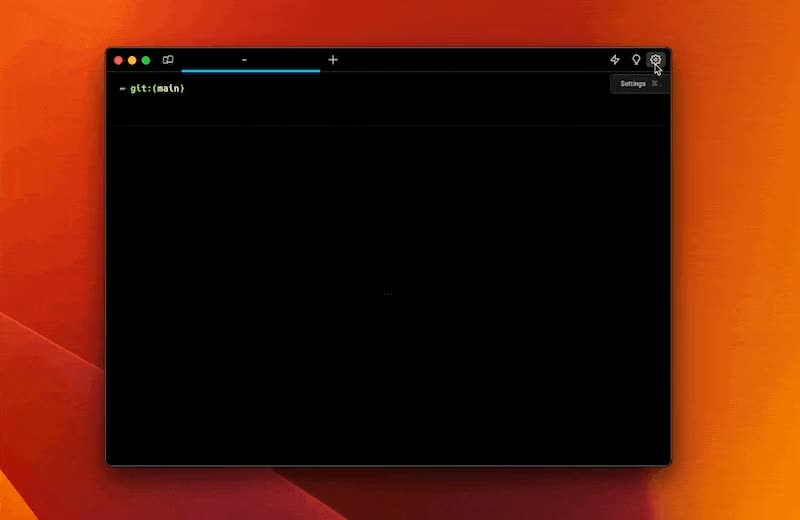](/assets/terminal/window_size_demo.mp4) [Window Opacity and Blurring Demo](https://www.loom.com/embed/22c9ef25392e4a5e80f9e01394c84dc4) ### Troubleshooting transparency on Windows [Section titled “Troubleshooting transparency on Windows”](#troubleshooting-transparency-on-windows) Some graphics drivers and rendering backends may not support rendering transparent windows. You can select the Vulkan or OpenGL graphics backend to render new Warp windows in the Settings menu, under `Features` > `System` > `Preferred graphics backend`. You can also opt to render new Warp windows with an integrated GPU, under `Features` > `System` > `Prefer rendering new windows with integrated GPU (low power)`.
# Tabs Behavior
Canonical page: [/terminal/appearance/tabs-behavior/](https://docs.warp.dev/terminal/appearance/tabs-behavior/)
> Customize tab behavior in Warp, including tab indicators, tab bar visibility, and close button position.
## Tab indicators [Section titled “Tab indicators”](#tab-indicators) Tab indicators provide visual cues in the tab bar under certain specific conditions: When the current pane is maximized, when panes or tabs are synchronized, and when a command exits with an error. These indicators serve as quick references. ### How to toggle tab indicators [Section titled “How to toggle tab indicators”](#how-to-toggle-tab-indicators) * Navigate to **Settings** > **Appearance** > **Tabs**, and switch the “Show tab indicators” option. * Utilize the [Command Palette](/terminal/command-palette/), then search for “Tab indicators” to toggle the tab indicators. [](/assets/terminal/tab-indicator-demo.mp4) ## Tab bar [Section titled “Tab bar”](#tab-bar) The tab bar provides easy navigation between open tabs. By default, the tab bar is visible in windowed mode but hides in fullscreen. To access the tab bar when hidden, hover near the top of the window. You can customize its visibility based on your preferences. ### How to configure the tab bar [Section titled “How to configure the tab bar”](#how-to-configure-the-tab-bar) * Navigate to **Settings** > **Appearance** > **Tabs** > **Show the tab bar** to toggle the visibility of the tab bar. Choose from the following options: * Always – Keeps the tab bar visible at all times. * Only on hover – Hides the tab bar in both modes. * When windowed – Displays the tab bar only in windowed mode. * Block dividers [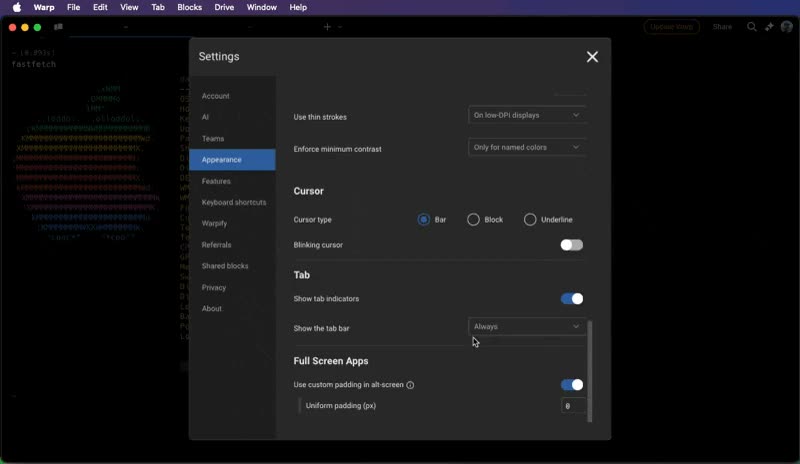](/assets/terminal/tab-bar-demo.mp4) ## Tab close button [Section titled “Tab close button”](#tab-close-button) You can configure the position of the tab close button to be either on the left or right side of the tab. ### How to configure the tab close button [Section titled “How to configure the tab close button”](#how-to-configure-the-tab-close-button) Navigate to **Settings** > **Appearance** > **Tabs** > **Tab close button position**, then choose from the following options: * Left - the close button will be on the left side of the tab (macOS style) * Right – the close button will be on the right side of the tab (Windows | Linux style)\\ [](/assets/terminal/tab-close-button-demo.mp4)
# Text, Fonts, & Cursor
Canonical page: [/terminal/appearance/text-fonts-cursor/](https://docs.warp.dev/terminal/appearance/text-fonts-cursor/)
> Warp supports customizing the font and how text is displayed. This can help improve readability and usability. Warp also supports disabling the blinking cursor.
## How to use it [Section titled “How to use it”](#how-to-use-it) ### Text and Fonts [Section titled “Text and Fonts”](#text-and-fonts) To access it, go to **Settings** > **Appearance** > **Text** From there you can customize: * Font type * Font weight * Font size * Line height * Use thin strokes * The default setting prevents text from being blurry on low-DPI displays. Caution On Linux, Warp does not support the “Use thin stroke” feature. * Enforce minimum contrast * The default setting tweaks named colors to meet accessibility standards. * Show ligatures in terminal ### Cursor [Section titled “Cursor”](#cursor) To access it, go to **Settings** > **Appearance** > **Cursor** From there you can customize: * Select the Cursor type to Bar, Block, or Underline. * Toggle the Blinking cursor or from the [Command Palette](/terminal/command-palette/), type “Cursor blink” and toggle the setting. ## How it works [Section titled “How it works”](#how-it-works) [Text and Fonts Demo](https://www.loom.com/embed/be2fa6ab10a3494a8c57a5431966905b) [Cursor Demo](https://www.loom.com/embed/6ce3218472894763bb80a26b6c632c4d)
# Terminal themes
Canonical page: [/terminal/appearance/themes/](https://docs.warp.dev/terminal/appearance/themes/)
> Warp includes several themes (out-of-box) and also supports setting custom themes.
### Theme Picker [Section titled “Theme Picker”](#theme-picker) The Theme Picker can be accessed by: 1. Navigating to **Settings** > **Appearance**. 2. Clicking the Custom Themes (shaded) box. 3. Upon selecting a theme, Warp’s appearance will update accordingly. 4. Press the checkmark to save the selection, or the X to revert. ### Theme Creator [Section titled “Theme Creator”](#theme-creator) Automatically create new themes based on a background image. 1. Go to **Settings** > **Appearance** > **Themes** or search “Open theme picker” within the [Command Palette](/terminal/command-palette/). 2. Click the **+** button in the theme picker. 3. Upload the image and select the background color. 4. Click “Create Theme” to save and accept the new theme. ### OS Theme Sync [Section titled “OS Theme Sync”](#os-theme-sync) Warp supports synchronizing your theme with the OS’s light and dark themes. To enable this: 1. Open the **Settings** > **Appearance** dialog. 2. Click the toggle “Sync with OS”. 3. You will then be able to select a specific theme for when the OS is in light mode and dark mode. ## How it works [Section titled “How it works”](#how-it-works) [](/assets/terminal/theme-picker.mp4) [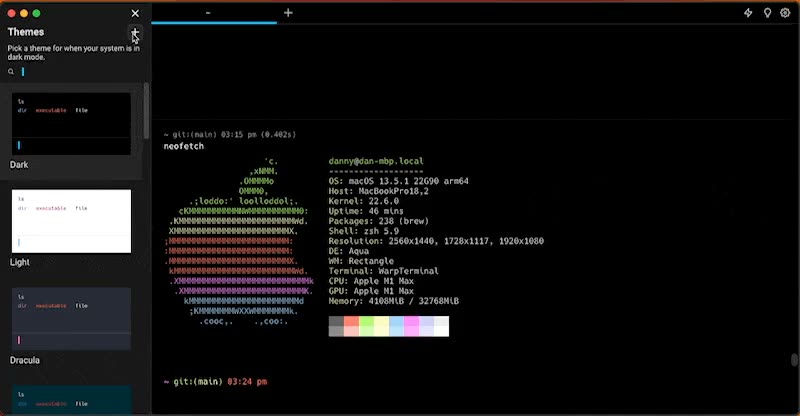](/assets/terminal/theme-creator.mp4) [](/assets/terminal/theme-sync-demo.mp4) ## Default Themes [Section titled “Default Themes”](#default-themes) By default, Warp ships with these themes:  Warp Dark  Warp Light  Dracula  Solarized Dark  Solarized Light  Gruvbox Dark  Gruvbox Light  Jellyfish  Koi  Leafy  Marble  Pink City  Snowy  Dark City  Red Rock  Cyber Wave  Willow Dream  Fancy Dracula  Phenomenon  Solar Flare  Adeberry
# Terminal Blocks overview
Canonical page: [/terminal/blocks/](https://docs.warp.dev/terminal/blocks/)
> A Block groups commands and outputs into one atomic unit.
Blocks are Warp’s fundamental unit for organizing terminal output. Every command and its output is grouped into a single Block that you can copy, search, filter, bookmark, share, and navigate independently — replacing the endless scroll of traditional terminals with structured, actionable output. ## What are Blocks? [Section titled “What are Blocks?”](#what-are-blocks) Blocks enable us to easily: * Copy a command * Copy a command’s output * Scroll directly to the start of a command’s output * Re-input commands * Share both a command and its output (with formatting!) * Bookmark commands  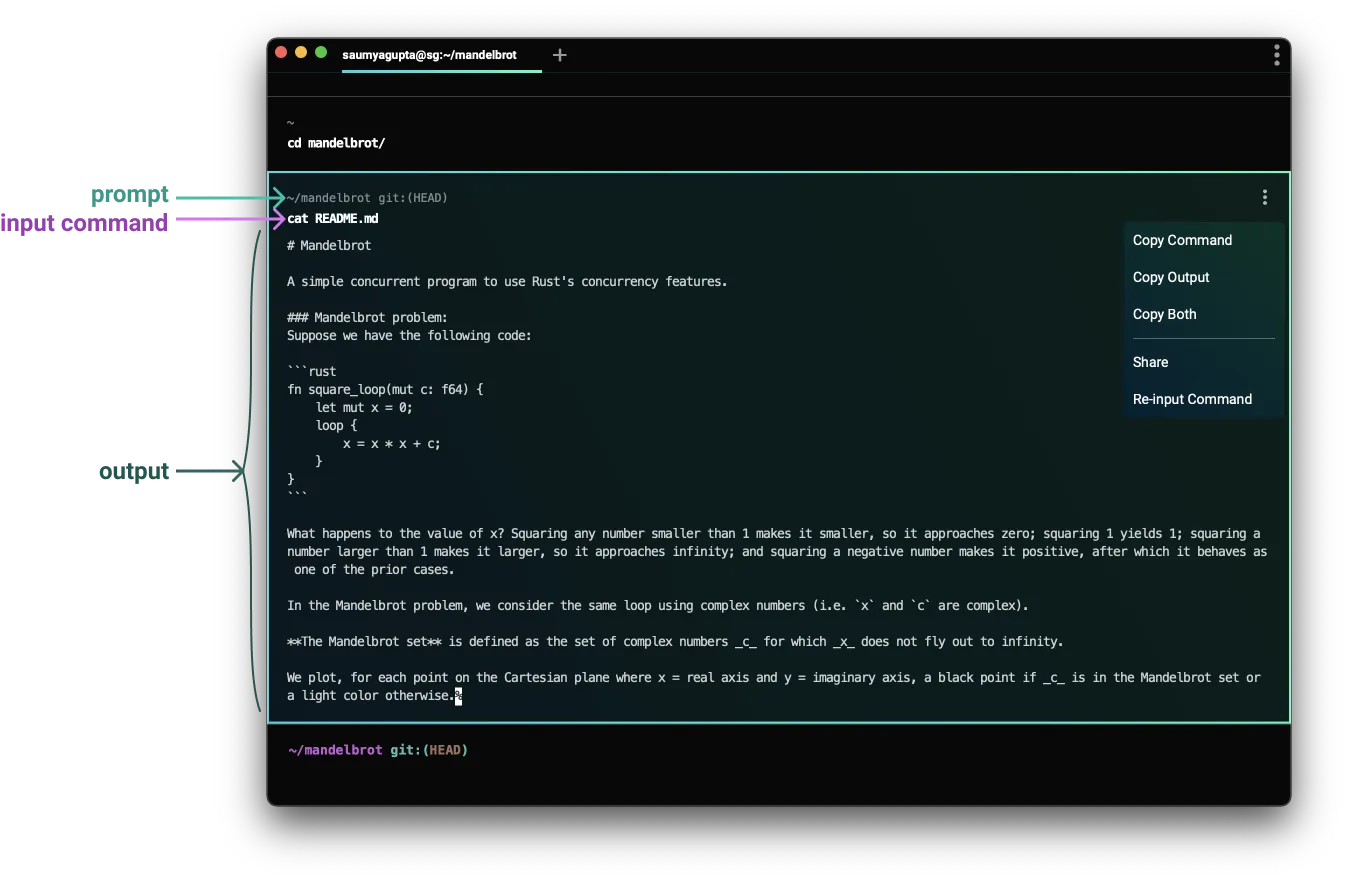
# Background Blocks
Canonical page: [/terminal/blocks/background-blocks/](https://docs.warp.dev/terminal/blocks/background-blocks/)
> How Blocks interact with background process output.
## What is it [Section titled “What is it”](#what-is-it) Commands can start background processes that continue even after they exit. You can also start a background process directly from the shell, such as by running it with `&`. If Warp receives output that is likely from a background process, the output goes into a *background block*. Background blocks act like regular blocks, except that they don’t have an associated command. This lets you use all of Warp’s block features with background output, such as sharing and bookmarking. ## How to use it [Section titled “How to use it”](#how-to-use-it) Background blocks are automatically created as needed, in between regular blocks running. If you run commands while a background process is still producing output, that output gets split into multiple blocks interleaved with your commands. ## How it works [Section titled “How it works”](#how-it-works) [Create Background Blocks](https://www.loom.com/embed/55bbbd9a8cbf495189260756c717cfb2) ## Troubleshooting background blocks [Section titled “Troubleshooting background blocks”](#troubleshooting-background-blocks) There are some limitations, because Warp doesn’t know *which* process any given output came from: * If a background process writes output while a foreground command is running in a regular block, the output goes into that block. * If there are multiple background processes running at the same time, their output may be mixed together. In addition, if you start entering a command while another one is running (typeahead), in some cases Warp will mistake the partial command for background output. The most common cause is editing typeahead when using bash versions older than 4.0 (for example, deleting and re-typing part of it).
# Block Actions
Canonical page: [/terminal/blocks/block-actions/](https://docs.warp.dev/terminal/blocks/block-actions/)
> Copy, bookmark, share, search, and filter Blocks using built-in actions.
## Accessing block actions [Section titled “Accessing block actions”](#accessing-block-actions) There are 2 ways you can access Block actions. 1. Hover over a Block and click the kebab (three dots) button on the right-hand side. 2. Right-click a Block. [Accessing Block Actions](https://www.loom.com/embed/3dec25e548d4484aa3dd6437869e2bbf) ## Copy input / output of block [Section titled “Copy input / output of block”](#copy-input--output-of-block) For command blocks, you can `RIGHT-CLICK` on a Block or click the context menu and copy the Block command, output, or both. For AI blocks, you can `RIGHT-CLICK` to copy the prompt, output, both or the entire conversation. [Copy Block Actions](https://www.loom.com/embed/9ad67eca0a8d47afb82cc1acba617f3c) ## Sharing a block [Section titled “Sharing a block”](#sharing-a-block) Share a block easily with coworkers or teammates by creating a web permalink. This preserves formatting and makes debugging and sharing output easy. [See Block Sharing Page.](/terminal/blocks/block-sharing/) ## Bookmarking a block [Section titled “Bookmarking a block”](#bookmarking-a-block) Quickly navigate to important Blocks despite where they are in the terminal history. * macOS Ways to bookmark a Block: 1. Select **Toggle bookmark** in the block context menu 2. Use `CMD-B` keybinding to bookmark a selected block Navigate to a bookmarked Block, by: * Clicking on the indicator.\ The indicator position reflects the approximate position of the Block in the Block history. Hovering over the indicator will give a snapshot of the Block including its prompt, command, and the last two lines of output. * Pressing `OPTION-UP` and `OPTION-DOWN` * Windows There are Ways to bookmark a Block: 1. Select **Toggle bookmark** in the block context menu 2. Use `CTRL-SHIFT-B` keybinding to bookmark a selected block Navigate to a bookmarked Block, by: * Clicking on the indicator.\ The indicator position reflects the approximate position of the Block in the Block history. Hovering over the indicator will give a snapshot of the Block including its prompt, command, and the last two lines of output. * Pressing `ALT-UP` and `ALT-DOWN` * Linux Ways to bookmark a Block: 1. Click on the bookmark icon in the top right corner of a Block 2. Select **Toggle bookmark** in the block context menu 3. Use `CTRL-SHIFT-B` keybinding to bookmark a selected block Navigate to a bookmarked Block, by: * Clicking on the indicator.\ The indicator position reflects the approximate position of the Block in the Block history. Hovering over the indicator will give a snapshot of the Block including its prompt, command, and the last two lines of output. * Pressing `ALT-UP` and `ALT-DOWN` [](/assets/terminal/block-bookmarks.mp4) ## Search within a block [Section titled “Search within a block”](#search-within-a-block) Quickly find important information within a Block. [See Find page](/terminal/blocks/find/) * macOS With a Block selected, press “Find Within Block” or use `CMD-F` to search within a Block. * Windows With a Block selected, Press “Find Within Block” or use `CTRL-SHIFT-F` to search within a Block. * Linux With a Block selected, Press “Find Within Block” or use `CTRL-SHIFT-F` to search within a Block. [Search within a Block](https://www.loom.com/embed/7dda0e7a6ec144cfb6410d29a586ddd0) ## Filtering a block [Section titled “Filtering a block”](#filtering-a-block) Filter the output lines of a block natively in Warp to quickly focus on a subset of the block. [See Block Filtering Page](/terminal/blocks/block-filtering/). * macOS * Using the keybinding `OPT-SHIFT-F` by default to toggle filtering on the selected or latest block * Selecting `Toggle Block Filter` in the block context menu * Windows * Using the keybinding `ALT-SHIFT-F` to toggle filtering on the selected or latest block * Selecting `Toggle Block Filter` in the block context menu * Linux * Using the keybinding `ALT-SHIFT-F` to toggle filtering on the selected or latest block * Selecting `Toggle Block Filter` in the block context menu
# Terminal Block Basics
Canonical page: [/terminal/blocks/block-basics/](https://docs.warp.dev/terminal/blocks/block-basics/)
> The basics of creating, selecting, and navigating between Blocks.
## The basics [Section titled “The basics”](#the-basics) * Blocks group your command and command output * The Input Editor can pin to the bottom, pin to the top, or start at the top. * Blocks grow from the bottom to the top. * Blocks are color-coded. Blocks that quit with a non-zero exit code have a red background and red sidebar. ## Create a block [Section titled “Create a block”](#create-a-block) 1. Execute a command (type `ls` and hit `ENTER`) in the Input Editor at the bottom of the screen. 2. Your command and output are grouped into a Block. 3. Try executing a different command (type `echo hello` and hit `ENTER`). 4. Warp adds your newly created Block to the bottom (directly above the input editor). [Create a Block](https://www.loom.com/embed/4b435c78344d4dc0bb92af5d1da5e219) ## Select a single block [Section titled “Select a single block”](#select-a-single-block) * macOS * Using your mouse: click on a Block. * Or using your keyboard: hit `CMD-UP` (or `CMD-DOWN` if input as pinned up top) to select the most recently executed Block and use the `UP ↑` and `DOWN ↓` arrow keys to navigate to the desired Block. * For long Blocks: * You can click “Jump to the bottom of this block”. * You can press `SHIFT-CMD-UP`/`SHIFT-CMD-DOWN` to Scroll to the top/bottom of the selected block. * From the [Command Palette](/terminal/command-palette/), you can also “Scroll to the top/bottom of selected block”. * Windows * Using your mouse: Click on a Block. * Or using your keyboard: hit `CTRL-UP` (or `CTRL-DOWN` if input as pinned up top) to select the most recently executed Block and use the `UP ↑` and `DOWN ↓` arrow keys to navigate to the desired Block. * For long Blocks: * You can click “Jump to the bottom of this block”. * You can press `CTRL-SHIFT-UP`/`CTRL-SHIFT-DOWN` to Scroll to the top/bottom of the selected block. * From the [Command Palette](/terminal/command-palette/), you can also “Scroll to the top/bottom of selected block”. * Linux * Using your mouse: Click on a Block. * Or using your keyboard: hit `CTRL-UP` (or `CTRL-DOWN` if input as pinned up top) to select the most recently executed Block and use the `UP ↑` and `DOWN ↓` arrow keys to navigate to the desired Block. * For long Blocks: * You can click “Jump to the bottom of this block”. * You can press `CTRL-SHIFT-UP`/`CTRL-SHIFT-DOWN` to Scroll to the top/bottom of the selected block. * From the [Command Palette](/terminal/command-palette/), you can also “Scroll to the top/bottom of selected block”. [Select a Single Block](https://www.loom.com/embed/1cf8546daad548fbbe056c35edb23cdc) ## Select multiple blocks [Section titled “Select multiple blocks”](#select-multiple-blocks) * macOS * Click another Block while holding `CMD` to toggle the selection of that Block, or * Click another Block while holding `SHIFT` to select a range of Block, or * Use `SHIFT-UP ↑` or `SHIFT-DOWN ↓` to expand the active selection (the Block with the thicker border) up or down, respectively. * Windows * Click another Block while holding `CTRL-SHIFT` to toggle the selection of that Block, or * Click another Block while holding `SHIFT` to select a range of Block, or * Use `SHIFT-UP ↑` or `SHIFT-DOWN ↓` to expand the active selection (the Block with the thicker border) up or down, respectively. * Linux * Click another Block while holding `CTRL-SHIFT` to toggle the selection of that Block, or * Click another Block while holding `SHIFT` to select a range of Block, or * Use `SHIFT-UP ↑` or `SHIFT-DOWN ↓` to expand the active selection (the Block with the thicker border) up or down, respectively. [Select Multiple Blocks](https://www.loom.com/embed/5058ab0dc3d244d4a2ce576331440821) ## Navigate blocks [Section titled “Navigate blocks”](#navigate-blocks) * macOS * **Mouse or scrollbar** - Scroll using your mouse, trackpad, or the scrollbar. * **Arrow keys** - Select a Block and use `UP ↑` and `DOWN ↓` to move between Blocks. * **Page scrolling** - Press `PAGE UP` or `PAGE DOWN` to scroll by one page. * **Jump to top or bottom** - Press `HOME` or `END` to scroll to the top or bottom of terminal output. * **Scroll within a selected Block** - Press `SHIFT-CMD-UP` or `SHIFT-CMD-DOWN` to scroll to the top or bottom of the selected Block. * **Scroll one line at a time** - “Scroll Terminal output up/down one line” can be configured with a keyboard shortcut in Settings > Keyboard shortcuts or accessed from the [Command Palette](/terminal/command-palette/). * When the output of a command is cut off, Warp keeps the [Sticky Command Header](/terminal/blocks/sticky-command-header/) pinned at the top that displays the command the Block corresponds to. Clicking the header will scroll the screen to the start of the Block. * Windows * **Mouse or scrollbar** - Scroll using your mouse, trackpad, or the scrollbar. * **Arrow keys** - Select a Block and use `UP ↑` and `DOWN ↓` to move between Blocks. * **Page scrolling** - Press `PAGE UP` or `PAGE DOWN` to scroll by one page. * **Jump to top or bottom** - Press `HOME` or `END` to scroll to the top or bottom of terminal output. * **Scroll within a selected Block** - Press `CTRL-SHIFT-UP` or `CTRL-SHIFT-DOWN` to scroll to the top or bottom of the selected Block. * **Scroll one line at a time** - “Scroll Terminal output up/down one line” can be configured with a keyboard shortcut in Settings > Keyboard shortcuts or accessed from the [Command Palette](/terminal/command-palette/). * When the output of a command is cut off, Warp keeps the [Sticky Command Header](/terminal/blocks/sticky-command-header/) pinned at the top that displays the command the Block corresponds to. Clicking the header will scroll the screen to the start of the Block. * Linux * **Mouse or scrollbar** - Scroll using your mouse, trackpad, or the scrollbar. * **Arrow keys** - Select a Block and use `UP ↑` and `DOWN ↓` to move between Blocks. * **Page scrolling** - Press `PAGE UP` or `PAGE DOWN` to scroll by one page. * **Jump to top or bottom** - Press `HOME` or `END` to scroll to the top or bottom of terminal output. * **Scroll within a selected Block** - Press `CTRL-SHIFT-UP` or `CTRL-SHIFT-DOWN` to scroll to the top or bottom of the selected Block. * **Scroll one line at a time** - “Scroll Terminal output up/down one line” can be configured with a keyboard shortcut in Settings > Keyboard shortcuts or accessed from the [Command Palette](/terminal/command-palette/). * When the output of a command is cut off, Warp keeps the [Sticky Command Header](/terminal/blocks/sticky-command-header/) pinned at the top that displays the command the Block corresponds to. Clicking the header will scroll the screen to the start of the Block. [Navigate between Blocks](https://www.loom.com/embed/21ebb0a79c1248a98846cba12a4b7020)
# Block Filtering
Canonical page: [/terminal/blocks/block-filtering/](https://docs.warp.dev/terminal/blocks/block-filtering/)
> Filter Block output by text, regex, or case to focus on specific matching lines.
Filter the output lines of a block in Warp to quickly focus on a subset of the block. You can filter by plaintext, regex, invert, or make your filter case-sensitive. You can also add context lines to view output around matches. Filtering does not delete any output lines, so you can clear the filter to go back to the original output. ## How to filter a block [Section titled “How to filter a block”](#how-to-filter-a-block) To apply a filter to a block: 1. Click on the filter icon in the top right corner of a block. A filter editor will appear with a large input field with two buttons on the left and a smaller input field on the right. 2. Type in the input to filter the block in the left input field. Only lines containing text that matches the filter query will be shown. 3. (Optional) Click on the regex, case sensitive search, or invert filter buttons to enable. 4. (Optional) Type a number in the right input field to add context lines around matched lines. [](/assets/terminal/block_filtering_with_context_lines.mp4) * macOS You can also toggle a filter by: * Using the keybinding `OPT-SHIFT-F` by default to toggle filtering on the selected or latest block * Selecting `Toggle Block Filter` in the block context menu * Windows You can also toggle a filter on/off by: * Using the keybinding `ALT-SHIFT-F` to toggle filtering on the selected or latest block * Selecting `Toggle Block Filter` in the block context menu * Linux You can also toggle a filter on/off by: * Using the keybinding `ALT-SHIFT-F` to toggle filtering on the selected or latest block * Selecting `Toggle Block Filter` in the block context menu [](/assets/terminal/block_filtering_toggle.mp4)
# Block Sharing
Canonical page: [/terminal/blocks/block-sharing/](https://docs.warp.dev/terminal/blocks/block-sharing/)
> Share Blocks with your team as permalinks or embeddable HTML snippets.
Share your blocks with a permalink or HTML embed. You can get started with shared blocks by opening the context menu and copying the command, output, or prompt. ## How to share blocks [Section titled “How to share blocks”](#how-to-share-blocks) * macOS To share your blocks, follow these steps: 1. On a finished block, click the context menu and select **Share…** or select the block and hit `CMD-SHIFT-S`. 2. A modal will pop up that lets you title your block and customize it by selecting which parts of the block you want to share (e.g. command, output, prompt, etc.). 3. Click either “Create link” or “Get embed” depending on how you want to share your block. 4. The link or embed snippet will be copied to your clipboard. * Windows To share your blocks, follow these steps: 1. On a finished block, click the context menu and select **Share…** or by setting up a key bind for Share Block in **Settings** > **Keyboard shortcuts**. 2. A modal will pop up that lets you title your block and customize it by selecting which parts of the block you want to share (e.g. command, output, prompt, etc.). 3. Click either “Create link” or “Get embed” depending on how you want to share your block. 4. The link or embed snippet will be copied to your clipboard. * Linux To share your blocks, follow these steps: 1. On a finished block, click the context menu and select **Share…** or by setting up a key bind for Share Block in **Settings** > **Keyboard shortcuts**. 2. A modal will pop up that lets you title your block and customize it by selecting which parts of the block you want to share (e.g. command, output, prompt, etc.). 3. Click either “Create link” or “Get embed” depending on how you want to share your block. 4. The link or embed snippet will be copied to your clipboard. [](/assets/terminal/block-sharing-embed.mp4) ## Permalink [Section titled “Permalink”](#permalink) Create and share a permalink to your blocks to collaborate with teammates. Here is the [web permalink](https://app.warp.dev/block/vzFATak939iqGWfNh7wsAP) of the block depicted below.  ## Embedded blocks [Section titled “Embedded blocks”](#embedded-blocks) Create and embed your blocks on web pages to help your readers follow along with technical writing. Readers can interact with an embedded block as they would with a block in Warp, with a context menu and styling. When you click “Get embed”, Warp will copy an `iframe` to your clipboard. Here’s an example `iframe`: ```html ``` #### Embedded block example on web page [Section titled “Embedded block example on web page”](#embedded-block-example-on-web-page)  ## Managing shared blocks [Section titled “Managing shared blocks”](#managing-shared-blocks) You can unshare a block by navigating to **Settings** > **Shared blocks**. Currently, shared blocks are accessible to anyone with the link. ## Link previews [Section titled “Link previews”](#link-previews) Shared permalinks will also display a preview of your code for quick context on each link. [Share and Unfurl a Block Preview](https://www.loom.com/embed/a78147fee8804c00b08a1decbc0d4e72)
# Terminal Block Find
Canonical page: [/terminal/blocks/find/](https://docs.warp.dev/terminal/blocks/find/)
> Search across Blocks from the bottom up, with regex, case-sensitive, and per-Block filtering options.
## What is it [Section titled “What is it”](#what-is-it) Find searches for matches in all your Blocks from the bottom up and can even be isolated to a specific Block. ## How to access it [Section titled “How to access it”](#how-to-access-it) * macOS 1. Hitting `CMD-F` opens the find view which searches across the terminal (scoped within the current pane). 2. Within the find modal, you can also enable the regex toggle, find on a selected Block, and or toggle case sensitive search. * Windows 1. Hitting `CTRL-SHIFT-F` opens the find view which searches across the terminal (scoped within the current pane). 2. Within the find modal, you can also enable the regex toggle, find on a selected Block, and or toggle case sensitive search. * Linux 1. Hitting `CTRL-SHIFT-F` opens the find view which searches across the terminal (scoped within the current pane). 2. Within the find modal, you can also enable the regex toggle, find on a selected Block, and or toggle case sensitive search. ## How it works [Section titled “How it works”](#how-it-works) [](/assets/terminal/find.mp4)
# Sticky Command Header
Canonical page: [/terminal/blocks/sticky-command-header/](https://docs.warp.dev/terminal/blocks/sticky-command-header/)
> Pin the running command at the top of the screen when scrolling through large Block outputs.
## How to access Sticky Command Header [Section titled “How to access Sticky Command Header”](#how-to-access-sticky-command-header) * macOS * Sticky Command Header is enabled by default. * Toggle Sticky Command Header by going to **Settings** > **Features** > **General** > toggle “Show sticky command header”. * Toggle by searching for “Sticky Command Header” within the [Command Palette](/terminal/command-palette/) or by pressing `CTRL-CMD-S`. * You can also “Toggle Sticky Command Header in Active Pane” with `CTRL-S`. This won’t disable the feature entirely, only minimize it on the active session. * Windows * Sticky Command Header is enabled by default. * Toggle the Sticky Command Header by going to **Settings** > **Features** > **General** > toggle “Show sticky command header”. * Toggle by searching for “Sticky Command Header” within the [Command Palette](/terminal/command-palette/) or by setting up a key bind in **Settings** > **Keyboard shortcuts**. * You can also “Toggle Sticky Command Header in Active Pane” in the Command Palette or by setting up a key bind in **Settings** > **Keyboard shortcuts**. This won’t disable the feature entirely, only minimize it on the active session. * Linux * Sticky Command Header is enabled by default. * Toggle the Sticky Command Header by going to **Settings** > **Features** > **General** > toggle “Show sticky command header”. * Toggle by searching for “Sticky Command Header” within the [Command Palette](/terminal/command-palette/) or by setting up a key bind in**Settings** > **Keyboard shortcuts**. * You can also “Toggle Sticky Command Header in Active Pane” in the Command Palette or by setting up a key bind in**Settings** > **Keyboard shortcuts**. This won’t disable the feature entirely, only minimize it on the active session. ## How to use Sticky Command Header [Section titled “How to use Sticky Command Header”](#how-to-use-sticky-command-header) * If a Block has a large output ( e.g. `seq 1 1000`), the header of the Block will show on the top of the active Window, Tab, or Pane. * Click on the Sticky Command Header to quickly jump to the top of the Block. * While active you can also minimize the Sticky Command Header on the active pane by clicking the UP/DOWN arrow in the middle of the header. ## How Sticky Command Header works [Section titled “How Sticky Command Header works”](#how-sticky-command-header-works) [Sticky Command Header Demo](https://www.loom.com/embed/a86967c057e44ab4bee4860ba80538b9)  Toggle active header and Jump to bottom of block demo.
# Command completions overview
Canonical page: [/terminal/command-completions/](https://docs.warp.dev/terminal/command-completions/)
> Warp's main features for command completions and autosuggestions.
1. [Completions](/terminal/command-completions/completions/) will suggest commands, option names, and path parameters for you. 2. [Autosuggestions](/terminal/command-completions/autosuggestions/) will automatically suggest commands as you type based on shell history and possible completions. ## Completions [Section titled “Completions”](#completions) [Completions Demo](https://www.loom.com/embed/92594c821ae341f69d5d1c1af56f2c69) ## Autosuggestions [Section titled “Autosuggestions”](#autosuggestions) [Autosuggestion Demo](https://www.loom.com/embed/5e87c52ae855486ab88ffb2f89aeaf73)
# Autosuggestions
Canonical page: [/terminal/command-completions/autosuggestions/](https://docs.warp.dev/terminal/command-completions/autosuggestions/)
> Warp will automatically suggest commands as you type based on shell history and possible completions.
## How to access it [Section titled “How to access it”](#how-to-access-it) * From the [Command Palette](/terminal/command-palette/), type in “Autosuggestions” to toggle. ## How to use it [Section titled “How to use it”](#how-to-use-it) * macOS There are several ways to accept autosuggestions, either completely or partially: * Complete an autosuggestion using the `RIGHT` arrow or `CTRL-F`. * `CTRL-E` also, completes the autosuggestion when your cursor is at the end of the buffer. * `CTRL-RIGHT` can be used to partially complete the autosuggestion one component at a time. * Windows There are several ways to accept autosuggestions, either completely or partially: * Complete an autosuggestion using the `RIGHT` arrow or `CTRL-F`. * `END` jumps to the last character in the Input Editor, then `RIGHT` completes the autosuggestion. * `CTRL-SHIFT-RIGHT` can be used to partially complete the autosuggestion one component at a time. * Linux There are several ways to accept autosuggestions, either completely or partially: * Complete an autosuggestion using the `RIGHT` arrow or `CTRL-F`. * `CTRL-E` jumps to the last character in the Input Editor, then `RIGHT` completes the autosuggestion. * `CTRL-SHIFT-RIGHT` can be used to partially complete the autosuggestion one component at a time. ## How it works [Section titled “How it works”](#how-it-works) [Autosuggestion Demo](https://www.loom.com/embed/5e87c52ae855486ab88ffb2f89aeaf73)
# Tab completions
Canonical page: [/terminal/command-completions/completions/](https://docs.warp.dev/terminal/command-completions/completions/)
> Get fuzzy-matched suggestions for commands, options, and paths by pressing Tab anywhere.
## What is it [Section titled “What is it”](#what-is-it) Completions feature fuzzy search capability that provides you with [approximate matches](https://en.wikipedia.org/wiki/Approximate_string_matching) for your queries. If you’re unsure about the exact syntax or spelling, you’ll be provided with suggestions based on your input, even if it’s not an exact match. ## How to access it [Section titled “How to access it”](#how-to-access-it) * Type out the beginning of your command, then press `TAB`. * To search for options and flags, you must type and press `TAB`. * Forgo `TAB` by enabling “Open completions menu as you type” in **Settings** > **Features** > **Terminal Input** ## How to use it [Section titled “How to use it”](#how-to-use-it) ### Completions [Section titled “Completions”](#completions) 1. Type `git checkout` (note the space) and then press `TAB` 2. A menu will show all of your local branches. You can select one using your mouse or the `UP ↑`/`DOWN ↓` arrow keys ### Completions on Aliases [Section titled “Completions on Aliases”](#completions-on-aliases) * Shell aliases - This is an alias for an entire command. For example, if you have `gc=git checkout` in alias, typing `gc` and hitting `TAB` should give you the same completion options as for `git checkout` . * Command aliases - This is an alias for a subcommand. For example, this could be setting `git status` to `git st`. With completions support, we could now suggest completions for `git status` even if you typed in `git st`. ## How it works [Section titled “How it works”](#how-it-works) [Completions Demo](https://www.loom.com/embed/92594c821ae341f69d5d1c1af56f2c69) ### Supported completion specs [Section titled “Supported completion specs”](#supported-completion-specs) | Command Name | Level of Support | | ----------------------- | ---------------- | | act | Partial | | adb | Partial | | afplay | Partial | | aftman | Partial | | ag | Partial | | agrippa | Partial | | amplify | Partial | | ansible | Partial | | ansible-config | Partial | | ansible-doc | Partial | | ansible-galaxy | Partial | | ansible-lint | Partial | | ansible-playbook | Partial | | appwrite | Partial | | arch | Partial | | asdf | Partial | | assimp | Partial | | atlas | Partial | | autojump | Partial | | aws | Partial | | babel | Partial | | banner | Partial | | base32 | Partial | | base64 | Partial | | basename | Partial | | basenc | Partial | | bat | Partial | | bazel | Partial | | bc | Partial | | black | Partial | | blitz | Partial | | bosh | Full | | brew | Full | | build-storybook | Partial | | bun | Partial | | bundle | Partial | | bw | Partial | | caffeinate | Partial | | cargo | Full | | cat | Partial | | cd | Partial | | cdk | Partial | | checkov | Partial | | chmod | Partial | | chown | Partial | | circleci | Partial | | clang | Partial | | clear | Partial | | clojure | Partial | | cloudflared | Partial | | cmake | Partial | | code | Partial | | code-insiders | Partial | | command | Partial | | composer | Partial | | conda | Full | | copilot | Partial | | cordova | Partial | | cosign | Partial | | cot | Partial | | cp | Partial | | create-completion-spec | Partial | | create-next-app | Partial | | create-nx-workspace | Partial | | create-react-app | Partial | | create-react-native-app | Partial | | create-remix | Partial | | create-t3-app | Partial | | create-video | Partial | | create-web3-frontend | Partial | | croc | Partial | | curl | Partial | | cut | Partial | | dart | Partial | | date | Partial | | dateseq | Partial | | datree | Partial | | dbt | Partial | | dd | Partial | | defaults | Full | | degit | Partial | | deno | Partial | | deployctl | Partial | | deta | Partial | | df | Partial | | diff | Partial | | dig | Partial | | direnv | Partial | | dirname | Partial | | django-admin | Partial | | do | Partial | | docker | Full | | docker-compose | Partial | | doctl | Partial | | dog | Partial | | doppler | Partial | | dotenv | Partial | | dotnet | Partial | | dotslash | Partial | | drush | Partial | | dtm | Partial | | du | Partial | | eb | Partial | | echo | Partial | | electron | Partial | | eleventy | Partial | | elif | Partial | | elixir | Partial | | elm | Partial | | elm-review | Partial | | else | Partial | | emacs | Partial | | esbuild | Partial | | eslint | Partial | | exa | Partial | | exec | Partial | | exercism | Partial | | expo | Partial | | expo-cli | Partial | | export | Partial | | fastlane | Partial | | fastly | Partial | | fd | Partial | | ffmpeg | Partial | | fig-teams | Partial | | file | Partial | | find | Partial | | firebase | Full | | fisher | Partial | | flutter | Full | | fly | Partial | | flyctl | Partial | | fmt | Partial | | fnm | Partial | | fold | Partial | | for | Partial | | forge | Partial | | fvm | Partial | | fzf | Partial | | fzf-tmux | Partial | | ganache-cli | Partial | | gatsby | Partial | | gcc | Partial | | gcloud | Partial | | gh | Full | | git | Full | | git-flow | Partial | | github | Partial | | gltfjsx | Partial | | go | Full | | goctl | Partial | | googler | Partial | | goreleaser | Partial | | gpg | Partial | | gradle | Partial | | graphcdn | Partial | | grep | Partial | | grex | Partial | | hardhat | Partial | | hasura | Partial | | hb-service | Partial | | head | Partial | | helm | Partial | | heroku | Full | | hexo | Partial | | hostname | Partial | | htop | Partial | | http | Partial | | https | Partial | | httpy | Partial | | hub | Partial | | hugo | Partial | | hx | Partial | | hyper | Partial | | id | Partial | | iex | Partial | | if | Partial | | ignite-cli | Partial | | install | Partial | | ionic | Partial | | j | Partial | | java | Partial | | jest | Partial | | join | Partial | | jq | Partial | | julia | Partial | | jupyter | Partial | | just | Partial | | keytool | Partial | | kill | Partial | | killall | Full | | kitty | Partial | | knex | Partial | | kool | Partial | | kubecolor | Partial | | kubectl | Full | | kubectx | Full | | kubens | Full | | laravel | Partial | | lerna | Partial | | less | Partial | | lima | Partial | | limactl | Partial | | ln | Partial | | lp | Partial | | lpass | Partial | | ls | Partial | | lsd | Partial | | mackup | Partial | | make | Full | | man | Full | | mas | Partial | | mask | Partial | | mdfind | Partial | | meteor | Partial | | micro | Partial | | mikro-orm | Partial | | minikube | Partial | | mix | Partial | | mkdir | Partial | | mkfifo | Partial | | mknod | Partial | | mob | Partial | | molecule | Partial | | mongocli | Partial | | mongosh | Partial | | more | Partial | | mosh | Partial | | mv | Partial | | mvn | Partial | | mysql | Partial | | n | Partial | | nano | Partial | | nativescript | Partial | | nc | Partial | | nest | Partial | | netlify | Partial | | networkQuality | Partial | | newman | Partial | | next | Partial | | ng | Full | | nginx | Partial | | ngrok | Partial | | nhost | Partial | | ni | Partial | | nl | Partial | | nocorrect | Partial | | node | Full | | noglob | Partial | | npm | Full | | npx | Partial | | nr | Partial | | nrm | Partial | | ns | Partial | | nu | Partial | | nuxi | Partial | | nuxt | Partial | | nvim | Partial | | nvm | Partial | | nx | Full | | nylas | Partial | | od | Partial | | oh-my-posh | Partial | | okta | Partial | | okteto | Partial | | omz | Partial | | onboardbase | Partial | | op | Partial | | opa | Partial | | open | Partial | | osascript | Partial | | pageres | Partial | | pandoc | Partial | | pass | Partial | | paste | Partial | | pathchk | Partial | | pdfunite | Partial | | pgcli | Partial | | php | Partial | | phpunit-watcher | Full | | ping | Partial | | pip | Full | | pip3 | Partial | | pipenv | Partial | | pm2 | Partial | | pmset | Partial | | pnpm | Partial | | pnpx | Partial | | pod | Partial | | poetry | Partial | | pre-commit | Partial | | preset | Partial | | prettier | Partial | | prisma | Partial | | projj | Partial | | ps | Partial | | pscale | Partial | | psql | Partial | | publish | Partial | | pulumi | Partial | | pushd | Partial | | pwd | Partial | | pyenv | Full | | python | Partial | | python3 | Partial | | qodana | Partial | | quickmail | Partial | | r | Partial | | rails | Partial | | railway | Partial | | rake | Partial | | rancher | Partial | | rbenv | Partial | | rclone | Partial | | react-native | Full | | readlink | Partial | | redwood | Partial | | remix | Partial | | remotion | Partial | | repeat | Partial | | rg | Partial | | rm | Partial | | rmdir | Partial | | robot | Partial | | rollup | Partial | | rscript | Partial | | rsync | Partial | | ruby | Partial | | rush | Partial | | rushx | Partial | | rustc | Partial | | rustup | Partial | | sam | Partial | | scc | Partial | | scp | Partial | | screen | Partial | | sed | Partial | | sequelize | Partial | | serve | Partial | | serverless | Partial | | sfdx | Partial | | sftp | Partial | | shopify | Partial | | shortcuts | Partial | | shred | Partial | | sips | Partial | | softwareupdate | Partial | | source | Partial | | splash | Partial | | split | Partial | | spotify | Partial | | sqlite3 | Partial | | src | Partial | | ssh | Full | | st2 | Partial | | start-storybook | Partial | | stat | Partial | | steadybit | Partial | | stepzen | Partial | | stripe | Partial | | su | Partial | | subl | Partial | | sudo | Partial | | swc | Partial | | swift | Partial | | sysctl | Partial | | tac | Partial | | tail | Partial | | tailscale | Partial | | tailwindcss | Partial | | tangram | Partial | | tar | Full | | task | Partial | | tccutil | Partial | | tee | Partial | | terraform | Full | | terragrunt | Partial | | tfenv | Partial | | tfsec | Partial | | then | Partial | | time | Partial | | tldr | Partial | | tmux | Full | | tmuxinator | Full | | tns | Partial | | tokei | Partial | | top | Partial | | touch | Partial | | tr | Partial | | traceroute | Partial | | trash | Partial | | trex | Partial | | trivy | Partial | | truffle | Partial | | truncate | Partial | | trunk | Partial | | ts-node | Partial | | tsc | Partial | | tsh | Partial | | turbo | Partial | | twiggy | Partial | | twilio | Partial | | typeorm | Partial | | uname | Partial | | uniq | Partial | | until | Partial | | until | Partial | | unzip | Partial | | vale | Partial | | valet | Partial | | vapor | Partial | | vault | Partial | | vela | Partial | | vercel | Partial | | vi | Partial | | vim | Partial | | vimr | Partial | | vite | Partial | | vite | Partial | | volta | Partial | | vr | Partial | | vsce | Partial | | vtex | Partial | | vue | Partial | | vue | Partial | | vultr-cli | Partial | | w | Partial | | w | Partial | | wasm-bindgen | Partial | | wasm-pack | Partial | | watson | Partial | | wc | Partial | | wc | Partial | | wd | Partial | | webpack | Partial | | wget | Partial | | whence | Partial | | where | Partial | | which | Partial | | while | Partial | | who | Partial | | whois | Partial | | wifi-password | Partial | | wifi-password | Partial | | wp | Partial | | wrangler | Partial | | wrk | Partial | | wscat | Partial | | xargs | Partial | | xcode-select | Partial | | xcodebuild | Partial | | xcodeproj | Partial | | xcrun | Partial | | xed | Partial | | yank | Partial | | yarn | Partial | | yo | Partial | | youtube-dl | Partial | | z | Partial | | z | Partial | | zapier | Partial | | zapier | Partial | | zip | Partial | | zoxide | Partial |
# Command Palette
Canonical page: [/terminal/command-palette/](https://docs.warp.dev/terminal/command-palette/)
> Command Palette is a global search to quickly locate Workflows, Notebooks, keyboard shortcuts, or other actions within Warp.
The Command Palette is Warp’s global search interface for quickly finding and launching Workflows, Notebooks, Prompts, keyboard shortcuts, file searches, settings, and other actions. Open it with a keyboard shortcut, then type or filter results by type to find exactly what you need. 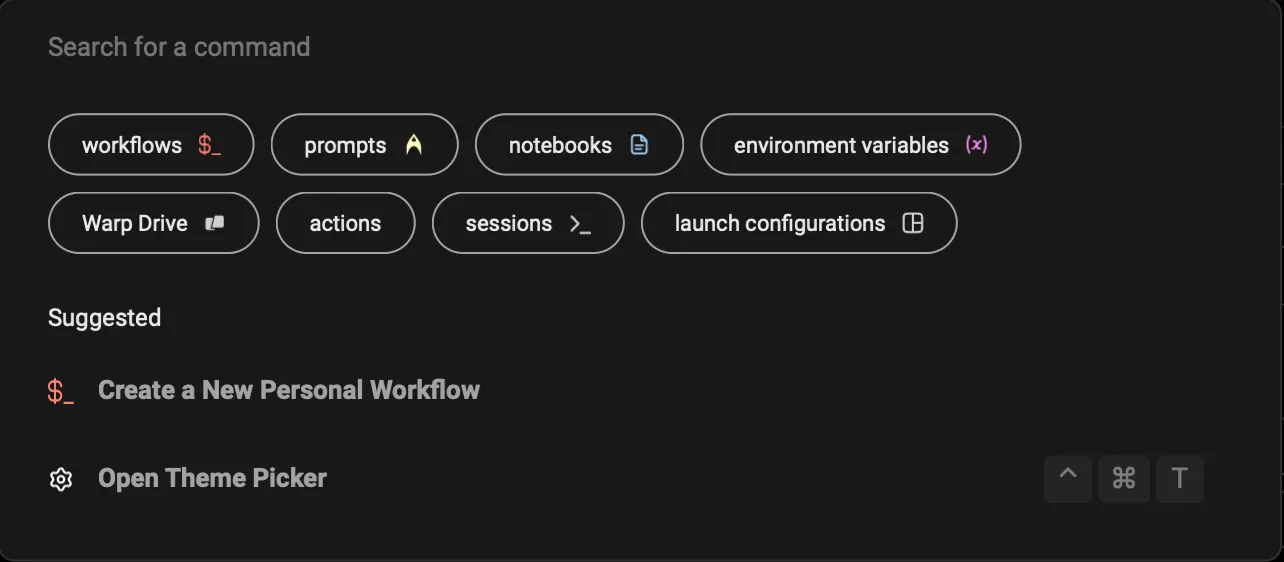 Command Palette Panel. ## How to access it [Section titled “How to access it”](#how-to-access-it) * macOS You can access the Command Palette with the keyboard shortcut `CMD-P`. * Windows You can access the Command Palette with the keyboard shortcut `CTRL-SHIFT-P`. * Linux You can access the Command Palette with the keyboard shortcut `CTRL-SHIFT-P`. ## How it works [Section titled “How it works”](#how-it-works) * Start typing to search for workflows, notebooks, keyboard shortcuts, actions, toggles, etc. * Activate a specific filter, by clicking on the filter buttons or prepending your search with the following: * `workflows:` or `w:` will filter for [Workflows](/knowledge-and-collaboration/warp-drive/workflows/). * `prompts:` or `p:` will filter for [Prompts](/knowledge-and-collaboration/warp-drive/prompts/). * `notebook:` or `n:` will filter for [Notebooks](/knowledge-and-collaboration/warp-drive/notebooks/). * `env_vars:` will filter for [Environment Variables](/knowledge-and-collaboration/warp-drive/environment-variables/). * `files:` will filter for local files. * `drive:` will filter for [Warp Drive](/knowledge-and-collaboration/warp-drive/). * `actions:` will filter for Warp-specific actions like settings and features. * `sessions:` will filter for active sessions with [Session Navigation](/terminal/sessions/session-navigation/). * `launch_configs:` will filter for [Launch Configurations](/terminal/sessions/launch-configurations/). [Command Palette Demo](https://www.loom.com/embed/0e6108b295234637a0bb20cc941976e9)
# Terminal comparisons overview
Canonical page: [/terminal/comparisons/](https://docs.warp.dev/terminal/comparisons/)
> Compare Warp's performance and terminal feature support against other popular terminal emulators like iTerm2, Alacritty, and WezTerm.
Warp is a modern terminal built in Rust with GPU rendering, agent support, and a code-editor-style input. Use this section to see how Warp stacks up against other popular terminals on raw performance and feature coverage. ## How Warp differs [Section titled “How Warp differs”](#how-warp-differs) * **Open source under AGPL v3** — Warp’s client lives at [`warpdotdev/warp`](https://github.com/warpdotdev/warp). You can read the code, build from source, and contribute. See [Contributing to Warp](/support-and-community/community/contributing/) for the flow. * **Built-in agents** — Warp ships with Warp Agent (powered by Oz) and supports third-party CLI agents like Claude Code, Codex, and Gemini CLI from the same terminal. * **Modern editing** — Cursor placement, multi-line input, block-based output, and integrated code review work like a text editor instead of a traditional terminal emulator. * **Cross-platform Rust core** — Warp ships on macOS, Linux, and Windows from a single Rust + GPU-rendered codebase. ## Benchmarks [Section titled “Benchmarks”](#benchmarks) * [Performance benchmarks](/terminal/comparisons/performance/) — VTE and Termbench results comparing Warp against Terminal.app, iTerm2, Alacritty, and WezTerm.
# Performance benchmarks
Canonical page: [/terminal/comparisons/performance/](https://docs.warp.dev/terminal/comparisons/performance/)
> This is a short comparison of different terminals and their performance.
## Terminal apps selected for these benchmarks [Section titled “Terminal apps selected for these benchmarks”](#terminal-apps-selected-for-these-benchmarks) We chose to benchmark Warp against 4 other terminal emulator applications, based on their popularity as well as language and principles. Here is the list of the applications we chose for this comparison together with the explanation as to why we decided to include it in our comparison: * Terminal.app - the default terminal app available on the macOS; * ITerm2 - one of the most popular terminal emulators used by macOS users; * Alacritty & WezTerm - both of those terminals are written in Rust and are well-known for their speed and overall performance, things that Warp is aiming for. ### Versions & settings used during the comparison [Section titled “Versions & settings used during the comparison”](#versions--settings-used-during-the-comparison) | Terminal | Version | Terminal size (cols / rows, window is identical pixel-wise) | | ------------ | ------------------------------ | ----------------------------------------------------------- | | Warp | v0.2022.04.01.01.37.stable\_03 | 208 cols / 54 rows | | Terminal.app | Version 2.11 (440) | 188 cols / 72 rows | | iTerm2 | Build 3.4.15 | 211 cols / 78 rows | | Alacritty | alacritty 0.10.1 (2844606) | 286 cols / 102 rows | | Wezterm | 20220319-142410-0fcdea07 | 243 cols / 80 rows | ### About benchmarks [Section titled “About benchmarks”](#about-benchmarks) We link the source code of each benchmark used, so you can easily reproduce the tests with other terminal apps. Please, note that those benchmarks are not exhaustive. Comparing terminal emulators with each other is not an easy task - right now we’re checking how each of the apps behaves when dealing with lots of input and/or output. Ideally, the benchmarks would also cover the latency (time between pressing a key and the character showing on the screen, but also a delay between the user’s input and communication with the shell). We may include tests that account for that in the future. ## VTE benchmark [Section titled “VTE benchmark”](#vte-benchmark) Benchmark code is available in the [Alacritty VTE benchmark repository](https://github.com/alacritty/vtebench) at the specific commit we used in our comparison: `93bcc32b6e0f7560e9b1a5a8b0998c04fbf9b50d`. Results in milliseconds. ### Average time for each of the benchmark tests [Section titled “Average time for each of the benchmark tests”](#average-time-for-each-of-the-benchmark-tests) | | Warp avg (ms) | Terminal.app avg (ms) | iTerm avg | Alacritty avg | WezTerm avg | | -------------------------------- | ------------- | --------------------- | --------- | ------------- | ----------- | | dense\_cells | 43.88 | 24.91 | 144.84 | 7.25 | 28.15 | | scrolling | 30.06 | 283.34 | 1257.57 | 31.75 | 687.77 | | scrolling\_bottom\_region | 117.34 | 257.23 | 1294.25 | 29.1 | 672.67 | | scrolling\_bottom\_small\_region | 114.52 | 227.75 | 1251 | 25.98 | 669.93 | | scrolling\_fullscreen | 37.4 | 307.03 | 1565.17 | 37.36 | 1205 | | scrolling\_top\_region | 120.63 | 209.29 | 2212.2 | 84.42 | 682.6 | | scrolling\_top\_small\_region | 114.64 | 205.59 | 1216.33 | 21.91 | 663.44 | | unicode | 66.47 | 34.45 | 93.01 | 16.78 | 1279.25 |  ### P90 of the results [Section titled “P90 of the results”](#p90-of-the-results) | | Warp p90 | Terminal.app p90 | iTerm p90 | Alacritty p90 | WezTerm p90 | | -------------------------------- | -------- | ---------------- | --------- | ------------- | ----------- | | dense\_cells | 52 | 28 | 189 | 8 | 32 | | scrolling | 32 | 266.76 | 1336 | 32 | 707 | | scrolling\_bottom\_region | 170 | 243 | 1398 | 30 | 686 | | scrolling\_bottom\_small\_region | 167 | 224 | 1331 | 30 | 679 | | scrolling\_fullscreen | 38 | 327 | 1593 | 41 | 1208 | | scrolling\_top\_region | 178 | 222 | 2243 | 85 | 686 | | scrolling\_top\_small\_region | 167 | 222 | 1314 | 30 | 666 | | unicode | 77 | 39 | 90 | 20 | 3883 | 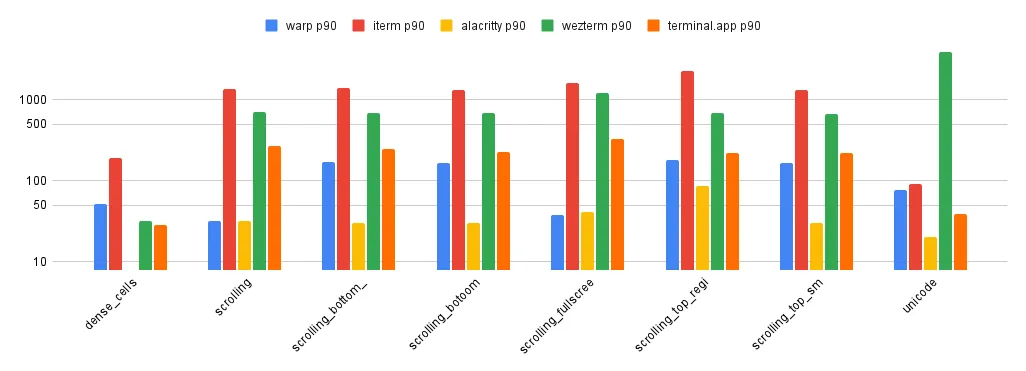 ## Termbench [Section titled “Termbench”](#termbench) Benchmark code is available in the [Termbench repository](https://github.com/cmuratori/termbench) at the specific commit we used in our comparison: `82afbc69256b4e22de913f0f02f82e0480f3dac5`. Below you’ll find results for small and regular test sizes. Note that Terminal.app only participated in the small test. Results in seconds. ### Small test sizes [Section titled “Small test sizes”](#small-test-sizes) | | Warp small (s) | Terminal.app small (s) | iTerm small (s) | Alacritty small | WezTerm small | | -------------- | -------------- | ---------------------- | --------------- | --------------- | ------------- | | ManyLine | 6.7854 | 2.6789 | 8.7057 | 1.2532 | 8.9436 | | LongLine | 9.0033 | 1.6473 | 9.0849 | 0.8179 | 11.4587 | | FGPerChar | 1.3716 | 453.9888 | 2.6625 | 0.2788 | 0.6487 | | FGBGPerChar | 2.8403 | 908.894 | 4.5881 | 0.5931 | 0.7283 | | overall result | 20.0006 | 1367.209 | 25.0413 | 2.943 | 21.7793 | 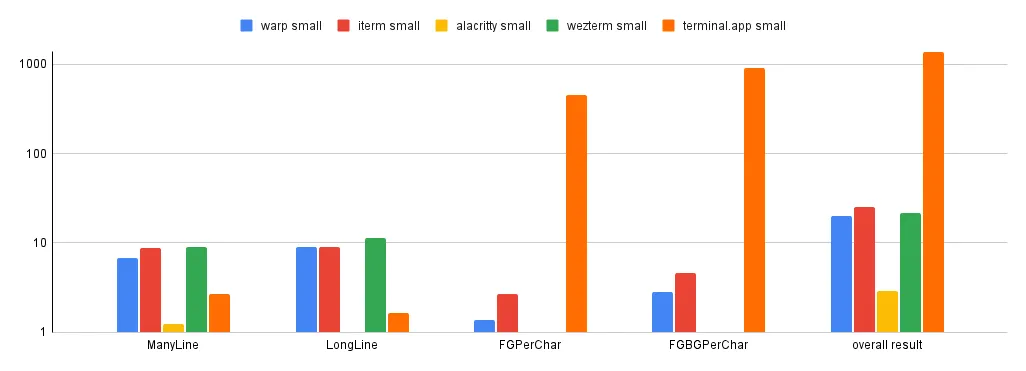 ### Regular test size [Section titled “Regular test size”](#regular-test-size) | | Warp regular (s) | iTerm regular (s) | Alacritty regular (s) | WezTerm regular | | -------------- | ---------------- | ----------------- | --------------------- | --------------- | | ManyLine | 113.76 | 132.4975 | 19.8802 | 150.8175 | | LongLine | 155.0937 | 126.7561 | 12.7859 | 207.3647 | | FGPerChar | 21.8928 | 39.3352 | 4.2925 | 9.4265 | | FGBGPerChar | 46.312 | 50.5369 | 8.418 | 13.5142 | | overall result | 337.0585 | 349.1258 | 45.3767 | 381.1229 | 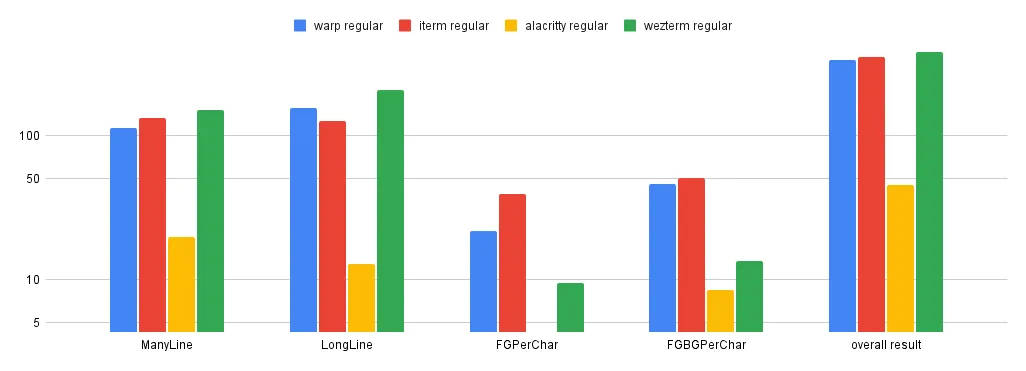
# Terminal features
Canonical page: [/terminal/comparisons/terminal-features/](https://docs.warp.dev/terminal/comparisons/terminal-features/)
> Below you'll find a table showcasing different terminal features (such as text attribution) and information about which one of those are supported in Warp.
To make it more transparent & useful, we also show the results for 4 other popular macOS terminal emulators. | Feature | Warp | Terminal.app | Iterm | Alacritty | Wezterm | | --------------------------------------------------------- | ---- | ------------ | ----- | --------- | ------- | | 24-bit (true color) | YES | NO | YES | YES | YES | | Bold | YES | YES | YES | YES | YES | | Dim | NO | YES | YES | YES | YES | | Italic | NO | YES | YES | YES | YES | | Underline | YES | YES | YES | YES | YES | | Underline (alt) | YES | NO | YES | YES | YES | | Double underline | NO | NO | NO | NO | YES | | Double underline (alt) | YES | NO | YES | YES | YES | | Curly underline | NO | NO | YES | NO | YES | | Colored underline | NO | NO | NO | NO | YES | | Blink | NO | YES | NO | NO | NO | | Reverse | YES | YES | YES | YES | YES | | Invisible (but copy-paste-able) | NO | YES | NO | YES | NO | | Strikethrough | YES | NO | YES | YES | YES | | Overline | NO | NO | NO | NO | YES | | [Magic string](https://en.wikipedia.org/wiki/Unicode#Web) | YES | YES | YES | YES | YES | | Emojis | YES | YES | YES | YES | YES | | Right-to-left | NO | YES | NO | NO | NO | | Sixel graphics | NO | NO | YES | NO | NO | Based on the [terminal-testdrive.sh](https://gist.github.com/hellricer/e514d9615d02838244d8de74d0ab18b3).
# Modern text editing overview
Canonical page: [/terminal/editor/](https://docs.warp.dev/terminal/editor/)
> Unlike other terminals, Warp’s input editor operates out of the box like a modern IDE and the text editors we’re used to.
Warp’s input editor works like a modern IDE text editor, with cursor movement, click-to-place, multi-line editing, copy-paste, word selection, and soft wrapping built in. Unlike traditional terminals, you can edit commands the same way you edit code — no memorizing shell-specific shortcuts required. ### Soft Wrapping [Section titled “Soft Wrapping”](#soft-wrapping) Warp supports soft wrapping in the input editor. If an autosuggestion goes off-screen, the input editor will be horizontally scrollable to make it visible. Some operations treat soft-wrapped lines like a logical line (`TRIPLE-CLICK`) while other operations treat soft wrapped lines like visible different lines (`UP`/`DOWN`, `SHIFT-UP`/`SHIFT-DOWN`). ### Copy on Select [Section titled “Copy on Select”](#copy-on-select) Warp supports copy on select for selectable text within [Blocks](/terminal/blocks/). * Toggle this feature **Settings** > **Features** > **Terminal** or search for “Copy on select” in the [Command Palette](/terminal/command-palette/). ### Autocomplete quotes, parentheses, and brackets [Section titled “Autocomplete quotes, parentheses, and brackets”](#autocomplete-quotes-parentheses-and-brackets) Warp can automatically complete quotes, brackets, and parentheses like you’re used to in IDEs. * Toggle this feature **Settings** > **Features** > **Text Editing** or search for “Autocomplete quotes” in the [Command Palette](/terminal/command-palette/). ## How to use it [Section titled “How to use it”](#how-to-use-it) * macOS | Keyboard binding | Shortcut description | | ---------------------------------------------------- | ------------------------------------------------------ | | `ESCAPE` | Closes the input suggestions or history menu | | `CTRL-L` | Clears the terminal | | `CTRL-H` | Backspace | | `CTRL-C` | Clear the entire editor buffer | | `CTRL-U` | Copy and Clear the current line | | `CMD-SHIFT-K` | Clear selected lines | | `CMD-C`, `CMD-X`, `CMD-V` | Copy, cut, paste | | `CTRL-W` / `OPT-D` | Cut the word to the left / right of the cursor | | `OPT-BACKSPACE` / `OPT-D` | Delete the word to the left / right of the cursor | | `CTRL-K CMD-DELETE` | Delete everything to the right of the cursor | | `OPT-LEFT` / `OPT-RIGHT` | Move to the beginning of the previous / next word | | `CTRL-OPT-LEFT` / `CTRL-OPT-RIGHT` | Move backward / forward by one subword | | `CMD-LEFT` `CTRL-A`/ `CTRL-E` `CMD-DOWN` `CMD-RIGHT` | Move the cursor to the start / end of the line | | `SHIFT-LEFT` / `SHIFT-RIGHT` | Select the character to the left / right of the cursor | | `OPT-SHIFT-LEFT` / `OPT-SHIFT-RIGHT` | Select the word to the left / right of the cursor | | `CMD-SHIFT-LEFT` / `CMD-SHIFT-RIGHT` | Select everything to the left / right of the cursor | | `SHIFT-UP` / `SHIFT-UP` | Select everything above / below the cursor | | `CMD-A` | Select the entire editor buffer | | `SHIFT-ENTER` `CTRL-ENTER` `OPT-ENTER` | Insert newline | | `CTRL-R` | Command Search | | `CMD-D` | Split pane | * Windows | Keyboard binding | Shortcut description | | -------------------------------------- | ------------------------------------------------------ | | `ESCAPE` | Closes the input suggestions or history menu | | `CTRL-L` | Clears the terminal | | `CTRL-H` | Backspace | | `CTRL-C` | Clear the entire editor buffer | | `CTRL-U` | Copy and Clear the current line | | `CTRL-SHIFT-K` | Clear selected lines | | `CTRL-C`, `CTRL-X`, `CTRL-V` | Copy, cut, paste | | `CTRL-W` / `ALT-D` | Cut the word to the left / right of the cursor | | `ALT-BACKSPACE` / `ALT-D` | Delete the word to the left / right of the cursor | | `CTRL-K` | Delete everything to the right of the cursor | | `ALT-LEFT` / `ALT-RIGHT` | Move to the beginning of the previous / next word | | `CTRL-LEFT` / `CTRL-RIGHT` | Move backward / forward by one subword | | `CTRL-A`/ `CTRL-E` | Move the cursor to the start / end of the line | | | Select the character to the left / right of the cursor | | `META-SHIFT-B` / `META-SHIFT-F` | Select the word to the left / right of the cursor | | | Select everything to the left / right of the cursor | | `SHIFT-UP` / `SHIFT-UP` | Select everything above / below the cursor | | `CTRL-A` | Select the entire editor buffer | | `SHIFT-ENTER` `CTRL-ENTER` `ALT-ENTER` | Insert newline | | `CTRL-R` | Command Search | | `CTRL-SHIFT-D` | Split pane | * Linux | Keyboard binding | Shortcut description | | -------------------------------------- | ------------------------------------------------------ | | `ESCAPE` | Closes the input suggestions or history menu | | `CTRL-L` | Clears the terminal | | `CTRL-H` | Backspace | | `CTRL-C` | Clear the entire editor buffer | | `CTRL-U` | Copy and Clear the current line | | `CTRL-SHIFT-K` | Clear selected lines | | `CTRL-C`, `CTRL-X`, `CTRL-V` | Copy, cut, paste | | `CTRL-W` / `ALT-D` | Cut the word to the left / right of the cursor | | `ALT-BACKSPACE` / `ALT-D` | Delete the word to the left / right of the cursor | | `CTRL-K` | Delete everything to the right of the cursor | | `ALT-LEFT` / `ALT-RIGHT` | Move to the beginning of the previous / next word | | `CTRL-LEFT` / `CTRL-RIGHT` | Move backward / forward by one subword | | `CTRL-A`/ `CTRL-E` | Move the cursor to the start / end of the line | | | Select the character to the left / right of the cursor | | `META-SHIFT-B` / `META-SHIFT-F` | Select the word to the left / right of the cursor | | | Select everything to the left / right of the cursor | | `SHIFT-UP` / `SHIFT-UP` | Select everything above / below the cursor | | `CTRL-A` | Select the entire editor buffer | | `SHIFT-ENTER` `CTRL-ENTER` `ALT-ENTER` | Insert newline | | `CTRL-R` | Command Search | | `CTRL-SHIFT-D` | Split pane | ## How it Works [Section titled “How it Works”](#how-it-works) [Text Editor Input Demo](https://www.loom.com/embed/1517049fefc34227bf1abaf19cc7e6ea) 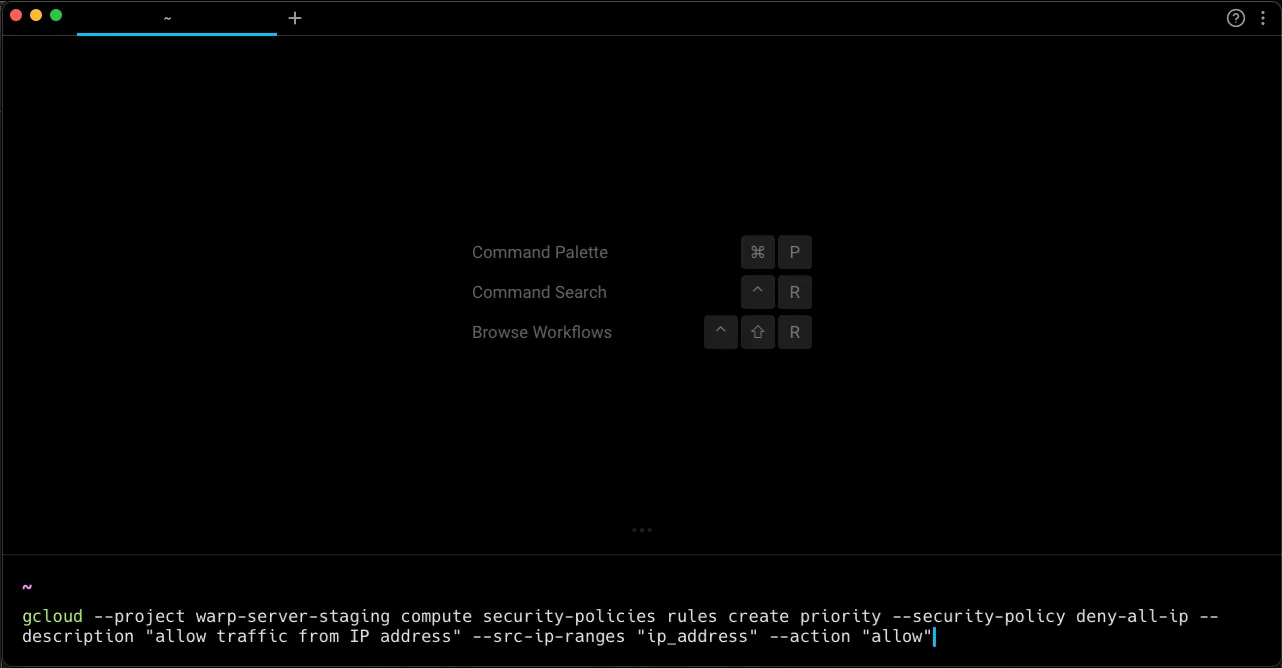 Soft wrapping applied to long lines in the editor.
# Alias Expansion
Canonical page: [/terminal/editor/alias-expansion/](https://docs.warp.dev/terminal/editor/alias-expansion/)
> Warp will automatically expand your aliases as you type in the input editor.
## How to use it [Section titled “How to use it”](#how-to-use-it) * macOS When Alias Expansion is enabled, type an alias and then hit `SPACE` will expand the alias. To insert a space without expanding an alias, the default keybinding is `OPT-SPACE`. * Windows When Alias Expansion is enabled, type an alias and then hit `SPACE` will expand the alias. To insert a space without expanding an alias, the default keybinding is `ALT-SPACE`. * Linux When Alias Expansion is enabled, type an alias and then hit `SPACE` will expand the alias. To insert a space without expanding an alias, the default keybinding is `ALT-SPACE`. ## How to access it [Section titled “How to access it”](#how-to-access-it) Alias expansion is disabled by default. There are two ways to toggle this on and off: * From Settings: Navigate to **Settings** > **Features** > **Terminal Input** and toggle “Expand aliases as you type”. * From the [Command Palette](/terminal/command-palette/#windows): Search for the “Enable/disable alias expansion” option and hit `ENTER`. ## How it works [Section titled “How it works”](#how-it-works) [Alias Expansion Demo](https://www.loom.com/embed/2267657c033e482890eea75a8a6c5373)
# Command Inspector
Canonical page: [/terminal/editor/command-inspector/](https://docs.warp.dev/terminal/editor/command-inspector/)
> Command Inspector (also known as Command X-Ray) surfaces documentation for sub-parts of your command, directly in Warp's Input Editor.
## How to access it [Section titled “How to access it”](#how-to-access-it) * macOS Hover over the part of the command you want to inspect with your mouse or press `CMD-SHIFT-I` to inspect the cursor’s current location. * Windows Hover over the part of the command you want to inspect with your mouse or press `CTRL-SHIFT-I` to inspect the cursor’s current location. * Linux Hover over the part of the command you want to inspect with your mouse or press `CTRL-SHIFT-I` to inspect the cursor’s current location. ## How it works [Section titled “How it works”](#how-it-works) [Command Inspector Demo](https://www.loom.com/embed/a00259927ada41b2895fd5c4072a3dcc)
# Syntax & Error Highlighting
Canonical page: [/terminal/editor/syntax-error-highlighting/](https://docs.warp.dev/terminal/editor/syntax-error-highlighting/)
> Color-code commands and underline errors in real time as you type in Warp's input editor.
## What is syntax highlighting [Section titled “What is syntax highlighting”](#what-is-syntax-highlighting) Warp supports Syntax Highlighting in the [Input Editor.](/terminal/editor/) It colors each part of a command to help differentiate between sub-commands, options/flags, arguments, and variables. Caution Newly installed apps or newly created aliases will not trigger syntax highlighting until you open a new Warp session (new window, tab, or pane), even if you `source` the RC files in the current session. ### How to access syntax highlighting [Section titled “How to access syntax highlighting”](#how-to-access-syntax-highlighting) When Syntax Highlighting is enabled, Warp’s [Input Editor](/terminal/editor/) automatically recognizes each part of the command as you type it into the Input Editor, and syntactically highlight them. ### How to enable/disable syntax highlighting [Section titled “How to enable/disable syntax highlighting”](#how-to-enabledisable-syntax-highlighting) Syntax highlighting is enabled by default, to toggle it: * Through the [Command Palette](/terminal/command-palette/), search for the “Syntax Highlighting” option and click it (or press enter) to enable/disable. * Through **Settings** > **Features** > **Terminal Input** , toggle “Syntax highlighting for commands” ### How syntax highlighting works [Section titled “How syntax highlighting works”](#how-syntax-highlighting-works) [Syntax Highlighting Demo](https://www.loom.com/embed/87b15de13ee9407b98a24f1a31835784) ## What is error underlining [Section titled “What is error underlining”](#what-is-error-underlining) Warp highlights errors in commands that are typed within the [Input Editor](/terminal/editor/) e.g. if the binary for the command you’ve typed does not exist. Caution Newly installed apps or newly created aliases will trigger error underlining until you open a new Warp session (new window, tab, or pane), even if you `source` the RC files in the current session. ### How to access error underlining [Section titled “How to access error underlining”](#how-to-access-error-underlining) When Error Underlining is enabled, Warp automatically underlines any invalid commands with a dashed red underline. ### How to enable/disable error underlining [Section titled “How to enable/disable error underlining”](#how-to-enabledisable-error-underlining) Error underlining is enabled by default, to toggle it: * Through the [Command Palette](/terminal/command-palette/), search for the “Syntax Highlighting” option and click it (or press enter) to enable/disable. * Through **Settings** > **Features** > **Terminal Input** , toggle “Error underlining for commands” ### How error underlining works [Section titled “How error underlining works”](#how-error-underlining-works) [Error Underlining Demo](https://www.loom.com/embed/7721e06ed4aa4e1380abae4f5827ef6f)
# Input editor Vim keybindings
Canonical page: [/terminal/editor/vim/](https://docs.warp.dev/terminal/editor/vim/)
> Use input editor Vim keybindings (also known as Vim mode) to edit commands quickly in Warp.
## About Vim keybindings [Section titled “About Vim keybindings”](#about-vim-keybindings) The Vi family of programs (including Vim and Neovim) are modal text editors that allow for keyboard-driven text editing. Several shells, including `bash` and `zsh`, implement vi-style keybindings. Warp’s input editor was built natively to support more modern text editing experiences, which means it replaces the shell’s editor capabilities. Warp has its implementation of Vim keybindings (also known as Vim mode) you can use. ### How to enable Vim keybindings [Section titled “How to enable Vim keybindings”](#how-to-enable-vim-keybindings) To manually toggle Vim keybindings in Warp’s input editor: * Through the [Command Palette](/terminal/command-palette/), search for “Vim Keybindings”. * Through **Settings** > **Features** > **Text Editing**, toggle “Edit commands with Vim keybindings”. As in `bash` and `zsh`’s vi mode implementations, the editor starts in insert mode. Pressing `CTRL-C` or `ENTER` clears any pending command state. ### Customizing Keybindings [Section titled “Customizing Keybindings”](#customizing-keybindings) At the moment, Warp only supports default Vim keybindings. One exception is the keyboard shortcut for exiting insert mode, which can be rebound under**Settings** > **Keyboard shortcuts** > **Exit Vim Insert Mode**, or through the [Command Palette](/terminal/command-palette/) search for “Exit Vim Insert Mode”. ## Supported Keybindings [Section titled “Supported Keybindings”](#supported-keybindings) Below is a list of the vim functionality implemented in Warp so far. ### Movement [Section titled “Movement”](#movement) See [Vim docs: motion](https://vimdoc.sourceforge.net/htmldoc/motion.html) for more information. #### Basic [Section titled “Basic”](#basic) | Command(s) | Description | | ---------------------------- | --------------------------------------------------- | | `h`, `j`, `k`, `l` | single-char movement | | ``, `` | single-char movement with line wrap | | `w`, `W`, `b`, `B`, `e`, `E` | word movement | | `ge`, `gE` | end of previous word | | `$` | end of line | | `0` | beginning of line | | `^` | first non-whitespace character of line | | `%` | jump to matching bracket | | `[`, `]` | prev/next unmatched bracket | | `_` | beginning of the current line | | `+` | first non-whitespace character of the next line | | `-` | first non-whitespace character of the previous line | #### Multi-line-related [Section titled “Multi-line-related”](#multi-line-related) | Command(s) | Description | | ---------- | ----------------------- | | `gg`, `G` | jump to first/last line | ### Editing [Section titled “Editing”](#editing) | Command(s) | Description | | ---------- | ----------------------------------------------------------- | | `r` | replace character under cursor | | `d`, `D` | delete a range or object | | `c`, `C` | change a range or object (delete, then go to insert mode) | | `s`, `S` | substitute (like change, but can only delete at the cursor) | | `x`, `X` | delete under cursor | | `y`, `Y` | yank (copy) into the clipboard | | `p`, `P` | paste from the clipboard | | `u`, `⌃r` | undo, redo | | `~` | toggle upper/lowercase under cursor | | `gu` | lowercase under cursor (`u` in visual mode) | | `gU` | uppercase under cursor (`U` in visual mode) | | `J` | join current and following lines | | `.` | repeat last edit | See [Vim docs: editing](https://vimdoc.sourceforge.net/htmldoc/editing.html) for more information. #### Text Objects [Section titled “Text Objects”](#text-objects) | Command(s) | Description | | ---------------- | ------------------------------------------ | | `i` | inner (exclude delimiters in text object) | | `a` | around (include delimiters in text object) | | `w`, `W` | whitespace-delimited string (word) | | `"`, `'`, \`\`\` | quote-delimited string | | `(`, `{`, `[` | parenthesized/bracketed string | See [Vim docs: text objects](https://vimdoc.sourceforge.net/htmldoc/motion.html#text-objects) for more information. ### Search [Section titled “Search”](#search) #### Character Search [Section titled “Character Search”](#character-search) | Command(s) | Description | | ------------------ | ------------------------------------------------------ | | `t`, `T`, `f`, `F` | find next/prev matching character on line | | `;` | repeat last character search in the same direction | | `,` | repeat last character search in the opposite direction | See [Vim docs: left-right motions](https://vimdoc.sourceforge.net/htmldoc/motion.html#f) for more information. #### General Search [Section titled “General Search”](#general-search) Unlike Vim, general search commands don’t search within the buffer. Instead, they open Warp’s native command search. | Command(s) | Description | | ------------------ | ------------------------ | | `/`, `?`, `*`, `#` | open Warp command search | ### Mode Switching [Section titled “Mode Switching”](#mode-switching) | Command(s) | Description | | ---------- | ----------------------------------------------------------------- | | `i` | insert text before the cursor | | `I` | insert text before the first non-whitespace character in the line | | `a` | append text after the cursor | | `A` | append text at the end of the line | | `o` | begin new line below the cursor and insert text | | `O` | begin new line above the cursor and insert text | | `v` | visual character mode | | `V` | visual line mode | See [Vim docs: insert](https://vimdoc.sourceforge.net/htmldoc/insert.html#insert) and [Vim docs: visual mode](https://vimdoc.sourceforge.net/htmldoc/visual.html#visual-mode) for more information. ### Registers [Section titled “Registers”](#registers) | Command(s) | Description | | ---------- | --------------- | | `"` | register prefix | Warp currently supports the following registers: | Register name | Description | | ---------------- | ---------------------------------------------------------------- | | `a`–`z`, `A`–`Z` | named registers | | `+` | system clipboard | | `*` | system clipboard | | `"` | unnamed register, containing the text of the last delete or yank | See [Vim docs: registers](https://vimdoc.sourceforge.net/htmldoc/change.html#registers) for more information. ## Feedback [Section titled “Feedback”](#feedback) The best way to report bugs and request features is through Warp’s [GitHub Issues](https://github.com/warpdotdev/Warp/issues) page. Please note that the issue or request is for Vim Keybindings.
# Command entry overview
Canonical page: [/terminal/entry/](https://docs.warp.dev/terminal/entry/)
> Warp's main features for Command Entry, History, Synchronized Inputs, YAML Workflows and More!
1. [Command Corrections](/terminal/entry/command-corrections/) provides auto-correct suggestions on previously run commands to catch typos, and forgotten flags, and fix general console errors. 2. [Command Search](/terminal/entry/command-search/) is a 3-in-1 panel that allows you to search across Command History, Workflows, Notebooks, and AI Command Search all at once. 3. [Command History](/terminal/entry/command-history/) allows Warp to isolate the history of each shell session to make previously run commands easily accessible. 4. [Synchronized Inputs](/terminal/entry/synchronized-inputs/) allow you to easily run the same command in multiple sessions at the same time. 5. [YAML Workflows](/terminal/entry/yaml-workflows/) are easier to execute and share parameterized and searchable commands within Warp. ## Command Corrections [Section titled “Command Corrections”](#command-corrections) [Command Corrections Demo](https://www.loom.com/embed/180e1dc8d1504ec39c00694d9fd71b7c) ## Command Search [Section titled “Command Search”](#command-search) [Command Search Demo](https://www.loom.com/embed/21a6f58a33754ee7913edbff6d33d8d1) ## Command History [Section titled “Command History”](#command-history) [Command History Demo](https://www.loom.com/embed/8119beca8d794b06859c5dea1b1377bb) ## YAML Workflows [Section titled “YAML Workflows”](#yaml-workflows) [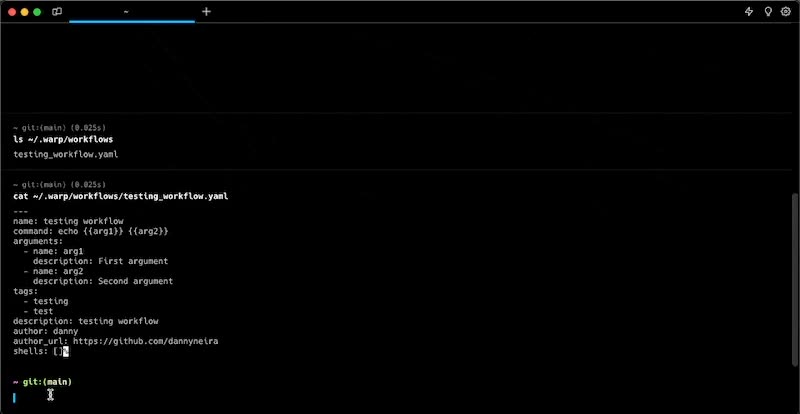](/assets/terminal/yaml_workflows_demo.mp4)
# Command Corrections
Canonical page: [/terminal/entry/command-corrections/](https://docs.warp.dev/terminal/entry/command-corrections/)
> Command Corrections provides auto-correct suggestions on previously run commands to catch typos and forgotten flags, and fix general console errors.
## What is it [Section titled “What is it”](#what-is-it) This feature was built on top of the open-source project [nvdn/thefuck](https://github.com/nvbn/thefuck). Here are some examples that the Warp team usually finds Command Corrections useful for: * Misspelled commands * `gti checkout myBranchName` -> `git checkout myBranchName` * `cd ap/sorce/executtor` -> `cd app/source/executor` * Missing flags * `git push` -> `git push –set-upstream myBranchName` * Add permissions * `./script` -> `chmod +x ./script && ./script` ## How to access it [Section titled “How to access it”](#how-to-access-it) * Command Corrections is enabled by default. You can disable Command Corrections by going to **Settings** > **Features** > **Terminal Input** > toggle “Suggest corrected commands”. * After an incorrect command is run, a panel with the corrected command suggestion appears above the Input Editor. `CLICK` or press the `RIGHT` arrow to insert the suggestion. ## How it works [Section titled “How it works”](#how-it-works) [Command Corrections Demo](https://www.loom.com/embed/180e1dc8d1504ec39c00694d9fd71b7c) #### Command correction rules: [Section titled “Command correction rules:”](#command-correction-rules) | Command | | ------------------------------------------------------------- | | brew | | cargo | | cat | | cd | | chmod | | conda | | cp | | docker | | generic (command agnostic, e.g. mis-spelling executable name) | | git | | go | | grep | | java | | ls | | mkdir | | npm | | pip | | python | | sed | | sudo | | yarn |
# Command History
Canonical page: [/terminal/entry/command-history/](https://docs.warp.dev/terminal/entry/command-history/)
> Command History helps you quickly find previously run commands.
## What is it [Section titled “What is it”](#what-is-it) While running, Warp isolates the history of each shell session e.g. if you have two Split Panes open, commands created in one pane do not populate the history of the other. Warp combines the history upon closing. Command History also provides rich information like exit code, directory, thread, time to finish running, last run, etc.  Command history with rich metadata. ## How to access it [Section titled “How to access it”](#how-to-access-it) * Hitting `UP` in the [Input Editor](/terminal/editor/) brings up your history and performs a prefix search based on input. * Pressing `CTRL-R` opens the [Command Search](/terminal/entry/command-search/) panel and initiates a search of your Command History. To navigate the Command Search panel: * Start typing and Warp will automatically filter using fuzzy search. Warp bolds matching text when filtering with fuzzy search. ## How it works [Section titled “How it works”](#how-it-works) [Command History Demo](https://www.loom.com/embed/8119beca8d794b06859c5dea1b1377bb)
# Command Search
Canonical page: [/terminal/entry/command-search/](https://docs.warp.dev/terminal/entry/command-search/)
> Search command history, Workflows, Prompts, and agent conversations with fuzzy matching.
The Command Search panel provides unified search across all your terminal inputs, saved commands, and [Terminal and Agent modes](/agent-platform/local-agents/interacting-with-agents/terminal-and-agent-modes/) conversation history. Use it to quickly find and reuse commands, workflows, or past agent interactions. 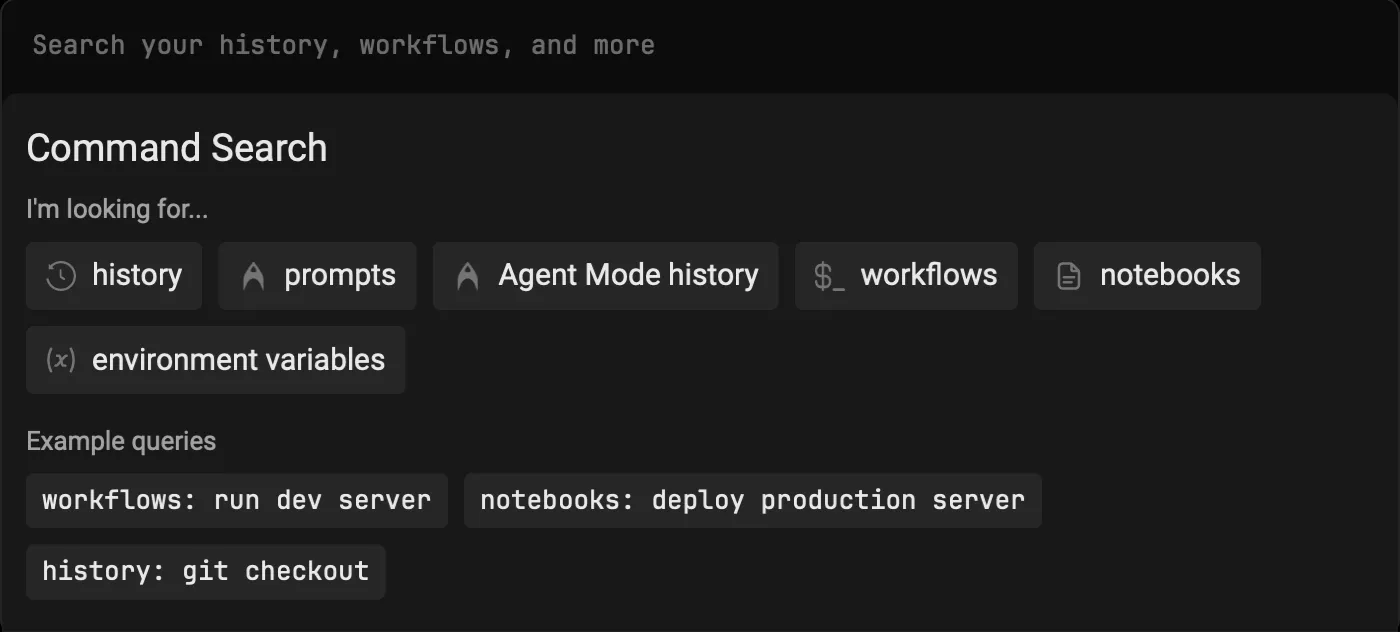 ## Quickstart [Section titled “Quickstart”](#quickstart) 1. Press `CTRL-R` to open the Command Search Panel 2. Type your search query in the input box 3. Press `ENTER` to input the selected command into Warp’s Input Editor ## Search Filters [Section titled “Search Filters”](#search-filters) You can filter your search results by prepending your search term with any of the following: | Filter | Shortcuts | | --------------------------------------------------------------------------- | ------------------------------- | | Command History | `history:`, `h:`, or `H-TAB` | | Prompts | `prompts:`, `p:`, or `P-TAB` | | [Agent Mode](/agent-platform/local-agents/interacting-with-agents/) History | `ai_history:`, `a:`, or `A-TAB` | ## Additional Features [Section titled “Additional Features”](#additional-features) * You can expand the menu horizontally by dragging the right edge * The panel supports fuzzy search and ranks results by relevance ## How it works [Section titled “How it works”](#how-it-works) [Command Search Demo](https://www.loom.com/embed/21a6f58a33754ee7913edbff6d33d8d1)
# Synchronized Inputs
Canonical page: [/terminal/entry/synchronized-inputs/](https://docs.warp.dev/terminal/entry/synchronized-inputs/)
> Type a command once and sync it to multiple panes simultaneously.
### Synchronized inputs vs. broadcast input [Section titled “Synchronized inputs vs. broadcast input”](#synchronized-inputs-vs-broadcast-input) Synchronized inputs in Warp work similarly to “broadcast input” settings in other terminals, but there are some differences. With Warp’s synchronized inputs, whatever command you enter in one session will sync to the other sessions in its entirety. Whereas, “broadcast input” typically allows you to “broadcast” individual keystrokes, which may be more suitable for editing parts of commands. ## How to access it [Section titled “How to access it”](#how-to-access-it) There are three ways to access controls to synchronize inputs: * [Command Palette](/terminal/command-palette/) in Warp: Search for “synchronize” * macOS menus for the Warp app: `Edit > Synchronize Input` ## How to use it [Section titled “How to use it”](#how-to-use-it) * macOS There are two modes available to scope how input is synchronized and one to stop any synchronization: * Synchronize All Panes in All Tabs * Synchronize All Panes in Current Tab `OPT-CMD-I` * Stop Synchronizing Any Panes `OPT-CMD-I` * Windows There are two modes available to scope how input is synchronized and one to stop any synchronization: * Synchronize All Panes in All Tabs * Synchronize All Panes in Current Tab `CTRL-ALT-I` * Stop Synchronizing Any Panes `CTRL-ALT-I` * Linux There are two modes available to scope how input is synchronized and one to stop any synchronization: * Synchronize All Panes in All Tabs * Synchronize All Panes in Current Tab `CTRL-ALT-I` * Stop Synchronizing Any Panes `CTRL-ALT-I` When inputs are synchronized, you can start typing in one input editor and that same input will be entered into all of the input editors for all panes in your current tab or all tabs, depending on the scope you selected. If you are working in an alternative editor mode (like vim), synchronized inputs will only apply to all tabs with that same editor type running. When you get done, you can select “Stop Synchronizing Any Panes” to end the synchronization. ## How it works [Section titled “How it works”](#how-it-works)
# YAML Workflows
Canonical page: [/terminal/entry/yaml-workflows/](https://docs.warp.dev/terminal/entry/yaml-workflows/)
> Workflows are an easier way to execute and share commands within Warp.
Danger You can continue to use YAML-based workflows, but we recommend using new [workflows in Warp Drive](/knowledge-and-collaboration/warp-drive/workflows/) instead for a better editing experience. ## What is it [Section titled “What is it”](#what-is-it) Workflows are easily parameterized and searchable by name, description, or command arguments. [Common Workflows](https://github.com/warpdotdev/workflows) sourced by the Warp team and community are readily available within the app. Additionally, you can create and scope Workflows locally or to a Git repository. ## How to use it [Section titled “How to use it”](#how-to-use-it) * Open the [Command Search](/terminal/entry/command-search/) or Workflow Search `CTRL-SHIFT-R` panel to find Workflows. * Once inside the menu, start typing in the search bar to filter the existing Workflows. (e.g. git, android, npm, etc.) * When a Workflow is selected with `ENTER`, you can use `SHIFT-TAB` to cycle through the arguments. * You can also expand the menu horizontally with the mouse by dragging it on the right edge. ## How it works [Section titled “How it works”](#how-it-works) [](/assets/terminal/yaml_workflows_demo.mp4) ### How is this different from aliases? [Section titled “How is this different from aliases?”](#how-is-this-different-from-aliases) Workflows solve some major pain points with aliases, specifically the: 1. need to context switch 1. leave vim, source dotfiles, or reset shell 2. difficulty with attaching documentation 3. inability to easily search or share 4. inability to easily parameterize ## Creating custom workflows [Section titled “Creating custom workflows”](#creating-custom-workflows) ### How to create a workflow with YAML [Section titled “How to create a workflow with YAML”](#how-to-create-a-workflow-with-yaml) You can store local workflows (scoped to your machine) in: * macOS ```bash $HOME/.warp/workflows/ ``` * Windows ```powershell $env:APPDATA\warp\Warp\data\workflows\ ``` * Linux ```bash ${XDG_DATA_HOME:-$HOME/.local/share}/warp-terminal/workflows/ ``` Or, you can share them with your team by saving them in `{{path_to_git_repo}}/.warp/workflows/`. Local and repository Workflows can be accessed under the “My Workflows” and “Repository Workflows” tab of the Workflows menu, respectively. See the existing Workflow spec within the [Workflows repo](https://github.com/warpdotdev/Workflows/tree/main/specs) for examples. Additionally, we outline the file format below: ### Where to save workflows [Section titled “Where to save workflows”](#where-to-save-workflows) Local Workflows are scoped to your machine. Repository Workflows are scoped to a Git repository and can be accessed by anyone who has cloned the repo. * macOS ```bash # Local Workflow Path $HOME/.warp/workflows/ # Repository Workflow Path {{path_to_git_repo}}/.warp/workflows ``` * Windows ```powershell # Local Workflow Path $env:APPDATA\warp\Warp\data\workflows\ # Repository Workflow Path {{path_to_git_repo}}\.warp\workflows ``` * Linux ```bash # Local Workflow Path ${XDG_DATA_HOME:-$HOME/.local/share}/warp-terminal/workflows/ # Repository Workflow Path {{path_to_git_repo}}/.warp/workflows ``` #### Local Workflows [Section titled “Local Workflows”](#local-workflows) To start, create a Workflow subdirectory within * macOS ```bash mkdir -p $HOME/.warp/workflows/ ``` * Windows ```powershell New-Item -Path "$env:APPDATA\warp\Warp\data\workflows\" -ItemType Directory ``` * Linux ```bash mkdir -p ${XDG_DATA_HOME:-$HOME/.local/share}/warp-terminal/workflows/ ``` Add your Workflow’s `.yaml` file to this directory; if the file format is valid Warp should automatically load it into the Workflows menu. `cp ~/path/to/my_awesome_workflow.yaml {{path_to_local_workflow_folder}}` #### Repository Workflows [Section titled “Repository Workflows”](#repository-workflows) You can add a repository Workflow similarly to how you added a local Workflow. Create a Workflows folder in a repository’s root directory and save your `.yaml` file like so: ```plaintext cd {{repository_path}} mkdir -p .warp/workflows/ cp ~/path/to/my_awesome_workflow.yaml {{path_to_local_workflow_folder}} ``` #### Global Workflows [Section titled “Global Workflows”](#global-workflows) You can contribute Workflows that will be made available to other Warp users by forking the [Workflows repo](https://github.com/warpdotdev/workflows/tree/main/specs) and opening a pull request. See the [Contributing](https://github.com/warpdotdev/workflows#contributing) section for more details.
# Classic Input
Canonical page: [/terminal/input/classic-input/](https://docs.warp.dev/terminal/input/classic-input/)
> Classic Input lets you use Warp with an editor that resembles a traditional terminal, offering full terminal features and Agent Mode support out of the box.
Classic Input corresponds to the **Shell (PS1)** option under **Settings** > **Appearance** > **Input**. It provides a traditional terminal experience with support for shell customizations like PS1 prompts, oh-my-zsh themes, same-line prompts, and more. Warp’s default input uses [Terminal and Agent modes](/agent-platform/local-agents/interacting-with-agents/terminal-and-agent-modes/), which provide a clean terminal by default and a dedicated conversation view for agent interactions. Classic Input is an alternative for users who prefer a more traditional terminal. [Agent Mode](/agent-platform/local-agents/interacting-with-agents/) works in Classic Input with some minor differences from the default input. ## Features [Section titled “Features”](#features) Classic Input supports all of Warp’s core terminal features, including the following and more: * [Prompt](/terminal/appearance/prompt/) — Use a fully customizable Warp prompt or your shell prompt, with support for PS1 and same-line prompts. * [Input Position](/terminal/appearance/input-position/) — Choose where the input appears in Warp, including both the prompt and the command line. * [Modern Text Editing](/terminal/editor/) — Warp’s input editor works like a modern IDE, with rich editing capabilities not found in most terminals. * [Command Entry](/terminal/entry/) — Access Warp’s features for command history, synchronized inputs, YAML workflows, and more. * [Text Selection](/terminal/more-features/text-selection/) — Use smart selection or rectangular (column) selection to highlight text precisely without tedious cleanup. ## How to enter Agent Mode [Section titled “How to enter Agent Mode”](#how-to-enter-agent-mode) You can enter Agent Mode in a few ways: * macOS * Type any natural language, like a task or a question, in the terminal input. Warp will recognize natural language with a local auto-detection feature and prepare to send your query to an agent. * Use the keyboard shortcut `⌘+I` to toggle into Agent Mode, or type `*+Space`. * Click the “AI” sparkles icon in the menu bar, and this will open a new terminal pane that starts in Agent Mode. * From a block you want to ask an agent about, you can click the sparkles icon in the toolbelt, or click on its block context menu item “Attach block(s) to AI query”. * Windows * Type any natural language, like a task or a question, in the terminal input. Warp will recognize natural language with a local auto-detection feature and prepare to send your query to an agent. * Use the keyboard shortcut `Ctrl+I` to toggle into Agent Mode, or type `*+Space`. * Click the “AI” sparkles icon in the menu bar, and this will open a new terminal pane that starts in Agent Mode. * From a block you want to ask an agent about, you can click the sparkles icon in the toolbelt, or click on its block context menu item “Attach block(s) to AI query”. * Linux * Type any natural language, like a task or a question, in the terminal input. Warp will recognize natural language with a local auto-detection feature and prepare to send your query to an agent. * Use the keyboard shortcut `Ctrl+I` to toggle into Agent Mode, or type `*+Space`. * Click the “AI” sparkles icon in the menu bar, and this will open a new terminal pane that starts in Agent Mode. * From a block you want to ask an agent about, you can click the sparkles icon in the toolbelt, or click on its block context menu item “Attach block(s) to AI query”. This opens an agent conversation where you can write questions and tasks in an ongoing conversation with Warp’s agent. When you are in Agent Mode, a ✨ sparkles icon will display in line with your terminal input. 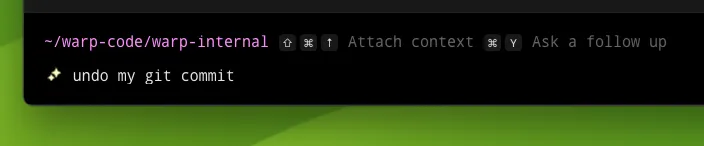 Agent Mode active indicator in Classic Input. ## Auto-detection for natural language and configurable settings [Section titled “Auto-detection for natural language and configurable settings”](#auto-detection-for-natural-language-and-configurable-settings) The feature Warp uses to detect natural language automatically is completely local. None of your input is sent to AI unless you press `Enter` in Agent Mode. If you find that certain shell commands are falsely detected as natural language, you can fix the model by adding those commands to a denylist in **Settings** > **Agents** > **Warp Agent** > **Natural language denylist**. You can also turn autodetection off from **Settings** > **Agents** > **Warp Agent** > **Autodetect agent prompts in terminal input**. The first time you enter Agent Mode, you will be served a banner with the option to disable auto-detection for natural language on your command line:  Natural language detection toggle. ## Input hints [Section titled “Input hints”](#input-hints) Warp input occasionally shows hints within the input editor in a light grey text that helps users learn about features. It’s enabled by default. * Toggle this feature **Settings** > **Agents** > **Warp Agent** > **Show input hint text** or search for “Input hint text” in the [Command Palette](/terminal/command-palette/) or Right-click on the input editor. ## How to exit Agent Mode [Section titled “How to exit Agent Mode”](#how-to-exit-agent-mode) * macOS You can quit Agent Mode at any point with `Esc` or `Ctrl+C`, or toggle out of Agent Mode with `⌘+I`. * Windows You can quit Agent Mode at any point with `Esc` or `Ctrl+C`, or toggle out of Agent Mode with `Ctrl+I`. * Linux You can quit Agent Mode at any point with `Esc` or `Ctrl+C`, or toggle out of Agent Mode with `Ctrl+I`. ## How to run commands in Agent Mode [Section titled “How to run commands in Agent Mode”](#how-to-run-commands-in-agent-mode) Once you have typed your question or task in the input, press `Enter` to execute your AI query. Agent Mode will send your request to Oz and begin streaming output in the form of an AI block. Unlike a chat panel, Agent Mode can complete tasks for you by running commands directly in your session. #### Agent Mode command suggestions [Section titled “Agent Mode command suggestions”](#agent-mode-command-suggestions) If Agent Mode finds a suitable command that will accomplish your task, it will describe the command in the AI block. It will also fill your terminal input with the suggested command so you can press `Enter` to run the command. When you run a command suggested by Agent Mode, that command will work like a standard command you’ve written in the terminal. No data will be sent back to the AI. If the suggested command fails and you want to resolve the error, you can start a new AI query to address the problem. 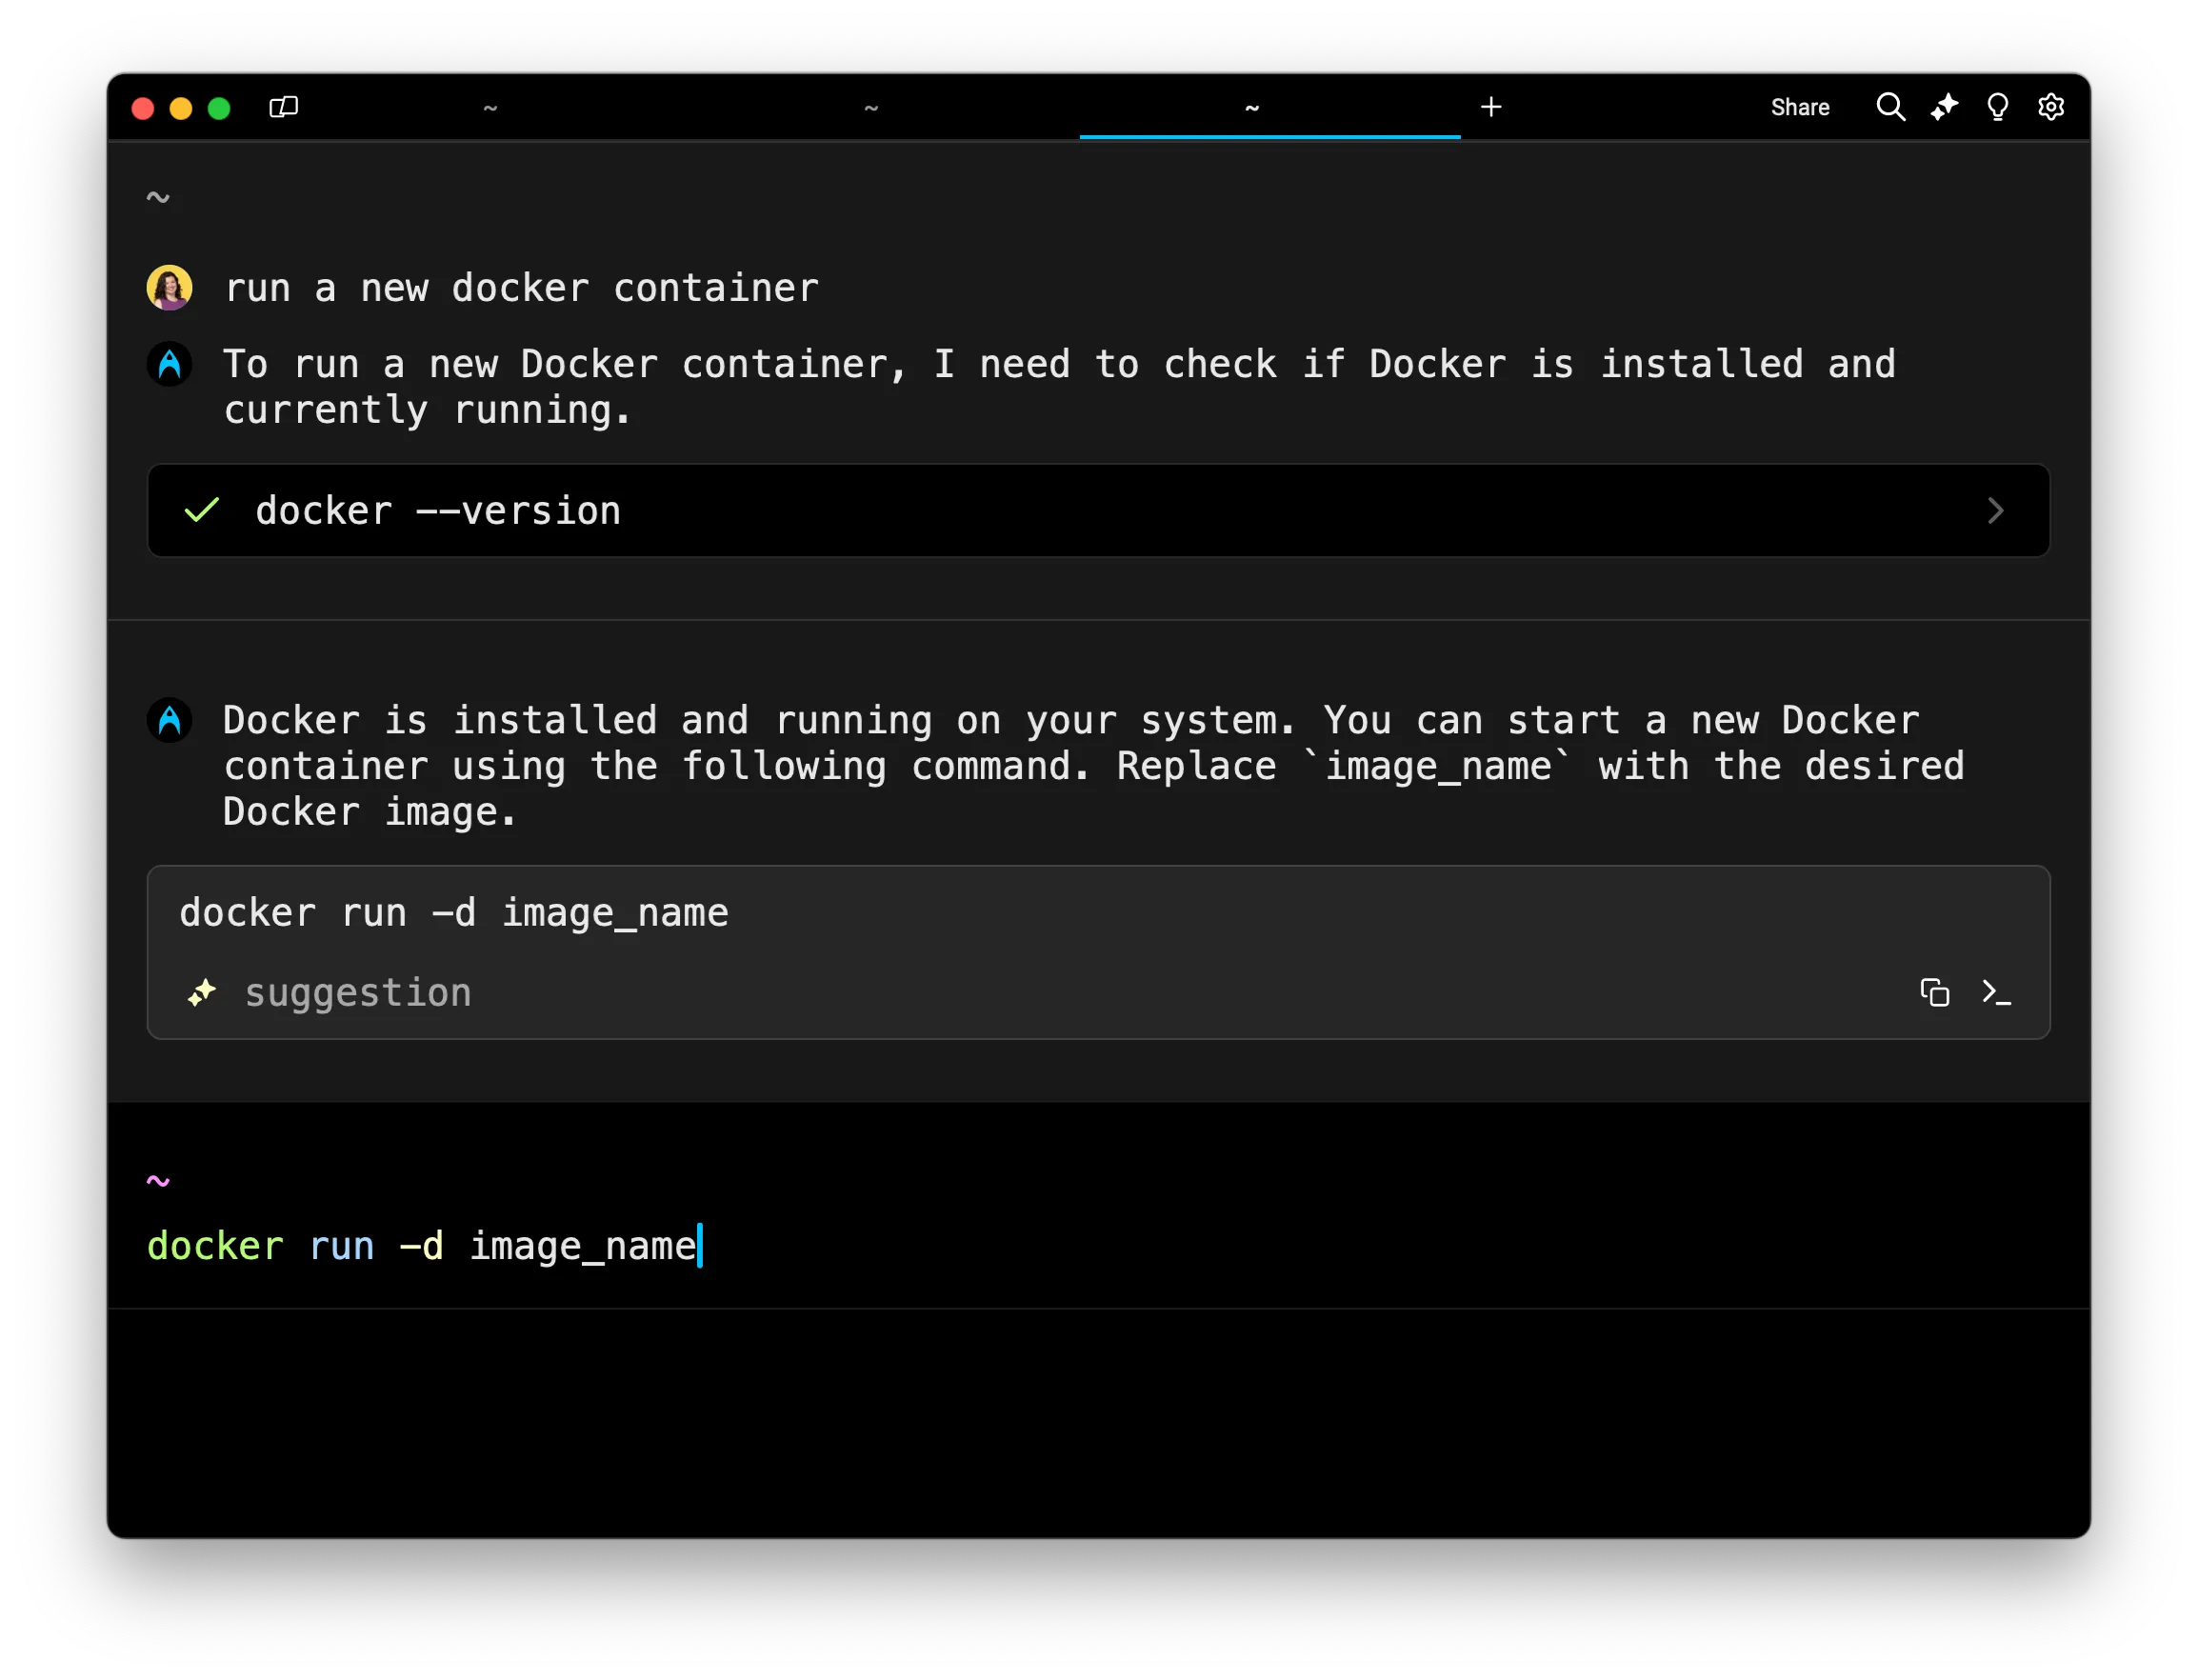 #### Agent Mode requested commands [Section titled “Agent Mode requested commands”](#agent-mode-requested-commands) If Agent Mode doesn’t have enough context to assist with a task, it will ask permission to run a command and read the output of that command. You must explicitly agree and press `Enter` to run the requested command. When you hit enter, both the command input and the output will be sent to Oz. If you do not wish to send the command or its output to AI, you can click Cancel or press `Ctrl+C` to exit Agent Mode and return to the traditional command line. 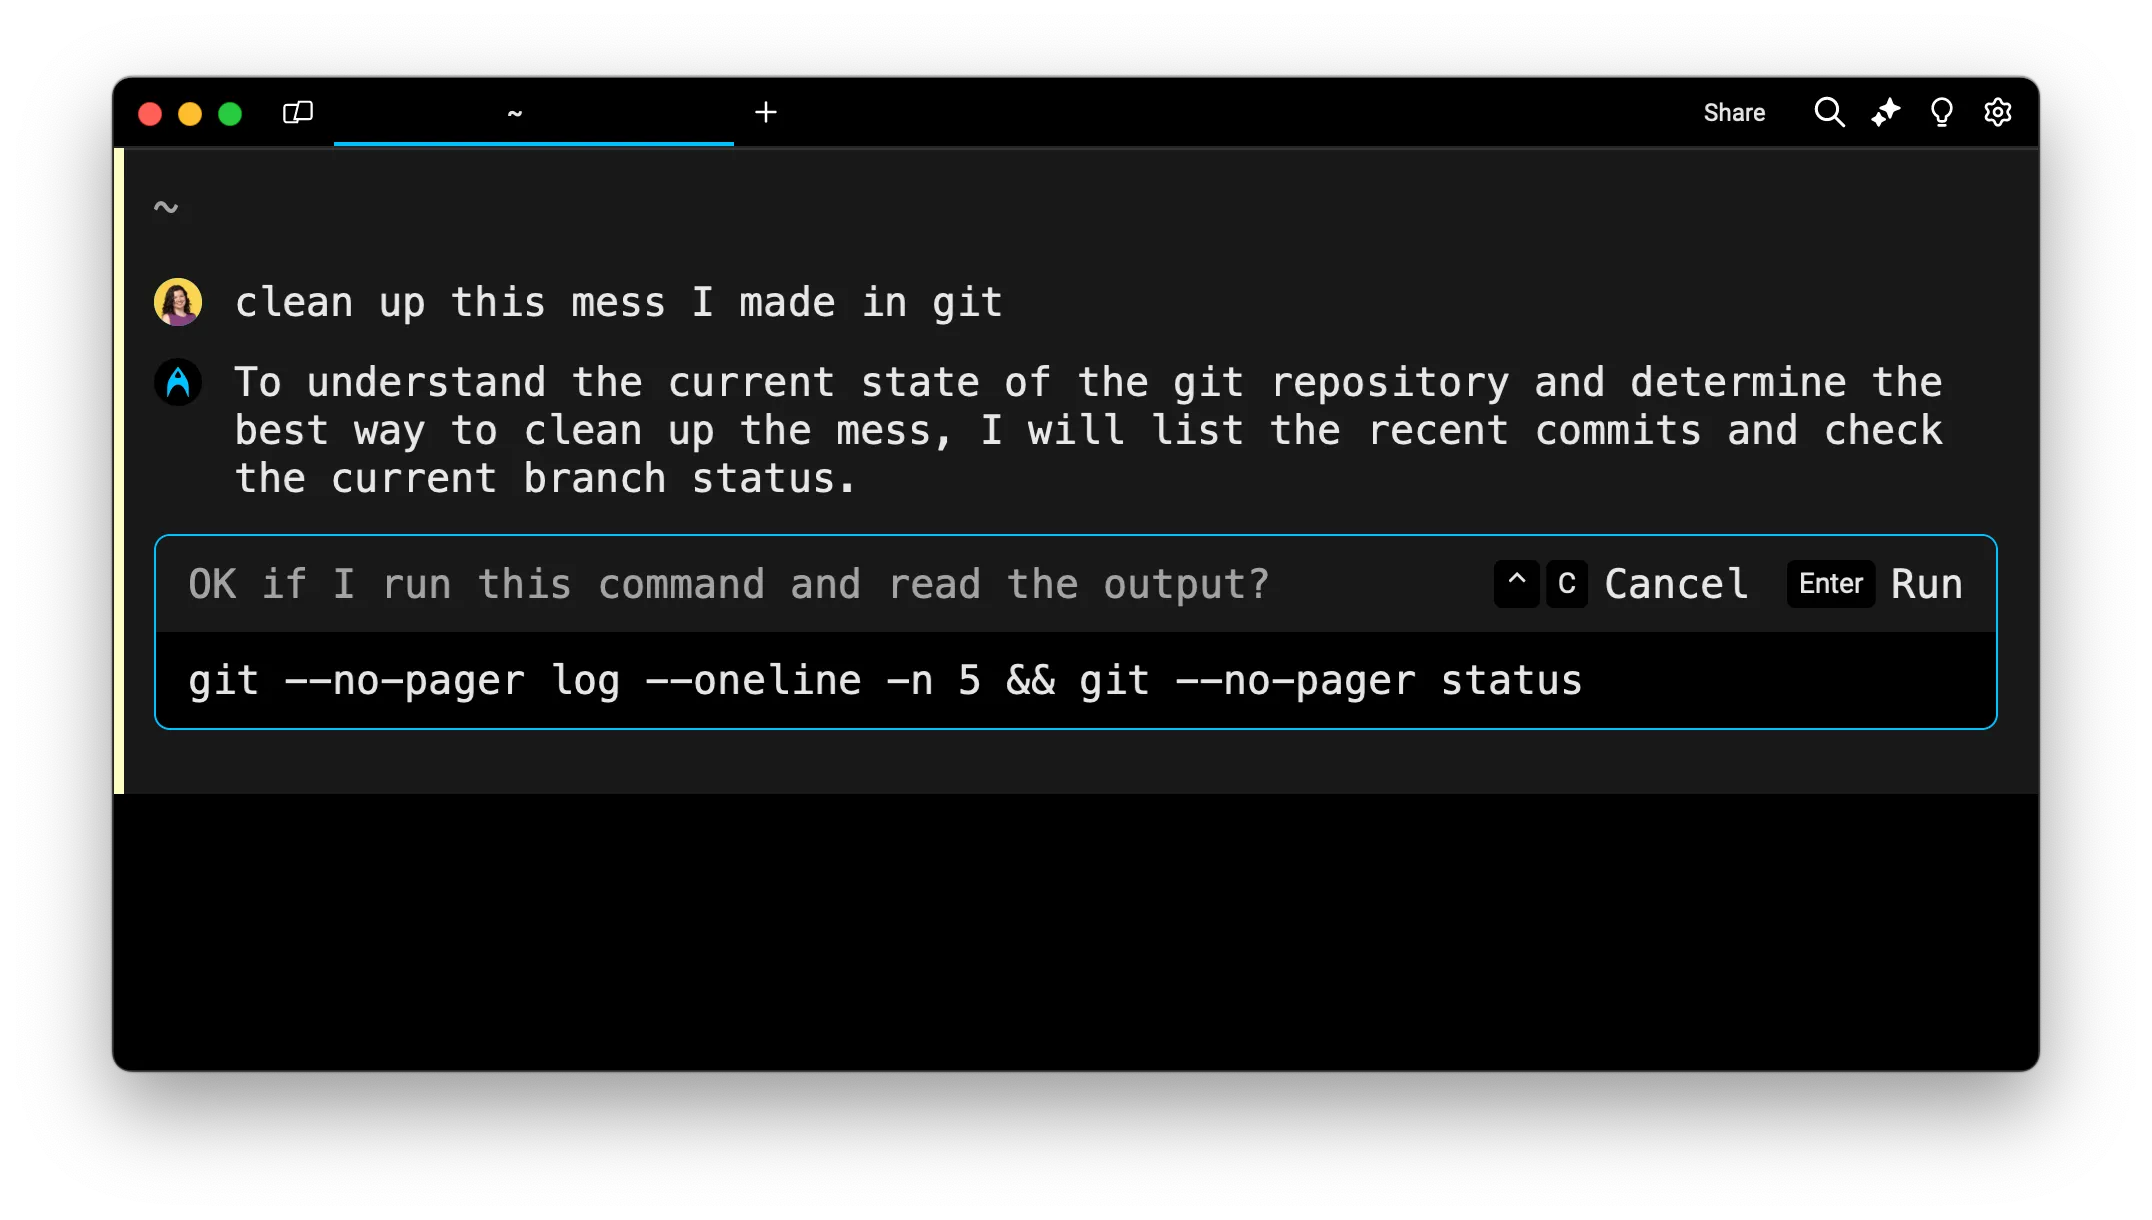 Agent command approval prompt. Once a requested command is executed, you can click to expand the output and view command details. 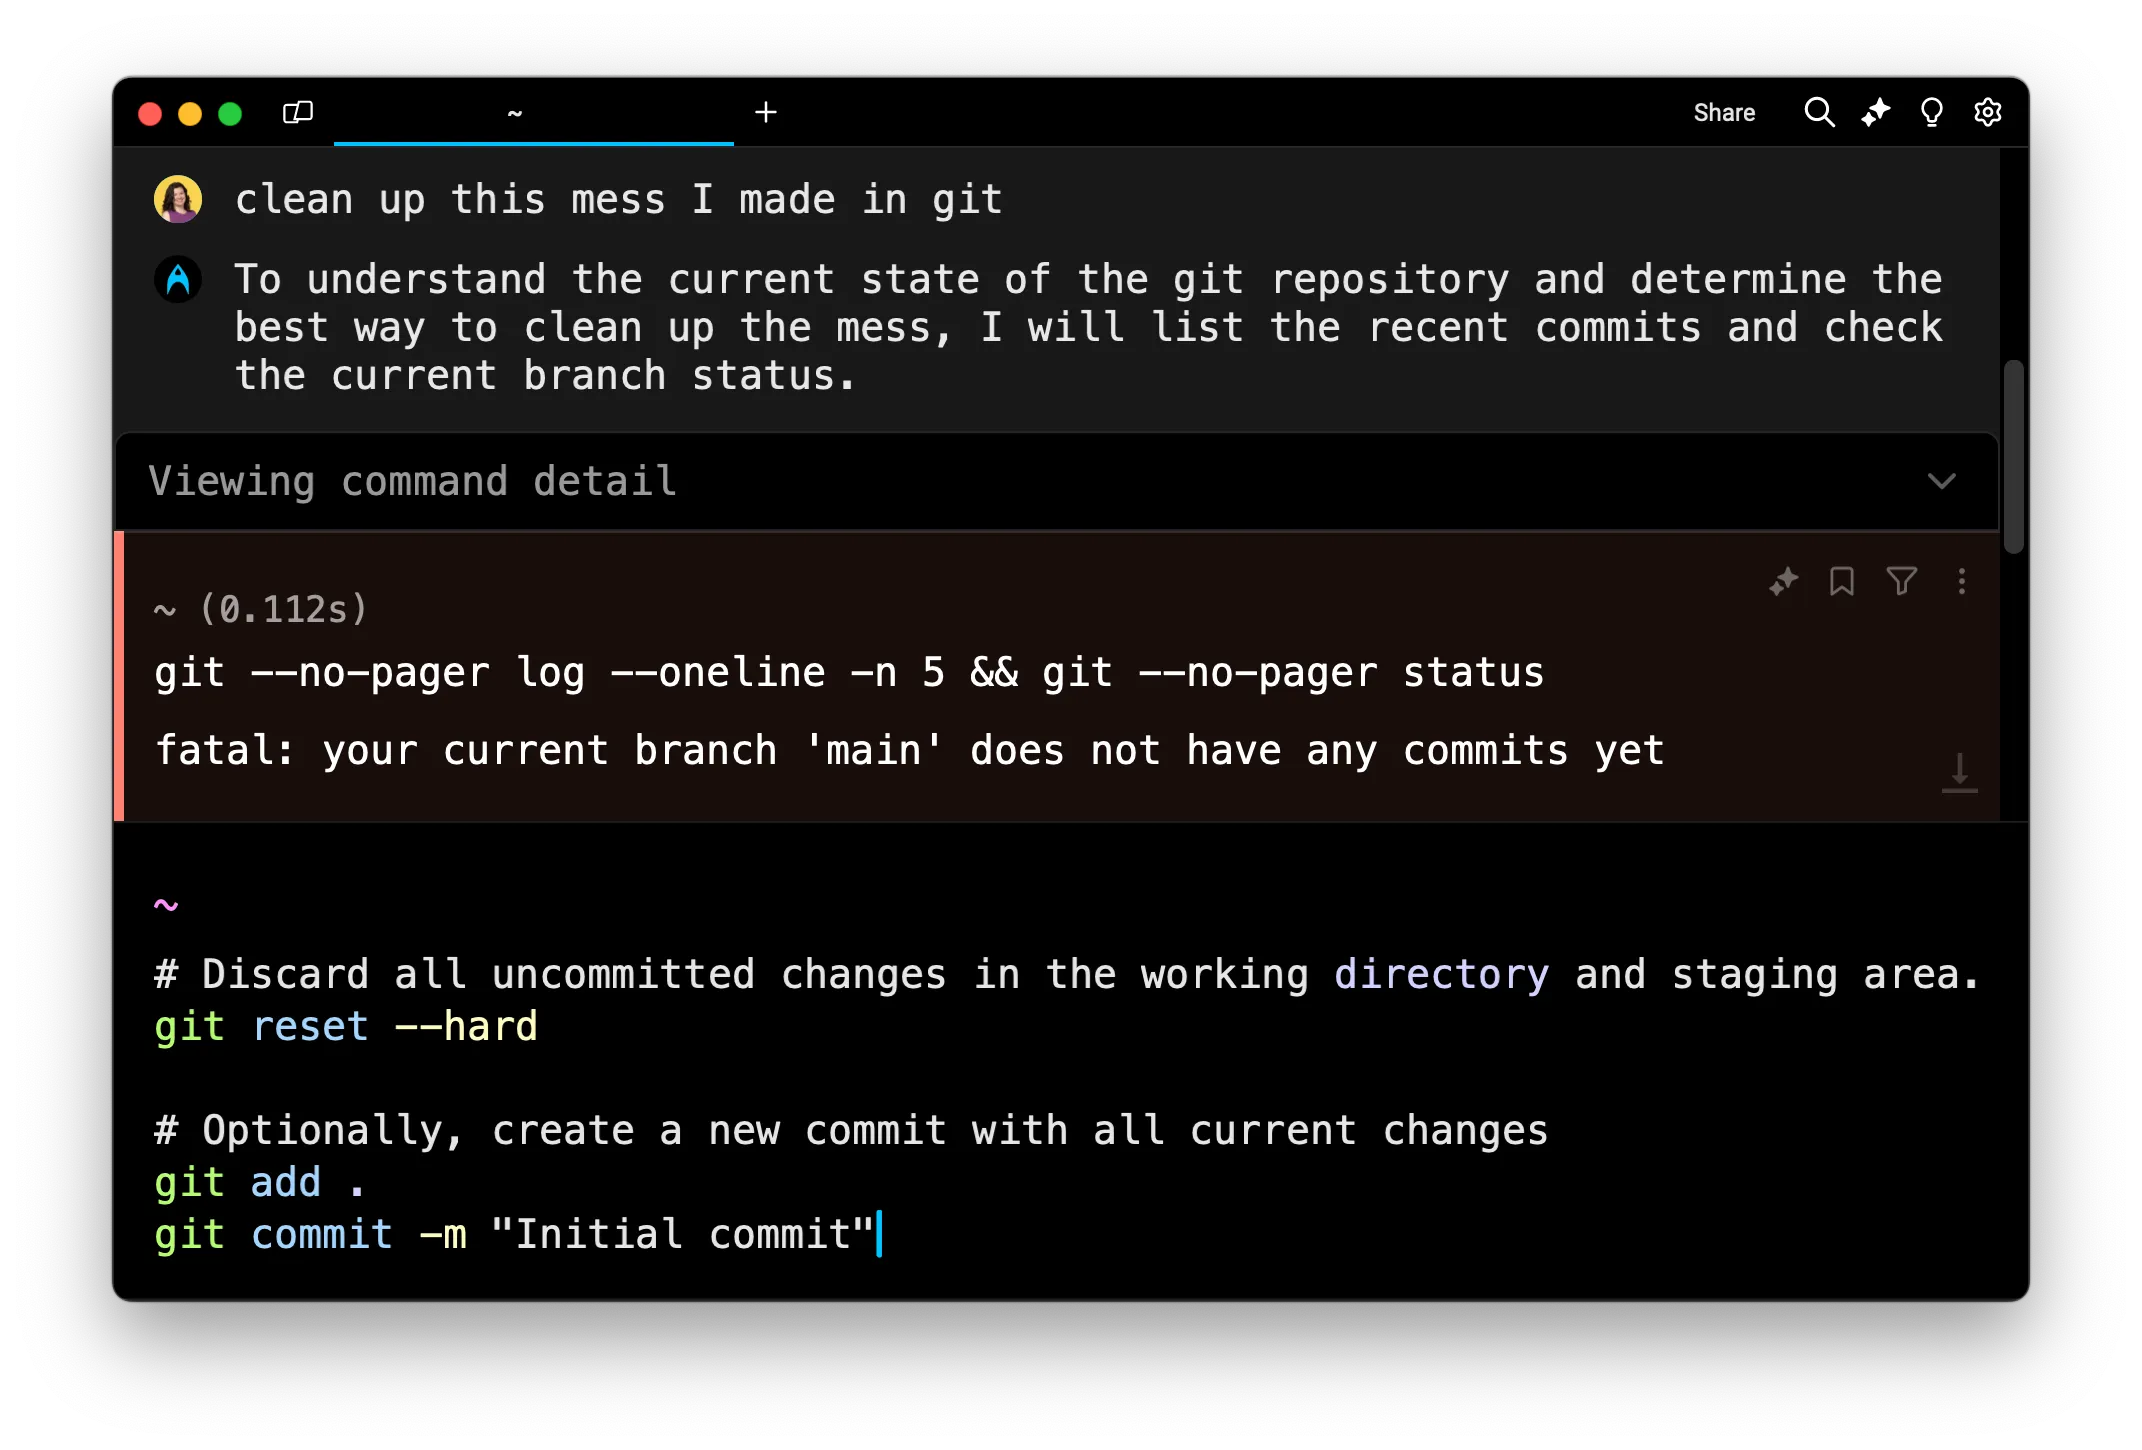 Viewing command details. If a requested command fails, Oz detects it. Agent Mode is self-correcting. It will request another command until it completes the task for you. Warp lets you choose from a curated list of LLMs for use in Agent Mode. By default, Warp uses **Auto (Responsive)**, which routes to the highest-quality, fastest available model. You can switch to other supported models — see [Model choice](/agent-platform/inference/model-choice/) for the full list.
# Universal Input (Legacy)
Canonical page: [/terminal/input/universal-input/](https://docs.warp.dev/terminal/input/universal-input/)
> Universal Input was the previous default input interface for Warp, replaced by Terminal and Agent modes.
Caution **This is legacy documentation.** Universal Input has been replaced by [Agent Modality](/agent-platform/local-agents/interacting-with-agents/terminal-and-agent-modes/), which provides a cleaner terminal experience with a dedicated conversation view for agent interactions. The **Universal Input** was the main input interface for using Warp. 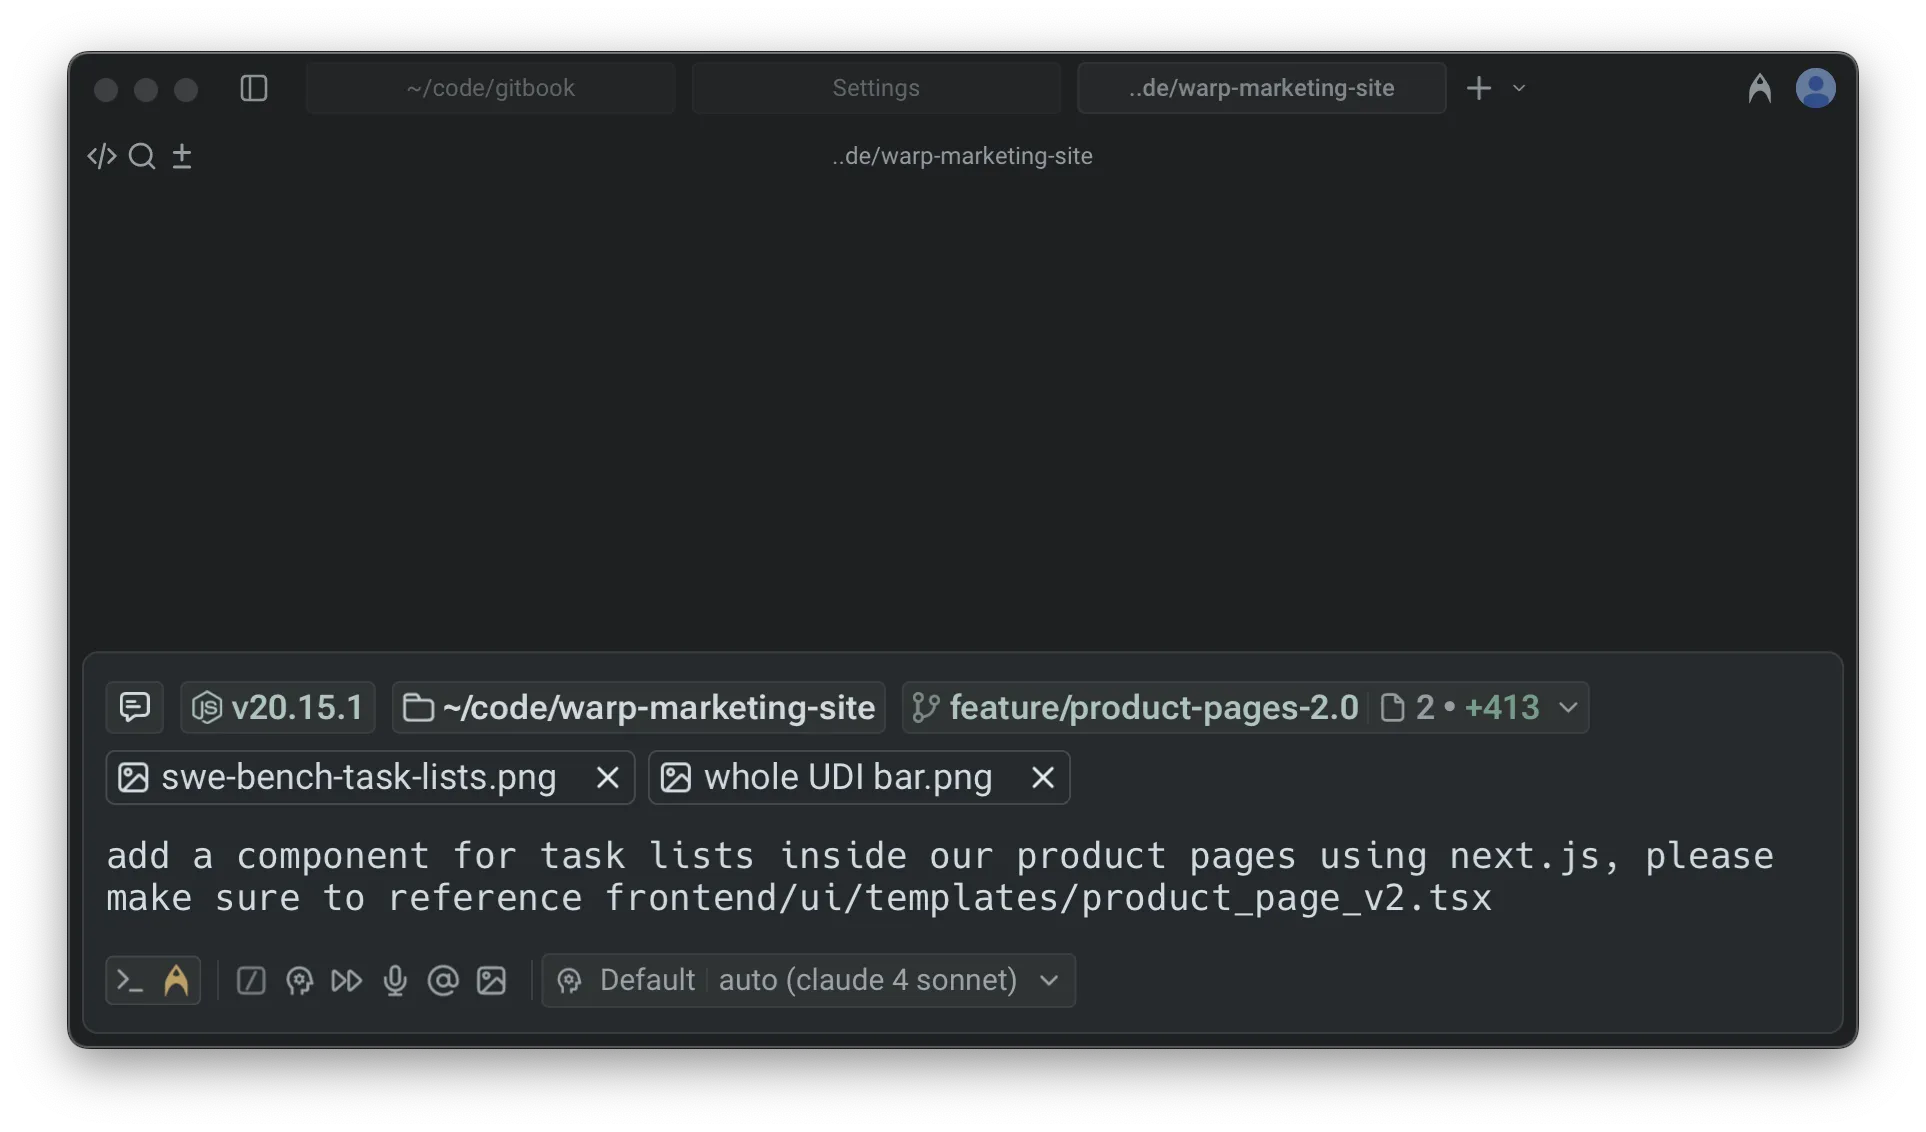 Universal Input with contextual chips.  ### Breaking down the Universal Input [Section titled “Breaking down the Universal Input”](#breaking-down-the-universal-input) The Universal Input brings together all of Warp’s input features into one streamlined editor: * **Natural language auto-detection**: Warp can automatically detect when you’re writing in plain English, as opposed to a shell command, and switch you into [Agent Mode](/agent-platform/local-agents/interacting-with-agents/#what-is-agent-mode). * **Contextual chips**: See your current directory, previous conversations, Git status, node version, and more, all inline with your input. * [**Modern text editing**](/terminal/editor/): Enjoy IDE-like editing features such as [completions](/terminal/command-completions/), [syntax highlighting](/terminal/editor/syntax-error-highlighting/), mouse support, [rectangular selection](/terminal/more-features/text-selection/), and [Next Command](/agent-platform/local-agents/active-ai/) predictions. * **Input toolbelt**: Quickly access [@-context](/agent-platform/local-agents/agent-context/using-to-add-context/), [Slash Commands](/agent-platform/capabilities/slash-commands/), [voice input](/agent-platform/local-agents/interacting-with-agents/voice/), [image attachments](/agent-platform/local-agents/agent-context/images-as-context/) as context, and other AI features. If you prefer a more traditional terminal input experience, you can switch to [Classic Input](/terminal/input/classic-input/) in **Settings** > **Appearance** > **Input**. Classic input also supports oh-my-posh, PS1 customizations, and [same line prompt.](/terminal/appearance/prompt/#same-line-prompt) ## Input Modes [Section titled “Input Modes”](#input-modes) The Universal Input supports three modes, shown in the input switcher: #### 1. Agent Mode (natural language) [Section titled “1. Agent Mode (natural language)”](#1-agent-mode-natural-language) Ask Warp’s agent to build, debug, or run tasks in natural language. Warp uses leading LLMs to interpret your request, run the right commands, surface code diffs, and stream results directly into your session. *Indicator:* Agent icon is highlighted in the switcher. 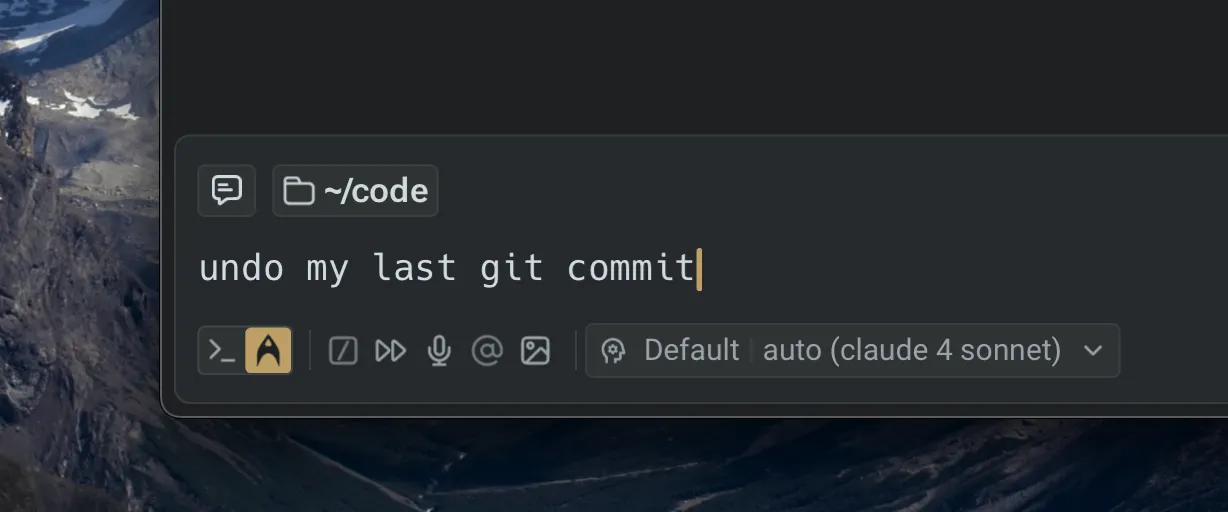 Universal Input locked in Agent Mode. #### 2. Terminal Mode (shell commands) [Section titled “2. Terminal Mode (shell commands)”](#2-terminal-mode-shell-commands) Enter shell commands just like any terminal, with the benefit of Warp’s modern editor features—completions, syntax highlighting, error underlining, and more included. *Indicator*: Terminal icon highlighted in the switcher 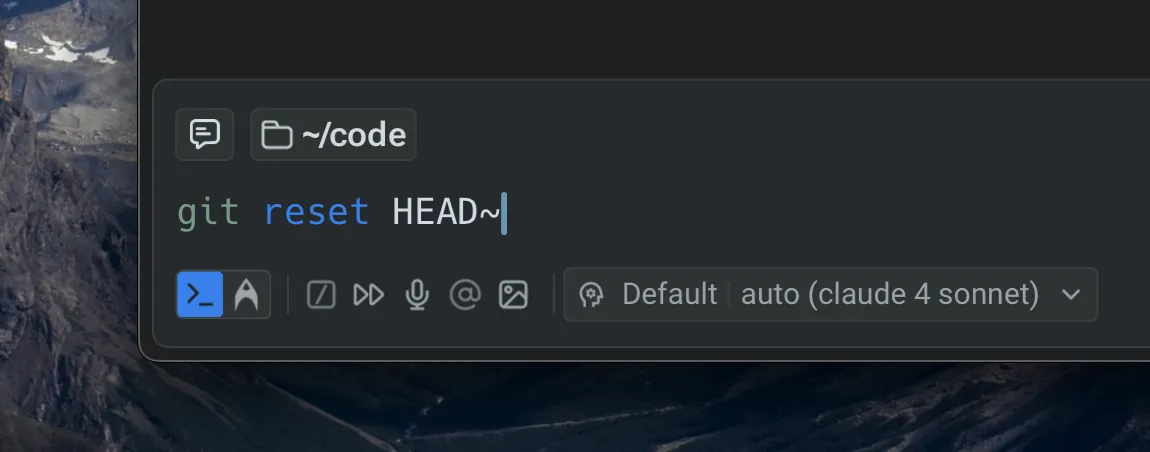 Universal Input locked in Terminal Mode. #### 3. Auto-detection Mode [Section titled “3. Auto-detection Mode”](#3-auto-detection-mode) Warp automatically detects whether your input is natural language or a shell command. You can stay in detection mode or explicitly lock into Terminal or Agent Mode. *Indicator*: Neither mode highlighted. 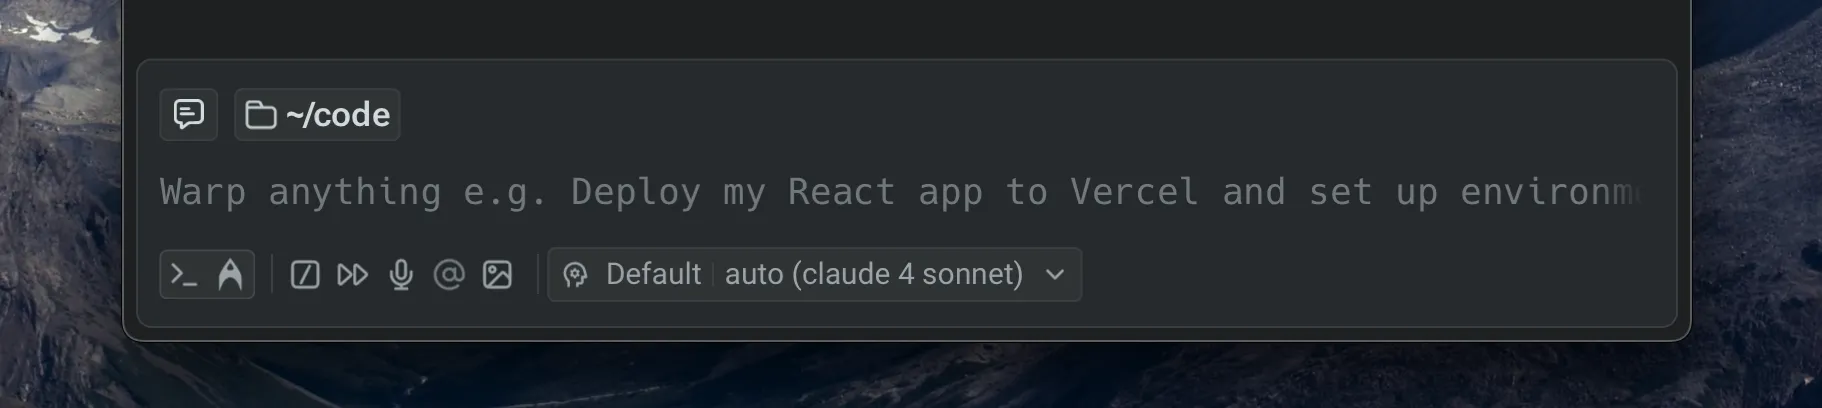 Universal Input in an empty / zero state. When Warp detects an input type, the input switcher softly highlights the corresponding mode. 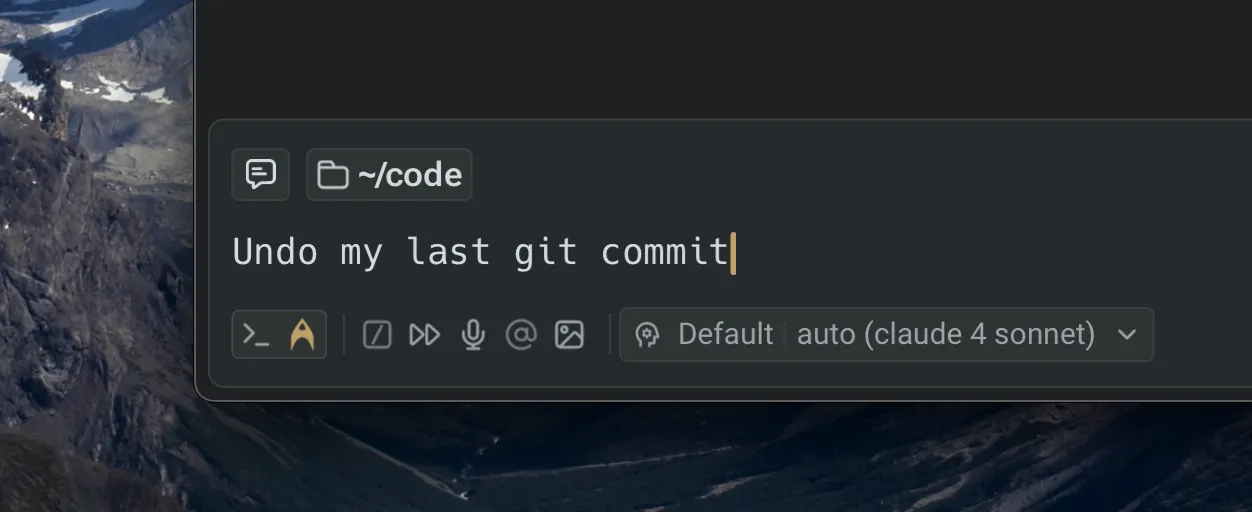 Agent (natural language) mode detected. 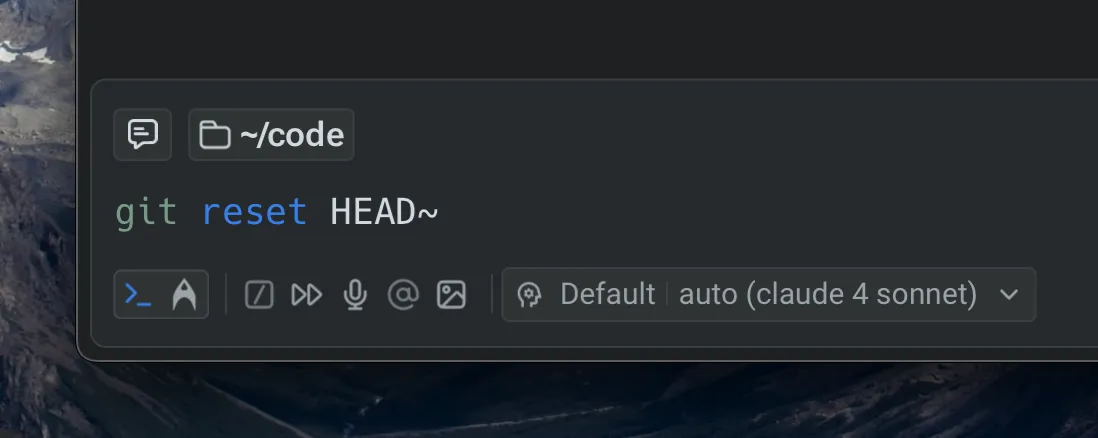 Terminal (shell) mode detected. #### Disabling Natural Language Auto-detection [Section titled “Disabling Natural Language Auto-detection”](#disabling-natural-language-auto-detection) By default, auto-detection is enabled. This means Warp decides whether to treat your input as a command or an Agent prompt. * **To turn off auto-detection**: go to **Settings** > **AI** > **Input** > **Natural Language Detection** * When disabled: You’ll explicitly be in either Terminal or Agent Mode. Use the following keyboard shortcuts to switch between modes: * `CMD+I` (macOS) * `CTRL+I` (Windows/Linux) 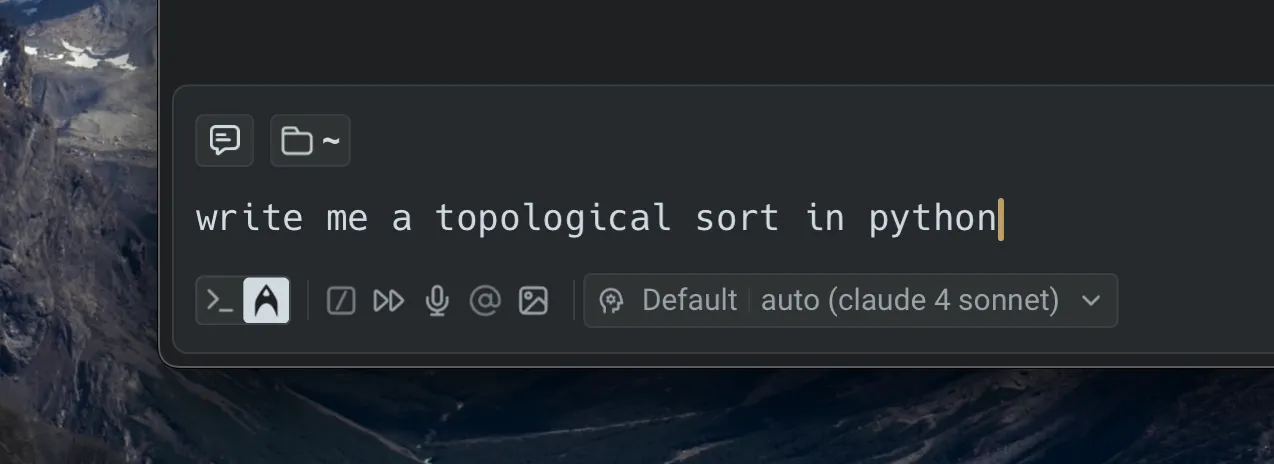 Agent (natural language) mode enabled. 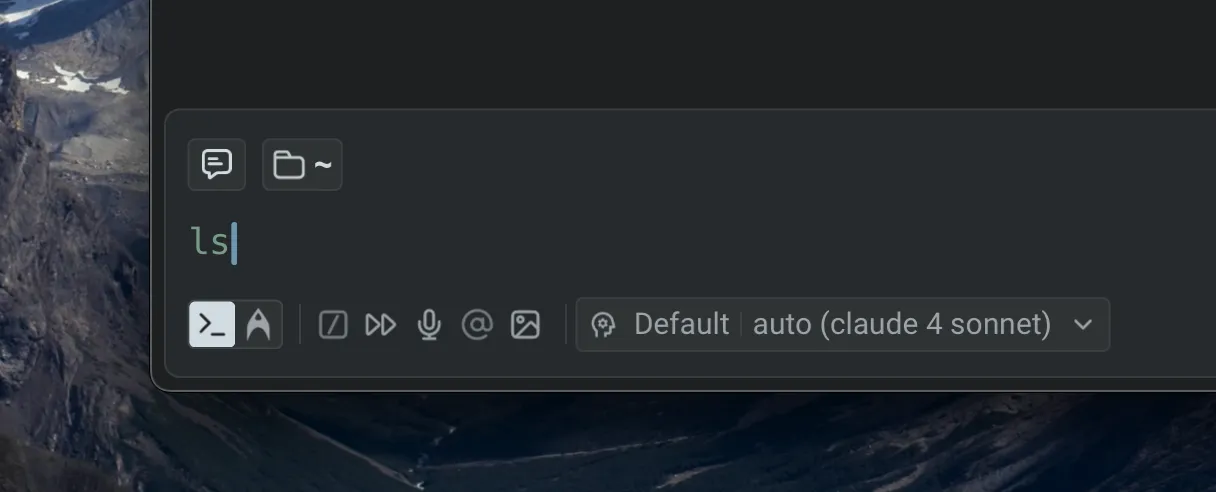 Terminal (shell) mode enabled. ### Entering Agent Mode [Section titled “Entering Agent Mode”](#entering-agent-mode) [Agent Mode](/agent-platform/local-agents/interacting-with-agents/) is how you interact directly with Warp’s AI to ask questions, run tasks, and collaborate in natural language. There are multiple ways to enter Agent Mode depending on where you are in your workflow: * macOS * **Type natural language directly**: If auto-detection is enabled, you can type a task or question into the input, and Warp will recognize it as natural language using its local auto-detection feature. * **Use keyboard shortcuts**: Quickly toggle into Agent Mode with `CMD + I`. * **Attach blocks to a prompt**: From any block you want to use as context, click the ✨ icon in the toolbelt or select “Attach block(s)” to AI query from the block’s context menu. * **Force a mode with special characters**: * `!` at the start of input forces Terminal Mode. * `*` at the start of input forces Agent Mode. * **Switch modes manually**: Click the Agent icon in the input switcher to lock into Agent Mode, or click the terminal icon to switch to Terminal Mode. * Windows * **Type natural language directly**: If auto-detection is enabled, you can type a task or question into the input, and Warp will recognize it as natural language using its local auto-detection feature. * **Use keyboard shortcuts**: Quickly toggle into Agent Mode with `CTRL + I`. * **Attach blocks to a prompt**: From any block you want to use as context, click the ✨ icon in the toolbelt or select “Attach block(s)” to AI query from the block’s context menu. * **Force a mode with special characters**: * `!` at the start of input forces Terminal Mode. * `*` at the start of input forces Agent Mode. * **Switch modes manually**: Click the Agent icon in the input switcher to lock into Agent Mode, or click the terminal icon to switch to Terminal Mode. * Linux * **Type natural language directly**: If auto-detection is enabled, you can type a task or question into the input, and Warp will recognize it as natural language using its local auto-detection feature. * **Use keyboard shortcuts**: Quickly toggle into Agent Mode with `CTRL + I`. * **Attach blocks to a prompt**: From any block you want to use as context, click the ✨ icon in the toolbelt or select “Attach block(s)” to AI query from the block’s context menu. * **Force a mode with special characters**: * `!` at the start of input forces Terminal Mode. * `*` at the start of input forces Agent Mode. * **Switch modes manually**: Click the Agent icon in the input switcher to lock into Agent Mode, or click the terminal icon to switch to Terminal Mode. When you’re in Agent Mode, the **Agent icon** will be highlighted in the \[Universal Input(/terminal/input/universal-input/) 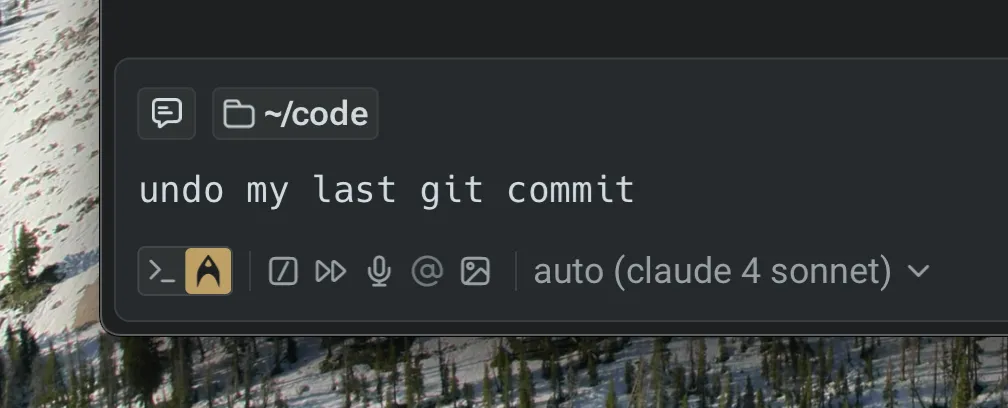 Agent Mode indicator in Universal Input. In Classic Input, you’ll also see a ✨ sparkles indicator inline.  Agent Mode active indicator in Classic Input. By default, entering Agent Mode starts you in *Pair Mode*, where you can continue an ongoing conversation by asking follow-up questions or assigning tasks. From here, you can ask the agent to build, debug, fix, or even deploy code as needed. ### Exiting Agent or Terminal Modes [Section titled “Exiting Agent or Terminal Modes”](#exiting-agent-or-terminal-modes) You can leave Agent or Terminal Modes in several ways: * macOS * **Keyboard shortcuts** * Press `ESC` to quit the current mode. * Toggle modes with `CMD + I` * **Force modes with special characters** * `!` at the start of input forces Terminal Mode. * `*` at the start of input forces Agent Mode. * **Manual switching**: click the Agent icon or Terminal icon in the input switcher to swap modes directly. * Windows * **Keyboard shortcuts** * Press `ESC` to quit the current mode. * Toggle modes with `CTRL + I` * **Force modes with special characters** * `!` at the start of input forces Terminal Mode. * `*` at the start of input forces Agent Mode. * **Manual switching**: click the Agent icon or Terminal icon in the input switcher to swap modes directly. * Linux * **Keyboard shortcuts** * Press `ESC` to quit the current mode. * Toggle modes with `CTRL + I` * **Force modes with special characters** * `!` at the start of input forces Terminal Mode. * `*` at the start of input forces Agent Mode. * **Manual switching**: click the Agent icon or Terminal icon in the input switcher to swap modes directly. ### Natural Language Auto-detection Settings [Section titled “Natural Language Auto-detection Settings”](#natural-language-auto-detection-settings) Warp can automatically detect when you’re writing in plain English and switch you into Agent Mode. If needed, you can customize or disable this behavior. #### Fixing false detections [Section titled “Fixing false detections”](#fixing-false-detections) If certain shell commands are mistakenly detected as natural language, you can add them to the denylist: **Settings** > **AI** > **Input** > **Natural language denylist** #### Turning off auto-detection [Section titled “Turning off auto-detection”](#turning-off-auto-detection) To disable natural language detection entirely, go to: **Settings** > **AI** > **Input Auto-detection** When auto-detection is turned off, you’ll need to explicitly switch between Terminal Mode and Agent Mode using `CMD + I` (macOS) or `CTRL + I` (Windows/Linux). #### First-time setup [Section titled “First-time setup”](#first-time-setup) The first time you enter Agent Mode, Warp will display a banner with the option to disable natural language detection for your command line:  Natural language detection toggle. *** ## Contextual Input Chips [Section titled “Contextual Input Chips”](#contextual-input-chips) 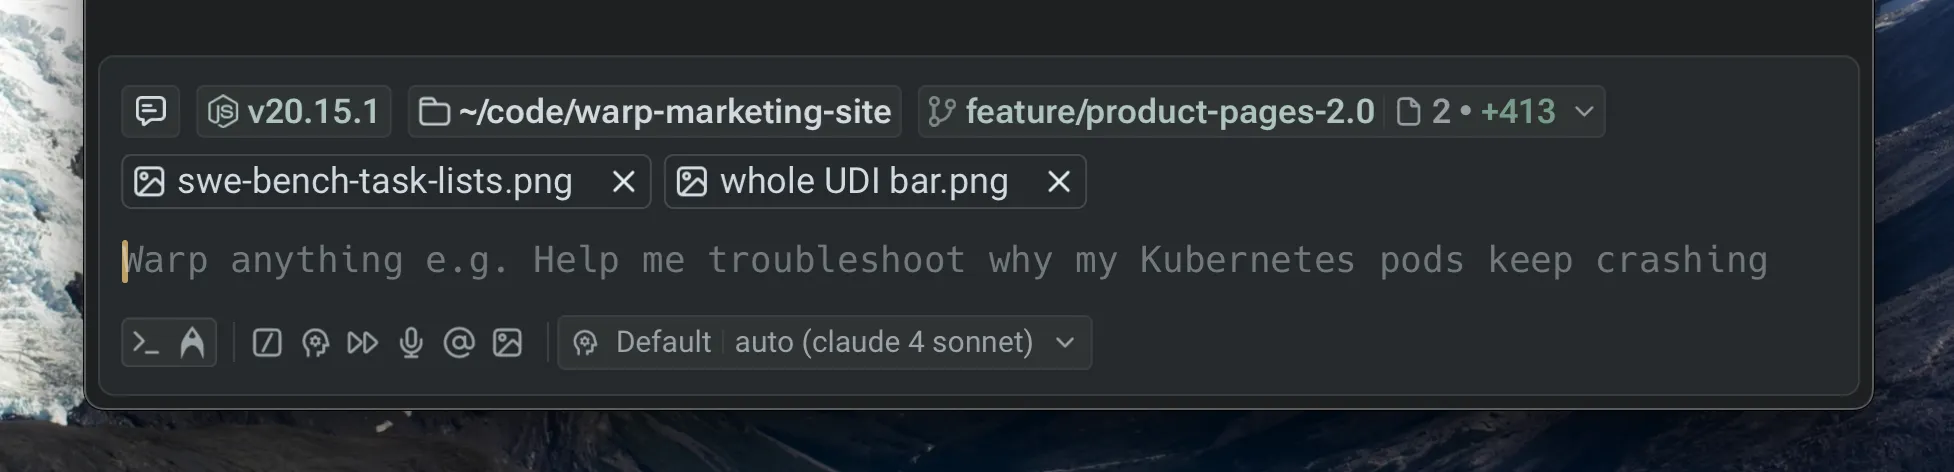 Universal Input contextual chips. The Universal Input includes **contextual chips** that provide inline information about your current environment. These chips surface relevant details such as directory paths, Git status, conversations, or runtime versions, making it easier to navigate, manage context, and take quick actions without leaving the input. #### Conversation Management chip [Section titled “Conversation Management chip”](#conversation-management-chip) The conversation management chip shows your recent [Agent conversations](/agent-platform/local-agents/interacting-with-agents/), allowing you to reference or reopen them directly. These chips appear in both Agent Mode and Terminal Mode, so you can continue a previous conversation without starting from scratch. For more details, see [Agent Conversations](/agent-platform/local-agents/interacting-with-agents/). 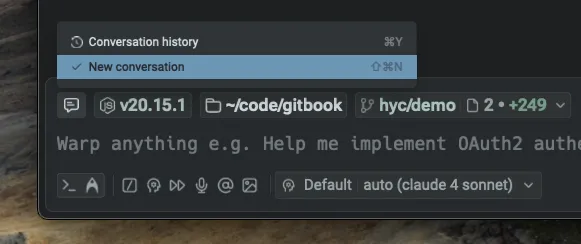 The Conversation Management chip. These chips appear in both Agent Mode and Terminal Mode, helping you continue a previous conversation without starting from scratch. For more details, refer to [Agent Conversations](/agent-platform/local-agents/interacting-with-agents/). #### Active directory chip [Section titled “Active directory chip”](#active-directory-chip) The active directory chip displays your current working directory and enables simple file navigation. Clicking on a folder moves you into that folder, while clicking on a file opens it in [Warp’s native code editor](/code/code-editor/). This makes it possible to move around your workspace seamlessly from within the input. 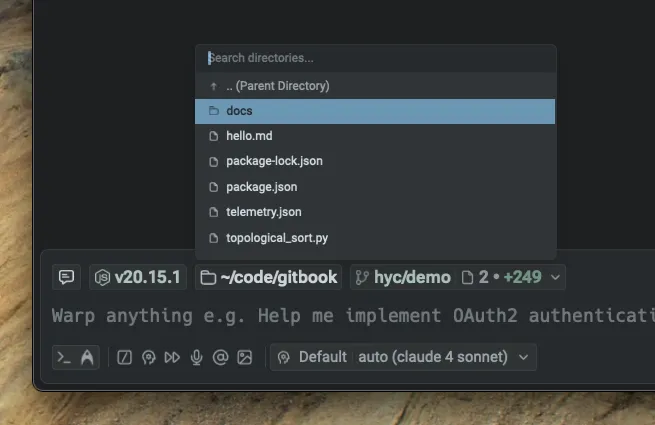 The Active Directory chip. #### Git Status chip [Section titled “Git Status chip”](#git-status-chip) When you’re in a Git-tracked repository, the Git Status chip displays file- and line-level changes. You can switch branches by clicking on the branch name or review modified files in Warp’s [native Code Review panel](/code/code-review/). The chip updates automatically as files are added, removed, or changed, giving you a real-time view of your repository state. 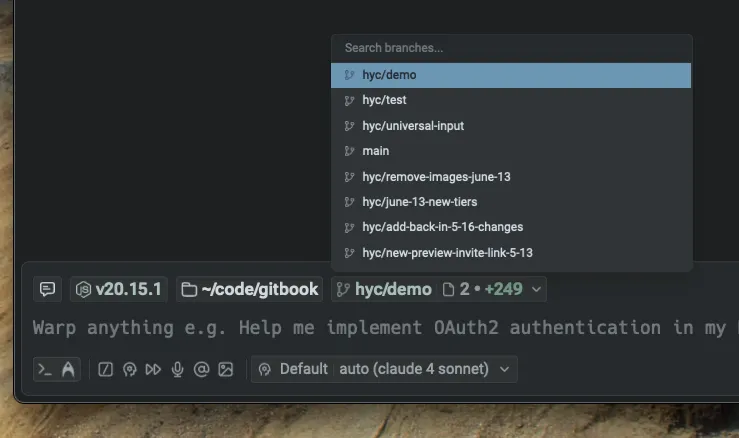 The Git Status chip. #### File attachments chips [Section titled “File attachments chips”](#file-attachments-chips) The file attachments chip lets you attach images and other files directly to a prompt. You can upload up to five [images at a time (as Agent Context)](/agent-platform/local-agents/agent-context/images-as-context/) using the upload button in the toolbelt or by dragging and dropping files into the input. This makes it possible to add screenshots, diagrams, PDFs, or other references directly to your query, giving the Agent richer context. 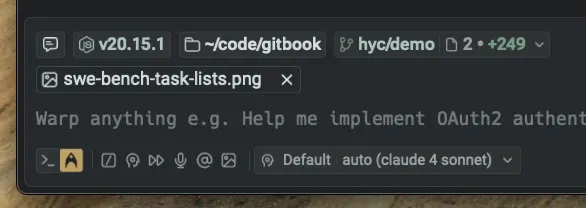 The File Attachments chip. **Node version chip** In repositories that include a `package.json`, a Node Version chip appears to show the detected Node.js version. This gives you visibility into your runtime environment without needing to run additional commands.  The Node Version chip. *** ## Input toolbelt [Section titled “Input toolbelt”](#input-toolbelt) The **Input Toolbelt** provides quick-access controls alongside the Universal Input. These tools allow you to attach context, run shortcuts, and configure Agent behavior without leaving the input field. Depending on the mode you are in, some features are automatically enabled or will place you into Agent Mode.  The Input Toolbelt in Universal Input. #### @ - Context [Section titled “@ - Context”](#---context) The [@ context chip](/agent-platform/local-agents/agent-context/using-to-add-context/) is available when you are working in a Git repository. Outside of a Git repo, it appears dimmed. This feature allows you to attach specific files, folders, code symbols, Warp Drive objects, or blocks from other sessions as context for a prompt. Typing **@** inside the input also opens a context menu where you can search for and select files or directories to include. Attaching context with @ works in both Agent Mode (when interacting with Agents) and classic Terminal commands (for referencing file paths). **Slash Commands** [Slash Commands](/agent-platform/capabilities/slash-commands/) are available in Agent Mode and Auto-detection Modes. They allow you to quickly run built-in actions or saved prompts without leaving the input field. Typing / displays a menu of available commands, which can be customized or extended. **Voice Input** [Voice Input](/agent-platform/local-agents/interacting-with-agents/voice/) automatically places you in Agent Mode. Speaking directly into Warp lets you phrase tasks, commands, or queries in natural language, and Warp will interpret them as if you had typed them. This feature is especially useful when you want hands-free interaction or when dictating longer tasks. **Image Attachments** You can [attach images as context](/agent-platform/local-agents/agent-context/images-as-context/) directly to a prompt, which will automatically place you in Agent Mode. This is useful when you want the Agent to reference visual materials such as screenshots, diagrams, or other assets. You can add images using the image upload button in the toolbelt (located at the bottom left or right, depending on your input layout). For additional methods of attaching images, see [Images as Context](/agent-platform/local-agents/agent-context/images-as-context/). **Fast Forward** Fast Forward gives the Agent full autonomy for the remainder of a task or conversation. When enabled, the next prompt you enter allows the Agent to execute commands, read files, and apply code diffs without asking for confirmation each time. This is useful for complex workflows where step-by-step approval would slow things down. #### Profile Picker [Section titled “Profile Picker”](#profile-picker) The Profile Picker allows you to select from different [Agent Profiles](/agent-platform/capabilities/agent-profiles-permissions/), each with its own configuration of autonomy, tools, and default model. If you have only one profile, the picker will not appear in the UI. From the Profile Picker, you can view all available profiles, switch between them, and quickly see the default model attached to each one. Profiles make it possible to tailor Agent behavior for different types of tasks or projects. ### Model Picker [Section titled “Model Picker”](#model-picker) The Model Picker is tied to your current Agent Profile. Each profile has a default model, but you can override it at any time using the picker. Warp curates a selection of top large language models (LLMs) for you to choose from, balancing speed, quality, and reasoning ability depending on your needs. For a full list of supported models and guidance on when to use them, see [Model Choice](/agent-platform/inference/model-choice/).
# Terminal Integrations
Canonical page: [/terminal/integrations-and-plugins/](https://docs.warp.dev/terminal/integrations-and-plugins/)
> Warp's terminal functionality extends and integrates with popular development tools.
## Docker [Section titled “Docker”](#docker) [Warp’s Docker extension](https://hub.docker.com/extensions/warpdotdev/warp) makes it more convenient to open Docker containers in Warp. With the extension, you can click to open any Docker container in a [Warpified subshell](/terminal/warpify/subshells/), without manually running `docker exec` or typing out lengthy container IDs. Select a container from the list and specify a shell type. Note, that only `bash|zsh|fish` are supported shells for docker containers. Then, select a user (optional) and finally click “Open in Warp” to run commands within the Docker container. 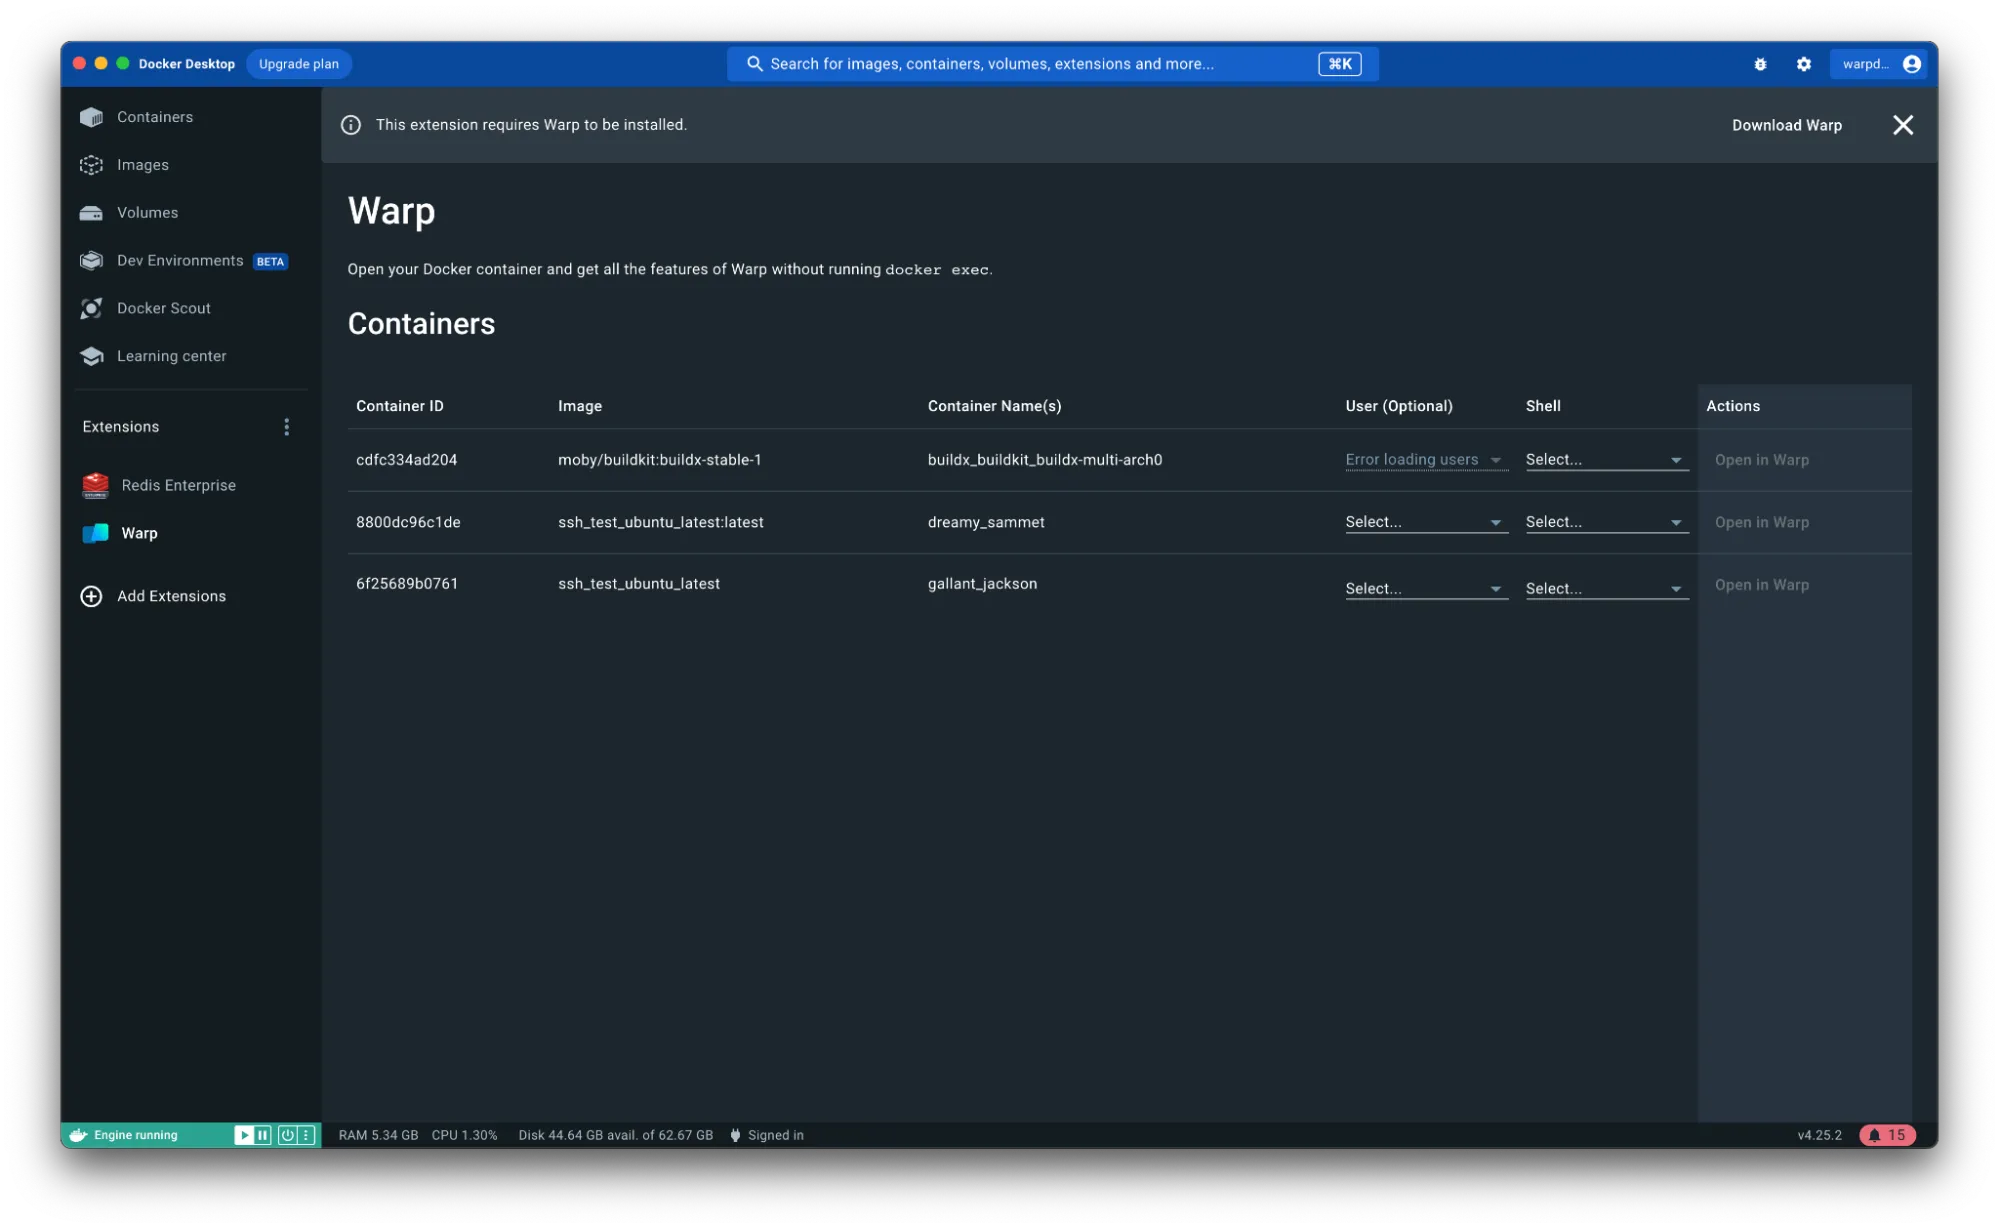 Warp’s extension for Docker lists available containers. ## Raycast [Section titled “Raycast”](#raycast) Warp + Raycast extension helps you open new windows, tabs, or Launch Configurations with [ease](https://twitter.com/warpdotdev/status/1678432353461637121). [Warp + Raycast Extension Link](https://www.raycast.com/warpdotdev/warp) 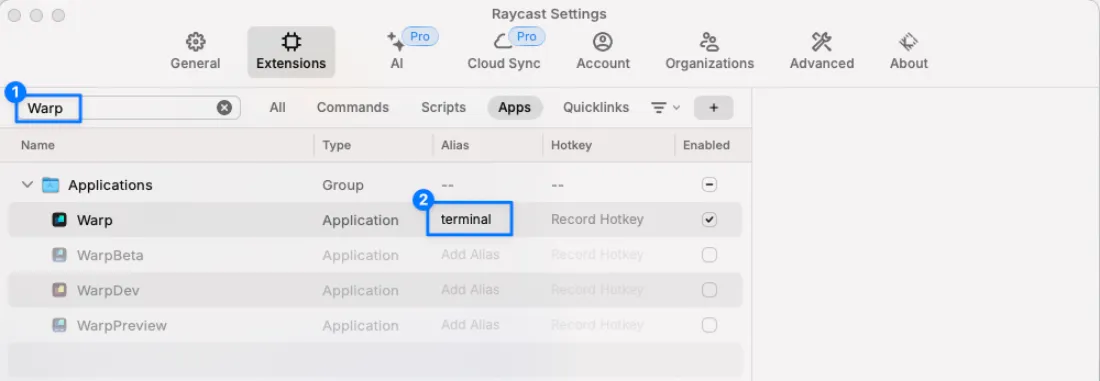 Warp integration with the Raycast launcher. ## VSCode [Section titled “VSCode”](#vscode) * macOS Press `SHIFT-CMD-C` while in [VSCode](https://code.visualstudio.com/docs/terminal/basics) to open a new session in Warp. [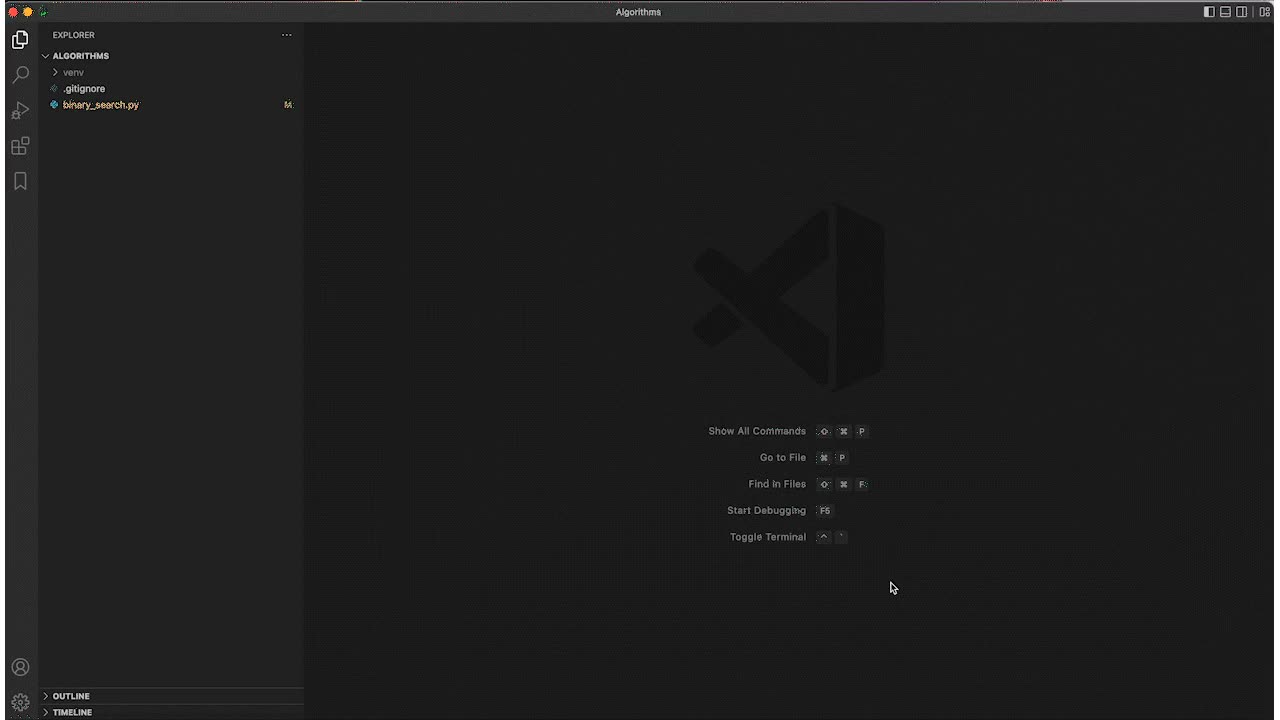](/assets/terminal/vscode_new_session.mp4) To configure this, navigate to Settings in VSCode and search for `Terminal › External: Osx Exec`.\ \ Change this to `Warp.app` if you’ve installed Warp in the default location. Otherwise, put in the full path to the executable. * Windows Press `CTRL-SHIFT-C` while in [VSCode](https://code.visualstudio.com/docs/terminal/basics) to open a new session in Warp. To configure this, navigate to Settings in VSCode and search for `Terminal › External: Windows Exec`.\ \ Change this to `%LOCALAPPDATA%\Programs\Warp\warp.exe` if you’ve installed Warp in the default location for a single user or `%PROGRAMFILES%\Warp\warp.exe` if you’ve installed Warp in the default location for all users. Otherwise, put in the full path to the executable. * Linux Press `CTRL-SHIFT-C` while in [VSCode](https://code.visualstudio.com/docs/terminal/basics) to open a new session in Warp. To configure this, navigate to Settings in VSCode and search for `Terminal › External: Linux Exec`.\ \ Change this to `warp-terminal` if you’ve installed Warp with your distribution’s package manager. Otherwise, put in the full path to the executable (e.g. if it is an AppImage). ## JetBrains IDEs [Section titled “JetBrains IDEs”](#jetbrains-ides) Press a keyboard shortcut of choice while in a JetBrains IDE to open a new session in Warp. To configure this, use the Apple Menu. Click on **Preferences**, go to `External Tools` , and click **Add**. In this menu, put the following information: * *Name*: Open Warp * *Program*: `/Applications/Warp.app` * *Arguments*: `$ProjectFileDir$` * *Working Directory*: `/Applications` Then press `Ok`. Now you will be able to `Open Warp` from the Apple Menu under `Tools` -> `External Tools`. [](/assets/terminal/jetbrains_external_terminal_config.mp4) To attach this configuration to a keyboard shortcut, you must go to the Apple Menu -> `Preferences`. Then go to `Keymap` -> `External Tools`. You will find `Open Warp`. Right-click on it, and select **Add Keyboard Shortcut**. Type your desired shortcut and click save! You’re ready to open Warp with a keyboard shortcut. [](/assets/terminal/jetbrains_external_window_keymap_config.mp4)
# More features overview
Canonical page: [/terminal/more-features/](https://docs.warp.dev/terminal/more-features/)
> Explore additional Warp terminal features beyond the essentials.
# Accessibility
Canonical page: [/terminal/more-features/accessibility/](https://docs.warp.dev/terminal/more-features/accessibility/)
> Warp's accessibility features include VoiceOver support, voice input, and configurable verbosity.
We recognize the need to improve the experience for those visually impaired, as - to our best knowledge - other terminal emulator apps didn’t do a good job in this area. This doc summarizes what we’ve done so far, how Warp works with VoiceOver, and outlines the main changes from the typical workflow. For the features documentation and its keyboard shortcuts, please go to the feature-specific page in the documentation. **Keep in mind that this is a work-in-progress and the current state is not a final state of accessibility in Warp**. ## How to use Warp with Voice Over? [Section titled “How to use Warp with Voice Over?”](#how-to-use-warp-with-voice-over) The best way to start working with Warp & VoiceOver is to install it using Homebrew: `brew install warp` This will ensure that you can receive all future updates automatically, without the need to go through a macOS standard drag-and-drop installation process. From there, Warp should seamlessly work with VoiceOver and start announcing what’s happening on the screen and what actions you can take. This may be a major difference from other apps - as Warp announces stuff on its own, letting you know what’s going on. There’s currently no way to navigate between different UI elements using VO key combinations. Once installed, it will ask you to log in. Warp also sends telemetry that we use to improve the overall user experience. You can find out more about that in the [privacy section](/support-and-community/privacy-and-security/privacy/). The login flow will require you to navigate between the app and your browser. The last step before you can start enjoying our new terminal app is filling up the onboarding survey. The main terminal window is not that different from other terminals - there’s a place to type commands (Command Input) and a list of the previously executed commands and their outputs. Warp groups those together - each command and output create a Block. You can navigate blocks with your keyboard to easily check what was the command, learn whether it was successful or not, and what was the output, as well as more easily copy the command, output, or both for further processing. A main entry point for discovering new features and actions is our Command Palette, which you can access by executing the cmd-p shortcut. ## Differences from the regular VoiceOver workflow [Section titled “Differences from the regular VoiceOver workflow”](#differences-from-the-regular-voiceover-workflow) As you may notice, typical Voice Over navigation keys or settings do not currently work in Warp. In short - it’s related to how our UI Framework is currently implemented and that as of now we don’t yet offer a keyboard-accessible way to navigate the UI elements. Instead, whenever you perform an action and/or something happens in the background, Warp announces it to you, letting you know what’s going on and what possible actions you can take. Since it’s a terminal, we care about all user actions being keyboard accessible from the start, so pretty much all our features have the assigned keybindings already. You can adjust the default keybindings by following the [Warp keysets repository](https://github.com/warpdotdev/keysets). You can also always fall back to using cmd-p to check the keybinding or execute the specific action. ### A11y specific actions [Section titled “A11y specific actions”](#a11y-specific-actions) Some a11y-specific settings are available through the Command Palette. For example, you can adjust the verbosity level of messages. Simply enter the [Command Palette](/terminal/command-palette/) and type “a11y” to discover related options and their keybindings. ### Voice Input [Section titled “Voice Input”](#voice-input) Warp supports voice input as an alternative way to interact with your terminal. This can be especially helpful for users who prefer or require voice commands over typing. You can use voice input to: * Issue terminal commands * Ask questions about command usage * Perform complex multi-step operations Voice input can be enabled in **Settings** > **Agents** > **Warp Agent** > **Voice**. For detailed information about voice features and setup, see our [Voice documentation](/agent-platform/local-agents/interacting-with-agents/voice/). ## Future work [Section titled “Future work”](#future-work) While not all Warp features are accessible yet, we’ve implemented a process around releasing new features and changes to the main app, to ensure that all new code provides proper a11y announcements. This is not the ideal and final implementation. We’re happy to hear your thoughts and ideas on how we can improve. The biggest milestone for this work is to add support for navigating the UI elements using the keyboard. Give Warp a try, and please, do not hesitate to [share your feedback](/support-and-community/troubleshooting-and-support/sending-us-feedback/).
# Audible terminal bell
Canonical page: [/terminal/more-features/audible-bell/](https://docs.warp.dev/terminal/more-features/audible-bell/)
> Enable an audible terminal bell in Warp that can be triggered by CLI tools like ping.
Warp allows you to enable an audible terminal bell (disabled by default) that can be triggered by a variety of CLI tools (for example, `ping -a`). * In Settings, enable an Audible terminal bell in **Settings** > **Features** > **Terminal**. * In [Command Palette](/terminal/command-palette/), “Enable/Disable Audible Terminal Bell”.
# Files, Links, & Scripts
Canonical page: [/terminal/more-features/files-and-links/](https://docs.warp.dev/terminal/more-features/files-and-links/)
> Quickly open links and files or run scripts with your mouse.
## Files & Links [Section titled “Files & Links”](#files--links) Warp supports opening files, folders, and URL links that are within Blocks. Multiple URL protocols are supported e.g. `https`, `ftp`, `file`, etc. Warp can open files and folders in a variety of editors and opens web links directly in your default browser. Warp can also open markdown files directly with a [Markdown Viewer](/terminal/more-features/markdown-viewer/). Warp parses relative and absolute file paths. Warp also tries to capture line and column numbers attached to the file path, supported formats include: * `file_name:line_num` * `file_name:line_num:column_num` * `file_name[line_num, column_num]` * `file_name(line_num, column_num)` * `file_name, line: line_num, column: column_num` * `file_name, line: line_num, in` - macOS 1. After hovering over a link, open it directly by holding down `CMD` while clicking it. 2. Clicking a link normally will open a clickable tooltip that says “Open File/Folder/Link”. 3. Right-clicking a link will open a context menu that supports copying the absolute file path or URL to the clipboard. - Windows 1. After hovering over a link, open it directly by holding down `CTRL` while clicking it. 2. Clicking a link normally will open a clickable tooltip that says “Open File/Folder/Link”. 3. Right-clicking a link will open a context menu that supports copying the absolute file path or URL to the clipboard. - Linux 1. After hovering over a link, open it directly by holding down `CTRL` while clicking it. 2. Clicking a link normally will open a clickable tooltip that says “Open File/Folder/Link”. 3. Right-clicking a link will open a context menu that supports copying the absolute file path or URL to the clipboard. * You can also Drag and drop a folder or file onto the Warp dock icon to open a new tab in this directory. * You can also right-click on a folder or file in Finder, then select Services, and “Open new Warp Tab | Window here”. * Configure the default editor to open files by navigating to **Settings** > **Features** > **General** > **Choose an editor to open file links**. * Selecting “Default App” uses your system’s default application for the file type. #### List of supported editors [Section titled “List of supported editors”](#list-of-supported-editors) Non exhaustive list of editors, please submit new ones on our GitHub, see [Sending Feedback](/support-and-community/troubleshooting-and-support/sending-us-feedback/#sending-warp-feedback). 1. `$EDITOR` 2. Visual Studio Code 3. JetBrains IDEs * WebStorm * PhpStorm * GoLand * PyCharm * DataGrip * DataSpell * Rider * RubyMine 4. Zed and Zed Preview 5. Cursor 6. Windsurf 7. Sublime Text 8. Android Studio [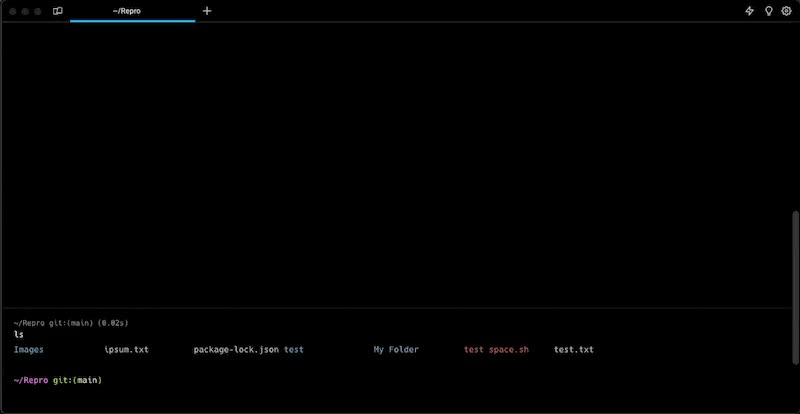](/assets/terminal/files-links-demo.mp4) ## Scripts [Section titled “Scripts”](#scripts) Warp can open `.command` and Unix Executable files from the finder directly. 1. Find a `.command` or Shell script you’d like to open in Finder. 2. Right-click and open the script with Warp. Caution Make sure the file has the appropriate executable permissions before you can run it in Warp. (e.g. `chmod +x script.command`) [](/assets/terminal/script-demo.mp4)
# Full-screen apps
Canonical page: [/terminal/more-features/full-screen-apps/](https://docs.warp.dev/terminal/more-features/full-screen-apps/)
> Run Vim, Emacs, and other full-screen apps with configurable mouse reporting and padding.
## Mouse and scroll reporting [Section titled “Mouse and scroll reporting”](#mouse-and-scroll-reporting) Warp supports configuring how to handle mouse and scroll events. They can be sent to the currently running app, e.g. `vim`, or kept and handled by Warp. Once mouse reporting is enabled, Warp will use ANSI escape sequences to communicate mouse events to the running app. ### How to access it [Section titled “How to access it”](#how-to-access-it) * From the Settings panel, **Settings** > **Features** > **Terminal** > **Enable Mouse Reporting** * Scroll Reporting can be enabled after toggling **Enable Mouse Reporting** * From the [Command Palette](/terminal/command-palette/), search for “Toggle Mouse Reporting” * From the macOS Menu, **View** > **Toggle Mouse Reporting** ### How it works [Section titled “How it works”](#how-it-works) [Mouse and Scroll Reporting Demo](https://www.loom.com/embed/a918696b002148d3beafd545b233c1be) ## Padding [Section titled “Padding”](#padding) Warp supports configuring how much padding surrounds full-screen apps. The default is 0 pixel padding, but this can be changed to a custom padding amount or to match the padding in the block list. ### How to access it [Section titled “How to access it”](#how-to-access-it-1) * Go to **Settings** > **Appearance** > **Full-screen Apps** or from the [Command Palette](/terminal/command-palette/) search for “Appearance” * `Use custom padding in alt-screen` is enabled by default, you can disable it to match the block list padding * Set the desired uniform padding (px) pixels, which is set to 0px by default Caution Some full-screen applications don’t behave well when resizing. If you are experiencing rendering issues with full screen apps, try turning this setting off. This will ensure that full-screen apps don’t need to resize when starting up. 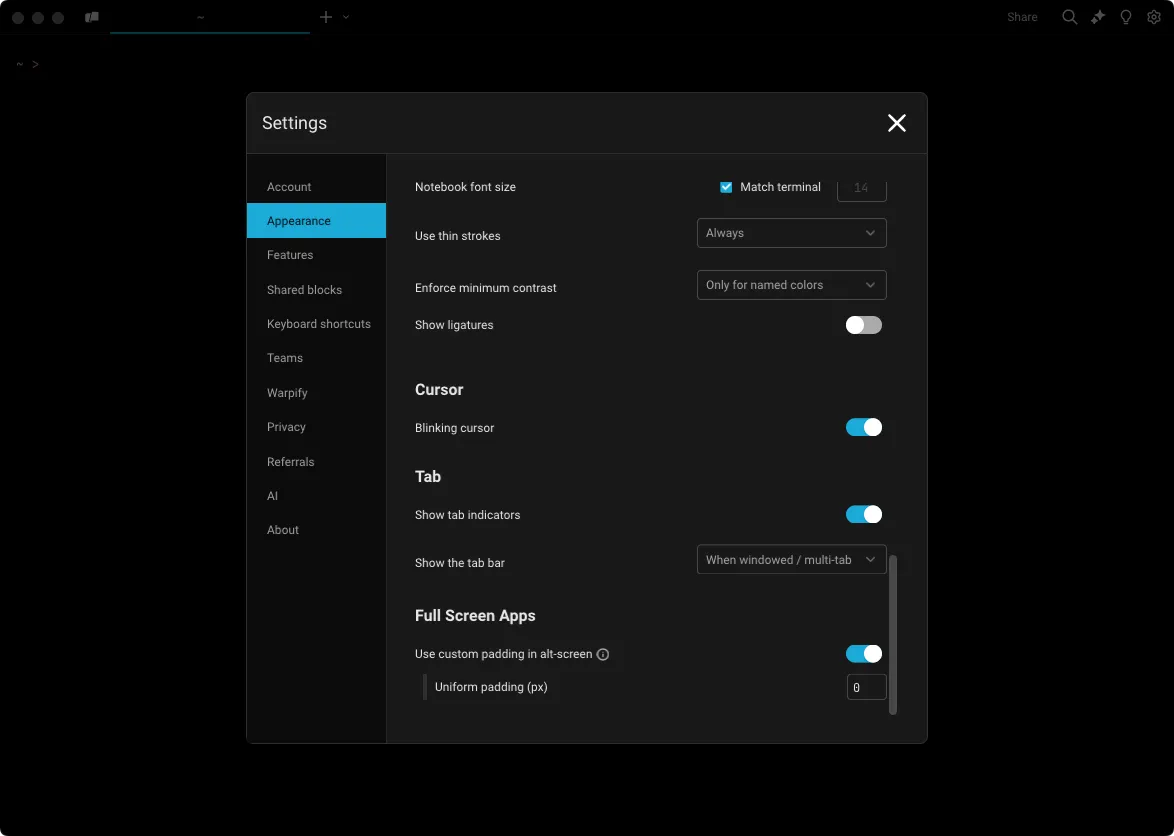 The alt-screen padding setting in appearance preferences. ## Kitty keyboard protocol [Section titled “Kitty keyboard protocol”](#kitty-keyboard-protocol) Warp supports the [Kitty keyboard protocol](https://sw.kovidgoyal.net/kitty/keyboard-protocol/) (CSI u progressive enhancement) so full-screen apps can read keystrokes that legacy terminal escape sequences can’t represent — for example, distinguishing `Ctrl+I` from `Tab`, capturing modifier-only key events, or detecting key release events. When a running app advertises that it supports the protocol, Warp emits the extended escape sequences automatically. No configuration is required. * **Supported in**: Vim, Neovim, Emacs, tmux, helix, and other modern TUI apps that opt into CSI u. * **Falls back to legacy encoding** when the running app doesn’t request progressive enhancement, so older programs keep working unchanged.
# Warp for Linux
Canonical page: [/terminal/more-features/linux/](https://docs.warp.dev/terminal/more-features/linux/)
> Linux-specific features including native Wayland support and crash recovery.
## Native Wayland [Section titled “Native Wayland”](#native-wayland) Warp Wayland support can be enabled in **Settings** > **Features** > **System**. Enabling Wayland support may fix issues with blurry text if you have fractional scaling enabled in your window manager. Caution When native Wayland is enabled, Global Hotkey support will be disabled. Unlike X11, the Wayland protocol does not expose the configuration necessary to support this feature. ## Wayland crash recovery [Section titled “Wayland crash recovery”](#wayland-crash-recovery) When Wayland support is enabled, Warp uses a custom crash recovery process to detect any crashes that may occur when using Wayland. If there’s a crash, Warp will fallback to use X11 to allow you to continue to use the application.
# Markdown Viewer
Canonical page: [/terminal/more-features/markdown-viewer/](https://docs.warp.dev/terminal/more-features/markdown-viewer/)
> Open Markdown files in your terminal and run commands.
Warp can be used for both editing and viewing rendered Markdown files in a [split pane](/terminal/windows/split-panes/). Any local file with the `.md` or `.markdown` extension is treated as a Markdown file. Remote files are currently not supported. Turning on **Settings** > **Features** > **General** > **Open Markdown files in Warp’s Markdown viewer by default** will make the Markdown viewer default, otherwise Markdown files will open in Warp’s editor. ### Opening a file link within a block [Section titled “Opening a file link within a block”](#opening-a-file-link-within-a-block) * macOS For any link to a Markdown file within a block, you can open the file in Warp by `CMD`-clicking on the link, from the link tooltip, or the right-click context menu on the link. * Windows For any link to a Markdown file within a block, you can open the file in Warp by `CTRL`-clicking on the link, from the link tooltip, or the right-click context menu on the link. * Linux For any link to a Markdown file within a block, you can open the file in Warp by `CTRL`-clicking on the link, from the link tooltip, or the right-click context menu on the link.  Opening a Markdown file via link tooltip. ### Markdown-viewing commands [Section titled “Markdown-viewing commands”](#markdown-viewing-commands) If you run a Markdown-viewing command like `cat myfile.md`, Warp will show a banner with a button to open the Markdown file. The following commands are considered Markdown viewers: * `cat` * `glow` * `less` ### Opening a Markdown file from Finder [Section titled “Opening a Markdown file from Finder”](#opening-a-markdown-file-from-finder) From Finder, you can open a Markdown file in Warp from the “Open With” menu that appears when right-clicking on the file. ### Toggling between editor and viewer [Section titled “Toggling between editor and viewer”](#toggling-between-editor-and-viewer) You can toggle between the Markdown editor and viewer via the pane overflow menu.  Toggling between editor and viewer. ## Shell commands in Markdown files [Section titled “Shell commands in Markdown files”](#shell-commands-in-markdown-files) Warp can run shell commands from Markdown code blocks in your active terminal session. Click the run icon `>_` to insert a command into the terminal input. Markdown shell blocks also support keyboard navigation. There are two ways to enter the keyboard navigation mode: * macOS * Clicking on a shell block. * Pressing `CMD-UP` or `CMD-DOWN`. Once a shell block is selected, press `CMD-ENTER` to insert it into the terminal input. You can also use `UP`, `DOWN`, `CMD-UP`, and `CMD-DOWN` to navigate between shell blocks. While the Markdown file is focused, press `CMD-L` to switch focus back to the terminal without inserting a command. * Windows * Clicking on a shell block. * Pressing `CTRL-UP` or `CTRL-DOWN`. Once a shell block is selected, press `CTRL-ENTER` to insert it into the terminal input. You can also use `UP`, `DOWN`, `CTRL-UP`, and `CTRL-DOWN` to navigate between shell blocks. While the Markdown file is focused, press `CTRL-SHIFT-L` to switch focus back to the terminal without inserting a command. * Linux * Clicking on a shell block. * Pressing `CTRL-UP` or `CTRL-DOWN`. Once a shell block is selected, press `CTRL-ENTER` to insert it into the terminal input. You can also use `UP`, `DOWN`, `CTRL-UP`, and `CTRL-DOWN` to navigate between shell blocks. While the Markdown file is focused, press `CTRL-SHIFT-L` to switch focus back to the terminal without inserting a command. If the command contains any arguments using the curly brace `{{param}}` syntax, they will be treated as Workflow arguments. Learn more about [Workflows](/knowledge-and-collaboration/warp-drive/workflows/). [](/assets/terminal/run-markdown-file-command.mp4) In addition, all shell and code blocks have a copy button to quickly copy the block’s text to the clipboard. Code blocks without a set language, or one of the following languages, are treated as shell commands: `sh`, `shell`, `bash`, `fish`, `zsh`, `warp-runnable-command`.
# Desktop Notifications
Canonical page: [/terminal/more-features/notifications/](https://docs.warp.dev/terminal/more-features/notifications/)
> Receive desktop notifications when long-running commands complete or need your input.
## What is it [Section titled “What is it”](#what-is-it) Notifications can be sent when a command completes after a configurable number of seconds or when a running command needs you to enter a password to proceed. For either of these triggers, Warp will only send you a desktop notification if you are using a different app at the time the trigger is fired. ## Custom notification hooks (OSC 9 / OSC 777) [Section titled “Custom notification hooks (OSC 9 / OSC 777)”](#custom-notification-hooks-osc-9--osc-777) Warp supports pluggable notifications triggered by terminal escape sequences, so scripts and tools can raise desktop notifications without additional dependencies. * OSC 9 (body only): sends a notification with just a body. * Format: `ESC ] 9 ; BEL` * Example (bash/zsh): `printf '\033]9;Build complete\007'` * OSC 777 (title + body): sends a notification with a title and body. * Format: `ESC ] 777 ; notify ; ; <body> BEL` * Example (bash/zsh): `printf '\033]777;notify;Deploy;Success on prod\007'` Notes: * Works on macOS, Windows, and Linux where Warp is allowed to show notifications. * Newlines and semicolons should be avoided or escaped in payloads. * This feature is enabled by default in current releases of Warp. ## How to access it [Section titled “How to access it”](#how-to-access-it) ### Notifications [Section titled “Notifications”](#notifications) * Notifications are enabled by default and require system permissions to appear. * If you’ve turned Notifications off before, toggle it back on by going to **Settings** > **Features** > **Session**, or quickly toggle Notifications with the [Command Palette](/terminal/command-palette/). * Customize Notification triggers for long-running commands or password prompts by going to **Settings** > **Features** > **Notifications**. ## How it works [Section titled “How it works”](#how-it-works) [Notifications Demo](https://www.loom.com/embed/65967f43a7fa432b98cf3e94766a8e79) ## Troubleshooting Notifications [Section titled “Troubleshooting Notifications”](#troubleshooting-notifications) * macOS Warp requires two distinct notification settings to work. macOS system settings found in > **System Settings** > **Notifications & Focus** and Warp app settings found in **Settings** > **Features** > **Session** must both be enabled for Notifications to show.\ \ If you have Notifications enabled in the system and Warp, but you still aren’t receiving desktop notifications, try the following: * Make sure that you are navigated away from Warp when you expect to receive the notification. * Make sure the **Do Not Disturb** mode is turned off in > **System Settings** > **Notifications** > **Notifications & Focus** > **Focus**. * Go to > **System Settings** > **Notifications & Focus** > **Notifications** and select Warp in the list. Make sure either banner style or alert style notifications are selected, then quit and restart Warp. * To get the macOS notification prompt to show again for Warp, run `defaults delete dev.warp.Warp-Stable Notifications`, then restart Warp and toggle on the **Settings** > **Features** > **Receive desktop notifications from Warp**. * Once all of the above is done, please restart macOS to apply the changes and that should help with restoring notifications in Warp. * Windows Warp requires two distinct notification settings to work. Windows system settings found in **Settings** > **System** > **Notifications** > **Warp** and Warp app settings found in **Settings** > **Features** > **Session** must both be enabled for Notifications to show. If you have Notifications enabled in the system and Warp, but you still aren’t receiving desktop notifications, try the following: * Make sure that you are navigated away from Warp when you expect to receive the notification. * Make sure the **Do Not Disturb** mode or **Focus** is turned off. * Go to **System** > **Notifications** and select Warp in the list. Make sure notifications are turned on, then quit and restart Warp. * Linux Warp requires two distinct notification settings to work. Linux system settings found in **Settings** > **Notifications** > **Warp** and Warp app settings found in **Settings** > **Features** > **Session** must both be enabled for Notifications to show. If you have Notifications enabled in the system and Warp, but you still aren’t receiving desktop notifications, try the following: * Make sure that you are navigated away from Warp when you expect to receive the notification. * Make sure the **Do Not Disturb** mode (if your distribution supports it) is turned off. * Go to **Settings** > **Notifications** and select Warp in the list. Make sure notifications are turned on, then quit and restart Warp. Please [reach out to us](/support-and-community/troubleshooting-and-support/sending-us-feedback/#sending-warp-feedback) if you have any other issues.
# Terminal quit warning
Canonical page: [/terminal/more-features/quit-warning/](https://docs.warp.dev/terminal/more-features/quit-warning/)
> Warp's quit warning feature is a valuable precaution to prevent unintentional data loss or lost progress on long-running jobs.
## What is it [Section titled “What is it”](#what-is-it) The quit warning feature ensures that you receive a warning before quitting the app with a running process, allowing you to save your work and avoid any unintended data loss.\ If you quit the app or close a window containing a session with a running process, you’ll see the alert and need to confirm the action before proceeding. If you aren’t sure which processes you have running, there is also an option to show those processes. ## How to access it [Section titled “How to access it”](#how-to-access-it) * Open **Settings** > **Features** > **General**, there you can toggle the “Show warning before quitting”. * You can also toggle the quit warning feature in the [Command Palette](/terminal/command-palette/), by searching for \`Quit Warning’. * If enabled, when you try and close Warp you will see a pop-up window with a few options listed below: * Yes, quit, which will close all the Warps sessions and running processes. * Show running processes, which will bring up the [Session Navigation](/terminal/sessions/session-navigation/) panel with a filter for running processes. * Cancel, which will prevent Warp from closing. * Don’t ask again, which is a box you can check to disable the quit warning feature. ## How it Works [Section titled “How it Works”](#how-it-works) [Quit Warning Modal Demo](https://www.loom.com/embed/bacb9d1c1e3947dca8365e15231cfcd3)
# Settings Sync
Canonical page: [/terminal/more-features/settings-sync/](https://docs.warp.dev/terminal/more-features/settings-sync/)
> Keep your Warp settings consistent across devices and sessions with cloud-based sync.
## How to toggle settings sync [Section titled “How to toggle settings sync”](#how-to-toggle-settings-sync) * You can toggle Settings Sync within the **Settings** > **Account** pane * Through the [Command Palette](/terminal/command-palette/) by searching for “Settings Sync” 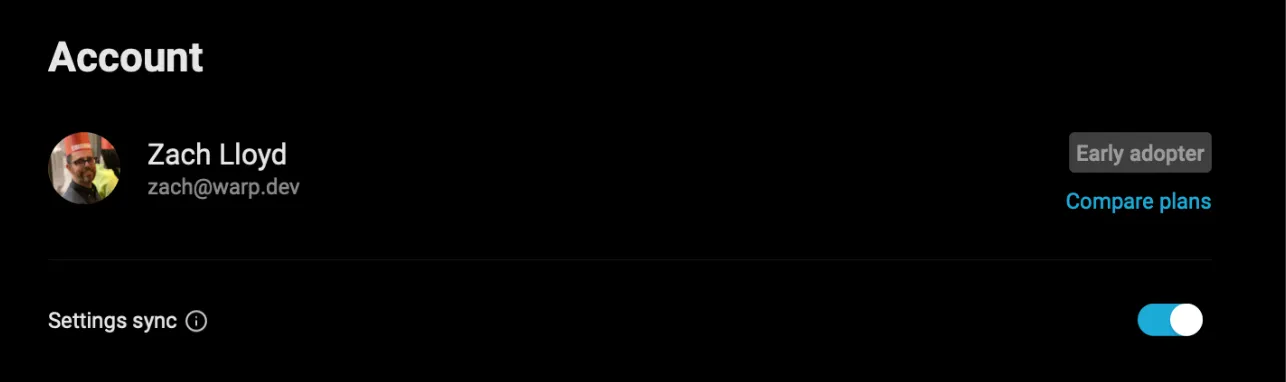 Settings Sync in Account pane.  Settings Sync in Command Palette. ## How settings sync works [Section titled “How settings sync works”](#how-settings-sync-works) **Settings Sync** works by syncing the state of most of your Warp settings to our cloud servers. When you log in to Warp on another device or through the browser with [Session Sharing](/knowledge-and-collaboration/session-sharing/), if you have Settings Sync enabled, most of your settings will be the same as they were when you were logged in before. That means your themes, most features, privacy settings, AI settings, **are all the same everywhere you use Warp**, saving you the time from having to set them up again. When you first enable Settings Sync, the settings from the computer you enabled it on becomes the default settings for all devices. This is true if you toggle Settings Sync off and on as well - the synced settings are always from **the last device you enabled Settings Sync on**, so toggling effectively causes all of your devices to have settings from the current logged in instance. ### Non-synced settings [Section titled “Non-synced settings”](#non-synced-settings) Not all settings are synced, however. Notably, Warp does not sync: * Custom keybindings (we may in the future). Although, you can set [custom keybinds with a file](/getting-started/keyboard-shortcuts/#custom-keyboard-shortcuts) * Custom themes (we may in the future) * Device specific settings (e.g. what editor you prefer using, startup shell) * Platform-specific settings are synced across devices on the same platform (e.g. your settings for how to interact with the Linux clipboard are synced across all Linux devices, but not on macOS, Windows, or Web). You can tell when a setting is not synced because it will have a special cloud strikethrough icon in the settings panel.  Indicator showing settings are not synced.
# Text selection
Canonical page: [/terminal/more-features/text-selection/](https://docs.warp.dev/terminal/more-features/text-selection/)
> Use smart selection and rectangular (column) selection to quickly highlight text in Warp.
## Smart selection [Section titled “Smart selection”](#smart-selection) **Smart selection** goes beyond the typical double-click selection, which only highlights a single word. Instead, it uses semantic rules to treat common patterns (like URLs or file paths) as one unit, even when separated by punctuation or whitespace.  Using smart selection to select a file path by double clicking. Double-click on text in the input or block list. The following patterns are recognized: 1. URLs 2. File paths 3. Email addresses 4. IP addresses 5. Floating point numbers, including scientific notation. You can toggle smart selection on the **Settings** > **Features** > **Terminal** > **Double-click smart selection**. If disabled, you can instead manually select specific punctuation characters to be included within word boundaries. ## Rectangular selection [Section titled “Rectangular selection”](#rectangular-selection) **Rectangular selection** lets you highlight text in a clean vertical block (also called *column* or *box* selection). This is especially useful for copying command output, logs, or prefixed text without grabbing unwanted characters.  Using rectangular selection to select by columns in the block output. Hold the modifier keys while dragging your mouse: * macOS: `CMD-OPT` * Windows and Linux: `CTRL-ALT`
# Warp URI Scheme
Canonical page: [/terminal/more-features/uri-scheme/](https://docs.warp.dev/terminal/more-features/uri-scheme/)
> Warp's URI scheme enables you to programmatically open new windows, tabs, launch configurations, or tab configs with ease.
## How to use it [Section titled “How to use it”](#how-to-use-it) There are several ways to use the URI scheme: * Open new window `warp://action/new_window?path=<path_to_folder>` * Open new tab `warp://action/new_tab?path=<path_to_folder>` * Open Launch Configuration `warp://launch/<launch_configuration_path>` * Open Tab Config `warp://tab_config/<name>` — opens the saved [Tab Config](/terminal/windows/tab-configs/) as a new tab in the active window. Append `?new_window=true` to open it in a new window instead. `<name>` is matched case-insensitively against the file stem of the `.toml`, so both `warp://tab_config/my_tab` and `warp://tab_config/my_tab.toml` resolve to `my_tab.toml`. ## How it works [Section titled “How it works”](#how-it-works) Example of Warp [URIs in use in Warp + Raycast Extension](https://github.com/raycast/extensions/blob/74521b70b62355004b0958393a64f9417b1ff3a6/extensions/warp/src/uri.ts). [Warp + Raycast Extension Demo made using URIs](https://twitter.com/i/status/1678432353461637121)
# Working Directory
Canonical page: [/terminal/more-features/working-directory/](https://docs.warp.dev/terminal/more-features/working-directory/)
> Set a default working directory for new Warp sessions, with options for home directory, previous session, custom path, or per-window/tab/pane configuration.
## What is it [Section titled “What is it”](#what-is-it) Warp’s working directory feature is designed to enhance your workflow by enabling you to set up a default directory for new sessions. This feature helps you save time and quickly access your preferred directories when starting new sessions. You have the flexibility to set up a working directory for all new sessions or customize it individually for Windows, Tabs, and Panes, based on your specific needs. ## How to access it [Section titled “How to access it”](#how-to-access-it) * Open **Settings** > **Features** > **Session** and go to “Working directory for new sessions”. * The drop-down for this feature provides several options discussed below: * Home Directory, is the default option for new sessions and opens new sessions in the currently logged-in users home folder `~/`. * Previous session’s directory, opens new sessions in your active sessions’ current directory. * Custom directory, opens new sessions in a file path you specify. * Advanced, allows you to select from the three options for new sessions in Windows, Tabs, and Panes. ## How to use it [Section titled “How to use it”](#how-to-use-it) [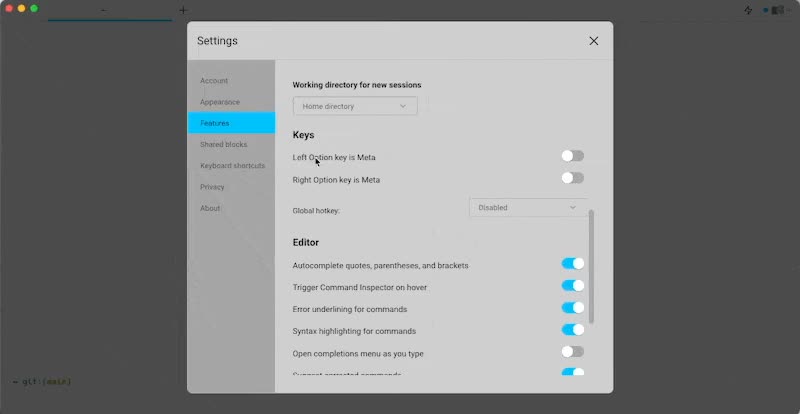](/assets/terminal/working-directory-demo.mp4)
# Sessions overview
Canonical page: [/terminal/sessions/](https://docs.warp.dev/terminal/sessions/)
> Navigate between sessions and automatically restore windows, tabs, and panes when you relaunch Warp.
Warp sessions let you navigate between terminal sessions and automatically restore your workspace when you relaunch the app. Session Navigation helps you quickly switch between active sessions, while Session Restoration preserves your windows, tabs, and panes across restarts. 1. [Session Navigation](/terminal/sessions/session-navigation/) enables you to easily navigate to any session in Warp. 2. [Session Restoration](/terminal/sessions/session-restoration/) automatically restores the window and tabs from your previous session. For tab layout configuration, see [Tab Configs](/terminal/windows/tab-configs/) and [Launch Configurations (Legacy)](/terminal/sessions/launch-configurations/) under [Windows and Tabs](/terminal/windows/). ## Session Navigation [Section titled “Session Navigation”](#session-navigation) [Session Navigation Demo](https://www.loom.com/embed/2147adc6749c4f4ea5da432eadda7995) ## Session Restoration [Section titled “Session Restoration”](#session-restoration) [](/assets/terminal/sessions-block_restoration.mp4)
# Launch Configurations (Legacy)
Canonical page: [/terminal/sessions/launch-configurations/](https://docs.warp.dev/terminal/sessions/launch-configurations/)
> Launch Configurations (Legacy) let you save a configuration of windows, tabs, and panes. For new setups, use Tab Configs instead.
Caution Launch Configurations have been replaced by [Tab Configs](/terminal/windows/tab-configs/). Existing Launch Configurations continue to work, but new features are not being added. For new setups, use [Tab Configs](/terminal/windows/tab-configs/). ## What is it [Section titled “What is it”](#what-is-it) With Launch configurations you can save in the app or by adding a yaml file. ## Creating a Launch Configuration [Section titled “Creating a Launch Configuration”](#creating-a-launch-configuration) ### From the UI [Section titled “From the UI”](#from-the-ui) 1. Set up the configuration of windows, tabs, and panes you would like to save. 2. Open the [Command Palette](/terminal/command-palette/), and type in `Save New Launch Configuration`. 3. Name the configuration file. The name field cannot be empty. 4. Click the Save configuration button. ### With a YAML File [Section titled “With a YAML File”](#with-a-yaml-file) * Launch Configurations files are generated when you create them with the UI and can also be created or modified manually. * Please see the below for [Launch Configuration YAML file locations, format, and examples](/terminal/sessions/launch-configurations/#launch-configuration-yaml-format). ## Using a Launch Configuration [Section titled “Using a Launch Configuration”](#using-a-launch-configuration) * macOS * From the [Command Palette](/terminal/command-palette/), enter `Launch Configuration` to open and select Launch Configuration. * Right-clicking the new Tab **+** button to open a menu and select saved Launch Configuration. * From the macOS menu bar, **File** > **Launch Configurations**, where you can search through and open your saved Launch Configuration. * Single-window launch configs can be launched into the active window from the launch configuration palette using `CMD-ENTER` on macOS. * Windows * From the [Command Palette](/terminal/command-palette/), enter `Launch Configuration` to open and select Launch Configuration. * Right-clicking the new Tab **+** button to open a menu and select saved Launch Configuration. * Single-window launch configs can be launched into the active window from the launch configuration palette using `CTRL-ENTER` on Linux. To open a WSL tab with a Launch Configuration, you must first set WSL as your default shell in Warp: * Go to **Settings** > **Features** > **Session** > **Startup shell for new sessions**. * Select your desired WSL distribution (e.g., Ubuntu) as the default shell. After this, any Launch Configuration you open will use WSL as the shell. * Linux * From the [Command Palette](/terminal/command-palette/), enter `Launch Configuration` to open and select Launch Configuration. * Right-clicking the new Tab **+** button to open a menu and select saved Launch Configuration. * Single-window launch configs can be launched into the active window from the launch configuration palette using `CTRL-ENTER` on Linux. ## How it works [Section titled “How it works”](#how-it-works) [Launch Configuration Demo](https://www.loom.com/embed/daa2a9e55c27458c8bbf722d90078880) ## Launch Configuration YAML Format [Section titled “Launch Configuration YAML Format”](#launch-configuration-yaml-format) All Launch Configuration yaml files are stored in the following location: * macOS ```bash $HOME/.warp/launch_configurations/ ``` * Windows ```powershell $env:APPDATA\warp\Warp\data\launch_configurations\ ``` * Linux ```bash ${XDG_DATA_HOME:-$HOME/.local/share}/warp-terminal/launch_configurations/ ``` Caution The `cwd:` value in the yaml code must contain an absolute path or `""`. Note that `~` or empty paths will result in the file not being visible on the list of options for Launch Configurations. ### Windows [Section titled “Windows”](#windows) Sample configuration that shows how windows are structured in launch configuration files. ```yaml # Warp Launch Configuration # # This configuration has two windows, # each with one tab in different starting directories. --- name: Example Windows windows: - tabs: - title: Documents layout: cwd: /Users/warp-user/Documents color: blue - tabs: - title: Warp User layout: cwd: /Users/warp-user color: green ``` ### Tabs [Section titled “Tabs”](#tabs) Here’s a sample configuration that shows how tabs are structured in launch configuration files. * Use the `title` field to set a custom tab name * Use the `color` field to set the tab color * We currently support using the terminal colors (ANSI colors): `Red | Green | Yellow | Blue | Magenta | Cyan` The actual color values will be automatically derived from your Warp theme ```yaml # Warp Launch Configuration # # This configuration has two tabs in the same window. --- name: Example Tabs windows: - tabs: - title: Documents layout: cwd: /Users/warp-user/Documents color: blue - title: Warp User layout: cwd: /Users/warp-user color: green ``` ### Panes [Section titled “Panes”](#panes) Launch Configurations support setting split panes in each tab. Note that Warp also supports nesting split panes in launch configuration files. ```yaml # Warp Launch Configuration # # This configuration is two windows, each with split panes. # The first window contains a vertically split tab with two panes. # The second window contains a horizontally split tab, # with a vertically split tab on the right. --- name: Example Panes windows: - tabs: - title: Downloads and Warp User layout: split_direction: vertical panes: - cwd: /Users/warp-user/Downloads - cwd: /Users/warp-user color: blue - tabs: - title: Desktop, Documents, and Warp User layout: split_direction: horizontal panes: - cwd: /Users/warp-user/Desktop - split_direction: vertical panes: - cwd: /Users/warp-user/Documents - cwd: /Users/warp-user color: green ``` ### Active and Focus [Section titled “Active and Focus”](#active-and-focus) Sample configuration that shows how a Window and Tab can be activated with a session in focus. * Use the `active_window_index` and `active_tab_index`fields to set your active Window and Tab. * Use the `is_focused` field to set which Pane is focused in each tab. Caution Note that when you use `- active_tab_index:` the `tabs:` field doesn’t need the `-` prefix, as this can cause syntax issues. ```yaml # Warp Launch Configuration # # This configurations has two tabs, with the second tab active. # Two vertical split panes in the first tab and the top pane focused. # Two horizontal split panes in the second tab and the right pane focused. --- name: Example Active and Focus active_window_index: 0 windows: - active_tab_index: 1 tabs: - title: Tab 1 layout: split_direction: vertical panes: - cwd: /Users/warp-user/Documents is_focused: true - cwd: /Users/warp-user/Documents/Projects - title: Tab 2 layout: split_direction: horizontal panes: - cwd: /Users/warp-user/Downloads - cwd: /Users/warp-user is_focused: true ``` ### Commands [Section titled “Commands”](#commands) Use the `commands` field to define a set of commands to run when a launch configuration in run. Caution You may need to use double quotes for commands with special characters. Commands in separate lines are chained together with `&&` when run, as such commands run after `ssh` commands may not execute. ```yaml # Warp Launch Configuration # # This configuration has two windows, # the first window executes two commands on start, # the second window has a split pane that executes a command on start. --- name: Example Commands windows: - tabs: - title: Documents layout: cwd: /Users/warp-user/Documents commands: - exec: ls - exec: code . color: blue - tabs: - title: Downloads layout: split_direction: vertical panes: - cwd: /Users/warp-user/Downloads commands: - exec: curl http://example.com -o my.file - exec: cp my.file my.file2 - cwd: /Users/warp-user commands: - exec: ssh user@remote.server.com color: green ```
# Session Navigation
Canonical page: [/terminal/sessions/session-navigation/](https://docs.warp.dev/terminal/sessions/session-navigation/)
> Quickly navigate to any terminal session across Warp using the Session Navigation palette.
## How to access Session navigation [Section titled “How to access Session navigation”](#how-to-access-session-navigation) 1. Open the Session Navigation palette with the [Command Palette](/terminal/command-palette/), click on **session >\_** or type in “sessions:”. 2. Jump to a session by using your mouse or the `UP ↑`/`DOWN ↓` arrow keys and `ENTER`. 3. Refine the session results by searching for sessions by prompt, the currently running command, last run command, and command status (ex: “Running…”, “Completed 10 minutes ago”, “Empty Session”). ### CTRL-TAB behavior [Section titled “CTRL-TAB behavior”](#ctrl-tab-behavior) `CTRL-TAB` shortcut defaults to activate the previous / next [Tabs](/terminal/windows/tabs/). You can configure the shortcut to cycle the most recent session, including any [Split Panes](/terminal/windows/split-panes/), in **Settings** > **Features** > **Keys** > **Ctrl-Tab behavior** ## How session navigation works [Section titled “How session navigation works”](#how-session-navigation-works) [Session Navigation Demo](https://www.loom.com/embed/2147adc6749c4f4ea5da432eadda7995)
# Session Restoration
Canonical page: [/terminal/sessions/session-restoration/](https://docs.warp.dev/terminal/sessions/session-restoration/)
> Restore your windows, tabs, panes, and recent Blocks automatically when you relaunch Warp.
## What is it [Section titled “What is it”](#what-is-it) Session restoration allows you to quickly pick up where you left off in your previous terminal session. ## How to access Session Restoration [Section titled “How to access Session Restoration”](#how-to-access-session-restoration) * Session Restoration comes enabled by default in Warp. - You can disable Session Restoration by going to **Settings** > **Features**, then toggling off `Restore windows, tabs, and panes on startup`. Caution Toggling off Session Restoration will not clear the [SQLite database](/terminal/sessions/session-restoration/#session-restoration-database); however, Warp will stop recording new output. ## How session restoration works [Section titled “How session restoration works”](#how-session-restoration-works) [](/assets/terminal/sessions-block_restoration.mp4) #### Session Restoration database [Section titled “Session Restoration database”](#session-restoration-database) Warp saves the data from your previous session’s windows, tabs, and panes to a SQLite database on your computer, and every time you quit the app, this data is overwritten by your latest session. You can open the database directly and inspect its full contents like so: * macOS ```bash sqlite3 "$HOME/Library/Group Containers/2BBY89MBSN.dev.warp/Library/Application Support/dev.warp.Warp-Stable/warp.sqlite" ``` * Windows ```powershell sqlite3 $env:LOCALAPPDATA\warp\Warp\data\warp.sqlite ``` * Linux ```bash sqlite3 "${XDG_STATE_HOME:-$HOME/.local/state}/warp-terminal/warp.sqlite" ``` **How to clear the Session Restoration database** Sometimes, you may want to prevent a sensitive Block from being saved on your computer, or you may want to clear blocks from a machine entirely. Danger The following guidance is destructive and will delete any sessions and block history. There are two ways to do this: * macOS * Clear the blocks from your running Warp session with `CMD-K`. * Delete the SQLite file entirely with the following command: ```bash rm -f "$HOME/Library/Group Containers/2BBY89MBSN.dev.warp/Library/Application Support/dev.warp.Warp-Stable/warp.sqlite" ``` * Windows * Clear the blocks from your running Warp session with `CTRL-SHIFT-K`. * Delete the SQLite file entirely with the following command: ```powershell Remove-Item -Force $env:LOCALAPPDATA\warp\Warp\data\warp.sqlite ``` * Linux * Clear the blocks from your running Warp session with `CTRL-SHIFT-K`. * Delete the SQLite file entirely with the following command: ```bash rm -f "${XDG_STATE_HOME:-$HOME/.local/state}/warp-terminal/warp.sqlite" ```
# Settings file
Canonical page: [/terminal/settings/](https://docs.warp.dev/terminal/settings/)
> Configure Warp with a plain-text TOML settings file. Learn where it lives, how it works with the Settings panel, and see common configuration examples.
Warp stores your preferences in a plain-text file called `settings.toml`. You can edit it directly in any text editor, check it into version control, or generate it with a script. Changes take effect immediately — no restart required. The settings file works alongside the graphical Settings panel. Changes you make in either place are reflected in the other. **Key features:** * **Hot-reload** — Warp watches `settings.toml` for changes and applies them instantly when you save the file. * **Error recovery** — If the file contains invalid TOML or an unrecognized value, Warp shows a warning banner and falls back to defaults for the affected settings. Fix the file and the banner clears automatically. * **Automatic migration** — When you upgrade to a version of Warp that includes the settings file, Warp automatically migrates your existing preferences into `settings.toml`. * **Bidirectional sync with Settings UI** — Changes in the Warp **Settings** panel (`⌘+,` on macOS, `Ctrl+,` on Linux/Windows) write to `settings.toml`, and hand-edits to the file are reflected in the panel. * **Agent-powered editing** — Ask Warp’s agent to change settings for you using natural language (for example, “increase my font size to 16”). The bundled `modify-settings` skill handles the file update automatically. ## Opening your settings file [Section titled “Opening your settings file”](#opening-your-settings-file) There are several ways to open `settings.toml`: * In the Warp app, go to **Settings** and click **Open settings file** at the bottom of the panel. * Open the file directly in any editor at the path listed below for your platform and Warp release channel. ## File location [Section titled “File location”](#file-location) Depending on your platform and Warp release channel, `settings.toml` is located at: * **macOS** * Stable — `~/.warp/settings.toml` * Preview — `~/.warp-preview/settings.toml` * **Linux** * Stable — `~/.config/warp-terminal/settings.toml` * Preview — `~/.config/warp-terminal-preview/settings.toml` * **Windows** * Stable — `%LOCALAPPDATA%\warp\Warp\config\settings.toml` * Preview — `%LOCALAPPDATA%\warp\WarpPreview\config\settings.toml` For the locations of every other Warp file — themes, tab configs, keybindings, logs, the local database, and more — see [File and folder locations](/terminal/settings/file-locations/). ## Settings file format [Section titled “Settings file format”](#settings-file-format) The file uses [TOML v1.1](https://toml.io/en/v1.1.0) syntax. Settings are organized into **sections** (TOML tables) that group related options — for example, `[appearance.text]` contains font settings and `[agents.profiles]` contains agent permission settings. Here is a minimal example showing the structure: ```toml # Appearance settings [appearance.text] font_name = "JetBrains Mono" font_size = 14.0 line_height_ratio = 1.3 [appearance.themes] theme = "dracula" # Terminal behavior [terminal.input] syntax_highlighting = true honor_ps1 = false # Agent permissions [agents.profiles] agent_mode_execute_readonly_commands = true ``` ### How sections map to TOML tables [Section titled “How sections map to TOML tables”](#how-sections-map-to-toml-tables) Each section in the settings file corresponds to a TOML table header in brackets. Subsections use dot-separated paths: * `[general]` — Top-level general settings like session restoration and tab placement * `[appearance]` — Visual settings, with subsections like `[appearance.text]`, `[appearance.themes]`, `[appearance.cursor]` * `[agents]` — Agent and AI settings, with subsections like `[agents.profiles]`, `[agents.warp_agent.input]` * `[terminal]` — Terminal behavior settings, with subsections like `[terminal.input]` For the complete list of every available setting, see [All settings reference](/terminal/settings/all-settings/). ## How settings are applied [Section titled “How settings are applied”](#how-settings-are-applied) ### Relationship between the Settings panel and the file [Section titled “Relationship between the Settings panel and the file”](#relationship-between-the-settings-panel-and-the-file) The Warp Settings panel (`⌘+,` on macOS, `Ctrl+,` on Linux/Windows) and `settings.toml` represent the same underlying configuration. Changing a toggle in the Settings panel writes the new value to `settings.toml`. Editing `settings.toml` by hand updates the Settings panel the next time it reads the file. ### Error banner [Section titled “Error banner”](#error-banner) When `settings.toml` has errors, Warp displays a dismissible warning banner at the top of the workspace. The banner includes an **Open settings file** button so you can jump directly to the file and fix the issue. Once you save a corrected file, the banner disappears automatically. ## Common configurations [Section titled “Common configurations”](#common-configurations) ### Change theme and font [Section titled “Change theme and font”](#change-theme-and-font) ```toml [appearance.themes] theme = "cyber_wave" [appearance.text] font_name = "Fira Code" font_size = 15.0 ligature_rendering_enabled = true font_weight = "normal" ``` ### Configure agent permissions [Section titled “Configure agent permissions”](#configure-agent-permissions) ```toml [agents.profiles] agent_mode_coding_permissions = "always_allow_reading" agent_mode_execute_readonly_commands = true agent_mode_command_execution_allowlist = [ "cat(\\s.*)?", "echo(\\s.*)?", "find .*", "grep(\\s.*)?", "ls(\\s.*)?", "which .*", ] ``` ### Enable Vim keybindings [Section titled “Enable Vim keybindings”](#enable-vim-keybindings) ```toml [text_editing] vim_mode_enabled = true vim_status_bar = true ``` ## Migrating from previous settings [Section titled “Migrating from previous settings”](#migrating-from-previous-settings) When you upgrade to a version of Warp that includes the settings file, Warp automatically migrates your existing preferences into `settings.toml`. No action is required — your customizations carry over and the file becomes the source of truth for all settings going forward. ## Troubleshooting [Section titled “Troubleshooting”](#troubleshooting) ### ”Your settings file contains an error” banner [Section titled “”Your settings file contains an error” banner”](#your-settings-file-contains-an-error-banner) This banner appears when `settings.toml` has invalid TOML syntax or an unrecognized value. Click **Open settings file** in the banner to open the file and look for: * **Missing quotes** — String values must be wrapped in double quotes: `font_name = "Hack"`, not `font_name = Hack`. * **Missing brackets** — Section headers require square brackets: `[appearance.text]`. * **Wrong value types** — Check that numbers are numbers (`font_size = 13.0`), booleans are `true`/`false`, and enum values are valid strings. ### Resetting to defaults [Section titled “Resetting to defaults”](#resetting-to-defaults) Delete `settings.toml` (or rename it) and restart Warp. Warp falls back to built-in defaults for all settings. The file is re-created the next time you change a setting through the Settings panel. ```bash # Uncomment the two lines that match your platform and Warp release # channel, then run them to back up and delete settings.toml. # Stable (macOS) # cp ~/.warp/settings.toml ~/.warp/settings.toml.bak # rm ~/.warp/settings.toml # Stable (Linux) # cp ~/.config/warp-terminal/settings.toml ~/.config/warp-terminal/settings.toml.bak # rm ~/.config/warp-terminal/settings.toml # Preview (macOS) # cp ~/.warp-preview/settings.toml ~/.warp-preview/settings.toml.bak # rm ~/.warp-preview/settings.toml # Preview (Linux) # cp ~/.config/warp-terminal-preview/settings.toml ~/.config/warp-terminal-preview/settings.toml.bak # rm ~/.config/warp-terminal-preview/settings.toml ``` ### Settings not applying [Section titled “Settings not applying”](#settings-not-applying) Confirm you’re editing the correct file for your platform and Warp release channel (see [File location](#file-location) above). If you run multiple [Warp release channels](/support-and-community/community/warp-preview-and-alpha-program/), each channel has its own settings directory. ## Related pages [Section titled “Related pages”](#related-pages) * [All settings reference](/terminal/settings/all-settings/) — Complete list of every available setting with descriptions, types, and defaults * [File and folder locations](/terminal/settings/file-locations/) — Where Warp stores every config, data, and state file across macOS, Windows, and Linux * [Customizing Warp](/getting-started/quickstart/customizing-warp/) — Overview of all customization options * [Custom themes](/terminal/appearance/custom-themes/) — Create and load custom YAML or Base16 themes * [Keyboard shortcuts](/getting-started/keyboard-shortcuts/) — Customize keybindings * [Settings Sync (Beta)](/terminal/more-features/settings-sync/) — Sync settings across machines
# All settings reference
Canonical page: [/terminal/settings/all-settings/](https://docs.warp.dev/terminal/settings/all-settings/)
> Complete reference for every setting available in Warp's settings.toml file, organized by section with descriptions, types, defaults, and examples.
This page lists every setting you can configure in [`settings.toml`](/terminal/settings/) organized by TOML section. For an introduction to the settings file, how to open it, and common configuration examples, see [Settings file](/terminal/settings/). Settings are grouped into sections that correspond to TOML table headers (for example, `[appearance.text]`). Only include the settings you want to change — Warp uses built-in defaults for everything else. ## General [Section titled “General”](#general) Top-level settings that control Warp’s startup behavior, session management, and window-level preferences. **Section**: `[general]` * `default_session_mode` — The default mode for new terminal sessions. Type: string. Default: `"terminal"`. Options: `"terminal"`, `"agent"`, `"cloud_agent"`, `"tab_config"`, `"docker_sandbox"`. * `default_tab_config_path` — Path to the tab config used when `default_session_mode` is `"tab_config"`. Type: string. Default: `""`. * `link_tooltip` — Whether to show a tooltip when hovering over links. Type: boolean. Default: `true`. * `login_item` — Whether to launch Warp automatically when you log in. Type: boolean. Default: `true`. * `mouse_scroll_multiplier` — The scroll speed multiplier for mouse scroll events. Type: number. Default: `3.0`. * `new_tab_placement` — Where new tabs are placed in the tab bar. Type: string. Default: `"after_current_tab"`. Options: `"after_current_tab"`, `"after_all_tabs"`. * `quit_on_last_window_closed` — Whether to quit Warp when the last window is closed. Type: boolean. Default: `false`. * `restore_session` — Whether to restore the previous session when Warp starts up. Type: boolean. Default: `true`. * `should_confirm_close_session` — Whether to show a confirmation dialog when closing a session. Type: boolean. Default: `true`. * `show_changelog_after_update` — Whether the changelog is shown after an update. Type: boolean. Default: `true`. * `show_warning_before_quitting` — Whether to show a warning dialog before quitting Warp. Type: boolean. Default: `true`. * `snackbar_enabled` — Whether to show snackbar notifications. Type: boolean. Default: `true`. * `user_native_preference` — Whether to prefer the native desktop app or the web app. Type: string. Default: `"not_selected"`. Options: `"not_selected"`, `"web"`, `"desktop"`. ### Undo close [Section titled “Undo close”](#undo-close) **Section**: `[general.undo_close]` * `enabled` — Whether the undo close feature is enabled. Type: boolean. Default: `true`. * `grace_period` — How long (in seconds) after closing a tab you can still undo the close. Type: integer. Default: `60`. ## Appearance [Section titled “Appearance”](#appearance) Visual settings that control how Warp looks, including themes, fonts, cursor, tabs, window, and layout. **Section**: `[appearance]` * `spacing` — Controls the spacing between terminal blocks. Type: string. Default: `"normal"`. Options: `"normal"`, `"compact"`. ### Themes [Section titled “Themes”](#themes) **Section**: `[appearance.themes]` * `theme` — The color theme. Type: string. Default: `"dark"`. Options: `"adeberry"`, `"phenomenon"`, `"dark"`, `"dracula"`, `"fancy_dracula"`, `"cyber_wave"`, `"solar_flare"`, `"solarized_dark"`, `"willow_dream"`, `"light"`, `"dark_city"`, `"gruvbox_dark"`, `"red_rock"`, `"jelly_fish"`, `"leafy"`, `"koi"`, `"solarized_light"`, `"snowy"`, `"gruvbox_light"`, `"pink_city"`, `"marble"`, or a custom theme object. * `system_theme` — Whether to match the system light/dark theme. Type: boolean. Default: `false`. * `selected_system_themes` — The themes to use for system light and dark modes. Type: object. Default: `{ dark = "dark", light = "light" }`. To use a custom theme: ```toml [appearance.themes] theme = { custom = { name = "My Theme", path = "~/.warp/themes/my-theme.yaml" } } ``` ### Text [Section titled “Text”](#text) **Section**: `[appearance.text]` * `font_name` — The monospace font used in the terminal. Type: string. Default: `"Hack"`. * `font_size` — The size of the monospace font in the terminal. Type: number. Default: `13.0`. * `font_weight` — The weight of the monospace font. Type: string. Default: `"normal"`. Options: `"thin"`, `"extra_light"`, `"light"`, `"normal"`, `"medium"`, `"semibold"`, `"bold"`, `"extra_bold"`, `"black"`. * `line_height_ratio` — The line height ratio for terminal text. Type: number. Default: `1.2`. * `ligature_rendering_enabled` — Whether to render font ligatures in the terminal. Type: boolean. Default: `false`. * `ai_font_name` — The font used for AI-generated content. Type: string. Default: `"Hack"`. * `match_ai_font` — Whether the AI font automatically matches the terminal font. Type: boolean. Default: `false`. * `notebook_font_size` — The font size used in notebooks. Type: number. Default: `14.0`. * `match_notebook_to_monospace_font_size` — Whether the notebook font size matches the terminal font size. Type: boolean. Default: `true`. * `use_thin_strokes` — Whether to use thin font strokes on macOS. Type: string. Default: `"on_high_dpi_displays"`. Options: `"never"`, `"on_low_dpi_displays"`, `"on_high_dpi_displays"`, `"always"`. * `enforce_minimum_contrast` — Whether to enforce minimum contrast for text readability. Type: string. Default: `"only_named_colors"`. Options: `"never"`, `"only_named_colors"`, `"always"`. ### Cursor [Section titled “Cursor”](#cursor) **Section**: `[appearance.cursor]` * `cursor_display_type` — The visual style of the cursor. Type: string. Default: `"bar"`. Options: `"bar"`, `"block"`, `"underline"`. * `cursor_blink` — Whether the cursor blinks. Type: string. Default: `"enabled"`. Options: `"enabled"`, `"disabled"`. ### Blocks [Section titled “Blocks”](#blocks) **Section**: `[appearance.blocks]` * `show_block_dividers` — Whether to show dividers between terminal blocks. Type: boolean. Default: `true`. * `show_jump_to_bottom_of_block_button` — Whether to show the jump-to-bottom button in long command output. Type: boolean. Default: `true`. * `should_show_bootstrap_block` — Whether the bootstrap block is visible in the terminal. Type: boolean. Default: `false`. * `should_show_in_band_command_blocks` — Whether in-band command blocks are visible. Type: boolean. Default: `false`. * `should_show_ssh_block` — Whether the SSH connection block is visible. Type: boolean. Default: `false`. ### Tabs [Section titled “Tabs”](#tabs) **Section**: `[appearance.tabs]` * `workspace_decoration_visibility` — When workspace decorations such as the tab bar are visible. Type: string. Default: `"hide_fullscreen"`. Options: `"always_show"`, `"hide_fullscreen"`, `"on_hover"`. * `tab_close_button_position` — Position of the close button on tabs. Type: string. Default: `"right"`. Options: `"right"`, `"left"`. * `show_indicators_button` — Whether to show activity indicators on tabs. Type: boolean. Default: `true`. * `preserve_active_tab_color` — Whether to preserve the active tab’s color when switching tabs. Type: boolean. Default: `false`. * `header_toolbar_chip_selection` — Configuration for the header toolbar chips in the vertical tab panel header. Type: string or object. Default: `"default"`. ### Vertical tabs [Section titled “Vertical tabs”](#vertical-tabs) **Section**: `[appearance.vertical_tabs]` * `enabled` — Whether to display tabs vertically instead of horizontally. Type: boolean. Default: `false`. * `view_mode` — Display mode for the vertical tab bar. Type: string. Default: `"compact"`. Options: `"compact"`, `"expanded"`. * `primary_info` — The primary information displayed on vertical tabs. Type: string. Default: `"command"`. Options: `"command"`, `"working_directory"`, `"branch"`. * `compact_subtitle` — Subtitle shown on compact vertical tabs. Type: string. Default: `"branch"`. Options: `"branch"`, `"working_directory"`, `"command"`. * `display_granularity` — Granularity of rows displayed in the vertical tabs panel. Type: string. Default: `"panes"`. Options: `"panes"`, `"tabs"`. * `tab_item_mode` — Tab item display mode in vertical tabs. Type: string. Default: `"focused_session"`. Options: `"focused_session"`, `"summary"`. * `show_details_on_hover` — Whether to show a details sidecar when hovering over a vertical tab. Type: boolean. Default: `true`. * `show_diff_stats` — Whether to show diff stats on vertical tabs. Type: boolean. Default: `true`. * `show_pr_link` — Whether to show PR links on vertical tabs. Type: boolean. Default: `true`. * `use_latest_prompt_as_title` — Whether vertical tab names for agent conversations use the latest user prompt. Type: boolean. Default: `false`. ### Panes [Section titled “Panes”](#panes) **Section**: `[appearance.panes]` * `focus_pane_on_hover` — Whether panes are focused when hovered over. Type: boolean. Default: `false`. * `should_dim_inactive_panes` — Whether inactive panes are visually dimmed. Type: boolean. Default: `false`. ### Input position [Section titled “Input position”](#input-position) **Section**: `[appearance.input]` * `input_mode` — The position of the terminal input. Type: string. Default: `"pinned_to_bottom"`. Options: `"pinned_to_bottom"`, `"pinned_to_top"`, `"waterfall"`. ### Full-screen apps [Section titled “Full-screen apps”](#full-screen-apps) **Section**: `[appearance.full_screen_apps]` * `alt_screen_padding` — Controls padding around full-screen terminal applications. Type: string or object. Default: `{ custom = { uniform_padding = 0.0 } }`. ### Icon [Section titled “Icon”](#icon) **Section**: `[appearance.icon]` * `app_icon` — The app icon displayed in the dock. Type: string. Default: `"default"`. Options: `"default"`, `"aurora"`, `"classic1"`, `"classic2"`, `"classic3"`, `"comets"`, `"cow"`, `"glass_sky"`, `"glitch"`, `"glow"`, `"holographic"`, `"mono"`, `"neon"`, `"original"`, `"starburst"`, `"sticker"`, `"warp_one"`. ### Window [Section titled “Window”](#window) **Section**: `[appearance.window]` * `override_opacity` — The opacity of the window background, from 1 to 100 percent. Type: integer. Default: `100`. * `override_blur` — The blur radius applied to the window background. Type: integer. Default: `1`. * `override_blur_texture` — Whether to apply a blur texture to the window background. Type: boolean. Default: `false`. * `zoom_level` — The zoom level for the window, as a percentage. Type: integer. Default: `100`. * `open_windows_at_custom_size` — Whether to open new windows at a custom size instead of the default. Type: boolean. Default: `false`. * `new_windows_num_columns` — The number of columns for new windows when using a custom size. Type: integer. Default: `80`. * `new_windows_num_rows` — The number of rows for new windows when using a custom size. Type: integer. Default: `40`. * `left_panel_visibility_across_tabs` — Whether the left panel visibility is shared across all tabs. Type: boolean. Default: `true`. ## Terminal [Section titled “Terminal”](#terminal) Settings that control terminal behavior, input, and event handling. **Section**: `[terminal]` * `copy_on_select` — Whether text is automatically copied to the clipboard when selected. Type: boolean. Default: `true`. * `focus_reporting_enabled` — Whether to forward focus and blur events to full-screen terminal applications. Type: boolean. Default: `true`. * `mouse_reporting_enabled` — Whether to forward mouse events to full-screen terminal applications. Type: boolean. Default: `true`. * `scroll_reporting_enabled` — Whether to forward scroll events to full-screen terminal applications. Type: boolean. Default: `true`. * `maximum_grid_size` — The maximum number of rows in the terminal grid. Type: integer. Default: `50000`. * `use_audible_bell` — Whether to play an audible bell sound on terminal bell events. Type: boolean. Default: `false`. * `show_terminal_zero_state_block` — Whether to show the AI zero-state block in new terminal sessions. Type: boolean. Default: `true`. ### Input [Section titled “Input”](#input) **Section**: `[terminal.input]` * `syntax_highlighting` — Whether syntax highlighting is enabled in the terminal input. Type: boolean. Default: `true`. * `honor_ps1` — Whether to use your shell’s PS1 prompt instead of the Warp prompt. Type: boolean. Default: `false`. * `input_box_type_setting` — The terminal input style. Type: string. Default: `"classic"`. Options: `"universal"` (AI-first input), `"classic"` (Terminal-first input). * `alias_expansion_enabled` — Whether shell alias expansion is enabled in the input. Type: boolean. Default: `false`. * `command_corrections` — Whether command corrections are suggested for mistyped commands. Type: boolean. Default: `true`. * `error_underlining_enabled` — Whether command errors are underlined in the input. Type: boolean. Default: `true`. * `completions_open_while_typing` — Whether the completions menu opens automatically while typing. Type: boolean. Default: `false`. * `classic_completions_mode` — Whether classic completions mode is enabled. Type: boolean. Default: `false`. * `show_hint_text` — Whether hint text is shown in the terminal input. Type: boolean. Default: `true`. * `show_terminal_input_message_bar` — Whether the terminal input message bar is shown. Type: boolean. Default: `true`. * `enable_slash_commands_in_terminal` — Whether slash commands are available in the terminal input. Type: boolean. Default: `true`. * `at_context_menu_in_terminal_mode` — Whether the @ context menu is available in terminal mode. Type: boolean. Default: `true`. * `outline_codebase_symbols_for_at_context_menu` — Whether codebase symbols appear in the @ context menu. Type: boolean. Default: `true`. * `middle_click_paste_enabled` — Whether middle-click pastes from the clipboard. Type: boolean. Default: `true`. * `extra_meta_keys` — Controls which additional keys are treated as meta keys. Type: object. Default: `{ left_alt = false, right_alt = false }`. #### Autosuggestions [Section titled “Autosuggestions”](#autosuggestions) **Section**: `[terminal.input.autosuggestions]` * `enabled` — Whether command autosuggestions are shown. Type: boolean. Default: `true`. * `keybinding_hint` — Whether autosuggestion keybinding hints are displayed. Type: boolean. Default: `true`. * `show_ignore_button` — Whether the ignore button is shown for autosuggestions. Type: boolean. Default: `false`. ### Smart select [Section titled “Smart select”](#smart-select) **Section**: `[terminal.smart_select]` * `enabled` — Whether double-click smart selection is enabled for URLs, emails, file paths, and identifiers. Type: boolean. Default: `true`. * `word_char_allowlist` — Characters considered part of a word for double-click selection when smart select is disabled. Type: string. Default: `"-.~/\"`. ## Session [Section titled “Session”](#session) Settings that control shell selection and working directory behavior for new sessions. **Section**: `[session]` * `startup_shell_override` — The shell to use when Warp starts up. Type: string or null. Default: `null` (uses system default). * `new_session_shell_override` — The shell to use when opening a new session. Type: string, object, or null. Default: `null` (uses system default). Options: `"system_default"`, `{ executable = "/path/to/shell" }`, `{ custom = "command" }`. ### Working directory config [Section titled “Working directory config”](#working-directory-config) **Section**: `[session.working_directory_config]` * `advanced_mode` — Whether to use separate settings per session source. Type: boolean. Default: `false`. When `advanced_mode` is `false`, the `[session.working_directory_config.global]` table applies to all session sources. When `true`, you can configure each source independently. **Section**: `[session.working_directory_config.global]` (also `.split_pane`, `.new_tab`, `.new_window`) * `mode` — How the working directory is determined. Type: string. Default: `"previous_dir"`. Options: `"home_dir"`, `"previous_dir"`, `"custom_dir"`. * `custom_dir` — Custom directory path, used when mode is `"custom_dir"`. Type: string. Default: `""`. ```toml # Use a specific directory for split panes, previous directory for everything else [session.working_directory_config] advanced_mode = true [session.working_directory_config.global] mode = "previous_dir" custom_dir = "" [session.working_directory_config.split_pane] mode = "custom_dir" custom_dir = "~/projects" [session.working_directory_config.new_tab] mode = "previous_dir" custom_dir = "" [session.working_directory_config.new_window] mode = "home_dir" custom_dir = "" ``` ## Agents [Section titled “Agents”](#agents) Settings for Warp’s agents, including model behavior, permissions, knowledge, MCP servers, and voice input. **Section**: `[agents]` * `cloud_conversation_storage_enabled` — Whether conversations are stored in the cloud. Type: boolean. Default: `true`. ### Knowledge [Section titled “Knowledge”](#knowledge) **Section**: `[agents.knowledge]` * `rules_enabled` — Whether the agent uses your saved rules during requests. Type: boolean. Default: `true`. * `warp_drive_context_enabled` — Whether Warp Drive context is included in AI requests. Type: boolean. Default: `true`. ### MCP servers [Section titled “MCP servers”](#mcp-servers) **Section**: `[agents.mcp_servers]` * `file_based_mcp_enabled` — Whether global file-based MCP servers from third-party agents are automatically spawned. Warp-managed global MCP servers auto-spawn regardless of this setting, and project-scoped servers must be started manually. Type: boolean. Default: `false`. ### Profiles (permissions) [Section titled “Profiles (permissions)”](#profiles-permissions) **Section**: `[agents.profiles]` * `agent_mode_coding_permissions` — The file read permission level for the agent. Type: string. Default: `"always_ask_before_reading"`. Options: `"always_ask_before_reading"`, `"always_allow_reading"`, `"allow_reading_specific_files"`. * `agent_mode_coding_file_read_allowlist` — File paths the agent can read without asking for permission. Type: array of strings. Default: `[]`. * `agent_mode_execute_readonly_commands` — Whether the agent can auto-execute read-only commands without asking. Type: boolean. Default: `false`. * `agent_mode_command_execution_allowlist` — Commands the agent can execute without explicit permission (regex patterns). Type: array of strings. Default: `["cat(\\s.*)?", "echo(\\s.*)?", "find .*", "grep(\\s.*)?", "ls(\\s.*)?", "which .*"]`. * `agent_mode_command_execution_denylist` — Commands the agent must always ask before executing (regex patterns). Type: array of strings. Default: `["bash(\\s.*)?", "fish(\\s.*)?", "pwsh(\\s.*)?", "sh(\\s.*)?", "zsh(\\s.*)?", "curl(\\s.*)?", "eval(\\s.*)?", "exec(\\s.*)?", "source(\\s.*)?", "wget(\\s.*)?", "dig(\\s.*)?", "nslookup(\\s.*)?", "host(\\s.*)?", "ssh(\\s.*)?", "scp(\\s.*)?", "rsync(\\s.*)?", "telnet(\\s.*)?", "rm(\\s.*)?"]`. ### Warp Agent (AI features) [Section titled “Warp Agent (AI features)”](#warp-agent-ai-features) **Section**: `[agents.warp_agent]` * `is_any_ai_enabled` — Controls whether all AI features are enabled. Type: boolean. Default: `true`. #### Active AI [Section titled “Active AI”](#active-ai) **Section**: `[agents.warp_agent.active_ai]` * `enabled` — Controls whether proactive AI features like suggestions are enabled. Type: boolean. Default: `true`. * `code_suggestions_enabled` — Controls whether AI code suggestions are enabled. Type: boolean. Default: `true`. * `intelligent_autosuggestions_enabled` — Controls whether AI-powered intelligent autosuggestions are enabled. Type: boolean. Default: `true`. * `agent_mode_query_suggestions_enabled` — Controls whether prompt suggestions are shown in Agent Mode. Type: boolean. Default: `true`. * `shared_block_title_generation_enabled` — Controls whether titles are auto-generated when sharing blocks. Type: boolean. Default: `true`. #### Input [Section titled “Input”](#input-1) **Section**: `[agents.warp_agent.input]` * `ai_auto_detection_enabled` — Controls whether AI automatically detects natural language input. Type: boolean. Default: `true`. * `ai_command_denylist` — Commands to exclude from AI natural language autodetection. Type: string. Default: `""`. * `nld_in_terminal_enabled` — Controls whether natural language detection is enabled in the terminal input. Type: boolean. Default: `false`. * `show_model_selectors_in_prompt` — Whether to show AI model selectors in the input prompt. Type: boolean. Default: `true`. * `show_agent_tips` — Whether agent tips are displayed in the input. Type: boolean. Default: `true`. * `include_agent_commands_in_history` — Whether agent-executed commands are included in command history. Type: boolean. Default: `false`. * `agent_toolbar_chip_selection_setting` — Controls the layout of context chips in the Agent Mode toolbar. Type: string or object. Default: `"default"`. #### Other [Section titled “Other”](#other) **Section**: `[agents.warp_agent.other]` * `thinking_display_mode` — Controls how agent thinking traces are displayed after streaming. Type: string. Default: `"show_and_collapse"`. Options: `"show_and_collapse"`, `"always_show"`, `"never_show"`. * `open_conversation_layout_preference` — Whether to open agent conversations in a new tab or a split pane. Type: string. Default: `"new_tab"`. Options: `"new_tab"`, `"split_pane"`. * `show_conversation_history` — Whether conversation history appears in the tools panel. Type: boolean. Default: `true`. * `show_agent_notifications` — Whether agent notifications are shown. Type: boolean. Default: `true`. * `should_show_oz_updates_in_zero_state` — Whether the “What’s new” section is shown in the agent view. Type: boolean. Default: `true`. * `should_render_use_agent_toolbar_for_user_commands` — Whether to show the “Use Agent” footer for terminal commands. Type: boolean. Default: `true`. * `cloud_agent_computer_use_enabled` — Whether computer use is enabled for cloud agent conversations. Type: boolean. Default: `false`. ### Code review autogeneration [Section titled “Code review autogeneration”](#code-review-autogeneration) Controls AI-driven autogeneration in the code review dialogs. This setting currently lives under `[agents.oz.active_ai]` rather than alongside the other `[agents.warp_agent.active_ai]` settings. **Section**: `[agents.oz.active_ai]` * `git_operations_autogen_enabled` — Controls whether AI auto-generates commit messages and PR title and body in the code review dialogs. Type: boolean. Default: `true`. ### Third-party (CLI agents) [Section titled “Third-party (CLI agents)”](#third-party-cli-agents) **Section**: `[agents.third_party]` * `should_render_cli_agent_toolbar` — Whether to show the CLI agent footer for coding agent commands. Type: boolean. Default: `true`. * `auto_toggle_composer` — Whether CLI agent Rich Input automatically closes and reopens based on the agent’s blocked state. Type: boolean. Default: `true`. * `auto_open_composer_on_cli_agent_start` — Whether CLI agent Rich Input automatically opens when a CLI agent session starts. Type: boolean. Default: `false`. * `auto_dismiss_composer_after_submit` — Whether CLI agent Rich Input automatically closes after the user submits a prompt. Type: boolean. Default: `false`. * `cli_agent_toolbar_chip_selection_setting` — Controls the layout of context chips in the CLI Agent toolbar. Type: string or object. Default: `"default"`. * `cli_agent_toolbar_enabled_commands` — Maps custom toolbar command patterns to specific CLI agents. Type: object. Default: `{}`. ### Voice [Section titled “Voice”](#voice) **Section**: `[agents.voice]` * `voice_input_enabled` — Controls whether voice input is enabled for AI interactions. Type: boolean. Default: `true`. * `voice_input_toggle_key` — The key used to toggle voice input. Type: string. Default: `"none"`. Options: `"none"`, `"fn"`, `"alt_left"`, `"alt_right"`, `"control_left"`, `"control_right"`, `"super_left"`, `"super_right"`, `"shift_left"`, `"shift_right"`. ## Code [Section titled “Code”](#code) Settings for Warp’s built-in code editor, file handling, and codebase indexing. **Section**: `[code]` ### Editor [Section titled “Editor”](#editor) **Section**: `[code.editor]` * `open_file_editor` — The editor used to open files. Type: string or object. Default: `"system_default"`. Options: `"system_default"`, `"warp"`, `"env_editor"`, or an external editor object such as `{ external_editor = "v_s_code" }`. Supported external editors: VS Code (`v_s_code`), VS Code Insiders (`v_s_code_insiders`), PyCharm (`py_charm`), IntelliJ IDEA (`intelli_j`), CLion (`c_lion`), RustRover (`rust_rover`), Sublime Text 4 (`sublime4`), Zed (`zed`), Cursor (`cursor`), Windsurf (`windsurf`), and others. * `open_code_panels_file_editor` — The editor used to open files from code panels. Type: string or object. Default: `"warp"`. * `open_file_layout` — The layout used when opening files in the editor. Type: string. Default: `"split_pane"`. Options: `"split_pane"`, `"new_tab"`. * `prefer_markdown_viewer` — Whether to use the Markdown viewer when opening Markdown files. Type: boolean. Default: `true`. * `prefer_tabbed_editor_view` — Whether to prefer opening files in a tabbed editor view. Type: boolean. Default: `true`. * `show_code_review_button` — Whether to show the code review button on tabs. Type: boolean. Default: `true`. * `auto_open_code_review_pane_on_first_agent_change` — Whether to automatically open the code review pane when the agent makes its first change. Type: boolean. Default: `false`. * `show_code_review_diff_stats` — Whether to show lines added/removed counts on the code review button. Type: boolean. Default: `true`. * `show_project_explorer` — Whether the project explorer is shown in the tools panel. Type: boolean. Default: `true`. * `show_global_search` — Whether global file search is shown in the tools panel. Type: boolean. Default: `true`. * `use_warp_as_default_editor` — Whether Warp is used as the default code editor. Type: boolean. Default: `false`. ### Indexing [Section titled “Indexing”](#indexing) **Section**: `[code.indexing]` * `agent_mode_codebase_context` — Whether Codebase Context is provided to the agent. Type: boolean. Default: `true`. * `agent_mode_codebase_context_auto_indexing` — Whether automatic codebase indexing is enabled. Type: boolean. Default: `false`. ## Keys [Section titled “Keys”](#keys) Keyboard behavior settings. **Section**: `[keys]` * `ctrl_tab_behavior_setting` — Controls the behavior of `Ctrl+Tab`. Type: string. Default: `"activate_prev_next_tab"`. Options: `"activate_prev_next_tab"`, `"cycle_most_recent_session"`. ## Notifications [Section titled “Notifications”](#notifications) Settings that control desktop notification behavior. **Section**: `[notifications]` * `toast_duration_secs` — How long notification toasts are displayed, in seconds. Type: integer. Default: `8`. ### Preferences [Section titled “Preferences”](#preferences) **Section**: `[notifications.preferences]` * `mode` — Whether notifications are enabled, disabled, or not yet configured. Type: string. Default: `"unset"`. Options: `"unset"`, `"dismissed"`, `"enabled"`, `"disabled"`. * `is_long_running_enabled` — Whether to notify when a long-running command completes. Type: boolean. Default: `true`. * `long_running_threshold` — Threshold in seconds for long-running command notifications. Type: integer. Default: `30`. * `is_agent_task_completed_enabled` — Whether to notify when an agent task completes. Type: boolean. Default: `true`. * `is_needs_attention_enabled` — Whether to notify when a session needs attention. Type: boolean. Default: `true`. * `is_password_prompt_enabled` — Whether to notify when a password prompt is detected. Type: boolean. Default: `true`. * `play_notification_sound` — Whether to play a sound with notifications. Type: boolean. Default: `true`. ## Privacy [Section titled “Privacy”](#privacy) Settings that control telemetry, crash reporting, and secret redaction. **Section**: `[privacy]` * `telemetry_enabled` — Whether anonymous usage telemetry is collected. Type: boolean. Default: `true`. * `crash_reporting_enabled` — Whether crash reports are sent. Type: boolean. Default: `true`. * `custom_secret_regex_list` — Custom regex patterns for detecting and redacting secrets. Type: array of objects. Default: `[]`. Each item in `custom_secret_regex_list` has the format: ```toml [[privacy.custom_secret_regex_list]] pattern = "sk-[A-Za-z0-9]{48}" name = "OpenAI API key" ``` ### Secret redaction [Section titled “Secret redaction”](#secret-redaction) **Section**: `[privacy.secret_redaction]` * `enabled` — Whether secret redaction is enabled to detect and obscure secrets in terminal output. Type: boolean. Default: `false`. * `hide_secrets_in_block_list` — Whether to hide detected secrets in the block list using asterisks. Type: boolean. Default: `false`. * `secret_display_mode_setting` — Controls how detected secrets are visually displayed. Type: string. Default: `"strikethrough"`. Options: `"asterisks"`, `"strikethrough"`, `"always_show"`. ## System [Section titled “System”](#system) Low-level system and rendering settings. **Section**: `[system]` * `prefer_low_power_gpu` — Whether to prefer the integrated (low-power) GPU. Type: boolean. Default: `false`. * `preferred_graphics_backend` — The preferred graphics backend (Windows). Type: string or null. Default: `null`. Options: `"dx12"`, `"vulkan"`, `"gl"`, `"metal"`, `null`. * `linux_selection_clipboard` — Whether the Linux primary selection clipboard is used. Type: boolean. Default: `true`. ## Text editing [Section titled “Text editing”](#text-editing) Settings that control text editing behavior in the input editor. **Section**: `[text_editing]` * `vim_mode_enabled` — Whether Vim keybindings are enabled. Type: boolean. Default: `false`. * `vim_status_bar` — Whether the Vim status bar is displayed. Type: boolean. Default: `true`. * `vim_unnamed_system_clipboard` — Whether the Vim unnamed register uses the system clipboard. Type: boolean. Default: `false`. * `autocomplete_symbols` — Whether matching symbols like brackets and quotes are auto-completed. Type: boolean. Default: `true`. ## Warp Drive [Section titled “Warp Drive”](#warp-drive) Settings for Warp Drive (shared workflows, notebooks, and prompts). **Section**: `[warp_drive]` * `enabled` — Whether Warp Drive is enabled. Type: boolean. Default: `true`. * `sorting_choice` — The sort order for items in Warp Drive. Type: string. Default: `"by_object_type"`. Options: `"by_timestamp"`, `"alphabetical_descending"`, `"alphabetical_ascending"`, `"by_object_type"`. ## Warpify [Section titled “Warpify”](#warpify) Settings for Warp features in SSH sessions and subshells. ### SSH [Section titled “SSH”](#ssh) **Section**: `[warpify.ssh]` * `enable_ssh_warpification` — Whether to enable Warp features in SSH sessions. Type: boolean. Default: `true`. * `enable_legacy_ssh_wrapper` — Whether the legacy SSH wrapper is enabled for SSH sessions. Type: boolean. Default: `true`. * `use_ssh_tmux_wrapper` — Whether to use a tmux-based wrapper for SSH warpification. Type: boolean. Default: `false`. * `ssh_extension_install_mode` — Controls SSH extension installation behavior. Type: string. Default: `"always_ask"`. Options: `"always_ask"` (always prompt before installing), `"always_install"` (auto-install and connect without prompting), `"never_install"` (fall back to legacy warpification). * `ssh_hosts_denylist` — SSH hosts that should not trigger the warpification prompt. Type: array of strings. Default: `[]`. ### Subshells [Section titled “Subshells”](#subshells) **Section**: `[warpify.subshells]` * `added_subshell_commands` — Additional regex patterns for commands that should be recognized as subshells. Type: array of strings. Default: `[]`. * `subshell_commands_denylist` — Commands that should not trigger the subshell warpification prompt. Type: array of strings. Default: `[]`. ## Workflows [Section titled “Workflows”](#workflows) Settings for workflow behavior. **Section**: `[workflows]` * `show_global_workflows_in_universal_search` — Whether to show global workflows in universal search results. Type: boolean. Default: `false`. ## Accessibility [Section titled “Accessibility”](#accessibility) Settings for screen reader support. **Section**: `[accessibility]` * `accessibility_verbosity` — The verbosity level for screen reader announcements. Type: string. Default: `"verbose"`. Options: `"verbose"` (includes help string), `"concise"` (value only). ## Account [Section titled “Account”](#account) Settings related to your Warp account. **Section**: `[account]` * `is_settings_sync_enabled` — Whether settings are synced across devices via the cloud. Type: boolean. Default: `false`. ## Cloud platform [Section titled “Cloud platform”](#cloud-platform) Settings for third-party API key integration and cloud model configuration. ### Third-party API keys [Section titled “Third-party API keys”](#third-party-api-keys) **Section**: `[cloud_platform.third_party_api_keys]` * `aws_bedrock_credentials_enabled` — Whether Warp should use your local AWS credentials for Bedrock-enabled requests. Type: boolean. Default: `false`. * `aws_bedrock_profile` — The AWS profile name to use for Bedrock credentials. Type: string. Default: `"default"`. * `aws_bedrock_auto_login` — Whether to automatically run the AWS login command when Bedrock credentials expire. Type: boolean. Default: `false`. * `aws_bedrock_auth_refresh_command` — The command to run to refresh AWS credentials for Bedrock. Type: string. Default: `"aws login"`. * `can_use_warp_credits_with_byok` — Whether Warp credits can be used even when providing your own API key. Type: boolean. Default: `false`. ## Global hotkey [Section titled “Global hotkey”](#global-hotkey) Settings for the global activation hotkey and dedicated hotkey window (Quake Mode). ### Toggle all windows [Section titled “Toggle all windows”](#toggle-all-windows) **Section**: `[global_hotkey.toggle_all_windows]` * `enabled` — Whether the hotkey that toggles visibility of all windows is enabled. Mutually exclusive with `global_hotkey.dedicated_window.enabled`. Type: boolean. Default: `false`. * `keybinding` — The keybinding for the global activation hotkey. Format: modifiers and a key joined by `-`, for example `"cmd-shift-a"` or `"alt-enter"`. Type: string or null. Default: `null`. ### Dedicated window (Quake Mode) [Section titled “Dedicated window (Quake Mode)”](#dedicated-window-quake-mode) **Section**: `[global_hotkey.dedicated_window]` * `enabled` — Whether the dedicated hotkey window is enabled. Mutually exclusive with `global_hotkey.toggle_all_windows.enabled`. Type: boolean. Default: `false`. **Section**: `[global_hotkey.dedicated_window.settings]` * `active_pin_position` — Screen edge where the hotkey window is pinned. Type: string. Options: `"top"`, `"bottom"`, `"left"`, `"right"`. * `hide_window_when_unfocused` — Whether to hide the hotkey window when it loses focus. Type: boolean. * `keybinding` — Keyboard shortcut to toggle the hotkey window. Type: string or null. * `pin_screen` — Display to pin the hotkey window to. Type: string or object or null. Options: `"primary"`, `{ external = 1 }`, `null`. Window size percentages are configured per pin position: ```toml [global_hotkey.dedicated_window] enabled = true [global_hotkey.dedicated_window.settings] active_pin_position = "top" hide_window_when_unfocused = true keybinding = "ctrl-`" [global_hotkey.dedicated_window.settings.pin_position_to_size_percentages.top] width = 100 height = 30 [global_hotkey.dedicated_window.settings.pin_position_to_size_percentages.bottom] width = 100 height = 30 [global_hotkey.dedicated_window.settings.pin_position_to_size_percentages.left] width = 40 height = 100 [global_hotkey.dedicated_window.settings.pin_position_to_size_percentages.right] width = 40 height = 100 ```
# File and folder locations
Canonical page: [/terminal/settings/file-locations/](https://docs.warp.dev/terminal/settings/file-locations/)
> Reference for where Warp stores config, themes, tab configs, settings, keybindings, logs, and other files on macOS, Windows, and Linux.
This reference lists every directory and file Warp reads or writes on disk, organized by platform and Warp release channel. Use it when you want to back up your config, edit a file directly, debug a missing setting, or symlink Warp’s configuration from another shell (for example, [WSL](#symlinking-warps-config-from-wsl)). ## How Warp organizes files [Section titled “How Warp organizes files”](#how-warp-organizes-files) Warp groups its files into three buckets, and the directory each bucket maps to depends on your platform. Knowing the bucket explains why two files that feel related (themes and settings, for example) live in different roots on Windows and Linux but the same root on macOS. * **Portable user data** - Files you’d want to copy to a new machine, such as themes, tab configs, workflows, and launch configurations. * **Non-portable config** - Local-only configuration that doesn’t make sense to roam, such as `settings.toml` and `keybindings.yaml`. * **Non-portable state** - Machine-specific state like logs, the local database, and the Codebase Context index. In addition, a small set of cross-cutting files always live in your home directory on every platform — currently MCP server config and bundled skills. Both Stable and Preview share the same `~/.warp/` directory for these files (Preview does **not** use `~/.warp-preview/` for MCP config or skills, so installing Preview alongside Stable shares the same MCP servers and skills). Other release channels do use a channel-suffixed directory — for example, `~/.warp-oss/` for OSS. These files sit in the home directory so they’re easy to reference from shell config, version control, or other tools. ## File locations by platform [Section titled “File locations by platform”](#file-locations-by-platform) The tables below cover the **Stable** channel. For **Preview**, see [Preview channel paths](#preview-channel-paths). * macOS On macOS, Stable keeps every Warp-authored file under `~/.warp/`. Preview uses `~/.warp-preview/` for everything except the cross-platform `~/.warp/` carve-out. **Portable user data** * **Themes** - `~/.warp/themes/` * **Tab configs** - `~/.warp/tab_configs/` * **Default tab configs** (shipped, user-editable) - `~/.warp/default_tab_configs/` * **Workflows** (local) - `~/.warp/workflows/` * **Launch configurations** - `~/.warp/launch_configurations/` **Non-portable config** * **Settings file** - `~/.warp/settings.toml` * **Keybindings** - `~/.warp/keybindings.yaml` * **User preferences** (legacy) - macOS `defaults` domain `dev.warp.Warp-Stable` **Non-portable state** * **Logs** - `~/Library/Logs/warp.log*` * **Crash reports** - `~/Library/Logs/DiagnosticReports/` (Warp `.ips` files) * **Database, Codebase Context index, MCP logs** - `~/Library/Group Containers/2BBY89MBSN.dev.warp/Library/Application Support/dev.warp.Warp-Stable/` **Cross-platform (always in your home directory)** * **MCP server config** - `~/.warp/.mcp.json` * **Bundled skills** - `~/.warp/skills/` * **Agent config** - `~/.agents/` * Windows On Windows, Warp follows the platform conventions used by the [`directories`](https://docs.rs/directories) crate, which splits user data across `%APPDATA%` (Roaming) and `%LOCALAPPDATA%` (Local). Themes and tab configs are portable and live in Roaming, while settings, logs, and the local database are machine-specific and live in Local. Two separate `data\` directories exist as a result — one under each root — so check the full path when locating files. **Portable user data** (`%APPDATA%\warp\Warp\data\`, Roaming) * **Themes** - `%APPDATA%\warp\Warp\data\themes\` * **Tab configs** - `%APPDATA%\warp\Warp\data\tab_configs\` * **Default tab configs** (shipped, user-editable) - `%APPDATA%\warp\Warp\data\default_tab_configs\` * **Workflows** (local) - `%APPDATA%\warp\Warp\data\workflows\` * **Launch configurations** - `%APPDATA%\warp\Warp\data\launch_configurations\` **Non-portable config** (`%LOCALAPPDATA%\warp\Warp\config\`) * **Settings file** - `%LOCALAPPDATA%\warp\Warp\config\settings.toml` * **Keybindings** - `%LOCALAPPDATA%\warp\Warp\config\keybindings.yaml` * **User preferences** (legacy) - Windows Registry key `HKCU:\Software\Warp.dev\Warp` **Non-portable state** (`%LOCALAPPDATA%\warp\Warp\data\`) * **Logs** - `%LOCALAPPDATA%\warp\Warp\data\logs\warp.log*` * **Database, Codebase Context index, MCP logs** - other subdirectories under `%LOCALAPPDATA%\warp\Warp\data\` * **Cache** - `%LOCALAPPDATA%\warp\Warp\cache\` **Cross-platform (always in your home directory)** * **MCP server config** - `%USERPROFILE%\.warp\.mcp.json` * **Bundled skills** - `%USERPROFILE%\.warp\skills\` * **Agent config** - `%USERPROFILE%\.agents\` * Linux On Linux, Warp follows the [XDG Base Directory Specification](https://specifications.freedesktop.org/basedir-spec/basedir-spec-latest.html). Each path below uses the standard XDG environment variable with its default fallback. **Portable user data** (`${XDG_DATA_HOME:-$HOME/.local/share}/warp-terminal/`) * **Themes** - `${XDG_DATA_HOME:-$HOME/.local/share}/warp-terminal/themes/` * **Tab configs** - `${XDG_DATA_HOME:-$HOME/.local/share}/warp-terminal/tab_configs/` * **Default tab configs** (shipped, user-editable) - `${XDG_DATA_HOME:-$HOME/.local/share}/warp-terminal/default_tab_configs/` * **Workflows** (local) - `${XDG_DATA_HOME:-$HOME/.local/share}/warp-terminal/workflows/` * **Launch configurations** - `${XDG_DATA_HOME:-$HOME/.local/share}/warp-terminal/launch_configurations/` **Non-portable config** (`${XDG_CONFIG_HOME:-$HOME/.config}/warp-terminal/`) * **Settings file** - `${XDG_CONFIG_HOME:-$HOME/.config}/warp-terminal/settings.toml` * **Keybindings** - `${XDG_CONFIG_HOME:-$HOME/.config}/warp-terminal/keybindings.yaml` **Non-portable state** (`${XDG_STATE_HOME:-$HOME/.local/state}/warp-terminal/`) * **Logs** - `${XDG_STATE_HOME:-$HOME/.local/state}/warp-terminal/warp.log*` * **Database, Codebase Context index, MCP logs** - other files under `${XDG_STATE_HOME:-$HOME/.local/state}/warp-terminal/` * **Cache** - `${XDG_CACHE_HOME:-$HOME/.cache}/warp-terminal/` **Cross-platform (always in your home directory)** * **MCP server config** - `~/.warp/.mcp.json` * **Bundled skills** - `~/.warp/skills/` * **Agent config** - `~/.agents/` ## Preview channel paths [Section titled “Preview channel paths”](#preview-channel-paths) Preview uses a separate set of directories so it never overwrites your Stable config: * **macOS** - Replace `~/.warp/` with `~/.warp-preview/` and `Warp-Stable` with `Warp-Preview` in the macOS paths above. The cross-platform `~/.warp/` carve-out (MCP config, skills) is shared with Stable and does not get a `-preview` suffix. * **Windows** - Replace `\warp\Warp\` with `\warp\WarpPreview\` in every path. Logs become `%LOCALAPPDATA%\warp\WarpPreview\data\logs\warp_preview.log*`. The Registry key is `HKCU:\Software\Warp.dev\WarpPreview` (no hyphen — `Warp-Preview` is the macOS bundle identifier, not the Windows app name). The cross-platform `%USERPROFILE%\.warp\` carve-out (MCP config, skills) is shared with Stable. * **Linux** - Append `-preview` to each `warp-terminal` directory (for example, `~/.config/warp-terminal-preview/settings.toml`). Logs become `${XDG_STATE_HOME:-$HOME/.local/state}/warp-terminal-preview/warp_preview.log*`. The cross-platform `~/.warp/` carve-out (MCP config, skills) is shared with Stable. ## Symlinking Warp’s config from WSL [Section titled “Symlinking Warp’s config from WSL”](#symlinking-warps-config-from-wsl) If you run Warp on Windows and also use WSL, you can share Warp’s config with your WSL `$HOME` so that tools running inside WSL can read the same themes, tab configs, settings, MCP servers, and agent config. WSL `$HOME` (typically `/home/<wsl-user>/`) is a separate Linux filesystem from your Windows profile (`%USERPROFILE%`, typically `C:\Users\<Windows-user>\`), so `~/.warp/` and `~/.agents/` inside WSL are **not** automatically the same as the Windows-side directories with those names — every Warp directory you want to share needs its own symlink that points back to the Windows path. Your WSL Linux username (`$USER`) is also usually different from your Windows account name, so don’t assume `/mnt/c/Users/$USER` resolves to your Windows profile. Resolve `%USERPROFILE%` through `cmd.exe` and convert it with `wslpath` instead, then run the symlinks from a WSL shell: ```bash # Resolve the Windows %USERPROFILE% (e.g. C:\Users\Alex) into a WSL path # (e.g. /mnt/c/Users/Alex). Avoids hard-coding the Windows username or # assuming it matches your WSL $USER. WIN_HOME=$(wslpath "$(cmd.exe /C 'echo %USERPROFILE%' 2>/dev/null | tr -d '\r')") # Portable data: themes, tab configs, workflows, launch configurations (Roaming AppData). ln -s "$WIN_HOME/AppData/Roaming/warp/Warp/data" ~/.warp-windows-data # Local config: settings.toml, keybindings.yaml (Local AppData). ln -s "$WIN_HOME/AppData/Local/warp/Warp/config" ~/.warp-windows-config # Cross-platform carve-outs that live under Windows %USERPROFILE%: # MCP server config and bundled skills (Windows-side ~/.warp). ln -s "$WIN_HOME/.warp" ~/.warp # Agent config (Windows-side ~/.agents). ln -s "$WIN_HOME/.agents" ~/.agents ``` If `~/.warp` or `~/.agents` already exist in WSL, remove or back them up first — otherwise `ln` will create the link inside the existing directory instead of replacing it. If you prefer to hard-code the Windows username instead of using `wslpath`, find it from WSL with `cmd.exe /C 'echo %USERNAME%' 2>/dev/null | tr -d '\r'` and replace `$WIN_HOME` above with `/mnt/c/Users/<your-windows-username>`. ## Related pages [Section titled “Related pages”](#related-pages) * [Settings file](/terminal/settings/) - Format, hot-reload behavior, and common examples for `settings.toml`. * [All settings reference](/terminal/settings/all-settings/) - Every setting available in `settings.toml`, organized by section. * [Keyboard shortcuts](/getting-started/keyboard-shortcuts/) - How to view and remap shortcuts, including the `keybindings.yaml` file. * [Tab Configs](/terminal/windows/tab-configs/) - TOML format and schema for tab config files in `tab_configs/`. * [Custom themes](/terminal/appearance/custom-themes/) - YAML format and image conventions for themes in `themes/`. * [Uninstalling Warp](/support-and-community/troubleshooting-and-support/logging-out-and-uninstalling/) - Commands for removing all of these files when uninstalling.
# Warpify overview
Canonical page: [/terminal/warpify/](https://docs.warp.dev/terminal/warpify/)
> Warp support for Warpifying, or enabling Warp's features, in local or remote sessions.
1. [Subshells](/terminal/warpify/subshells/), Warp supports enabling Warp features in subshells for bash, zsh, and fish. 2. [SSH](/terminal/warpify/ssh/), Warp’s SSH extension brings the file tree, reliable completions, and native code diffs to remote macOS and Linux hosts. Legacy tmux-based Warpification is still available for clients that don’t yet ship the extension. 3. [SSH Legacy](/terminal/warpify/ssh-legacy/), Warp supports a legacy wrapper that enables Warp features in remote (SSH) sessions. ## Subshells [Section titled “Subshells”](#subshells) [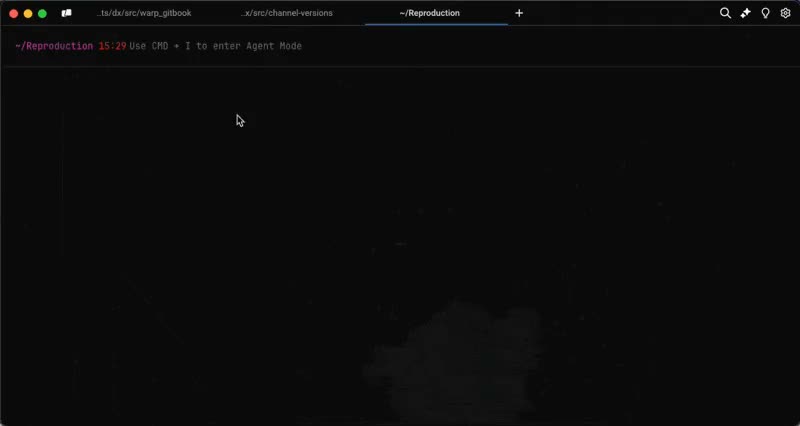](/assets/terminal/subshells-demo.mp4) ## SSH [Section titled “SSH”](#ssh) [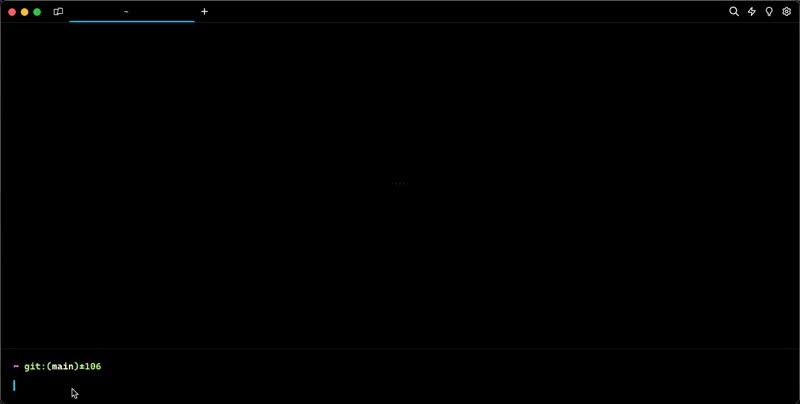](/assets/terminal/subshell-ssh-demo.mp4)
# SSH with Warp features
Canonical page: [/terminal/warpify/ssh/](https://docs.warp.dev/terminal/warpify/ssh/)
> Use Warp's SSH extension on remote macOS and Linux hosts to get a real file tree, reliable completions, and native code edits over SSH.
Warp’s **SSH extension** brings the local Warp experience to remote macOS and Linux hosts. After you opt in on first connect, you get a real file tree backed by the remote filesystem, more reliable completions over a single multiplexed SSH connection, and a coding agent that applies edits with Warp’s native diff tool instead of falling back to `sed`. [SSH extension demo](https://www.loom.com/embed/466d88a1968842c68f66a3b66b94f146) ## What you get over SSH [Section titled “What you get over SSH”](#what-you-get-over-ssh) Once the SSH extension is installed on a remote host, the following features work the same way they do locally: * **File tree (Project Explorer)** - The left panel reflects the remote project’s structure and updates as you `cd` between directories or change files. See [File Tree](/code/code-editor/file-tree/). * **Reliable completions and autosuggestions** - Generators run in parallel over a single multiplexed connection instead of opening a new SSH session per command, so completions stop hitting the remote host’s `MaxSessions` ceiling and stop occasionally injecting errors into your blocks. * **Native file reads and code diffs** - The Agent reads files and applies edits through Warp’s built-in diff tool. Code changes show up as inline diffs you can review and approve, instead of being applied via `sed` or other shell commands. See [Code diffs](/agent-platform/local-agents/code-diffs/). * **All core terminal features** - The input editor, blocks, command history, autosuggestions, and history search behave the same as in a local session. For a full breakdown of what works over SSH and what doesn’t, see [Feature support over SSH](/code/ssh-feature-support/). 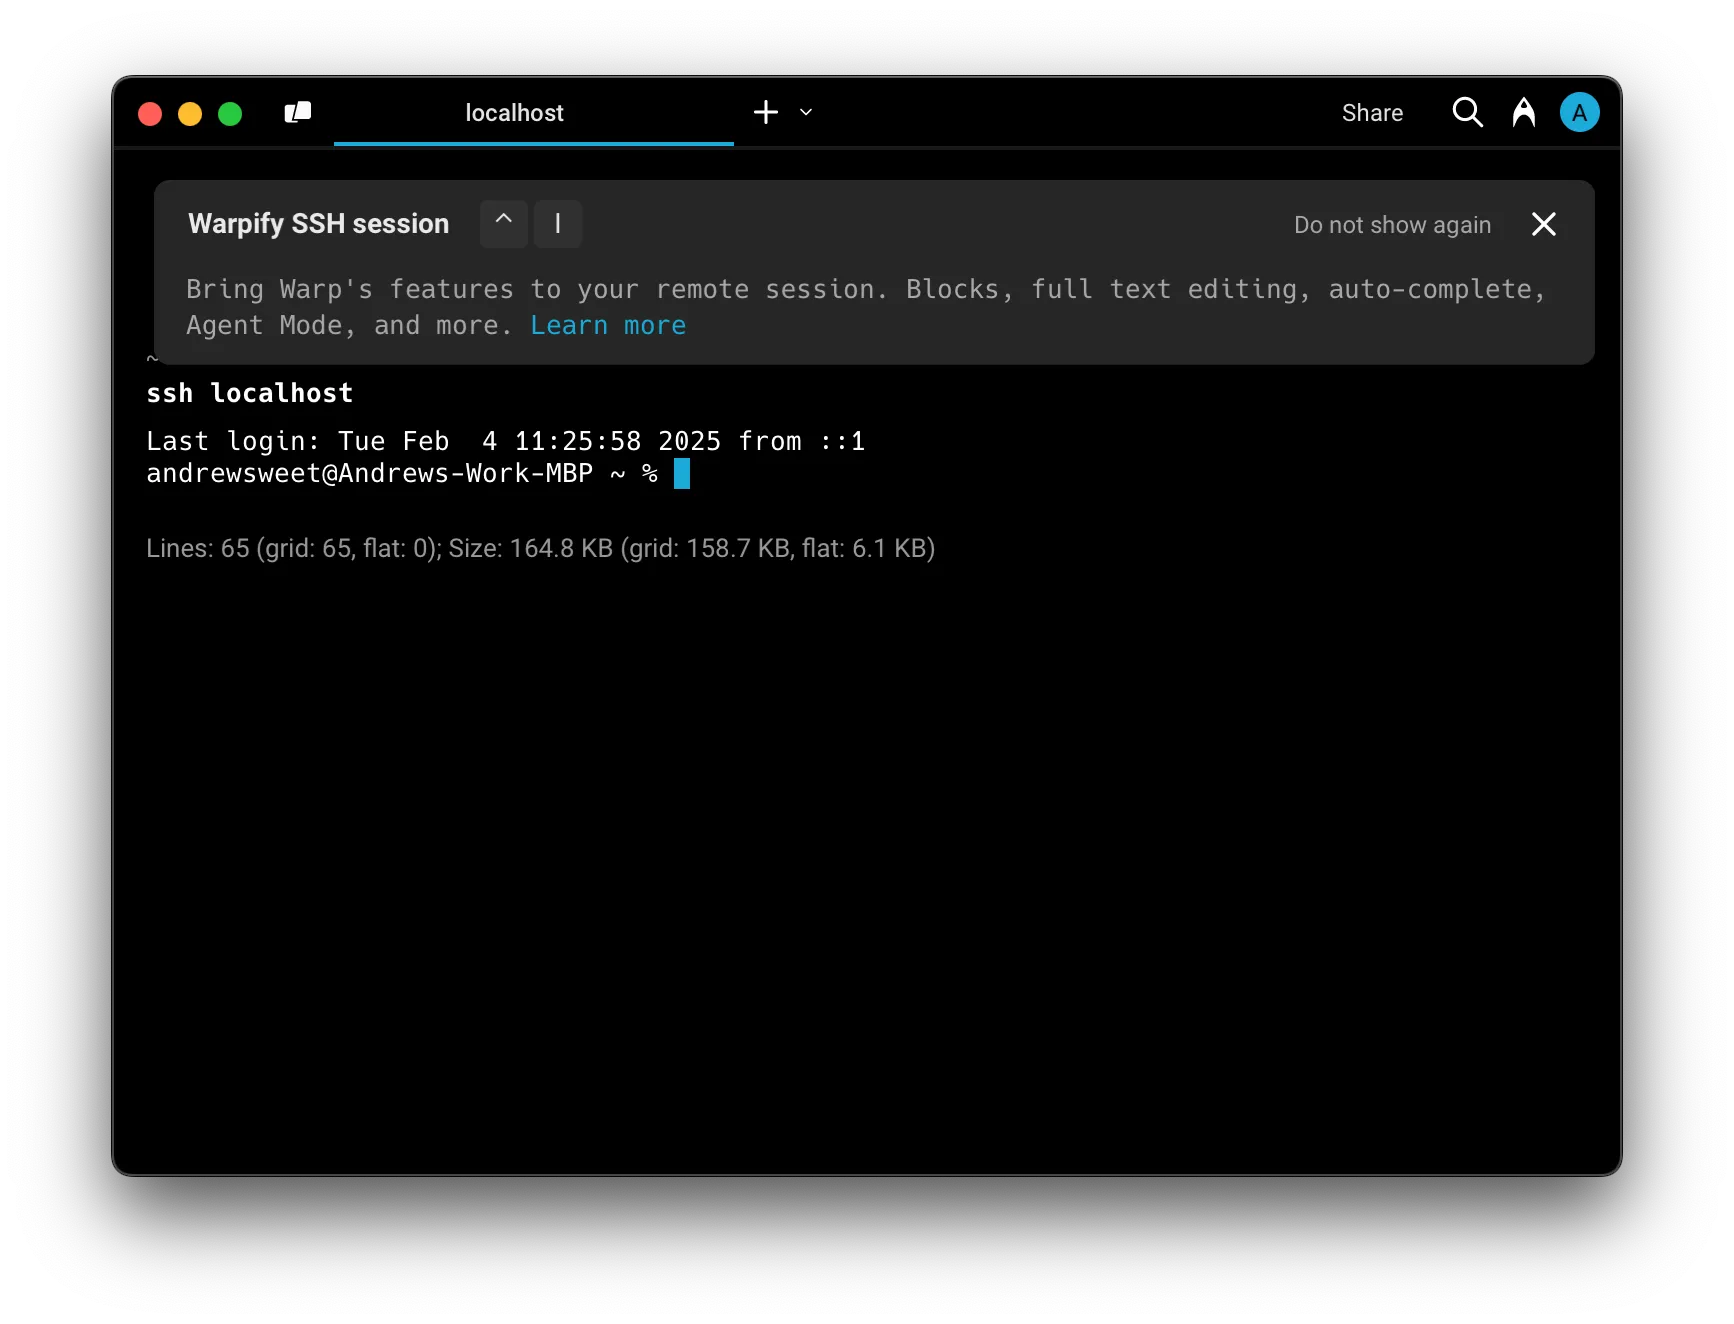 ## Installing the SSH extension [Section titled “Installing the SSH extension”](#installing-the-ssh-extension) On the first SSH connection to a host that doesn’t already have the SSH extension installed, Warp shows an in-block prompt with two options: * **Install Warp’s SSH extension** - Recommended. Warp downloads the matching remote server extension for the remote OS and architecture, installs it under `~/.warp/remote-server` (or `~/.warp-preview/remote-server` on Preview builds), launches it, and completes the handshake. Subsequent connections to the same host skip the prompt and reuse the installed binary. * **Continue without installing** - Skip installing the extension for this connection. The session continues without the SSH extension, so file tree, native file reads, and native code diffs are unavailable until you install. You can reconnect and install at any time. Warp never installs anything on a remote host without your explicit consent, and the install only writes under `~/.warp*/`. ### Managing the install prompt [Section titled “Managing the install prompt”](#managing-the-install-prompt) In the Warp app, go to **Settings** > **Warpify** to control how the prompt behaves: * **Always ask** (default) - Show the install prompt the first time you connect to each host. * **Always install** - Skip the prompt and install the extension automatically when it’s missing. * **Never install** - Skip the prompt and connect to the host without installing the SSH extension. The same setting can also be changed inline from the install prompt by selecting **Don’t ask me this again** before clicking either button. The underlying TOML key is `warpify.ssh.ssh_extension_install_mode` - see [All settings reference](/terminal/settings/all-settings/#ssh) for the full list of SSH-related settings, including `ssh_hosts_denylist` for hosts you never want to engage Warpification on. ## Legacy: tmux-based Warpification [Section titled “Legacy: tmux-based Warpification”](#legacy-tmux-based-warpification) Caution Tmux-based Warpification is a legacy alternative to the SSH extension and is being deprecated. Use the SSH extension above whenever possible. Tmux-based Warpification remains available today for clients that don’t yet ship the SSH extension (for example, Windows clients). Tmux-based Warpification is an older approach to enabling Warp features in SSH sessions. It uses [`tmux`](#why-do-i-need-tmux-on-the-remote-machine) to multiplex commands over your SSH connection and provides Blocks, completions, the input editor, and history search. ### FAQs [Section titled “FAQs”](#faqs) #### Will Warpifying a remote SSH session make changes to the remote machine? [Section titled “Will Warpifying a remote SSH session make changes to the remote machine?”](#will-warpifying-a-remote-ssh-session-make-changes-to-the-remote-machine) Only with your explicit permission. The SSH extension installs the remote server extension under `~/.warp*/remote-server`. Legacy tmux-based Warpification installs [`tmux`](#why-do-i-need-tmux-on-the-remote-machine) (a popular open source terminal multiplexer) if it isn’t already present. Both flows show you exactly what they’re going to run, and you can always decline and continue using SSH without these features. #### Why do I need `tmux` on the remote machine? [Section titled “Why do I need tmux on the remote machine?”](#why-do-i-need-tmux-on-the-remote-machine) `tmux` is only required by the legacy tmux-based Warpification path; the SSH extension does not need it. [tmux](https://github.com/tmux/tmux/wiki) is a popular open source terminal multiplexer that lets you run multiple sessions within one SSH connection. It requires minimal permissions and is widely adopted (⭐ 35k+ on GitHub). The legacy path uses [tmux Control Mode](https://github.com/tmux/tmux/wiki/Control-Mode) to run ad-hoc background tasks like autocompleting a `cd` command or populating the contents of a custom prompt. The SSH extension supersedes this by speaking a length-delimited protocol over a single SSH connection. #### Can I SSH to remote machines that I don’t want to Warpify? [Section titled “Can I SSH to remote machines that I don’t want to Warpify?”](#can-i-ssh-to-remote-machines-that-i-dont-want-to-warpify) Yes. Cancel the prompt to continue without Warp features, or add the host to the denylist (**Settings** > **Warpify** > **SSH hosts denylist**) so you’re never prompted again. #### Do I have to manually Warpify every time? [Section titled “Do I have to manually Warpify every time?”](#do-i-have-to-manually-warpify-every-time) After you successfully Warpify an SSH connection manually, Warp provides a brief script you can run to append a marker at the end of your shell’s rcfile. This lets Warp know when your remote shell is ready to be Warpified. Place the snippet at the bottom of your rcfile for the best results. 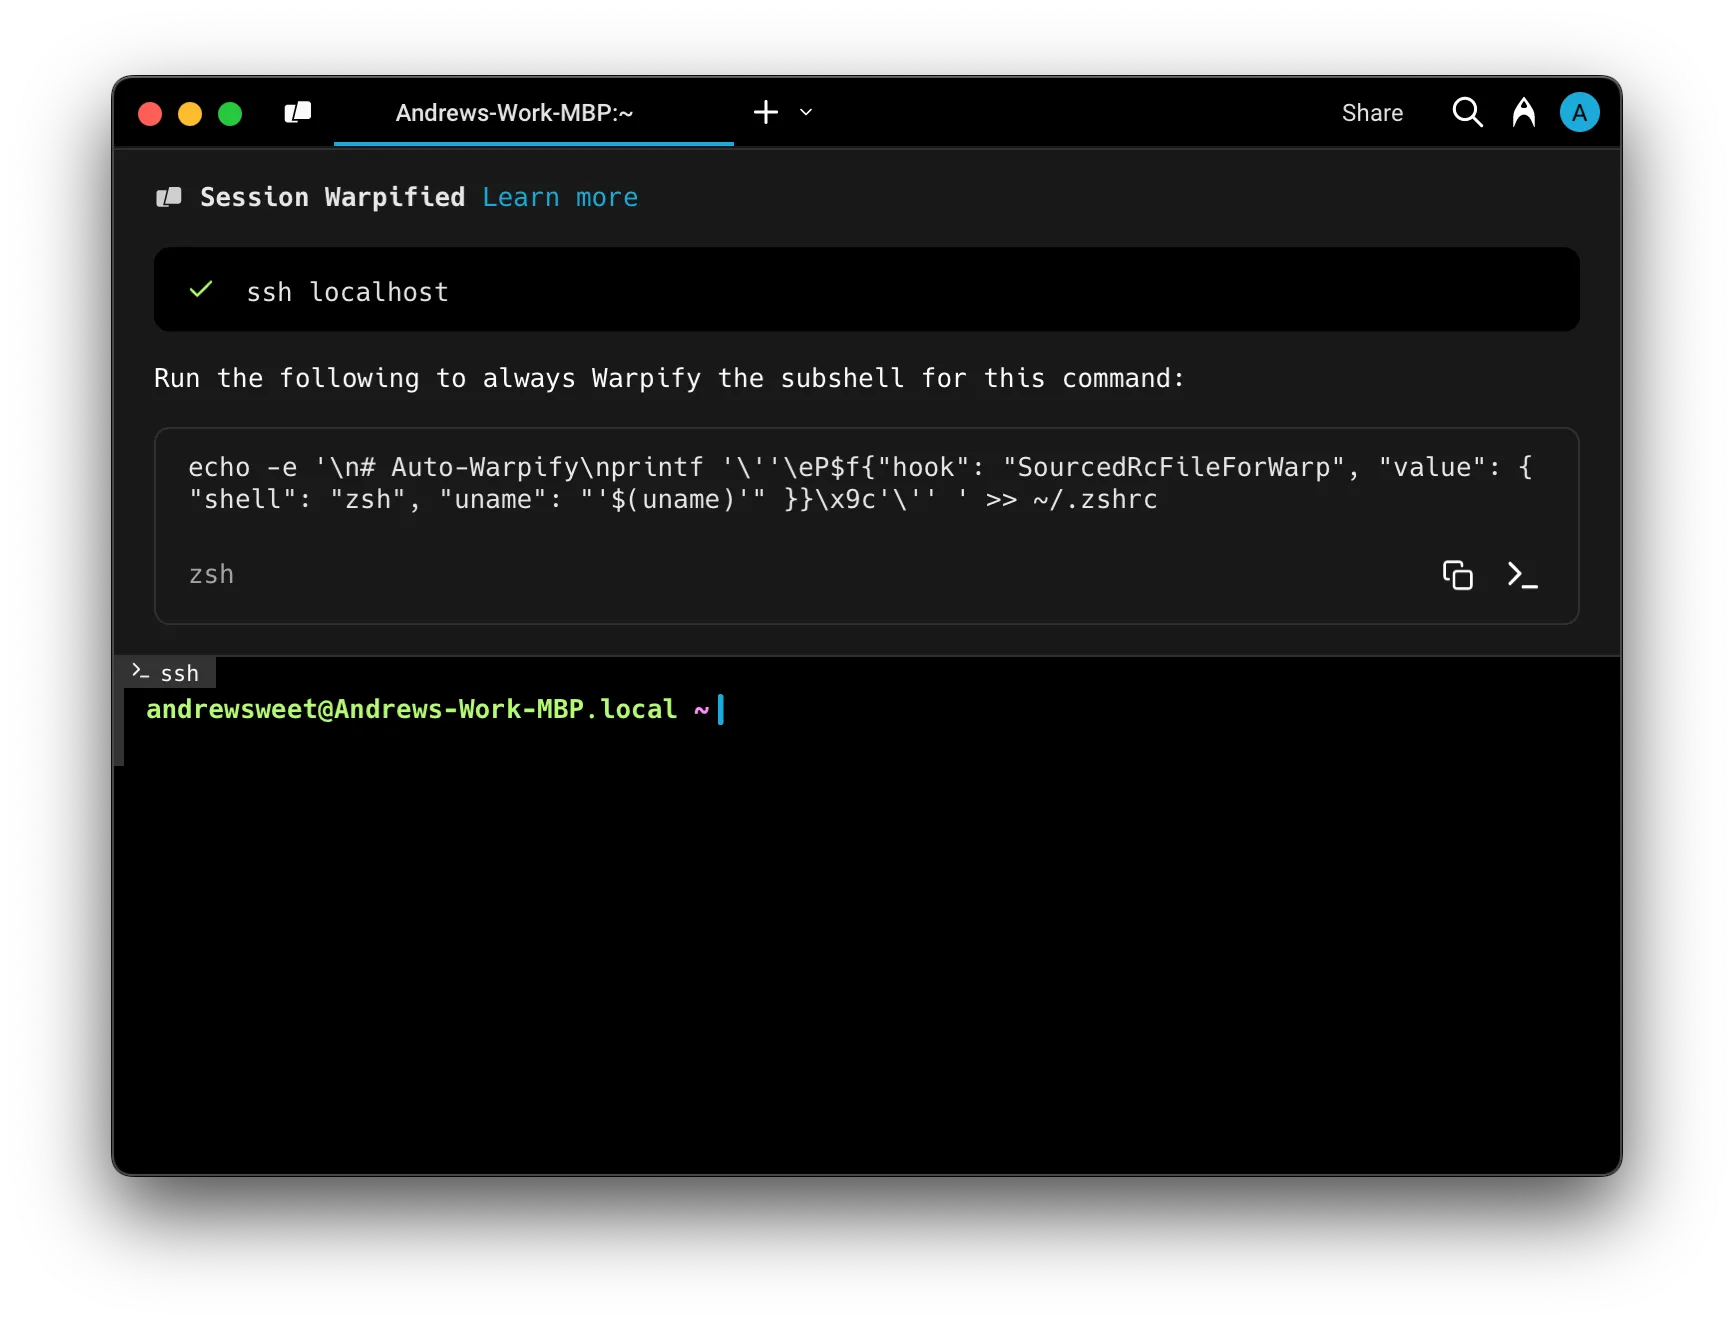 #### What shells and operating systems are supported? [Section titled “What shells and operating systems are supported?”](#what-shells-and-operating-systems-are-supported) Warp supports macOS and most flavors of Linux as remote hosts on both the SSH extension and legacy tmux-based Warpification. Supported shells are `bash` and `zsh`. Windows remote hosts are not yet supported. #### What if Warp fails to detect my SSH session? [Section titled “What if Warp fails to detect my SSH session?”](#what-if-warp-fails-to-detect-my-ssh-session) If you’re in a remote SSH session and Warp didn’t detect it, you can manually Warpify by opening the [Command Palette](/terminal/command-palette/) and searching for “Warpify SSH Session”. #### What triggers SSH session detection for Warpification? [Section titled “What triggers SSH session detection for Warpification?”](#what-triggers-ssh-session-detection-for-warpification) With SSH session detection enabled, Warp watches for `ssh` commands whose arguments suggest an interactive session. If you’ve aliased `ssh` or are running it as part of a script, Warp won’t perform SSH session detection. Once Warp is confident you’ve successfully authenticated (by detecting `Last login:` or something resembling a basic prompt), it prompts you to Warpify the active SSH session. If SSH session detection doesn’t pick up your session, you can still [Warpify manually](#what-if-warp-fails-to-detect-my-ssh-session).
# Legacy SSH wrapper
Canonical page: [/terminal/warpify/ssh-legacy/](https://docs.warp.dev/terminal/warpify/ssh-legacy/)
> Legacy SSH wrapper that bootstraps Warp features on remote machines without tmux.
When you SSH into a remote box, you get all the features of Warp without any configuration on your part. The input editor, auto-completions, and history search work the same, regardless of machine. Caution [Limitations of SSH](https://github.com/warpdotdev/Warp/issues/578) (as of May 2024): * The SSH Wrapper only supports `bash` or `zsh` shells in remote sessions. * If you’re using a different shell, you’ll want to use `command ssh` directly (see below for more details). * For zsh, xxd is required to bootstrap warp. * For Windows, [Cygwin](https://www.cygwin.com/) is required to bootstrap the SSH Wrapper. * RemoteCommand causes the ssh wrapper to fail. * [Tmux is not currently supported.](https://github.com/warpdotdev/Warp/discussions/501)  ## Implementation [Section titled “Implementation”](#implementation) We create a wrapper (around `/usr/bin/ssh`) to set up the shell for Warp’s feature set. We authenticate normally using `/usr/bin/ssh`, and bootstrap the remote shell to work with Warp Blocks and the Input Editor. You can opt out of this functionality by invoking `command ssh` directly. * Warp takes over the prompt which enables us to build a modern input editor. * Warp configures histcontrol to ignore commands with leading spaces. We do this so our bootstrapping code does not clutter the history. You can see the SSH wrapper by using `which warp_ssh_helper` in zsh, `type warp_ssh_helper` in bash. *Note:* The ssh wrapper is only *initialized* on your local machine. We don’t currently support bootstrapping nested ssh sessions. ## Troubleshooting SSH [Section titled “Troubleshooting SSH”](#troubleshooting-ssh) ### channel 2: open failed: connect failed: open failed [Section titled “channel 2: open failed: connect failed: open failed”](#channel-2-open-failed-connect-failed-open-failed) If you’re seeing these errors, you may have some config on your server (usually in `/etc/ssh/sshd_config`) preventing Warp’s ControlMaster connection from working. In this state, completions that require information from your remote host won’t work and your history also won’t work. You should ensure that `MaxSessions` is either commented out or is at least `2`. Write access in `/etc/ssh/` typically requires sudo access. After any edits, you’d also need to restart the `sshd` daemon. ### SSH Wrapper fails [Section titled “SSH Wrapper fails”](#ssh-wrapper-fails) There are several [known issues with SSH Wrapper](https://github.com/warpdotdev/Warp/issues?q=is%3Aissue+is%3Aopen+sort%3Acreated-desc+label%3ABugs+label%3ASSH). As a workaround to the SSH Wrapper, you can add `command ssh` to your **Settings** > **Warpify** > **Subshells** > **Added commands**, then run `command ssh <user@server>` to connect to a remote session, this will attempt to enable Warp features as a [subshell](/terminal/warpify/subshells/). [](/assets/terminal/subshell-ssh-demo.mp4)
# Warpify subshells
Canonical page: [/terminal/warpify/subshells/](https://docs.warp.dev/terminal/warpify/subshells/)
> Warpify subshells in bash, zsh, and fish to get Warp features in nested sessions.
## What is a subshell? [Section titled “What is a subshell?”](#what-is-a-subshell) Within the context of Warp, a “subshell” is defined as any nested interactive shell session that’s spawned and running within the context of an existing, running shell. This can be a nested session running locally on your machine, a shell session running within a Docker container, or a remote server accessed through SSH. [See more on SSH Warpification](/terminal/warpify/ssh/). Note that Warp’s definition of a subshell differs from the more common definition of a Unix subshell, which typically refers to any shell process spawned as a child of the interactive shell. For example, in bash, a command wrapped in parentheses is executed in a subshell with its own PID and addressable memory space. ## How to Warpify the subshell [Section titled “How to Warpify the subshell”](#how-to-warpify-the-subshell) By default, Warp automatically recognizes the following commands as **subshell-compatible**: * bash, fish, zsh * docker exec * gcloud compute ssh * eb ssh * poetry shell When you run a command that’s subshell-compatible, Warp will prompt you and invite you to “Warpify” the subshell which makes all of the modern IDE features of Warp available in that subshell. The list of subshell-compatible commands is configurable in Subshell settings as described [below](/terminal/warpify/subshells/#configuring-subshell-compatible-commands). [](/assets/terminal/subshells-demo.mp4) ### Configuring subshell-compatible commands [Section titled “Configuring subshell-compatible commands”](#configuring-subshell-compatible-commands) To configure subshell-compatible commands, navigate to **Settings** > **Warpify** > **Subshells**. #### Adding compatible commands [Section titled “Adding compatible commands”](#adding-compatible-commands) You can add any command that spawns a bash, fish, or zsh subshell to ‘Added commands’ to make it eligible for “Warpification.” Furthermore, you can add regular expressions to the Added commands list. Any commands that match an added regex will be eligible for “Warpification.” #### Blocklisting commands [Section titled “Blocklisting commands”](#blocklisting-commands) Some types of subshells are not compatible, and you may also want to control Warp so it never invites you to “Warpify” the subshells for specific commands. When you add commands to the Blocklist, Warp will never invite you to “Warpify” subshells spawned by those commands. ### Automatically “Warpify” subshells [Section titled “Automatically “Warpify” subshells”](#automatically-warpify-subshells) To remember your preferences for a command and bypass the confirmation banner, you can manually paste the appropriate snippet to the end of the RC file corresponding to your subshell (bash, fish, or zsh). ```bash # For zsh subshells, add to ~/.zshrc. printf '\eP$f{"hook": "SourcedRcFileForWarp", "value": { "shell": "zsh"}}\x9c' # For bash subshells, add to ~/.bashrc or ~/.bash_profile. printf '\eP$f{"hook": "SourcedRcFileForWarp", "value": { "shell": "bash"}}\x9c' # For fish subshells, add to ~/.config/fish/config.fish. if status is-interactive printf '\eP$f{"hook": "SourcedRcFileForWarp", "value": { "shell": "fish"}}\x9c' end ``` Once added, Warp will automatically “Warpify” subsequent subshell sessions for the corresponding shell on the machine with the newly updated RC file. Under the hood, this snippet prints a Device Control String ([DCS](https://vt100.net/docs/vt510-rm/chapter4.html)) to be read by Warp, signaling that a subshell session has started and is ready to be “Warpified.” In turn, Warp executes a setup script in the session that enables the full suite of Warp features like blocks, completions, and the input editor. For this reason, it’s best to ensure the snippet is added to the end of the RC file, so Warp does not attempt to execute the setup script before the shell has finished sourcing your RC file. To disable automatic integration, remove the snippet from the corresponding RC file. If you encounter issues in subshell sessions where the RC file is sourced, [file a GitHub issue](https://github.com/warpdotdev/Warp/issues/new/choose). ## Background commands [Section titled “Background commands”](#background-commands) Warp runs background commands to power useful features like completions, syntax highlighting, and command corrections. For example, to provide completions for git checkout, Warp runs a background command that lists all git branches in the current repo. In local subshell sessions, these commands are run in forked shell processes, isolated from your interactive shell session. This is the same implementation used for any non-subshell session. In remote sessions, however, Warp takes a different approach – while a forked shell process is running on your local machine (where the Warp app is running), your remote session might be running on a server elsewhere. In these cases, Warp takes advantage of the session’s “idle time” – when no command is currently running – to run background commands directly in the session itself. These commands are executed in a non-interactive subshell process to prevent modifications to the session state (they cannot modify an environment variable, for instance). ### Show/hide background blocks [Section titled “Show/hide background blocks”](#showhide-background-blocks) By default, blocks for background commands are hidden. To show background command blocks, select ‘Show background blocks’ in the ‘Blocks’ menu of the macOS menu bar. ### Disable background commands in remote sessions [Section titled “Disable background commands in remote sessions”](#disable-background-commands-in-remote-sessions) We understand that some developers may want to disable background commands for certain or all environments. To disable background commands in remote subshell sessions, you can execute the following command in a top-level terminal session: * macOS Update the settings defaults located in `dev.warp.Warp-Stable` to include the following name-value pair: `"DisableInBandCommands": "true"`. ```bash defaults update dev.warp.Warp-Stable DisableInBandCommands true ``` * Windows Update the settings registry located at `HKCU:\Software\Warp.dev\Warp` to include the following name-value pair: `"DisableInBandCommands": "true"`. ```powershell Set-ItemProperty -Path "HKCU:\SOFTWARE\Warp.dev\Warp" -Name DisableInBandCommands -Value true ``` * Linux Update the settings file located at `~/.config/warp-terminal/user_preferences.json` to include the following name-value pair: `"DisableInBandCommands": "true"`. ```bash cd ~/.config/warp-terminal/ jq '.prefs += {"DisableInBandCommands": "true"}' user_preferences.json > tmp.json && mv tmp.json user_preferences.json ``` This will effectively disable tab completions, syntax highlighting, command corrections, and the git status prompt indicator in remote subshells.
# Windows and tabs overview
Canonical page: [/terminal/windows/](https://docs.warp.dev/terminal/windows/)
> Manage Warp windows, tabs, vertical tabs, split panes, and tab configurations with global hotkeys and reusable layouts.
1. [Tabs](/terminal/windows/tabs/) allow you to organize a window into multiple terminal sessions. 2. [Vertical Tabs](/terminal/windows/vertical-tabs/) replace the horizontal tab bar with a sidebar that shows rich metadata and drag-and-drop management for every tab and pane. 3. [Split Panes](/terminal/windows/split-panes/) allows you to divide a Tab into multiple rectangular *panes*, each of which is a unique terminal session. 4. [Tab Configs](/terminal/windows/tab-configs/) let you define reusable tab setups in a simple TOML file 5. [Global Hotkey](/terminal/windows/global-hotkey/) is a configurable shortcut that can show/hide a dedicated window or all windows on your chosen desktop regardless of whether the app is focused. 6. [Launch Configurations (Legacy)](/terminal/sessions/launch-configurations/) support saving a configuration of windows, tabs, and panes to open later. ## Tabs [Section titled “Tabs”](#tabs) [Tabs Demo](https://www.loom.com/embed/84d15cc7eb5a4a668bb86be9e827f261) ## Split Panes [Section titled “Split Panes”](#split-panes) [Split Panes Demo](https://www.loom.com/embed/c1104b51cab848a9bef6792ec4fd8421) ## Global Hotkey [Section titled “Global Hotkey”](#global-hotkey) [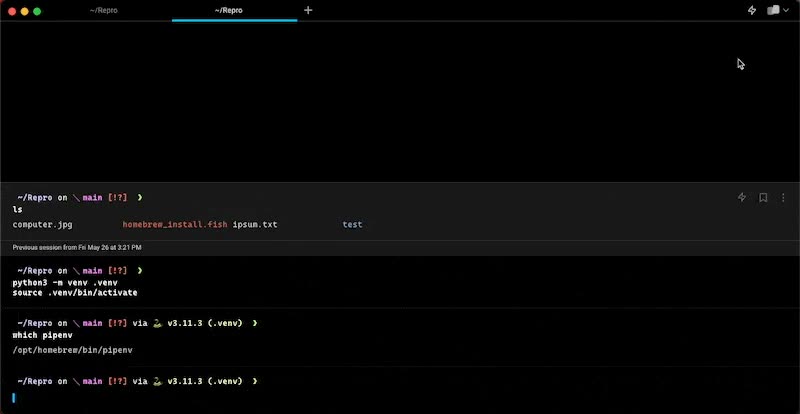](/assets/terminal/Dedicated-Window.mp4) [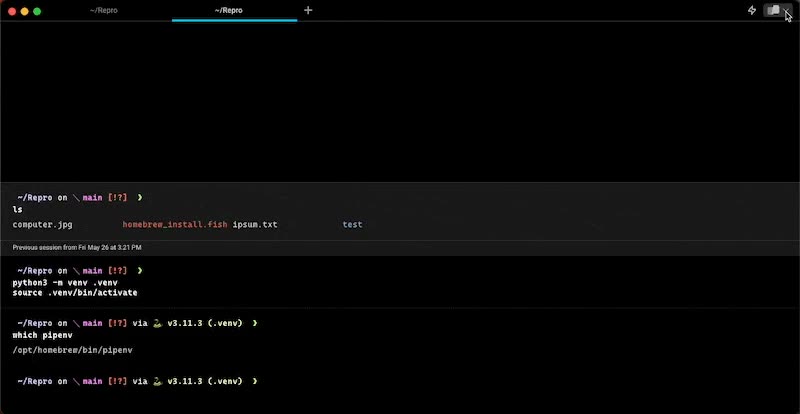](/assets/terminal/Show-Hide-All-Windows.mp4)
# Configurable toolbar
Canonical page: [/terminal/windows/configurable-toolbar/](https://docs.warp.dev/terminal/windows/configurable-toolbar/)
> Reorder, hide, and move panel toggle buttons between the left and right sides of Warp's header toolbar to match your workflow.
The header toolbar holds the panel toggle buttons for the tabs panel, tools panel, agent management, Code Review, and notifications mailbox. Instead of a fixed layout, you can rearrange these buttons, move them between the left and right sides of the header, or hide the ones you don’t use. The side a button lives on also determines which side of the window its panel opens on, so you can tune Warp’s layout to match how you work. The configurable toolbar works with both [horizontal tabs](/terminal/windows/tabs/) and [vertical tabs](/terminal/windows/vertical-tabs/). [Configurable toolbar demo](https://www.loom.com/embed/292d126ecf7148f296fc8685e451790f) ## Key features [Section titled “Key features”](#key-features) * **Reorder items within a side** - Drag toolbar chips to change the left-to-right order on either side of the header. * **Move items across sides** - Drag a chip between the left and right drop zones to move its button (and the panel it opens) to the other side of the window. * **Hide items you don’t need** - Remove a chip from both sides to hide the button. Removed items become available again, so you can drop them back in later. * **Side placement drives panel side** - Moving the tools panel, tabs panel, or code review button flips the corresponding panel to open from the same side, with resize handles, borders, and anchored popups following along. * **Persistent across sessions** - Your layout is saved to settings and survives app restarts. ## Configurable items [Section titled “Configurable items”](#configurable-items) The following header buttons can be rearranged or hidden: * **Tabs panel** - Toggles the [vertical tabs](/terminal/windows/vertical-tabs/) sidebar. * **Tools panel** - Toggles the panel that contains the project explorer, global search, [Warp Drive](/knowledge-and-collaboration/warp-drive/), and conversation history. * **Agent management** - Toggles the agent management view for [cloud agents](/agent-platform/cloud-agents/managing-cloud-agents/). * **Code review** - Toggles the [Code Review](/code/code-review/) panel. * **Notifications mailbox** - Toggles the [agent notifications](/agent-platform/capabilities/agent-notifications/) mailbox. The search bar and profile avatar are fixed and can’t be repositioned. An item only appears in the toolbar when its prerequisites are met. For example, the tabs panel button requires [vertical tabs](/terminal/windows/vertical-tabs/) to be enabled, and agent management requires Agent Mode to be enabled. If an item’s prerequisite becomes unavailable later, the button disappears but your saved layout is preserved, so the button reappears once the prerequisite is met again. ## Default layout [Section titled “Default layout”](#default-layout) The default layout matches Warp’s standard header: * **Left** - Tabs panel, tools panel, agent management. * **Right** - Code review, notifications mailbox. ## Editing the toolbar [Section titled “Editing the toolbar”](#editing-the-toolbar) You can open the toolbar editor from the header or from Settings. ### From the header [Section titled “From the header”](#from-the-header) Right-click any toolbar button (or any empty space between the buttons and the search bar) and select **Rearrange toolbar items**. The configurator modal opens. ### From Settings [Section titled “From Settings”](#from-settings) 1. In the Warp app, navigate to **Settings** > **Appearance** > **Tabs**. 2. Click **Edit toolbar**. ## How side placement affects panels [Section titled “How side placement affects panels”](#how-side-placement-affects-panels) Moving a button to the opposite side also moves where its panel opens, and Warp flips associated UI to stay readable: * **Tabs panel** - Opens its sidebar on whichever side its button sits. The hover detail sidecar, action buttons, and right-click menu flip to face the center of the screen. * **Tools panel** - Opens on the side its button sits. Warp Drive hover previews, kebab menus, and dialogs flip toward the center. The resize handle and border switch to the edge facing the main content. * **Code review** - Opens on the side its button sits, with a matching resize handle. * **Agent management** - Replaces the main content area when opened, so side placement only affects the button’s position, not where the view renders. * **Notifications mailbox** - The popover anchors under its button, and notification toasts appear on the same side as the mailbox button. When multiple panels are open on the same side, they render in the order their buttons appear in the toolbar. For example, if the left-side order is code review, tabs panel, tools panel, the panels open in that same order from left to right, with the main content to their right. ## Related pages [Section titled “Related pages”](#related-pages) * [Vertical tabs](/terminal/windows/vertical-tabs/) - The sidebar toggled by the tabs panel button. * [Code Review panel](/code/code-review/) - The panel toggled by the code review button. * [Agent notifications](/agent-platform/capabilities/agent-notifications/) - The mailbox toggled by the notifications button. * [Managing cloud agents](/agent-platform/cloud-agents/managing-cloud-agents/) - The view toggled by the agent management button. * [Warp Drive](/knowledge-and-collaboration/warp-drive/) - One of the views available in the tools panel.
# Global Hotkey
Canonical page: [/terminal/windows/global-hotkey/](https://docs.warp.dev/terminal/windows/global-hotkey/)
> Show or hide Warp instantly with a global hotkey, including a dedicated Quake-style drop-down window.
Caution On Linux, the Global Hotkey may not work for some X11 window managers that do not implement [Extended Window Manager Hints](https://en.wikipedia.org/wiki/Extended_Window_Manager_Hints). Some examples include: [sowm](https://github.com/dylanaraps/sowm), [catwm](https://github.com/pyknite/catwm), [Fvwm](https://www.fvwm.org/), [dwm](https://dwm.suckless.org/), [2bWM](https://github.com/venam/2bwm), [monsterwm](https://github.com/c00kiemon5ter/monsterwm), [TinyWM](https://github.com/mackstann/tinywm), [x11fs](https://github.com/sdhand/x11fs), [XMonad](https://xmonad.org/) ## How to access it [Section titled “How to access it”](#how-to-access-it) ### Dedicated window [Section titled “Dedicated window”](#dedicated-window) Dedicated Window allows you to customize the windows’ pinned position and its width and height ratio relative to your active screen size (also known as Quake Mode). 1. Open **Settings** > **Features** > **Keys** and select “Dedicated hotkey window” from the Global Hotkey dropdown to enable the feature. 2. Configure the keybinding, the windows position, screen, and relative size or uncheck “Autohides on the loss of keyboard focus” which will cause the dedicated Hotkey Window to stay on top when triggered regardless of mouse or keyboard focus. Caution On Linux and Windows, Warp does not support the “Autohides on the loss of keyboard focus” feature. ### Show/hide all windows [Section titled “Show/hide all windows”](#showhide-all-windows) Show/Hide All Windows allows you to configure a shortcut to show/hide all Warp windows. 1. Open **Settings** > **Features** > **Keys** and select “Show/hide all windows” from the Global Hotkey dropdown to enable the feature. 2. Configure your preferred keybinding. Caution On Linux, hidden windows may not appear in your `ALT-TAB` window switcher menu. Furthermore, the ordering of windows beyond the top window may change after toggling. ## How it works [Section titled “How it works”](#how-it-works) [](/assets/terminal/Dedicated-Window.mp4) [](/assets/terminal/Show-Hide-All-Windows.mp4) ## Troubleshooting hotkey dedicated window [Section titled “Troubleshooting hotkey dedicated window”](#troubleshooting-hotkey-dedicated-window) Review platform-specific instructions for troubleshooting the global hotkey below * macOS If the keybinding doesn’t work, check under `System Preferences > Security & Privacy > Accessibility` and tick the checkbox to grant Warp access. * Windows On Windows, there are no known issues with Global Hotkey Dedicated Window. If you find an issue, please [send feedback](/support-and-community/troubleshooting-and-support/sending-us-feedback/) to let us know. * Linux The hotkey window may appear on the incorrect monitor under certain window sizes. For example, with GNOME, if the hotkey window is supposed to show on a monitor having the taskbar (GNOME Panel), and the window height is 100%, causing an overlap, the hotkey window may fallback to showing on an external monitor if you have one. Try working around this by setting a window height to a lesser percentage, e.g. 90%.
# Split panes
Canonical page: [/terminal/windows/split-panes/](https://docs.warp.dev/terminal/windows/split-panes/)
> The split panes feature allows you to divide a tab into multiple rectangular panes, each of which is a unique terminal session.
## How to use split panes [Section titled “How to use split panes”](#how-to-use-split-panes) * macOS * Split panes to the right / down with `CMD-D` / `SHIFT-CMD-D` or in any direction by right-clicking on any Pane. * Activate the Previous / Next Pane with `CMD-[` / `CMD-]` or by clicking a pane. * Navigate among split panes with `OPT-CMD-ARROW`, the active pane will be marked with a triangle in the top corner. * Toggle Maximize Pane with `CMD-SHIFT-ENTER`. * Close the active Pane with `CMD-W`. * You can also drag and drop panes. Click and drag a Pane’s header around a given tab, drag the Pane to the tab bar to move it to another Tab, or make it into a Tab. * Windows * Split Panes to the right / down with `CTRL-SHIFT-D` / `CTRL-SHIFT-E` or in any direction by right-clicking on any Pane. * Activate the Previous / Next Pane with `CTRL-SHIFT-{` / `CTRL-SHIFT-}` or by clicking a pane. * Navigate among Split Panes with `CTRL-ALT-ARROW`, the active pane will be marked with a triangle in the top corner. * Toggle Maximize Pane with `CTRL-SHIFT-ENTER`. * Close the active Pane with `CTRL-SHIFT-W`. * You can also drag and drop panes. Click and drag a Pane’s header around a given tab, drag the Pane to the tab bar to move it to another Tab, or make it into a Tab. * Linux * Split Panes to the right / down with `CTRL-SHIFT-D` / `CTRL-SHIFT-E` or in any direction by right-clicking on any Pane. * Activate the Previous / Next Pane with `CTRL-SHIFT-{` / `CTRL-SHIFT-}` or by clicking a pane. * Navigate among Split Panes with `CTRL-ALT-ARROW`, the active pane will be marked with a triangle in the top corner. * Toggle Maximize Pane with `CTRL-SHIFT-ENTER`. * Close the active Pane with `CTRL-SHIFT-W`. * You can also drag and drop panes. Click and drag a Pane’s header around a given tab, drag the Pane to the tab bar to move it to another Tab, or make it into a Tab. ### CTRL-TAB behavior [Section titled “CTRL-TAB behavior”](#ctrl-tab-behavior) `CTRL-TAB` shortcut defaults to activate the previous / next [Tabs](/terminal/windows/tabs/). You can configure the shortcut to cycle the most recent session, including any split panes, in **Settings** > **Features** > **Keys** > **Ctrl-Tab behavior** ## How split panes work [Section titled “How split panes work”](#how-split-panes-work) [Split Panes Demo](https://www.loom.com/embed/c1104b51cab848a9bef6792ec4fd8421) [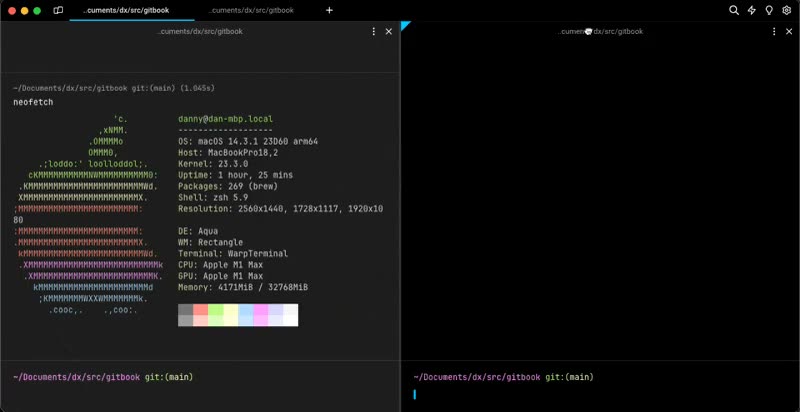](/assets/terminal/split-panes-dragging-demo.mp4)
# Tab Configs
Canonical page: [/terminal/windows/tab-configs/](https://docs.warp.dev/terminal/windows/tab-configs/)
> Tab Configs let you define reusable tab setups — including directory, startup commands, pane layout, shell, and theme — in a simple TOML file.
Tab Configs let you define reusable tab setups — including directory, startup commands, pane layout, shell, and theme — in a simple TOML file. Select a Tab Config from the `+` menu to open a fully configured tab with a single click.  ## How Tab Configs work [Section titled “How Tab Configs work”](#how-tab-configs-work) Each Tab Config is a `.toml` file stored in Warp’s `tab_configs` directory. Every file defines a single tab layout with optional pane splits, startup commands, and parameterized inputs. Tab Configs appear in the `+` menu alongside your existing tabs, so you can launch a preconfigured workspace instantly. The `tab_configs` directory lives in a different location on each platform: * macOS `~/.warp/tab_configs/` (Stable) or `~/.warp-preview/tab_configs/` (Preview). * Windows `%APPDATA%\warp\Warp\data\tab_configs\` (Stable) or `%APPDATA%\warp\WarpPreview\data\tab_configs\` (Preview). * Linux `${XDG_DATA_HOME:-$HOME/.local/share}/warp-terminal/tab_configs/` (Stable) or `${XDG_DATA_HOME:-$HOME/.local/share}/warp-terminal-preview/tab_configs/` (Preview). For the full list of Warp file locations, see [File and folder locations](/terminal/settings/file-locations/). ## Creating a Tab Config [Section titled “Creating a Tab Config”](#creating-a-tab-config) ### From the UI [Section titled “From the UI”](#from-the-ui) 1. Click the **+** button in the tab bar to open the new-tab menu. 2. Click **+ New tab config**. Warp creates a new `.toml` file in the `tab_configs` directory and opens it for editing. ### Manually [Section titled “Manually”](#manually) 1. Create a new `.toml` file in the `tab_configs` directory shown above. Use snake\_case for the file name (e.g., `dev_server.toml`). 2. Define the tab layout using the schema below, then save the file. The new config appears in the `+` menu automatically. ### Save an existing tab as a Tab Config [Section titled “Save an existing tab as a Tab Config”](#save-an-existing-tab-as-a-tab-config) You can also capture a tab’s current state as a reusable Tab Config without writing TOML. Right-click any tab in the [vertical tabs](/terminal/windows/vertical-tabs/) panel or horizontal tab bar to open the context menu, then click **Save as new config**. Warp generates a `.toml` file from the tab’s layout, commands, and directory and adds it to the `+` menu. 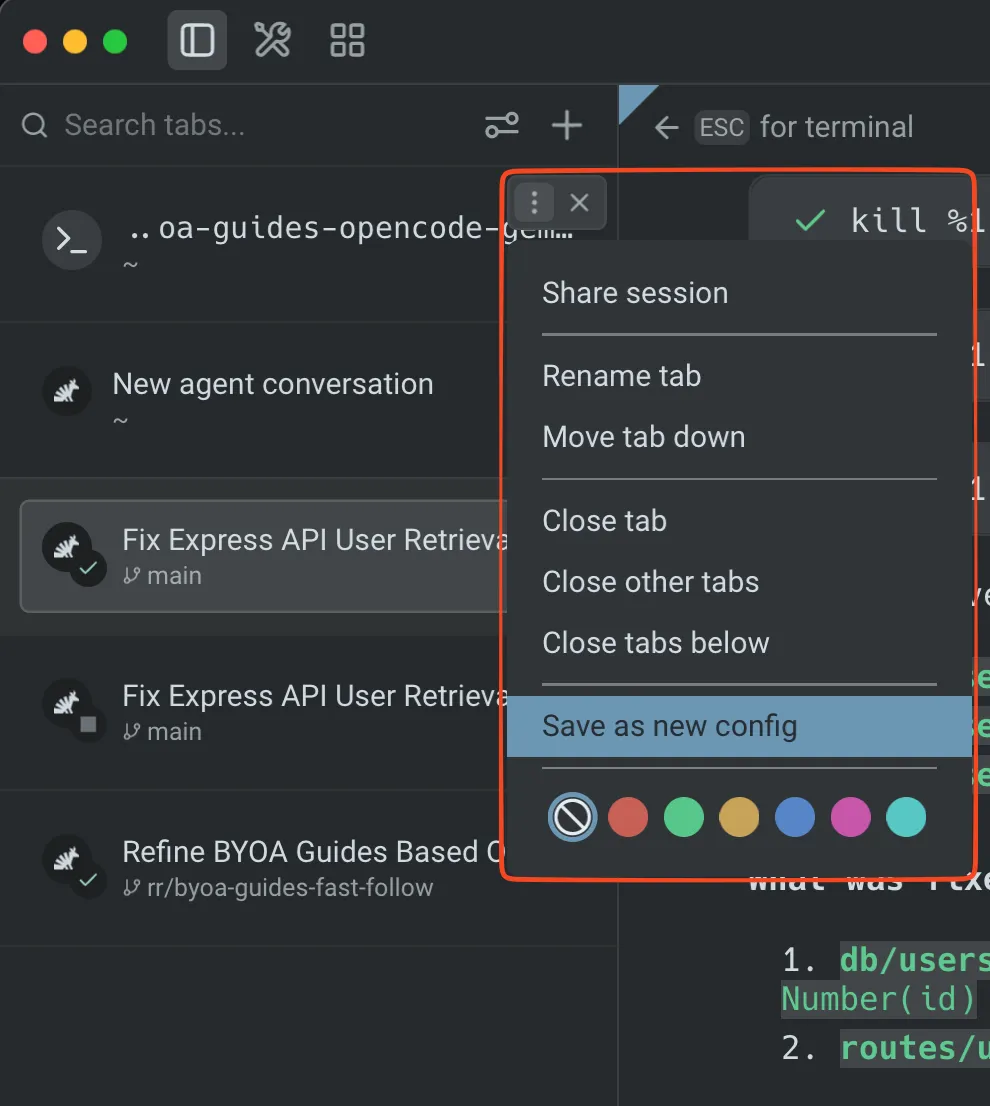 Saving a tab config. ## Managing Tab Configs [Section titled “Managing Tab Configs”](#managing-tab-configs) Saved Tab Configs appear in the `+` menu for quick access. When you hover a Tab Config in the menu, a **sidecar panel** appears alongside it with options to: * **Edit config** — Open the underlying `.toml` file for manual editing. The editor also shows a footer to invoke the **update tab config** skill, so you can describe changes in natural language and have Warp’s agent apply them. * **Remove** — Remove the Tab Config from the `+` menu. * **Make default** — Assign the Tab Config as the default `Cmd T` action for new tabs.  Tab config menu with sidecar options. ## Open a Tab Config from a URL [Section titled “Open a Tab Config from a URL”](#open-a-tab-config-from-a-url) You can open a saved Tab Config directly via Warp’s [URI scheme](/terminal/more-features/uri-scheme/). This is useful for browser bookmarks, scripts, and launchers like Raycast or Alfred that need to jump straight into a configured pane layout without going through the `+` menu. By default, the Tab Config opens as a new tab in the active window. Pass `?new_window=true` (or invoke when no Warp window is open) to open it in a new window instead. ```bash # Open my_tab.toml as a new tab in the focused window open "warp://tab_config/my_tab" # Open it in a brand-new window open "warp://tab_config/my_tab?new_window=true" ``` `<name>` is matched case-insensitively against the file stem of the `.toml`, so `warp://tab_config/my_tab` and `warp://tab_config/my_tab.toml` both resolve to `my_tab.toml`. Matching uses the filename rather than the `name` field inside the file, because multiple Tab Configs can share the same display name. If the Tab Config declares `[params.*]` entries, the params modal opens just like launching from the `+` menu. Worktree-style configs that reference `{{autogenerated_branch_name}}` still get a freshly generated branch name on each open. ## Using skills to manage Tab Configs [Section titled “Using skills to manage Tab Configs”](#using-skills-to-manage-tab-configs) Warp includes built-in skills for creating and modifying Tab Configs through natural language: * **Create Tab Config** — Generate a new Tab Config from a description (e.g., “create a 2x2 grid with one pane running my dev server”). * **Update Tab Config** — Modify an existing Tab Config by describing the changes you want. To use these skills, type `/skills` in Agent Mode and select the tab config skill, or use the footer that appears when editing a Tab Config file. ## Tab Config TOML schema [Section titled “Tab Config TOML schema”](#tab-config-toml-schema) ### Top-level fields [Section titled “Top-level fields”](#top-level-fields) * **`name`** (required, string) — display name shown in the `+` menu. * **`title`** (optional, string) — custom tab title. Supports `{{param}}` template variables. * **`color`** (optional, string) — tab color. One of: `"black"`, `"red"`, `"green"`, `"yellow"`, `"blue"`, `"magenta"`, `"cyan"`, `"white"`. Actual color values are derived from your Warp [Theme](/terminal/appearance/themes/). ### Pane list [Section titled “Pane list”](#pane-list) All panes are defined in a flat `[[panes]]` array. The first entry is the root of the pane tree. Each entry is either a **split node** (branch) or a **leaf node**. #### Leaf node fields [Section titled “Leaf node fields”](#leaf-node-fields) * **`id`** (required, string) — unique identifier for this pane. Use descriptive names like `"editor"` or `"server"`. * **`type`** (required, string) — `"terminal"` (standard shell), `"agent"` (opens in Agent Mode), or `"cloud"` (cloud mode pane, no local shell). * **`directory`** (optional, string) — initial working directory. Supports `~` expansion and `{{param}}` template variables. * **`commands`** (optional, array of strings) — commands to run in sequence when the tab opens. * **`shell`** (optional, string) — shell executable to use for this pane (e.g. `"pwsh"`, `"zsh"`, `"bash"`, `"fish"`). Only applies to `terminal` and `agent` pane types. If omitted or the specified shell is not installed, the user’s default shell is used. * **`is_focused`** (optional, bool) — set to `true` on at most one pane to give it initial focus. #### Split node fields [Section titled “Split node fields”](#split-node-fields) * **`id`** (required, string) — unique identifier for this split. * **`split`** (required, string) — `"horizontal"` (children arranged left-to-right) or `"vertical"` (children arranged top-to-bottom). * **`children`** (required, array of strings) — ordered list of child pane `id` values. Must contain at least 2 entries. Order determines visual order. ### Parameters [Section titled “Parameters”](#parameters) Parameters let users fill in values at open time via a modal prompt. Declare them with `[params.<name>]` tables and reference them in `directory`, `commands`, and `title` using `{{name}}` syntax. Each parameter has: * **`type`** (optional, string) — `"text"` (default, freeform input), `"branch"` (Git branch picker), or `"repo"` (repository picker). * **`description`** (optional, string) — label shown in the fill-in UI. * **`default`** (optional, string) — default value. `{{autogenerated_branch_name}}` is a reserved template variable. If a Tab Config references it, Warp generates a unique worktree branch name on each open instead of prompting the user. ## Examples [Section titled “Examples”](#examples) ### Single pane [Section titled “Single pane”](#single-pane) A simple config that opens a terminal in a project directory and starts a dev server: ```toml name = "Dev Server" [[panes]] id = "main" type = "terminal" directory = "~/code/my-app" commands = ["npm run dev"] ``` ### Two panes side by side [Section titled “Two panes side by side”](#two-panes-side-by-side) An editor and server running in parallel, with the editor focused: ```toml name = "Editor + Server" color = "green" [[panes]] id = "root" split = "horizontal" children = ["editor", "server"] [[panes]] id = "editor" type = "terminal" directory = "~/code/my-app" commands = ["nvim ."] is_focused = true [[panes]] id = "server" type = "terminal" directory = "~/code/my-app" commands = ["npm run dev"] ``` ### Cross-shell development [Section titled “Cross-shell development”](#cross-shell-development) A config that opens two panes side by side, each with a different shell: ```toml name = "Cross Shell" color = "cyan" [[panes]] id = "root" split = "horizontal" children = ["bash_pane", "pwsh_pane"] [[panes]] id = "bash_pane" type = "terminal" shell = "bash" directory = "~/code/my-app" is_focused = true [[panes]] id = "pwsh_pane" type = "terminal" shell = "pwsh" directory = "~/code/my-app" ``` ### Worktree with parameters [Section titled “Worktree with parameters”](#worktree-with-parameters) A parameterized config that creates a new Git worktree on open: ```toml name = "New Worktree" title = "{{branch_name}}" [[panes]] id = "main" type = "terminal" directory = "{{repo}}" commands = [ "git worktree add -b {{branch_name}} ../{{branch_name}} {{base_branch}}", "cd ../{{branch_name}}", ] [params.repo] type = "repo" description = "Repository path" [params.base_branch] type = "branch" description = "Base branch to branch from" [params.branch_name] type = "text" description = "New branch name" default = "my-feature" ``` ### Quick worktree setup [Section titled “Quick worktree setup”](#quick-worktree-setup) You can also create a worktree-based Tab Config directly from the `+` menu by clicking **New worktree config** and selecting the repo you want your worktree to be from. Warp generates the Tab Config automatically and saves it for future use. ## Related pages [Section titled “Related pages”](#related-pages) * [Launch Configurations (Legacy)](/terminal/sessions/launch-configurations/) — the previous session configuration format. Existing configs still work, but Tab Configs are the recommended approach for new setups. * [Tabs](/terminal/windows/tabs/) — tab management, keyboard shortcuts, and behavior settings * [Themes](/terminal/appearance/themes/) — customize the colors used by tab color settings * [Working Directory](/terminal/more-features/working-directory/) — how Warp resolves working directories * [Third-Party CLI Agents](/agent-platform/cli-agents/overview/) — use the `"agent"` pane type to open tabs in Agent Mode * [Warp URI Scheme](/terminal/more-features/uri-scheme/) — open Tab Configs via `warp://tab_config/<name>` deeplinks
# Tabs
Canonical page: [/terminal/windows/tabs/](https://docs.warp.dev/terminal/windows/tabs/)
> Organize your window into multiple terminal sessions with customizable tabs, complete with titles and ANSI colors.
## How to use Tabs [Section titled “How to use Tabs”](#how-to-use-tabs) * macOS * Right-click on the new Tab button `+` to make a new tab, restore closed tab, or run a saved [Launch Configuration](/terminal/sessions/launch-configurations/). * Open a new Tab with `CMD-T` or by clicking on the `+` in the top bar. * Close the current Tab with `CMD-W` or by clicking on the `X` on hover over a Tab. * Reopen closed tabs with `SHIFT-CMD-T`. * Move a Tab to the Left / Right with `CTRL-SHIFT-LEFT` / `CTRL-SHIFT-RIGHT` or by clicking and dragging a Tab. * Activate the Previous / Next Tab with `SHIFT-CMD-{` / `SHIFT-CMD-}` or by clicking a Tab. * Activate the first through eighth Tabs with `CMD-1` thru `CMD-8`. * Switch to the last Tab with `CMD-9`. * Double-click a Tab to rename it. * Right-clicking on a Tab reveals more options you can explore within the [Command Palette](/terminal/command-palette/) or [Keyboard Shortcuts](/getting-started/keyboard-shortcuts/#fundamentals). * Windows * Right-click on the new Tab button `+` to make a new tab, restore closed tab, or run a saved [Launch Configuration](/terminal/sessions/launch-configurations/). * Open a new Tab with `CTRL-SHIFT-T` or by clicking on the `+` in the top bar. * Close the current Tab with `CTRL-SHIFT-W` or by clicking on the `x` on hover over a Tab. * Reopen closed tabs with `CTRL-ALT-T`. * Move a Tab to the Left / Right with `CTRL-SHIFT-LEFT` / `CTRL-SHIFT-RIGHT` or by clicking and dragging a Tab. * Activate the Previous / Next Tab with `CTRL-PGUP` / `CTRL-PGDN` or by clicking a Tab. * Activate the first through eighth Tabs with `CTRL-1` thru `CTRL-8`. * Switch to the last Tab with `CTRL-9`. * Double-click a Tab to rename it. * Right-clicking on a Tab reveals more options you can explore within the [Command Palette](/terminal/command-palette/) or [Keyboard Shortcuts](/getting-started/keyboard-shortcuts/#fundamentals). * Linux * Right-click on the new Tab button `+` to make a new tab, restore closed tab, or run a saved [Launch Configuration](/terminal/sessions/launch-configurations/). * Open a new Tab with `CTRL-SHIFT-T` or by clicking on the `+` in the top bar. * Close the current Tab with `CTRL-SHIFT-W` or by clicking on the `x` on hover over a Tab. * Reopen closed tabs with `CTRL-ALT-T`. * Move a Tab to the Left / Right with `CTRL-SHIFT-LEFT` / `CTRL-SHIFT-RIGHT` or by clicking and dragging a Tab. * Activate the Previous / Next Tab with `CTRL-PGUP` / `CTRL-PGDN` or by clicking a Tab. * Activate the first through eighth Tabs with `CTRL-1` thru `CTRL-8`. * Switch to the last Tab with `CTRL-9`. * Double-click a Tab to rename it. * Right-clicking on a Tab reveals more options you can explore within the [Command Palette](/terminal/command-palette/) or [Keyboard Shortcuts](/getting-started/keyboard-shortcuts/#fundamentals). ### Tab Restoration [Section titled “Tab Restoration”](#tab-restoration) Tab Restoration enables you to reopen recently closed tabs for up to 60 seconds. Configure this feature in **Settings** > **Features** > **Session** > **Enable reopening of closed sessions** ### CTRL-TAB Behavior [Section titled “CTRL-TAB Behavior”](#ctrl-tab-behavior) `CTRL-TAB` shortcut defaults to activate the previous / next Tab. You can configure the shortcut to cycle the most recent session, including any [Split Panes](/terminal/windows/split-panes/), in **Settings** > **Features** > **Keys** > **Ctrl-Tab behavior** ### Tabs Behavior [Section titled “Tabs Behavior”](#tabs-behavior) Please see our [Appearance > Tabs Behavior](/terminal/appearance/tabs-behavior/) docs for more Tab related settings. ### How Tabs work [Section titled “How Tabs work”](#how-tabs-work) [Tabs Demo](https://www.loom.com/embed/84d15cc7eb5a4a668bb86be9e827f261)
# Vertical Tabs
Canonical page: [/terminal/windows/vertical-tabs/](https://docs.warp.dev/terminal/windows/vertical-tabs/)
> The vertical tabs panel replaces the horizontal tab bar with a sidebar showing rich metadata, drag-and-drop management, and display options for tabs and panes.
The vertical tabs panel is a sidebar that replaces the traditional horizontal tab bar with a richer, more powerful tab management surface. Instead of a single row of tab titles, the panel displays every tab and pane with contextual metadata — Git branch, working directory, agent conversation status, diff stats, and more. Scan and switch between workstreams without losing context. Vertical tabs are especially useful when running multiple coding agents side by side, giving you a clear overview of each session’s state without switching tabs.  ## Key features [Section titled “Key features”](#key-features) ### Rich metadata and status [Section titled “Rich metadata and status”](#rich-metadata-and-status) * **Pane metadata** - See working directory, Git branch, agent conversation status, diff stats, and PR badges at a glance for every pane. * **Agent status badges** - Pane icons display a colored badge overlay showing agent state (in progress, done, errored, cancelled, or blocked). [Third-party CLI agents](/agent-platform/cli-agents/overview/) like Claude Code, Codex, and Gemini CLI display their brand icon and color alongside badges. * **Notification indicators** - An accent-colored dot appears on pane rows with unread agent activity, so you can spot sessions that need attention without switching tabs. ### Display modes and customization [Section titled “Display modes and customization”](#display-modes-and-customization) * **Pane or tab view** - Display every split pane as its own row (**Panes**) or show only the focused pane per tab (**Tabs**). * **Focused session or summary tab item** - When viewing as **Tabs**, choose **Focused session** to show the active pane per tab, or **Summary** to show a condensed multi-line digest of every pane in the tab (commands, working directories, branches, and status badges). * **Compact and expanded modes** - Choose between a dense single-line view (default) or a detailed multi-line layout with full metadata. * **Configurable pane titles** - Control which metadata appears first: last command or conversation, working directory, or Git branch. * **Hover detail sidecar** - Hover any pane row to see full, un-clipped metadata in a floating detail card without changing focus. ### Tab management [Section titled “Tab management”](#tab-management) * **Search, drag and drop, and renaming** - Filter panes by title, directory, or branch; reorder tabs or move panes between tabs by dragging; double-click a tab to rename it inline. * **New tab menu** - Create agent tabs, terminal tabs, cloud agent sessions, worktree configs, and [Tab Configs](/terminal/windows/tab-configs/) from a unified **+** menu. ## Enabling vertical tabs [Section titled “Enabling vertical tabs”](#enabling-vertical-tabs) To switch from horizontal tabs to the vertical tabs panel: 1. In the Warp app, navigate to **Settings** > **Appearance** > **Tabs**. 2. Toggle **Use vertical tab layout** on. The vertical tabs panel appears as a resizable sidebar on the left side of the window. The horizontal tab bar is hidden while vertical tabs are active. 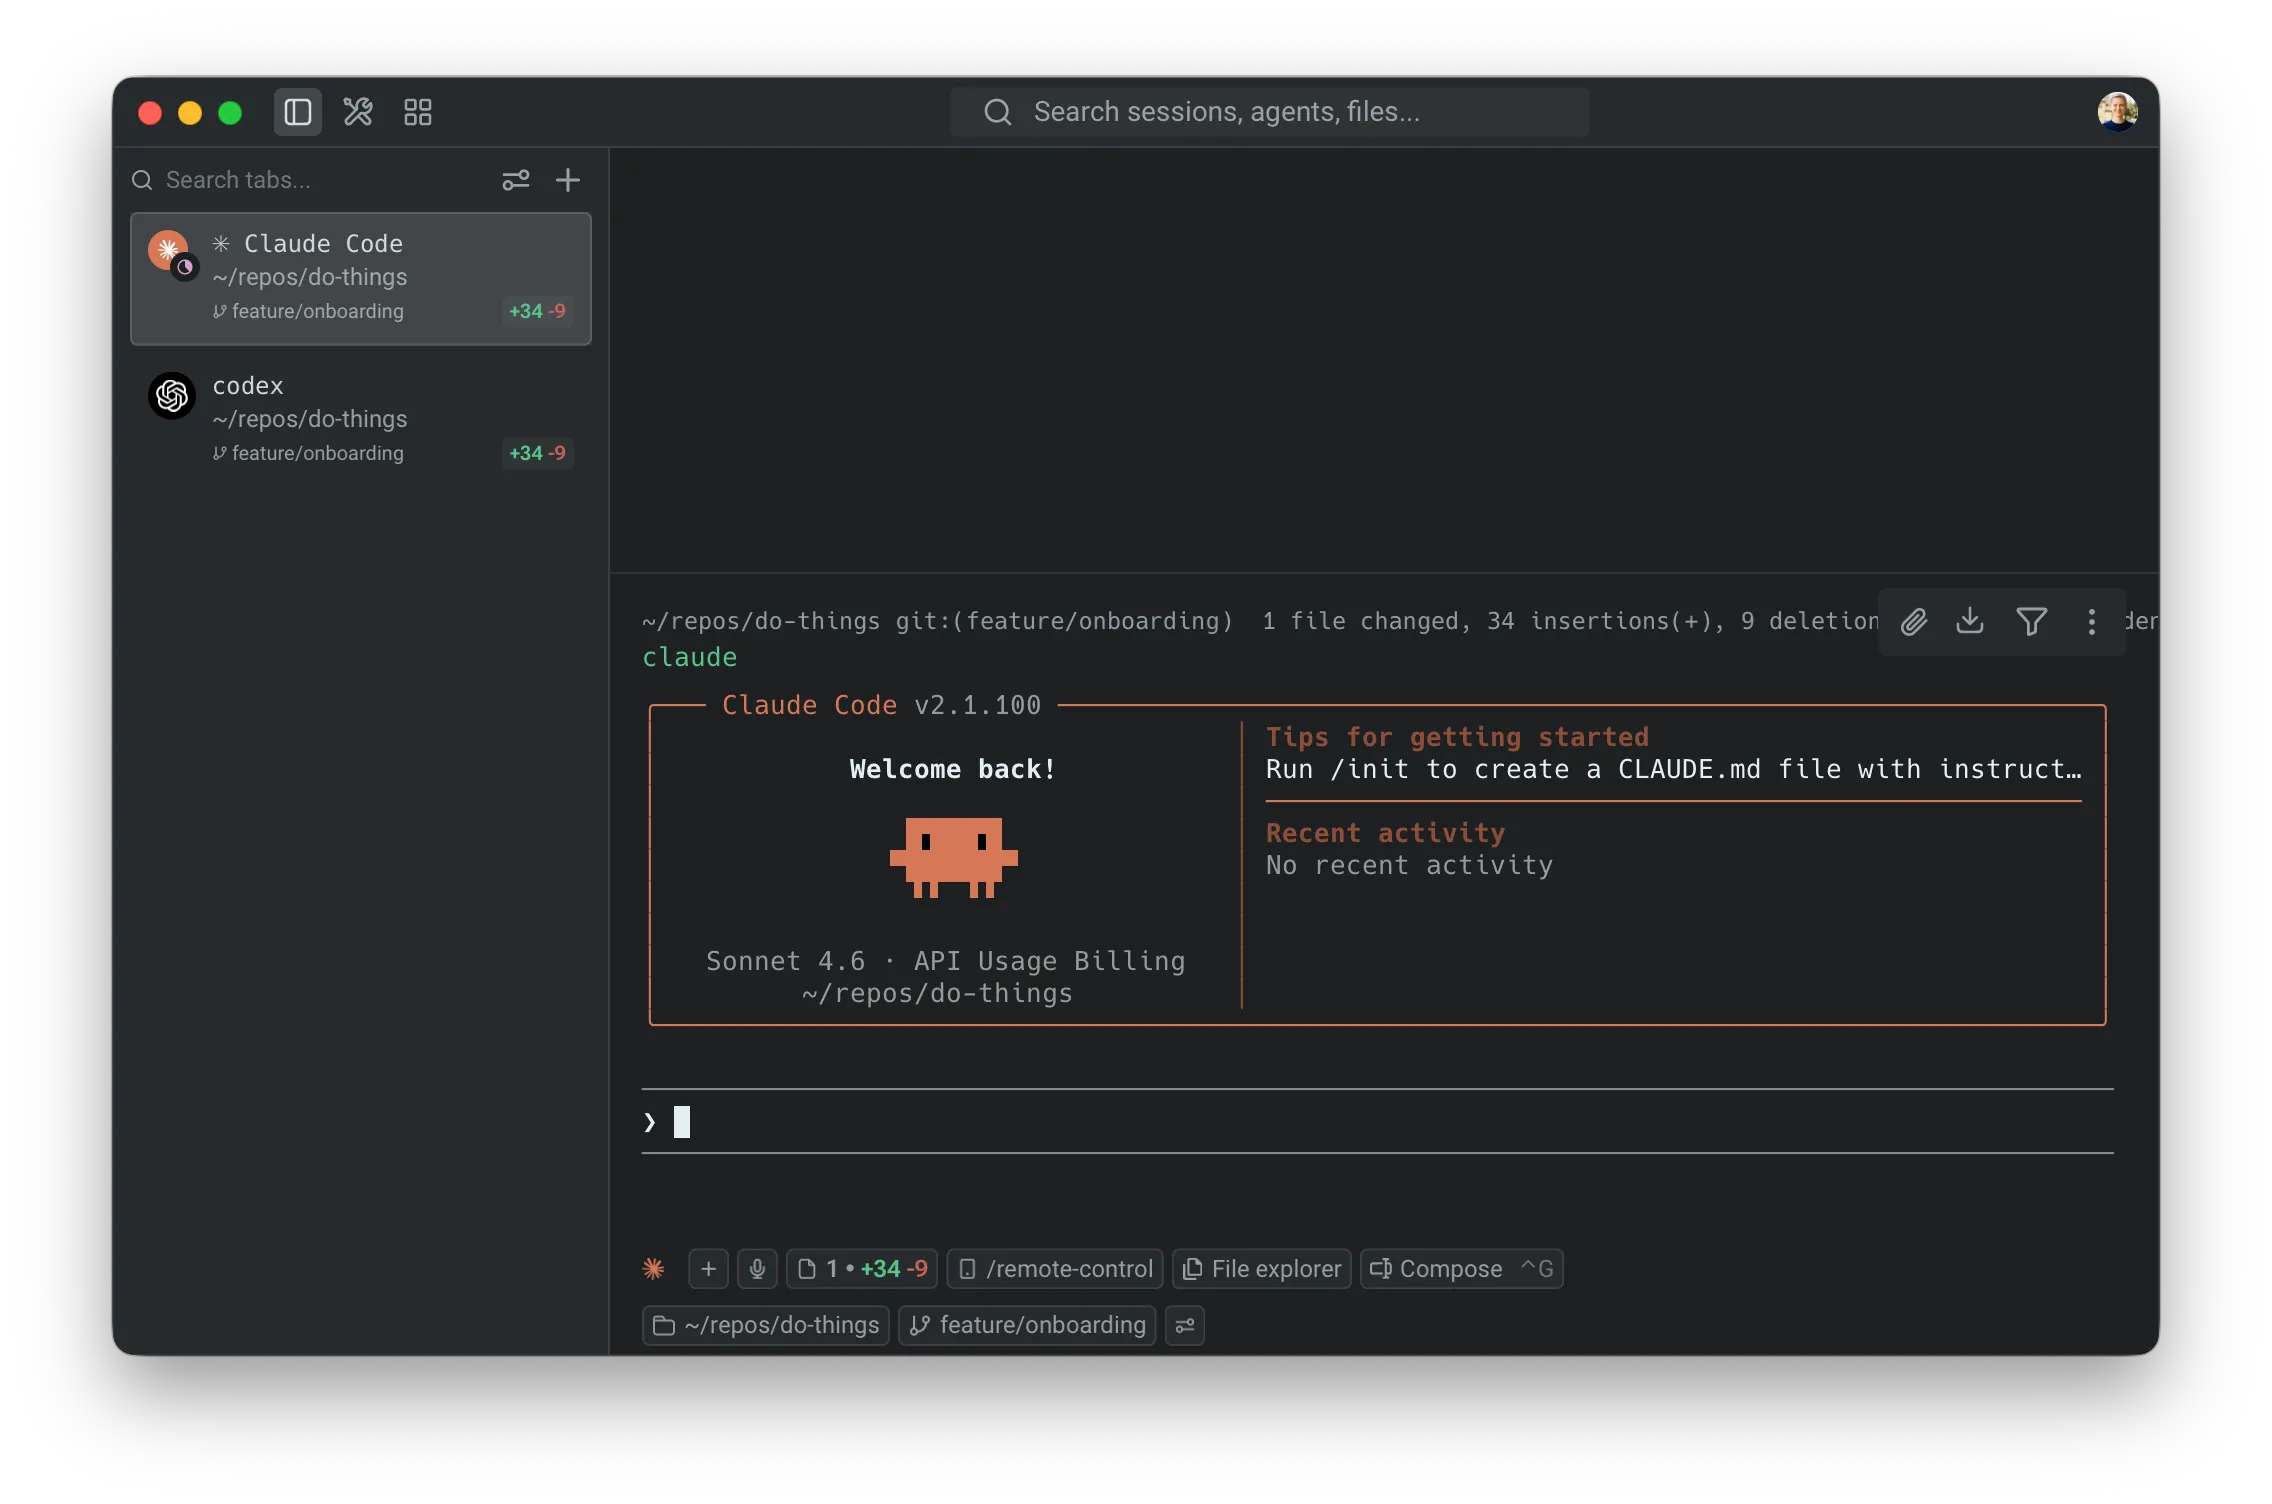 Vertical tab with agent details. ## View modes [Section titled “View modes”](#view-modes) The vertical tabs panel supports two display densities that you can switch between at any time. ### Compact mode [Section titled “Compact mode”](#compact-mode) Compact mode is the default. Each pane row displays an icon and title on one line, with an optional subtitle below it. The subtitle is configurable via the **Additional metadata** setting in the settings popup. 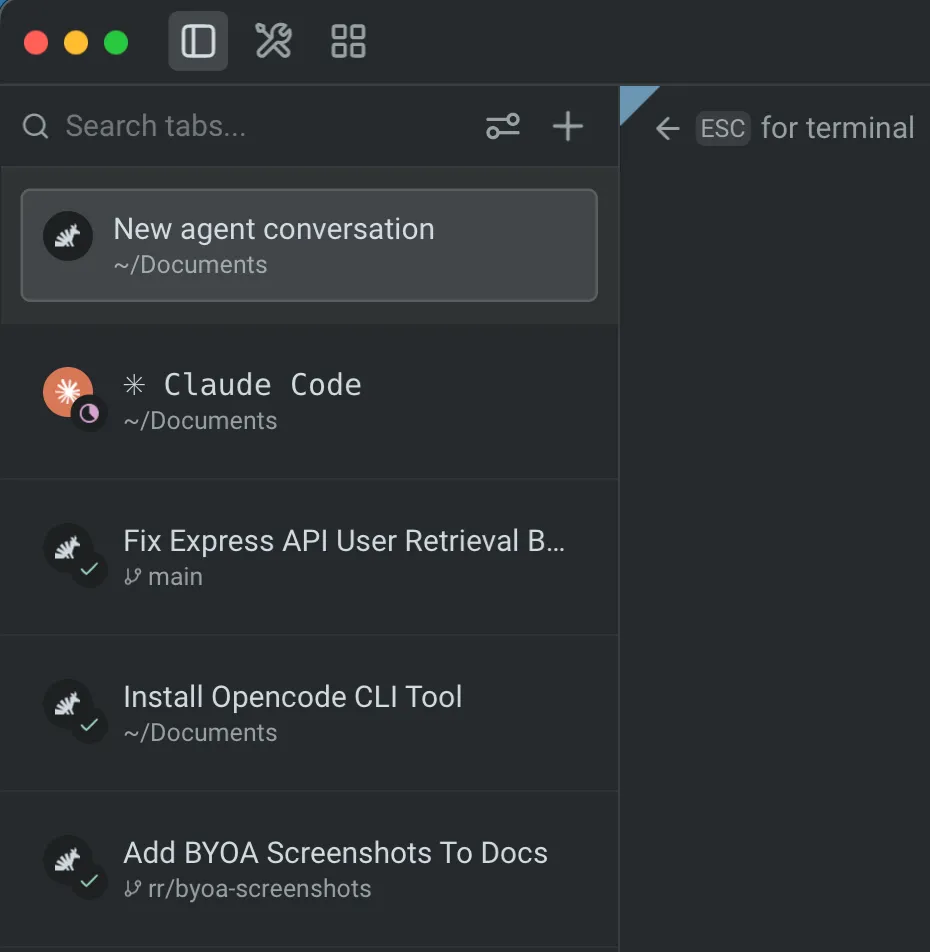 Vertical tabs in compact mode. ### Expanded mode [Section titled “Expanded mode”](#expanded-mode) Expanded mode shows each pane row with a title, description (such as the working directory or file path), and metadata (Git branch, diff stats badge, and PR badge when available). 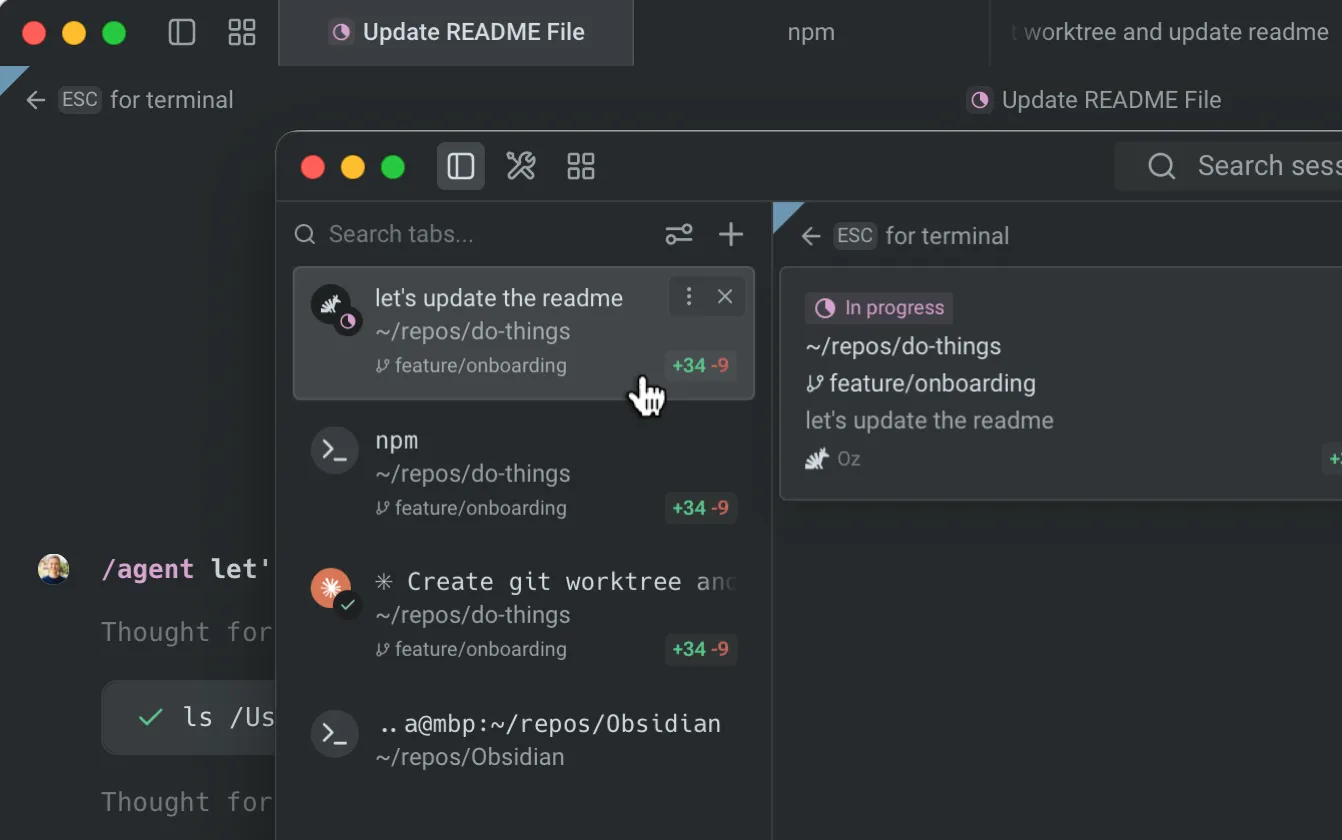 Vertical tabs overview. ### Switching view modes [Section titled “Switching view modes”](#switching-view-modes) Click the settings icon (sliders) in the control bar at the top of the vertical tabs panel. In the popup, use the **Density** segmented control to switch between compact and expanded views. The change takes effect immediately.  Vertical tabs settings popup. ## Customizing vertical tabs [Section titled “Customizing vertical tabs”](#customizing-vertical-tabs) When vertical tabs are enabled, configure their appearance and behavior from the settings popup (click the sliders icon in the control bar) or from **Settings** > **Appearance** > **Tabs**. You can also rearrange the panel toggle buttons at the top of the Warp window — including the tabs panel, tools panel, agent management, code review, and notifications mailbox — and move them between the left and right sides of the header. See [Configurable toolbar](/terminal/windows/configurable-toolbar/) for details. | Setting | Availability | Options | Default | | ------------------------- | ------------------------------ | ---------------------------------------------------------------------------------------------------------------------------------------------------------------------------------------------------------------------------------------------------------------------------------- | ---------------------- | | **View as** | Always | **Panes** — each split pane gets its own row. **Tabs** — one row per tab, controlled further by the **Tab item** setting. | Panes | | **Tab item** | **View as** is set to **Tabs** | **Focused session** — show the focused pane’s title and metadata. **Summary** — show a condensed digest of every pane in the tab, with command or conversation titles, working directories, branches, and agent status badges (up to three lines, with a `+ N more` overflow row). | Focused session | | **Density** | Always | **Compact** — smaller rows with title and optional subtitle. **Expanded** — larger rows with title, description, and metadata. | Compact | | **Pane title as** | Always | **Command / Conversation** — last command, conversation title, or CLI agent session name. **Working Directory** — pane’s working directory. **Branch** — checked-out Git branch. | Command / Conversation | | **Additional metadata** | Compact mode only | **Branch** **Working Directory** **Command / Conversation** (options depend on the **Pane title as** setting; duplicates are excluded). | Branch | | **Show** | Expanded mode only | **PR link** — pull request and status for the current branch (requires GitHub CLI). **Diff stats** — lines added/removed. | — | | **Show details on hover** | Always | On / Off — toggles the hover detail sidecar. | On | ### Automatic metadata [Section titled “Automatic metadata”](#automatic-metadata) The following metadata appears automatically and doesn’t require configuration: * **Git branch** - The currently checked-out branch for the pane’s working directory. * **Worktree** - The active [Git worktree](/code/git-worktrees/) path, if applicable. * **Agent status** - A colored badge on the pane icon indicating the agent’s current state (see [Agent status badges](#agent-status-badges) below). * **Notification dot** - An accent-colored dot on the title row when a pane has unread agent activity. ## Agent status badges [Section titled “Agent status badges”](#agent-status-badges) Agent pane icons display a small circular badge overlay in the bottom-right corner that reflects the agent’s current state: | Status | Icon | Meaning | | --------------- | ------------- | -------------------------------------------------- | | **In progress** | Magenta clock | The agent is actively running. | | **Done** | Green check | The agent’s last turn completed successfully. | | **Error** | Red triangle | The agent’s last turn completed with an error. | | **Cancelled** | Gray stop | The user cancelled the agent’s last turn. | | **Blocked** | Yellow stop | The agent is waiting for user approval to proceed. | 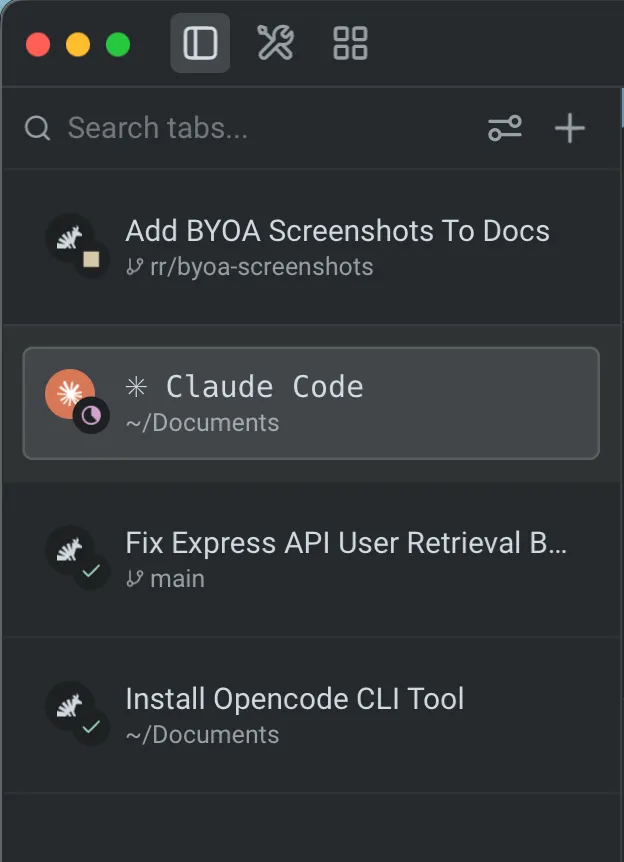 Agent status badges on vertical tabs. Third-party CLI agents (Claude Code, Codex, Gemini CLI, and others) display their brand icon and color inside the circular pane icon, with the same status badge overlay. When a pane has unread agent activity, an accent-colored notification dot appears at the right edge of the title row. The dot clears when you focus the pane. ## Managing tabs [Section titled “Managing tabs”](#managing-tabs) ### Search [Section titled “Search”](#search) The control bar at the top of the vertical tabs panel includes a search field. Type to filter the visible tabs and panes by title, working directory, Git branch, PR label, or diff stats. Only matching tabs remain visible while the search query is active. ### New tab menu [Section titled “New tab menu”](#new-tab-menu) Click the **+** button in the control bar to open the new tab menu. The menu includes: * **Agent** - Open a new agent tab. * **Terminal** - Open a new terminal tab. * **Cloud agent** - Open a new cloud agent session tab. * **Tab Configs** - Any [Tab Configs](/terminal/windows/tab-configs/) you’ve created appear as menu items for one-click setup. * **New worktree config** - Create a new worktree-based Tab Config. * **New tab config** - Create a new Tab Config from a starter template. ### Drag and drop [Section titled “Drag and drop”](#drag-and-drop) Reorder tabs by dragging tab group headers within the panel. To move a pane from one tab to another, drag the pane header over a different tab group in the panel. Warp switches to that tab so you can place the pane using the standard drop targets. Dropping a pane between tab groups creates a new tab at that position. ### Tab renaming [Section titled “Tab renaming”](#tab-renaming) Double-click a tab row to rename it inline. Press `Enter` to confirm or `Esc` to cancel. ## Hover detail sidecar [Section titled “Hover detail sidecar”](#hover-detail-sidecar) Hover any pane row to open a floating detail card anchored to the right side of the panel. The sidecar shows full, un-clipped metadata (complete directory paths, full branch names, and the full conversation or command title) without changing which pane is focused. 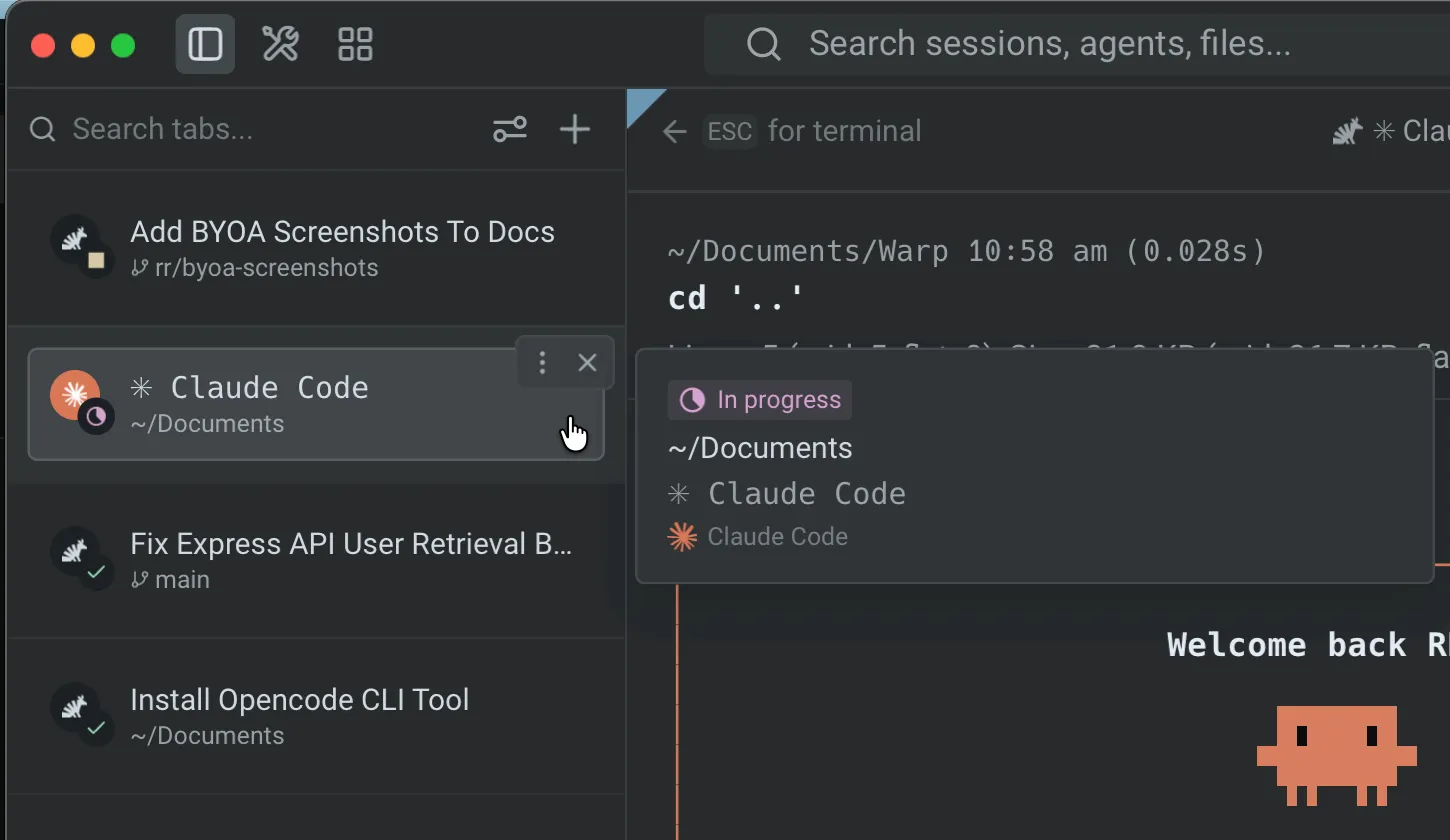 Hover detail card for a vertical tab. The sidecar stays open as you move the cursor from the row into the card. Move away from both the row and the sidecar to dismiss it. Disable this behavior with the **Show details on hover** toggle in the settings popup. ## Keyboard shortcuts [Section titled “Keyboard shortcuts”](#keyboard-shortcuts) All existing tab keyboard shortcuts continue to work with vertical tabs. The sidebar layout changes how tabs are displayed, not how you interact with them. See [Terminal tabs](/terminal/windows/tabs/) for the full list of tab shortcuts. ## Related pages [Section titled “Related pages”](#related-pages) * [Terminal tabs](/terminal/windows/tabs/) - Horizontal tab bar usage and keyboard shortcuts * [Split panes](/terminal/windows/split-panes/) - Divide tabs into multiple terminal panes * [Tab Configs](/terminal/windows/tab-configs/) - Define reusable tab setups in TOML files * [Git Worktrees](/code/git-worktrees/) - Worktree support that surfaces in vertical tab metadata * [Tabs behavior](/terminal/appearance/tabs-behavior/) - Tab bar visibility, indicators, and close button settings * [Third-party CLI agents](/agent-platform/cli-agents/overview/) - Use Claude Code, Codex, Gemini CLI, and other third-party agents with Warp’s utility bar, including brand icons and status badges in the vertical tabs panel