Reference: CLI and API reference.
# Technical reference
Canonical page: [/reference/](https://docs.warp.dev/reference/)
> Technical reference documentation for the Oz CLI, API, and SDK.
Technical reference documentation for the Oz CLI, API, and SDKs. Use these programmatic interfaces to run and manage agents from CI pipelines, scripts, backend services, and custom tooling without requiring the Warp desktop app. ## CLI [Section titled “CLI”](#cli) The [Oz CLI](/reference/cli/) lets you run and configure agents from any environment — locally, in CI pipelines, or on remote machines. * [API Keys](/reference/cli/api-keys/) - Create and manage API keys to authenticate the Oz CLI without human interaction, ideal for CI pipelines, headless servers, and containers. * [Agent Profiles](/reference/cli/agent-profiles/) - Use agent profiles to control what the agent can access, how it behaves, and where it can act, including file access, command execution, and MCP server usage. * [MCP Servers](/reference/cli/mcp-servers/) - Pass MCP server configuration to agent runs using the `--mcp` flag, by UUID, inline JSON, or file path. * [Skills](/reference/cli/skills/) - Run agents from reusable instruction sets stored in your repositories using the `--skill` flag. * [Warp Drive Context](/reference/cli/warp-drive/) - Reference saved prompts, notebooks, workflows, and rules from Warp Drive directly in CLI agent commands. * [Integration Setup](/reference/cli/integration-setup/) - Configure environments and connect external tools like Slack and Linear so you can trigger agents from outside the terminal. * [Troubleshooting](/reference/cli/troubleshooting/) - Find solutions to common CLI errors, including authentication issues, agent failures, environment problems, and Docker image issues. ## API & SDK [Section titled “API & SDK”](#api--sdk) The [Oz API](/reference/api-and-sdk/) lets you create and monitor cloud agent runs over HTTP. Official SDKs for [Python](https://github.com/warpdotdev/oz-sdk-python) and [TypeScript](https://github.com/warpdotdev/oz-sdk-typescript) provide typed clients with built-in retries and error handling. * [Demo: Sentry monitoring with SDK](/reference/api-and-sdk/demo-sentry-monitoring-with-sdk/) - example integration
# Oz API & SDK reference
Canonical page: [/reference/api-and-sdk/](https://docs.warp.dev/reference/api-and-sdk/)
> Create and inspect cloud agent runs over HTTP with the Oz API, or use the Python and TypeScript SDKs for typed requests, retries, and error handling.
The Oz API and SDKs let you create, monitor, and inspect cloud agent runs programmatically. Use the REST API from any HTTP client, or the official Python and TypeScript SDKs for typed requests, built-in retries, and structured error handling. The SDKs are ideal for CI pipelines, internal tools, and custom integrations. ### Oz API [Section titled “Oz API”](#oz-api) The Oz API lets you create and inspect [Cloud Agent](/agent-platform/cloud-agents/overview/) runs over HTTP from any system (CI, cron, backend services, internal tools), without requiring the Warp desktop app. **With the API you can:** * Run an agent by submitting a prompt plus optional config (model, environment, MCP servers, base prompt, etc.) * Monitor execution by listing runs and tracking state transitions over time (queued → in progress → succeeded/failed) * Inspect results and provenance by fetching a run’s full details, including the original prompt, source/creator metadata, session link, and resolved agent configuration Caution This page is a high-level overview.\ \ For full API endpoint details, please refer to the [**Agents API Reference**](/api)**.** For schema definitions, see the SDK repos: [**Python SDK**](https://github.com/warpdotdev/oz-sdk-python) and [**TypeScript SDK**](https://github.com/warpdotdev/oz-sdk-typescript). ### Oz SDK [Section titled “Oz SDK”](#oz-sdk) Oz provides official [Python](https://github.com/warpdotdev/oz-sdk-python) and [TypeScript](https://github.com/warpdotdev/oz-sdk-typescript) SDKs that wrap the Oz API with: * **Typed requests and responses** (editor autocomplete, fewer schema mistakes) * **Built-in retries and timeouts** (with per-request overrides) * [**Consistent error types**](/reference/api-and-sdk/troubleshooting/errors/) that map to API status codes * **Helpers for raw responses** when you need headers/status or custom parsing If you’re building an integration (CI, Slack bots, internal tooling, orchestrators), the SDKs are typically the quickest and safest starting point.  **SDK vs raw REST** * Use the SDK when you want strong typing, standardized error handling, and easy concurrency patterns. * Use raw REST when you want minimal dependencies or full control over your HTTP client (the SDKs also support calling undocumented endpoints when needed). Caution For the full SDK surface area and latest usage, refer to the GitHub repos: [**Python SDK**](https://github.com/warpdotdev/oz-sdk-python) and [**TypeScript SDK**](https://github.com/warpdotdev/oz-sdk-typescript). *** ## Oz API [Section titled “Oz API”](#oz-api-1) ### REST API Base URL [Section titled “REST API Base URL”](#rest-api-base-url) All endpoints are served over HTTPS: ```http https://app.warp.dev/api/v1 ``` ### Core Concepts [Section titled “Core Concepts”](#core-concepts) #### **Agent runs** [Section titled “Agent runs”](#agent-runs) An agent run represents a single execution of a cloud agent, created with a prompt and optional configuration. Each run has: * A unique `run_id` * A human-readable `title` * A `prompt` that the agent executes * A `state` (for example `QUEUED`, `INPROGRESS`, `SUCCEEDED`, `FAILED`) * Timestamps (`created_at`, `updated_at`) * Optional session information (`session_id`, `session_link`) * Optional resolved configuration (`agent_config`) See the [**Agents API Reference**](/api) for details on how runs are created and listed. #### **Agent configuration** [Section titled “Agent configuration”](#agent-configuration) You can influence how an agent runs using AmbientAgentConfig, including: * `name` — a human-readable label for grouping, filtering, and traceability. When you run an agent from a [skill](/agent-platform/capabilities/skills/), `name` is automatically set to the skill name. You can also set `name` explicitly via the API, SDK, or CLI (`--name`) to categorize runs by intent — for example, grouping all runs of a particular workflow regardless of how they were triggered. Use the `name` query parameter on `GET /agent/runs` to filter runs by config name. * `model_id` for LLM selection * `base_prompt` to shape behavior * `environment_id` to choose a `CloudEnvironment` * `skill_spec` to use a [skill](/agent-platform/capabilities/skills/) as the base prompt (format: `owner/repo:skill-name` or `owner/repo:path/to/SKILL.md`) * `mcp_servers` to enable specific tools via MCP See the [**Python SDK**](https://github.com/warpdotdev/oz-sdk-python) or [**TypeScript SDK**](https://github.com/warpdotdev/oz-sdk-typescript) for the full configuration schema. *** ### Key Endpoints [Section titled “Key Endpoints”](#key-endpoints) **The Agents API exposes three primary endpoints:** * `POST /agent/run` Create a new agent run with a prompt and optional config and title. Returns run\_id and initial state. * `GET /agent/runs` List runs with pagination and filters for state, config\_name, model\_id, creator, source, and creation time. * `GET /agent/runs/{runId}` Fetch full details for a single run, including session link and resolved configuration. All endpoint semantics, query parameters, and [error codes](/reference/api-and-sdk/troubleshooting/errors/) are documented on the [Agents API Reference](/api). *** #### Models Reference [Section titled “Models Reference”](#models-reference) The API shares a set of reusable models across endpoints. Detailed JSON schemas, types, and enums are available in the SDK repos ([Python](https://github.com/warpdotdev/oz-sdk-python), [TypeScript](https://github.com/warpdotdev/oz-sdk-typescript)). Key models include: * `RunAgentRequest` * `RunAgentResponse` * `ListRunsResponse` * `RunItem` * `PageInfo` * `RunStatusMessage` * `RunCreatorInfo` * `RunState` * `RunSourceType` * `AmbientAgentConfig` * `MCPServerConfig` * `Error` *** ## Oz SDKs [Section titled “Oz SDKs”](#oz-sdks) ### Python SDK [Section titled “Python SDK”](#python-sdk) The Python SDK is the recommended way to call the Oz API from Python services and scripts. It provides: * Sync + async clients * Typed request/response models * Configurable retries/timeouts and structured errors See the [**Python SDK GitHub repo**](https://github.com/warpdotdev/oz-sdk-python) for installation, full API reference (api.md), and up-to-date examples. ### TypeScript SDK [Section titled “TypeScript SDK”](#typescript-sdk) The TypeScript SDK is the recommended way to call the Oz API from Node.js services and modern TS/JS runtimes. It provides: * Fully typed params/responses * First-class error handling, retries/timeouts * Support across common runtimes where fetch is available or polyfilled See the [**TypeScript SDK GitHub repo**](https://github.com/warpdotdev/oz-sdk-typescript) for installation, full API reference (api.md), and up-to-date examples.
# Demo: Sentry monitoring with SDK
Canonical page: [/reference/api-and-sdk/demo-sentry-monitoring-with-sdk/](https://docs.warp.dev/reference/api-and-sdk/demo-sentry-monitoring-with-sdk/)
> Build a Sentry webhook handler that triggers agents to investigate errors and create draft PRs.
### Turn Production Errors into Draft PRs with Cloud Agents + TypeScript SDK [Section titled “Turn Production Errors into Draft PRs with Cloud Agents + TypeScript SDK”](#turn-production-errors-into-draft-prs-with-cloud-agents--typescript-sdk)  In this demo, Ben builds a small TypeScript “Sentry monitor” service that listens for specific Sentry alerts (like a Go nil pointer dereference) and triggers a Warp cloud agent to investigate. The server validates the webhook, extracts the stack trace, and injects it into an agent run inside a Warp Environment so the agent can inspect the repo and propose a fix. He also covers the task lifecycle basics in the TypeScript SDK (running an agent, polling task state to fetch a session link for debugging), and shows the end result: a draft GitHub pull request created from the Sentry event for a maintainer to review. **What Ben covers** * Using Warp’s TypeScript SDK to trigger agent runs and retrieve run details. * Handling run lifecycle states (queued → running) to reliably fetch a session link. * Running agents inside a Warp Environment so they can investigate real code, run tests, and validate fixes. * Building a lightweight Sentry webhook server that filters, validates, and routes only the right errors to an agent. * Creating a workflow that results in draft PRs for human review, instead of silent autonomous changes.
# API & SDK quickstart
Canonical page: [/reference/api-and-sdk/quickstart/](https://docs.warp.dev/reference/api-and-sdk/quickstart/)
> Create and monitor your first cloud agent run via the Oz API or SDK in ~5 minutes.
The Oz API lets you run and manage cloud agents from anywhere — CI/CD pipelines, backend services, scripts, or custom tooling — without the Warp desktop app. This quickstart walks you through creating your first run and checking its status. Watch this short demo of how the REST API can power agent-backed apps like [PowerFixer](https://github.com/warpdotdev/power-fixer-setup), an issue triage bot built by the Warp team:  *** ## Prerequisites [Section titled “Prerequisites”](#prerequisites) * **A Warp API key** - Create one in the [Oz web app](https://oz.warp.dev/settings) and copy the raw value. Use a personal key if you want runs attributed to you, or an agent key to attribute runs to a [cloud agent](/agent-platform/cloud-agents/agents/). See [API Keys](/reference/cli/api-keys/) for the full flow. * **An Oz cloud environment** - Agents run inside a configured environment that includes repos and other dependencies. If you don’t have an environment yet, follow the [Cloud Agents Quickstart](/agent-platform/cloud-agents/quickstart/) first. *** ## 1. Set your API key [Section titled “1. Set your API key”](#1-set-your-api-key) Export your API key so the API can authenticate your requests automatically — all commands in this guide reference the `WARP_API_KEY` environment variable. ```bash export WARP_API_KEY="wk-..." ``` Replace `wk-...` with the key you created earlier. ## 2. Create your first run [Section titled “2. Create your first run”](#2-create-your-first-run) Submit a prompt to start an agent run: ```bash curl -X POST https://app.warp.dev/api/v1/agent/run \ -H "Authorization: Bearer $WARP_API_KEY" \ -H "Content-Type: application/json" \ -d '{ "prompt": "Scan the repo for outdated dependencies and summarize the findings.", "config": { "environment_id": "" } }' ``` Replace `` with your environment ID. Find it with `oz environment list` on the Oz CLI or in the [Oz web app](https://oz.warp.dev). The API returns a `run_id` immediately. The agent starts asynchronously — you can check its status at any time using the run ID. ## 3. Check run status [Section titled “3. Check run status”](#3-check-run-status) Fetch the current state of the run with the following command. Replace `` with the `run_id` from step 2. ```bash curl "https://app.warp.dev/api/v1/agent/runs/" \ -H "Authorization: Bearer $WARP_API_KEY" ``` The `state` has the following possible values: * `QUEUED` - The run is waiting to start. * `INPROGRESS` - The agent is actively running. * `SUCCEEDED` - The run completed successfully. * `FAILED` - The run encountered an error. Check the `status_message` field in the response for details, then use the [API error reference](/reference/api-and-sdk/troubleshooting/errors/) to interpret the error code. These are the most common states. See the [full API reference](/reference/api-and-sdk/) for all possible values. To list all recent runs: ```bash curl "https://app.warp.dev/api/v1/agent/runs" \ -H "Authorization: Bearer $WARP_API_KEY" ``` ## 4. View the results [Section titled “4. View the results”](#4-view-the-results) Once the run reaches `SUCCEEDED`, the response includes a `session_link` — a direct URL to the full run transcript, including commands executed, files changed, and agent output. You can also view and manage all runs in the [Oz dashboard](https://oz.warp.dev/runs). *** ## Next steps [Section titled “Next steps”](#next-steps) * **Read the full API reference** - [Oz API](/reference/api-and-sdk/) documents all endpoint parameters, query filters, and response schemas. * **Explore the SDKs** - [Python SDK](https://github.com/warpdotdev/oz-sdk-python) and [TypeScript SDK](https://github.com/warpdotdev/oz-sdk-typescript) include typed request/response models, retries, and error handling. * **See a real-world example** - [Demo: Sentry monitoring with SDK](/reference/api-and-sdk/demo-sentry-monitoring-with-sdk/) shows how to build a webhook handler that triggers agents from production errors. * **Schedule and automate** - See [Scheduled Agents Quickstart](/agent-platform/cloud-agents/triggers/scheduled-agents-quickstart/) to run agents on a cron, or [Integrations Quickstart](/agent-platform/cloud-agents/integrations/quickstart/) to trigger agents from Slack or Linear.
# API Troubleshooting
Canonical page: [/reference/api-and-sdk/troubleshooting/](https://docs.warp.dev/reference/api-and-sdk/troubleshooting/)
> Troubleshooting resources for the Oz API and SDK, including a full reference for all platform error codes.
When the Oz platform API encounters an error, it returns a structured response following [RFC 7807 (Problem Details for HTTP APIs)](https://datatracker.ietf.org/doc/html/rfc7807) with a machine-readable error code, HTTP status, and actionable resolution steps. ## Resources [Section titled “Resources”](#resources) * [**Errors**](/reference/api-and-sdk/troubleshooting/errors/) — Full reference for all API error codes, including causes, example responses, and resolution steps
# Errors Overview
Canonical page: [/reference/api-and-sdk/troubleshooting/errors/](https://docs.warp.dev/reference/api-and-sdk/troubleshooting/errors/)
> Reference for all error codes returned by the Oz platform API. Each error includes an HTTP status, machine-readable code, and actionable resolution steps.
When the Oz platform API encounters an error, it returns a structured JSON response following [RFC 7807 (Problem Details for HTTP APIs)](https://datatracker.ietf.org/doc/html/rfc7807). Every error response includes a machine-readable error code, a human-readable message, and metadata to help you diagnose and resolve the issue. *** ## Response format [Section titled “Response format”](#response-format) All error responses share this structure: ```json { "type": "/reference/api-and-sdk/troubleshooting/errors/invalid-request/", "title": "The request contains invalid or missing parameters.", "status": 400, "detail": "schedule_id is required", "instance": "/api/v1/agent/tasks", "error": "The request contains invalid or missing parameters. (schedule_id is required)", "retryable": false, "trace_id": "abc123def456..." } ``` Error responses use the `application/problem+json` content type per RFC 7807. ### Field reference [Section titled “Field reference”](#field-reference) * **`type`** — A URI identifying the error type. Links to the documentation page for that error. * **`title`** — A short, human-readable summary of the problem. * **`status`** — The HTTP status code for this response. * **`detail`** — Additional context specific to this occurrence of the error. Not always present. * **`instance`** — The request path that produced the error. * **`error`** — A backward-compatible field combining `title` and `detail` (for older clients). When `detail` is present, formatted as `"title (detail)"`. * **`retryable`** — Whether this request can be retried. If `true`, the platform may automatically retry the operation. * **`trace_id`** — An OpenTelemetry trace ID, included when available. Reference this when contacting support. Some errors include additional metadata fields (for example, `auth_url`, `provider`, or `inaccessible_repos`). These are documented on each error’s page. *** ## Error categories [Section titled “Error categories”](#error-categories) Errors are split into two categories based on what caused the failure: ### User errors [Section titled “User errors”](#user-errors) These indicate something the caller needs to fix. When a cloud agent task encounters a user error, the task transitions to the **FAILED** state. * [`insufficient_credits`](/reference/api-and-sdk/troubleshooting/errors/insufficient-credits/) — Team has no remaining add-on credits * [`feature_not_available`](/reference/api-and-sdk/troubleshooting/errors/feature-not-available/) — Feature not included in your current plan * [`external_authentication_required`](/reference/api-and-sdk/troubleshooting/errors/external-authentication-required/) — External service authorization needed * [`not_authorized`](/reference/api-and-sdk/troubleshooting/errors/not-authorized/) — Insufficient permissions for the operation * [`invalid_request`](/reference/api-and-sdk/troubleshooting/errors/invalid-request/) — Malformed request or invalid parameters * [`resource_not_found`](/reference/api-and-sdk/troubleshooting/errors/resource-not-found/) — Referenced resource does not exist * [`budget_exceeded`](/reference/api-and-sdk/troubleshooting/errors/budget-exceeded/) — Spending budget limit reached * [`integration_disabled`](/reference/api-and-sdk/troubleshooting/errors/integration-disabled/) — Integration is disabled * [`integration_not_configured`](/reference/api-and-sdk/troubleshooting/errors/integration-not-configured/) — Integration setup is incomplete * [`operation_not_supported`](/reference/api-and-sdk/troubleshooting/errors/operation-not-supported/) — Operation not supported for this resource or state * [`environment_setup_failed`](/reference/api-and-sdk/troubleshooting/errors/environment-setup-failed/) — Cloud agent environment failed to initialize * [`content_policy_violation`](/reference/api-and-sdk/troubleshooting/errors/content-policy-violation/) — Task flagged by content policy checks * [`conflict`](/reference/api-and-sdk/troubleshooting/errors/conflict/) — Request conflicts with the current resource state (retryable) ### Platform errors [Section titled “Platform errors”](#platform-errors) These indicate a Warp-side issue. When a cloud agent task encounters a platform error, the task transitions to the **ERROR** state. Retryable errors are automatically retried before the task is marked as failed. * [`authentication_required`](/reference/api-and-sdk/troubleshooting/errors/authentication-required/) — Invalid or expired API key * [`resource_unavailable`](/reference/api-and-sdk/troubleshooting/errors/resource-unavailable/) — Transient infrastructure issue (retryable) * [`internal_error`](/reference/api-and-sdk/troubleshooting/errors/internal-error/) — Unexpected server-side error (retryable) * [`infrastructure_timeout`](/reference/api-and-sdk/troubleshooting/errors/infrastructure-timeout/) — Task terminated after exceeding the maximum allowed runtime * [`agent_process_failed`](/reference/api-and-sdk/troubleshooting/errors/agent-process-failed/) — Agent process exited unexpectedly during task execution *** ## Using the `trace_id` [Section titled “Using the trace\_id”](#using-the-trace_id) When an error response includes a `trace_id`, you can include it when [contacting Warp support](/support-and-community/troubleshooting-and-support/sending-us-feedback/) to help the team locate the specific request in internal logs. This is especially useful for `internal_error` and `resource_unavailable` errors. *** ## Related [Section titled “Related”](#related) * [Oz API & SDK](/reference/api-and-sdk/) — API reference for creating and managing agent tasks * [Cloud Agents Overview](/agent-platform/cloud-agents/overview/) — How cloud agents work * [Access, Billing, and Identity](/agent-platform/cloud-agents/team-access-billing-and-identity/) — Plan requirements and billing details
# agent_process_failed
Canonical page: [/reference/api-and-sdk/troubleshooting/errors/agent-process-failed/](https://docs.warp.dev/reference/api-and-sdk/troubleshooting/errors/agent-process-failed/)
> The agent process exited unexpectedly during task execution. Retry the task or contact support if it recurs consistently.
The `agent_process_failed` error occurs when the agent process exits unexpectedly after environment setup has completed, before the task reaches a normal terminal state. *** ## Details [Section titled “Details”](#details) * **HTTP Status:** `500 Internal Server Error` * **Retryable:** No * **Task State:** ERROR *** ## When does this occur? [Section titled “When does this occur?”](#when-does-this-occur) This error is returned when: * The agent process exits with a non-zero exit code after environment setup has completed * An unrecoverable runtime error occurs inside the agent process while it is handling the task * The agent process is terminated by the operating system (for example, due to an out-of-memory kill or a segmentation fault) *** ## Example response [Section titled “Example response”](#example-response) ```json { "type": "/reference/api-and-sdk/troubleshooting/errors/agent-process-failed/", "title": "The agent process exited unexpectedly.", "status": 500, "instance": "/api/v1/agent/tasks", "error": "The agent process exited unexpectedly.", "retryable": false, "trace_id": "abc123..." } ``` *** ## How to resolve [Section titled “How to resolve”](#how-to-resolve) 1. Retry the task. Occasional process failures are transient. 2. If the error recurs consistently, look for triggers in the task itself: very large prompts or attached context, memory-heavy tools spawned by the agent, or setup steps that leave the environment in a degraded state. 3. Contact [Warp support](/support-and-community/troubleshooting-and-support/sending-us-feedback/) and include the `trace_id` from the error response if the issue persists. *** ## Related [Section titled “Related”](#related) * [Cloud Agents Overview](/agent-platform/cloud-agents/overview/) — How cloud agent tasks work * [environment\_setup\_failed](/reference/api-and-sdk/troubleshooting/errors/environment-setup-failed/) — Errors during environment setup * [internal\_error](/reference/api-and-sdk/troubleshooting/errors/internal-error/) — Catch-all for unexpected server-side errors
# authentication_required
Canonical page: [/reference/api-and-sdk/troubleshooting/errors/authentication-required/](https://docs.warp.dev/reference/api-and-sdk/troubleshooting/errors/authentication-required/)
> The API key in the request is invalid, expired, or missing. Generate a new key and update your client configuration.
The `authentication_required` error occurs when the API request lacks valid authentication credentials. *** ## Details [Section titled “Details”](#details) * **HTTP Status:** `401 Unauthorized` * **Retryable:** No * **Task State:** ERROR *** ## When does this occur? [Section titled “When does this occur?”](#when-does-this-occur) This error is returned when: * The `Authorization` header is missing from the request * The API key has been revoked or has expired * The API key is malformed or invalid *** ## Example response [Section titled “Example response”](#example-response) ```json { "type": "/reference/api-and-sdk/troubleshooting/errors/authentication-required/", "title": "Your API key is invalid or has expired. Please generate a new key and try again.", "status": 401, "instance": "/api/v1/agent/tasks", "error": "Your API key is invalid or has expired. Please generate a new key and try again.", "retryable": false } ``` *** ## How to resolve [Section titled “How to resolve”](#how-to-resolve) 1. Generate a new API key from the [Oz web app](https://oz.warp.dev) or via the Oz CLI. 2. Update your client configuration with the new key. 3. Retry the request. *** ## Related [Section titled “Related”](#related) * [Oz API & SDK](/reference/api-and-sdk/) — API authentication * [Oz Platform](/agent-platform/cloud-agents/platform/) — API key management
# budget_exceeded
Canonical page: [/reference/api-and-sdk/troubleshooting/errors/budget-exceeded/](https://docs.warp.dev/reference/api-and-sdk/troubleshooting/errors/budget-exceeded/)
> Your team's configured spending budget limit has been reached. Increase the budget or wait for the budget period to reset.
The `budget_exceeded` error occurs when your team has reached the spending budget limit configured in team settings. *** ## Details [Section titled “Details”](#details) * **HTTP Status:** `403 Forbidden` * **Retryable:** No * **Task State:** FAILED *** ## When does this occur? [Section titled “When does this occur?”](#when-does-this-occur) This error is returned when: * Your team has set a spending budget cap, and the current period’s usage has reached that cap * A cloud agent task, scheduled run, or integration-triggered run attempts to start but would exceed the budget The `title` field in the response will describe the specific budget constraint. *** ## Example response [Section titled “Example response”](#example-response) ```json { "type": "/reference/api-and-sdk/troubleshooting/errors/budget-exceeded/", "title": "Monthly spending budget of $50 has been reached.", "status": 403, "instance": "/api/v1/agent/tasks", "error": "Monthly spending budget of $50 has been reached.", "retryable": false } ``` *** ## How to resolve [Section titled “How to resolve”](#how-to-resolve) 1. Go to your team settings and increase the spending budget, or 2. Wait for the budget period to reset (for example, at the start of the next billing cycle). If you are not a team admin, contact your team admin to adjust the budget. *** ## Related [Section titled “Related”](#related) * [Access, Billing, and Identity](/agent-platform/cloud-agents/team-access-billing-and-identity/) — Budget configuration and billing details
# Error: conflict (409)
Canonical page: [/reference/api-and-sdk/troubleshooting/errors/conflict/](https://docs.warp.dev/reference/api-and-sdk/troubleshooting/errors/conflict/)
> The request conflicts with the current state of the resource. Wait for the resource to reach the expected state and retry.
The `conflict` error occurs when a request cannot be completed because the resource is in a state that conflicts with the requested operation. *** ## Details [Section titled “Details”](#details) * **HTTP Status:** `409 Conflict` * **Retryable:** Yes * **Task State:** FAILED *** ## When does this occur? [Section titled “When does this occur?”](#when-does-this-occur) This error is returned when: * You attempt to cancel a task that is still in the **pending** state (the task has not yet been claimed by a worker) The operation can typically succeed once the resource transitions to the expected state. *** ## Example response [Section titled “Example response”](#example-response) ```json { "type": "/reference/api-and-sdk/troubleshooting/errors/conflict/", "title": "Pending agent runs cannot be cancelled, retry after a moment.", "status": 409, "instance": "/api/v1/agent/tasks/abc123/cancel", "error": "Pending agent runs cannot be cancelled, retry after a moment.", "retryable": true } ``` *** ## How to resolve [Section titled “How to resolve”](#how-to-resolve) 1. Wait a moment for the resource to transition to the expected state. 2. Retry the request. For task cancellation specifically, wait until the task moves from **pending** to **in progress** before attempting to cancel. *** ## Related [Section titled “Related”](#related) * [Managing Cloud Agents](/agent-platform/cloud-agents/managing-cloud-agents/) — Viewing and managing agent tasks * [Oz API & SDK](/reference/api-and-sdk/) — API reference for managing agent tasks
# content_policy_violation
Canonical page: [/reference/api-and-sdk/troubleshooting/errors/content-policy-violation/](https://docs.warp.dev/reference/api-and-sdk/troubleshooting/errors/content-policy-violation/)
> The task prompt or environment setup commands were flagged by the platform's automated content policy checks.
The `content_policy_violation` error occurs when the task prompt or environment setup commands are flagged by the platform’s automated content policy checks. *** ## Details [Section titled “Details”](#details) * **HTTP Status:** `403 Forbidden` * **Retryable:** No * **Task State:** FAILED *** ## When does this occur? [Section titled “When does this occur?”](#when-does-this-occur) This error is returned when: * The task prompt contains content that violates Warp’s usage policies * The environment setup commands contain patterns flagged as potentially harmful * The automated content classifier determines the task should be blocked *** ## Example response [Section titled “Example response”](#example-response) ```json { "type": "/reference/api-and-sdk/troubleshooting/errors/content-policy-violation/", "title": "Unable to start cloud agent. Please try again or contact support if the issue persists.", "status": 403, "instance": "/api/v1/agent/tasks", "error": "Unable to start cloud agent. Please try again or contact support if the issue persists.", "retryable": false, "trace_id": "abc123..." } ``` *** ## How to resolve [Section titled “How to resolve”](#how-to-resolve) 1. Review your task prompt and environment setup commands to ensure they comply with [Warp’s usage policies](https://www.warp.dev/legal/terms-of-service). 2. If you believe this was flagged in error, contact [Warp support](/support-and-community/troubleshooting-and-support/sending-us-feedback/) and include the `trace_id` from the error response. *** ## Related [Section titled “Related”](#related) * [Cloud Agents Overview](/agent-platform/cloud-agents/overview/) — How cloud agent tasks work * [Environments](/agent-platform/cloud-agents/environments/) — Configuring setup commands
# environment_setup_failed
Canonical page: [/reference/api-and-sdk/troubleshooting/errors/environment-setup-failed/](https://docs.warp.dev/reference/api-and-sdk/troubleshooting/errors/environment-setup-failed/)
> The cloud agent's environment failed to initialize. Check repo URLs, setup commands, and working directory paths.
The `environment_setup_failed` error occurs when the cloud agent’s runtime environment could not be initialized. This covers failures during any phase of environment setup, including repository cloning, setup command execution, working directory resolution, and MCP server startup. *** ## Details [Section titled “Details”](#details) * **HTTP Status:** `500 Internal Server Error` * **Retryable:** No * **Task State:** FAILED *** ## When does this occur? [Section titled “When does this occur?”](#when-does-this-occur) This error is returned when any part of the environment initialization process fails: * **Git clone failed** — The repository URL is incorrect, the branch does not exist, or the agent does not have access to the repository * **Setup command failed** — A command in the environment’s setup commands list exited with an error (for example, missing dependencies, script errors) * **Working directory not found** — The configured working directory does not exist after cloning * **MCP server startup failed** — An MCP server configured for the environment could not start The `title` field in the response will describe the specific setup failure. *** ## Example response [Section titled “Example response”](#example-response) ```json { "type": "/reference/api-and-sdk/troubleshooting/errors/environment-setup-failed/", "title": "Failed to clone repository: branch 'main' not found in acme/backend", "status": 500, "instance": "/api/v1/agent/tasks", "error": "Failed to clone repository: branch 'main' not found in acme/backend", "retryable": false } ``` *** ## How to resolve [Section titled “How to resolve”](#how-to-resolve) 1. **Check repository configuration** — Verify the repository URL and branch name in your [environment settings](/agent-platform/cloud-agents/environments/). Ensure the repository exists and is accessible. 2. **Check setup commands** — Run the setup commands locally to confirm they work. Look for missing dependencies, incorrect paths, or syntax errors. 3. **Check working directory** — Ensure the working directory path exists relative to the cloned repository root. 4. **Check MCP server configuration** — Verify MCP server startup commands and that any required dependencies or credentials are available. See [MCP Servers for Agents](/reference/cli/mcp-servers/). 5. **Check secrets** — If setup commands reference environment variables from [secrets](/agent-platform/cloud-agents/secrets/), verify the secrets are configured and in scope. *** ## Related [Section titled “Related”](#related) * [Environments](/agent-platform/cloud-agents/environments/) — Configuring cloud agent environments * [Secrets](/agent-platform/cloud-agents/secrets/) — Managing credentials for agent environments * [MCP Servers for Agents](/reference/cli/mcp-servers/) — Configuring MCP servers
# external_authentication_required
Canonical page: [/reference/api-and-sdk/troubleshooting/errors/external-authentication-required/](https://docs.warp.dev/reference/api-and-sdk/troubleshooting/errors/external-authentication-required/)
> The task requires access to an external service (GitHub, Slack, Linear, etc.) that hasn't been authorized. Follow the auth_url to grant access.
The `external_authentication_required` error occurs when a cloud agent task needs access to an external service that the user hasn’t authorized, or when the Warp GitHub App doesn’t have access to the required repositories. *** ## Details [Section titled “Details”](#details) * **HTTP Status:** `401 Unauthorized` * **Retryable:** No * **Task State:** FAILED *** ## When does this occur? [Section titled “When does this occur?”](#when-does-this-occur) This error is returned when: * **GitHub not connected** — Your Warp account is not linked to a GitHub account, but the task’s environment includes GitHub repositories * **Repository inaccessible** — The Warp GitHub App is not installed on, or does not have access to, one or more repositories required by the task’s environment * **Account matching failed** — A Slack or Linear user who triggered the task cannot be matched to a Warp account *** ## Additional metadata fields [Section titled “Additional metadata fields”](#additional-metadata-fields) This error includes extra fields beyond the standard response format: * **`provider`** — The external service name (for example, `"github"`, `"slack"`, `"linear"`) * **`auth_url`** — A URL to complete the authorization flow (when available) * **`inaccessible_repos`** — A list of repository names the agent cannot access (when applicable) *** ## Example responses [Section titled “Example responses”](#example-responses) ### GitHub user not connected [Section titled “GitHub user not connected”](#github-user-not-connected) ```json { "type": "/reference/api-and-sdk/troubleshooting/errors/external-authentication-required/", "title": "User is not connected to GitHub", "status": 401, "instance": "/api/v1/agent/tasks", "error": "User is not connected to GitHub. Authorize access here: https://...", "retryable": false, "provider": "github", "auth_url": "https://github.com/login/oauth/authorize?..." } ``` ### Repository inaccessible [Section titled “Repository inaccessible”](#repository-inaccessible) ```json { "type": "/reference/api-and-sdk/troubleshooting/errors/external-authentication-required/", "title": "User does not have access to the following repositories in the environment: acme/backend", "status": 401, "detail": "inaccessible repos: acme/backend", "instance": "/api/v1/agent/tasks", "error": "User does not have access to the following repositories in the environment: acme/backend (inaccessible repos: acme/backend)", "retryable": false, "provider": "github", "auth_url": "https://github.com/apps/warp-dev/installations/new", "inaccessible_repos": ["acme/backend"] } ``` ### Account matching failed (Slack/Linear) [Section titled “Account matching failed (Slack/Linear)”](#account-matching-failed-slacklinear) ```json { "type": "/reference/api-and-sdk/troubleshooting/errors/external-authentication-required/", "title": "Unable to locate your Warp account", "status": 401, "instance": "/api/v1/agent/tasks", "error": "Unable to locate your Warp account", "retryable": false, "provider": "slack" } ``` *** ## How to resolve [Section titled “How to resolve”](#how-to-resolve) ### GitHub not connected [Section titled “GitHub not connected”](#github-not-connected) 1. Follow the `auth_url` in the response to connect your GitHub account to Warp. 2. Complete the OAuth authorization flow. 3. Retry the task. ### Repository inaccessible [Section titled “Repository inaccessible”](#repository-inaccessible-1) 1. Follow the `auth_url` to install or reconfigure the Warp GitHub App. 2. Ensure the app has access to all repositories listed in `inaccessible_repos`. 3. Retry the task. If you are using an **agent API key** bound to a [cloud agent](/agent-platform/cloud-agents/agents/), ensure the Warp GitHub App is installed on the organization that owns the repositories. ### Account matching failed [Section titled “Account matching failed”](#account-matching-failed) 1. Ensure your Slack or Linear account is associated with the same email as your Warp account. 2. If using Slack, verify the Warp Slack integration is installed in your workspace. 3. Contact your team admin if the issue persists. *** ## Related [Section titled “Related”](#related) * [Environments](/agent-platform/cloud-agents/environments/) — Configuring GitHub repositories for cloud agent environments * [Integrations](/agent-platform/cloud-agents/integrations/) — Setting up Slack and Linear integrations
# feature_not_available
Canonical page: [/reference/api-and-sdk/troubleshooting/errors/feature-not-available/](https://docs.warp.dev/reference/api-and-sdk/troubleshooting/errors/feature-not-available/)
> The requested feature is not included in your current plan. Upgrade your team's plan to access this capability.
The `feature_not_available` error occurs when you attempt to use a feature or capability that is not included in your team’s current plan. *** ## Details [Section titled “Details”](#details) * **HTTP Status:** `403 Forbidden` * **Retryable:** No * **Task State:** FAILED *** ## When does this occur? [Section titled “When does this occur?”](#when-does-this-occur) This error is returned when: * You attempt to use a feature that requires a higher-tier plan (for example, certain integrations, advanced capabilities, or self-hosted execution) * A cloud agent or integration trigger tries to access a feature gated behind a plan upgrade The `title` field in the response will describe the specific feature that is unavailable. *** ## Example response [Section titled “Example response”](#example-response) ```json { "type": "/reference/api-and-sdk/troubleshooting/errors/feature-not-available/", "title": "Slack integration requires a Build plan or higher.", "status": 403, "instance": "/api/v1/agent/tasks", "error": "Slack integration requires a Build plan or higher.", "retryable": false } ``` *** ## How to resolve [Section titled “How to resolve”](#how-to-resolve) 1. Check which plan your team is on in your team’s billing settings. 2. Upgrade to a plan that includes the required feature. 3. Retry the operation. For plan comparisons and feature availability, see [Access, Billing, and Identity](/agent-platform/cloud-agents/team-access-billing-and-identity/). *** ## Related [Section titled “Related”](#related) * [Access, Billing, and Identity](/agent-platform/cloud-agents/team-access-billing-and-identity/) — Plan requirements and feature availability * [Integrations](/agent-platform/cloud-agents/integrations/) — Integration requirements by plan
# infrastructure_timeout
Canonical page: [/reference/api-and-sdk/troubleshooting/errors/infrastructure-timeout/](https://docs.warp.dev/reference/api-and-sdk/troubleshooting/errors/infrastructure-timeout/)
> The task was forcibly terminated because it remained active past the maximum allowed runtime. Retry the task or contact support if it persists.
The `infrastructure_timeout` error occurs when a cloud agent task runs past the platform’s maximum allowed runtime and is forcibly terminated. *** ## Details [Section titled “Details”](#details) * **HTTP Status:** `500 Internal Server Error` * **Retryable:** No * **Task State:** ERROR *** ## When does this occur? [Section titled “When does this occur?”](#when-does-this-occur) This error is returned when: * The task runs longer than the platform’s maximum allowed runtime and is terminated by the periodic stale-task cleanup job * The agent process never reports a terminal status within that window (for example, the process is hung or stuck on a long-running command) * A networking or infrastructure issue causes the task to stall silently without reporting completion *** ## Example response [Section titled “Example response”](#example-response) ```json { "type": "/reference/api-and-sdk/troubleshooting/errors/infrastructure-timeout/", "title": "The task exceeded the maximum allowed runtime and was terminated.", "status": 500, "instance": "/api/v1/agent/tasks", "error": "The task exceeded the maximum allowed runtime and was terminated.", "retryable": false, "trace_id": "abc123..." } ``` *** ## How to resolve [Section titled “How to resolve”](#how-to-resolve) 1. Retry the task. If it consistently times out, break the work into smaller, shorter-running subtasks or reduce the scope of the prompt. 2. Review the [environment configuration](/agent-platform/cloud-agents/environments/) for setup commands or MCP servers that block on user input, long downloads, or unresponsive network calls. 3. Contact [Warp support](/support-and-community/troubleshooting-and-support/sending-us-feedback/) and include the `trace_id` from the error response if the issue persists. *** ## Related [Section titled “Related”](#related) * [Cloud Agents Overview](/agent-platform/cloud-agents/overview/) — How cloud agent tasks work * [internal\_error](/reference/api-and-sdk/troubleshooting/errors/internal-error/) — Other platform-level errors * [Cloud Agents FAQs](/agent-platform/cloud-agents/faqs/) — Common questions about cloud agents
# insufficient_credits
Canonical page: [/reference/api-and-sdk/troubleshooting/errors/insufficient-credits/](https://docs.warp.dev/reference/api-and-sdk/troubleshooting/errors/insufficient-credits/)
> The principal billed for the run has no remaining credits. Top up the right pool — the triggering user's, or the team owner's for agent API key and scheduled runs — to continue.
The `insufficient_credits` error occurs when the principal billed for a cloud agent run has no remaining credits to charge against. On self-serve plans (Build, Max, Business), the billed principal depends on how the run was triggered: * **User-triggered runs** draw from the triggering user’s pool: plan-included credits first, then their user-scoped add-on credits. * **Agent API key and scheduled runs** draw from the team owner’s pool: the owner’s plan-included credits first, then the owner’s add-on credits. When both pools are depleted and [auto-reload](/support-and-community/plans-and-billing/add-on-credits/) is off, new runs return this error. On Enterprise plans, runs draw from the team-scoped credit pool per your contract — contact your account manager when the pool is exhausted. *** ## Details [Section titled “Details”](#details) * **HTTP Status:** `403 Forbidden` * **Retryable:** No * **Task State:** FAILED *** ## When does this occur? [Section titled “When does this occur?”](#when-does-this-occur) This error is returned when: * A user-triggered run runs out of the user’s plan-included credits and their user-scoped add-on credits. * An agent API key or scheduled run runs out of the team owner’s plan-included credits and the owner’s add-on credits. * Auto-reload is off, or auto-reload is on but the team-wide monthly spend cap has been reached. For the full waterfall, see [How are cloud agent runs on team plans billed when no individual user triggered them?](/support-and-community/plans-and-billing/pricing-faqs/#how-are-cloud-agent-runs-on-team-plans-billed-when-no-individual-user-triggered-them) in the Pricing FAQs. *** ## Example response [Section titled “Example response”](#example-response) ```json { "type": "/reference/api-and-sdk/troubleshooting/errors/insufficient-credits/", "title": "The principal billed for this run has no remaining credits. Purchase add-on credits or raise the team-wide spend cap to continue.", "status": 403, "instance": "/api/v1/agent/tasks", "retryable": false } ``` *** ## How to resolve [Section titled “How to resolve”](#how-to-resolve) The fix depends on which principal was billed. **For user-triggered runs (your own pool was exhausted):** 1. Purchase [add-on credits](/support-and-community/plans-and-billing/add-on-credits/) in **Settings** > **Billing and usage**, or wait for your monthly credits to refresh. 2. Alternatively, enable auto-reload, subject to your team’s monthly spend cap. 3. Retry the failed operation. **For agent API key or scheduled runs (the team owner’s pool was exhausted):** 1. The team owner tops up their pool: purchase add-on credits or wait for the monthly refresh. 2. If auto-reload is on but the team-wide spend cap was reached, an admin can raise the cap in **Settings** > **Billing and usage**. 3. Retry the failed operation. If you are not a team admin or the team owner, contact them to top up the right pool. *** ## Related [Section titled “Related”](#related) * [Access, billing, and identity permissions](/agent-platform/cloud-agents/team-access-billing-and-identity/) — Credit billing for individual user runs and agent API key runs. * [Add-on credits](/support-and-community/plans-and-billing/add-on-credits/) — Purchase additional credits and configure auto-reload. * [Platform credits](/support-and-community/plans-and-billing/platform-credits/) — The third credit bucket alongside AI credits and compute credits. * [Cloud Agents Overview](/agent-platform/cloud-agents/overview/) — Billing and plan requirements for cloud agents.
# integration_disabled
Canonical page: [/reference/api-and-sdk/troubleshooting/errors/integration-disabled/](https://docs.warp.dev/reference/api-and-sdk/troubleshooting/errors/integration-disabled/)
> The integration (Slack, Linear, etc.) is currently disabled in the Oz settings. Enable it to continue.
The `integration_disabled` error occurs when a task targets an integration that is currently disabled in the Oz settings. *** ## Details [Section titled “Details”](#details) * **HTTP Status:** `403 Forbidden` * **Retryable:** No * **Task State:** FAILED *** ## When does this occur? [Section titled “When does this occur?”](#when-does-this-occur) This error is returned when: * A Slack message, Linear issue, or other integration event triggers a cloud agent, but the corresponding integration has been disabled in the Oz settings * The integration was previously active but has been turned off by a team admin *** ## Example response [Section titled “Example response”](#example-response) ```json { "type": "/reference/api-and-sdk/troubleshooting/errors/integration-disabled/", "title": "This integration is disabled. Please enable it in Oz.", "status": 403, "instance": "/api/v1/agent/tasks", "error": "This integration is disabled. Please enable it in Oz.", "retryable": false } ``` *** ## How to resolve [Section titled “How to resolve”](#how-to-resolve) 1. Go to the [Oz integrations page](https://oz.warp.dev/integrations). 2. Enable the integration that was disabled. 3. Retry the triggering event or task. *** ## Related [Section titled “Related”](#related) * [Integrations](/agent-platform/cloud-agents/integrations/) — Configuring Slack, Linear, and GitHub integrations * [Oz Web App](/agent-platform/cloud-agents/oz-web-app/) — Managing integrations via the web interface
# integration_not_configured
Canonical page: [/reference/api-and-sdk/troubleshooting/errors/integration-not-configured/](https://docs.warp.dev/reference/api-and-sdk/troubleshooting/errors/integration-not-configured/)
> The integration's setup is incomplete. Visit the setup URL to finish configuring the integration.
The `integration_not_configured` error occurs when a task requires an integration whose setup has not been completed (for example, missing OAuth tokens or unfinished configuration steps). *** ## Details [Section titled “Details”](#details) * **HTTP Status:** `400 Bad Request` * **Retryable:** No * **Task State:** FAILED *** ## When does this occur? [Section titled “When does this occur?”](#when-does-this-occur) This error is returned when: * An integration (Slack, Linear, etc.) was partially set up but the configuration was not completed * Required OAuth tokens or credentials for the integration are missing or expired * The integration was installed but additional setup steps were not finished *** ## Additional metadata fields [Section titled “Additional metadata fields”](#additional-metadata-fields) This error includes extra fields beyond the standard response format: * **`integration_name`** — The name of the integration that needs configuration * **`setup_url`** — A URL to the integration setup page where you can complete configuration *** ## Example response [Section titled “Example response”](#example-response) ```json { "type": "/reference/api-and-sdk/troubleshooting/errors/integration-not-configured/", "title": "Slack integration is not configured", "status": 400, "instance": "/api/v1/agent/tasks", "error": "Slack integration is not configured", "retryable": false, "integration_name": "slack", "setup_url": "https://oz.warp.dev/integrations" } ``` *** ## How to resolve [Section titled “How to resolve”](#how-to-resolve) 1. Visit the `setup_url` provided in the response metadata (or go to the [Oz integrations page](https://oz.warp.dev/integrations)). 2. Complete all setup steps for the integration. 3. Retry the triggering event or task. *** ## Related [Section titled “Related”](#related) * [Integrations](/agent-platform/cloud-agents/integrations/) — Integration setup guides * [Slack Integration](/agent-platform/cloud-agents/integrations/slack/) — Slack-specific setup * [Linear Integration](/agent-platform/cloud-agents/integrations/linear/) — Linear-specific setup
# internal_error
Canonical page: [/reference/api-and-sdk/troubleshooting/errors/internal-error/](https://docs.warp.dev/reference/api-and-sdk/troubleshooting/errors/internal-error/)
> An unexpected server-side error occurred. The platform will automatically retry. Contact support if the issue persists.
The `internal_error` is a catch-all for unexpected server-side errors. The platform automatically retries these errors before marking the task as failed. *** ## Details [Section titled “Details”](#details) * **HTTP Status:** `500 Internal Server Error` * **Retryable:** Yes (automatic) * **Task State:** ERROR *** ## When does this occur? [Section titled “When does this occur?”](#when-does-this-occur) This error is returned when: * An unexpected condition occurred on the server that does not match any specific error category * An internal service dependency failed or timed out * An unclassified error occurred during task processing *** ## Example response [Section titled “Example response”](#example-response) ```json { "type": "/reference/api-and-sdk/troubleshooting/errors/internal-error/", "title": "An unexpected error occurred. Please try again later. If the issue persists, contact support.", "status": 500, "instance": "/api/v1/agent/tasks", "error": "An unexpected error occurred. Please try again later. If the issue persists, contact support.", "retryable": true, "trace_id": "abc123..." } ``` *** ## How to resolve [Section titled “How to resolve”](#how-to-resolve) No action is typically needed — the platform will automatically retry the task. If the error persists: 1. Wait a few minutes and try again. 2. Contact [Warp support](/support-and-community/troubleshooting-and-support/sending-us-feedback/) and include the `trace_id` from the error response. *** ## Related [Section titled “Related”](#related) * [Cloud Agents Overview](/agent-platform/cloud-agents/overview/) — How cloud agent tasks work * [Cloud Agents FAQs](/agent-platform/cloud-agents/faqs/) — Common questions about cloud agents
# invalid_request
Canonical page: [/reference/api-and-sdk/troubleshooting/errors/invalid-request/](https://docs.warp.dev/reference/api-and-sdk/troubleshooting/errors/invalid-request/)
> The request body is malformed, missing required fields, or contains invalid parameter values.
The `invalid_request` error occurs when the API request is malformed or contains invalid parameters. *** ## Details [Section titled “Details”](#details) * **HTTP Status:** `400 Bad Request` * **Retryable:** No * **Task State:** FAILED *** ## When does this occur? [Section titled “When does this occur?”](#when-does-this-occur) This error is returned when: * Required fields are missing from the request body (for example, `prompt` or `schedule_id`) * Parameter values are invalid or out of range * The request body cannot be parsed (malformed JSON) * A referenced identifier is in the wrong format * A team-owned task references a personal environment (team tasks require team-scoped environments) The `detail` field in the response will describe the specific validation issue. *** ## Example response [Section titled “Example response”](#example-response) ```json { "type": "/reference/api-and-sdk/troubleshooting/errors/invalid-request/", "title": "The request contains invalid or missing parameters.", "status": 400, "detail": "schedule_id is required", "instance": "/api/v1/agent/tasks", "error": "The request contains invalid or missing parameters. (schedule_id is required)", "retryable": false } ``` *** ## How to resolve [Section titled “How to resolve”](#how-to-resolve) 1. Check the `detail` field for the specific validation issue. 2. Correct the request parameters according to the [API documentation](/reference/api-and-sdk/). 3. Retry the request. *** ## Related [Section titled “Related”](#related) * [Oz API & SDK](/reference/api-and-sdk/) — API request format and parameters
# not_authorized
Canonical page: [/reference/api-and-sdk/troubleshooting/errors/not-authorized/](https://docs.warp.dev/reference/api-and-sdk/troubleshooting/errors/not-authorized/)
> The authenticated user or API key does not have permission to perform the requested operation.
The `not_authorized` error occurs when the authenticated principal (user or API key) does not have sufficient permissions to perform the requested operation. *** ## Details [Section titled “Details”](#details) * **HTTP Status:** `403 Forbidden` * **Retryable:** No * **Task State:** FAILED *** ## When does this occur? [Section titled “When does this occur?”](#when-does-this-occur) This error is returned when: * You attempt to access a resource owned by another team or user * Your API key does not have the required scope for the operation * You try to perform an admin-level operation without admin privileges * A team-level operation is attempted by a user who is not a member of the team *** ## Example response [Section titled “Example response”](#example-response) ```json { "type": "/reference/api-and-sdk/troubleshooting/errors/not-authorized/", "title": "You do not have permission for this operation.", "status": 403, "detail": "user is not a member of the team", "instance": "/api/v1/agent/tasks/abc123", "error": "You do not have permission for this operation. (user is not a member of the team)", "retryable": false } ``` *** ## How to resolve [Section titled “How to resolve”](#how-to-resolve) 1. Verify that the API key or user account belongs to the correct team. 2. Check that your role has the necessary permissions for the operation. 3. Contact a team admin if you need elevated access. *** ## Related [Section titled “Related”](#related) * [Access, Billing, and Identity](/agent-platform/cloud-agents/team-access-billing-and-identity/) — Permission model and identity * [Oz API & SDK](/reference/api-and-sdk/) — API authentication and authorization
# operation_not_supported
Canonical page: [/reference/api-and-sdk/troubleshooting/errors/operation-not-supported/](https://docs.warp.dev/reference/api-and-sdk/troubleshooting/errors/operation-not-supported/)
> The requested operation is not supported for this resource or its current state.
The `operation_not_supported` error occurs when you attempt an operation that is not currently supported for the given resource or its current state. *** ## Details [Section titled “Details”](#details) * **HTTP Status:** `422 Unprocessable Entity` * **Retryable:** No * **Task State:** FAILED *** ## When does this occur? [Section titled “When does this occur?”](#when-does-this-occur) This error is returned when: * You attempt to cancel a **self-hosted** agent run via the API (self-hosted runs must be cancelled through the hosting infrastructure) * You attempt to cancel a **local** agent run via the API (local runs must be cancelled from the source client) * You attempt to cancel a run triggered via **GitHub Actions** (these must be cancelled through the GitHub Actions workflow view) *** ## Example response [Section titled “Example response”](#example-response) ```json { "type": "/reference/api-and-sdk/troubleshooting/errors/operation-not-supported/", "title": "Self-hosted agent runs cannot be cancelled with the API.", "status": 422, "instance": "/api/v1/agent/tasks/abc123/cancel", "error": "Self-hosted agent runs cannot be cancelled with the API.", "retryable": false } ``` *** ## How to resolve [Section titled “How to resolve”](#how-to-resolve) 1. Check the error message to understand which operation is unsupported and why. 2. Use the appropriate method for the operation: * **Self-hosted runs** — Cancel through your hosting infrastructure. * **Local runs** — Cancel from the Warp desktop app or terminal session. * **GitHub Actions runs** — Cancel via the GitHub Actions workflow view. *** ## Related [Section titled “Related”](#related) * [Cloud Agents Overview](/agent-platform/cloud-agents/overview/) — How cloud agent tasks work * [Self-hosting](/agent-platform/cloud-agents/self-hosting/) — Self-hosted agent configuration * [Oz API & SDK](/reference/api-and-sdk/) — API reference for managing agent tasks
# resource_not_found
Canonical page: [/reference/api-and-sdk/troubleshooting/errors/resource-not-found/](https://docs.warp.dev/reference/api-and-sdk/troubleshooting/errors/resource-not-found/)
> The requested resource (task, environment, schedule, agent, etc.) does not exist or has been deleted.
The `resource_not_found` error occurs when a referenced resource cannot be found. This typically means the resource ID is incorrect, the resource has been deleted, or it belongs to a different team. *** ## Details [Section titled “Details”](#details) * **HTTP Status:** `404 Not Found` * **Retryable:** No * **Task State:** FAILED *** ## When does this occur? [Section titled “When does this occur?”](#when-does-this-occur) This error is returned when: * A task ID, environment UID, schedule ID, or other resource identifier does not match any existing resource * The referenced resource has been deleted * The resource exists but belongs to a different team or user (and you don’t have access) The `detail` field in the response will describe which resource was not found. *** ## Example response [Section titled “Example response”](#example-response) ```json { "type": "/reference/api-and-sdk/troubleshooting/errors/resource-not-found/", "title": "The requested resource was not found.", "status": 404, "detail": "environment abc123 not found", "instance": "/api/v1/agent/tasks", "error": "The requested resource was not found. (environment abc123 not found)", "retryable": false } ``` *** ## How to resolve [Section titled “How to resolve”](#how-to-resolve) 1. Verify the resource ID is correct and properly formatted. 2. Check that the resource has not been deleted (for example, via the [Oz web app](https://oz.warp.dev) or CLI). 3. Confirm the resource belongs to your team or that you have access to it. *** ## Related [Section titled “Related”](#related) * [Environments](/agent-platform/cloud-agents/environments/) — Managing cloud agent environments * [Managing Cloud Agents](/agent-platform/cloud-agents/managing-cloud-agents/) — Viewing and managing agent tasks
# resource_unavailable
Canonical page: [/reference/api-and-sdk/troubleshooting/errors/resource-unavailable/](https://docs.warp.dev/reference/api-and-sdk/troubleshooting/errors/resource-unavailable/)
> A transient infrastructure issue prevented the task from running. The platform will automatically retry. No action is needed.
The `resource_unavailable` error indicates a transient infrastructure issue that prevented the cloud agent task from running. This is automatically retried by the platform. *** ## Details [Section titled “Details”](#details) * **HTTP Status:** `429 Too Many Requests` or `500 Internal Server Error` * **Retryable:** Yes (automatic) * **Task State:** ERROR *** ## When does this occur? [Section titled “When does this occur?”](#when-does-this-occur) This error is returned when: * **Capacity full (429)** — Cloud agent capacity is temporarily saturated. Your task will be queued and retried automatically. * **Sandbox creation failed (500)** — A sandbox instance could not be created for the agent. This is typically a transient issue. *** ## Example responses [Section titled “Example responses”](#example-responses) ### Capacity full [Section titled “Capacity full”](#capacity-full) ```json { "type": "/reference/api-and-sdk/troubleshooting/errors/resource-unavailable/", "title": "Agent capacity is temporarily full. Your task will be retried automatically, or you can try again later.", "status": 429, "instance": "/api/v1/agent/tasks", "error": "Agent capacity is temporarily full. Your task will be retried automatically, or you can try again later.", "retryable": true, "trace_id": "abc123..." } ``` ### Sandbox creation failed [Section titled “Sandbox creation failed”](#sandbox-creation-failed) ```json { "type": "/reference/api-and-sdk/troubleshooting/errors/resource-unavailable/", "title": "Failed to create a sandbox instance for your agent. This is typically a transient issue — your task will be retried automatically.", "status": 500, "instance": "/api/v1/agent/tasks", "error": "Failed to create a sandbox instance for your agent. This is typically a transient issue — your task will be retried automatically.", "retryable": true, "trace_id": "abc123..." } ``` *** ## How to resolve [Section titled “How to resolve”](#how-to-resolve) No action is typically needed — the platform will automatically retry the task. If the error persists after retries: 1. Try again later when capacity has freed up. 2. Contact [Warp support](/support-and-community/troubleshooting-and-support/sending-us-feedback/) and include the `trace_id` from the error response. *** ## Related [Section titled “Related”](#related) * [Cloud Agents Overview](/agent-platform/cloud-agents/overview/) — How cloud agent execution works * [Deployment Patterns](/agent-platform/cloud-agents/deployment-patterns/) — Execution models and infrastructure
# Oz CLI reference
Canonical page: [/reference/cli/](https://docs.warp.dev/reference/cli/)
> Use the Oz CLI to run, configure, and manage agents from the terminal.
The Oz CLI is the command-line tool for running and managing Warp’s cloud agents from any terminal, script, or CI pipeline. Use it to start agents locally or in the cloud, connect MCP servers, configure integrations, and authenticate without requiring the Warp desktop app. ## What is the Oz CLI? [Section titled “What is the Oz CLI?”](#what-is-the-oz-cli) The Oz CLI is the command-line tool that lets you run [Cloud Agents](/agent-platform/cloud-agents/overview/) from anywhere, including terminals, scripts, automated systems, or services. It’s the standard runtime entry point that turns a **prompt** plus **configuration** into an **executable agent task** that runs on either a **Warp-hosted or [self-hosted](/agent-platform/cloud-agents/self-hosting/) runner**. With the Oz CLI, you can: * Run agents locally for development and debugging * Run agents on remote machines * Connect agents to MCP servers like GitHub and Linear * Configure integrations that connect agents to Slack, Linear, and other trigger surfaces ## Installing the CLI [Section titled “Installing the CLI”](#installing-the-cli) You can install the Oz CLI as part of the Warp desktop app, or as a standalone package. ### Bundled with Warp [Section titled “Bundled with Warp”](#bundled-with-warp) The Oz CLI is automatically distributed with the Warp desktop app and can be used right away in Warp. To make the CLI globally available, add it to your `PATH`. * macOS To add the Oz CLI to your `PATH`: 1. Open the [Command Palette](/terminal/command-palette/) (`CMD+P` ) 2. In the search field, find and select the **Install Oz CLI Command** action. * Windows In the Warp installer, select **Add Warp to PATH**. If you are installing for all users, this will put the CLI on the system path. Otherwise, the CLI is only added to the path for your account. * Linux To run the Oz CLI on Linux, use the same command that you’d use to start Warp normally. If you installed Warp via a package manager, it should already be on the system `PATH`. ### Standalone package [Section titled “Standalone package”](#standalone-package) Warp provides standalone packages for the CLI on macOS and Linux, without the Warp app. * macOS On macOS, we recommend that you install and update the standalone CLI with [Homebrew](https://brew.sh/), using the [`warpdotdev/warp` tap](https://github.com/warpdotdev/homebrew-warp): ```sh $ brew tap warpdotdev/warp $ brew update $ brew install --cask oz ``` If you’re using Warp Preview, install the preview version of the CLI instead: ```sh brew install --cask oz@preview ``` *** You can also download the CLI directly from these URLs: * [Apple Silicon](https://app.warp.dev/download/cli?os=macos\&package=tar\&arch=aarch64) * [Intel](https://app.warp.dev/download/cli?os=macos\&package=tar\&arch=x86_64) * [Apple Silicon, Warp Preview](https://app.warp.dev/download/cli?os=macos\&channel=preview\&package=tar\&arch=aarch64) * [Intel, Warp Preview](https://app.warp.dev/download/cli?os=macos\&channel=preview\&package=tar\&arch=x86_64) * Linux On Linux, we recommend that you install and update the standalone CLI through your distribution’s package manager. We support `apt`, `yum`, and `pacman`. 1. Add the Warp package repository for your distribution (see the [installation instructions](/getting-started/quickstart/installation-and-setup/)). 2. Install either the stable or Preview package (replace `apt` with `yum` or `pacman` as needed): ```sh # Stable sudo apt install oz-stable # Preview (beta/early-access) sudo apt install oz-preview ``` *** You can also install the CLI by downloading a package directly. These installers automatically add the Warp repository, so future updates come through your package manager: * x86-64: [`.deb`](https://app.warp.dev/download/cli?os=linux\&package=deb\&arch=x86_64), [`.rpm`](https://app.warp.dev/download/cli?os=linux\&package=rpm\&arch=x86_64), [pacman](https://app.warp.dev/download/cli?os=linux\&package=pacman\&arch=x86_64) * aarch64: [`.deb`](https://app.warp.dev/download/cli?os=linux\&package=deb\&arch=aarch64), [`.rpm`](https://app.warp.dev/download/cli?os=linux\&package=rpm\&arch=aarch64), [pacman](https://app.warp.dev/download/cli?os=linux\&package=pacman\&arch=aarch64) * Windows A standalone CLI package is not currently available on Windows. To use the Oz CLI on Windows, install the Warp app, which bundles the CLI. You can install Warp using [WinGet](https://learn.microsoft.com/en-us/windows/package-manager/winget/): ```powershell winget install Warp.Warp ``` After installation, see [Bundled with Warp](#bundled-with-warp) for instructions on adding the CLI to your `PATH`. ## Running the CLI [Section titled “Running the CLI”](#running-the-cli) Regardless of your OS or installation method, the CLI command is `oz`. If you’re using [Warp Preview](/support-and-community/community/warp-preview-and-alpha-program/), use `oz-preview` instead. ## Logging in [Section titled “Logging in”](#logging-in) The Oz CLI supports two authentication methods, depending on where and how you’re running agents. * **Interactive login —** best for local machines where you have Warp installed and can authenticate through a browser. * **API keys** — best for automated or remote environments that need to authenticate without human interaction. ### Interactive login (local machines) [Section titled “Interactive login (local machines)”](#interactive-login-local-machines) Use interactive login when you’re working on a machine where you already use the Warp app, or when you can open a browser to complete authentication. If you use the CLI on a host where you’re already signed in to Warp, it automatically reuses your existing credentials. To authenticate interactively: ```bash oz login ``` The CLI prints out a URL that you can open in any browser to login to Warp. ### Checking who you’re signed in as [Section titled “Checking who you’re signed in as”](#checking-who-youre-signed-in-as) Use `oz whoami` to print information about the currently authenticated principal: ```sh oz whoami ``` The output includes your user or service account ID, display name, email, and team (when available). When the CLI is authenticated as a service account principal, that principal is a [cloud agent](/agent-platform/cloud-agents/agents/) on your team. For machine-readable output, set `--output-format json` or `--output-format text`. ```sh # JSON output for scripts oz whoami --output-format json # Compact "type:id" output oz whoami --output-format text ``` If `oz whoami` reports that it could not determine your user ID, your credentials are missing or invalid. Run `oz login` (or set `WARP_API_KEY`) and try again. ### Logging out [Section titled “Logging out”](#logging-out) Use `oz logout` to clear the CLI’s cached credentials on this machine: ```sh oz logout ``` If you weren’t logged in, the command prints `You are not logged in.` and exits. After logging out, run `oz login` to authenticate again. ### API key authentication [Section titled “API key authentication”](#api-key-authentication) Use an API key when the environment must authenticate on its own, such as CI pipelines, headless servers, VMs, Codespaces, or containers. API keys let the CLI authenticate non-interactively. For detailed instructions on creating, managing, and using API keys, see [API Keys](/reference/cli/api-keys/). **Quickstart:** ```sh $ export WARP_API_KEY="wk-xxx..." $ oz agent run --prompt "analyze this codebase" ``` *** ## Running agents [Section titled “Running agents”](#running-agents) The Oz CLI offers two ways to run agents, depending on where you want the work to happen: **Use `oz agent run` when:** * You’re developing locally and want immediate feedback * You need the agent to work with files in your current directory * You want to inspect and modify the agent’s work in real time * You’re debugging or iterating on prompts **Use `oz agent run-cloud` when:** * You want the agent to run on a remote machine or standardized environment * You’re triggering agent work from CI/CD or automated systems * You need the agent to run independently of your local session * You’re delegating work that doesn’t require your immediate attention ### Running locally: \`oz agent run\` [Section titled “Running locally: \`oz agent run\`”](#running-locally-oz-agent-run) To start an agent, use the `oz agent run` subcommand. You’ll need to specify a prompt and, optionally, the [MCP servers](/agent-platform/capabilities/mcp/) and [agent profile](/agent-platform/capabilities/agent-profiles-permissions/) to use. ```sh oz agent run --prompt "set up a new Rust crate named warp-cli" I'll run a few terminal commands to: - Check if this is a Git repo and Cargo workspace - Create a new binary crate named warp-cli ``` **Key flags:** * `--cwd ` (`-C`) — run from a different directory. * `--name ` (`-n`) — label the run for grouping and traceability. * `--share` — share the session with teammates (see [Collaboration](/reference/cli/#collaboration)). * `--profile ` — use a specific agent profile (see [Using Agent Profiles](/reference/cli/#using-agent-profiles)). * `--model ` — override the default model (see [Model Choice](/agent-platform/inference/model-choice/)). * `--skill ` — use a skill as the base prompt (see [Using Skills](/reference/cli/#using-skills)). * `--mcp ` — start one or more MCP servers before execution (UUID, JSON file path, or inline JSON). Can be repeated. * `--environment ` (`-e`) — run in a specific cloud environment. * `--file ` (`-f`) — load run configuration from a YAML or JSON file. The agent will automatically carry out the task you gave it, printing out tool calls and responses as it works. By default, the agent runs in your current working directory. To run from a different directory, use the `-C/--cwd` flag. ### Running agents remotely: \`oz agent run-cloud\` [Section titled “Running agents remotely: \`oz agent run-cloud\`”](#running-agents-remotely-oz-agent-run-cloud) Cloud runs dispatch tasks to remote environments. Use cloud runs for: * Background processing * Standardized team configurations * Remote execution on servers you don’t directly access ```sh oz agent run-cloud \ --environment \ --name "Repo summary" \ --prompt "Summarize this repo and list the top 5 risky areas" \ --open ``` **Key flags** * `--environment ` (`-e`) — select the environment to run in. * `--no-environment` — run without an environment (not recommended). * `--open` — view the agent’s session in Warp once it’s available. * `--name ` (`-n`) — label the run for grouping and traceability (see [Naming runs](/reference/cli/#naming-runs) below). * `--mcp ` — start one or more MCP servers before execution (UUID, JSON file path, or inline JSON). Can be repeated. * `--model ` — override the default model. * `--skill ` — use a skill from the environment’s repository as the base prompt (see [Using Skills](/reference/cli/#using-skills)). * `--host ` — run on a specific self-hosted worker instead of Warp-hosted infrastructure. * `--attach ` — attach an image file to the agent query. Can be repeated (maximum 5). * `--computer-use` / `--no-computer-use` — enable or disable [Computer Use](/agent-platform/capabilities/computer-use/) for this run. * `--file ` (`-f`) — load run configuration from a YAML or JSON file. **Key differences from `run`** * No `--cwd` — the environment determines the working directory. * No `--share` — sharing options are on `run`, not `run-cloud`. * No `--profile` — cloud runs do not use agent profiles. #### Naming runs [Section titled “Naming runs”](#naming-runs) The `--name` flag assigns a config name to the run. Use it to group related runs under a shared label so you can filter, search, and track them later. **How names work:** * **Skill-based runs** — When you run an agent from a [skill](/agent-platform/capabilities/skills/), the name is automatically set to the skill name. You don’t need to pass `--name` explicitly. * **Custom runs** — When you build your own automation (via the CLI, API, or SDK), set `--name` to a consistent value that describes the workflow’s intent. **Why naming matters:** When your team runs many agents across schedules, integrations, and ad-hoc triggers, `name` lets you answer questions like “how many distinct workflows are we running?” and “how often does this particular workflow run?” You can filter runs by name using the `name` query parameter on `GET /agent/runs` in the [Oz API](/reference/api-and-sdk/). **Examples:** ```sh # Name a recurring workflow for easy tracking oz agent run-cloud \ --environment \ --name "nightly-dependency-check" \ --prompt "Check for outdated dependencies and open a PR with updates" # Skill-based runs are named automatically oz agent run-cloud \ --environment \ --skill "myorg/backend:code-review" \ --prompt "review the latest PR" ``` **When cloud runs fail** * Verify your environment has the correct repository and context. * Check that your profile allows the commands and MCP servers needed. * Ensure environment variables are set in the environment, not your local shell. #### Reusing saved prompts and Warp Drive objects [Section titled “Reusing saved prompts and Warp Drive objects”](#reusing-saved-prompts-and-warp-drive-objects) You can reuse saved prompts with `--saved-prompt`, and reference notebooks, workflows, and rules inline in any `--prompt` string. See [Referencing Warp Drive objects](/reference/cli/warp-drive/) for details. ## Using agent profiles [Section titled “Using agent profiles”](#using-agent-profiles) Agent profiles control what the agent can do, how it behaves, and where it can act. Use the `--profile` flag with `oz agent run` to apply a specific profile. See [Agent profiles](/reference/cli/agent-profiles/) for how to find profile IDs and apply them. ## Using MCP servers [Section titled “Using MCP servers”](#using-mcp-servers) MCP servers connect agents to external systems like GitHub, Linear, or Sentry. Use the `--mcp` flag with any of three formats: a Warp MCP server UUID, inline JSON, or a path to a JSON config file. See [MCP Servers](/reference/cli/mcp-servers/) for full details, including how to find UUIDs, combine multiple servers, and handle environment variables on remote machines. ## Using skills [Section titled “Using skills”](#using-skills) [Skills](/agent-platform/capabilities/skills/) are reusable instruction sets that teach agents how to perform specific tasks. Use the `--skill` flag to run an agent from a skill stored in a repository. See [Skills](/reference/cli/skills/) for supported spec formats and examples for both local and cloud agent runs. ## Collaboration [Section titled “Collaboration”](#collaboration) In addition to text-based output, the CLI can share the agent’s session for you to access on other devices or in a browser. To enable [Agent Session Sharing](/agent-platform/local-agents/session-sharing/), use the `--share` flag. By default, the session is only accessible to the user running the CLI, but you can also share with [Teams](/knowledge-and-collaboration/teams/) or other Warp users: ```sh # Share the agent's session with yourself: $ oz agent run --share --prompt "fix the compiler error" # Give specific users view-only access to a session: $ oz agent run --share firstuser@example.com --share otheruser@example.com --prompt "fix the compiler error" # Let any user on your team edit the session: $ oz agent run --share team:edit --prompt "fix the compiler error" ``` The `--share` flag can be repeated, and uses the following syntax: * `--share user@email.com` or `--share user@email.com:view` — gives specified user read-only access to the session. * `--share user@email.com:edit` — gives specified user `user@email.com` read/write access to the session. * `--share team` or `--share team:view` — gives all members of your team read-only access to the session. * `--share team:edit` — gives all members of your team read/write access to the session. ## Additional commands [Section titled “Additional commands”](#additional-commands) The following commands are available for managing and inspecting Oz resources. ### `oz agent list` [Section titled “oz agent list”](#oz-agent-list) List all available skills discovered from your environments. Optionally filter by repository: ```sh oz agent list oz agent list --repo owner/repo ``` ### `oz run list` / `oz run get` [Section titled “oz run list / oz run get”](#oz-run-list--oz-run-get) List and inspect cloud agent runs: ```sh # List recent runs (default: 10) oz run list oz run list --limit 20 # Get details for a specific run oz run get ``` ### `oz model list` [Section titled “oz model list”](#oz-model-list) List all available models: ```sh oz model list ``` ### `oz environment image list` [Section titled “oz environment image list”](#oz-environment-image-list) List suggested base images for cloud environments: ```sh oz environment image list ``` ### `oz artifact get` / `oz artifact download` [Section titled “oz artifact get / oz artifact download”](#oz-artifact-get--oz-artifact-download) Inspect and retrieve files an agent produced during a run. See [Artifacts](/reference/cli/artifacts/) for details. ### `oz federate issue-token` [Section titled “oz federate issue-token”](#oz-federate-issue-token) Issue a short-lived OIDC identity token from inside a running agent to authenticate to cloud providers without long-lived credentials. See [Federated identity tokens](/reference/cli/federate/) for details. *** ## Troubleshooting [Section titled “Troubleshooting”](#troubleshooting) For built-in CLI help commands and solutions to common errors — including authentication issues, agent failures, environment problems, and Docker image issues — see [Troubleshooting](/reference/cli/troubleshooting/).
# Agent profiles
Canonical page: [/reference/cli/agent-profiles/](https://docs.warp.dev/reference/cli/agent-profiles/)
> Use agent profiles with the Oz CLI to control what the agent can access, how it behaves, and where it can act.
Agent profiles control what the agent can do, how it behaves, and where it can act when running from the Oz CLI. Create profiles in the Warp app to configure file access, command execution, MCP server usage, model selection, and directory permissions, then reference them by ID in CLI commands. Agent profiles control three things: * **What the agent can do** — file access, command execution, and MCP server usage * **How the agent works** — model selection, autonomy level, and response style * **Where the agent can act** — directory allowlists and denylists You can create and configure agent profiles in the Warp app. For detailed instructions, see [Agent Profiles & Permissions](/agent-platform/capabilities/agent-profiles-permissions/). Agent profiles are automatically synced to each host where you have Warp installed, so you can use them remotely as well. Caution The default profile for CLI usage is broadly permissive and gives the agent the ability to read and write files, apply code diffs, and execute commands (with a default denylist). The agent does not have the ability to use MCP servers by default. ## Using a profile with the CLI [Section titled “Using a profile with the CLI”](#using-a-profile-with-the-cli) 1. Find the profile ID using `oz agent profile list`: ```sh $ oz agent profile list +--------------+------------------------+ | Name | ID | +=======================================+ | Default | AnTb02PZfrkVC9l4V15eH1 | |--------------+------------------------| | Coding | CWhozDJPdPCsjJ1pSG0HCN | |--------------+------------------------| | Command Line | hV6n5dNm7ThQVlOiPF8DLS | +--------------+------------------------+ ``` 2. Pass that ID using the `--profile` flag: ```sh $ oz agent run --profile CWhozDJPdPCsjJ1pSG0HCN --prompt "update my CI pipeline to use nextest" ```
# API keys for the Oz CLI
Canonical page: [/reference/cli/api-keys/](https://docs.warp.dev/reference/cli/api-keys/)
> Create and manage API keys for authenticating the Oz CLI and cloud agents.
API keys let the Oz CLI and cloud agents authenticate without human interaction. Use API keys for CI pipelines, headless servers, VMs, Codespaces, containers, and other automated environments. ## Personal vs. agent keys [Section titled “Personal vs. agent keys”](#personal-vs-agent-keys) Every API key is either a **personal API key** or an **agent API key**. * **Personal API keys** authenticate as you. Runs use your GitHub permissions, draw from your credit pool, and inherit your account’s [skills](/agent-platform/capabilities/skills/). Use a personal key when the run should act on your behalf — for example, developer-triggered API automation, or the [Enterprise Analytics API](/enterprise/enterprise-features/analytics-api/), which only accepts personal keys. * **Agent API keys** run as a [cloud agent](/agent-platform/cloud-agents/agents/) on your team. Use an agent key for scheduled jobs, integrations (Slack, Linear, GitHub Actions), SDK-triggered runs, and other automation that isn’t tied to a specific user. Billing and GitHub permissions are scoped to the team rather than to you. ## Creating an API key [Section titled “Creating an API key”](#creating-an-api-key) You can create an API key in either the [Oz web app](https://oz.warp.dev/settings) or the Warp app. Both surfaces produce keys that authenticate the CLI and SDK identically. ### From the Oz web app (recommended) [Section titled “From the Oz web app (recommended)”](#from-the-oz-web-app-recommended) 1. Open [oz.warp.dev/settings](https://oz.warp.dev/settings). 2. In the API keys section, click **Generate new token**. 3. Choose the type: * **Personal** — Tied to your individual Warp account. * **Agent** — Runs as a cloud agent on your team. Pick a cloud agent from the dropdown. 4. Enter a name for the key and choose an expiration (1 day, 30 days, 90 days, or never). 5. Click **Create key**. 6. Copy the raw API key and store it securely. **You won’t be able to see it again after closing the dialog.** ### From the Warp app [Section titled “From the Warp app”](#from-the-warp-app) 1. In the Warp app, click your profile photo in the top-right corner, then click **Settings**. 2. In the sidebar, expand **Cloud platform** and click **Oz Cloud API Keys**. 3. In the API Keys section, click **+ Create API Key**. 4. Pick **Personal** for a personal key, or **Agent** / **Team** for an agent key tied to your team. (The toggle may still read **Team** in older versions of the desktop app.) 5. Name the key and choose an expiration (1 day, 30 days, 90 days, or never). 6. Click **Create key**. 7. Copy the raw API key and store it securely. **You won’t be able to see it again after closing the dialog.** 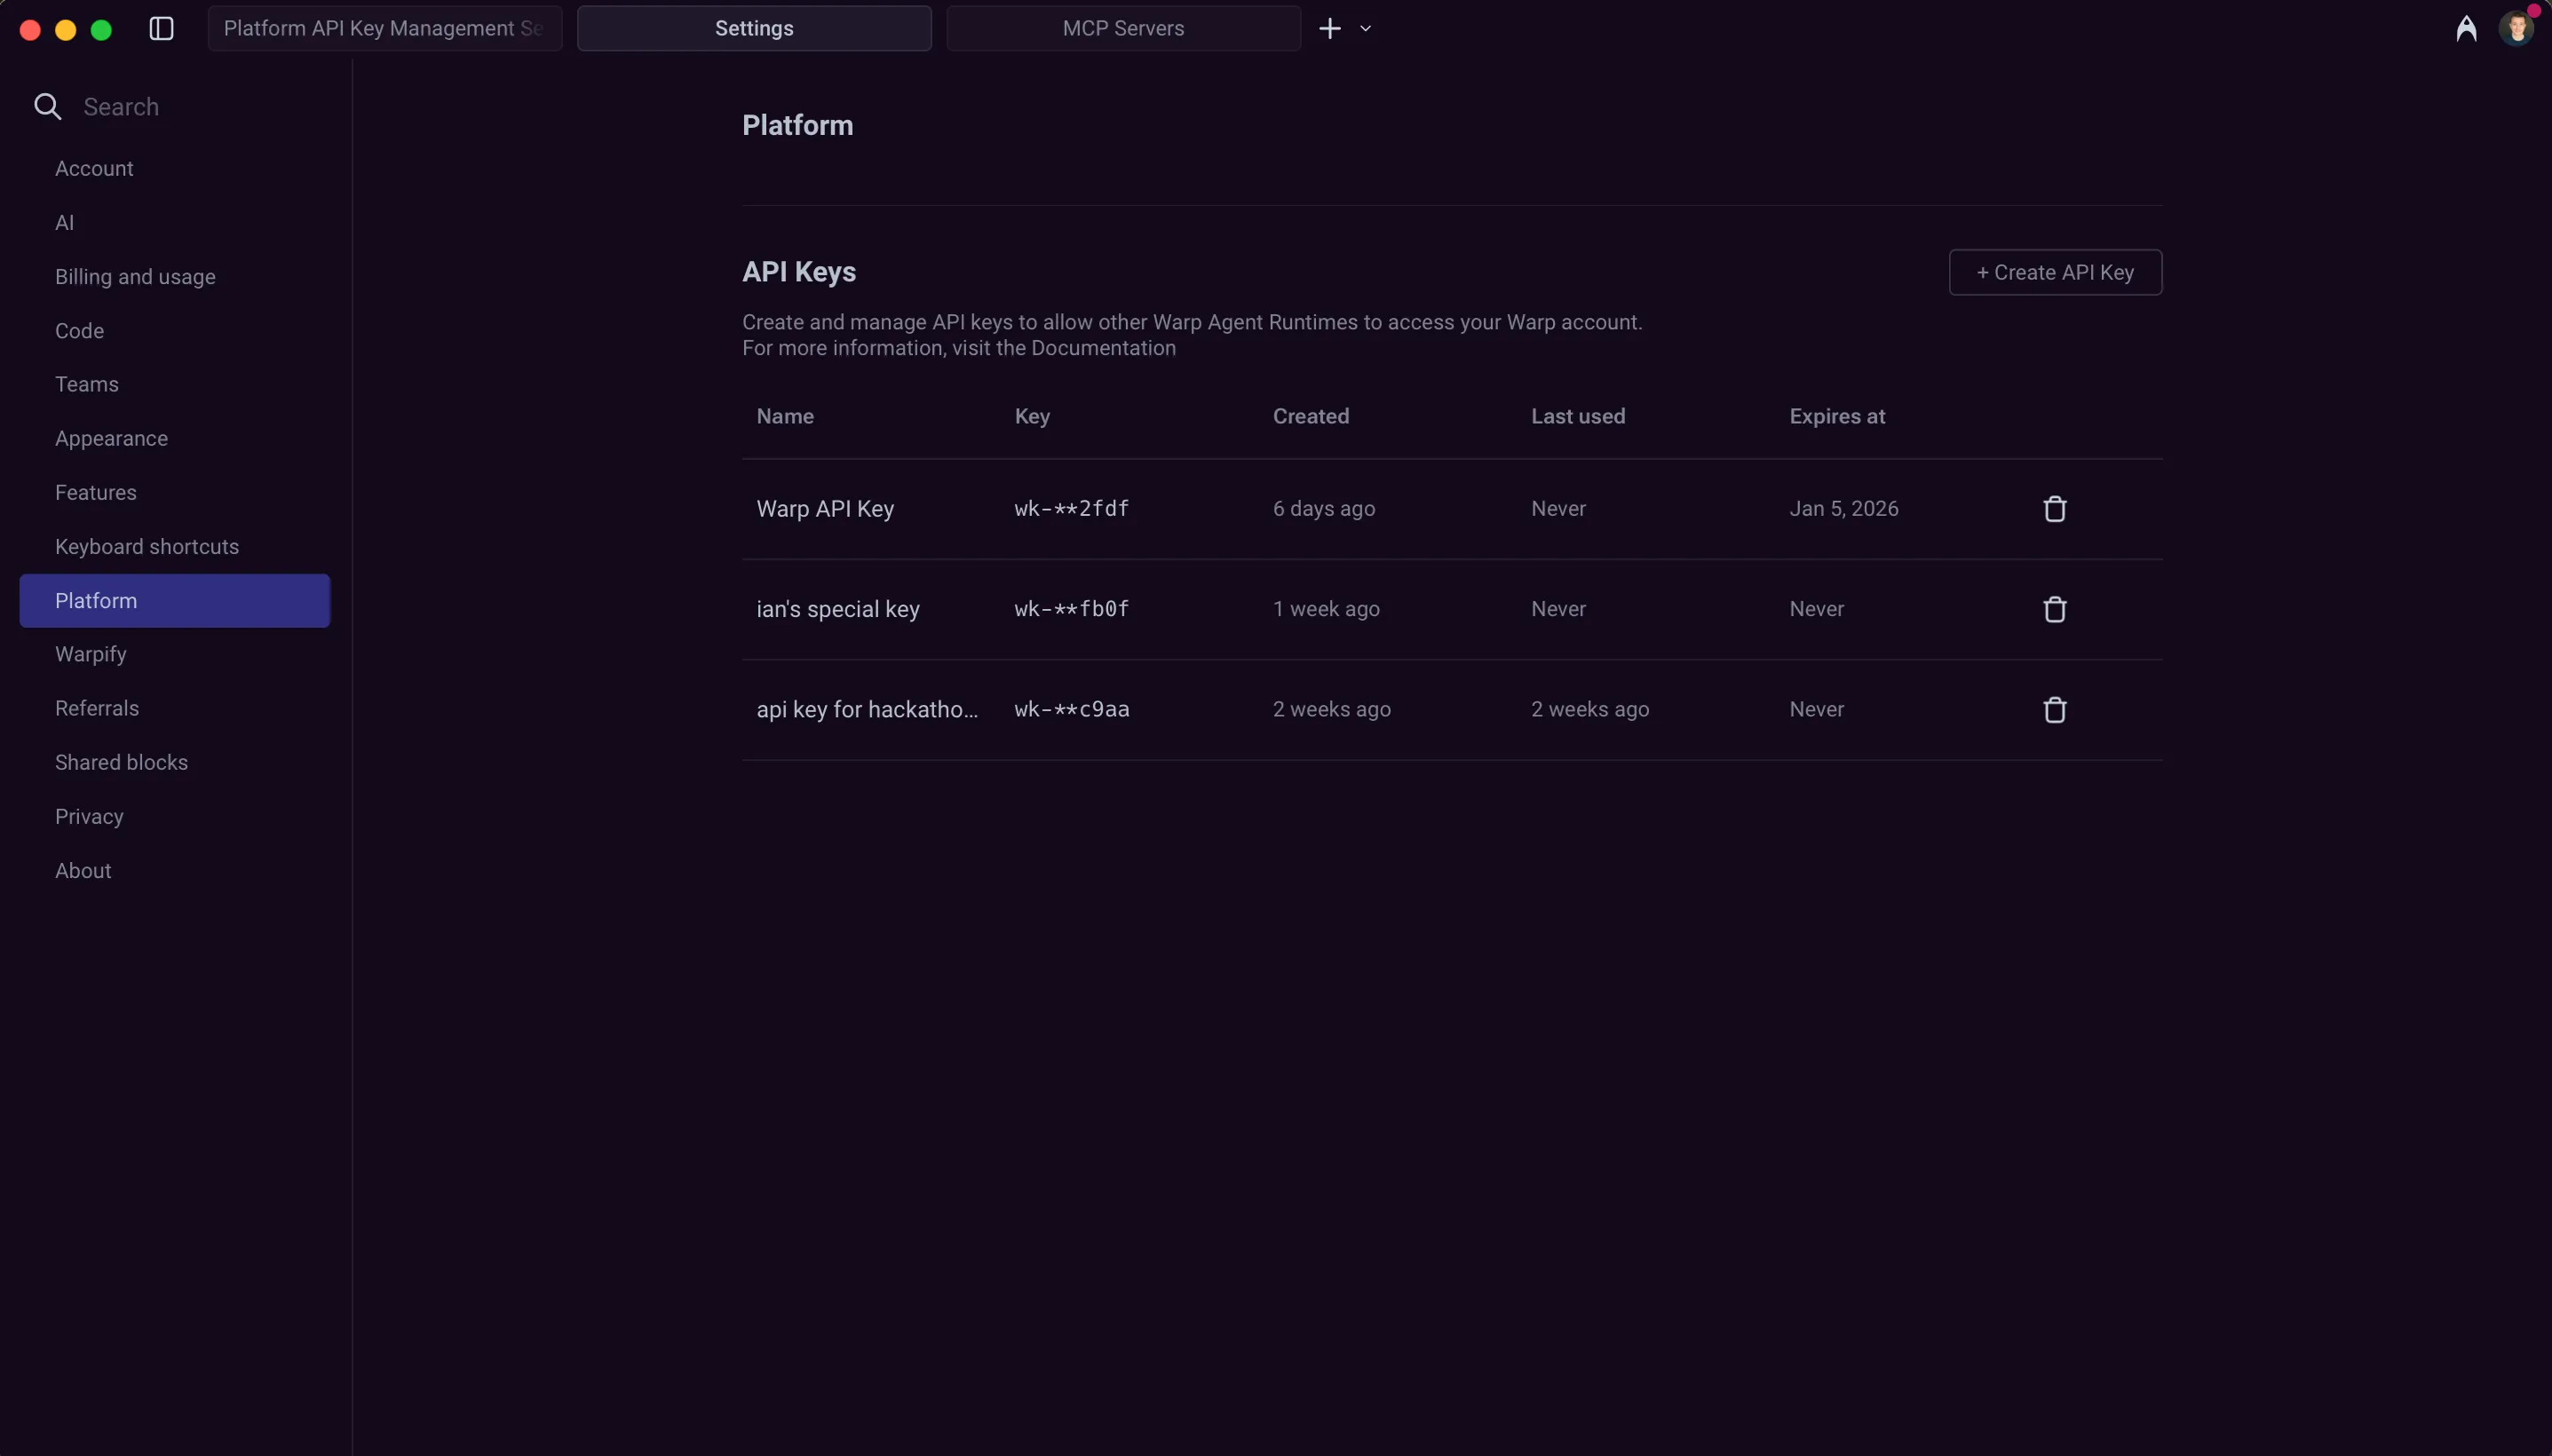 API key management interface in Warp settings. ## How key type affects billing and GitHub access [Section titled “How key type affects billing and GitHub access”](#how-key-type-affects-billing-and-github-access) The key type determines who the run is attributed to, which credit pool is billed, and which GitHub credentials the agent can use. **Personal API keys** * Run as you. * On Build, Max, and Business plans, use your plan-included credits, then your add-on credits. On Enterprise plans, use the team-scoped credit pool. * Use your GitHub permissions. Code changes are attributed to your GitHub account. **Agent API keys** * Run as a cloud agent on your team. * On Build, Max, and Business plans, bill the team owner: the owner’s plan-included credits, then the owner’s add-on credits. With auto-reload on, usage can trigger a reload on the owner’s pool, subject to the team-wide monthly spend cap. On Enterprise plans, use the team-scoped credit pool. * Use the **Oz by Warp** GitHub App when [team GitHub authorization](/agent-platform/cloud-agents/team-access-billing-and-identity/#team-github-authorization) is configured. Without team GitHub authorization, agent keys are still useful for tasks that don’t need to write to GitHub, such as analysis, monitoring, or triage. For the full credit waterfall, see [Access, billing, and identity permissions](/agent-platform/cloud-agents/team-access-billing-and-identity/) and [add-on credits](/support-and-community/plans-and-billing/add-on-credits/). ## Authenticating with API keys [Section titled “Authenticating with API keys”](#authenticating-with-api-keys) You can authenticate with an API key in the CLI using either an environment variable or a command flag. Environment variables are recommended for security and easier reuse across multiple commands. **Via environment variable (recommended):** ```sh $ export WARP_API_KEY="wk-xxx..." $ oz agent run --prompt "analyze this codebase" ``` **Via command flag:** ```sh $ oz agent run --api-key "wk-xxx..." --prompt "analyze this codebase" ``` ## Managing API keys [Section titled “Managing API keys”](#managing-api-keys) The Oz web app at [oz.warp.dev/settings](https://oz.warp.dev/settings) and the Warp app’s **Settings** > **Cloud platform** > **Oz Cloud API Keys** both list your active keys. Both surfaces show: * **Name** — The name you assigned when creating the key. * **Scope** — Personal keys show your user; agent keys show the cloud agent the key runs as. * **Expires at** — The key’s expiration date, or “Never” if it doesn’t expire. The Warp app also shows additional metadata that isn’t surfaced in the Oz web app: * **Key** — A masked suffix (`wk-**xxxx`) to help identify the key. * **Created** — When the key was created. * **Last used** — When the key was last used for authentication. ### Deleting API keys [Section titled “Deleting API keys”](#deleting-api-keys) To delete an API key, find it in either the Oz web app or the Warp app’s API Keys list and click the delete icon next to the key. Deleted keys are immediately invalidated and cannot be recovered. Any services or scripts using the deleted key will lose access and may return an [`authentication_required` error](/reference/api-and-sdk/troubleshooting/errors/authentication-required/). ## Best practices [Section titled “Best practices”](#best-practices) * **Use personal keys for runs that should act as you.** When code changes should be attributed to your GitHub account, a personal key is the right choice. Use agent keys for automation that isn’t tied to a specific user. * **Use environment variables.** Avoid passing API keys directly in commands where they may be logged or visible in shell history. * **Set appropriate expiration.** Use shorter expiration times for development and testing; consider longer durations for stable production workflows. * **Configure team GitHub authorization for agents that write to GitHub.** Personal keys authenticate as you with your GitHub permissions. Agent keys authenticate via the [Oz by Warp GitHub App](/agent-platform/cloud-agents/team-access-billing-and-identity/#team-github-authorization) when team GitHub authorization is configured in the Admin Panel. * **Rotate keys periodically.** Create new keys and retire old ones on a regular schedule to limit exposure from compromised credentials. * **Store securely.** Use secret managers (like 1Password CLI, HashiCorp Vault, or cloud provider secret services) rather than plain text files.
# Artifacts
Canonical page: [/reference/cli/artifacts/](https://docs.warp.dev/reference/cli/artifacts/)
> Get metadata for and download files produced by an agent run using the `oz artifact` subcommands.
Artifacts are files that an agent produces during a run and uploads to Oz — screenshots, generated reports, build outputs, logs, or any other file the agent saves alongside its conversation. Use `oz artifact` to inspect those files from outside the run and pull them down to your machine. ## When to use artifacts [Section titled “When to use artifacts”](#when-to-use-artifacts) Use artifacts when you need to retrieve files an agent produced after a run completes, without re-running the agent or scraping the conversation output. * **Hand-offs between runs** - A scheduled agent produces a report; a follow-up workflow downloads and processes it. * **Local inspection** - Pull a generated file (HTML, image, CSV) onto your laptop to review. * **CI integration** - Fetch an agent-produced build artifact from a pipeline step that runs after the agent finishes. Artifacts are referenced by an artifact UID. You can find UIDs in the agent’s run detail view, in the JSON returned by [`oz run get`](/reference/cli/), or in the response from the [Oz API](/reference/api-and-sdk/). ## `oz artifact get` [Section titled “oz artifact get”](#oz-artifact-get) Print metadata for an artifact without downloading it. ```sh oz artifact get ``` The output describes the artifact (file name, content type, size, the run or conversation it’s associated with, and the description supplied when it was uploaded). Use `--output-format json` for a structured response that’s easy to parse from a script: ```sh oz artifact get --output-format json ``` This command is useful for confirming an artifact exists and inspecting its size before you decide to download it. ## `oz artifact download` [Section titled “oz artifact download”](#oz-artifact-download) Download the file contents of an artifact. ```sh oz artifact download [--out ] ``` ### Flags [Section titled “Flags”](#flags) * **``** - The UID of the artifact to download. Required positional argument. * **`--out `** (`-o`) - Write the downloaded artifact to a specific file path. When omitted, the file is written to the current directory using the artifact’s stored file name. ### Examples [Section titled “Examples”](#examples) Download an artifact to the current directory, preserving its original name: ```sh oz artifact download ``` Download to a specific path: ```sh oz artifact download --out ./reports/nightly.html ``` Use the artifact in a pipeline by combining `oz run get` and `oz artifact download`: ```sh # Pull the latest run for a scheduled agent, grab its first artifact RUN_ID=$(oz run list --limit 1 --output-format json | jq -r '.[0].uid') ARTIFACT_UID=$(oz run get "$RUN_ID" --output-format json | jq -r '.artifacts[0].uid') oz artifact download "$ARTIFACT_UID" --out ./latest-report.html ``` ## Related [Section titled “Related”](#related) * [Oz API & SDK](/reference/api-and-sdk/) - retrieve artifacts programmatically over HTTP. * [Scheduled cloud agents](/agent-platform/cloud-agents/triggers/scheduled-agents/) - common producer of recurring artifacts that downstream tooling consumes.
# Federated identity tokens
Canonical page: [/reference/cli/federate/](https://docs.warp.dev/reference/cli/federate/)
> Issue short-lived OIDC identity tokens from a running agent so it can authenticate to cloud providers without long-lived credentials.
`oz federate` issues short-lived OIDC identity tokens for the agent that’s currently running. Use these tokens to authenticate to cloud providers (AWS, GCP, Azure, and other OIDC-aware systems) without baking long-lived credentials into your environment. This command can only be called from inside a running agent session — typically as part of a [skill](/agent-platform/capabilities/skills/), a tool, or a script the agent executes while a run is in progress. ## When to use federation [Section titled “When to use federation”](#when-to-use-federation) Use federated identity tokens when you want an agent to act against a cloud account without storing service-account keys, access keys, or refresh tokens in the environment. * **Short-lived credentials** - Tokens expire on a schedule you choose. Even if a token leaks, its blast radius is bounded. * **No secret rotation** - Federation removes the need to rotate static keys in environments or secrets. * **Per-run identity** - Each run can claim a different subject (user, team, environment, skill, run ID), giving you fine-grained IAM policies. For background on federation, see your cloud provider’s workload identity federation guide (for example, [Google Cloud’s workload identity federation](https://cloud.google.com/iam/docs/workload-identity-federation) or [AWS IAM Identity Center](https://docs.aws.amazon.com/IAM/latest/UserGuide/id_roles_providers_oidc.html)). ## `oz federate issue-token` [Section titled “oz federate issue-token”](#oz-federate-issue-token) Issue an OIDC identity token for the current run. ```sh oz federate issue-token \ --run-id \ --audience \ [--duration ] \ [--subject-template ...] ``` ### Flags [Section titled “Flags”](#flags) * **`--run-id `** - The ID of the Oz run requesting the token. The token is bound to this run. * **`--audience `** - The `aud` claim for the issued token. Set this to the value your cloud provider’s identity pool expects (for example, an AWS IAM Identity Center audience or a GCP workload identity pool URL). * **`--duration `** - Requested token lifetime. Accepts human-readable durations like `15m`, `1h`, or `2h30m`. Defaults to `1h`. * **`--subject-template ...`** - Controls how the OIDC token’s `sub` claim is formatted. Pass one or more components, which are joined to form the subject. Defaults to `principal` (for example, `user:my-user-id`). ### Subject template components [Section titled “Subject template components”](#subject-template-components) The subject claim is what your cloud provider’s policy will match on, so pick the combination that gives you the IAM granularity you need. Supported components: * **`principal`** - The acting principal, like `user:my-user-id` or `service_account:my-sa-id`. A `service_account:` principal corresponds to a [cloud agent](/agent-platform/cloud-agents/agents/) on your team. * **`scoped_principal`** - The principal scoped to a team, like `principal:my-team-id/user:my-user-id`. * **`email`** - The principal’s email, like `email:user@warp.dev`. * **`teams`** - The principal’s team, like `teams:my-team-id`. * **`environment`** - The [cloud environment](/agent-platform/cloud-agents/environments/) the run is using, like `environment:my-environment-id`. * **`agent_name`** - The configured name of the run, like `agent_name:my-agent`. * **`skill_spec`** - The skill the run was launched from, like `skill_spec:warpdotdev/repo_path_to_skill`. * **`run_id`** - The run’s unique ID, like `run_id:abc123`. * **`host`** - The self-hosted worker the run is on, like `host:my-worker-id`. When you pass multiple components, the resulting subject joins them in the order you specified. ### Examples [Section titled “Examples”](#examples) Issue a one-hour token bound to the current user, for an AWS audience: ```sh oz federate issue-token \ --run-id "$OZ_RUN_ID" \ --audience "sts.amazonaws.com" ``` Issue a 15-minute token whose subject identifies the team and environment, so a GCP IAM policy can grant access only to that pair: ```sh oz federate issue-token \ --run-id "$OZ_RUN_ID" \ --audience "//iam.googleapis.com/projects/123/locations/global/workloadIdentityPools/oz/providers/oz-oidc" \ --duration 15m \ --subject-template teams environment ``` ## Using tokens with cloud providers [Section titled “Using tokens with cloud providers”](#using-tokens-with-cloud-providers) Once you have a token, exchange it for cloud credentials using your provider’s standard OIDC federation flow. The exchange happens between the cloud provider and your script — Oz only issues the OIDC token. A typical AWS flow: 1. Run `oz federate issue-token` to get the OIDC JWT. 2. Call `sts:AssumeRoleWithWebIdentity` with the JWT and an IAM role ARN. 3. Use the temporary AWS credentials returned by STS. A typical GCP flow: 1. Run `oz federate issue-token` to get the OIDC JWT. 2. Call the [Security Token Service `token` endpoint](https://cloud.google.com/iam/docs/reference/sts/rest/v1/TopLevel/token) to exchange the JWT for a federated access token. 3. Optionally impersonate a service account for the final credentials. ## Related [Section titled “Related”](#related) * [Cloud environments](/agent-platform/cloud-agents/environments/) - configure the environment your agent runs in. * [Secrets](/agent-platform/cloud-agents/secrets/) - alternative for credentials that can’t be federated.
# Integration setup
Canonical page: [/reference/cli/integration-setup/](https://docs.warp.dev/reference/cli/integration-setup/)
> Learn how to set up environments and integrations so you can trigger Oz agents from external tools.
This article describes the environment and integration setup that is required before you can trigger agents from external tools, like Slack or Linear. You will learn how to: * Create and configure the environment needed to run agents * Connect that environment to your team * Trigger agents using Slack or Linear ## How integrations and environments work [Section titled “How integrations and environments work”](#how-integrations-and-environments-work) Warp integrations connect external tools, like Slack or Linear, to agents that run your code in the background. There are three main components to know: * **Triggers** provide the context that tells Warp *what* to run. A trigger could be a Slack message where you tag @Oz, or a Linear issue or comment. * [**Integrations**](/agent-platform/cloud-agents/integrations/) are what connect the trigger surface (Slack, Linear) to Warp. An integration links the trigger to your [Warp team](/knowledge-and-collaboration/teams/) and handles posting results to the original tool, for example, replying in Slack. * **Environments** define how and where agents run your code. When an agent is triggered, Warp uses the environment to spin up a container, clone repositories, and execute the agent’s workflow. ```plaintext Slack or Linear (trigger) → Warp Integration (connects tools to Warp) → Environment (Docker image + repos + setup) → Agent (runs workflow, opens PRs, posts results) ``` Setting up an integration consists of three steps. 1. **Create an environment** for the agent to run your code. 2. **Authorize GitHub** so Warp can clone repositories, write code, debug issues, open pull requests, and more. 3. **Configure** the Oz app with an integration. *** ## Step 1: Creating an environment [Section titled “Step 1: Creating an environment”](#step-1-creating-an-environment) Before you can trigger agents from Slack or Linear, you need an environment. The environment defines how and where Warp runs your code. At a minimum, an environment includes: * A Docker image * One or more GitHub repositories * Optional setup commands Typically, you’ll create **one environment per codebase** (or closely related set of repos) and reuse it across integrations. You can create environments using a guided Agent flow, or directly through the CLI. #### Before you begin [Section titled “Before you begin”](#before-you-begin) Make sure you have: * A GitHub repository (or repositories) that the agent can work in. * A publicly-accessible Docker image that can build and run your code. Official images like `node`, `python`, or `rust` work for many projects. ### Option 1: Guided environment setup (recommended) [Section titled “Option 1: Guided environment setup (recommended)”](#option-1-guided-environment-setup-recommended) The fastest way to get started is to use the guided environment setup. Use the `/create-environment` [slash command](/agent-platform/capabilities/slash-commands/) if you want Warp to analyze your repos and suggest an environment configuration. You can run the command inside a Git repo directory with no argument, or with one or more repo paths or URLs. For example, from Warp: owner/repo ```bash # File paths /create-environment ./warp-internal ./warp-server /create-environment warpdotdev/warp-internal warpdotdev/warp-server # GitHub URLs /create-environment https://github.com/warpdotdev/warp-internal.git ``` The guided flow will: 1. Detect the repositories you want the agent to work with and identify languages, frameworks, and tools 2. Look for an existing Dockerfile, recommend an official base image, or help build a custom image (if needed) 3. Suggest setup commands based on your scripts and package managers 4. Create the environment through the CLI and return an environment ID This produces a ready-to-use environment that can immediately be connected to [Slack](/agent-platform/cloud-agents/integrations/slack/) or [Linear](/agent-platform/cloud-agents/integrations/linear/). ### Option 2: Create an environment with the CLI [Section titled “Option 2: Create an environment with the CLI”](#option-2-create-an-environment-with-the-cli) If you already know how you want to configure your environment, you can create it directly with the CLI. **Use this approach when:** * You already have a custom Docker image * You want full control over repos and setup commands * You’re scripting or automating environment creation From Warp: ```sh oz environment create \ --name \ --docker-image \ --repo \ --repo \ --setup-command "" \ --setup-command "" \ --description "Optional description" ``` Key flags: * `--name` (`-n`) – human-readable label for the environment. * `--docker-image` (`-d`) – image name on Docker Hub. If not specified, you’ll be prompted to select from available images (see `oz environment image list`). * `--repo` (`-r`) – can be repeated for each repo. * `--setup-command` (`-c`) – can be repeated; commands run in the order provided. * `--description` – optional description (max 240 characters). You can inspect existing environments with `oz environment list`. To delete an environment, use `oz environment delete `. Add `--force` to skip confirmation checks for environments used by integrations. For more details about environment configuration, see the [Slack](/agent-platform/cloud-agents/integrations/slack/) and [Linear](/agent-platform/cloud-agents/integrations/linear/) articles. #### Example environments [Section titled “Example environments”](#example-environments) | Project type | Docker image | Repos | Example setup commands | | --------------- | ----------------------------------- | -------------------------------------------- | ---------------------------------------------------------------------------------------- | | Web dev project | `node:20-bullseye` | your-org/frontend-react your-org/backend-api | `npm install -g pnpm``cd frontend-react && pnpm install``cd backend-api && pnpm install` | | Python project | Custom image based on `python:3.11` | your-org/cool\_python\_project | `cd cool_python_project && pip install -r requirements.txt` | *** ## Step 2: Authorizing GitHub [Section titled “Step 2: Authorizing GitHub”](#step-2-authorizing-github) Warp needs GitHub access so agents can clone your repositories and, when permitted, write code and open pull requests. #### How GitHub Authorization works [Section titled “How GitHub Authorization works”](#how-github-authorization-works) When you create an environment or integration, Warp will prompt you to: * Install or update the Warp GitHub app * Grant access to the repositories in your environment This authorization enables agents to clone repositories into the environment, create branches and commits, and open pull requests. **Public vs private repos** * **Public repos:** Agents can read code without authorization, but cannot write or open PRs. * **Private repos:** The Warp GitHub App must have access and the triggering user must have write permissions. #### Ongoing permissions [Section titled “Ongoing permissions”](#ongoing-permissions) Depending on how the GitHub app is installed in your organization: * You may need to grant access to new repositories over time * An organization admin may need to update the app’s permissions You typically only need to handle this once per team, unless your repo access changes. #### Team-level GitHub authorization [Section titled “Team-level GitHub authorization”](#team-level-github-authorization) For automated workflows that use an [agent API key](/reference/cli/api-keys/) (CI/CD pipelines, scheduled agents, SDK-triggered runs), you can configure team GitHub authorization so the agent authenticates with the Oz by Warp GitHub App instead of an individual’s personal token. This requires a Warp team admin to enable the GitHub organization in the Admin Panel (**Settings** > **Admin Panel** > **Platform**). Once configured, tasks initiated with an agent API key can clone repos and open pull requests using the GitHub App installation token. For full setup instructions, see [Team GitHub authorization](/agent-platform/cloud-agents/team-access-billing-and-identity/#team-github-authorization). *** ## Step 3: Setting up an integration [Section titled “Step 3: Setting up an integration”](#step-3-setting-up-an-integration) Once you have set up at least one environment, you can create integrations that connect it to Slack or Linear. Alternatively, use the CLI where `` is your environment ID: ```bash oz integration create slack --environment # or oz integration create linear --environment ``` The CLI then: 1. Links the integration to your Warp team and environment. 2. Opens a browser flow to install the Oz app into your Slack workspace or Linear workspace. 3. Generates an **integration ID** you can later list or delete. **Additional `integration create` flags:** * `--prompt` — custom instructions applied to all runs for this integration. * `--mcp ` — attach MCP servers (inline JSON, file path, or UUID). Can be repeated. * `--model ` — override the default model. * `--host ` — run on a specific self-hosted worker. * `--file ` (`-f`) — load configuration from a YAML or JSON file. **Example with a custom prompt:** ```bash oz integration create slack \ --environment \ --prompt "Always prefix PR titles with [WARP-AGENT] and add detailed test steps." ``` ### Updating an integration [Section titled “Updating an integration”](#updating-an-integration) You can modify an existing integration using `oz integration update`: ```bash oz integration update slack \ --environment \ --prompt "Updated instructions for the integration." ``` **Update-specific flags:** * `--environment ` — change the environment. * `--remove-environment` — remove the environment from the integration. * `--prompt` — update the custom instructions. * `--mcp ` — add MCP servers to the integration. * `--remove-mcp ` — remove an MCP server by name. * `--model ` — update the default model. * `--host ` — update the execution host. ## How are environments used at runtime? [Section titled “How are environments used at runtime?”](#how-are-environments-used-at-runtime) When you trigger an agent from Slack or Linear, Warp follows a consistent, repeatable execution process using your environment. At a high level, each run works like this: 1. **Warp receives the trigger**\ Warp captures the message content (for example, a Slack thread or Linear issue), along with any linked context. 2. **Warp creates an execution container**\ Warp spins up a fresh container from the Docker image defined in your environment. 3. **Repositories are cloned**\ The GitHub repositories associated with the environment are cloned into the container. 4. **Setup commands are run**\ Any setup commands you configured, like installing dependencies, are executed. 5. **The agent workflow runs**\ The agent executes the task using the provided context, tools, and permissions. 6. **Results are posted back**\ Progress updates, summaries, and results are posted back to Slack or Linear. 7. **The container is destroyed**\ After the run completes, the container is torn down. Each run starts from a clean, isolated environment. ## Next steps [Section titled “Next steps”](#next-steps) You now have everything needed to trigger agents from your team’s tools. From here, you can: * Add or adjust setup commands * Switch to a custom Docker image * Include additional repositories * Add custom prompts for consistent agent behavior * Create separate environments for different workflows or teams **Additional reading** * [Cloud Agents Overview](/agent-platform/cloud-agents/overview/) * [Oz Platform](/agent-platform/cloud-agents/platform/) * [Slack](/agent-platform/cloud-agents/integrations/slack/), [Linear](/agent-platform/cloud-agents/integrations/linear/), and [GitHub Actions](/agent-platform/cloud-agents/integrations/github-actions/) integrations * [Troubleshooting](/reference/cli/troubleshooting/)
# MCP servers (CLI reference)
Canonical page: [/reference/cli/mcp-servers/](https://docs.warp.dev/reference/cli/mcp-servers/)
> Connect agents to external tools like GitHub, Linear, and Sentry by passing MCP servers to the --mcp flag as a UUID, inline JSON, or file path.
MCP servers connect agents to external systems like GitHub, Linear, or Sentry. To use a [Model Context Protocol (MCP)](/agent-platform/capabilities/mcp/) server from the CLI, use the `--mcp` flag with `oz agent run` or `oz agent run-cloud`. For help choosing between local, cloud, and shared MCP workflows, see [Connect developer tools to agents with MCP workflows](/guides/external-tools/using-mcp-servers-with-warp/). For a conceptual overview of MCP with cloud agents — including configuration schema, full agent config examples, and limitations — see [MCP Servers](/agent-platform/cloud-agents/mcp/) in the Cloud Agents docs. *** ## Using the `--mcp` flag [Section titled “Using the --mcp flag”](#using-the---mcp-flag) The `--mcp` flag accepts three formats: * **UUID** — reference a Warp-shared MCP server by its UUID (find UUIDs with `oz mcp list`) * **Inline JSON** — pass a full MCP JSON configuration directly as a string * **File path** — path to a JSON file containing the MCP configuration You can repeat `--mcp` to include multiple servers. ### Passing MCP servers by UUID [Section titled “Passing MCP servers by UUID”](#passing-mcp-servers-by-uuid) 1. Locate the MCP server UUID using `oz mcp list`. This command lists all MCP servers configured in your Warp account, including team-shared ones: ```sh $ oz mcp list +--------------------------------------+--------+ | UUID | Name | +===============================================+ | 1deb1b14-b6e5-4996-ae99-233b7555d2d0 | github | |--------------------------------------+--------| | 65450c32-9eb1-4c57-8804-0861737acbc4 | linear | |--------------------------------------+--------| | d94ade64-0e73-47a6-b3ee-14e5afec3d90 | Sentry | +--------------------------------------+--------+ ``` Alternatively, copy the UUID from Warp in **Settings** > **Agents** > **MCP servers**. 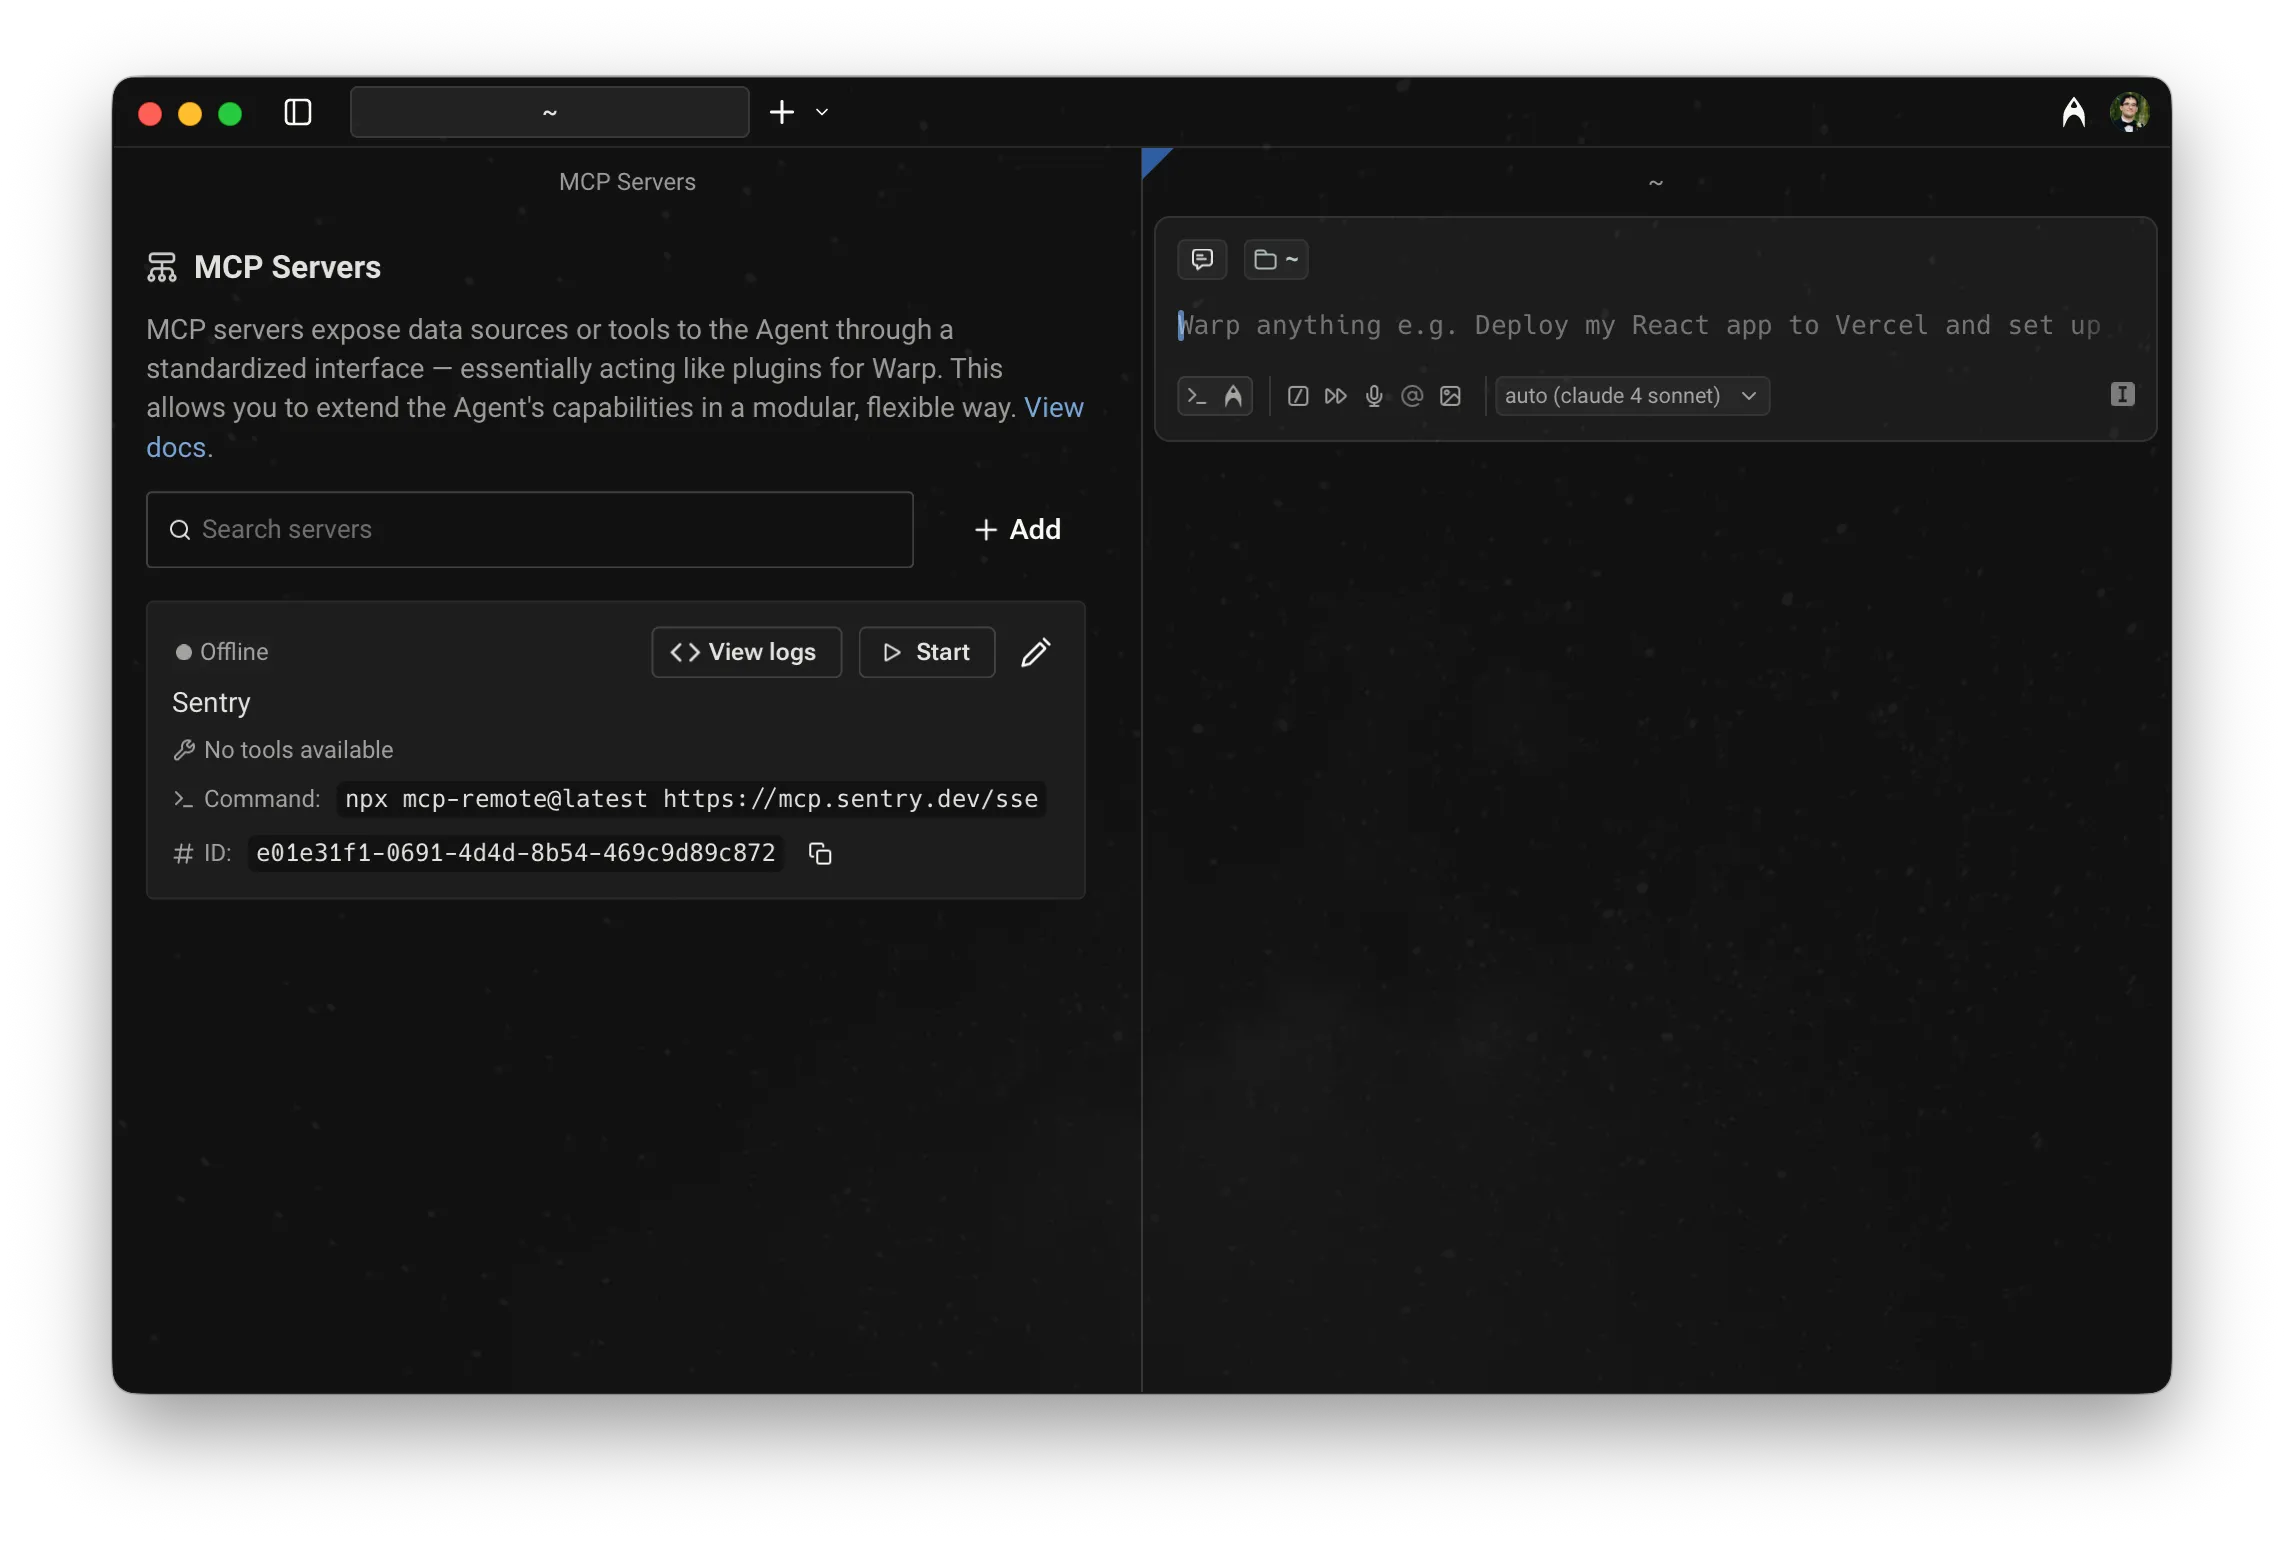 MCP servers page, showing a server with its UUID. 2. Pass the UUID to `--mcp`: ```sh $ oz agent run --mcp "1deb1b14-b6e5-4996-ae99-233b7555d2d0" --prompt "who last updated the README?" ``` ### Passing MCP servers as inline JSON or a file [Section titled “Passing MCP servers as inline JSON or a file”](#passing-mcp-servers-as-inline-json-or-a-file) You can pass MCP configuration inline or via a file: ```sh # Inline JSON $ oz agent run --mcp '{"github": {"url": "https://api.githubcopilot.com/mcp/"}}' --prompt "list open issues" # From a file $ oz agent run --mcp ./my-mcp-config.json --prompt "list open issues" ``` The file must contain a valid MCP JSON object. For example: ```json { "github": { "url": "https://api.githubcopilot.com/mcp/" }, "sentry": { "command": "npx", "args": ["-y", "mcp-remote@latest", "https://mcp.sentry.dev/mcp"] } } ``` ### Combining multiple servers [Section titled “Combining multiple servers”](#combining-multiple-servers) Pass `--mcp` multiple times to combine UUID references, inline JSON, and file-based configs in a single run: ```sh $ oz agent run \ --mcp "1deb1b14-b6e5-4996-ae99-233b7555d2d0" \ --mcp '{"sentry": {"url": "https://mcp.sentry.dev/sse"}}' \ --prompt "open a PR that fixes the top Sentry error" ``` *** ## Environment variables on remote machines [Section titled “Environment variables on remote machines”](#environment-variables-on-remote-machines) Warp syncs MCP server configuration between machines logged in with your Warp account, but **does not** sync the environment variables used in that configuration. When running on a remote machine, set any required secrets manually before running the agent: ```sh export MY_MCP_SERVER_ACCESS_TOKEN="..." $ oz agent run --mcp "904a8936-fa82-4571-b1d6-166c26197981" --prompt "use my MCP server to check for errors" ``` *** ## Learn more [Section titled “Learn more”](#learn-more) * [MCP Servers (cloud agents)](/agent-platform/cloud-agents/mcp/) — configuration schema, full agent config file examples, and cloud agent limitations * [Model Context Protocol (MCP)](/agent-platform/capabilities/mcp/) — configuring MCP servers in Warp for local agents * [Connect developer tools to agents with MCP workflows](/guides/external-tools/using-mcp-servers-with-warp/) — choose the setup path for local sessions, cloud runs, team sharing, and repeatable automation * [Secrets](/agent-platform/cloud-agents/secrets/) — store credentials in Warp so agents can access them at run time without exposing them in config files
# CLI quickstart
Canonical page: [/reference/cli/quickstart/](https://docs.warp.dev/reference/cli/quickstart/)
> Set up and run your first cloud agent via the Oz CLI in less than 5 minutes.
This guide walks you through the essentials to get up and running with the Oz CLI in less than 5 minutes: installing the CLI, authenticating, running your first local agent, and optionally connecting MCP servers to give the agent access to external tools. Watch this short demo of the Oz CLI workflow: 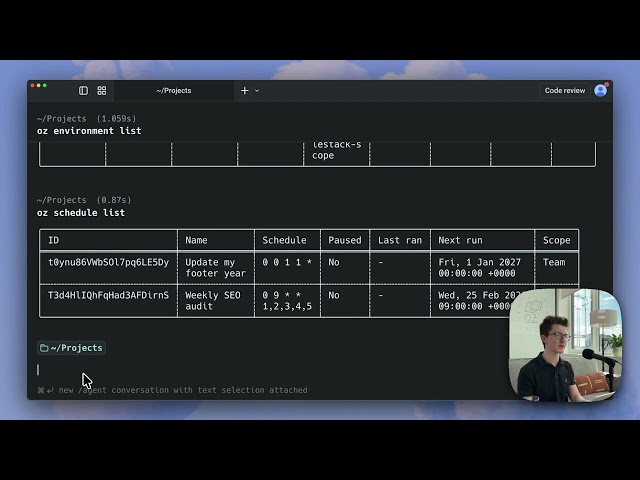 ## 1. Install the CLI [Section titled “1. Install the CLI”](#1-install-the-cli) If you already have the [Warp desktop app installed](/getting-started/quickstart/installation-and-setup/), the **CLI is included** and available in Warp. If not, see [Installing the CLI](/reference/cli/#installing-the-cli) for installation options for all platforms. ## 2. Authenticate [Section titled “2. Authenticate”](#2-authenticate) For local development and first-time setup, authenticate interactively using the `oz login` command. **For example, on macOS:** ```sh oz login ``` This command prints a sign-in URL in your terminal. Open the URL in your browser to login to Warp. Your credentials will be stored securely for future CLI use. Interactive login works on both **local** and **remote** machines, and does not require API keys. ## 3. Run an agent [Section titled “3. Run an agent”](#3-run-an-agent) From any directory, run: ```sh oz agent run --prompt "summarize this directory" ``` This uses the default agent profile, loads any available MCP servers, and executes the run locally. The output appears directly in your terminal. What happens: * The agent runs locally in your current working directory. * The session is tracked on Warp’s backend for observability and collaboration. * The agent autonomously executes commands and streams output to your terminal. ## 4. Run a cloud agent (optional) [Section titled “4. Run a cloud agent (optional)”](#4-run-a-cloud-agent-optional) Cloud agents run in a remote environment with your repositories cloned and dependencies installed, making them useful for tasks that need full codebase access. If you haven’t already created an environment, run `/create-environment` in Warp or follow the [Cloud Agents Quickstart](/agent-platform/cloud-agents/quickstart/). Then run the following command: ```sh oz agent run-cloud --environment --prompt "Scan this repo for outdated dependencies" ``` Replace `` with your environment ID, which you can find by running `oz environment list` on the Oz CLI. ## 5. Add MCP context (optional) [Section titled “5. Add MCP context (optional)”](#5-add-mcp-context-optional) You can connect MCP servers to give the agent access to external tools like GitHub or Linear. Pass MCP configuration inline or from a file using the `--mcp` flag: ```sh oz agent run --mcp '{"github": {"url": "https://api.githubcopilot.com/mcp/"}}' --prompt "Open a pull request that fixes TODOs in this repo" ``` See [MCP Servers](/reference/cli/mcp-servers/) for all supported formats, including UUID references and multi-server configurations. ## Next steps [Section titled “Next steps”](#next-steps) Once you’ve successfully set up and run your agent, explore other configurations and workflows with the Oz CLI: * Customize behavior with [agent profiles](/reference/cli/agent-profiles/). * [Reuse prompts](/reference/cli/warp-drive/) with `--saved-prompt`. * Connect agents to external systems using [MCP Servers](/reference/cli/mcp-servers/). * Authenticate with [API keys](/reference/cli/api-keys/) for automated environments or workflows. * Get up-to-date information about the Oz CLI using the [`oz help` command](/reference/cli/troubleshooting/#getting-help). * Run agents in CI with the [GitHub Actions quickstart](/agent-platform/cloud-agents/integrations/quickstart-github-actions/). Continue reading the [Oz CLI reference](/reference/cli/) to learn how to install the CLI on different platforms, authenticate in different environments, and configure agents for real-world workflows.
# Skills via the Oz CLI
Canonical page: [/reference/cli/skills/](https://docs.warp.dev/reference/cli/skills/)
> Use skills with the Oz CLI to run agents from reusable skill definitions stored in your repositories.
[Skills](/agent-platform/capabilities/skills/) are reusable instruction sets that teach agents how to perform specific tasks. Use the `--skill` flag to run an agent from a skill in a repository accessible to your environment. ## Skill spec format [Section titled “Skill spec format”](#skill-spec-format) The `--skill` flag accepts a skill specification that identifies which skill to use: ```sh # Fully qualified (recommended) oz agent run-cloud -e --skill "owner/repo:skill-name" --prompt "deploy to staging" # With full path oz agent run-cloud -e --skill "warpdotdev/warp-server:.warp/skills/deploy/SKILL.md" --prompt "deploy to staging" ``` Supported formats: * `owner/repo:skill-name` — skill by name in a specific repository (recommended) * `owner/repo:path/to/SKILL.md` — skill by full path in a repository * `repo:skill-name` — skill by name (only works when the repo is configured in your environment) ## Using skills with cloud agents [Section titled “Using skills with cloud agents”](#using-skills-with-cloud-agents) Skills are particularly useful with cloud agents (`oz agent run-cloud`) because they define reusable workflows that run consistently across environments: ```sh # Run a deploy skill from a specific repo oz agent run-cloud \ --environment SVhg783GBFQHk1OfdPfFU9 \ --skill "myorg/backend:.warp/skills/deploy/SKILL.md" \ --prompt "deploy to staging" # Run a code review skill oz agent run-cloud \ --environment SVhg783GBFQHk1OfdPfFU9 \ --skill "myorg/backend:code-review" \ --prompt "review the latest PR" ``` When you run an agent from a skill, the run `name` is automatically set to the skill name — no need to pass `--name` explicitly. ## Using skills with local agents [Section titled “Using skills with local agents”](#using-skills-with-local-agents) For local agent runs, skills from your current repository are automatically discovered. You can also explicitly specify a skill: ```sh oz agent run --skill "owner/repo:skill-name" --prompt "additional context" ``` For more information about creating and managing skills, see [Skills](/agent-platform/capabilities/skills/).
# CLI Troubleshooting
Canonical page: [/reference/cli/troubleshooting/](https://docs.warp.dev/reference/cli/troubleshooting/)
> Solutions for common Oz CLI errors — including authentication issues, agent failures, environments, GitHub access, and Docker image issues.
Solutions for common Oz CLI errors, including authentication issues, agent failures, environment configuration, GitHub access problems, and Docker image compatibility. Use `oz help` for built-in documentation on any command. ## Getting help [Section titled “Getting help”](#getting-help) The CLI includes built-in documentation for all commands: ```bash # See all available commands oz help # Get details on a specific command oz help agent run # Explore MCP-related commands oz help mcp ``` ## Common errors [Section titled “Common errors”](#common-errors) **Command not found / CLI not installed correctly**\ Verify your installation path and confirm the CLI version: ```bash oz --version ``` **Authentication issues** * Interactive login: ensure you’ve completed the browser-based flow with `oz login`. * API keys: confirm the key is valid, not expired, and exported correctly. Invalid, expired, or missing keys can return an [`authentication_required` error](/reference/api-and-sdk/troubleshooting/errors/authentication-required/). **Agent or MCP errors**\ Ensure your agent profile and [MCP servers](/agent-platform/capabilities/mcp/) are configured properly, with correct permissions. See [MCP Servers](/reference/cli/mcp-servers/) and [Agent profiles](/reference/cli/agent-profiles/) for details. *** ## Environments [Section titled “Environments”](#environments) #### How do I see what environment my integration is using? [Section titled “How do I see what environment my integration is using?”](#how-do-i-see-what-environment-my-integration-is-using) List your integrations: ```plaintext oz integration list ``` This shows each integration, its ID, and the environment it’s linked to. Use this to confirm which environment to inspect or update before making changes. #### How do I see what’s inside that environment? [Section titled “How do I see what’s inside that environment?”](#how-do-i-see-whats-inside-that-environment) Once you know the environment ID, run: ```plaintext oz environment get ``` This prints the full configuration, including: * The **environment ID** (used in other commands) * The **name** * The **Docker image** * Associated **repos** This is the most reliable way to verify what the agent will see when it runs. #### How do I add or remove repos and setup commands? [Section titled “How do I add or remove repos and setup commands?”](#how-do-i-add-or-remove-repos-and-setup-commands) Use `oz environment` update. You can modify environments incrementally without recreating them. **Add a repo:** ```plaintext oz environment update --repo owner/repo ``` **Remove a repo:** ```plaintext oz environment update --remove-repo owner/repo ``` **Add a setup command:** ```plaintext oz environment update --setup-command "your command" ``` **Remove a setup command (must match exactly):** ```plaintext oz environment update --remove-setup-command "exact command" ``` Notes: * Warp may prompt you to adjust GitHub app permissions when adding repos. * Setup commands run in the order they are defined. #### **How do I delete an environment?** [Section titled “How do I delete an environment?”](#how-do-i-delete-an-environment) If an environment is no longer needed: ```plaintext oz environment delete ``` Add `--force` to skip confirmation checks for environments used by integrations. Only do this once you’ve confirmed no active integrations are relying on that environment. If an integration points to a deleted environment, requests from Slack/Linear will fail with a [`resource_not_found` error](/reference/api-and-sdk/troubleshooting/errors/resource-not-found/) until you create a new integration with a valid environment. ### Integrations [Section titled “Integrations”](#integrations) #### **How do I figure out what environment my integration is using?** [Section titled “How do I figure out what environment my integration is using?”](#how-do-i-figure-out-what-environment-my-integration-is-using) List your integrations: ```plaintext oz integration list ``` This shows each integration, its ID, and the environment it’s attached to. Use this when you’re unsure which environment to update or delete. #### **I created a new environment, but don’t see it when running oz integration create** [Section titled “I created a new environment, but don’t see it when running oz integration create”](#i-created-a-new-environment-but-dont-see-it-when-running-oz-integration-create) Check: 1. Environment exists and is healthy: `oz environment list` 2. You’re on the correct Warp team. Make sure your local CLI is logged into the same team where the environment was created. 1. If both look correct and the environment still doesn’t appear, recreate it and confirm there were no errors during creation. ## GitHub & repo access issues [Section titled “GitHub & repo access issues”](#github--repo-access-issues) #### **I’m being asked to authorize GitHub when creating/using an environment** [Section titled “I’m being asked to authorize GitHub when creating/using an environment”](#im-being-asked-to-authorize-github-when-creatingusing-an-environment) This happens when: * You add a repo that Warp doesn’t have access to yet, or * You personally haven’t granted the Warp GitHub app permissions for that repo. Follow the GitHub popup flow to install/adjust the Warp GitHub app. Missing external authorization can return an [`external_authentication_required` error](/reference/api-and-sdk/troubleshooting/errors/external-authentication-required/). #### **The agent can’t open PRs or push changes to my repo** [Section titled “The agent can’t open PRs or push changes to my repo”](#the-agent-cant-open-prs-or-push-changes-to-my-repo) Check the following: 1. **Repo is part of your environment**. 1. Make sure the repo is listed in: `oz environment get ` 2. **Warp GitHub app has access to that repo** 1. In GitHub’s settings, confirm the Warp app is installed and that the repo is selected. 3. **You have write access** 1. The agent inherits your GitHub permissions. If you only have read access, Warp can’t open PRs or push branches on your behalf, and the run may return a [`not_authorized` error](/reference/api-and-sdk/troubleshooting/errors/not-authorized/). ### Docker image & environment failures [Section titled “Docker image & environment failures”](#docker-image--environment-failures) #### **I see errors like “pull access denied” or “repository does not exist”** [Section titled “I see errors like “pull access denied” or “repository does not exist””](#i-see-errors-like-pull-access-denied-or-repository-does-not-exist) Check: 1. The Docker image name and tag are correct. 2. The image is public on Docker Hub. 3. You can pull it locally: `docker pull ` If local docker pull fails, fix the image visibility/name first, then recreate or update the environment with a working image. Image pull and setup failures can surface as [`environment_setup_failed`](/reference/api-and-sdk/troubleshooting/errors/environment-setup-failed/). #### **The agent can’t find tools or runtimes inside the environment** [Section titled “The agent can’t find tools or runtimes inside the environment”](#the-agent-cant-find-tools-or-runtimes-inside-the-environment) This usually means the Docker image is missing required dependencies. Fix by either: * Updating the Dockerfile used to build the image, then pushing a new version to Docker Hub and updating the environment with the new image, or * Adding additional setup commands to install the missing tools: `oz environment update --setup-command "apt-get update && apt-get install -y "` #### **I see “VM failed before the agent could run. This is likely an issue with your Docker image”** [Section titled “I see “VM failed before the agent could run. This is likely an issue with your Docker image””](#i-see-vm-failed-before-the-agent-could-run-this-is-likely-an-issue-with-your-docker-image) This typically means your Docker image uses musl libc instead of glibc. Alpine Linux and other musl-based images are not compatible with the agent runtime, and this can surface as [`environment_setup_failed`](/reference/api-and-sdk/troubleshooting/errors/environment-setup-failed/). Fix: * Switch to a glibc-based image such as Debian, Ubuntu, or the default (non-Alpine) variants of official Docker Hub images (e.g. `node`, `python`, `rust`). * If you’re using an Alpine variant like `node:20-alpine`, replace it with the default tag (e.g. `node:20`).
# Warp Drive context
Canonical page: [/reference/cli/warp-drive/](https://docs.warp.dev/reference/cli/warp-drive/)
> Use saved prompts, notebooks, workflows, and rules from Warp Drive as context in CLI agent commands.
Reference saved Warp Drive objects in Oz CLI commands to reuse prompts, notebooks, workflows, and rules as agent context. Pass a saved prompt ID with `--saved-prompt` or inline Warp Drive references using ``, ``, or `` syntax. ## Reusing saved prompts [Section titled “Reusing saved prompts”](#reusing-saved-prompts) When you find prompts that work well, save them in [Warp Drive](/knowledge-and-collaboration/warp-drive/) to reuse across sessions, share with teammates, and integrate into automated workflows. For more information, see [Prompts](/knowledge-and-collaboration/warp-drive/prompts/). To reuse a saved prompt, find its ID. The ID is the last segment of its Warp Drive sharing link. For example, in the URL: ```plaintext https://www.warp.dev/drive/prompt/Fix-compiler-error-sgNpbUgDkmp2IImUVDc8kR ``` …the ID is `sgNpbUgDkmp2IImUVDc8kR`. Then pass the ID using the `--saved-prompt` flag: ```bash $ oz agent run --saved-prompt sgNpbUgDkmp2IImUVDc8kR ``` ## Referencing Warp Drive objects as context [Section titled “Referencing Warp Drive objects as context”](#referencing-warp-drive-objects-as-context) Use ``, ``, or `` in prompts to attach [Warp Drive objects](/knowledge-and-collaboration/warp-drive/) and [rules](/agent-platform/capabilities/rules/) as context for the agent. ```bash $ oz agent run --prompt "Follow the instructions in " ```