Guides: Task-oriented walkthroughs and tutorials.
# Guides
Canonical page: [/guides/](https://docs.warp.dev/guides/)
> Step-by-step guides for Warp, the agentic development environment — from first setup to coding agent workflows, MCP integrations, and full app builds.
Practical, task-oriented walkthroughs that help you get productive with Warp’s coding agents. Each guide walks through a real AI coding workflow with actual prompts, code, and reproducible results. Featured (6) All (55) Set up your environment (9) Work with agents (12) Automate your workflow (10) Connect external services (9) Build & deploy apps (8) Review & debug (7) [Work with agents](/guides/agent-workflows/how-to-attach-agent-session-context-to-github-prs/) ### [Attach agent context to PRs](/guides/agent-workflows/how-to-attach-agent-session-context-to-github-prs/) [Share a Warp agent session or cloud agent run link in a GitHub pull request so reviewers can inspect the context behind agent-generated changes.](/guides/agent-workflows/how-to-attach-agent-session-context-to-github-prs/) [agentscode-reviewsession-sharing](/guides/agent-workflows/how-to-attach-agent-session-context-to-github-prs/) [Work with agents](/guides/agent-workflows/how-to-edit-agent-code-in-warp/) ### [Edit agent code in Warp](/guides/agent-workflows/how-to-edit-agent-code-in-warp/) [Review, edit, and refine AI-generated code diffs directly in Warp — accept, reject, or modify changes before applying them.](/guides/agent-workflows/how-to-edit-agent-code-in-warp/) [agents](/guides/agent-workflows/how-to-edit-agent-code-in-warp/) [Work with agents](/guides/agent-workflows/how-to-explain-your-codebase-using-warp-rust-codebase/) ### [Explain your codebase using Warp](/guides/agent-workflows/how-to-explain-your-codebase-using-warp-rust-codebase/) [Use Warp's coding agents with semantic and symbol search to explore, understand, and modify unfamiliar codebases — demonstrated on a large Rust project.](/guides/agent-workflows/how-to-explain-your-codebase-using-warp-rust-codebase/) [agents](/guides/agent-workflows/how-to-explain-your-codebase-using-warp-rust-codebase/) [Review & debug](/guides/agent-workflows/how-to-review-ai-generated-code/) ### [Review AI-generated code](/guides/agent-workflows/how-to-review-ai-generated-code/) [Review AI-generated code in Warp with visual diffs and inline comments — works with Claude Code, Codex, or any CLI agent.](/guides/agent-workflows/how-to-review-ai-generated-code/) [agentscode-review](/guides/agent-workflows/how-to-review-ai-generated-code/) [Review & debug](/guides/agent-workflows/how-to-review-prs-like-a-senior-dev/) ### [Review PRs like a senior dev](/guides/agent-workflows/how-to-review-prs-like-a-senior-dev/) [Prompt Warp's coding agent to generate structured PR reviews with risk assessment, critical issues, and merge confidence scoring.](/guides/agent-workflows/how-to-review-prs-like-a-senior-dev/) [agentscode-review](/guides/agent-workflows/how-to-review-prs-like-a-senior-dev/) [Work with agents](/guides/agent-workflows/how-to-run-3-agents-in-parallel-summarize-logs-analyze-pr-modify-ui/) ### [Run 3 agents in parallel](/guides/agent-workflows/how-to-run-3-agents-in-parallel-summarize-logs-analyze-pr-modify-ui/) [Run three agent tasks simultaneously in Warp — modify UI, analyze code reviews, and summarize production logs in parallel.](/guides/agent-workflows/how-to-run-3-agents-in-parallel-summarize-logs-analyze-pr-modify-ui/) [agents](/guides/agent-workflows/how-to-run-3-agents-in-parallel-summarize-logs-analyze-pr-modify-ui/) [Work with agents](/guides/agent-workflows/how-to-run-multiple-ai-coding-agents/) ### [Run multiple AI coding agents](/guides/agent-workflows/how-to-run-multiple-ai-coding-agents/) [Run Claude Code, Codex, Warp Agent, and other coding agents across worktrees, tabs, and cloud orchestration with clear task ownership.](/guides/agent-workflows/how-to-run-multiple-ai-coding-agents/) [agents](/guides/agent-workflows/how-to-run-multiple-ai-coding-agents/) [Work with agents](/guides/agent-workflows/how-to-run-unattended-agents/) ### [Run unattended agents](/guides/agent-workflows/how-to-run-unattended-agents/) [Start unattended cloud agents from schedules, Slack, Linear, GitHub Actions, the Oz CLI, or the Oz API, then inspect every run.](/guides/agent-workflows/how-to-run-unattended-agents/) [agentscloud-agentsschedules](/guides/agent-workflows/how-to-run-unattended-agents/) [Work with agents](/guides/agent-workflows/how-to-use-voice-and-images-to-prompt-coding-agents/) ### [Use voice and images to prompt coding agents](/guides/agent-workflows/how-to-use-voice-and-images-to-prompt-coding-agents/) [Use voice and image context to prompt coding agents faster in Warp — works with Claude Code, Codex, and any CLI agent.](/guides/agent-workflows/how-to-use-voice-and-images-to-prompt-coding-agents/) [agents](/guides/agent-workflows/how-to-use-voice-and-images-to-prompt-coding-agents/) [Work with agents](/guides/agent-workflows/running-multiple-agents-at-once-with-warp/) ### [Run multiple agents at once](/guides/agent-workflows/running-multiple-agents-at-once-with-warp/) [Run multiple agent tasks simultaneously in Warp — revert PRs, edit shortcuts, and add tests across repos without losing context.](/guides/agent-workflows/running-multiple-agents-at-once-with-warp/) [agents](/guides/agent-workflows/running-multiple-agents-at-once-with-warp/) [Work with agents](/guides/agent-workflows/understanding-your-codebase/) ### [Understand your codebase](/guides/agent-workflows/understanding-your-codebase/) [Use Warp's Codebase Context to search across client and server repos, generate architecture summaries, and onboard to unfamiliar features fast.](/guides/agent-workflows/understanding-your-codebase/) [agents](/guides/agent-workflows/understanding-your-codebase/) [Work with agents](/guides/agent-workflows/using-images-as-context-with-warp/) ### [Use images as context](/guides/agent-workflows/using-images-as-context-with-warp/) [Attach screenshots and design mockups as context for Warp's agent to generate UI code, debug visual issues, and match Figma designs.](/guides/agent-workflows/using-images-as-context-with-warp/) [agents](/guides/agent-workflows/using-images-as-context-with-warp/) [Work with agents](/guides/agent-workflows/warp-for-product-managers/) ### [5 agent workflows for product managers](/guides/agent-workflows/warp-for-product-managers/) [Five agent workflows that automate status updates, documentation, Slack search, and meeting prep for product managers.](/guides/agent-workflows/warp-for-product-managers/) [agents](/guides/agent-workflows/warp-for-product-managers/) [Work with agents](/guides/agent-workflows/warp-vs-claude-code/) ### [Warp vs Claude Code](/guides/agent-workflows/warp-vs-claude-code/) [Compare Warp and Claude Code across setup, diff review, model selection, configuration, and performance.](/guides/agent-workflows/warp-vs-claude-code/) [agentsthird-party-tools](/guides/agent-workflows/warp-vs-claude-code/) [Build & deploy apps](/guides/build-an-app-in-warp/building-a-chrome-extension-d3js-javascript-html-css/) ### [Build a Chrome extension](/guides/build-an-app-in-warp/building-a-chrome-extension-d3js-javascript-html-css/) [Build a D3.js Sankey diagram Chrome extension using Warp — scaffold, debug, coordinate multiple agents, and publish to the Chrome Web Store.](/guides/build-an-app-in-warp/building-a-chrome-extension-d3js-javascript-html-css/) [build-appfrontend](/guides/build-an-app-in-warp/building-a-chrome-extension-d3js-javascript-html-css/) [Build & deploy apps](/guides/build-an-app-in-warp/building-a-real-time-chat-app-github-mcp-railway/) ### [Build a real-time chat app](/guides/build-an-app-in-warp/building-a-real-time-chat-app-github-mcp-railway/) [Build and deploy a real-time chat app with Python, FastAPI, and JavaScript — from idea to production, all inside Warp.](/guides/build-an-app-in-warp/building-a-real-time-chat-app-github-mcp-railway/) [build-appmcp](/guides/build-an-app-in-warp/building-a-real-time-chat-app-github-mcp-railway/) [Build & deploy apps](/guides/build-an-app-in-warp/building-warps-input-with-warp/) ### [Build Warp's input component](/guides/build-an-app-in-warp/building-warps-input-with-warp/) [Watch how a Warp designer uses Warp's own agent to locate, modify, and test a UI component change in a large Rust codebase.](/guides/build-an-app-in-warp/building-warps-input-with-warp/) [build-appfrontend](/guides/build-an-app-in-warp/building-warps-input-with-warp/) [Automate your workflow](/guides/configuration/creating-rules-for-agents/) ### [Create Rules for agents](/guides/configuration/creating-rules-for-agents/) [Create reusable Rules in Warp to encode team conventions — like Dockerfile patterns or dependency management — so agents follow your standards.](/guides/configuration/creating-rules-for-agents/) [rules](/guides/configuration/creating-rules-for-agents/) [Automate your workflow](/guides/configuration/how-to-configure-yolo-and-strategic-agent-profiles/) ### [Configure YOLO and strategic Agent Profiles](/guides/configuration/how-to-configure-yolo-and-strategic-agent-profiles/) [Configure custom agent profiles in Warp to control planning depth, autonomy, and execution speed — demonstrated with YOLO and Strategic examples.](/guides/configuration/how-to-configure-yolo-and-strategic-agent-profiles/) [profiles](/guides/configuration/how-to-configure-yolo-and-strategic-agent-profiles/) [Automate your workflow](/guides/configuration/how-to-create-project-rules-for-an-existing-project-astro-typescript-tailwind/) ### [Create project Rules for an existing project](/guides/configuration/how-to-create-project-rules-for-an-existing-project-astro-typescript-tailwind/) [Create and maintain an AGENTS.md project rules file so coding agents always understand your project's setup, commands, architecture, and conventions.](/guides/configuration/how-to-create-project-rules-for-an-existing-project-astro-typescript-tailwind/) [rules](/guides/configuration/how-to-create-project-rules-for-an-existing-project-astro-typescript-tailwind/) [Automate your workflow](/guides/configuration/how-to-set-coding-best-practices/) ### [Set coding best practices](/guides/configuration/how-to-set-coding-best-practices/) [Use Warp Rules to enforce coding style, TypeScript conventions, and documentation quality across AI-generated code.](/guides/configuration/how-to-set-coding-best-practices/) [rules](/guides/configuration/how-to-set-coding-best-practices/) [Automate your workflow](/guides/configuration/how-to-set-coding-preferences-with-rules/) ### [Set coding preferences with Rules](/guides/configuration/how-to-set-coding-preferences-with-rules/) [Store your package manager, environment tool, and CLI preferences as Warp Rules so agents automatically use pnpm, miniconda, or your preferred tools.](/guides/configuration/how-to-set-coding-preferences-with-rules/) [rules](/guides/configuration/how-to-set-coding-preferences-with-rules/) [Automate your workflow](/guides/configuration/how-to-set-tech-stack-preferences-with-rules/) ### [Set tech stack preferences with Rules](/guides/configuration/how-to-set-tech-stack-preferences-with-rules/) [Define your preferred frameworks and tech stack in Warp Rules so agents consistently use Astro, SvelteKit, Vite, or your tools of choice.](/guides/configuration/how-to-set-tech-stack-preferences-with-rules/) [rules](/guides/configuration/how-to-set-tech-stack-preferences-with-rules/) [Automate your workflow](/guides/configuration/how-to-set-up-self-serve-data-analytics-with-skills/) ### [Set up self-serve data analytics with skills](/guides/configuration/how-to-set-up-self-serve-data-analytics-with-skills/) [Set up a self-serve data analytics workflow in Warp using two community Skills that map questions to dbt models and structure reproducible analyses.](/guides/configuration/how-to-set-up-self-serve-data-analytics-with-skills/) [skills](/guides/configuration/how-to-set-up-self-serve-data-analytics-with-skills/) [Automate your workflow](/guides/configuration/how-to-sync-your-monorepos/) ### [Sync your monorepos](/guides/configuration/how-to-sync-your-monorepos/) [Define global Rules in Warp to keep monorepo schemas, server types, and client types automatically synchronized across repositories.](/guides/configuration/how-to-sync-your-monorepos/) [rules](/guides/configuration/how-to-sync-your-monorepos/) [Automate your workflow](/guides/configuration/how-to-use-agent-profiles-efficiently/) ### [Use Agent Profiles efficiently](/guides/configuration/how-to-use-agent-profiles-efficiently/) [Compare Strategic and YOLO agent profiles side-by-side to choose the right balance of planning, safety, and speed for your project.](/guides/configuration/how-to-use-agent-profiles-efficiently/) [profiles](/guides/configuration/how-to-use-agent-profiles-efficiently/) [Automate your workflow](/guides/configuration/trigger-reusable-actions-with-saved-prompts/) ### [Trigger reusable actions with saved prompts](/guides/configuration/trigger-reusable-actions-with-saved-prompts/) [Save and share prompts in Warp Drive to automate commits, code reviews, and PR creation across your team.](/guides/configuration/trigger-reusable-actions-with-saved-prompts/) [rules](/guides/configuration/trigger-reusable-actions-with-saved-prompts/) [Build & deploy apps](/guides/devops/how-to-analyze-cloud-run-logs-gcloud/) ### [Analyze Cloud Run logs](/guides/devops/how-to-analyze-cloud-run-logs-gcloud/) [Use Warp to pull, organize, and analyze Cloud Run production logs by severity with natural language prompts and automated Python scripts.](/guides/devops/how-to-analyze-cloud-run-logs-gcloud/) [cloud](/guides/devops/how-to-analyze-cloud-run-logs-gcloud/) [Build & deploy apps](/guides/devops/how-to-create-a-production-ready-docker-setup/) ### [Create a production-ready Docker setup](/guides/devops/how-to-create-a-production-ready-docker-setup/) [Use Agents in Warp to generate optimized Dockerfiles, docker-compose configs, and .dockerignore files for multi-stage production deployments.](/guides/devops/how-to-create-a-production-ready-docker-setup/) [docker](/guides/devops/how-to-create-a-production-ready-docker-setup/) [Review & debug](/guides/devops/how-to-create-priority-matrix-for-database-optimization/) ### [Create a priority matrix for database optimization](/guides/devops/how-to-create-priority-matrix-for-database-optimization/) [Prompt Warp to audit SQL queries, analyze execution plans, and generate a priority matrix ranking database optimizations by impact and effort.](/guides/devops/how-to-create-priority-matrix-for-database-optimization/) [database](/guides/devops/how-to-create-priority-matrix-for-database-optimization/) [Review & debug](/guides/devops/how-to-generate-unit-and-security-tests-to-debug-faster/) ### [Generate unit and security tests to debug faster](/guides/devops/how-to-generate-unit-and-security-tests-to-debug-faster/) [Prompt Warp to generate comprehensive unit and security tests for REST APIs, including SQL injection, XSS, and auth validation checks.](/guides/devops/how-to-generate-unit-and-security-tests-to-debug-faster/) [testing](/guides/devops/how-to-generate-unit-and-security-tests-to-debug-faster/) [Review & debug](/guides/devops/how-to-prevent-secrets-from-leaking/) ### [Prevent secrets from leaking](/guides/devops/how-to-prevent-secrets-from-leaking/) [Use Warp Rules and built-in secret reduction to prevent API keys and credentials from leaking in agent output, demos, and shared sessions.](/guides/devops/how-to-prevent-secrets-from-leaking/) [cloud](/guides/devops/how-to-prevent-secrets-from-leaking/) [Review & debug](/guides/devops/how-to-write-sql-commands-inside-a-postgres-repl/) ### [Write SQL commands inside a Postgres REPL](/guides/devops/how-to-write-sql-commands-inside-a-postgres-repl/) [Use Agents in Warp inside a Postgres REPL to translate natural language into SQL queries — works with Node.js, Python, and MySQL too.](/guides/devops/how-to-write-sql-commands-inside-a-postgres-repl/) [database](/guides/devops/how-to-write-sql-commands-inside-a-postgres-repl/) [Build & deploy apps](/guides/devops/improve-your-kubernetes-workflow-kubectl-helm/) ### [Improve your Kubernetes workflow](/guides/devops/improve-your-kubernetes-workflow-kubectl-helm/) [Streamline kubectl and Helm workflows with Warp's AI assistance, active suggestions, custom workflows, and synchronized panes.](/guides/devops/improve-your-kubernetes-workflow-kubectl-helm/) [kubernetes](/guides/devops/improve-your-kubernetes-workflow-kubectl-helm/) [Connect external services](/guides/external-tools/context7-mcp-update-astro-project-with-best-practices/) ### [Context7 MCP: update Astro project with best practices](/guides/external-tools/context7-mcp-update-astro-project-with-best-practices/) [Use the Context7 MCP server to give Warp agents real-time access to framework documentation for automated project upgrades.](/guides/external-tools/context7-mcp-update-astro-project-with-best-practices/) [mcp](/guides/external-tools/context7-mcp-update-astro-project-with-best-practices/) [Connect external services](/guides/external-tools/figma-remote-mcp-create-a-website-from-a-figma-file-from-scratch/) ### [Figma remote MCP: create a website from a Figma file](/guides/external-tools/figma-remote-mcp-create-a-website-from-a-figma-file-from-scratch/) [Connect Warp to Figma's remote MCP server via OAuth and generate front-end code directly from your design files.](/guides/external-tools/figma-remote-mcp-create-a-website-from-a-figma-file-from-scratch/) [mcpfrontend](/guides/external-tools/figma-remote-mcp-create-a-website-from-a-figma-file-from-scratch/) [Connect external services](/guides/external-tools/github-mcp-summarizing-open-prs-and-creating-gh-issues/) ### [GitHub MCP: summarize open PRs and create GitHub issues](/guides/external-tools/github-mcp-summarizing-open-prs-and-creating-gh-issues/) [Connect the GitHub MCP server to Warp to summarize open PRs, create issues from TODO comments, and automate repo management.](/guides/external-tools/github-mcp-summarizing-open-prs-and-creating-gh-issues/) [mcpcode-review](/guides/external-tools/github-mcp-summarizing-open-prs-and-creating-gh-issues/) [Set up your environment](/guides/external-tools/how-to-set-up-claude-code/) ### [Set up Claude Code](/guides/external-tools/how-to-set-up-claude-code/) [Set up Claude Code in Warp, configure it for your project, and learn productivity tips — from voice prompting to visual code review.](/guides/external-tools/how-to-set-up-claude-code/) [third-party-tools](/guides/external-tools/how-to-set-up-claude-code/) [Set up your environment](/guides/external-tools/how-to-set-up-codex-cli/) ### [Set up Codex CLI](/guides/external-tools/how-to-set-up-codex-cli/) [Set up OpenAI's Codex CLI in Warp, configure it for your project, and learn productivity tips for faster AI-assisted coding workflows in Warp.](/guides/external-tools/how-to-set-up-codex-cli/) [third-party-tools](/guides/external-tools/how-to-set-up-codex-cli/) [Set up your environment](/guides/external-tools/how-to-set-up-gemini-cli/) ### [Set up Gemini CLI](/guides/external-tools/how-to-set-up-gemini-cli/) [Set up Google's Gemini CLI in Warp, configure it for your project, and learn productivity tips for faster AI-assisted coding workflows.](/guides/external-tools/how-to-set-up-gemini-cli/) [third-party-tools](/guides/external-tools/how-to-set-up-gemini-cli/) [Set up your environment](/guides/external-tools/how-to-set-up-ollama/) ### [Set up Ollama](/guides/external-tools/how-to-set-up-ollama/) [Install Ollama, run LLMs locally, compare model performance, and integrate local models into your apps using Warp.](/guides/external-tools/how-to-set-up-ollama/) [third-party-tools](/guides/external-tools/how-to-set-up-ollama/) [Set up your environment](/guides/external-tools/how-to-set-up-opencode/) ### [Set up OpenCode](/guides/external-tools/how-to-set-up-opencode/) [Set up OpenCode in Warp, configure it for your project, and learn productivity tips for faster AI-assisted coding workflows.](/guides/external-tools/how-to-set-up-opencode/) [third-party-tools](/guides/external-tools/how-to-set-up-opencode/) [Connect external services](/guides/external-tools/linear-mcp-retrieve-issue-data/) ### [Linear MCP: retrieve issue data](/guides/external-tools/linear-mcp-retrieve-issue-data/) [Add the Linear MCP server to Warp and query your issues, tasks, and assignments directly from the terminal.](/guides/external-tools/linear-mcp-retrieve-issue-data/) [mcp](/guides/external-tools/linear-mcp-retrieve-issue-data/) [Connect external services](/guides/external-tools/linear-mcp-updating-tickets-with-a-lean-build-approach/) ### [Linear MCP: update tickets with a lean build approach](/guides/external-tools/linear-mcp-updating-tickets-with-a-lean-build-approach/) [Use Warp's Linear MCP integration to update ticket descriptions, propagate changes to subtasks, and maintain a lean build strategy.](/guides/external-tools/linear-mcp-updating-tickets-with-a-lean-build-approach/) [mcp](/guides/external-tools/linear-mcp-updating-tickets-with-a-lean-build-approach/) [Connect external services](/guides/external-tools/puppeteer-mcp-scraping-amazon-web-reviews/) ### [Puppeteer MCP: scrape Amazon web reviews](/guides/external-tools/puppeteer-mcp-scraping-amazon-web-reviews/) [Configure the Puppeteer MCP server in Warp to automate browser tasks like navigating sites, scraping product data, and analyzing reviews.](/guides/external-tools/puppeteer-mcp-scraping-amazon-web-reviews/) [mcp](/guides/external-tools/puppeteer-mcp-scraping-amazon-web-reviews/) [Connect external services](/guides/external-tools/sentry-mcp-fix-sentry-error-in-empower-website/) ### [Sentry MCP: fix Sentry error in empower website](/guides/external-tools/sentry-mcp-fix-sentry-error-in-empower-website/) [Connect the Sentry MCP server to Warp, fetch live error data, diagnose stack traces, and auto-generate fixes for production issues.](/guides/external-tools/sentry-mcp-fix-sentry-error-in-empower-website/) [mcp](/guides/external-tools/sentry-mcp-fix-sentry-error-in-empower-website/) [Connect external services](/guides/external-tools/sqlite-and-stripe-mcp-basic-queries-you-can-make-after-set-up/) ### [SQLite and Stripe MCP: basic queries you can make after setup](/guides/external-tools/sqlite-and-stripe-mcp-basic-queries-you-can-make-after-set-up/) [Connect SQLite and Stripe MCP servers to Warp and run conversational queries against your local database and payment data.](/guides/external-tools/sqlite-and-stripe-mcp-basic-queries-you-can-make-after-set-up/) [mcpdatabase](/guides/external-tools/sqlite-and-stripe-mcp-basic-queries-you-can-make-after-set-up/) [Connect external services](/guides/external-tools/using-mcp-servers-with-warp/) ### [Connect agents to MCP servers](/guides/external-tools/using-mcp-servers-with-warp/) [Use MCP servers to connect Warp agents to developer tools like GitHub, Linear, Sentry, and Figma across local and cloud agent workflows.](/guides/external-tools/using-mcp-servers-with-warp/) [mcp](/guides/external-tools/using-mcp-servers-with-warp/) [Build & deploy apps](/guides/frontend/how-to-actually-code-ui-that-matches-your-mockup-react-tailwind/) ### [Code UI that matches your mockup](/guides/frontend/how-to-actually-code-ui-that-matches-your-mockup-react-tailwind/) [Prompt Warp to generate pixel-perfect React + Tailwind code from design mockups, with structured specs and iterative refinement.](/guides/frontend/how-to-actually-code-ui-that-matches-your-mockup-react-tailwind/) [frontend](/guides/frontend/how-to-actually-code-ui-that-matches-your-mockup-react-tailwind/) [Build & deploy apps](/guides/frontend/how-to-replace-a-ui-element-in-warp-rust-codebase/) ### [Replace a UI element in Warp](/guides/frontend/how-to-replace-a-ui-element-in-warp-rust-codebase/) [Use Agent Mode in Warp to plan and execute icon replacements across a large Rust codebase — with live diffs, auto-compilation, and self-correction.](/guides/frontend/how-to-replace-a-ui-element-in-warp-rust-codebase/) [frontend](/guides/frontend/how-to-replace-a-ui-element-in-warp-rust-codebase/) [Set up your environment](/guides/getting-started/10-coding-features-you-should-know/) ### [10 coding features you should know](/guides/getting-started/10-coding-features-you-should-know/) [Discover 10 essential coding features in Warp — file search, tabbed editor, find and replace, syntax highlighting, code review panel, and more.](/guides/getting-started/10-coding-features-you-should-know/) [getting-startedagents](/guides/getting-started/10-coding-features-you-should-know/) [Set up your environment](/guides/getting-started/how-to-customize-warps-appearance/) ### [Customize Warp's appearance](/guides/getting-started/how-to-customize-warps-appearance/) [Customize Warp's themes, input placement, AI settings, codebase indexing, team collaboration, and visual appearance to fit your workflow.](/guides/getting-started/how-to-customize-warps-appearance/) [getting-started](/guides/getting-started/how-to-customize-warps-appearance/) [Set up your environment](/guides/getting-started/how-to-make-warps-ui-more-minimal/) ### [Make Warp's UI more minimal](/guides/getting-started/how-to-make-warps-ui-more-minimal/) [Reduce visual noise in Warp by disabling UI elements, switching to a minimal theme, using the classic prompt, and hiding the tab bar.](/guides/getting-started/how-to-make-warps-ui-more-minimal/) [getting-started](/guides/getting-started/how-to-make-warps-ui-more-minimal/) [Review & debug](/guides/getting-started/how-to-master-warps-code-review-panel/) ### [Master Warp's Code Review panel](/guides/getting-started/how-to-master-warps-code-review-panel/) [Use Warp's Code Review Panel to view file diffs, edit code inline, componentize changes, and commit directly — all without leaving the terminal.](/guides/getting-started/how-to-master-warps-code-review-panel/) [getting-startedcode-review](/guides/getting-started/how-to-master-warps-code-review-panel/) [Set up your environment](/guides/getting-started/welcome-to-warp/) ### [Welcome to Warp](/guides/getting-started/welcome-to-warp/) [Get oriented with Warp's agentic terminal. Learn the basics of prompt-based coding, blending terminal and agent workflows, and navigating the interface.](/guides/getting-started/welcome-to-warp/) [getting-started](/guides/getting-started/welcome-to-warp/)
# Share agent context in GitHub PRs
Canonical page: [/guides/agent-workflows/how-to-attach-agent-session-context-to-github-prs/](https://docs.warp.dev/guides/agent-workflows/how-to-attach-agent-session-context-to-github-prs/)
> Share a Warp agent session or cloud agent run link in a GitHub pull request so reviewers can inspect the context behind agent-generated changes.
When an agent helps prepare a pull request, reviewers need the execution context behind the diff: the original prompt, plan, commands, validation results, code changes, and decisions that still need human review. Add a Warp session or cloud agent run link to the PR description or a PR comment. That link gives reviewers a record of the agent’s work alongside the GitHub diff. Use these Warp docs and surfaces to collect the right context: * [Agent Session Sharing](/agent-platform/local-agents/session-sharing/) for local Warp agents or third-party CLI agents running in Warp. * [Cloud agent session sharing](/agent-platform/cloud-agents/viewing-cloud-agent-runs/) for cloud agent runs started from Slack, Linear, GitHub Actions, schedules, the Oz CLI, or the API. * The [Code Review panel](/code/code-review/) and [Interactive Code Review](/agent-platform/local-agents/interactive-code-review/) to inspect and refine the actual code diff before or after you share the PR. ## What to include in the PR [Section titled “What to include in the PR”](#what-to-include-in-the-pr) Add the shared session link near the top of the PR description or as a pinned PR comment. Pair it with a short review summary so teammates can decide what to inspect first. At minimum, include: * **Goal** - What the agent was asked to do. * **Agent context** - Link to the shared Warp session or cloud agent run. * **Changed files** - The main areas reviewers should inspect. * **Validation** - Tests, lint, typecheck, build, or manual checks the agent or author ran. * **Known risks** - Anything the agent could not verify, skipped, or changed speculatively. * **Reviewer asks** - Specific files, behaviors, or decisions that need human review. ## PR comment template [Section titled “PR comment template”](#pr-comment-template) ```markdown ## Agent-generated change summary **Goal:** **Agent session:** **Changed files:** **Validation:** **Known risks:** **Reviewer asks:** Notes: - The session link contains the agent prompt, plan, commands, logs, output, and follow-up messages where available. - Please review the code diff and the agent context before merging. ``` ## 1. Share the agent session or cloud run [Section titled “1. Share the agent session or cloud run”](#1-share-the-agent-session-or-cloud-run) Choose the link based on where the agent ran. ### Local agent or third-party CLI agent in Warp [Section titled “Local agent or third-party CLI agent in Warp”](#local-agent-or-third-party-cli-agent-in-warp) If the agent ran locally in Warp, share the session: 1. Open the agent session in Warp. 2. In the conversation pane header, open the three-dot menu, then click **Share session**. Do not use the top-level **Share** icon if you need the session transcript. 3. Choose the scrollback range to include. 4. Copy the shared session link. 5. Paste the link into the PR description or a PR comment. See [Agent Session Sharing](/agent-platform/local-agents/session-sharing/) for the full sharing flow. ### Cloud agent run [Section titled “Cloud agent run”](#cloud-agent-run) If the agent ran in the cloud, use the cloud run session link: 1. Open the run from the [Agent Management Panel](/agent-platform/cloud-agents/managing-cloud-agents/) in the Warp app or the [Runs page in the Oz web app](/agent-platform/cloud-agents/oz-web-app/#runs). 2. Confirm the session shows the run context reviewers need. 3. Copy the cloud agent session link. 4. Paste the link into the PR description or a PR comment. See [Viewing cloud agent runs](/agent-platform/cloud-agents/viewing-cloud-agent-runs/) for details. ## 2. Review the diff before handing it off [Section titled “2. Review the diff before handing it off”](#2-review-the-diff-before-handing-it-off) Before asking teammates to review the PR, inspect the code yourself in Warp: 1. Open the [Code Review panel](/code/code-review/). 2. Compare the branch against the PR base branch, not just uncommitted changes. 3. Review the changed files, revert obvious mistakes, and leave inline comments for the agent if it should revise anything. 4. Run your project’s tests, lint, typecheck, or build. 5. Add validation results to the PR summary. For a detailed local workflow, see [How to review AI-generated code](/guides/agent-workflows/how-to-review-ai-generated-code/) and [Interactive Code Review](/agent-platform/local-agents/interactive-code-review/). ## 3. Make the agent context easy to review [Section titled “3. Make the agent context easy to review”](#3-make-the-agent-context-easy-to-review) Reviewers should not have to read an entire transcript to understand what happened. In the PR summary, call out the most important parts of the session: * The original prompt or task source. * The plan the agent followed. * Commands that changed or validated the code. * Files or directories that need extra attention. * Any failed commands and how they were resolved. * Any assumptions the agent made. If the PR came from an automated workflow, include the trigger source too. For example: Slack thread, Linear issue, GitHub Actions workflow, scheduled agent, Oz CLI command, or API call. ## 4. Watch for sensitive context before sharing [Section titled “4. Watch for sensitive context before sharing”](#4-watch-for-sensitive-context-before-sharing) Shared sessions can include prompts, terminal output, logs, command history, environment details, and other scrollback. Before putting a session link in a PR: * Check whether the session includes secrets, tokens, private customer data, or unrelated terminal output. * Choose the narrowest useful scrollback range for local session sharing. * Prefer links visible only to the reviewers who need the context. * If the agent produced logs or artifacts with sensitive values, remove or rotate those values before broader sharing. See [Secret Redaction](/support-and-community/privacy-and-security/secret-redaction/) for more on how Warp helps detect secrets. ## 5. Keep the PR review focused [Section titled “5. Keep the PR review focused”](#5-keep-the-pr-review-focused) Use the session link to make review faster, not to replace review. The GitHub diff is still the source of truth for what will merge. Good reviewer asks: * “Check the migration and rollback path in `db/migrations/`.” * “Verify the agent’s test coverage for the auth edge cases.” * “Review the session commands around the failing lint step and the final fix.” * “Confirm whether the agent’s assumption about the API contract is correct.” Avoid vague asks like “review the agent output.” Point reviewers to the decision, file, or validation result that needs human judgment. ## Next steps [Section titled “Next steps”](#next-steps) * Use [Agent Session Sharing](/agent-platform/local-agents/session-sharing/) to share local or third-party agent sessions. * Use [Cloud agent session sharing](/agent-platform/cloud-agents/viewing-cloud-agent-runs/) to inspect cloud agent runs. * Use [Code Review panel](/code/code-review/) to review Git diffs in Warp. * Use [Interactive Code Review](/agent-platform/local-agents/interactive-code-review/) to leave inline comments and send feedback back to an agent.
# Edit agent code in Warp
Canonical page: [/guides/agent-workflows/how-to-edit-agent-code-in-warp/](https://docs.warp.dev/guides/agent-workflows/how-to-edit-agent-code-in-warp/)
> Review, edit, and refine AI-generated code diffs directly in Warp — accept, reject, or modify changes before applying them.
Warp lets you see, edit, and refine AI-generated code diffs directly within the app.\ This makes debugging and bug-fix workflows fast, transparent, and interactive.  *** ### 1. Starting an Agent Task [Section titled “1. Starting an Agent Task”](#1-starting-an-agent-task) When you start an agent task, Warp: 1. Uses your prompt and context 2. Builds a task list 3. Searches across your codebase using tools like: * Grep * Codebase embeddings * Semantic search Warp shows progress step-by-step, including what it’s searching and which files are being modified. *** ### 2. Reviewing Diffs [Section titled “2. Reviewing Diffs”](#2-reviewing-diffs) Warp generates diffs for every proposed change.\ You can: * Accept changes * Refine them with a follow-up prompt (`Cmd + R`) * Or directly edit the code in the inline editor view This editor view works like a lightweight IDE — perfect for quick corrections before applying. *** ### 3. Applying or Skipping Changes [Section titled “3. Applying or Skipping Changes”](#3-applying-or-skipping-changes) Once you’re happy with a diff: * Click Apply Changes to accept it * Or Fast-Forward to let Warp automatically continue the rest of the fix sequence You can control this level of autonomy globally in Settings → AI → Autonomy. *** ### 4. Compiling and Verifying Fixes [Section titled “4. Compiling and Verifying Fixes”](#4-compiling-and-verifying-fixes) After applying changes, you can immediately test your build, like: ```bash cargo run ``` Warp monitors compilation, verifies results, and runs post-checks automatically. *** ### 5. Visual Verification [Section titled “5. Visual Verification”](#5-visual-verification) In this example, the bug involved a checkbox not being honored in the UI.\ \ After the agent’s fix: * The checkbox logic now works as intended * The model picker toggles correctly * The UI behaves as expected
# Explain your codebase using Warp (Rust codebase)
Canonical page: [/guides/agent-workflows/how-to-explain-your-codebase-using-warp-rust-codebase/](https://docs.warp.dev/guides/agent-workflows/how-to-explain-your-codebase-using-warp-rust-codebase/)
> Use Warp's coding agents with semantic and symbol search to explore, understand, and modify unfamiliar codebases — demonstrated on a large Rust project.
Learn how to use Warp’s agents to explore and understand large, unfamiliar codebases — using semantic and symbol-level search.  *** ## Overview [Section titled “Overview”](#overview) This walkthrough shows: * How Warp explains unknown sections of code * How it combines semantic and keyword searches * How to use these insights to modify UI components *** 1. #### Prompt [Section titled “Prompt”](#prompt) ```plaintext Please explain how the agent popup code is structured, where it lives in the codebase, and how it is rendered and called. I want to understand the full data flow and structure so I can add a new agent button to it. ``` 2. #### How Warp’s Agent Searches [Section titled “How Warp’s Agent Searches”](#how-warps-agent-searches) Warp begins by using **semantic (vectorized) search** to locate relevant files.\ Once it finds probable matches (e.g., `agent_management_popup.rs`), it switches to **symbolic search** (`grep` and direct code reads). Warp intelligently reads large files (splitting them into smaller chunks) to extract relevant definitions and render logic. 3. #### Generated Explanation [Section titled “Generated Explanation”](#generated-explanation) Warp returns a full breakdown: * File paths where the popup is defined * How it’s rendered within the workspace * Which actions and UI components trigger it * A step-by-step view of data flow through the popup component
# Review AI-generated code
Canonical page: [/guides/agent-workflows/how-to-review-ai-generated-code/](https://docs.warp.dev/guides/agent-workflows/how-to-review-ai-generated-code/)
> Review AI-generated code in Warp with visual diffs and inline comments — works with Claude Code, Codex, or any CLI agent.
Coding agents can produce hundreds of lines of code in seconds, but shipping that code without review is risky. This guide provides a practical workflow for reviewing agent-generated code in Warp, catching common issues, and giving structured feedback that the agent can act on. Plan on about 10 minutes to complete. ## Prerequisites [Section titled “Prerequisites”](#prerequisites) * **A Git-tracked project** — Code review in Warp works on any Git repository. * **An AI coding agent** — This workflow applies to any CLI agent: [Claude Code](/guides/external-tools/how-to-set-up-claude-code/), [Codex](/guides/external-tools/how-to-set-up-codex-cli/), OpenCode, or Warp’s built-in agent. See [Third-party CLI agents](/agent-platform/cli-agents/overview/) for setup. ## Why review matters [Section titled “Why review matters”](#why-review-matters) Agents are fast but imperfect. They hallucinate imports, introduce subtle logic errors, make bad architectural decisions, and duplicate code. Reviewing agent output is the step that turns agentic development from vibe coding into a workflow you can trust. Common issues in AI-generated code: * **Hallucinated imports** — referencing packages or modules that don’t exist in your project * **Redundant logic** — duplicating existing functionality instead of reusing it * **Questionable architectural decisions** — adding new patterns instead of following existing ones, or restructuring code in ways that conflict with your project’s architecture * **Security gaps** — hardcoded credentials, missing input validation, or overly permissive permissions * **Style drift** — ignoring your project’s conventions for naming, error handling, or file structure * **Incomplete error handling** — happy-path code that crashes on edge cases ## 1. Give the agent a task [Section titled “1. Give the agent a task”](#1-give-the-agent-a-task) Whether you’re using Claude Code, Codex, or Warp’s built-in agent, start by giving your agent a task. For example: ```plaintext Fix the authentication middleware to handle expired tokens gracefully ``` The agent will modify one or more files. ## 2. Open the Code Review panel [Section titled “2. Open the Code Review panel”](#2-open-the-code-review-panel) Once the agent has finished the task, open Warp’s [Code Review panel](/code/code-review/) to see every file that changed. You can open it in several ways: * **Keyboard shortcut**: `⌘+Shift++` (macOS) or `Ctrl+Shift++` (Windows/Linux) * **Git diff chip**: Click the diff chip in the terminal input that shows files modified and lines changed * **Review changes button**: After an agent conversation, click **Review changes** at the bottom of the conversation * **Tab bar**: Click the Code Review button in the top-right corner of Warp 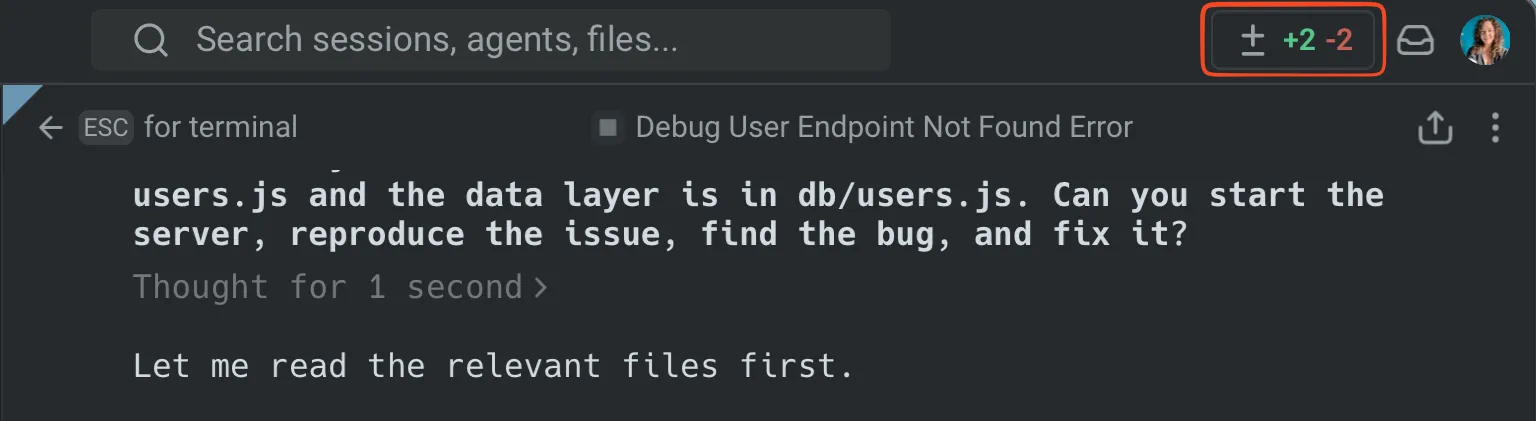 The Code Review button. The panel shows all uncommitted changes as a visual diff, grouped by file. Additions are highlighted in green with a `+` prefix, removals in red with a `-` prefix.  Code Review panel with diffs. ## 3. Review diffs by file [Section titled “3. Review diffs by file”](#3-review-diffs-by-file) With the Code Review panel, you can review changes file-by-file: * **Browse all changed files** using the file sidebar. * **Switch diff views** to compare against uncommitted changes or against `main`/`master` to see the full scope of what would land in a PR. * **Click anywhere in the code** to edit diffs directly in the panel. Focus on the areas where agents are most likely to make mistakes: imports, error handling, and anything that touches security or authentication. 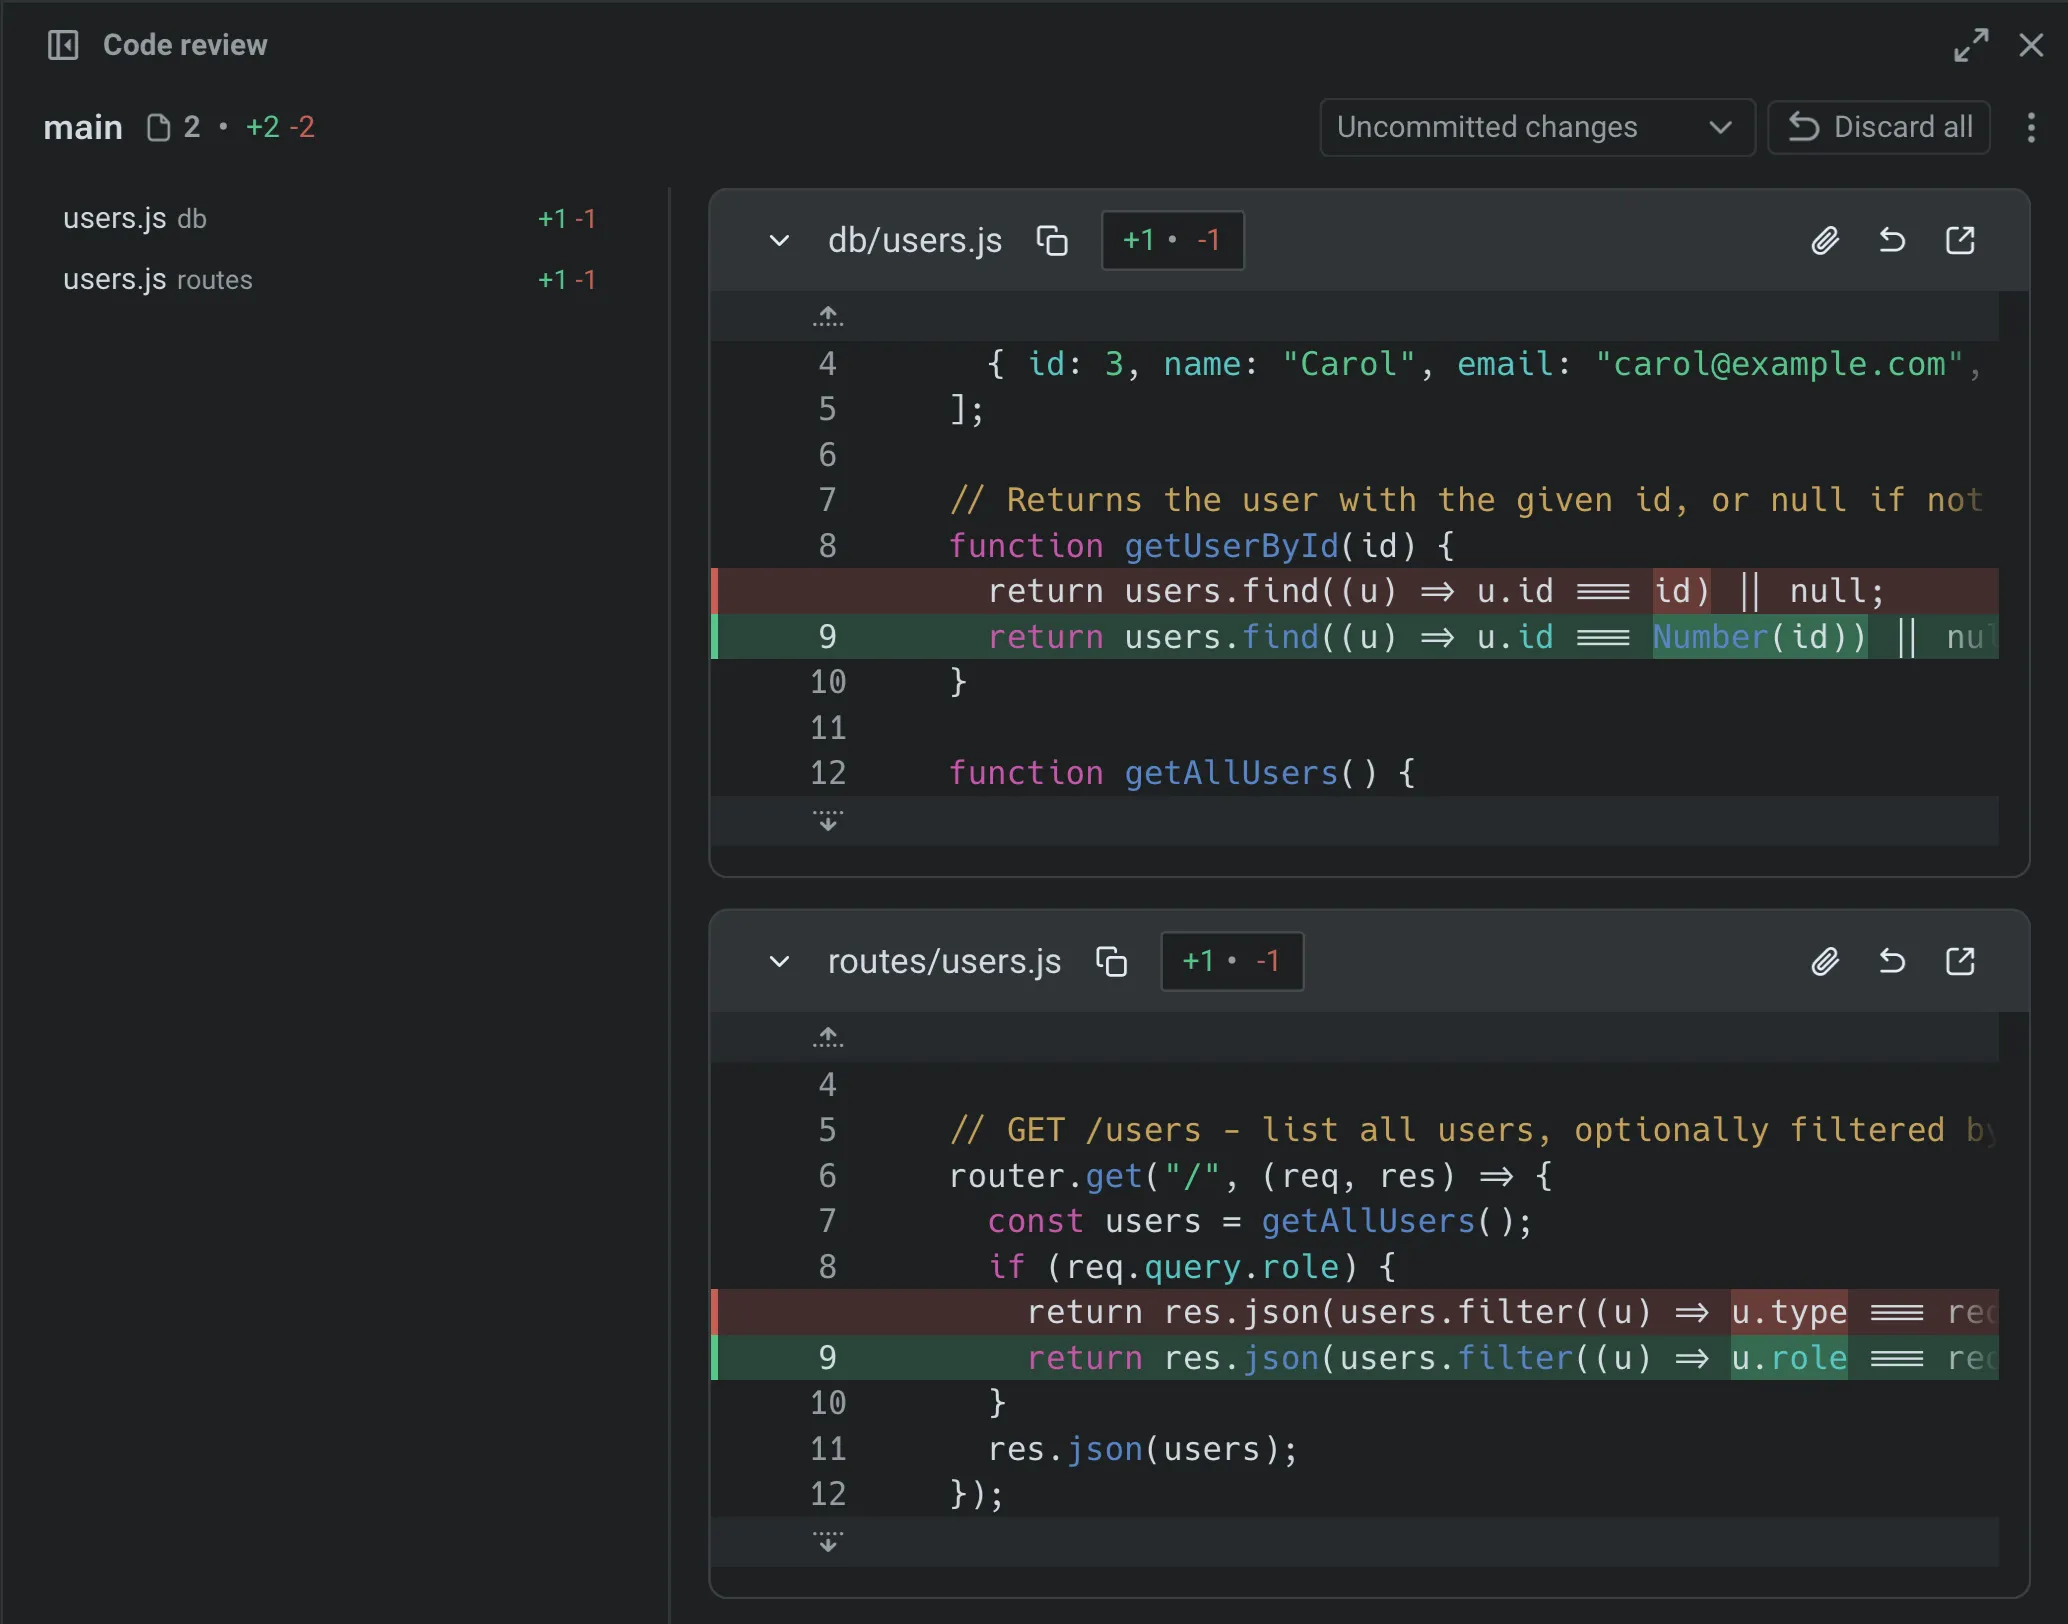 Changed files sidebar. ## 4. Leave inline comments on issues [Section titled “4. Leave inline comments on issues”](#4-leave-inline-comments-on-issues) Click the “Add comment” button on any line or block of code and add a comment describing what needs to change. Warp anchors each comment to the exact file and line, so any agent understands precisely what to fix. You can add as many comments as you need before submitting — Warp batches them so the agent receives all your feedback at once instead of processing changes one at a time. 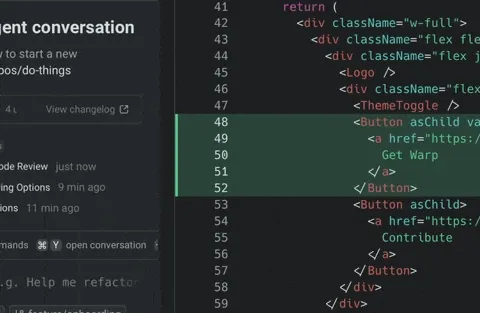 Inline comments on specific diff lines. ## 5. Submit all comments to the agent [Section titled “5. Submit all comments to the agent”](#5-submit-all-comments-to-the-agent) Once you’ve reviewed each file and left comments, submit the complete batch. The agent receives all your feedback, applies the requested changes in one pass, and returns an updated diff. Review the updated diff to verify the fixes. Repeat this cycle until the code meets your standards: comment, submit, review. ## 6. Run your project’s checks before committing [Section titled “6. Run your project’s checks before committing”](#6-run-your-projects-checks-before-committing) Before accepting the changes, run your project’s test suite, linter, and type checker. Agent-generated code might pass a visual review but fail automated checks. ```bash # Example: run tests and lint npm test && npm run lint ``` If checks fail, you can either fix the issues manually in the Code Review panel or send the error output back to the agent as context for another iteration. ## Productivity tips [Section titled “Productivity tips”](#productivity-tips) * **Attach diffs as context** — Select a diff hunk in the Code Review panel and attach it to your next prompt. This grounds the agent’s response in your actual code changes. See [Selection as context](/agent-platform/local-agents/agent-context/selection-as-context/) for details. * **Revert individual hunks** — Don’t like one specific change? Revert just that hunk from the Code Review panel without undoing the rest of the agent’s work. * **Compare against main** — Switch the diff view to “Changes vs. main” to see how the agent’s work fits into the full scope of your branch, not just the latest edits. * **Use rules to prevent recurring issues** — If you notice the agent repeatedly making the same mistake (wrong import paths, incorrect naming conventions), add a [Rule](/agent-platform/capabilities/rules/) so it learns your project’s standards. ## Next steps [Section titled “Next steps”](#next-steps) You now have a structured workflow for reviewing AI-generated code in Warp: visual diff review, inline comments that feed back to the agent, and batch feedback submission. This workflow works with any CLI coding agent: Claude Code, Codex, OpenCode, or Warp’s built-in agent. Explore related guides and features: * [Set up Claude Code](/guides/external-tools/how-to-set-up-claude-code/) or [Set up Codex CLI](/guides/external-tools/how-to-set-up-codex-cli/) to start using third-party agents in Warp * [Attach agent session context to GitHub PRs](/guides/agent-workflows/how-to-attach-agent-session-context-to-github-prs/) to give reviewers the prompt, plan, commands, logs, and validation behind agent-generated changes * [Run multiple agents at once](/guides/agent-workflows/how-to-run-multiple-ai-coding-agents/) to compare outputs from different agents on the same task * [Claude Code in Warp](https://www.warp.dev/agents/claude-code) | [Codex in Warp](https://www.warp.dev/agents/codex) | [Gemini CLI in Warp](https://www.warp.dev/agents/gemini-cli) | [OpenCode in Warp](https://www.warp.dev/agents/opencode) — agent-specific overviews on the Warp marketing site * [Code Review panel](/code/code-review/) — full reference for all Code Review features * [Interactive Code Review](/agent-platform/local-agents/interactive-code-review/) — detailed docs on inline comments and batch feedback * [Third-party CLI agents](/agent-platform/cli-agents/overview/) — all supported agents and Warp’s universal agent features
# Review PRs like a senior dev
Canonical page: [/guides/agent-workflows/how-to-review-prs-like-a-senior-dev/](https://docs.warp.dev/guides/agent-workflows/how-to-review-prs-like-a-senior-dev/)
> Prompt Warp's coding agent to generate structured PR reviews with risk assessment, critical issues, and merge confidence scoring.
Learn how to prompt Warp’s AI to review pull requests like an experienced engineer — focusing on structure, red flags, and clarity  *** 1. #### Intro [Section titled “Intro”](#intro) This tutorial teaches you how to use Warp to make **pull-request reviews faster and smarter**.\ Instead of relying on AI summaries, you’ll prompt Warp to generate an **index and priority list**, guiding your review order while flagging risky sections. Although this example focuses on large PRs, the same workflow applies to **code reviews**, **design docs**, or **feature diffs**. 2. #### The Problem [Section titled “The Problem”](#the-problem) Large PRs are difficult to parse.\ AI summaries gloss over nuance and may miss subtle issues — you need structured, prioritized insight instead. 3. #### The Prompt [Section titled “The Prompt”](#the-prompt) Use this in Warp’s AI input: ```plaintext ## Prompt: Structured PR Review Format > Review this pull request and format your response for rapid scanning by a busy maintainer. Follow the structure below. --- ### 1. 🚨 Risk Assessment **Overall Risk:** 🔴 HIGH | 🟠 MEDIUM | 🟢 LOW **Complexity:** [Simple | Moderate | Complex | Very Complex] **Blast Radius:** [Isolated | Module-wide | System-wide | External APIs affected] **Requires Immediate Review:** [YES / NO – why] --- ### 2. 🔍 Critical Issues _If none, write “None found” and skip to the next section._ #### 1. [CRITICAL ISSUE TITLE] **File:** `path/to/file.js:L125` **Impact:** Data loss / Security hole / System crash **Fix:** // Quick code fix example here --- ### 3. ⚠️ Concerns _Should discuss or fix before merge. If none, write “None found.”_ **Examples:** - [PERFORMANCE] Unindexed query on large table - [SECURITY] Missing input sanitization in login form --- ### 4. 🎯 Maintainer Decision Guide **Merge confidence:** [0–100]% - □ Safe to merge after fixing blockers - □ Needs architecture discussion first - □ Requires performance testing - □ Get security team review - □ Author should split into smaller PRs **Time to properly review:** ~[X] minutes **Recommended reviewer expertise:** [Backend | Security | Database | Frontend] --- ### 5. 🧭 Formatting Rules - Use emoji headers for instant visual recognition - Keep sections short; if empty, say “None found” - Blockers get full detail, everything else stays concise - Include code examples only for blockers - Bold key impact/risk words - Use consistent prefixes like [SECURITY], [PERFORMANCE], [LOGIC] for easy scanning - If PR is genuinely fine, end with: ✅ “This PR is safe to merge as-is.” ```
# Run 3 agents in parallel
Canonical page: [/guides/agent-workflows/how-to-run-3-agents-in-parallel-summarize-logs-analyze-pr-modify-ui/](https://docs.warp.dev/guides/agent-workflows/how-to-run-3-agents-in-parallel-summarize-logs-analyze-pr-modify-ui/)
> Run three agent tasks simultaneously in Warp — modify UI, analyze code reviews, and summarize production logs in parallel.
 *** ### 🧠 Overview [Section titled “🧠 Overview”](#-overview) Warp allows you to launch several agents at once, each focused on a separate task.\ In the demo, we run three parallel workflows: * Modify UI behavior * Analyze team code reviews * Summarize logs from production 1. #### Launch Agents in Parallel [Section titled “Launch Agents in Parallel”](#launch-agents-in-parallel) Each agent runs in its own tab. * UI Fix Remove the background and border from unfocused input panes. ```plaintext I'd like to make a coding change. Please create a new branch to do this. What i want to do is for the Universal Developer Input, remove the border and background if it's being rendered in the same pane that is not focused. Please look at the reference file and at the attached screenshot. In the screenshot, you'll see what it looks like right now - there are two equally prominent input areas, even though one is focused and one is not. What I want to do is make the non-focused one not have a border and not have a background. Please check out this linear issue for more information. Also, give me a plan before you make any changes. ``` * Code Review Check Analyze how many pull requests a team member has assigned. ```plaintext Use the GitHub CLI tool to summarize all open PRs for review that are assigned to user. I'd like to see who is the author of the PR, when was it opened, how long has it been open for, which repo is it in, are there open an dunaddressed commens on it, and is it ready for review? ``` * Log Analysis Summarize Cloud Run logs by error severity. ```plaintext Use the gcloud tool to list all my open projects. Once you've done that, let me select a project. Once I've selected a project, we will want to see all the Cloud Run instances that are available. Then once I've picked a Cloud Run instance, I'd like to get a sumary of the last 2000 logs from that Cloud Run instance to see the history histogram of different types of logging on info, warning, and error levels. ``` 2. #### Monitor All Agents [Section titled “Monitor All Agents”](#monitor-all-agents) The **task pane** in Warp shows all running agents.\ You can view plans, progress, and results live without interrupting other tasks. 3. #### Review Results [Section titled “Review Results”](#review-results) * **Coding Agent:** Implements UI fixes accurately. * **Code Review Agent:** Reports 26 open PRs (identifies bottlenecks). * **Log Agent:** Analyzes 1,000 log entries, categorizing errors and flagging Gemini API issues. 4. #### Why This Matters [Section titled “Why This Matters”](#why-this-matters) Warp multi‑agent execution allows you to: * Run multiple tasks without context switching. * Keep coding, debugging, and ops visible simultaneously. * Use AI assistants collaboratively for faster iteration.
# Run multiple AI coding agents
Canonical page: [/guides/agent-workflows/how-to-run-multiple-ai-coding-agents/](https://docs.warp.dev/guides/agent-workflows/how-to-run-multiple-ai-coding-agents/)
> Run Claude Code, Codex, Warp Agent, and other coding agents across worktrees, tabs, and cloud orchestration with clear task ownership.
Use multiple coding agents, including Warp Agent, Claude Code, Codex, and other CLI agents, when work can be split into independent tasks, reviewed from separate branches, or delegated to cloud agents while you keep working locally. In Warp, you can coordinate agents in three ways: * **Local parallel sessions** - run Warp Agent, Claude Code, Codex, OpenCode, or another CLI agent in separate tabs or panes. * **Isolated worktrees** - give each agent its own Git worktree and branch so parallel edits do not collide. * **Oz cloud orchestration** - use `/orchestrate`, `/plan`, the Oz CLI, the Oz web app, or the Oz API to fan work out to child agents in cloud environments. The best multi-agent workflows have one thing in common: each agent owns a clear slice of work, reports back with validation results, and hands off a branch, diff, PR, or concise finding you can review. Plan on about 15 minutes for the local setup. Cloud orchestration takes longer only if you need to create or select an [environment](/agent-platform/cloud-agents/environments/) first. ## Prerequisites [Section titled “Prerequisites”](#prerequisites) * **Any coding agent** — Any combination of supported agents works well: Warp Agent, [Claude Code](/guides/external-tools/how-to-set-up-claude-code/), [Codex CLI](/guides/external-tools/how-to-set-up-codex-cli/), OpenCode, Gemini CLI, Amp, Pi, Droid, and others. * **A Git-tracked project** — Notifications and code review work best in a Git repository. ## Choose a multi-agent pattern [Section titled “Choose a multi-agent pattern”](#choose-a-multi-agent-pattern) | Pattern | Use it when | How to run it in Warp | | --------------------------- | ------------------------------------------------------------------------------- | ---------------------------------------------------------------------------------------------------------------------------------------------------------------------------------------------------- | | Same task, different agents | You want to compare approaches or pick the best implementation. | Run each agent in a separate tab and worktree, then compare diffs in the [Code Review panel](/code/code-review/). | | Split by file or subsystem | A feature spans independent modules that can be changed in parallel. | Assign each agent a worktree, branch, file boundary, and validation command. | | Builder plus reviewer | One agent implements while another reviews, writes tests, or checks edge cases. | Put the reviewer in a read-only or review-focused tab, or use a separate branch for test-only changes. | | Cloud fan-out | The work is large, slow, or can run away from your laptop. | Use [Multi-agent orchestration](/agent-platform/cloud-agents/orchestration/) or [Running orchestrated agents](/agent-platform/cloud-agents/orchestration/multi-agent-runs/) to spawn cloud children. | | Repeatable fleet workflow | You want the same agent pattern on every PR, issue, schedule, or release. | Use a cloud agent with a trigger, skill, or API workflow, then inspect parent and child runs in the [Oz web app](/agent-platform/cloud-agents/oz-web-app/). | ## Plan the split before launching agents [Section titled “Plan the split before launching agents”](#plan-the-split-before-launching-agents) Before you start agents, decide: * **Task ownership** - Which files, packages, tests, issues, or PRs each agent owns. * **Workspace ownership** - Which branch or Git worktree each agent uses. * **Validation ownership** - Which agent runs unit tests, typechecks, lint, smoke tests, or manual verification. * **Handoff format** - Whether each agent should leave a local diff, branch, PR, patch, summary, or code review comments. * **Merge strategy** - Whether you will keep one winner, cherry-pick changes, merge multiple branches, or open separate PRs. Use boundaries that minimize overlapping edits. For example, assign one agent to `packages/api`, another to `packages/web`, and a third to tests or docs. If two agents must touch the same files, make one the owner and ask the other to review or propose changes without editing. ## 1. Switch to vertical tabs [Section titled “1. Switch to vertical tabs”](#1-switch-to-vertical-tabs) Vertical tabs are the foundation of a multi-agent workflow. Unlike horizontal tabs, they show rich metadata for each session: which agent is running, which branch you’re on, which directory, and the current status. To enable vertical tabs: 1. In the Warp app, go to **Settings** > **Appearance** > **Tabs**. 2. Select **Use vertical tab layout**. You can configure what information to display for each tab: * The running agent (Warp Agent, Claude Code, Codex, etc.) * The current Git branch * The working directory * A status indicator showing whether the agent is active, waiting for input, or idle 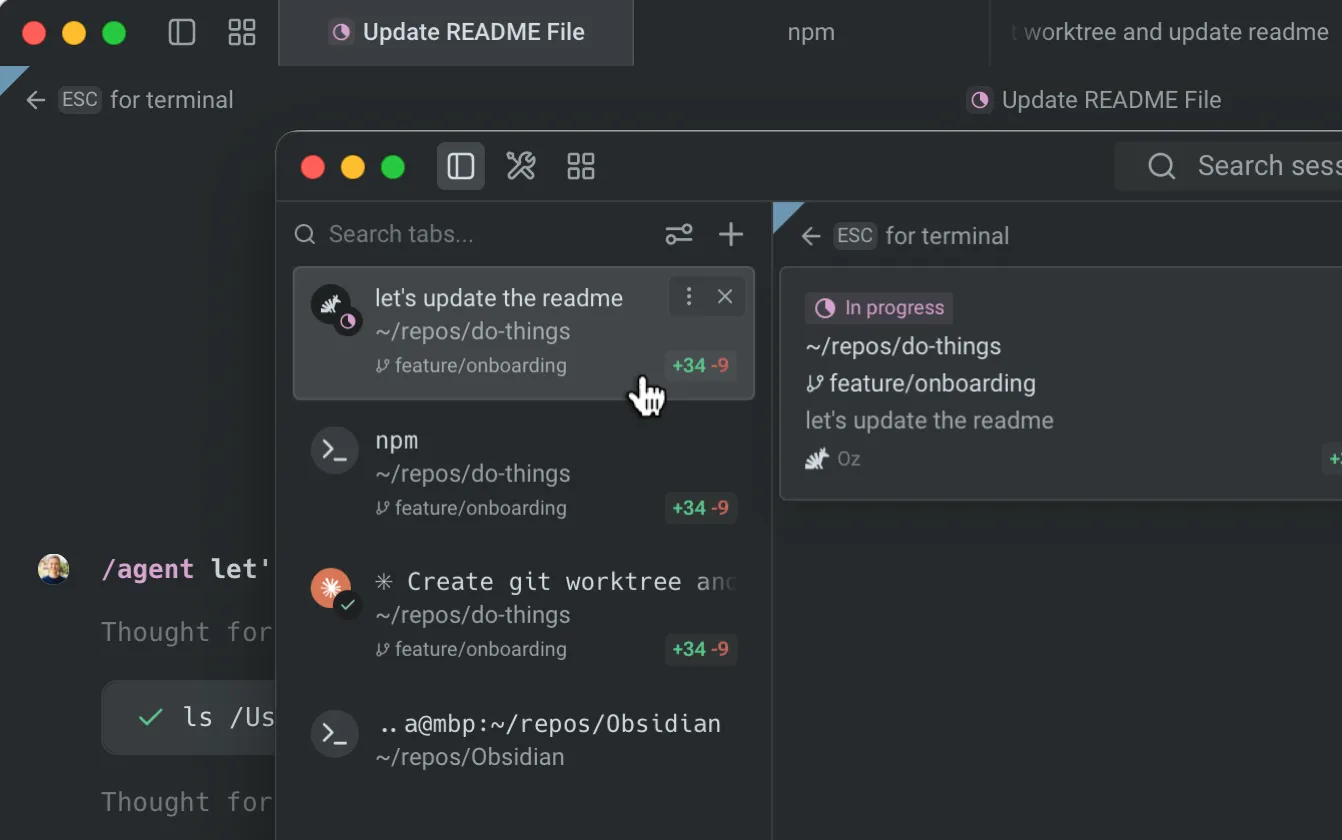 Vertical tabs overview. ## 2. Launch agents in separate tabs [Section titled “2. Launch agents in separate tabs”](#2-launch-agents-in-separate-tabs) Open a new tab for each agent session. Within each tab, navigate to your project directory and start an agent: **Tab 1 — Claude Code:** ```bash cd ~/your-project claude ``` **Tab 2 — Codex:** ```bash cd ~/your-project codex ``` Give each agent a different task, or give them the same task to compare approaches: ```plaintext # Claude Code: refactor the authentication module Refactor src/auth/ to use async/await instead of callbacks # Codex: write tests for the same module Write comprehensive tests for src/auth/ covering edge cases ``` For split work, include the same operating contract in every prompt: ```plaintext You own src/auth/ and tests/auth/. Do not edit src/billing/ or src/api/payments/. Work on branch feature/auth-refactor-claude in ../your-project-claude. Run npm test -- auth and npm run typecheck before handing off. When done, report changed files, validation results, and any risks. ``` If one agent depends on another, do not let both edit at once. Ask the first agent to finish and report its branch, patch, or PR before starting the dependent work. 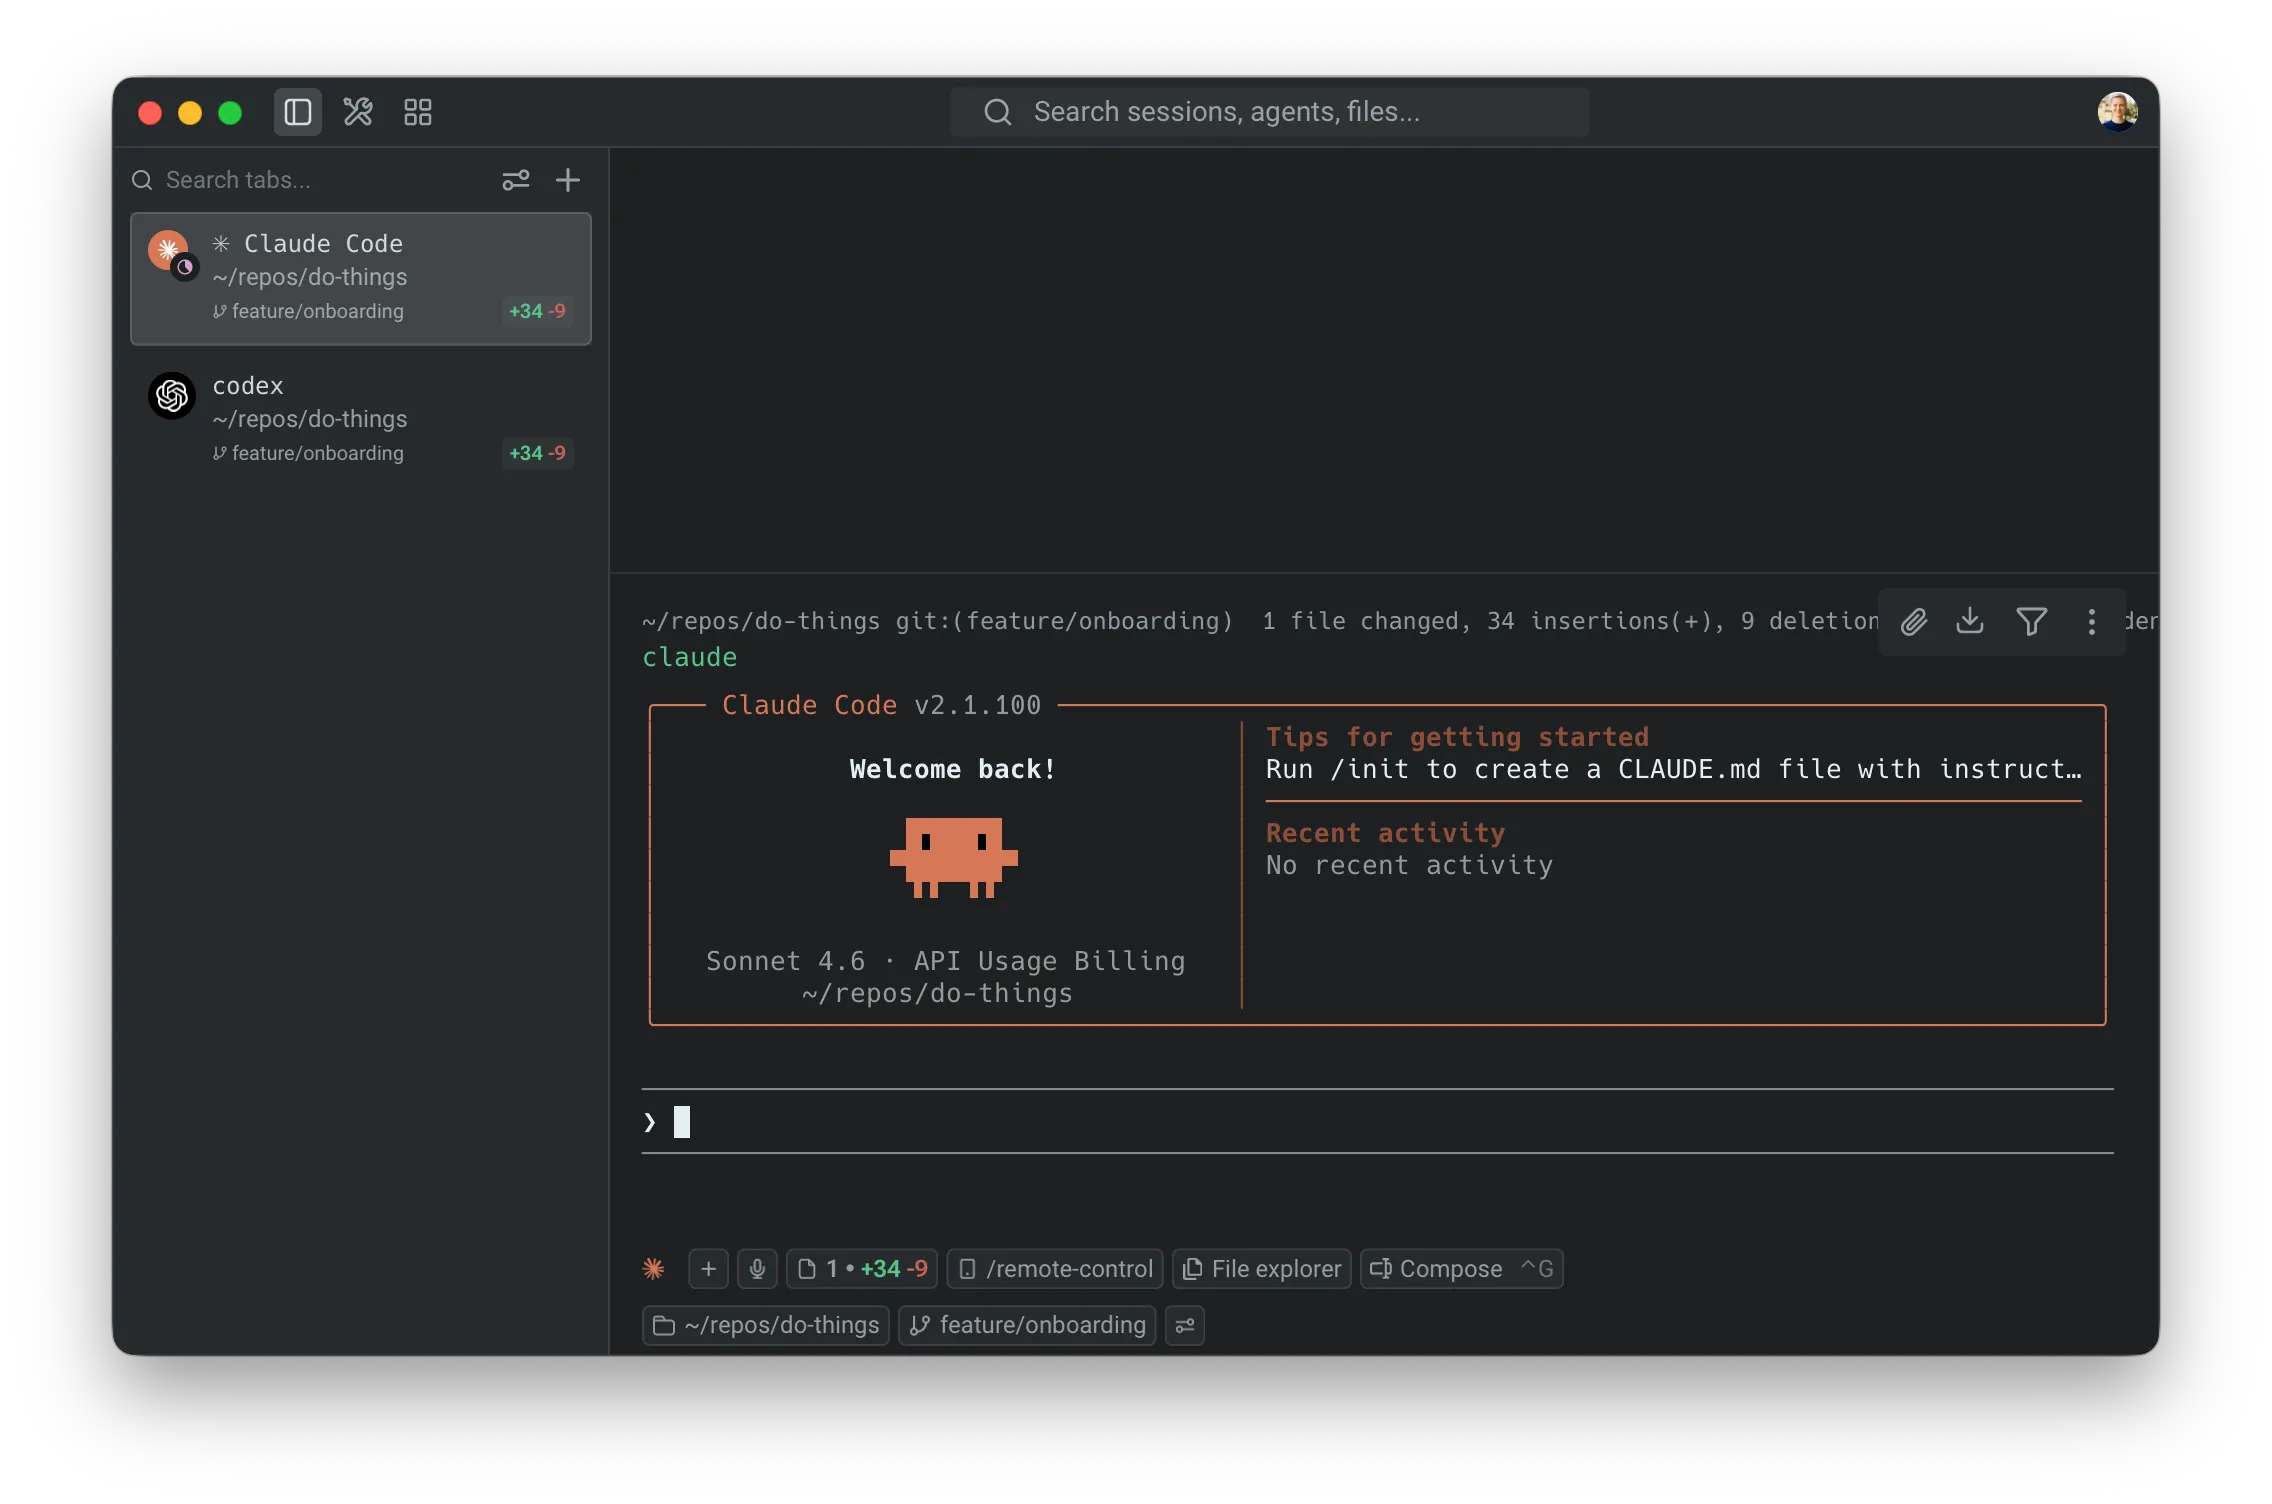 Vertical tab with agent details. ## 3. Monitor agents with notifications [Section titled “3. Monitor agents with notifications”](#3-monitor-agents-with-notifications) When you have multiple agents running, you don’t need to watch each tab. Warp sends notifications when an agent needs your attention, for example, when it needs permission to run a command or approval to apply a code diff. Look for the attention-needed indicator on the tab in the vertical sidebar. Click the tab to jump directly to the agent that needs input. Notification setup varies by agent: * **Claude Code** — Install the [Warp notification plugin](https://github.com/warpdotdev/claude-code-warp). Warp shows a one-click install chip when you first run Claude Code, or you can install manually. See the [Claude Code guide](/guides/external-tools/how-to-set-up-claude-code/) for details. * **Codex** — Warp automatically sets up notifications when you first run Codex. No manual setup required. * **OpenCode** — Add the [Warp notification plugin](https://github.com/warpdotdev/opencode-warp) to your `opencode.json` configuration.  Agent approval notification. ## 4. Compare outputs from different agents [Section titled “4. Compare outputs from different agents”](#4-compare-outputs-from-different-agents) A practical use of parallel agents is running the same task in different Git worktrees, with different agents, to compare their approaches. For example, prompt both Claude Code and Codex with the following: ```plaintext Optimize the database query in src/api/users.ts to reduce response time ``` After both agents complete, open the [Code Review panel](/code/code-review/) (`⌘+Shift++`) in each tab to compare their diffs side-by-side. You might find one agent produces cleaner code while the other catches an edge case the first missed. ## 5. Save your workspace with tab configs [Section titled “5. Save your workspace with tab configs”](#5-save-your-workspace-with-tab-configs) If you regularly work with the same multi-agent setup, save it as a tab config so you can recreate it with one click: 1. Hover over the tab and click the three dots on the right-hand side. 2. Click **Save as new config**. 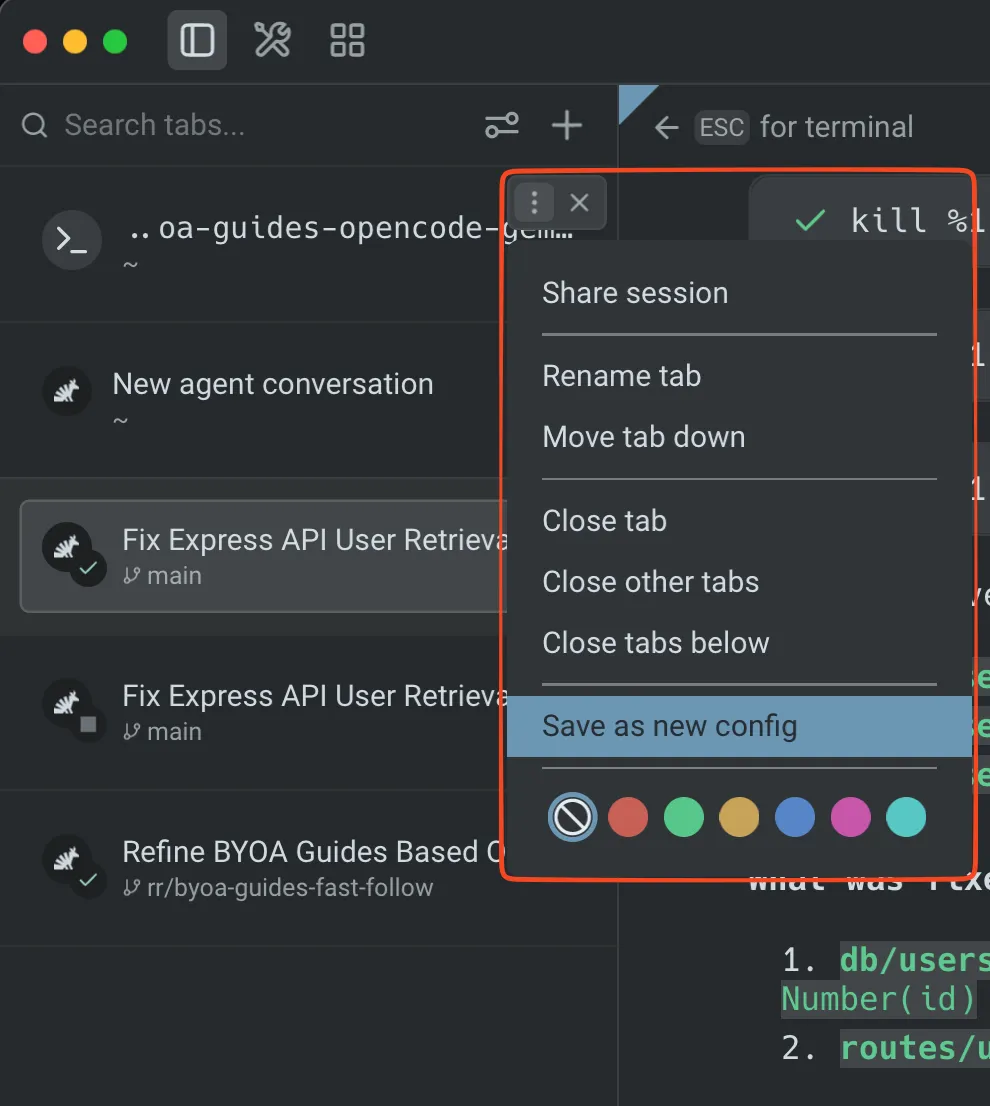 Saving a tab config. Tab configs are TOML files that define the directory, startup commands, and layout for a tab. For example, you might create a config that: * Opens two panes side-by-side * Drops you into your project repo automatically * Starts Claude Code in one pane and Codex in the other ## 6. Use Git worktrees for isolated agent workspaces [Section titled “6. Use Git worktrees for isolated agent workspaces”](#6-use-git-worktrees-for-isolated-agent-workspaces) When multiple agents modify the same files, they can create conflicts. Git worktrees give each agent its own copy of your repo on a separate branch. 1. Create one worktree per agent so each agent has an isolated branch. ```bash git worktree add ../your-project-claude feature/claude-refactor git worktree add ../your-project-codex feature/codex-refactor ``` 2. Point each agent tab at its assigned worktree directory. 3. Give every worktree a branch name that makes ownership obvious: * `agent/claude-auth-refactor` * `agent/codex-auth-tests` * `agent/warp-review-pass` 4. Keep a merge note somewhere lightweight, such as your parent Warp Agent conversation or PR description: * Which branch each agent owns. * Which tests each agent ran. * Which branch should be merged first. * Which conflicts or follow-up decisions remain. 5. After both agents finish, compare the branches and merge the best results. ```bash git diff feature/claude-refactor..feature/codex-refactor ``` 6. Remove worktrees after you merge or discard the branch. ```bash git worktree remove ../your-project-claude git worktree remove ../your-project-codex ``` ## 7. Fan out work to cloud agents [Section titled “7. Fan out work to cloud agents”](#7-fan-out-work-to-cloud-agents) Use cloud agents when the work is long-running, resource-intensive, easy to shard, or better handled away from your local machine. For example: * Review every open PR in a repo. * Run a migration across many packages. * Ask one child agent per service to inspect logs, tests, or incidents. * Let a parent agent coordinate a plan while children research, implement, or validate. 1. Start in the Warp app with `/orchestrate` when you want a parent agent to propose the child-agent breakdown. ```text /orchestrate Split this TypeScript monorepo migration by package. Use one child agent per package, require each child to run package tests, and summarize changed files and risks before merge. ``` 2. Use `/plan` for larger changes where you want to review the plan, orchestration config, child ownership, and merge strategy before agents launch. 3. For repeatable or unattended workflows, start the parent from the Oz CLI, the Oz web app, or the Oz API. See [Running orchestrated agents](/agent-platform/cloud-agents/orchestration/multi-agent-runs/) for launch options. 4. Inspect parent and child runs from the [Oz web app](/agent-platform/cloud-agents/oz-web-app/) or the [Agent Management Panel](/agent-platform/cloud-agents/managing-cloud-agents/) in the Warp app. Cloud orchestration is the best fit when you need: * **Parallel fan-out** across many files, packages, PRs, issues, or services. * **Clear observability** across parent and child runs. * **Durable handoff** through child run summaries, session links, artifacts, PRs, or messages. * **Team-scale execution** from Slack, Linear, schedules, GitHub Actions, the CLI, or the API. ## 8. Validate, merge, and hand off [Section titled “8. Validate, merge, and hand off”](#8-validate-merge-and-hand-off) Do not merge every agent’s output automatically. Use a fan-in pass: 1. Review each agent’s summary, changed files, and validation results. 2. Open the [Code Review panel](/code/code-review/) for local branches, or inspect cloud run artifacts and session links for cloud children. 3. Merge or cherry-pick one branch at a time. 4. Re-run the full validation suite from the final integrated branch. 5. Attach context for reviewers: agent session links, changed files, validation commands, known risks, and reviewer asks. For GitHub handoff, see [Attach agent session context to GitHub PRs](/guides/agent-workflows/how-to-attach-agent-session-context-to-github-prs/). For reviewing the generated code itself, see [How to review AI-generated code](/guides/agent-workflows/how-to-review-ai-generated-code/). ## Productivity tips [Section titled “Productivity tips”](#productivity-tips) * **Use the Agent Management Panel** — Open the Agent Management Panel to see all active agents across tabs. This gives you a dashboard view of what’s running, what’s waiting, and what’s finished. * **Color-code your tabs** — Assign different themes or colors to agent tabs so you can visually distinguish them at a glance in the vertical sidebar. * **Compose with `Ctrl+G`** — Use Warp’s rich input editor (`Ctrl+G`) when composing prompts for third-party agents. This gives you click-to-edit instead of arrow-key navigation in the raw CLI. * **Review all changes before committing** — After running multiple agents, open the Code Review panel to see the combined diff across all files. Use “Changes vs. main” view to see the full scope of all agent-generated changes on your branch. ## Next steps [Section titled “Next steps”](#next-steps) You set up a multi-agent workspace with vertical tabs, launched different agents in parallel, monitored them with notifications, compared their outputs, and learned how to use tab configs and Git worktrees for isolated, reproducible multi-agent workflows. Explore related guides and features: * [How to review AI-generated code](/guides/agent-workflows/how-to-review-ai-generated-code/) — review and refine the code your agents produced * [Attach agent session context to GitHub PRs](/guides/agent-workflows/how-to-attach-agent-session-context-to-github-prs/) — give reviewers the agent context behind a PR * [Multi-agent orchestration](/agent-platform/cloud-agents/orchestration/) — coordinate parent and child agents across local and cloud runs * [Running orchestrated agents](/agent-platform/cloud-agents/orchestration/multi-agent-runs/) — start orchestrated runs from Warp, the Oz CLI, the Oz web app, or the Oz API * [Set up Claude Code](/guides/external-tools/how-to-set-up-claude-code/) or [Set up Codex CLI](/guides/external-tools/how-to-set-up-codex-cli/) — install both agents if you haven’t already * [Claude Code in Warp](https://www.warp.dev/agents/claude-code) — overview of Claude Code support in Warp * [Codex in Warp](https://www.warp.dev/agents/codex) — overview of Codex support in Warp * [Gemini CLI in Warp](https://www.warp.dev/agents/gemini-cli) — overview of Gemini CLI support in Warp * [OpenCode in Warp](https://www.warp.dev/agents/opencode) — overview of OpenCode support in Warp * [Third-party CLI agents](/agent-platform/cli-agents/overview/) — all supported agents and universal agent features * [Vertical tabs](/terminal/windows/vertical-tabs/) — full reference for tab features
# How to run unattended agents
Canonical page: [/guides/agent-workflows/how-to-run-unattended-agents/](https://docs.warp.dev/guides/agent-workflows/how-to-run-unattended-agents/)
> Start unattended cloud agents from schedules, Slack, Linear, GitHub Actions, the Oz CLI, or the Oz API, then inspect every run.
Warp cloud agents can run unattended from schedules, team tools, CI, the Oz CLI, or the API. Use them when you want an agent to keep working after you leave your terminal, react to external events, or run recurring maintenance without a human starting each run. Every unattended workflow creates a cloud agent run that your team can inspect later. Open runs from the [Runs page in the Oz web app](/agent-platform/cloud-agents/oz-web-app/#runs), the [Agent Management Panel](/agent-platform/cloud-agents/managing-cloud-agents/) in the Warp app, or the session link posted back to the tool that triggered the agent. ## Choose a trigger [Section titled “Choose a trigger”](#choose-a-trigger) Use this table to decide where an unattended agent should start. | Trigger | Use it when | Where to configure | Where to inspect | | ---------------- | ------------------------------------------------------------------------------------------------------------ | ------------------------------------------------------------------------------------------------------------------------------------------------------------------------------------ | -------------------------------------------------------------------------------------------------------------- | | Scheduled agents | Work should run on a predictable cadence, like weekly triage, nightly dependency checks, or monthly cleanup. | [Scheduled Agents](/agent-platform/cloud-agents/triggers/scheduled-agents/) or the [Scheduled Agents quickstart](/agent-platform/cloud-agents/triggers/scheduled-agents-quickstart/) | Oz web app Runs page, Agent Management Panel in the Warp app, schedule history, and cloud agent session links | | Slack | A teammate should delegate work from a Slack message or thread. | [Slack integration](/agent-platform/cloud-agents/integrations/slack/) | Slack thread updates, Oz web app Runs page, Agent Management Panel in the Warp app, and the shared run session | | Linear | An issue, comment, or assignment should start the agent. | [Linear integration](/agent-platform/cloud-agents/integrations/linear/) | Linear issue updates, Oz web app Runs page, Agent Management Panel in the Warp app, and the shared run session | | GitHub Actions | A repository event, PR workflow, issue workflow, or CI failure should start the agent. | [GitHub Actions](/agent-platform/cloud-agents/integrations/github-actions/) | GitHub Actions logs, PR or issue comments, Oz web app, and cloud agent runs | | Oz CLI | You want to start a named cloud run from a terminal, script, or local automation. | [Oz CLI](/reference/cli/#running-agents-remotely-oz-agent-run-cloud) | CLI output, Oz web app Runs page, Agent Management Panel in the Warp app, and cloud agent session links | | Oz API or SDK | Your internal system should create, query, or monitor runs programmatically. | [Oz API and SDK](/reference/api-and-sdk/) | Your system, API results, Oz web app, and run sessions | ## Choose a workflow pattern [Section titled “Choose a workflow pattern”](#choose-a-workflow-pattern) ### Run recurring maintenance [Section titled “Run recurring maintenance”](#run-recurring-maintenance) Use [Scheduled Agents](/agent-platform/cloud-agents/triggers/scheduled-agents/) for tasks that should happen on a fixed cadence. Good fits include: * dependency update checks * stale issue or PR triage * repository hygiene * documentation refreshes * recurring reports or audits Each scheduled run starts a fresh cloud agent session and records its own task history, so you can review what ran, when it ran, and what the agent did. ### Delegate work from Slack or Linear [Section titled “Delegate work from Slack or Linear”](#delegate-work-from-slack-or-linear) Use [Slack](/agent-platform/cloud-agents/integrations/slack/) or [Linear](/agent-platform/cloud-agents/integrations/linear/) when the task starts from team conversation or issue context. These integrations are best for: * turning a Slack thread into an implementation task * asking an agent to investigate a Linear issue * generating a PR from a bug report or product request * letting teammates monitor progress without opening Warp The agent posts progress updates back to the source thread or issue and provides a shared run link for deeper inspection. ### React to GitHub events [Section titled “React to GitHub events”](#react-to-github-events) Use [GitHub Actions](/agent-platform/cloud-agents/integrations/github-actions/) when the trigger should be tied to a repository event. For example: * review a PR when it opens * respond to an `@oz-agent` comment * summarize issues on a schedule * attempt a fix when CI fails * suggest fixes for review comments The GitHub Action can pass event data, prior step output, and repository context into the agent prompt. The agent can comment, review, or open branches depending on the workflow permissions you grant. ### Start runs from scripts or internal systems [Section titled “Start runs from scripts or internal systems”](#start-runs-from-scripts-or-internal-systems) Use the [Oz CLI](/reference/cli/#running-agents-remotely-oz-agent-run-cloud) for scripts and terminal workflows. Use the [Oz API and SDK](/reference/api-and-sdk/) when another service should create or monitor runs. This is useful for: * internal dashboards * custom webhooks * CI systems outside GitHub Actions * recurring jobs managed by your own scheduler * workflows that need to query run status or results programmatically Name cloud runs consistently with `--name` so your team can filter and review related runs later. ## Define the run before deploying [Section titled “Define the run before deploying”](#define-the-run-before-deploying) Before deploying an unattended agent, define: * **Trigger** - What starts the run: schedule, Slack, Linear, GitHub event, CLI command, API request, or another automation. * **Context** - Which repository, issue, thread, PR, logs, or files the agent needs. * **Environment** - Where the agent runs, including repos, image, setup commands, secrets, and any MCP servers. * **Permissions** - What the agent can read or write in GitHub, Slack, Linear, or other systems. * **Output** - Whether the agent should comment, open a PR, generate an artifact, post a summary, or only report findings. * **Review path** - Where a human will inspect the run, validate results, and approve changes. If the agent can change code or infrastructure, keep the instructions narrow and make validation explicit. ## Review unattended runs [Section titled “Review unattended runs”](#review-unattended-runs) Unattended does not mean invisible. Use these surfaces to review what happened: * [Oz web app](/agent-platform/cloud-agents/oz-web-app/) - View runs, schedules, run metadata, and session transcripts from a browser or mobile device. * [Managing cloud agents](/agent-platform/cloud-agents/managing-cloud-agents/) - Filter runs by source, status, day, creator, or trigger. * [Cloud agent session sharing](/agent-platform/cloud-agents/viewing-cloud-agent-runs/) - Inspect the prompt, plan, commands, logs, output, and follow-up messages where available. * [Oz API and SDK](/reference/api-and-sdk/) - Query runs and build internal monitoring around status, runtime, or outcomes. When a run creates a PR, include the cloud run link in the PR description or a comment. See [Attach agent session context to GitHub PRs](/guides/agent-workflows/how-to-attach-agent-session-context-to-github-prs/) for a template. ## Start with one reviewable workflow [Section titled “Start with one reviewable workflow”](#start-with-one-reviewable-workflow) Start with one narrow workflow before deploying many unattended agents: 1. Pick one trigger and one repository. 2. Use a focused prompt or skill. 3. Run it manually or with **Run now** before enabling a recurring schedule. 4. Confirm the run has the right environment, secrets, and permissions. 5. Check the output and session transcript. 6. Add a review or approval step before merging code changes. 7. Expand the workflow only after the first runs are predictable. ## Next steps [Section titled “Next steps”](#next-steps) * [Scheduled Agents quickstart](/agent-platform/cloud-agents/triggers/scheduled-agents-quickstart/) - Create your first recurring agent in the Oz web app. * [Integrations quickstart](/agent-platform/cloud-agents/integrations/quickstart/) - Trigger agents from Slack or Linear. * [GitHub Actions quickstart](/agent-platform/cloud-agents/integrations/quickstart-github-actions/) - Add an agent to a PR review workflow. * [Viewing cloud agent runs](/agent-platform/cloud-agents/viewing-cloud-agent-runs/) - Inspect and share unattended run sessions.
# Use voice and images to prompt coding agents
Canonical page: [/guides/agent-workflows/how-to-use-voice-and-images-to-prompt-coding-agents/](https://docs.warp.dev/guides/agent-workflows/how-to-use-voice-and-images-to-prompt-coding-agents/)
> Use voice and image context to prompt coding agents faster in Warp — works with Claude Code, Codex, and any CLI agent.
Typing detailed prompts for coding agents can be slow. Describing a bug from a screenshot, dictating a complex refactoring plan, or explaining a UI change from a design mockup are examples of tasks that are faster with voice and images than with text alone. This guide shows you how to use multimodal input with any CLI coding agent running in Warp in about 5 minutes. ## Prerequisites [Section titled “Prerequisites”](#prerequisites) * **Warp** — Voice and image input are built into Warp’s agent interface. Download from [Warp homepage](https://www.warp.dev). * **A CLI coding agent** — Voice and image input work with any supported agent: [Claude Code](/guides/external-tools/how-to-set-up-claude-code/), [Codex CLI](/guides/external-tools/how-to-set-up-codex-cli/), OpenCode, Gemini CLI, Amp, or Droid. See [Third-party CLI agents](/agent-platform/cli-agents/overview/) for the full list. * **A working microphone** (for voice) — Built-in or external, including Bluetooth audio devices. ## 1. Enable voice input [Section titled “1. Enable voice input”](#1-enable-voice-input) Voice transcription is available in Warp’s agent input. To use it: 1. Click the **microphone icon** in the input area, or use the voice input keyboard shortcut.  The microphone icon appears in the input area for voice transcription. 2. Speak your prompt naturally. Warp transcribes your speech and places the text in the input field. 3. Review the transcription, edit if needed, then submit your prompt. Voice input works for both Warp’s built-in agent and third-party CLI agents when the agent utility bar is active. ## 2. Prompt with voice instead of typing [Section titled “2. Prompt with voice instead of typing”](#2-prompt-with-voice-instead-of-typing) Voice is fastest for prompts that are easy to say but tedious to type, such as complex descriptions, multi-step plans, or explanations that reference what you’re looking at. Try prompts like: ```plaintext Refactor the authentication middleware to handle three cases: valid token, expired token, and missing token. For expired tokens, return a 401 with a refresh token hint. For missing tokens, return a 403. Add unit tests for each case. ``` The transcription appears in your input field where you can review and edit before submitting. ## 3. Attach screenshots as context [Section titled “3. Attach screenshots as context”](#3-attach-screenshots-as-context) Paste (`⌘+V`) or drag images directly into the input area to give the agent visual context. This is useful for: * **Bug reports** — Screenshot the error in your browser and ask the agent to fix it. * **Design mockups** — Paste a Figma screenshot and ask the agent to implement the UI. * **Error messages** — Screenshot a stack trace instead of copying and reformatting it. * **Visual diffs** — Show the agent what the UI looks like now vs. what it should look like. 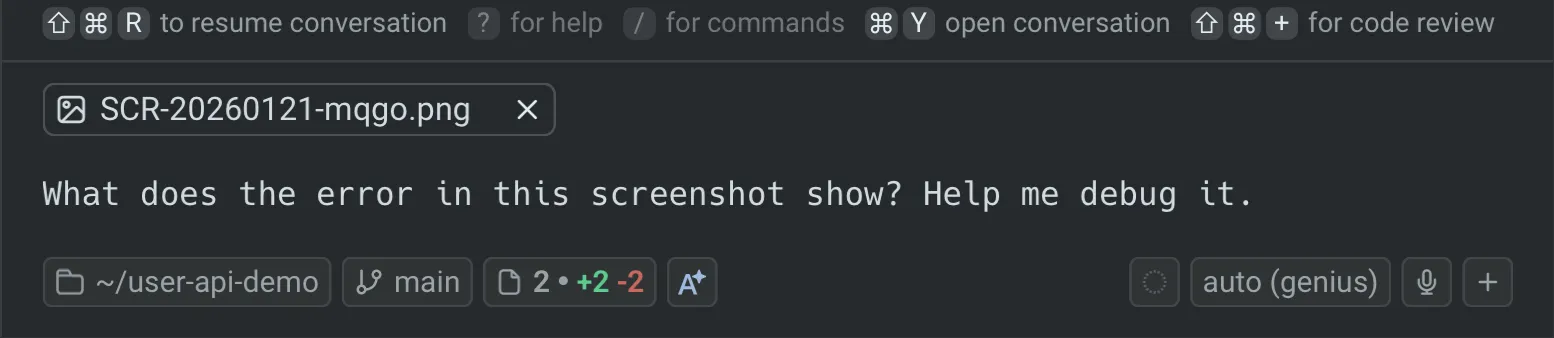 Attaching images as agent context. ## 4. Combine voice and images for design-to-code workflows [Section titled “4. Combine voice and images for design-to-code workflows”](#4-combine-voice-and-images-for-design-to-code-workflows) The most powerful use of multimodal input is combining voice and images. For example: 1. Take a screenshot of a design mockup from Figma. 2. Paste it into the input area. 3. Use voice to describe what you want: ```plaintext This is the login page design. Implement it using React and Tailwind. Match the spacing and colors exactly. The form should validate email format on blur and show inline error messages. ``` The agent sees the design and hears your implementation requirements at the same time — much faster than writing a detailed specification by hand. ## 5. Use voice and images with third-party agents [Section titled “5. Use voice and images with third-party agents”](#5-use-voice-and-images-with-third-party-agents) Voice and image input work with any CLI agent that Warp detects, not just the built-in agent. When you run Claude Code, Codex, or another supported agent, Warp shows the **agent utility bar** with controls for voice, images, and files. To use with a third-party agent: 1. Start the agent in your terminal (e.g., `claude` or `codex`). 2. The agent utility bar appears automatically when Warp detects the agent session. 3. Use the microphone icon for voice input or paste images as context. 4. Press `Ctrl+G` to open the rich input editor for composing complex prompts with attached images. The voice transcription and image context are sent to the running agent session just as if you had typed and pasted them manually. ## Productivity tips [Section titled “Productivity tips”](#productivity-tips) * **Use voice for code review feedback** — Instead of typing inline comments, use voice to describe what needs to change while looking at the diff in the [Code Review panel](/code/code-review/). * **Screenshot UI issues** — When you want to change a UI component, just screenshot it, send it to the agent, and describe what you want changed. * **Dictate commit messages** — After reviewing your changes, use voice to describe what you did. The agent can format it as a proper commit message. * **Use with Rules for consistent results** — Combine image context with [Rules](/agent-platform/capabilities/rules/) that define your project’s UI patterns. The agent will match the mockup while following your existing design system. ## Next steps [Section titled “Next steps”](#next-steps) You can now prompt coding agents using voice transcription and image context — whether you’re using Claude Code, Codex, or any other CLI agent in Warp. Voice and images make complex prompts faster to create and more accurate, especially for design-to-code workflows, bug reproduction, and multi-step refactoring plans. Explore related guides and features: * [Set up Claude Code](/guides/external-tools/how-to-set-up-claude-code/) or [Set up Codex CLI](/guides/external-tools/how-to-set-up-codex-cli/) to start using third-party agents * [How to review AI-generated code](/guides/agent-workflows/how-to-review-ai-generated-code/) — review the code your agents produce * [Run multiple agents at once](/guides/agent-workflows/how-to-run-multiple-ai-coding-agents/) — combine voice/image prompting with parallel agents * [Voice input](/agent-platform/local-agents/interacting-with-agents/voice/) — full reference for voice features * [Images as context](/agent-platform/local-agents/agent-context/images-as-context/) — full reference for image input * [Third-party CLI agents](/agent-platform/cli-agents/overview/) — all supported agents and universal features
# Run multiple agents at once with Warp
Canonical page: [/guides/agent-workflows/running-multiple-agents-at-once-with-warp/](https://docs.warp.dev/guides/agent-workflows/running-multiple-agents-at-once-with-warp/)
> Run multiple agent tasks simultaneously in Warp — revert PRs, edit shortcuts, and add tests across repos without losing context.
 ### 1. Why Multiple Agents Matter [Section titled “1. Why Multiple Agents Matter”](#1-why-multiple-agents-matter) Sometimes you need to work on several coding tasks at once — fix a PR, add a feature, debug a build — without losing context.\ \ Warp lets you run multiple agent tasks simultaneously, all within one workspace. *** ### 2. How It Works [Section titled “2. How It Works”](#2-how-it-works) Each agent runs in its own thread, complete with: * Progress tracking * Notifications when blocked or completed * Separate command histories Because Warp is a desktop app, it can send system notifications to alert you when an agent finishes or when it needs review. *** ### 3. Example: Reverting a PR and Editing a Shortcut [Section titled “3. Example: Reverting a PR and Editing a Shortcut”](#3-example-reverting-a-pr-and-editing-a-shortcut) Ben uses voice mode to quickly start tasks. Prompt Example:\ “Find the PR where we added the keyboard shortcut to the UDI input and revert it.” He pastes in the PR number, and the agent: * Locates the relevant diff * Reverts the change automatically * Pushes it to the correct branch Warp notifies him when the task completes. Then, he runs another prompt: Prompt Example:\ “Change the keyboard shortcut to `Cmd + Shift + I`.” Warp modifies `input.rs`, previews the diff, and Ben applies the change directly from Warp. *** ### 4. Managing Multiple Tasks [Section titled “4. Managing Multiple Tasks”](#4-managing-multiple-tasks) You can switch between concurrent agents: * Each task appears in a Task List panel * Completed, canceled, and running tasks are color-coded * Toast notifications appear when tasks are blocked You can even fast-forward agents to auto-approve all code diffs once you trust their trajectory. *** ### 5. Parallel Contexts [Section titled “5. Parallel Contexts”](#5-parallel-contexts) In another repo, Ben adds a new Eval test via a different agent: Prompt Example:\ “Create a Python hello world function and verify it prints ‘Hello World.’” Warp’s second agent: * Locates the correct file * Writes the test code * Verifies execution Meanwhile, the first agent continues working on the keyboard shortcut task. *** ### 6. Reviewing All Active Agents [Section titled “6. Reviewing All Active Agents”](#6-reviewing-all-active-agents) Open the Agent Mode Dashboard to see: * Active tasks * Completed tasks * Logs and outputs You can refine or cancel tasks mid-run if needed, or switch back to manual commands. For a workflow-oriented setup guide that covers task decomposition, worktrees, cloud orchestration, validation, and review handoff, see [How to run multiple AI coding agents](/guides/agent-workflows/how-to-run-multiple-ai-coding-agents/).
# Understand your codebase
Canonical page: [/guides/agent-workflows/understanding-your-codebase/](https://docs.warp.dev/guides/agent-workflows/understanding-your-codebase/)
> Use Warp's Codebase Context to search across client and server repos, generate architecture summaries, and onboard to unfamiliar features fast.
 ### 1. The Challenge [Section titled “1. The Challenge”](#1-the-challenge) Kevin, who worked on Warp’s Windows and Linux builds, wanted to jump into a feature he hadn’t touched before: Block Sharing.\ \ This feature spans two codebases — Warp’s client (Rust) and server (Go) — making onboarding tough. That’s where Codebase Context comes in. *** ### 2. What Is Codebase Context? [Section titled “2. What Is Codebase Context?”](#2-what-is-codebase-context) Warp’s Codebase Context uses semantic search to understand your code.\ It doesn’t rely on exact function or variable names — instead, it searches based on meaning. You can use it through a shared workflow in Warp Drive. This prompt tells Warp to: * Search across both client and server codebases * Summarize how a feature works end-to-end * Include clickable links to relevant files *** ### 3. Real Example: Block Sharing [Section titled “3. Real Example: Block Sharing”](#3-real-example-block-sharing) Kevin types `block sharing` into Warp’s shared workflow.\ Warp: 1. Searches the client codebase for the rendering logic 2. Searches the server codebase for GraphQL handlers 3. Generates a summary combining both perspectives The output includes: * Architecture overview * Linked file paths * Function and module summaries No more manual onboarding or guessing file names. *** ### 4. Incremental Syncing [Section titled “4. Incremental Syncing”](#4-incremental-syncing) Whenever you change a file in an indexed repo: * Warp detects the update automatically * Re-embeds just that file * Keeps your code context fresh That means agents never reference stale code. *** ### 5. Why It’s Game-Changing [Section titled “5. Why It’s Game-Changing”](#5-why-its-game-changing) Codebase Context helps teams: * Understand large or unfamiliar codebases * Onboard faster * Jump between client and server logic seamlessly * Generate accurate, clickable documentation > “This saved us hours of one-on-one walkthroughs.” — Lucy
# Use images as context with Warp
Canonical page: [/guides/agent-workflows/using-images-as-context-with-warp/](https://docs.warp.dev/guides/agent-workflows/using-images-as-context-with-warp/)
> Attach screenshots and design mockups as context for Warp's agent to generate UI code, debug visual issues, and match Figma designs.
 ### 1. Why Images Matter [Section titled “1. Why Images Matter”](#1-why-images-matter) Humans process visuals much faster than text — and the same applies to AI.\ \ When you’re trying to explain a UI issue (“this button is off by a few pixels”), describing it with words can be clunky.\ \ That’s why Warp supports images as context — letting you attach screenshots directly to your prompts. > 🧠 “An image is worth a thousand words” — especially when debugging UI or building frontend components. *** ### 2. What Image Context Does [Section titled “2. What Image Context Does”](#2-what-image-context-does) Image Context allows you to: * Attach one or more screenshots to an agent query * Give visual references for bugs, designs, or features * Let the agent visually interpret what you mean This is especially useful for frontend tasks like: * Rebuilding a design from Figma * Identifying layout misalignments * Debugging visual bugs *** ### 3. Building an MCP Marketplace from Figma [Section titled “3. Building an MCP Marketplace from Figma”](#3-building-an-mcp-marketplace-from-figma) Taking a Figma mock of an MCP Server Marketplace and using it as input for Warp. #### Step 1. Capture the Mock [Section titled “Step 1. Capture the Mock”](#step-1-capture-the-mock) Take a screenshot of your design (e.g., the MCP Marketplace layout). #### Step 2. Attach the Image [Section titled “Step 2. Attach the Image”](#step-2-attach-the-image) In Warp: 1. Click the 📎 image icon in the input bar 2. Select your screenshot 3. Confirm it’s attached to the query *** ### 4. Running the Task [Section titled “4. Running the Task”](#4-running-the-task) Once attached, Warp’s agent: 1. Detects the attached image 2. Searches your repo (e.g., `collection.rs`) 3. Generates diffs that recreate the UI from the mock 4. Creates corresponding components and layout logic You can view and edit these diffs in the Code Diff Viewer, similar to GitHub’s diff interface. > 💡 Warp recommends smaller, focused diffs — agents perform better when working iteratively. *** ### 5. Reviewing the Results [Section titled “5. Reviewing the Results”](#5-reviewing-the-results) The agent built: * A UI component for the MCP Marketplace * Static data for three MCP servers (`Linear`, `GitHub`, `Stripe`) * Proper rendering logic and styling Verify the UI in Warp: > “It matched the mock almost perfectly — something that would’ve taken me two days was done in 20 minutes.” *** ### 6. Optimizing for Performance [Section titled “6. Optimizing for Performance”](#6-optimizing-for-performance) Because images can consume tokens quickly, Warp automatically: * Resizes images client-side * Compresses them intelligently before sending * Minimizes token usage without losing clarity
# 5 agent workflows for product managers
Canonical page: [/guides/agent-workflows/warp-for-product-managers/](https://docs.warp.dev/guides/agent-workflows/warp-for-product-managers/)
> Five agent workflows that automate status updates, documentation, Slack search, and meeting prep for product managers.
Most PM work breaks down into three activities: gathering information, synthesizing it, and communicating the result. These five workflows use Warp’s agents and MCP integrations to automate the gathering and speed up the synthesis, so you spend less time switching between tools and more time making decisions. Each workflow takes 5–10 minutes to set up. ## Prerequisites [Section titled “Prerequisites”](#prerequisites) * **Warp** — installed and signed in. See [Installation and setup](/getting-started/quickstart/installation-and-setup/) to get started. * **MCP servers (optional but recommended)** — Slack, Linear, and Notion all have documented MCP configs in Warp. See [MCP](https://docs.warp.dev/agent-platform/capabilities/mcp/) for setup instructions. Each workflow below notes which MCP servers it uses and includes a fallback for users without MCP. ## 1. Pull cross-project status updates [Section titled “1. Pull cross-project status updates”](#1-pull-cross-project-status-updates) Compiling a status update across multiple projects usually means opening Slack, Linear, Notion, and email in separate tabs, reading through each one, and manually synthesizing a summary. With MCP-connected agents, you can pull context from all of these tools in a single prompt. 1. Tell the agent which projects, tools, and time range to cover. Be specific about the audience and format you need. 2. Submit a prompt that queries your connected tools. For example: ```plaintext Pull updates from the last week across #project-atlas and #project-beacon in Slack, any Linear tickets that moved to Done or In Review, and the latest entries in our Notion launch tracker. Summarize into a status update for my skip-level, organized by project. Use bullet points. Flag anything blocked or at risk. ``` 3. Review the output and iterate. Ask the agent to adjust the tone (more concise, more formal), reorder sections, or add context for a specific stakeholder. The result is a formatted status update ready to paste into Slack or email. **MCP servers used** — Slack, Linear, Notion. ## 2. Draft documents from the terminal [Section titled “2. Draft documents from the terminal”](#2-draft-documents-from-the-terminal) Writing a rollout doc, product brief, or strategy doc usually starts with a blank page in Google Docs or Notion. Instead, describe what you need to the agent and iterate on a draft without leaving Warp. 1. Describe the document type, audience, and structure. For example: ```plaintext Draft a product brief for a new onboarding flow redesign. The audience is engineering and design leads. Include sections for problem statement, proposed solution, success metrics, and open questions. The problem is that 40% of new users drop off before completing setup. ``` 2. Review the draft and iterate. Ask the agent to expand a section, tighten the language, add a competitor comparison, or restructure the outline. 3. Copy the finished draft into Google Docs, Notion, Confluence, or wherever your team keeps docs. If you have Notion MCP connected, ask the agent to push the content directly. The result is a structured first draft, grounded in your specific context, ready for review. **MCP servers used** — Notion (optional, for pushing content directly). ## 3. Search Slack for meeting prep [Section titled “3. Search Slack for meeting prep”](#3-search-slack-for-meeting-prep) Before a meeting or project check-in, you often need to catch up on activity across multiple Slack channels. Manually reading through 10+ channels is slow. With the Slack MCP server, you can search and summarize in one prompt. 1. Tell the agent which channels and time range to search. For example: ```plaintext Search #eng-backend, #design-reviews, #project-atlas, and #incidents for the last 3 days. Summarize the key decisions, open questions, and anything that was escalated. I have a project sync in 30 minutes and need to be caught up. ``` 2. Review the structured summary the agent returns, grouped by topic or channel. 3. Ask follow-up questions to drill into specific threads. For example: “What was the resolution on the API rate limiting discussion in #eng-backend?” The result is a briefing doc summarizing recent activity across channels, ready in minutes. **MCP servers used** — Slack. ## 4. Run parallel workstreams in tabs [Section titled “4. Run parallel workstreams in tabs”](#4-run-parallel-workstreams-in-tabs) PM work often involves juggling multiple threads at once: researching a competitor while drafting a brief while reviewing a doc from a teammate. Warp’s vertical tabs let you run separate agent sessions side by side, each focused on a different task. 1. To enable vertical tabs, in the Warp app go to **Settings** > **Appearance** > **Tabs** and toggle on **Use vertical tab layout**. 2. Open a separate tab for each workstream. For example: * **Tab 1** — researching competitor pricing via web search * **Tab 2** — drafting a product brief based on the research * **Tab 3** — summarizing Slack threads for a stakeholder update 3. Each tab shows which agent is running and its current status. Warp sends notifications when an agent needs your input, so you don’t need to watch each tab. This “thought threads” pattern keeps your workstreams isolated and lets you context-switch without losing progress. For a deeper walkthrough of multi-agent tab setups, including tab configs and Git worktrees, see [Run multiple AI coding agents](/guides/agent-workflows/how-to-run-multiple-ai-coding-agents/). ## 5. Use voice to draft strategy docs [Section titled “5. Use voice to draft strategy docs”](#5-use-voice-to-draft-strategy-docs) When thinking through a brief, strategy doc, or stakeholder update, talking is often faster than typing. Warp’s voice input lets you dictate a rough draft, then ask the agent to clean it up. 1. Click the **microphone icon** in the input area or press the voice input key (default: `fn` key) to start recording. 2. Talk through your document naturally. Describe the problem, your proposed approach, open questions, and next steps. Don’t worry about structure or polish. 3. After the transcription appears, submit a follow-up prompt: ```plaintext Clean up that transcription into a structured strategy doc. Add an executive summary at the top, organize the body into Problem, Approach, Risks, and Next Steps sections, and tighten the language for a leadership audience. ``` The result is a structured first draft from a stream-of-consciousness recording. For full setup details and more use cases, see [Use voice and images to prompt agents](/guides/agent-workflows/how-to-use-voice-and-images-to-prompt-coding-agents/). ## Productivity tips [Section titled “Productivity tips”](#productivity-tips) * **Save Rules for recurring formats** — Save a Rule with your team’s status update format, doc templates, or project list so agents start with the right context every time. See [Rules](https://docs.warp.dev/agent-platform/capabilities/rules/). * **Create Saved Prompts for recurring workflows** — Turn your weekly status prompt or meeting prep prompt into a reusable Saved Prompt so you can run it with one click. See [Trigger reusable actions with Saved Prompts](/guides/configuration/trigger-reusable-actions-with-saved-prompts/). * **Use `Ctrl+G` for complex prompts** — Open the rich input editor for click-to-edit prompt composition instead of navigating with arrow keys. Works with any CLI agent running in Warp. See [Rich Input Editor](https://docs.warp.dev/agent-platform/cli-agents/rich-input/). * **Save tab configs for recurring setups** — If you regularly run a research + drafting + review tab layout, save it as a tab config for one-click workspace setup. See [Tab Configs](https://docs.warp.dev/terminal/windows/tab-configs/). ## Next steps [Section titled “Next steps”](#next-steps) You now have five workflows for automating the information gathering, synthesis, and communication that make up most PM work: cross-project status updates, document drafting, Slack search for meeting prep, parallel workstreams in tabs, and voice-to-text for rough drafts. To go deeper on any of the tools used in these workflows, explore the related guides below. You can also customize how agents behave across your team with Rules, Saved Prompts, and MCP integrations. * [Connect agents to MCP servers](/guides/external-tools/using-mcp-servers-with-warp/) — set up Slack, Linear, Notion, and other MCP integrations * [Use voice and images to prompt agents](/guides/agent-workflows/how-to-use-voice-and-images-to-prompt-coding-agents/) — full setup and use cases for multimodal input * [Run multiple AI coding agents](/guides/agent-workflows/how-to-run-multiple-ai-coding-agents/) — multi-tab workflows, tab configs, and Git worktrees * [MCP](https://docs.warp.dev/agent-platform/capabilities/mcp/) — full reference for MCP server configuration * [Rules](https://docs.warp.dev/agent-platform/capabilities/rules/) — save persistent context so agents follow your team’s conventions * [Voice input](/agent-platform/local-agents/interacting-with-agents/voice/) — full reference for voice transcription features
# Warp vs Claude Code
Canonical page: [/guides/agent-workflows/warp-vs-claude-code/](https://docs.warp.dev/guides/agent-workflows/warp-vs-claude-code/)
> Compare Warp and Claude Code across setup, diff review, model selection, configuration, and performance.
 ### 1. Overview [Section titled “1. Overview”](#1-overview) This walkthrough compares Claude Code and Warp’s built-in coding agent — two tools built for AI-assisted development.\ Both can: * Read and edit files * Generate code diffs * Plan multi-step tasks\ \ But they differ in experience, configurability, and performance. *** ### 2. Setup and Interface [Section titled “2. Setup and Interface”](#2-setup-and-interface) #### Claude Code [Section titled “Claude Code”](#claude-code) * Runs as a CLI tool, requiring a terminal and the `claude` CLI installed. * You type prompts directly into a command box. * Supports file reading, search, and diff generation. #### Warp [Section titled “Warp”](#warp) * Built directly into the Warp terminal. * No installation needed — type a natural-language query or click the Agent button to enter Agent Mode. * Handles the same operations as Claude Code but integrated into the environment you already use. *** ### 3. Reviewing Diffs [Section titled “3. Reviewing Diffs”](#3-reviewing-diffs) In Claude Code: * You manually review diffs via CLI or external editors like VS Code. * You can hit Shift + Tab to auto-accept all edits. In Warp: * You get a visual diff view built in. * Accept, reject, or manually edit diffs inline using Warp’s lightweight editor. * The agent automatically updates its context to avoid overwriting your changes. *** ### 4. Planning & Context Gathering [Section titled “4. Planning & Context Gathering”](#4-planning--context-gathering) Both support planning mode for complex tasks: * Claude Code uses a Markdown-style plan view. * Warp can either show a similar plan or skip planning for short tasks. For context: * Both allow file references with `@filename`. * Warp extends this with symbol referencing (`@functionName`) and a file tree explorer, letting you pull in specific lines and symbols as context. *** ### 5. Model Selection [Section titled “5. Model Selection”](#5-model-selection) Claude Code lets you pick between Claude 3 models (`Sonnet`, `Opus`, `Haiku`) via the `/model` menu. Warp supports multiple ecosystems: * Claude (Sonnet, Opus) * GPT-5 (various reasoning levels) * Gemini series Switch models from the dropdown or directly in the agent menu. *** ### 6. Configuration [Section titled “6. Configuration”](#6-configuration) In Claude Code: * Everything is configured via `/commands` in the CLI. * Includes model switching, tool permissions, and sub-agent creation. In Warp: * Configure from Settings → AI & Agents. * Add MCP servers, prompts, and global rules. * Define Agent Profiles for read/write permissions, autonomy, and planning behavior. * Maintain a global rules directory for consistent behavior across projects. Warp also supports codebase indexing, which creates embeddings for faster semantic search across your repos. *** ### 7. Managing Agents Over Time [Section titled “7. Managing Agents Over Time”](#7-managing-agents-over-time) Claude Code: * Shows progress directly in the CLI tab. * Displays the current task name in the terminal tab title. Warp: * Adds visual indicators for agent status, progress, and toast notifications when blocked. * Optional desktop notifications keep you informed when you’re multitasking. *** ### 8. Performance Comparison [Section titled “8. Performance Comparison”](#8-performance-comparison) Ben ran both tools on the same coding task — fixing a bug in the `renderKeyboardShortcut` function from a Sentry issue. Claude Code results: * Took \~2–4 minutes with Claude 3 Sonnet. * Found the right issue and produced working code, though some redundant logic remained. Warp results: * With GPT-5, average time was \~1 minute 20 seconds. * Consistent, high-quality output. * Produced concise solutions with fewer redundant checks. * Supported multiple models for experimentation. *** ### 9. Conclusions [Section titled “9. Conclusions”](#9-conclusions) | Criteria | Claude Code | Warp | | --------------- | ----------------- | ------------------------ | | Environment | CLI tool | Integrated into terminal | | Diff Review | External / Manual | Built-in panel | | Planning | Markdown mode | Inline or Opus-assisted | | Model Options | Claude only | Claude, GPT-5, Gemini | | Configurability | CLI-based | UI + Profiles + Rules | | Performance | 2–4 min avg | \~1.2 min avg (GPT-5) | **TL;DR:**\ If you prefer the Claude model suite and CLI workflow — go with Claude Code.\ If you want richer diff editing, context referencing, and model flexibility — Warp is the better fit. > “Claude Code gives you an AI terminal. Warp gives you an AI development environment.”
# Build a Chrome extension (D3.js + JavaScript + HTML + CSS)
Canonical page: [/guides/build-an-app-in-warp/building-a-chrome-extension-d3js-javascript-html-css/](https://docs.warp.dev/guides/build-an-app-in-warp/building-a-chrome-extension-d3js-javascript-html-css/)
> Build a D3.js Sankey diagram Chrome extension using Warp — scaffold, debug, coordinate multiple agents, and publish to the Chrome Web Store.
 1. #### Set up your environment and create a new Chrome Extension project [Section titled “Set up your environment and create a new Chrome Extension project”](#set-up-your-environment-and-create-a-new-chrome-extension-project) Our goal: build a Chrome extension called **“Sankey Stone”** that visualizes flows using **D3.js**. Files created during setup * `manifest.json` * `popup.html` * `popup.css` * `popup.js` * Icon images (`icon16.png`, `icon32.png`, `icon48.png`, etc.) Enable Developer Mode in Chrome and load the project: chrome://extensions → Developer Mode → Load unpacked → Select your project folder Caution If you see errors like “Failed to load extension” or “Could not load icon 16.png,” double‑check your manifest paths and icon filenames. The transcript explicitly shows these initial debugging steps. 2. #### Test the initial D3.js rendering [Section titled “Test the initial D3.js rendering”](#test-the-initial-d3js-rendering) After fixing missing icons, the extension loads but initially shows only “Loading diagram.”\ \ Debug this by taking a screenshot and feeding it to an agent for context by asking: ```plaintext It says loading diagram — why isn’t the chart appearing? ``` An agent reviews the error and regenerates the `popup.js` so the Sankey chart appears using **D3.js**. Result: a working, interactive diagram rendered inside the extension popup. 3. #### Version control and GitHub setup [Section titled “Version control and GitHub setup”](#version-control-and-github-setup) Initialize a Git repository and commit: ```bash git init git add . git commit -m "Initial Sankey Stone extension" ``` The developer asks the agent to create a GitHub repo and push the code.\ \ The agent handles authentication, creates the remote repo, and pushes all files automatically. 4. #### Add a local test page and dynamic data [Section titled “Add a local test page and dynamic data”](#add-a-local-test-page-and-dynamic-data) Launch a simple local web server with a test page that outputs traffic flow data. The extension reads this data and updates the Sankey diagram dynamically. Transcript example prompt: ```plaintext Update the test data page so that it generates random labels and different contexts when I hit the regenerate button. ``` The agent edits the test page so that clicking the **Regenerate Test Page** button updates the diagram in real time. 5. #### Coordinate multiple agents in parallel [Section titled “Coordinate multiple agents in parallel”](#coordinate-multiple-agents-in-parallel) The video demonstrates running **multiple agents** in parallel. Each agent receives a different task: | Agent | Task | | ----- | ----------------------------------------------------------------------------- | | #1 | `Update the test data page to randomize labels and values` | | #2 | `Change the refresh page button to regenerate the chart in a different style` | | #3 | `Generate a useful README file for the project` | You can approve actions automatically by enabling **Auto‑approve all agent actions** so background updates run without manual confirmation. 6. #### Refine styles and interactions [Section titled “Refine styles and interactions”](#refine-styles-and-interactions) After the data layer works, now you can iterate on appearance: ```plaintext Apply new color themes and improve the layout. ``` Changes applied: * Support for multiple color themes and improved node layout. * Hovering over links highlights connected nodes. * Users can drag nodes to rearrange the layout. * Added a “Switch Style” button to cycle between themes. To support exporting diagrams, you can ask: ```plaintext Add a button to download this image as a PNG. ``` The Warp agent writes the JS logic for PNG export and verifies that clicking the button saves a screenshot of the diagram. 7. #### Add an API key setup screen [Section titled “Add an API key setup screen”](#add-an-api-key-setup-screen) Create a settings page where users can store API keys: ```plaintext Add a settings page to enter the Anthropic API key and test it. ``` * The page allows testing the key to ensure it works. * API keys are stored locally in the browser, not sent to a server. 8. #### Publish to the Chrome Web Store [Section titled “Publish to the Chrome Web Store”](#publish-to-the-chrome-web-store) Package and submit the extension: ```bash zip -r sankey_stone.zip * ``` Upload the ZIP file to the [Chrome Web Store developer dashboard](https://chrome.google.com/webstore/devconsole) and follow the prompts. *** ### Summary [Section titled “Summary”](#summary) By following these transcript‑based steps, you can recreate the same workflow: * Scaffold a Chrome extension with D3.js. * Debug manifest and icon issues. * Use agents to generate and refine code. * Introduce multi‑agent parallel tasks for UI, data, and docs. * Add interactivity, themes, and export options. * Create an API key setup screen. * Package and publish to the Chrome Web Store.
# Build a real-time chat app (GitHub MCP + Railway)
Canonical page: [/guides/build-an-app-in-warp/building-a-real-time-chat-app-github-mcp-railway/](https://docs.warp.dev/guides/build-an-app-in-warp/building-a-real-time-chat-app-github-mcp-railway/)
> Build and deploy a real-time chat app with Python, FastAPI, and JavaScript — from idea to production, all inside Warp.
 ### Overview [Section titled “Overview”](#overview) This video shows how to go from **idea → working web app → production deployment**, all inside Warp.\ The project: a **real-time chat application** built with **Python (FastAPI)** and a **JavaScript frontend**, deployed through **Railway**, and integrated with **GitHub** via **MCP (Model Context Protocol)**. 1. #### Setup & Installation [Section titled “Setup & Installation”](#setup--installation) Once you open Warp, you’ll see three core modes: * **Auto Mode** – Detects whether you’re typing a command or an AI prompt * **Terminal Mode** – For standard shell commands only (`ls`, `pwd`, etc.) * **Agent Mode** – For conversational AI prompts (`build me an app`, `add feature X`, etc.) You can switch modes using the top-bar buttons. Pro tip: Enable voice input for natural prompting or attach screenshots when debugging UI issues. 2. #### Generate an App Idea [Section titled “Generate an App Idea”](#generate-an-app-idea) Warp supports *planning models*, where the AI generates a detailed roadmap before coding. ```plaintext I would like to make something of simple to medium complexity that I could finish in about 30 minutes. I want this to be web based. I want to have some kind of interface and some kind of backend. Can you give me a fun idea that's not going to be too complicated to build out and to eventually deploy? ``` The AI suggested several projects, like a personal mood tracker, quick poll creator, recipe randomizer, and more.\ \ Chosen idea we went with: **a real-time chat application**. 3. #### Create a Development Plan [Section titled “Create a Development Plan”](#create-a-development-plan) Prompt: ```bash I like idea one. Can you come up with a detailed plan on how to build this? ``` Warp’s agent generated a plan for: * A **frontend** (UI for chat rooms and messages) * A **backend** (FastAPI server for real-time communication) * Database integration and planned deployment steps You can refine or expand the plan interactively by prompting: ```plaintext Make this more detailed. ``` And get back something like this: ```plaintext Here's your development roadmap: 🏗️ Architecture Decisions Frontend Options: • React + Socket.IO Client (recommended for rich UI) • Vue.js + Socket.IO Client • Vanilla JS + WebSockets (simpler but limited) Backend Options: • Node.js + Socket.IO + Express (most popular for real-time) • Python + Flask-SocketIO • Go + Gorilla WebSocket Database: • MongoDB (flexible for chat messages) • PostgreSQL (structured data with JSON fields) • Redis (for session management and caching) 🚀 Recommended Tech Stack 📋 Core Features to Implement 1. Real-time messaging (Socket.IO) 2. User authentication (JWT) 3. Multiple chat rooms 4. Online user presence 5. Message history 6. Typing indicators 7. File/image sharing (optional) 🛠️ Development Steps 1. Create project in ~/Documents/Coding_Projects/realtime-chat 2. Set up Node.js backend with Socket.IO 3. Create React frontend with real-time connection 4. Implement user auth and room management 5. Add message persistence and history 6. Style UI and add advanced features ``` At any point, you can go into the plan and start directly modifying it. And when you’re ready, you can tell Warp to: ```bash Please execute this plan. ``` 4. #### Allow Autonomous Execution [Section titled “Allow Autonomous Execution”](#allow-autonomous-execution) Once Warp starts executing, you can let Warp run commands automatically: 1. Go to **Settings → AI → Agents** 2. Change **“Always Ask”** → **“Always Allow”** 3. Ensure restricted commands (e.g., `rm -rf`) remain blocked This enables autonomous execution for safe, fast iteration. Warp will run shell commands, create directories, initialize files, and write code. 5. #### Running the App [Section titled “Running the App”](#running-the-app) First, you can click into any file, like `main.py` to edit it directly in Warp. Warp displays your file directly in the app for easy editing, similar to any regular IDE experience. 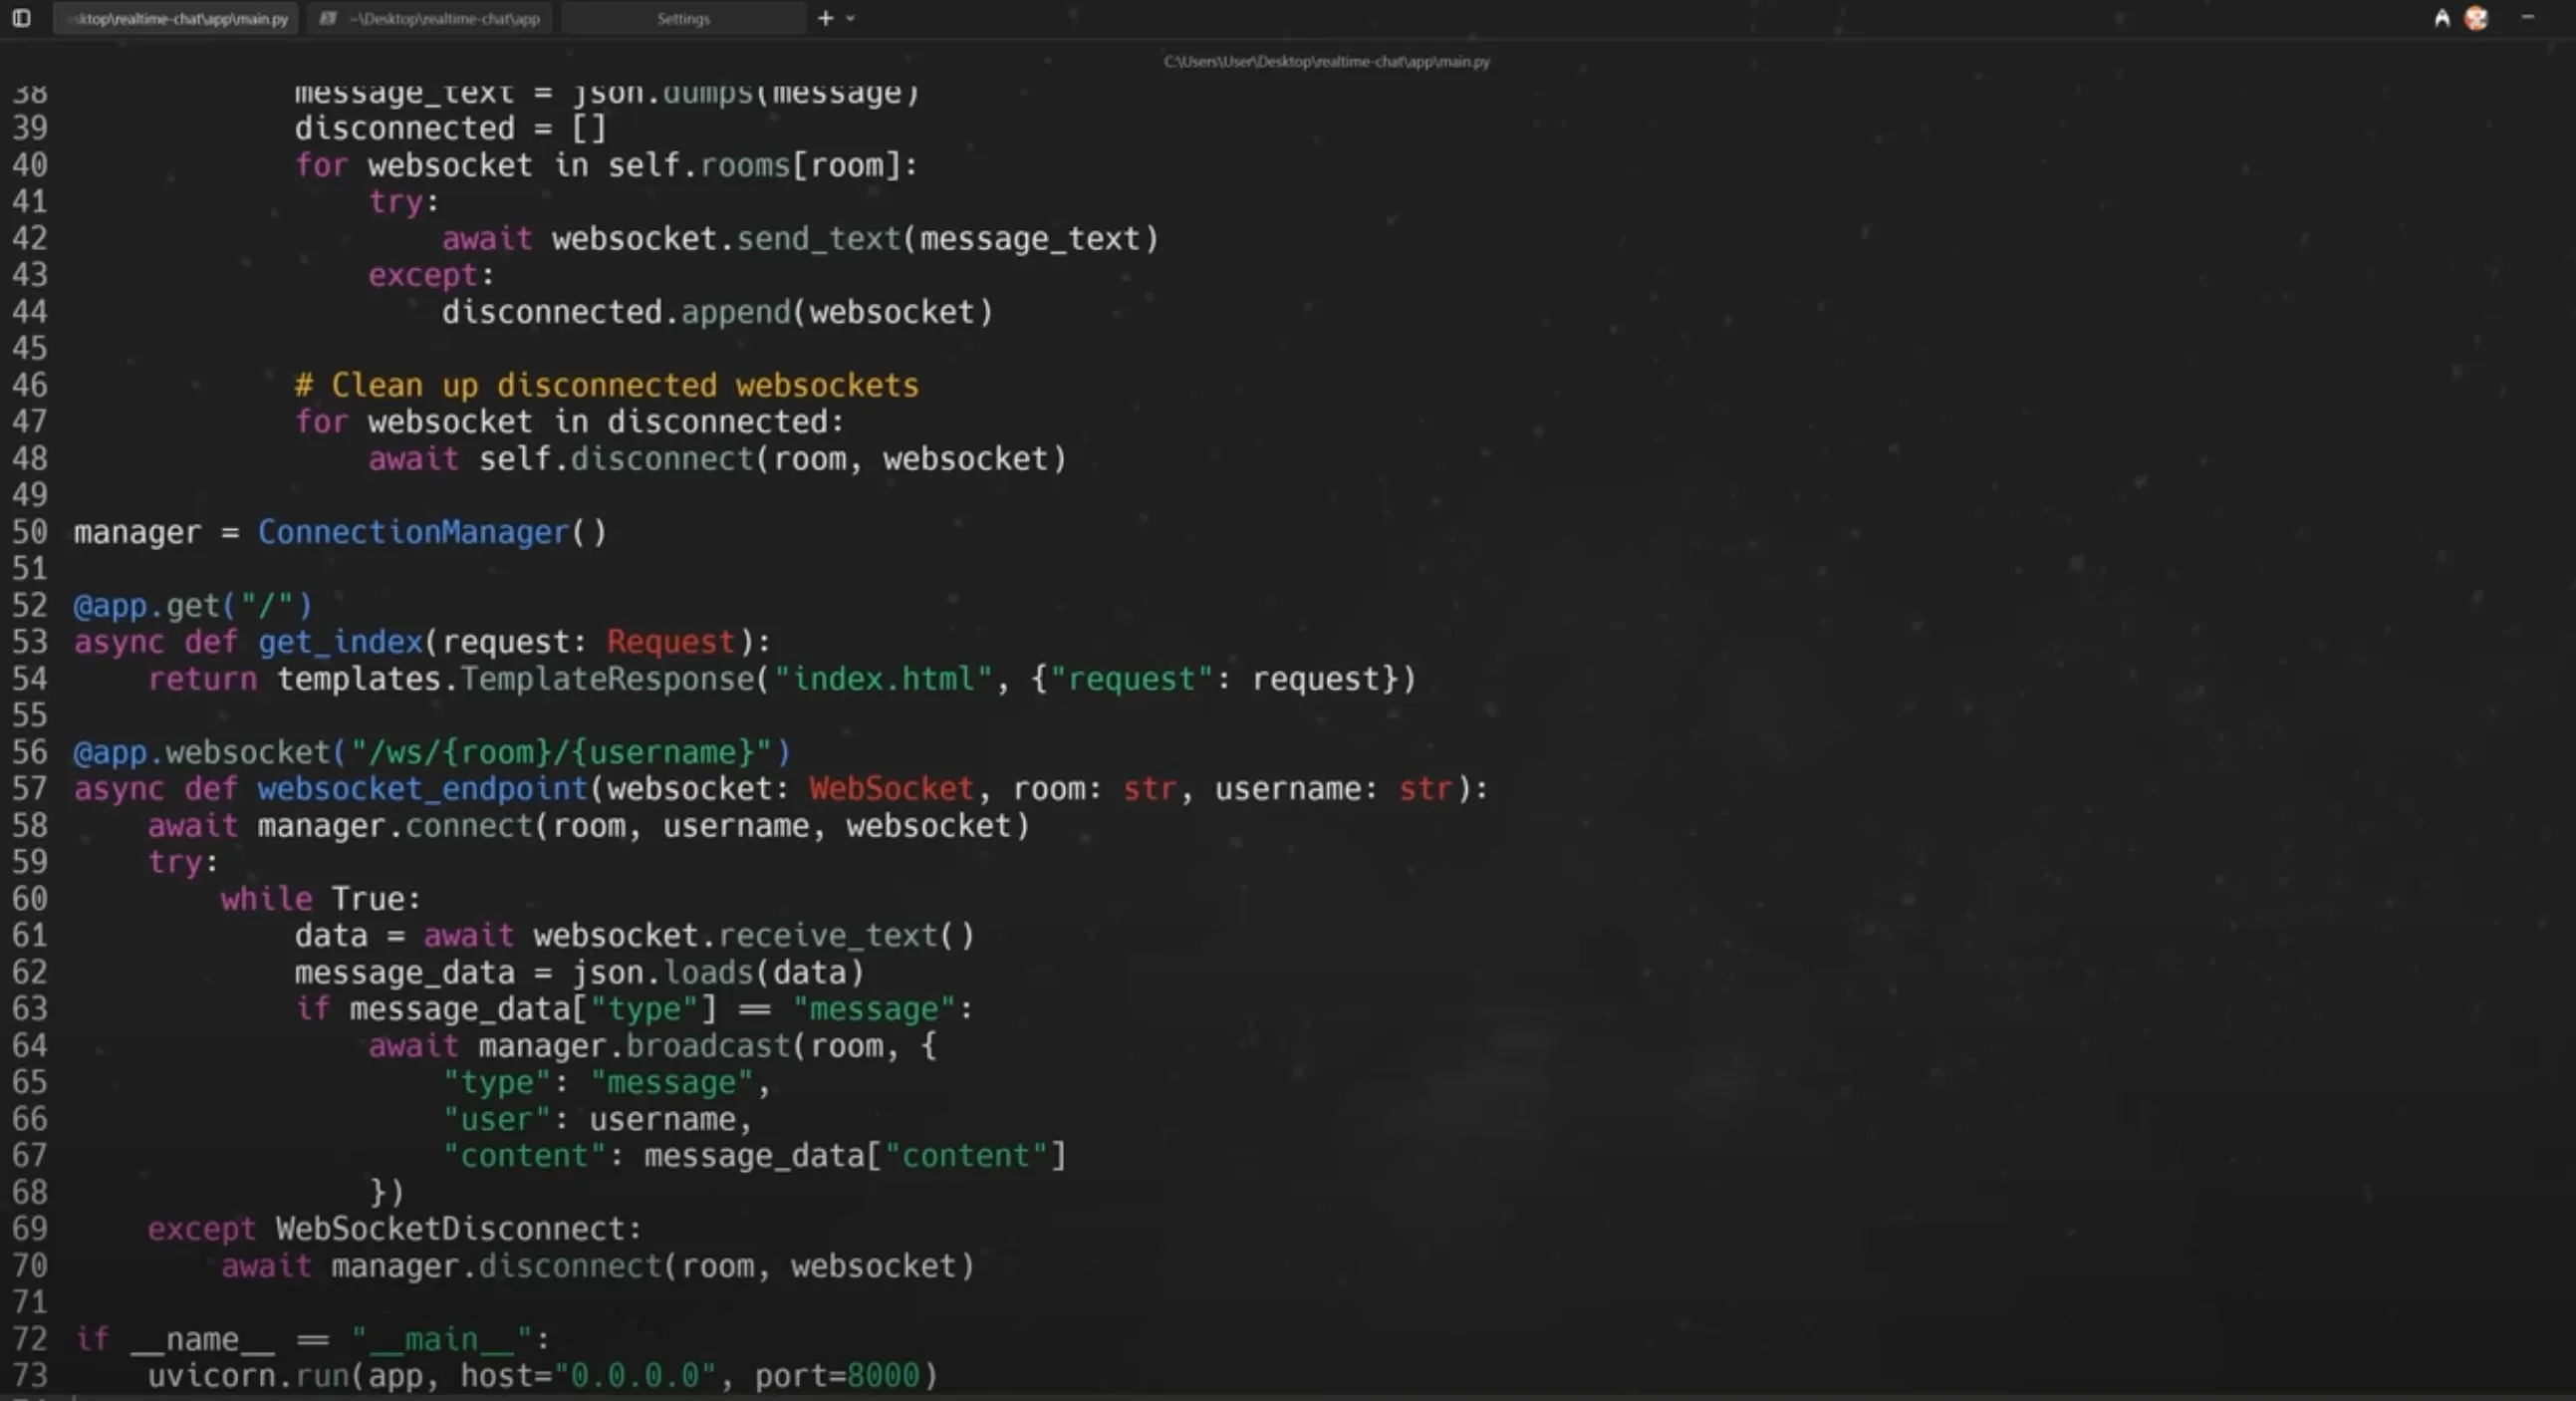 You can also ask Warp to run the app and test locally: ```plaintext Can you run this app for me so I can test it? Tell me how to view it. ``` It’s possible (like in the video) for an error to occur (e.g., Internal Server Error). If that happens, y you can simply debug conversationally: ```bash I’m getting an internal server error. Can you fix this? ``` And Warp can fix the issue and rerun the app automatically. 6. #### Adding New Features [Section titled “Adding New Features”](#adding-new-features) To enhance the app, request features conversationally: ```plaintext Can you add emoji reactions to the messages? ``` Warp will modify frontend and backend code, updating WebSocket logic for real-time reactions. After testing, multiple users can now react to messages in the chat interface. 7. #### Preparing for Deployment [Section titled “Preparing for Deployment”](#preparing-for-deployment) Warp integrates directly with version control and cloud deployers via **MCP servers**. Connect GitHub MCP: 1. Go to **Settings → AI → MCP Servers → Add** 2. Add a JSON block for GitHub MCP: ```json { "github": { "command": "docker", "args": [ "run", "-i", "--rm", "-e", "GITHUB_PERSONAL_ACCESS_TOKEN", "ghcr.io/github/github-mcp-server" ], "env": { "GITHUB_PERSONAL_ACCESS_TOKEN": "${}" } } } ``` 3. Generate a GitHub personal access token (Settings → Developer Settings → Tokens) * Enable scopes for: `repo`, `workflow`, `secrets`, `pull_request`, and `environments`. Save and restart Warp. Then tell the agent: ```plaintext Can you make a new remote repo for me and upload my code? ``` Warp uses Git commands automatically: ```bash git init git add . git commit -m "Initial commit" git remote add origin ... git push ``` 8. #### Deploying via Railway [Section titled “Deploying via Railway”](#deploying-via-railway) Prompt: ```plaintext I have a FastAPI application built with Python. I want to deploy this. It just has an integrated frontend with JavaScript, HTML, and CSS. What’s the easiest way to do that? Can you assist me? ``` Warp recommends **Railway** and walks through: * Creating a Railway account * Connecting your GitHub repo * Deploying directly from GitHub * Generating a public domain Once deployed, test it in your browser — you’ll see your live chat app with emoji reactions working in real time. ### Appendix [Section titled “Appendix”](#appendix) * [GitHub MCP Server](https://github.com/github/github-mcp-server) * [Docker Desktop download](https://www.docker.com/products/docker-desktop/) * [Railway](https://railway.com/)
# Build Warp's input with Warp
Canonical page: [/guides/build-an-app-in-warp/building-warps-input-with-warp/](https://docs.warp.dev/guides/build-an-app-in-warp/building-warps-input-with-warp/)
> Watch how a Warp designer uses Warp's own agent to locate, modify, and test a UI component change in a large Rust codebase.
*Speaker: Dave, Product Design Lead at Warp*  ### The Challenge [Section titled “The Challenge”](#the-challenge) Redesigning the input was tricky because it’s the primary interface developers use all day, every day.\ Everyone had opinions — and expectations — about how it should look and behave. So, Peter (a product designer on my team) and I iterated on multiple designs using Figma. Once we landed on a version we liked, we shared it internally.\ Most people were excited, but engineering resources were stretched thin — focused on improving agent-mode quality and prepping the Agentic Development Environment. So I thought: *“What if I just Warp it?”* #### Step 1. Locating the Git Diff Chip Code [Section titled “Step 1. Locating the Git Diff Chip Code”](#step-1-locating-the-git-diff-chip-code) Inside the universal input, there’s a small Git Diff chip — it shows your current branch and open changes. It was one pixel too tall. That tiny visual bug drove me nuts, so I used Warp to find where it lived. Warp searched across the entire codebase and found references inside: * `displaychip.rs` * Related render and configuration files It used a combination of semantic search, code indexing, and traditional grep to pinpoint the exact implementation. *** #### Step 2. Modifying the Font Size [Section titled “Step 2. Modifying the Font Size”](#step-2-modifying-the-font-size) Once Warp located the implementation, I asked it to reduce the font size by 1 pixel. Warp automatically edited the relevant lines: * Found the current setting (`system_font_size - 1`) * Adjusted it to (`system_font_size - 2`) I reviewed the diffs to confirm everything looked good. *** #### Step 3. Building and Testing the Change [Section titled “Step 3. Building and Testing the Change”](#step-3-building-and-testing-the-change) Next, I rebuilt the app using: ```bash cargo run ```
# Create Rules for agents
Canonical page: [/guides/configuration/creating-rules-for-agents/](https://docs.warp.dev/guides/configuration/creating-rules-for-agents/)
> Create reusable Rules in Warp to encode team conventions — like Dockerfile patterns or dependency management — so agents follow your standards.
*Speaker: Maggie — Engineer at Warp*  ### 1. Starting with Agent Mode Evals [Section titled “1. Starting with Agent Mode Evals”](#1-starting-with-agent-mode-evals) I’m currently adding **Evals** (short for evaluations) to test a new feature I’ve been building. Warp quickly surfaces helpful context — like notebooks and internal docs — written by teammates on how to run Evals.\ \ This makes onboarding onto new tasks fast and collaborative. *** ### 2. Adding a Rust Syntax Eval [Section titled “2. Adding a Rust Syntax Eval”](#2-adding-a-rust-syntax-eval) Next, I want to add an Eval that tests for Rust syntax errors.\ So I ask Warp to update the Dockerfile to include Rust. However, the generated Dockerfile installs Rust differently than I wanted.\ It also includes `gcc` and `python` via a single `apt-get` line, which doesn’t follow our internal conventions. *** ### 3. Stashing Changes & Creating a Rule [Section titled “3. Stashing Changes & Creating a Rule”](#3-stashing-changes--creating-a-rule) Instead of fixing this manually every time, I decide to stash the current changes and create a reusable Rule that encodes our convention: > Rule Example:\ > “Always use `apt-get` to install packages and follow the same pattern used for installing Python and GCC.” This way, future sessions — and even other teammates — can automatically apply the same standard. *** ### 4. Applying the Rule [Section titled “4. Applying the Rule”](#4-applying-the-rule) Now, I just ask Warp’s Agent Mode to try again! Warp re-runs the request, follows the new rule, and correctly adds Rust with the right syntax. The code now matches our conventions.
# Configure YOLO and strategic Agent Profiles
Canonical page: [/guides/configuration/how-to-configure-yolo-and-strategic-agent-profiles/](https://docs.warp.dev/guides/configuration/how-to-configure-yolo-and-strategic-agent-profiles/)
> Configure custom agent profiles in Warp to control planning depth, autonomy, and execution speed — demonstrated with YOLO and Strategic examples.
 1. #### Define the Project [Section titled “Define the Project”](#define-the-project) I want to create an app that scrapes **NFL data** from the past decade, processes stats like team scores and player performance, and predicts future wins. The prompt specifies: * Data sources and constraints * Dependencies and CLI commands * Implementation details and deliverables ```plaintext Role & Goal You are my AI coding copilot inside Warp. Create a production-ready Python project that ingests 2015–2025 NFL data to power future win projections. Specifically: acquire week-level player and team stats, acquire game schedules + final scores (to determine weekly winners), and assemble a clean analytics dataset I can build models on later. Prefer stable/public data sources over brittle HTML scraping. Where scraping is unavoidable, respect robots.txt, add rate-limiting, and make scraping pluggable/optional. Primary data sources: nflverse/nflreadr static files for weekly player stats and schedules (CSV/Parquet over HTTPS). Tech constraints: Python 3.11+, no notebooks in the main flow. Deterministic, idempotent pipelines. Strong typing (pydantic) + docstrings. Parquet as the storage format; small sample CSVs for quick checks. CLI via Typer (warp run … friendly). Logging (structlog), retry/backoff (tenacity), polite rate-limits. Zero secrets required for core pipeline. Deliverables: A fully initialized repo with the scaffold above. Implemented CLI + modules to download/ingest 2015–2025 data, compute/normalize fantasy PPR, produce winners by week, and write Parquet outputs. One sample run in the README showing commands and example output counts. If successful, run full 2015–2025. Print a summary table (by season: games, players, weeks) at the end. ``` 2. #### Configure the Strategic Agent [Section titled “Configure the Strategic Agent”](#configure-the-strategic-agent) **Base Model:** GPT‑5 (for reasoning)\ **Planning Model:** Claude 4 Opus (for detailed breakdowns) | Action | Permission | | ---------------- | ------------- | | Apply code diffs | Agent decides | | Read files | Agent decides | | Create plans | Always allow | | Execute commands | Always ask | Behavior: * The agent starts by asking clarifying questions: > “Do you want me to scrape both player stats and schedules or just one first?”\ > “Where should raw data be stored — locally or in a database?” * It builds a **14-step plan** covering setup, dependencies, validation modules, and pipelines. * When the agent requests NFL schedule URLs, the chosen source returns 404 errors. * Execution halts — showing that the **Strategic** profile prioritizes verification over progress. 3. #### Configure the YOLO Agent [Section titled “Configure the YOLO Agent”](#configure-the-yolo-agent) **Permissions:** | Action | Permission | | ------------------------ | ------------ | | Apply diffs / read files | Always allow | | Create plans | Never | | Execute commands | Always allow | Behavior: * The YOLO agent skips detailed planning. * It produces a **10-step plan** that covers essentials only: * Initialize project * Build CLI * Ingest player data * Compute scores and transformations * Instead of using unstable schedule URLs, it focuses on reliable player endpoints — completing a functional data pipeline. 4. #### Compare Outcomes [Section titled “Compare Outcomes”](#compare-outcomes) | Aspect | Strategic Agent | YOLO Agent | | ----------- | ----------------------- | -------------------------------------- | | Planning | Detailed (14 steps) | Minimal (10 steps) | | Interaction | Clarifications required | Autonomous | | Speed | Slower due to checks | Faster iteration | | Output | Stalled on invalid URLs | Working player dataset + summary table |
# Create project Rules for an existing project
Canonical page: [/guides/configuration/how-to-create-project-rules-for-an-existing-project-astro-typescript-tailwind/](https://docs.warp.dev/guides/configuration/how-to-create-project-rules-for-an-existing-project-astro-typescript-tailwind/)
> Create and maintain an AGENTS.md project rules file so coding agents always understand your project's setup, commands, architecture, and conventions.
 *** ## What Project Rules Are [Section titled “What Project Rules Are”](#what-project-rules-are) A **Project Rules** file (`Warp.md`) acts as your project’s AI onboarding guide. Instead of re‑explaining your setup on every prompt, you document it once and Warp will always have that context. The transcript demo walks through creating the file, opening it in a side editor, and organizing it with standard Markdown headings for clear sections. *** ## Generate `Warp.md` [Section titled “Generate Warp.md”](#generate-warpmd) Run the following **verbatim** prompts in Warp to create and verify your rules file, then open it in the editor: ```plaintext /init ``` ```plaintext /open-project-rules ``` * `/init` generates a starter `Warp.md` in your project root. * `/open project rules` opens it in a side editor where you can scroll and edit the content. You’ll get something that looks like this: WARP.md ````markdown This file provides guidance to WARP (warp.dev) when working with code in this repository. ## Project Overview Share Your Brewfiles is an Astro-based website that allows developers to share and discover their Homebrew package lists (Brewfiles). The platform generates personality profiles based on package usage patterns and provides a leaderboard of popular packages. ## Core Architecture * **Frontend**: Astro 4 with React 18 components, TypeScript, and Tailwind CSS * **Backend**: Astro API routes with Firebase integration * **Database**: Firebase Firestore for storing brewfiles, user data, and personality summaries * **Deployment**: Vercel with serverless functions * **Styling**: Custom Tailwind configuration with dark theme and gradient animations ## Key Components ### API Routes (`src/pages/api/`) * `getBrewfiles.json.ts` - Retrieves all brewfiles or a specific brewfile by ID, triggers personality generation * `uploadBrewfile.ts` - Handles brewfile uploads with GitHub OAuth integration * `getRankedPackages.json.ts` - Generates leaderboard data for popular packages * `updatePersonality.ts` - Updates personality summaries for users * `exchangeCodeForAccessToken.ts` - GitHub OAuth token exchange * `logSearch.json.ts` - Analytics for search functionality ### Core Library Functions (`src/lib/`) * `generatePersonality.ts` - Complex algorithm that analyzes brewfile packages and assigns personality types (15 different personalities) * `personalityBuckets.ts` - Defines personality type metadata and descriptions * `validateBrewfileData.ts` - Data validation for brewfile uploads * `totalBrewData.ts` - Aggregates package statistics for leaderboards ### Type System (`src/types/`) * `brews.ts` - Main data structures for brewfiles, users, and entries * `personality.ts` - Personality analysis types and enums * `packageEntry.ts` - Package metadata structures ## Development Commands ### Setup ```bash # Install dependencies npm install # Set up environment (Firebase config is public but consider security) # No additional env setup needed for development # Development server npm run dev ``` ### Development Workflow ```bash # Start development server with Astro npm run dev # Build for production npm run build # Preview production build npm run preview # Run Astro CLI commands npm run astro ``` ### Testing API Endpoints ```bash # Test brewfile retrieval curl "http://localhost:4321/api/getBrewfiles.json" # Test specific brewfile by ID curl "http://localhost:4321/api/getBrewfiles.json?id=DOCUMENT_ID" # Test package rankings curl "http://localhost:4321/api/getRankedPackages.json" ``` ## Architecture Notes ### Personality Generation System The core feature analyzes brewfile packages against a curated dictionary (`labelledBrewfiles.ts`) that categorizes packages by: - Developer type (Backend, Frontend, DevOps, Security, Data, General) - Package characteristics (AI tools, organization tools, customization, popularity rank) - Legacy/modern status The system calculates percentage distributions and applies complex rules to assign one of 15 personality types (Minimalist, Golden Retriever, Pragmatist, Trendy, AI, Architect, Artist, Traditionalist, Retro, Bob the Builder, Marie Kondo, Crazy Scientist, Trailblazer, Security, Wallflower). ### Firebase Integration - Uses Firestore for data persistence - Collection: `brewfiles` stores user brewfiles with personality summaries - Real-time personality generation happens asynchronously after uploads - GitHub OAuth integration for user authentication ### Path Alias System Uses TypeScript path mapping with `@/*` pointing to `./src/*` for clean imports. ### Astro Configuration - Server-side rendering with Vercel adapter - React integration for interactive components - Sitemap generation for SEO - Prefetch enabled for performance ## Development Environment Setup ### Prerequisites - Node.js (version compatible with Astro 4) - Access to Firebase project (config is in source but consider security implications) - GitHub OAuth app for testing upload functionality ### Local Development Notes - The site uses server-side rendering so API routes work in development - Firebase config is currently in source code - be aware of security implications - GitHub OAuth integration requires valid access tokens for uploads - Personality generation is computationally expensive with large datasets ### Custom Tailwind Configuration - Dark theme with custom color palette (`bkg: #111111`) - Custom accent colors (teal, orange, green, pink, blue variants) - Marquee animations for scrolling elements - Responsive typography with fluid scaling - Container queries support ## File Structure Navigation - src/ - pages/ - api/ Astro API routes (serverless functions) - index.astro Homepage with hero and marquee - brewfiles.astro Search and browse brewfiles - leaderboard.astro Package popularity rankings - components/ Astro and React components - lib/ Core business logic and utilities - types/ TypeScript type definitions - data/ Static data and package dictionaries - firebase/ Firebase configuration ## Common Development Tasks ### Adding New Personality Types 1. Update `DeveloperPersonalityType` enum in `src/types/personality.ts` 2. Add detection function in `src/lib/generatePersonality.ts` 3. Update `personalityBuckets.ts` with new personality metadata 4. Add corresponding image to `public/images/` ### Modifying Package Analysis - Update `labelledBrewfiles.ts` to modify package categorization - Adjust percentage thresholds in personality detection functions - Test with different brewfile compositions ### API Route Development - All routes in `src/pages/api/` become serverless functions on Vercel - Use `export const prerender = false;` for dynamic routes - Handle errors consistently with try/catch blocks ```` *** ## Keep the File Lean and Intentional [Section titled “Keep the File Lean and Intentional”](#keep-the-file-lean-and-intentional) 1. #### Start Lean [Section titled “Start Lean”](#start-lean) Everything in `warp.md` is **prepended to your prompt**. A longer file consumes more tokens and can increase compute cost. Keep only what truly matters. 2. #### Iterate and Maintain [Section titled “Iterate and Maintain”](#iterate-and-maintain) Start with `/init` boilerplate, then treat the file as a **living document**. Add the rules that help your team ship faster (e.g., branching, PR guidelines) and prune anything redundant. Caution If the file grows large (e.g., **500+ lines**), run it through a **prompt optimizer** to catch duplication, remove overlaps, and slim it down — exactly as advised in the transcript. *** ## Use Sub‑directory Rules for Monorepos [Section titled “Use Sub‑directory Rules for Monorepos”](#use-subdirectory-rules-for-monorepos) For large repos, you can generate localized rule files in sub‑trees. Navigate into a subfolder and run `/init` again to create a **directory‑scoped `Warp.md`** tailored to that area:
# Set coding best practices
Canonical page: [/guides/configuration/how-to-set-coding-best-practices/](https://docs.warp.dev/guides/configuration/how-to-set-coding-best-practices/)
> Use Warp Rules to enforce coding style, TypeScript conventions, and documentation quality across AI-generated code.
Learn how to use Warp’s Rules to enforce coding style, documentation quality, and consistency across projects.  *** ## Intro [Section titled “Intro”](#intro) This tutorial teaches you how to create coding Rules that make AI follow your team’s **best practices** automatically.\ \ By specifying formatting, style preferences, and documentation standards, Warp ensures consistent, high-quality code across your repositories. *** 1. #### The Problem [Section titled “The Problem”](#the-problem) Developers often have different habits — formatting styles, TypeScript conventions, or comment quality.\ Without clear rules, AI-generated code can be inconsistent or hard to maintain. 2. #### The Rule Setup [Section titled “The Rule Setup”](#the-rule-setup) Define Rules that enforce formatting, type preferences, and doc quality. **Example Rule** ```plaintext Rule: Code Authoring Standards - Always format and check work before returning results. - Prefer `types` over `interfaces` in TypeScript. - Apply concise, human-readable JS Docs using the Hemingway test. ``` 3. #### Benefits [Section titled “Benefits”](#benefits) * Encourages readable, maintainable code * Improves documentation clarity * Prevents style drift across AI contributions
# Set coding preferences with Rules
Canonical page: [/guides/configuration/how-to-set-coding-preferences-with-rules/](https://docs.warp.dev/guides/configuration/how-to-set-coding-preferences-with-rules/)
> Store your package manager, environment tool, and CLI preferences as Warp Rules so agents automatically use pnpm, miniconda, or your preferred tools.
Learn how to use Warp’s Rules feature to define your personal environment and tool preferences for every coding session.  This tutorial teaches you how to customize your development setup using **Warp’s Rules** — ensuring agents always work in your preferred environment. Instead of constantly reminding them which package manager or environment to use, you can **store those preferences as persistent Rules** that apply automatically across projects. 1. #### The Problem [Section titled “The Problem”](#the-problem) When using AI tools to write or modify code, they often default to outdated or undesired tools.\ For example, many agents still use **npm** instead of **pnpm** — or **pip** instead of **miniconda**. Warp fixes this by letting you define your preferences once, and then applying them automatically whenever your agent runs commands. 2. #### The Rule Setup [Section titled “The Rule Setup”](#the-rule-setup) You can set Rules for how you want the AI to handle environments, dependencies, and commands. **Example Rule** ```plaintext Rule: Environment Preferences - Always use pnpm for Node.js projects unless the project already uses npm. - Default to miniconda for Python environments. - Use the Tauri CLI when building desktop apps. ``` This ensures the agent automatically chooses the right package manager or environment — no extra prompts required. 3. #### Supported Use Cases [Section titled “Supported Use Cases”](#supported-use-cases) You can apply Rules to: * Package managers (e.g., npm → pnpm) * Environment tools (e.g., virtualenv → miniconda) * Framework defaults (e.g., Next.js over React) * CLI utilities or custom build tools
# Set tech stack preferences with Rules
Canonical page: [/guides/configuration/how-to-set-tech-stack-preferences-with-rules/](https://docs.warp.dev/guides/configuration/how-to-set-tech-stack-preferences-with-rules/)
> Define your preferred frameworks and tech stack in Warp Rules so agents consistently use Astro, SvelteKit, Vite, or your tools of choice.
Learn how to guide Warp’s AI to use your favorite tech stack when scaffolding new apps or generating code.  *** ## Intro [Section titled “Intro”](#intro) This tutorial walks you through teaching Warp’s AI your **preferred technologies** so it consistently uses the frameworks and stacks you care about. By setting up tech stack Rules, you make sure every new project follows your conventions — whether you prefer **Astro**, **SvelteKit**, **Next.js**, or something else. *** ## The Problem [Section titled “The Problem”](#the-problem) When you ask AI to scaffold a new web app, it often defaults to **React** and **Express**, or other older stacks.\ This creates friction when your workflow is based on modern tools or opinionated frameworks. Warp solves this by letting you **store your stack preferences** directly as Rules. *** ## The Rule Setup [Section titled “The Rule Setup”](#the-rule-setup) Create a simple Rule that defines your favorite frameworks for each project type. ### Example Rule [Section titled “Example Rule”](#example-rule) ```plaintext Rule: Tech Stack Preferences - Use Astro for websites. - Use SvelteKit for desktop apps. - Prefer Vite for build tooling. - Avoid legacy stacks like Create React App or Express. ``` Once added, Warp’s AI automatically applies these defaults when generating new projects or updating existing ones. *** ## Why It Matters [Section titled “Why It Matters”](#why-it-matters)
# Set up self-serve data analytics with Skills
Canonical page: [/guides/configuration/how-to-set-up-self-serve-data-analytics-with-skills/](https://docs.warp.dev/guides/configuration/how-to-set-up-self-serve-data-analytics-with-skills/)
> Set up a self-serve data analytics workflow in Warp using two community Skills that map questions to dbt models and structure reproducible analyses.
Self-serve data analytics means anyone on your team can ask a data question and get a trustworthy answer, without pinging the data team. This guide sets up that workflow using two community Skills that chain together: one resolves vague questions to the right BigQuery tables, and the other structures deep-dive analyses into reproducible folders. Plan on about 10 minutes for initial setup, plus time to customize the model index for your warehouse. ## Prerequisites [Section titled “Prerequisites”](#prerequisites) * **Warp** — Install from [Warp download page](https://www.warp.dev/download) if you don’t already have it. * **A BigQuery data warehouse with dbt models** — The Skills as published assume BigQuery and dbt. You can adapt them to Snowflake, Redshift, Databricks, or a non-dbt setup. See [Adapting to your stack](#adapting-to-your-stack). * **The BigQuery CLI (`bq`)** — Installed as part of the [Google Cloud SDK](https://cloud.google.com/sdk/docs/install). Agents call it directly to query the warehouse, so no MCP server is required. * **A Git repository where the Agent will work** — Warp auto-discovers Skills from `.agents/skills/` in your current working directory up through the repo root. See [Skills](https://docs.warp.dev/agent-platform/capabilities/skills/) for the full list of supported directories and how discovery works. ## Walkthrough video [Section titled “Walkthrough video”](#walkthrough-video) In this 40-minute livestream, Warp’s data team demonstrates the workflow end-to-end, including the two Skills you’ll install below and a third pattern (running the same Skills from Slack via a cloud agent). Feel free to skip ahead if you prefer to follow the written steps.  ## 1. Install the two Skills [Section titled “1. Install the two Skills”](#1-install-the-two-skills) Warp automatically discovers any Skill stored under `.agents/skills/` in your repo, so committing the two directories makes them available to every teammate’s Agent runs. Clone the public [warpdotdev/oz-skills](https://github.com/warpdotdev/oz-skills) repo and copy the two Skill directories into your own dbt repo: ```bash cd /path/to/your/dbt-repo mkdir -p .agents/skills git clone https://github.com/warpdotdev/oz-skills.git /tmp/oz-skills cp -r /tmp/oz-skills/.agents/skills/dbt-model-index .agents/skills/ cp -r /tmp/oz-skills/.agents/skills/analysis-artifacts .agents/skills/ ``` Verify both Skills landed: ```bash ls .agents/skills/ # analysis-artifacts dbt-model-index ``` Commit the Skills. Once committed to your repo, they are available to the whole team: ```bash git add .agents/skills && git commit -m "Add self-serve analytics skills" ``` ## 2. Customize the dbt model index [Section titled “2. Customize the dbt model index”](#2-customize-the-dbt-model-index) The [`dbt-model-index`](https://github.com/warpdotdev/oz-skills/blob/main/.agents/skills/dbt-model-index/SKILL.md) Skill is a template that you will need to fill in with details about your own models. This Skill teaches the Agent which tables answer which question types, so it’s important to spend time on customization. Detailed “Useful for” descriptions make the Skill most effective. Open `.agents/skills/dbt-model-index/SKILL.md` and replace the template placeholders with real models. For each one, include: * The table name (backtick-formatted) * A 1- to 2-sentence description of its grain * “Useful for:” bullets covering the question types it answers A filled-in entry might look like this: ```markdown ### `users_daily` One row per user per day, with activity signals and plan type. **Useful for:** - Daily, weekly, or monthly active user counts - Retention and churn by plan tier - Joining to revenue models as the canonical user dimension ``` Fill in the domains that cover your most common questions first (typically Users, Activity, and Revenue). You can expand the index over time as you notice the Agent guessing at tables. Don’t skip the **Important Notes** section at the bottom of the Skill. Documenting your standard filters (e.g., `where not is_internal_user`), your fully-qualified project path, your partition fields, and any plan or tier values prevents the Agent from accidentally fanning out joins, scanning entire partitioned tables, or returning numbers polluted by test accounts. After you complete this step, the Agent has a curated map from question to table and will consult it before writing any BigQuery SQL. ## 3. Review the analysis-artifacts Skill [Section titled “3. Review the analysis-artifacts Skill”](#3-review-the-analysis-artifacts-skill) The [`analysis-artifacts`](https://github.com/warpdotdev/oz-skills/blob/main/.agents/skills/analysis-artifacts/SKILL.md) Skill is workflow scaffolding. It tells the Agent how to structure a deep-dive analysis: plan first, save every material SQL query to `assets/queries/`, save visualizations to `assets/visualizations/`, and write a readable README with a Problem Statement, TL;DR, Cohorts Definition, per-step sections, and Key Takeaways. No customization is needed to start using it. When the Agent invokes it, you’ll end up with a directory like: ```plaintext analyses/ └── 2026-04-ai-usage-by-os/ ├── README.md └── assets/ ├── queries/ │ └── ai_requests_by_os.sql └── visualizations/ ├── os_trend.py └── os_trend.png ``` That structure is what makes the analysis shareable. A teammate can read the README, click through to any SQL file, and reproduce or extend the work. ## 4. Ask a simple data question [Section titled “4. Ask a simple data question”](#4-ask-a-simple-data-question) With both Skills in place, start with a concrete lookup prompt. This exercises `dbt-model-index` without pulling in the deep-dive workflow. Open an Agent conversation inside your dbt repo and ask: ```plaintext How many unique users made AI requests yesterday? ``` The Agent will: 1. Consult `dbt-model-index` to find the right activity table. 2. Write a BigQuery query, applying any standard filters you documented (e.g., excluding internal users). 3. Run the query via the `bq` CLI. 4. Return a single number along with the SQL it ran. Verify the result by reviewing the query. If it used the wrong table or skipped a standard filter, your `dbt-model-index` entries for that domain need more detail. Update the Skill and try again. ## 5. Run a deep-dive analysis [Section titled “5. Run a deep-dive analysis”](#5-run-a-deep-dive-analysis) Now try a prompt that goes beyond a single lookup. The Agent recognizes this as a deep dive and invokes `analysis-artifacts`. ```plaintext Tell me about any recent trends in AI usage across different operating systems in the last month. ``` The Agent will: 1. Use `dbt-model-index` to resolve the right activity and OS dimensions. 2. Invoke `analysis-artifacts`, propose a plan, and wait for your approval. 3. Execute the plan step by step, saving queries and visualizations as artifacts. 4. Write a README summarizing the analysis end to end. The resulting README follows a consistent shape, roughly: ```markdown # AI usage trends by operating system (last 30 days) Author: Your Name Date: 2026-04-22 ## TL;DR One or two sentences capturing the headline finding. ## Problem Statement What the analysis set out to answer and why. ## Cohorts Definition Explicit definition of the groups being compared, including tenure, plan type, and observation windows. ## Step 1: Baseline volume by OS Narrative, embedded chart, and a link to the query in assets/queries/. ## Step 2: Week-over-week trend ... ## Key Takeaways Bulleted summary of what was learned and any follow-up questions. ``` Commit the new `analyses//` directory to your repo so it’s reviewable alongside your code. Anyone on the team can read it, verify the queries, or pick up where you left off. ## Adapting to your stack [Section titled “Adapting to your stack”](#adapting-to-your-stack) Both Skills were written for BigQuery and dbt, but the pattern generalizes. Here’s what to change: * **Non-BigQuery warehouse (Snowflake, Redshift, Databricks)** — Update the **Important Notes** section of `dbt-model-index/SKILL.md` with your warehouse’s fully-qualified table reference format, partition or clustering conventions, and standard filters. Replace `bq` references with your warehouse’s CLI (e.g., `snowsql`, `redshift-data`). * **No dbt** — The `dbt-model-index` Skill works for any warehouse schema, not just dbt. Rename it if you like, and treat the entries as a map over raw tables, views, or your semantic layer. * **Different modeling conventions** — Document your grain, tier or plan values, and internal-user filters explicitly in the Skill. Agents are good at following documented rules and bad at guessing them. The `analysis-artifacts` Skill is largely stack-agnostic. It structures outputs, not queries, so it works the same regardless of warehouse. ## Next steps [Section titled “Next steps”](#next-steps) You installed two community Skills, customized the model index for your warehouse, and ran both a simple lookup and a full deep-dive analysis. **Extend to Slack.** Wire the same two Skills into a cloud agent configured with your dbt repo, and your teammates can ask data questions by @-mentioning Oz in a Slack channel, without opening a terminal. The agent clones the repo, picks up the Skills from `.agents/skills/`, and replies in-thread. See the [Slack integration docs](https://docs.warp.dev/agent-platform/cloud-agents/integrations/slack/) and [Skills as Agents](https://docs.warp.dev/agent-platform/cloud-agents/skills-as-agents/) for setup. Explore related guides and features: * [Trigger reusable actions with saved prompts](/guides/configuration/trigger-reusable-actions-with-saved-prompts/) — another reusable Agent primitive, useful for scaffolding frequent data questions * [Create project rules](/guides/configuration/how-to-create-project-rules-for-an-existing-project-astro-typescript-tailwind/) — pair Skills with Rules to steer Agent behavior across your repo * [Skills](https://docs.warp.dev/agent-platform/capabilities/skills/) — full reference on Skills, discovery, arguments, and slash-command invocation * [warpdotdev/oz-skills](https://github.com/warpdotdev/oz-skills) — public repo with these two Skills and more
# Sync your monorepos
Canonical page: [/guides/configuration/how-to-sync-your-monorepos/](https://docs.warp.dev/guides/configuration/how-to-sync-your-monorepos/)
> Define global Rules in Warp to keep monorepo schemas, server types, and client types automatically synchronized across repositories.
Learn how to use Warp’s Rules system to connect interrelated repositories and automate type updates across your stack.  *** ## Intro [Section titled “Intro”](#intro) This tutorial teaches you how to define **global Rules** in Warp so your coding agent understands how your projects relate to one another. By linking monorepos (e.g., server, client, and shared API schemas), Warp automatically updates types and schemas across repos when you make a change in one place. Although this example uses Warp’s internal repos, the same workflow applies to any multi-repo setup. *** ## The Problem [Section titled “The Problem”](#the-problem) When projects are split into multiple repos — like backend, client, and shared schema — developers often forget to synchronize type changes manually. That’s error-prone and time-consuming. Warp solves this by teaching your **agent** the relationships between your repos through a global Rule. *** ## The Rule Setup [Section titled “The Rule Setup”](#the-rule-setup) Describe each repository and its connection to the others. ### Example Rule [Section titled “Example Rule”](#example-rule) ```plaintext We have three inter-related projects in ~/Repos: warp-internal (client-side application) warp-server (server application) warp-proto-apis (shared API schemas for each) When you update the schema types, push to git and update the installed types in the server and client by the commit hash. ``` Once defined, Warp automatically follows these instructions when a schema file is changed. 1. #### When the schema updates — update server types [Section titled “When the schema updates — update server types”](#when-the-schema-updates--update-server-types) `cd` into the server repository and run the appropriate commands to regenerate/update server-side types based on the changed schema. 2. #### When the schema updates — update client types [Section titled “When the schema updates — update client types”](#when-the-schema-updates--update-client-types) `cd` into the client repository and run the appropriate commands to regenerate/update client-side types so the client stays in sync with the schema changes. ***
# Use Agent Profiles efficiently
Canonical page: [/guides/configuration/how-to-use-agent-profiles-efficiently/](https://docs.warp.dev/guides/configuration/how-to-use-agent-profiles-efficiently/)
> Compare Strategic and YOLO agent profiles side-by-side to choose the right balance of planning, safety, and speed for your project.
Agent Profiles control how your coding agents behave in different contexts.\ They define what the agent can read, plan, or execute — and how much autonomy it has. To show how profiles change workflow, we’ll build an NFL Predictor App using two profiles: * Strategic Agent * YOLO Agent  *** ### Strategic Agent [Section titled “Strategic Agent”](#strategic-agent) Base Model: GPT-5\ Planning Model: Claude 4 Opus Configuration: * Apply code diffs → *agent decides* * Read files → *always allow* * Create plans → *always allow* * Execute commands → *ask first* When run: 1. The agent asks clarifying questions (e.g., *Do you want to scrape players and schedules?*) 2. Builds a detailed 14-step plan 3. Requests user input for environment variables It’s thorough and safe — but pauses often if you miss setup details. *** ### YOLO Agent [Section titled “YOLO Agent”](#yolo-agent) Configuration: * Apply code diffs → *always allow* * Read files → *always allow* * Create plans → *never* * Execute commands → *always allow* This agent skips long planning.\ It builds the project quickly, skipping over optional validation and focusing on essentials: * Data ingestion * Player stats * Scoring calculation It avoids brittle endpoints and produces a working dataset fast — though with fewer checks. *** ### Comparing the Two [Section titled “Comparing the Two”](#comparing-the-two) | Trait | Strategic Agent | YOLO Agent | | --------- | ------------------- | ------------------ | | Planning | Detailed (14 steps) | Minimal (10 steps) | | Safety | High | Low | | Speed | Moderate | Very fast | | Ideal For | Production projects | Quick prototypes |
# Trigger reusable actions with saved prompts
Canonical page: [/guides/configuration/trigger-reusable-actions-with-saved-prompts/](https://docs.warp.dev/guides/configuration/trigger-reusable-actions-with-saved-prompts/)
> Save and share prompts in Warp Drive to automate commits, code reviews, and PR creation across your team.
 ### 1. Automating Commits [Section titled “1. Automating Commits”](#1-automating-commits) When working on a PR, instead of typing long commit messages, you can use a saved prompt. Warp’s agent: * Runs a `git diff` and summarizes the change * Generates a clean commit message * Pushes it automatically to your branch You can view the saved prompt in Warp Drive → Team Prompts, where it shows: * Who created it * When it was last used * How many times it’s been run Because it’s saved in your team drive, anyone can reuse it. *** ### 2. Reviewing Code with Prompts [Section titled “2. Reviewing Code with Prompts”](#2-reviewing-code-with-prompts) Before creating a PR, you can run another saved prompt. This agent: * Reads your current branch * Reviews the diffs * Highlights logical or stylistic issues * Suggests improvements Example output: > “Logic bug detected — potential race condition in async handler.” Warp automatically surfaces real issues before you even open a PR — saving time and reducing back-and-forth with reviewers. *** ### 3. Opening a Pull Request Automatically [Section titled “3. Opening a Pull Request Automatically”](#3-opening-a-pull-request-automatically) Once your code looks clean, trigger your final saved prompt. Warp will: * Generate a PR title and description * Push the branch * Open the PR on GitHub * Even link related issues if found in commit messages *** ### 4. Sharing and Team Usage [Section titled “4. Sharing and Team Usage”](#4-sharing-and-team-usage) All saved prompts live in your Team Warp Drive, meaning: * Anyone can discover and run them * You can parameterize or modify them * Usage history and creator info are visible This makes it easy for teams to standardize common actions like code reviews, deployments, or build runs.
# Analyze Cloud Run logs (gcloud)
Canonical page: [/guides/devops/how-to-analyze-cloud-run-logs-gcloud/](https://docs.warp.dev/guides/devops/how-to-analyze-cloud-run-logs-gcloud/)
> Use Warp to pull, organize, and analyze Cloud Run production logs by severity with natural language prompts and automated Python scripts.
Learn how to use Warp to retrieve, organize, and analyze production logs from your cloud servers — all with natural language prompts.  1. #### Setting the Context [Section titled “Setting the Context”](#setting-the-context) Open Warp and enable **voice input** (optional) for hands-free prompting. **Prompt** ```plaintext Use the warp-server-staging gcloud project and pull logs for the last 10 minutes from the warp-server Cloud Run instance. Organize them by info, warning, and error levels. Create a histogram across message types, and highlight the most concerning errors to investigate. ``` 2. #### Warp’s Agent in Action [Section titled “Warp’s Agent in Action”](#warps-agent-in-action) After you hit Enter: * Warp detects the command as an **Agent Mode** request. * It gathers project context (`warp-server-staging`). * Executes the necessary `gcloud` logging queries automatically. * Writes retrieved data to a temporary file for processing. 3. #### Automated Analysis [Section titled “Automated Analysis”](#automated-analysis) Warp’s agent generates a **Python script** on the fly to: * Parse logs * Count messages by severity * Output summary metrics Example output: ```plaintext 1,000 log entries total 980 info 11 warning 9 errors ``` You can view or fast-forward execution, or stop the process at any point. 4. #### Reviewing Results [Section titled “Reviewing Results”](#reviewing-results) Warp outputs a readable histogram and highlights anomalies.\ For example: > “Gemini AI error messages detected — worth reviewing.” You can expand each log group interactively or inspect the temporary Python code for debugging.
# Create a production-ready Docker setup
Canonical page: [/guides/devops/how-to-create-a-production-ready-docker-setup/](https://docs.warp.dev/guides/devops/how-to-create-a-production-ready-docker-setup/)
> Use Agents in Warp to generate optimized Dockerfiles, docker-compose configs, and .dockerignore files for multi-stage production deployments.
Learn how to use Warp’s AI to automatically build a clean, multi-stage Docker setup for both development and production.  This tutorial shows how to create a **complete Docker environment** in minutes using Warp.\ Warp’s AI can analyze your entire codebase, generate **Dockerfiles**, **.dockerignore**, and **docker-compose.yml** — all optimized for small image size and multi-service orchestration. Although this example uses a generic web app, the same pattern applies to **Python**, **Node.js**, **Go**, and other ecosystems. 1. #### The Challenge [Section titled “The Challenge”](#the-challenge) You’ve built your app and suddenly realize — it should have been containerized from the start.\ Manually configuring Docker files, image sizes, and environment variables takes time and breaks flow. 2. #### The Prompt [Section titled “The Prompt”](#the-prompt) Use this prompt inside Warp’s AI input: ```plaintext "Analyze my entire project directory structure, package files, and configuration to generate a complete production-ready Docker setup. I need: A multi-stage Dockerfile optimized for my specific language/framework with proper layer caching, security best practices, and minimal image size A docker-compose.yml for both development and production environments with all necessary services, networks, volumes, and environment variable handling A comprehensive .dockerignore file that excludes unnecessary files but keeps what's needed for the build Startup scripts and health check configurations Documentation explaining each Docker command and why specific choices were made Please detect my project type automatically and configure everything accordingly. Include comments explaining the optimization decisions." ``` Warp will detect frameworks, infer services, and produce a ready-to-run setup. 3. #### Review and Customize [Section titled “Review and Customize”](#review-and-customize) Warp outputs: * Optimized base images * Cached build layers * Correct dependency stages * Unified environment management You can easily adjust service names or ports in the generated compose file.
# Create a priority matrix for database optimization
Canonical page: [/guides/devops/how-to-create-priority-matrix-for-database-optimization/](https://docs.warp.dev/guides/devops/how-to-create-priority-matrix-for-database-optimization/)
> Prompt Warp to audit SQL queries, analyze execution plans, and generate a priority matrix ranking database optimizations by impact and effort.
Learn how to generate a data-driven optimization matrix that ranks database issues by impact, risk, and effort.  1. #### Intro [Section titled “Intro”](#intro) This tutorial teaches you how to prompt Warp to audit and optimize your **database performance** automatically. It analyzes SQL queries, identifies common inefficiencies, and generates a **priority matrix** for improvements. 2. #### The Problem [Section titled “The Problem”](#the-problem) When you tell AI to “optimize a query,” that could mean *anything* — faster, safer, or simpler.\ Instead, use Warp to clarify intent and return measurable outcomes. 3. #### The Prompt [Section titled “The Prompt”](#the-prompt) Paste this into Warp’s AI input: ````plaintext # **Comprehensive Database Query Analysis and Optimization Guide** This guide provides a structured, repeatable approach for analyzing, profiling, and optimizing database performance within your application. --- ## **PHASE 1: Query Discovery & Cataloging** ### **Step 1 — Identify All Queries** Scan the entire codebase and locate every SQL or ORM-based query. This includes: - All **raw SQL queries**, including stored procedures - **ORM-generated queries** (capture the actual SQL being produced) - **Dynamic query builders** and their permutations - **Background job queries** that may run at scale - **Admin or reporting queries** that could lock tables ### **Step 2 — Document Key Details** For each query discovered, record the following: - **File location and function name** - **Frequency of execution** (per request, batch job, or cron schedule) - **Typical data volume processed** --- ## **PHASE 2: Performance Analysis** For each identified query, generate and analyze a detailed **execution plan**. ### **Execution Plan Commands** ```sql -- PostgreSQL EXPLAIN (ANALYZE, BUFFERS, FORMAT JSON); -- MySQL EXPLAIN FORMAT=JSON; ``` ### **Extract the Following Metrics** - Total execution time - Rows examined vs. rows returned ratio - Index usage (full table scans, index scans, seeks) - Join methods (nested loop, hash, merge) - Memory usage and temporary file creation - Buffer pool hit ratio --- ## **PHASE 3: Identify Specific Problems** ### **1. N+1 Query Detection** **Problem:** Loading users and their posts separately **Found in:** `/api/users/controller.js:45` **Impact:** 100 queries for 100 users instead of one batched query #### **Current Implementation** ```js const users = await db.query('SELECT * FROM users'); for (const user of users) { user.posts = await db.query('SELECT * FROM posts WHERE user_id = ?', [user.id]); } ``` #### **Optimized Version** ```js const usersWithPosts = await db.query(` SELECT u.*, COALESCE(json_agg(p.*) FILTER (WHERE p.id IS NOT NULL), '[]') AS posts FROM users u LEFT JOIN posts p ON p.user_id = u.id GROUP BY u.id; `); ``` --- ### **2. Missing Index Analysis** **Finding:** Full table scan on `orders` table (2M rows) **Query:** ```sql SELECT * FROM orders WHERE status = 'pending' AND created_at > ?; ``` **Recommendation:** ```sql CREATE INDEX idx_orders_status_created ON orders(status, created_at); ``` **Impact:** Query time reduced from **3.2s → 0.045s** --- ### **3. Inefficient JOIN Patterns** **Problem:** Queries join through unnecessary intermediate tables. **Solution:** Simplify relationships using direct joins or indexed subqueries where possible. --- ### **4. Subquery Optimization** **Inefficient Query:** ```sql SELECT * FROM products WHERE price > (SELECT AVG(price) FROM products WHERE category_id = p.category_id); ``` **Optimized (Using Window Function):** ```sql WITH product_stats AS ( SELECT *, AVG(price) OVER (PARTITION BY category_id) AS avg_category_price FROM products ) SELECT * FROM product_stats WHERE price > avg_category_price; ``` --- ## **PHASE 4: Advanced Optimizations** ### **Caching Strategies** Use caching for: - User-specific data with low update frequency - Expensive aggregations that can be pre-computed #### **Implementation** ```js // Add caching layer with TTL const getCachedOrQuery = async (key, query, ttl = 3600) => { const cached = await redis.get(key); if (cached) return JSON.parse(cached); const result = await db.query(query); await redis.setex(key, ttl, JSON.stringify(result)); return result; }; ``` --- ### **Recommended Connection Configuration** ```json { "connectionLimit": 50, "queueLimit": 100, "acquireTimeout": 30000, "waitForConnections": true, "idleTimeout": 300000, "enableKeepAlive": true, "keepAliveInitialDelay": 10 } ``` --- ### **Batch Operation Optimization** **Problem:** Records are inserted one by one **Found in:** `/jobs/import-data.js` **Current Implementation:** 1000 individual `INSERT` statements **Optimized:** ```sql INSERT INTO users (name, email, created_at) VALUES ($1, $2, $3), ($4, $5, $6), ... -- batch in groups of 1000 ``` --- ### **Pagination Optimization** ```sql SELECT * FROM posts WHERE created_at < $cursor ORDER BY created_at DESC LIMIT 20; ``` --- ## **PHASE 5: Monitoring & Maintenance** ### **1. Slow Query Logging Setup** #### **PostgreSQL** ```sql ALTER SYSTEM SET log_min_duration_statement = '1000'; -- Log queries over 1s ALTER SYSTEM SET log_statement = 'all'; ALTER SYSTEM SET log_duration = on; ``` #### **MySQL** ```sql SET GLOBAL slow_query_log = 'ON'; SET GLOBAL long_query_time = 1; SET GLOBAL log_output = 'TABLE'; ``` --- ### **2. Query Performance Testing** ```js describe('Query Performance', () => { test('User listing should complete under 100ms', async () => { const start = Date.now(); await db.query('SELECT * FROM users LIMIT 1000'); expect(Date.now() - start).toBeLessThan(100); }); }); ``` --- ## **PHASE 6: Deliverables** ### **Deliverable Outputs** - **Optimization Script:** A single SQL file with all index creations, ordered by performance impact. - **Code Changes PR:** Includes all query optimizations with before/after comparison results. ### **Performance Report** - Baseline metrics vs. optimized metrics - Expected resource savings (CPU, memory, I/O) - Risk assessment for each change ### **Monitoring Dashboard** Define recurring queries to track query performance over time. --- ## **PRIORITY MATRIX** Rank each optimization by: - **Impact:** Query frequency × time saved - **Risk:** Low / Medium / High - **Effort:** Quick fix / Moderate / Complex refactor > Focus on **high-impact**, **low-risk**, **low-effort** items first. --- ### **Summary** This workflow ensures the AI: 1. Systematically identifies all queries 2. Analyzes them using database-specific profiling tools 3. Provides **actionable, tested solutions** 4. Considers the full application context 5. Delivers **implementation-ready optimizations** ```` Warp will locate all SQL usage, test each query, and score them using explain-plan data. 4. #### Review the Matrix [Section titled “Review the Matrix”](#review-the-matrix) The output includes: * Query locations * Performance metrics * Recommended fixes * A **graph** mapping impact vs effort Caution A well-tuned database is the heart of your web stack — don’t skip it.
# Generate unit and security tests to debug faster
Canonical page: [/guides/devops/how-to-generate-unit-and-security-tests-to-debug-faster/](https://docs.warp.dev/guides/devops/how-to-generate-unit-and-security-tests-to-debug-faster/)
> Prompt Warp to generate comprehensive unit and security tests for REST APIs, including SQL injection, XSS, and auth validation checks.
Learn how to prompt Warp’s AI to generate useful unit and security tests — helping you debug faster and deploy with confidence.  *** 1. #### The Problem [Section titled “The Problem”](#the-problem) Building REST APIs involves a lot of overhead: validation, testing, and security.\ Most “auto-generated tests” from AI end up generic and incomplete — leaving gaps in reliability. To solve this, Warp lets you run **precise, context-aware test generation** using better-structured prompts. 2. #### The Prompt [Section titled “The Prompt”](#the-prompt) Paste this into Warp’s AI input: prompt.txt ```text After implementing this API code, generate comprehensive unit tests and security tests to verify everything works correctly and securely: 1. Unit tests for each function / method Core functionality - Happy path with valid inputs -> expected output - Each edge case (empty inputs, nulls, boundary values) - Error handling for invalid inputs - Return value types and structure - Edge cases: empty strings, null/undefined, max values, special characters 2. SECURITY TESTS FOR EACH ENDPOINT For every API endpoint, create security tests that check: Input validation Test with these malicious payloads in every user input field: SQL Injection: " ' OR '1' = '1', "1; DROP TABLE users--", "admin'--" NoSQL Injection: {"$gt": ""}, {"$ne": null} Command Injection: "; ls -la", "| whoami", "$(cat /etc/passwd)" Path Traversal: "../../../etc/passwd", "..\..\..\windows\system32" XSS: "", "javascript:alert(1)" XXE (for XML): "]>" Authentication Tests: - No token/credentials → Must return 401 - Invalid token → Must return 401 - Expired token → Must return 401 - Valid token for wrong user → Must return 403 - Token with insufficient permissions → Must return 403 Authorization Tests: - User A trying to access User B's data → 403 - Regular user accessing admin endpoints → 403 - Deleted/disabled user token → 401 - Verify all role-based access controls work Additional Security Checks: - Rate limiting works (spam 100 requests → 429 response) - Large payloads are rejected (>1MB unless specified) - Sensitive data not exposed in errors - Headers don't leak server info - CORS properly configured 3. After running all tests, ensure: ✓ All unit tests pass ✓ 100% of functions have tests ✓ All security tests pass ✓ No SQL/NoSQL injection vulnerabilities ✓ Authentication is properly enforced ✓ Authorization rules are working ✓ Input validation catches malicious data ✓ Error messages don't expose sensitive info 4. Output Format Generate 2 test files: 1. Unit_tests.[ext] - all functional tests 2. security_tests.[ext] - all security tests Use simple assertions that clearly show: - What is being tested - What the expected behavior is - Why this test matters Keep these tests simple and focused - each test should verify ONE thing ``` 3. #### Add to Rules File [Section titled “Add to Rules File”](#add-to-rules-file) Once you’ve validated the prompt, add it to your Warp Rules file so Warp can automatically reuse it. ```plaintext Name: Run tests after writing Rule: run pytest mapp/tests to validate if the code you inserted works ``` Warp will then run these tests as a source of truth — deciding whether new AI-generated code is safe to merge or deploy. 4. #### Recap [Section titled “Recap”](#recap)
# Prevent secrets from leaking
Canonical page: [/guides/devops/how-to-prevent-secrets-from-leaking/](https://docs.warp.dev/guides/devops/how-to-prevent-secrets-from-leaking/)
> Use Warp Rules and built-in secret reduction to prevent API keys and credentials from leaking in agent output, demos, and shared sessions.
Learn how to safeguard credentials and sensitive data using Warp’s secret-reduction and Rule system.  This tutorial shows how to use Warp’s **Rules** to prevent agents or collaborators from exposing sensitive information while coding or sharing output. Whether you’re pair-programming, streaming, or reviewing code, Warp can automatically redact secrets before they’re ever seen by an agent. 1. #### The Problem [Section titled “The Problem”](#the-problem) AI assistants often echo API keys, tokens, or credentials in generated code blocks.\ When collaborating or screen-sharing, that can expose secrets publicly. 2. #### The Rule Setup [Section titled “The Rule Setup”](#the-rule-setup) Define a simple Rule in Warp that instructs the agent to **never display secrets** in outputs or commands. ```plaintext Rule: Protect Secrets Behavior: - Never include or reveal secrets when generating code or commands. - Automatically redact sensitive strings before showing output. ``` 3. #### Benefits [Section titled “Benefits”](#benefits) * Protects API keys and credentials from exposure * Keeps live streams and demos safe * Works seamlessly with pair-programming or AI debugging
# Write SQL commands inside a Postgres REPL
Canonical page: [/guides/devops/how-to-write-sql-commands-inside-a-postgres-repl/](https://docs.warp.dev/guides/devops/how-to-write-sql-commands-inside-a-postgres-repl/)
> Use Agents in Warp inside a Postgres REPL to translate natural language into SQL queries — works with Node.js, Python, and MySQL too.
 *** ### 🧠 Overview [Section titled “🧠 Overview”](#-overview) You’ll learn how to: * Start a Postgres REPL in Warp. * Use **Command + I** (or **Ctrl + I**) to open Warp’s AI input. * Speak or type natural-language requests and let Warp translate them into SQL. * Run the generated queries directly inside your REPL session. 1. #### Open a Postgres REPL in Warp [Section titled “Open a Postgres REPL in Warp”](#open-a-postgres-repl-in-warp) Open Warp and connect to your Postgres database (or a test instance): ```bash psql -U postgres -d my_database ``` You’ll enter the interactive `psql` prompt, where you normally type SQL commands. 2. #### Invoke Warp’s AI Input [Section titled “Invoke Warp’s AI Input”](#invoke-warps-ai-input) Inside the running REPL, press: ```plaintext Command + I (macOS) Ctrl + I (Windows/Linux) ``` This opens the **Generate Input** box. You can **type or speak** in plain English — Warp will translate your request into valid SQL or shell syntax, depending on the REPL you’re in. 3. #### Ask Warp in Natural Language [Section titled “Ask Warp in Natural Language”](#ask-warp-in-natural-language) Start with a simple request: ```plaintext Show me all tables. ``` Warp translates this to the Postgres command: ```sql \dt ``` Then try a more specific query, as shown in the video: ```plaintext Show me our users table and our teams table. ``` Warp generates: ```sql SELECT * FROM users; SELECT * FROM teams; ``` You can run both within your REPL to display the tables. 4. #### Observe How Warp Learns from Context [Section titled “Observe How Warp Learns from Context”](#observe-how-warp-learns-from-context) As you continue issuing prompts, Warp’s agent **learns the structure of your database** by observing what’s printed in the REPL output. This means you can ask progressively more complex questions, and Warp will tailor the SQL accordingly. ```plaintext Show me all of the users who have joined Warp in the last 90 days from public email accounts (like Gmail, Yahoo, Hotmail) and are on teams of more than two people. ``` Warp generates a multi-clause SQL query such as: ```sql SELECT * FROM users WHERE email LIKE '%gmail.com%' OR email LIKE '%yahoo.com%' OR email LIKE '%hotmail.com%' AND joined_at > NOW() - INTERVAL '90 days' AND team_size > 2; ``` Running this query in `psql` filters users accordingly. 5. #### Apply the Same Workflow to Other REPLs [Section titled “Apply the Same Workflow to Other REPLs”](#apply-the-same-workflow-to-other-repls) This feature works **not just in Postgres** but also in: * Node.js * Python * MySQL * GDB (GNU Debugger) For any of these environments: 1. Launch the REPL inside Warp. 2. Press **Command + I** to bring up AI input. 3. Describe what you want in natural language. 4. Warp translates it into the correct syntax for that environment. 6. #### Experiment and Iterate [Section titled “Experiment and Iterate”](#experiment-and-iterate) Try varying your natural-language prompts: ```plaintext List all databases. ``` ```sql \l ``` ```plaintext Count how many users signed up this month. ``` ```sql SELECT COUNT(*) FROM users WHERE joined_at > date_trunc('month', NOW()); ``` The more you experiment, the more context Warp gathers, improving its translations. *** ### 🏁 Key Takeaways [Section titled “🏁 Key Takeaways”](#-key-takeaways) * **Command + I** activates Warp’s AI input within any interactive shell. * Warp understands natural language and produces valid commands for the current REPL. * It **learns from context** — subsequent prompts become more accurate. * Works beyond Postgres: Node, Python, MySQL, and others. * A fast way to query or explore systems without memorizing syntax.
# Improve your Kubernetes workflow (kubectl + Helm)
Canonical page: [/guides/devops/improve-your-kubernetes-workflow-kubectl-helm/](https://docs.warp.dev/guides/devops/improve-your-kubernetes-workflow-kubectl-helm/)
> Streamline kubectl and Helm workflows with Warp's AI assistance, active suggestions, custom workflows, and synchronized panes.
Discover how Warp’s modern terminal features streamline Kubernetes workflows through AI assistance, automation, and intuitive design.  ## Overview [Section titled “Overview”](#overview) This guide covers 6 key Warp features that enhance Kubernetes productivity: 1. #### AI Integration in the Terminal [Section titled “AI Integration in the Terminal”](#ai-integration-in-the-terminal) Warp’s **Agent Mode** (`Cmd + I`) lets you run complex Kubernetes operations with plain-English prompts. **Examples** ```plaintext When does my wildcard TLS certificate expire? ``` Warp auto-detects namespaces, runs `kubectl` commands, and outputs expiration details. ```plaintext Generate a command to identify all pods running as root across all namespaces. ``` Warp builds and runs the corresponding `kubectl` + `grep` query, returning a security report. 2. #### Building AI-Aided Context [Section titled “Building AI-Aided Context”](#building-ai-aided-context) You can attach any command’s output as context for follow-up prompts.\ For instance, right-click log output → “Attach as Agent Context,” then run: ```plaintext I’m sending anonymous usage data in Traefik. How can I disable it? ``` Warp detects the Helm chart and outputs the required YAML config to disable stats reporting. 3. #### Active AI Suggestions [Section titled “Active AI Suggestions”](#active-ai-suggestions) Warp automatically suggests next actions.\ Examples of suggested actions: * After `kubectl describe pod` it might propose: > “Check the logs of this pod.” * When running `sudo apt update` it detects available upgrades and offers: > “Run sudo apt upgrade to update packages.” 4. #### Custom Workflows [Section titled “Custom Workflows”](#custom-workflows) Create reusable, parameterized commands for common operations like: ```bash helm upgrade --namespace -f ``` Accessible from the **Command Palette (`Cmd + P`)**, workflows make repetitive Kubernetes tasks fast and standardized. 5. #### Synchronized Panes and Tabs [Section titled “Synchronized Panes and Tabs”](#synchronized-panes-and-tabs) Link multiple terminal panes or tabs (e.g., master + worker nodes).\ When synchronization is active, running: ```bash sudo apt update ``` executes simultaneously across all linked sessions. 6. #### Modern Text Editing [Section titled “Modern Text Editing”](#modern-text-editing) Warp supports **click-to-edit** for commands — no more arrow key gymnastics.\ Hovering shows inline **tooltips** explaining flags and subcommands (e.g., Helm, kubectl, etc.), with autocompletions for 400+ CLI tools.
# Context7 MCP: update Astro project with best practices
Canonical page: [/guides/external-tools/context7-mcp-update-astro-project-with-best-practices/](https://docs.warp.dev/guides/external-tools/context7-mcp-update-astro-project-with-best-practices/)
> Use the Context7 MCP server to give Warp agents real-time access to framework documentation for automated project upgrades.
 *** ## 🧠 Overview [Section titled “🧠 Overview”](#-overview) The **Context7 MCP Server** lets Warp fetch live documentation from across the web.\ \ In the example, the agent updates an older **Astro** project to align with the latest version (Astro 5). *** 1. #### Add the Context7 Server [Section titled “Add the Context7 Server”](#add-the-context7-server) * Open Warp’s **MCP Panel** via the Command Palette. * Add the **Context7 JSON config** and click **Save**. ```json { "Context7": { "command": "npx", "args": [ "-y", "@upstash/context7-mcp" ], "env": {}, "working_directory": null } } ``` * This enables the endpoint `getLibraryDocs`, which retrieves live documentation directly from the official sources. 2. #### Run the Update Prompt [Section titled “Run the Update Prompt”](#run-the-update-prompt) The developer issues this prompt: ```plaintext Create a new git branch called update and in that branch update this Astro project to follow all the latest best practices based on all Astro and developer documentation. ``` 3. #### Review the Automatic Code Changes [Section titled “Review the Automatic Code Changes”](#review-the-automatic-code-changes) The transcript shows that Warp automatically: * Updates Tailwind import syntax * Improves TypeScript configuration * Optimizes build settings * Enhances accessibility rules These edits happen across multiple files — without manually searching docs or changelogs. 4. #### Best Use Cases [Section titled “Best Use Cases”](#best-use-cases) * Migrating old Astro, React, or Vue projects * Refreshing codebases to reflect recent standards * Saving time otherwise spent reading version notes
# Figma remote MCP: create a website from a Figma file
Canonical page: [/guides/external-tools/figma-remote-mcp-create-a-website-from-a-figma-file-from-scratch/](https://docs.warp.dev/guides/external-tools/figma-remote-mcp-create-a-website-from-a-figma-file-from-scratch/)
> Connect Warp to Figma's remote MCP server via OAuth and generate front-end code directly from your design files.
Learn how to connect Warp to Figma’s remote MCP server to generate code directly from your design files — complete with screenshots, metadata, and design system context.  *** ## Overview [Section titled “Overview”](#overview) This guide covers how to: * Connect Warp to the **remote Figma MCP server** * Log in securely using OAuth * Use the server to pull live context (components, variables, and assets) from your Figma designs * Generate front-end code based on your UI files * Iterate and refine output directly in Warp *** 1. #### What Is a Remote MCP Server? [Section titled “What Is a Remote MCP Server?”](#what-is-a-remote-mcp-server) A **remote MCP server** runs outside your local machine — Warp connects to it through a secure network call.\ \ This means you don’t have to manage processes, ports, or tokens manually. Warp handles setup, authentication, and communication for you. 2. #### Connect Figma MCP to Warp [Section titled “Connect Figma MCP to Warp”](#connect-figma-mcp-to-warp) * Copy the Figma MCP configuration JSON ```plaintext { "Figma": { "url": "https://mcp.figma.com/mcp" } } ``` * In Warp, paste the JSON — Warp will automatically open an OAuth login window. * Log in once with your **Figma account** credentials. 3. #### What the Figma MCP Server Provides [Section titled “What the Figma MCP Server Provides”](#what-the-figma-mcp-server-provides) Once connected, the server enables Warp’s AI to understand your design context by fetching: | Type | Description | | -------------------------------- | -------------------------------------------------------------------- | | **`get_screenshot`** | Helps the AI visualize layout and relationships between elements. | | **`create_design_system_rules`** | Components, variables, and styles for consistent, reusable code. | | **`get_code`** | Extracts code from your Figma design for direct use in projects. | | **`get_metadata`** | Includes text, images, and layer names for more realistic mock data. | 4. #### Generate a Website from a Figma File [Section titled “Generate a Website from a Figma File”](#generate-a-website-from-a-figma-file) Basic flow: * Copy your **Figma file link**: * Right-click → *Copy / Paste As → Copy Link to Selection* * In Warp, paste a prompt to create a website based on that design. Prompt: ```plaintext Create a website from this Figma file: Follow the design layout and use these guidelines: - Match spacing and typography from the design - Use Tailwind CSS and TypeScript - Make components reusable ``` Warp uses the Figma MCP server to pull all necessary context and begin generating code diffs. 5. #### Iterating on Output [Section titled “Iterating on Output”](#iterating-on-output) * In under five minutes, Warp generates a working site structure based on the Figma layout. * Missing assets (e.g., logos or images) are automatically referenced in an `assets/` folder. * Warp prompts you to add any missing files before continuing. 6. #### Persistent Input Feature [Section titled “Persistent Input Feature”](#persistent-input-feature) Warp’s **persistent input** allows mid-process updates.\ If you forget an image (e.g., the Misho logo), simply upload it and notify Warp: ```plaintext I’ve uploaded the Misho logo to the assets folder. ``` Warp will automatically detect and use it during the same generation session. 7. #### Recap [Section titled “Recap”](#recap) * Warp now supports **remote MCP servers** for Figma (and others like GitHub, Sentry, and Linear). * OAuth login streamlines setup and removes manual token handling. * The Figma MCP integration enables rapid, context-aware code generation. * Persistent input and real-time iteration make design-to-code workflows seamless.
# GitHub MCP: summarize open PRs and create GitHub issues
Canonical page: [/guides/external-tools/github-mcp-summarizing-open-prs-and-creating-gh-issues/](https://docs.warp.dev/guides/external-tools/github-mcp-summarizing-open-prs-and-creating-gh-issues/)
> Connect the GitHub MCP server to Warp to summarize open PRs, create issues from TODO comments, and automate repo management.
 The GitHub MCP Server lets Warp agents read, write, and automate tasks in your GitHub repositories directly — no manual tab-switching required. *** ### 2. Setup [Section titled “2. Setup”](#2-setup) #### Step 1. Get a GitHub Personal Access Token [Section titled “Step 1. Get a GitHub Personal Access Token”](#step-1-get-a-github-personal-access-token) 1. Go to **GitHub → Settings → Developer Settings → Personal Access Tokens** 2. Create a new token and enable: * ✅ `repo` * ✅ `read:user` *** #### Step 2. Add the Server in Warp [Section titled “Step 2. Add the Server in Warp”](#step-2-add-the-server-in-warp) 1. Open the **MCP Panel** via Command Palette (`Cmd + P`) 2. Click **Add Server** 3. Paste in your JSON config and the access token 4. Save — and you’ll see the available endpoints immediately *** ### 3. Workflow 1 — Summarize All Open PRs [Section titled “3. Workflow 1 — Summarize All Open PRs”](#3-workflow-1--summarize-all-open-prs) Use Warp’s agent to summarize pull requests: Behind the scenes, the MCP server: * Lists PRs * Fetches comments and reviews * Compiles summaries with clickable links Perfect for daily PR triage or stand-ups. *** ### 4. Workflow 2 — Create GitHub Issues from TODOs [Section titled “4. Workflow 2 — Create GitHub Issues from TODOs”](#4-workflow-2--create-github-issues-from-todos) Use a saved prompt to automate issue creation. Warp: 1. Scans your codebase for TODO comments 2. Calls `create_issue` for each one via MCP 3. Generates a linked list of new issues This turns scattered notes into trackable tickets instantly. *** ### 5. Why It’s Useful [Section titled “5. Why It’s Useful”](#5-why-its-useful) * Save 20–30 minutes per session * Keep repos synchronized automatically * Enable PR summaries, issue tracking, and automation — all inside Warp.
# Set up Claude Code
Canonical page: [/guides/external-tools/how-to-set-up-claude-code/](https://docs.warp.dev/guides/external-tools/how-to-set-up-claude-code/)
> Set up Claude Code in Warp, configure it for your project, and learn productivity tips — from voice prompting to visual code review.
Claude Code is Anthropic’s AI coding agent. It reads your codebase, writes and edits code, runs commands, and handles complex refactors using natural language prompts. This guide takes you from zero to a working Claude Code session in Warp in about 5 minutes, then shows you how to get the most out of it. ## Prerequisites [Section titled “Prerequisites”](#prerequisites) * **A Claude account with CLI access** — Claude Code requires a paid plan or API credits. See [Claude Code requirements](https://docs.anthropic.com/en/docs/claude-code/setup) for eligible plans. * **macOS 13+, Windows 10+, or Ubuntu 20.04+** — See [Claude Code system requirements](https://docs.anthropic.com/en/docs/claude-code/setup) for full platform details. * **Git** — Claude Code works best inside a Git repository. On Windows, [Git for Windows](https://git-scm.com) is required. ## 1. Install Claude Code [Section titled “1. Install Claude Code”](#1-install-claude-code) Follow Anthropic’s [official installation guide](https://docs.anthropic.com/en/docs/claude-code/quickstart) to install Claude Code. The native installer (recommended) requires no dependencies and auto-updates in the background. When you launch Claude Code inside Warp, Warp auto-detects the agent session and surfaces integrated controls, including rich input, code review, vertical tab metadata, and more. ## 2. Authenticate [Section titled “2. Authenticate”](#2-authenticate) The first time you run Claude Code, it opens your browser for login. ```bash claude ``` Sign in with your Claude account. Once authenticated, the token is stored locally and you won’t need to log in again. For headless environments or CI/CD, set an API key instead: ```bash export ANTHROPIC_API_KEY=YOUR_API_KEY ``` ## 3. Start your first session [Section titled “3. Start your first session”](#3-start-your-first-session) Navigate to any project directory and launch Claude Code: ```bash cd ~/your-project claude ``` Try giving it a task, for example: ```plaintext Explain the architecture of this project ``` Or something more hands-on: ```plaintext Add input validation to the user registration endpoint ``` Claude Code will find the relevant files, show you the proposed changes, and ask for confirmation before modifying anything. ## 4. Configure for your project [Section titled “4. Configure for your project”](#4-configure-for-your-project) Create a `CLAUDE.md` file at your project root to teach Claude Code your project’s conventions. Claude Code reads this file at the start of every session. ```markdown # My Project ## Stack - Backend: Python 3.12, FastAPI, SQLAlchemy - Frontend: React, TypeScript, Vite - Database: PostgreSQL 16 ## Commands - `npm run dev` starts the dev server - `pytest -v` runs the test suite - `npm run lint` checks code style ## Conventions - Use async/await for all database operations - Type hints on all function signatures - ESM imports only (no require()) ``` This prevents Claude Code from guessing your conventions and ensures it follows your team’s standards from the first prompt. ## 5. Choose a model and permissions [Section titled “5. Choose a model and permissions”](#5-choose-a-model-and-permissions) Claude Code uses the latest Claude model by default. To use a specific model: ```bash claude --model MODEL_NAME ``` By default, Claude Code asks for permission before every file write and command execution. You can pre-approve safe operations in `.claude/settings.json`: ```json { "permissions": { "allow": [ "Read", "Glob", "Grep", "Bash(pytest*)", "Bash(npm run lint)" ] } } ``` This lets Claude read files and run your test/lint commands without prompting, while still asking before writing files. ## 6. Set up agent notifications [Section titled “6. Set up agent notifications”](#6-set-up-agent-notifications) Warp supports agent notifications for Claude Code through a plugin. When you run Claude Code in Warp without the plugin installed, a notification chip appears offering one-click installation. Once installed, Warp surfaces in-app and desktop alerts when Claude Code needs your input. For manual installation steps, troubleshooting, and SSH/remote setup, see [Claude Code in Warp (docs)](/agent-platform/cli-agents/claude-code/#setting-up-notifications). ## Productivity tips [Section titled “Productivity tips”](#productivity-tips) * **Use voice to prompt Claude Code** — Instead of typing complex instructions, dictate them. Warp supports [voice transcription](/agent-platform/local-agents/interacting-with-agents/voice/) that works with any CLI agent, including Claude Code. Press the microphone icon or the `fn` key to start recording. * **Attach images as context** — Paste screenshots of bug reports, design mockups, or error messages directly into your prompt. Warp’s [images as context](/agent-platform/local-agents/agent-context/images-as-context/) feature lets Claude Code see what you see. * **Review diffs visually** — After Claude Code makes changes, open Warp’s [Code Review panel](/code/code-review/) (`⌘+Shift++`) to see a visual diff of every file changed. You can leave inline comments and send them back to Claude Code for corrections. * **Run multiple Claude Code sessions in parallel** — Use [vertical tabs](/terminal/windows/vertical-tabs/) to run different Claude Code tasks side by side, one session fixing bugs while another writes tests. Each tab shows which agent is running and its current status. * **Compose richer prompts** — Press `Ctrl+G` to open Warp’s rich input editor for Claude Code. This gives you a full text editor experience for composing prompts — click to position your cursor, select text, and edit naturally instead of navigating with arrow keys. ## Next steps [Section titled “Next steps”](#next-steps) You installed Claude Code, authenticated, started your first session, configured it for your project, and learned the key productivity features that make it faster to use in Warp. Explore related guides and features: * [Set up Codex CLI](/guides/external-tools/how-to-set-up-codex-cli/) to run a second agent alongside Claude Code * [How to review AI-generated code](/guides/agent-workflows/how-to-review-ai-generated-code/) — a structured workflow for reviewing and refining agent output * [Run multiple agents at once](/guides/agent-workflows/how-to-run-multiple-ai-coding-agents/) — use Claude Code and Codex side by side * [Claude Code documentation](https://docs.anthropic.com/en/docs/claude-code/quickstart) — Anthropic’s official reference * [Claude Code in Warp](https://www.warp.dev/agents/claude-code) — overview of Claude Code support in Warp * [Claude Code in Warp (docs)](/agent-platform/cli-agents/claude-code/) — full reference for Claude Code’s Warp integration, including notification setup * [Third-party CLI agents](/agent-platform/cli-agents/overview/) — all supported agents and Warp’s universal agent features
# Set up Codex CLI
Canonical page: [/guides/external-tools/how-to-set-up-codex-cli/](https://docs.warp.dev/guides/external-tools/how-to-set-up-codex-cli/)
> Set up OpenAI's Codex CLI in Warp, configure it for your project, and learn productivity tips for faster AI-assisted coding workflows in Warp.
Codex CLI is OpenAI’s open-source coding agent. It reads your codebase, edits files, and executes commands from natural language prompts. This guide takes you from installation to a working Codex session in Warp in about 5 minutes, then shows you how to get the most out of it. ## Prerequisites [Section titled “Prerequisites”](#prerequisites) * **A ChatGPT account with Codex access** — Included with paid ChatGPT plans, or use an OpenAI API key. See [Codex CLI documentation](https://developers.openai.com/codex/cli/) for eligible plans. * **Node.js 18+** (for npm install) or **Homebrew** (for macOS) — Choose your preferred package manager. * **macOS or Linux** — Windows support is experimental; for the best Windows experience, use Codex in a WSL workspace. ## 1. Install Codex CLI [Section titled “1. Install Codex CLI”](#1-install-codex-cli) Install Codex CLI globally with npm or Homebrew: **npm:** ```bash npm install -g @openai/codex ``` **Homebrew (macOS):** ```bash brew install codex ``` Verify installation: ```bash codex --version ``` You can also download platform-specific binaries directly from the [GitHub releases](https://github.com/openai/codex/releases). ## 2. Authenticate [Section titled “2. Authenticate”](#2-authenticate) Run Codex for the first time: ```bash codex ``` Select **Sign in with ChatGPT** and authenticate with your ChatGPT account (recommended). Your Codex usage is included in your ChatGPT plan. For API key authentication (useful for CI/CD or automation): ```bash export OPENAI_API_KEY=YOUR_API_KEY ``` ## 3. Start your first session [Section titled “3. Start your first session”](#3-start-your-first-session) Navigate to a project directory and launch Codex: ```bash cd ~/your-project codex ``` Codex starts an interactive terminal session. Try giving it a task, for example: ```plaintext Explain the structure of this project ``` Or something more hands-on: ```plaintext Add error handling to the database connection module ``` Codex will read the relevant files, propose changes, and ask for your confirmation before modifying anything. You can review changes in a diff view and accept or reject each one. ## 4. Configure model and approval mode [Section titled “4. Configure model and approval mode”](#4-configure-model-and-approval-mode) Switch between available models during a session with the `/model` command. See [Codex CLI documentation](https://developers.openai.com/codex/cli/) for the current model list. Codex has three [approval modes](https://developers.openai.com/codex/cli/features#approval-modes) that control how much autonomy it has. * **Auto** (the default) lets Codex read, edit, and run commands within your working directory but asks before anything outside that scope. * **Read-only** keeps Codex consultative * **Full Access** grants broader autonomy including network access. Use `/permissions` inside a session to switch modes as your comfort level changes. ## 5. Customize with a configuration file [Section titled “5. Customize with a configuration file”](#5-customize-with-a-configuration-file) Create a `codex.md` or `AGENTS.md` file at your project root to teach Codex your project’s conventions: ```markdown # My Project ## Stack - Backend: Node.js, Express, TypeScript - Database: PostgreSQL with Prisma ORM - Testing: Vitest for unit tests, Playwright for e2e ## Conventions - Use ESM imports (no require()) - All API endpoints need Zod input validation - Run `npm test` before committing ``` Codex reads this file at the start of every session and follows your conventions automatically. ## Productivity tips [Section titled “Productivity tips”](#productivity-tips) * **Use voice to prompt Codex** — Dictate complex instructions instead of typing them. Warp supports [voice transcription](/agent-platform/local-agents/interacting-with-agents/voice/) that works with any CLI agent, including Codex. * **Attach images as context** — Paste screenshots of bugs, designs, or error messages into your prompt. Warp’s [images as context](/agent-platform/local-agents/agent-context/images-as-context/) feature lets Codex see what you see. * **Review diffs visually** — After Codex makes changes, open Warp’s [Code Review panel](/code/code-review/) (`⌘+Shift++`) to see a visual diff. You can leave inline comments and send them back to Codex for corrections. * **Run Codex alongside Claude Code** — Use [vertical tabs](/terminal/windows/vertical-tabs/) to run Claude Code and Codex side by side on the same task. Compare their approaches and pick the best output, or combine elements from both. * **Compose richer prompts** — Press `Ctrl+G` to open Warp’s rich input editor for Codex, giving you a full text editor experience instead of raw CLI input. ## Next steps [Section titled “Next steps”](#next-steps) You installed Codex CLI, authenticated, started your first session, and configured it for your project. Codex is now set up as a working AI coding agent in Warp. Explore related guides and features: * [Set up Claude Code](/guides/external-tools/how-to-set-up-claude-code/) to run a second agent alongside Codex * [How to review AI-generated code](/guides/agent-workflows/how-to-review-ai-generated-code/) — a structured workflow for reviewing agent output * [Run multiple agents at once](/guides/agent-workflows/how-to-run-multiple-ai-coding-agents/) — use Codex and Claude Code side by side * [Codex CLI documentation](https://developers.openai.com/codex/cli/) — OpenAI’s official reference * [Codex in Warp](https://www.warp.dev/agents/codex) — overview of Codex support in Warp * [Codex in Warp (docs)](/agent-platform/cli-agents/codex/) — full reference for Codex’s Warp integration, including notification setup * [Third-party CLI agents](/agent-platform/cli-agents/overview/) — all supported agents and Warp’s universal agent features
# Set up Gemini CLI
Canonical page: [/guides/external-tools/how-to-set-up-gemini-cli/](https://docs.warp.dev/guides/external-tools/how-to-set-up-gemini-cli/)
> Set up Google's Gemini CLI in Warp, configure it for your project, and learn productivity tips for faster AI-assisted coding workflows.
Gemini CLI is Google’s open-source coding agent. It brings Gemini directly into your terminal with built-in tools for file operations, shell commands, web search, and MCP support. This guide takes you from installation to a working Gemini CLI session in Warp in about 5 minutes, then shows you how to get the most out of it. ## Prerequisites [Section titled “Prerequisites”](#prerequisites) * **A Google account** — Gemini CLI’s free tier includes 60 requests per minute and 1,000 requests per day with a personal Google account. Alternatively, use a Gemini API key or Vertex AI. See the [Gemini CLI authentication guide](https://geminicli.com/docs/get-started/authentication/) for all options. * **Node.js 20+** — Required for installation. Check with `node -v`. * **macOS, Linux, or Windows** — See [Gemini CLI system requirements](https://geminicli.com/docs/get-started/installation/) for recommended specifications. ## 1. Install Gemini CLI [Section titled “1. Install Gemini CLI”](#1-install-gemini-cli) Follow Google’s [official installation guide](https://geminicli.com/docs/get-started/installation/) to install Gemini CLI. The two most common methods: **npm:** ```bash npm install -g @google/gemini-cli ``` **Homebrew (macOS/Linux):** ```bash brew install gemini-cli ``` Verify installation: ```bash gemini --version ``` You can also run without installing using `npx @google/gemini-cli`. When you launch Gemini CLI inside Warp, Warp auto-detects the agent session and surfaces integrated controls, including rich input, code review, vertical tab metadata, and more. ## 2. Authenticate [Section titled “2. Authenticate”](#2-authenticate) The first time you run Gemini CLI, it prompts you to choose an authentication method. ```bash gemini ``` Select **Sign in with Google** and complete the browser authentication flow. Once authenticated, the token is stored locally and you won’t need to sign in again. For API key authentication (useful for CI/CD or higher rate limits): ```bash export GEMINI_API_KEY=YOUR_API_KEY ``` For enterprise environments using Vertex AI, the recommended approach is Application Default Credentials (ADC): ```bash export GOOGLE_CLOUD_PROJECT=YOUR_PROJECT_ID export GOOGLE_CLOUD_LOCATION=YOUR_LOCATION export GOOGLE_GENAI_USE_VERTEXAI=true gcloud auth application-default login ``` See the [Gemini CLI authentication guide](https://geminicli.com/docs/get-started/authentication/) for all Vertex AI auth methods. ## 3. Start your first session [Section titled “3. Start your first session”](#3-start-your-first-session) Navigate to any project directory and launch Gemini CLI: ```bash cd ~/your-project gemini ``` Try giving it a task, for example: ```plaintext Explain the architecture of this project ``` Or something more hands-on: ```plaintext Add error handling to the database connection module ``` Gemini CLI reads the relevant files, proposes changes, and asks for confirmation before modifying anything. ## 4. Configure for your project [Section titled “4. Configure for your project”](#4-configure-for-your-project) Create a `GEMINI.md` file at your project root to teach Gemini CLI your project’s conventions. Gemini CLI reads this file at the start of every session. ```markdown # My Project ## Stack - Backend: Node.js, Express, TypeScript - Database: PostgreSQL with Prisma ORM - Testing: Vitest for unit tests, Playwright for e2e ## Commands - `npm run dev` starts the dev server - `npm test` runs the test suite - `npm run lint` checks code style ## Conventions - Use ESM imports (no require()) - All API endpoints need Zod input validation - Run `npm test` before committing ``` This prevents Gemini CLI from guessing your conventions and ensures it follows your team’s standards from the first prompt. ## 5. Choose a model [Section titled “5. Choose a model”](#5-choose-a-model) Gemini CLI defaults to the latest Gemini model. To use a specific model: ```bash gemini -m MODEL_NAME ``` You can also switch models during a session with the `/model` command. See the [Gemini CLI documentation](https://github.com/google-gemini/gemini-cli) for the current model list. ## Productivity tips [Section titled “Productivity tips”](#productivity-tips) * **Use voice to prompt Gemini CLI** — Dictate complex instructions instead of typing them. Warp supports [voice transcription](/agent-platform/local-agents/interacting-with-agents/voice/) that works with any CLI agent, including Gemini CLI. * **Attach images as context** — Paste screenshots of bugs, designs, or error messages into your prompt. Warp’s [images as context](/agent-platform/local-agents/agent-context/images-as-context/) feature lets Gemini CLI see what you see. * **Review diffs visually** — After Gemini CLI makes changes, open Warp’s [Code Review panel](/code/code-review/) (`⌘+Shift++`) to see a visual diff. You can leave inline comments and send them back to Gemini CLI for corrections. * **Run Gemini CLI alongside other agents** — Use [vertical tabs](/terminal/windows/vertical-tabs/) to run Gemini CLI and Claude Code or Codex side by side on the same task. Compare their approaches and pick the best output. * **Compose richer prompts** — Press `Ctrl+G` to open Warp’s rich input editor for Gemini CLI, giving you a full text editor experience instead of raw CLI input. * **Use built-in Google Search** — Gemini CLI can ground responses with real-time web search. Ask it to research current best practices or look up documentation while working on your code. ## Next steps [Section titled “Next steps”](#next-steps) You installed Gemini CLI, authenticated with your Google account, started your first session, and configured it for your project. Gemini CLI is now set up as a working coding agent in Warp. Explore related guides and features: * [Set up Ollama for local models](/guides/external-tools/how-to-set-up-ollama/) to pair Gemini CLI with local model workflows * [Code Review panel](/code/code-review/) — review and refine agent-generated code * [Gemini CLI in Warp](https://www.warp.dev/agents/gemini-cli) — overview of Gemini CLI support in Warp * [Third-party CLI agents](/agent-platform/cli-agents/overview/) — all supported agents and Warp’s universal agent features * [Gemini CLI documentation](https://github.com/google-gemini/gemini-cli) — Google’s official reference
# Set up Ollama
Canonical page: [/guides/external-tools/how-to-set-up-ollama/](https://docs.warp.dev/guides/external-tools/how-to-set-up-ollama/)
> Install Ollama, run LLMs locally, compare model performance, and integrate local models into your apps using Warp.
Running AI models locally just got easier — and faster — with Ollama.\ \ In this guide, we’ll walk through how to use Warp to install, profile, and integrate Ollama into your local setup.  *** ### 1. Check Your System Specs [Section titled “1. Check Your System Specs”](#1-check-your-system-specs) Before running large language models (LLMs) locally, confirm your hardware can handle them. Example setups: * Mac: 64GB unified memory — good for larger models but with lower throughput. * Windows (NVIDIA RTX 5090): 32GB VRAM — excellent performance, but limited by VRAM capacity. > 🧠 Rule of thumb: You’ll need roughly 1GB of VRAM per billion parameters. *** ### 2. Run Your First Model [Section titled “2. Run Your First Model”](#2-run-your-first-model) Run a model locally: > ollama run gpt-oss For example: * Try GPT-OSS 20B (requires ≥16GB VRAM, supports tool calling). * Then try Mistral 8B for a faster, smaller alternative. Compare their performance and quality side-by-side.\ Use Warp to easily monitor GPU usage and model response time. *** ### 3. Understanding Model Terms [Section titled “3. Understanding Model Terms”](#3-understanding-model-terms) Here’s a quick glossary for choosing the right local model: | Term | Meaning | | ---------------- | ------------------------------------------------------------------ | | **Thinking** | The model “thinks” before answering; better for complex reasoning. | | **Tools** | Models can use external utilities (e.g., web search). | | **Vision** | Can process and respond to images. | | **Embedding** | Converts text to numeric form for search or RAG pipelines. | | **Quantization** | Reduces memory use by lowering precision (e.g., 4-bit). | *** ### 4. Integrate Ollama into Your App [Section titled “4. Integrate Ollama into Your App”](#4-integrate-ollama-into-your-app) Most apps use OpenAI-compatible APIs, so integration is simple. 1. Open your app’s code in Warp. 2. Locate the OpenAI client initialization. 3. Replace the base URL with Ollama’s 4. Update your API key and model name. Warp helps you quickly locate, edit, and test the integration directly from the terminal. *** ### 6. Customize Model Behavior [Section titled “6. Customize Model Behavior”](#6-customize-model-behavior) Pull and modify a model. Then save it as a custom model with new settings like temperature or system prompt. Use Warp to generate a model file automatically. This adds a structured system prompt for that task — ready to use instantly.
# Set up OpenCode
Canonical page: [/guides/external-tools/how-to-set-up-opencode/](https://docs.warp.dev/guides/external-tools/how-to-set-up-opencode/)
> Set up OpenCode in Warp, configure it for your project, and learn productivity tips for faster AI-assisted coding workflows.
OpenCode is an open-source coding agent that runs in your terminal. It supports 75+ LLM providers, features a built-in terminal UI (TUI), and lets you edit code, execute commands, and manage sessions from natural language prompts. This guide takes you from installation to a working OpenCode session in Warp in about 5 minutes, then shows you how to get the most out of it. ## Prerequisites [Section titled “Prerequisites”](#prerequisites) * **An LLM provider account** — OpenCode connects to any supported provider (Anthropic, OpenAI, Google, and others) via API key, or use OpenCode Zen for a curated model list. See [OpenCode configuration](https://opencode.ai/docs#configure) for details. * **macOS, Linux, or Windows (via WSL)** — WSL is recommended for the best experience on Windows. See [OpenCode docs](https://opencode.ai/docs) for full platform details. ## 1. Install OpenCode [Section titled “1. Install OpenCode”](#1-install-opencode) Follow the [official OpenCode installation guide](https://opencode.ai/docs#install) to install OpenCode. The install script is the fastest method: ```bash curl -fsSL https://opencode.ai/install | bash ``` You can also install via npm or Homebrew: ```bash npm install -g opencode-ai ``` ```bash brew install anomalyco/tap/opencode ``` See the [OpenCode docs](https://opencode.ai/docs#install) for additional installation methods including Homebrew taps, platform-specific binaries, and Docker. When you launch OpenCode inside Warp, Warp auto-detects the agent session and surfaces integrated controls, including rich input, code review, vertical tab metadata, and more. ## 2. Authenticate [Section titled “2. Authenticate”](#2-authenticate) OpenCode supports multiple LLM providers. Run the `/connect` command inside OpenCode’s TUI to configure a provider, or set API keys as environment variables: ```bash # For Anthropic models export ANTHROPIC_API_KEY=YOUR_API_KEY # For OpenAI models export OPENAI_API_KEY=YOUR_API_KEY # For Google Gemini models export GEMINI_API_KEY=YOUR_API_KEY ``` Outside the TUI, run `opencode auth login` from the command line for interactive provider setup. Credentials are stored locally in `~/.local/share/opencode/auth.json`. ## 3. Start your first session [Section titled “3. Start your first session”](#3-start-your-first-session) Navigate to any project directory and launch OpenCode: ```bash cd ~/your-project opencode ``` OpenCode starts its TUI. Try giving it a task, for example: ```plaintext Explain the architecture of this project ``` Or something more hands-on: ```plaintext Add input validation to the user registration endpoint ``` OpenCode reads the relevant files, proposes changes, and asks for confirmation before modifying anything. Use the `Tab` key to switch between Plan mode (read-only suggestions) and Build mode (applies changes). ## 4. Configure for your project [Section titled “4. Configure for your project”](#4-configure-for-your-project) Initialize OpenCode for your project by running `/init` inside the TUI. This analyzes your codebase and creates an `AGENTS.md` file at your project root: ```plaintext /init ``` The `AGENTS.md` file teaches OpenCode your project’s structure and conventions. You can also create or edit it manually: ```markdown # My Project ## Stack - Backend: Python 3.12, FastAPI, SQLAlchemy - Frontend: React, TypeScript, Vite - Database: PostgreSQL 16 ## Commands - `npm run dev` starts the dev server - `pytest -v` runs the test suite - `npm run lint` checks code style ## Conventions - Use async/await for all database operations - Type hints on all function signatures - ESM imports only (no require()) ``` Commit the `AGENTS.md` file to Git so your team shares the same project context. ## 5. Set up agent notifications [Section titled “5. Set up agent notifications”](#5-set-up-agent-notifications) Warp supports agent notifications for OpenCode through a plugin. If the plugin isn’t installed, Warp displays an installation chip in the terminal when you run OpenCode, with setup steps you can follow directly. For manual installation and configuration, see [OpenCode in Warp (docs)](/agent-platform/cli-agents/opencode/#setting-up-notifications). ## Productivity tips [Section titled “Productivity tips”](#productivity-tips) * **Use voice to prompt OpenCode** — Dictate complex instructions instead of typing them. Warp supports [voice transcription](/agent-platform/local-agents/interacting-with-agents/voice/) that works with any CLI agent, including OpenCode. * **Attach images as context** — Paste screenshots of bugs, designs, or error messages into your prompt. Warp’s [images as context](/agent-platform/local-agents/agent-context/images-as-context/) feature lets OpenCode see what you see. * **Review diffs visually** — After OpenCode makes changes, open Warp’s [Code Review panel](/code/code-review/) (`⌘+Shift++`) to see a visual diff. You can leave inline comments and send them back to OpenCode for corrections. * **Run OpenCode alongside other agents** — Use [vertical tabs](/terminal/windows/vertical-tabs/) to run OpenCode and Claude Code or Codex side by side on the same task. Compare their approaches and pick the best output. * **Compose richer prompts** — Press `Ctrl+G` to open Warp’s rich input editor for OpenCode, giving you a full text editor experience instead of raw CLI input. ## Next steps [Section titled “Next steps”](#next-steps) You installed OpenCode, authenticated with a provider, started your first session, and configured it for your project. OpenCode is now set up as a working coding agent in Warp. Explore related guides and features: * [Set up Ollama for local models](/guides/external-tools/how-to-set-up-ollama/) to run OpenCode with local models * [Code Review panel](/code/code-review/) — review and refine agent-generated code * [OpenCode in Warp](https://www.warp.dev/agents/opencode) — overview of OpenCode support in Warp * [OpenCode in Warp (docs)](/agent-platform/cli-agents/opencode/) — full reference for OpenCode’s Warp integration, including notification setup * [Third-party CLI agents](/agent-platform/cli-agents/overview/) — all supported agents and Warp’s universal agent features * [OpenCode documentation](https://opencode.ai/docs) — official reference * [opencode-warp plugin](https://github.com/warpdotdev/opencode-warp) — notification plugin source and updates
# Linear MCP: retrieve issue data
Canonical page: [/guides/external-tools/linear-mcp-retrieve-issue-data/](https://docs.warp.dev/guides/external-tools/linear-mcp-retrieve-issue-data/)
> Add the Linear MCP server to Warp and query your issues, tasks, and assignments directly from the terminal.
Learn how to connect the Linear MCP server in Warp so your agents can access live data — like issues, tickets, and user assignments — directly from your Linear workspace.  *** #### Overview [Section titled “Overview”](#overview) This tutorial covers how to: * Add and configure a Linear MCP server in Warp * Use MCP to query and retrieve issue data ### 1. Adding the Linear MCP Serve [Section titled “1. Adding the Linear MCP Serve”](#1-adding-the-linear-mcp-serve) #### Add a new server in Warp [Section titled “Add a new server in Warp”](#add-a-new-server-in-warp) * In Warp, open Warp Drive → Personal → MCP Servers.\ Alternatively, press `⌘P` and type **MCP servers** to open the palette. * Click **Add New Server**. * Paste in this JSON ```json { "linear": { "command": "npx", "args": ["-y", "mcp-remote", "https://mcp.linear.app/sse"], "env": {}, "working_directory": null } } ``` * Click Save. * Warp will immediately start the server. * You should now see Linear MCP listed as Running. *** ### 2. Testing the Connection [Section titled “2. Testing the Connection”](#2-testing-the-connection) After saving, retry your earlier query: ```plaintext Show me all Linear tasks assigned to me. ``` Warp’s agent will now call the Linear MCP server to fetch your data. You can click inside the response panel to inspect the **raw API response** — ideal for debugging or understanding what’s being fetched. If the server can’t find your user, it may be due to your Linear login address. Try querying a teammate to confirm the connection: ```plaintext Show tasks assigned to [teammate name]. ``` Once verified, the agent can display a full list of tasks.
# Linear MCP: update tickets with a lean build approach
Canonical page: [/guides/external-tools/linear-mcp-updating-tickets-with-a-lean-build-approach/](https://docs.warp.dev/guides/external-tools/linear-mcp-updating-tickets-with-a-lean-build-approach/)
> Use Warp's Linear MCP integration to update ticket descriptions, propagate changes to subtasks, and maintain a lean build strategy.
Learn how to use Warp’s Linear MCP integration to update tickets programmatically while maintaining a lean build strategy.  *** ## Overview [Section titled “Overview”](#overview) This walkthrough demonstrates: * Updating Linear tickets via Warp’s MCP integration * Structuring tasks around a lean development stack * Observing real-time synchronization of ticket data * Testing agent autonomy when editing related subtasks 1. #### Setting Up the Scenario [Section titled “Setting Up the Scenario”](#setting-up-the-scenario) The goal is to use Warp’s agent to update a Linear epic with a new, leaner build approach and reflect the changes in related subtasks. First, open your Linear project and locate the target epic.\ Copy the **ticket ID** (e.g. “Empty Studio 36”). 2. #### Define the Update Prompt [Section titled “Define the Update Prompt”](#define-the-update-prompt) Within Warp, run the MCP command to edit the Linear issue. **Prompt** ```plaintext Use the warp-server-staging gcloud project and pull logs for the last 10 minutes from the warp-server Cloud Run instance. Organize them by info, warning, and error levels. Create a histogram across message types, and highlight the most concerning errors to investigate. ``` Warp parses the issue context and updates the ticket’s fields accordingly. 3. #### Observing the Changes [Section titled “Observing the Changes”](#observing-the-changes) After execution: * The Linear ticket reflects the new **Next.js + Supabase** stack. * Tasks like *Build Foundation*, *Implement AI-powered PRD Generation*, and *Set up Development Environment* are updated. * Time estimates automatically adjust from *4–6 weeks* to *2–3 weeks*. * Complex integrations (AI and Linear App) are deferred to a future phase. 4. #### Propagating Updates to Child Tasks [Section titled “Propagating Updates to Child Tasks”](#propagating-updates-to-child-tasks) Warp’s agent can cascade changes to linked subtasks.\ If it begins editing other epics unexpectedly, you can constrain its scope by specifying task IDs in the prompt: ```plaintext Only update the ticket with ID . Do not modify other epics or related tickets. ``` 5. #### Review and Verification [Section titled “Review and Verification”](#review-and-verification) Re-open the Linear epic to confirm updates: * **Frontend specs** reflect the lean stack. * **Child tasks** align with phase 1 deliverables. * **Deferred features** (e.g., advanced integrations) are pushed to phase 2.
# Puppeteer MCP: scrape Amazon web reviews
Canonical page: [/guides/external-tools/puppeteer-mcp-scraping-amazon-web-reviews/](https://docs.warp.dev/guides/external-tools/puppeteer-mcp-scraping-amazon-web-reviews/)
> Configure the Puppeteer MCP server in Warp to automate browser tasks like navigating sites, scraping product data, and analyzing reviews.
 *** ### 🧠 Overview [Section titled “🧠 Overview”](#-overview) **Puppeteer MCP** integrates Warp’s agents with the browser, letting you automate tasks such as navigation, form filling, screenshotting, and scraping content.\ \ Once configured, Warp can issue Puppeteer commands directly from prompts, enabling full **browser automation** without manual scripting. You’ll learn how to: * Set up the Puppeteer MCP server. * Use Warp’s voice input and AI to describe automation tasks. * Execute browser workflows hands-free. * Capture, scrape, and analyze web data programmatically. *** 1. #### Configure the Puppeteer MCP Server [Section titled “Configure the Puppeteer MCP Server”](#configure-the-puppeteer-mcp-server) Open the MCP panel in Warp: * Press **Cmd + Shift + P** (Mac) or **Ctrl + Shift + P** (Windows/Linux) to open the **Command Palette**. * Search for `MCP` and open the **MCP Panel**. Add the Puppeteer MCP config: * Click **Add**, then paste in the provided JSON configuration for Puppeteer: ```json { "puppeteer": { "command": "npx", "args": [ "-y", "@modelcontextprotocol/server-puppeteer" ], "env": {}, "working_directory": null } } ``` Save your configuration. Available endpoints will include: * `puppeteer.navigate` * `puppeteer.fill` * `puppeteer.screenshot` * `puppeteer.evaluate` These represent actions Warp can call automatically through its agents. 2. #### Use Voice Input to Trigger Automation [Section titled “Use Voice Input to Trigger Automation”](#use-voice-input-to-trigger-automation) Enable **voice input** by clicking the microphone icon in Warp. Then speak your automation prompt naturally. ```plaintext Can you go to Amazon search for "white t-short women?" Scrape the results so the titles, prices, and links are extracted. Then open each product link and summarize the product reviews. Finally, give me a recommendation for which shirt to buy based on the combination of the pricing and review quality. ``` #### Watch Puppeteer Automate the Workflow [Section titled “Watch Puppeteer Automate the Workflow”](#watch-puppeteer-automate-the-workflow) Behind the scenes, Puppeteer: * Navigates to Amazon. * Fills the search bar with “white t-shirt woman.” * Scrapes the product results — capturing titles, prices, and product links. * Clicks into each product and extracts review data using JavaScript selectors. * Takes screenshots of the pages for reference. You can see the browser (Amazon) and Warp side-by-side as Puppeteer performs these steps autonomously. #### Analyze and Summarize Results [Section titled “Analyze and Summarize Results”](#analyze-and-summarize-results) Once the scrape is complete, Warp compiles the data and provides a ranked list of products. Example output (from transcript): | Product | Price | Rating | Summary | | ---------------- | ----- | ------ | --------------------- | | Cozy T-Shirt | $8 | ⭐ 4.5 | Soft fabric, good fit | | Comfy Cotton Tee | $10 | ⭐ 4.2 | Slightly looser fit | | Basic White Top | $6 | ⭐ 3.8 | Mixed quality reviews | Warp’s recommendation: > “The Cozy T‑Shirt — $8, 4.5 stars, good fit, and soft fabric.” #### Apply Puppeteer MCP to Other Scenarios [Section titled “Apply Puppeteer MCP to Other Scenarios”](#apply-puppeteer-mcp-to-other-scenarios) The same setup works for: * Product research – Compare reviews or specs across multiple sites. * Competitive analysis – Scrape competitors’ pricing or product data. * Web testing – Automate user flows like login or checkout. * Repetitive data tasks – Periodic scraping or screenshot capture.
# Sentry MCP: fix Sentry error in Empower website
Canonical page: [/guides/external-tools/sentry-mcp-fix-sentry-error-in-empower-website/](https://docs.warp.dev/guides/external-tools/sentry-mcp-fix-sentry-error-in-empower-website/)
> Connect the Sentry MCP server to Warp, fetch live error data, diagnose stack traces, and auto-generate fixes for production issues.
 ### Overview [Section titled “Overview”](#overview) The **Sentry MCP server** gives Warp’s agents access to authenticated Sentry error data.\ This enables detailed diagnostics and automated fixes that would otherwise be impossible using AI alone. You’ll learn how to: * Connect the Sentry MCP server inside Warp. * Trigger live error retrieval from Sentry. * Diagnose code issues and generate patches automatically. * Integrate Sentry debugging into your daily development loop. 1. #### Set Up the Sentry MCP Server [Section titled “Set Up the Sentry MCP Server”](#set-up-the-sentry-mcp-server) Open the MCP panel in Warp: * Mac: Cmd + Shift + P * Windows/Linux: Ctrl + Shift + P\ Search for “MCP” and select the **MCP Panel**. Click **Add**, then paste your configuration: ```json { "sentry": { "command": "npx", "args": [ "-y", "mcp-remote@latest", "https://mcp.sentry.dev/mcp" ], "env": {}, "working_directory": null } } ``` Save the configuration and ensure it appears in the MCP panel. 2. #### Run Your App and Trigger an Error [Section titled “Run Your App and Trigger an Error”](#run-your-app-and-trigger-an-error) We’re using the [**Empower Plant** repository](https://github.com/sentry-demos/empower) — Sentry’s official demo project. This fake e-commerce app includes a React frontend and multiple backends, each containing intentional bugs for testing. Run the app locally: ```bash npm install npm start ``` Open the site in your browser and trigger a few known errors. 3. #### Capture the Error in Sentry [Section titled “Capture the Error in Sentry”](#capture-the-error-in-sentry) 1. Go to your **Sentry Dashboard**. 2. Locate the triggered issue (for example, a `TypeError`). 3. Copy the issue’s URL from the Sentry interface. Example: ```plaintext https://sentry.io/organizations/demo/issues/12345/ ``` 4. #### Diagnose the Error Using Warp [Section titled “Diagnose the Error Using Warp”](#diagnose-the-error-using-warp) Back in Warp, prompt the agent to fetch and analyze the issue: ```plaintext Diagnose this Sentry error and show where it’s coming from in my code. Create a fix. ``` The Sentry MCP calls `getIssueDetails`, fetching the stack trace and error metadata directly from Sentry. Warp then scans your local codebase, cross-references the error location, and identifies the root cause. From this example: > The issue was caused by calling `.toUpperCase()` on an array instead of a string. Warp’s agent automatically writes a fix — changing the code to handle the array properly. 5. #### Apply the Generated Fix [Section titled “Apply the Generated Fix”](#apply-the-generated-fix) Warp produces a suggested code change inline. Review the diff and apply it automatically with one click. 6. #### Integrate Into Your Workflow [Section titled “Integrate Into Your Workflow”](#integrate-into-your-workflow) Use Sentry MCP whenever you encounter production or staging errors. Warp can pull the latest issues, analyze them, and suggest patches. Ideal for: * Debugging live production errors. * Triaging complex stack traces. * Creating immediate hot-fixes without switching tools.
# SQLite and Stripe MCP: basic queries you can make after setup
Canonical page: [/guides/external-tools/sqlite-and-stripe-mcp-basic-queries-you-can-make-after-set-up/](https://docs.warp.dev/guides/external-tools/sqlite-and-stripe-mcp-basic-queries-you-can-make-after-set-up/)
> Connect SQLite and Stripe MCP servers to Warp and run conversational queries against your local database and payment data.
This tutorial teaches you how to use **MCP servers** to connect Warp to **Stripe** and **SQLite**, showing how AI transforms the command line into a connected, conversational workspace. [SQLite and Stripe MCP demo in Warp](https://x.com/svpino/status/1937896922297311390) 1. #### Enabling MCP in Warp [Section titled “Enabling MCP in Warp”](#enabling-mcp-in-warp) Warp now supports configuring any MCP server directly from the terminal. To set it up: * Open **Settings → AI → MCP Servers** in Warp. * Click **Add Server**, and choose from a list of available MCP configurations. * Once added, Warp automatically connects and authorizes the agent to use those tools. In this demo, two MCP servers were enabled: * **SQLite Server** – for running local database queries * **Stripe Server** – for retrieving and analyzing payment data 2. #### Querying Stripe [Section titled “Querying Stripe”](#querying-stripe) Once configured, you can issue conversational prompts to the terminal — no manual API calls required. Example — Querying Stripe ```plaintext How many customers do I have in Stripe? ``` Warp connects to the Stripe MCP server, confirms the action, and returns: > “You have 3 customers.” You can continue naturally: ```plaintext List the payments made by the first customer. ``` The agent retrieves seven payment intents — one successful, six canceled — all live from your Stripe test account. Note: MCP’s confirmation prompts can be disabled once you trust a given server or agent. 3. #### Querying SQLite [Section titled “Querying SQLite”](#querying-sqlite) The same workflow applies to databases. Example — Querying SQLite ```plaintext What SQL tables do I have access to? ``` Warp lists all available tables from the local SQLite database. ```plaintext Break down female penguins by island. ``` Warp translates this into a structured SQL query and executes it, returning: > “Bisco Island — 51 female penguins; Dream Island — …” Follow-up prompts work contextually: ```plaintext Do the same with male penguins. ``` Warp runs the updated SQL query and displays results inline. 4. #### Why This Matters [Section titled “Why This Matters”](#why-this-matters) This demo highlights how Warp’s AI and MCP support combine to make your terminal: * **Connected** — Access cloud APIs, local data, or enterprise tools instantly. * **Conversational** — Run natural language prompts for structured data retrieval. 5.
# Connect developer tools to agents with MCP workflows
Canonical page: [/guides/external-tools/using-mcp-servers-with-warp/](https://docs.warp.dev/guides/external-tools/using-mcp-servers-with-warp/)
> Use MCP servers to connect Warp agents to developer tools like GitHub, Linear, Sentry, and Figma across local and cloud agent workflows.
 MCP servers let Warp agents use external tools and data sources through a standard interface. Add an MCP server when an agent needs to read issues, inspect pull requests, query incidents, fetch design context, call internal APIs, or update systems outside the terminal. Warp supports MCP in two places: * **Local agents in the Warp app** use MCP servers configured in **Settings** > **Agents** > **MCP servers**, Warp Drive, or file-based config. * **Cloud agents** use MCP servers passed through the Oz CLI, agent config files, or Warp-shared MCP server UUIDs. Use this guide to choose the right setup path, then jump to the source docs for exact configuration syntax. ## Choose local or cloud MCP [Section titled “Choose local or cloud MCP”](#choose-local-or-cloud-mcp) | Workflow | Use it when | Configure MCP with | Source docs | | ----------------------------- | -------------------------------------------------------------------------------------------------------------------------- | ----------------------------------------------------------------------------------------------- | ---------------------------------------------------------------------------------- | | Local Warp agent | You are working interactively in Warp and want the agent to use tools from your machine or desktop-authenticated services. | Warp MCP settings, Warp Drive MCP servers, `.warp/.mcp.json`, or provider config files. | [Model Context Protocol (MCP)](/agent-platform/capabilities/mcp/) | | Third-party CLI agent in Warp | You run Claude Code, Codex, OpenCode, or another CLI agent in Warp and want shared MCP config across tools. | File-based MCP config that Warp can detect and approve. | [File-based MCP servers](/agent-platform/capabilities/mcp/#file-based-mcp-servers) | | Cloud agent run | The agent runs in a cloud environment from Slack, Linear, schedules, GitHub Actions, the CLI, or the API. | `--mcp`, an agent config file, or a Warp-shared MCP UUID. | [MCP Servers for cloud agents](/agent-platform/cloud-agents/mcp/) | | Repeatable automation | You need the same MCP tools every time a scheduled agent, integration, or CI workflow runs. | Agent config files plus [Agent Secrets](/agent-platform/cloud-agents/secrets/) for credentials. | [MCP servers (CLI reference)](/reference/cli/mcp-servers/) | ## Common MCP workflows [Section titled “Common MCP workflows”](#common-mcp-workflows) ### Pull GitHub or Linear context into a local coding session [Section titled “Pull GitHub or Linear context into a local coding session”](#pull-github-or-linear-context-into-a-local-coding-session) Use local MCP when you want an interactive agent to understand an issue, PR, or ticket while you work in Warp. Example workflow: 1. In the Warp app, add a GitHub or Linear MCP server from **Settings** > **Agents** > **MCP servers**. 2. Start a local agent conversation in the repo. 3. Ask the agent to fetch the issue, inspect linked context, and make a plan. 4. Review changes in the [Code Review panel](/code/code-review/). 5. Use [Agent Session Sharing](/agent-platform/local-agents/session-sharing/) if teammates need to inspect the agent context. For setup details, see [Model Context Protocol (MCP)](/agent-platform/capabilities/mcp/). ### Give cloud agents access to developer tools [Section titled “Give cloud agents access to developer tools”](#give-cloud-agents-access-to-developer-tools) Use cloud MCP when an unattended or remote agent needs tool access while it runs away from your machine. Example workflow: 1. Create or identify the MCP server the cloud agent should use. 2. Store required credentials as [Agent Secrets](/agent-platform/cloud-agents/secrets/) instead of hardcoding tokens in config files. 3. Attach the MCP server with `--mcp`, a config file, or a Warp-shared MCP UUID. 4. Run the cloud agent from the Oz CLI, Slack, Linear, GitHub Actions, a schedule, or the API. 5. Inspect the run in the [Oz web app](/agent-platform/cloud-agents/oz-web-app/) or [Cloud agent session sharing](/agent-platform/cloud-agents/viewing-cloud-agent-runs/). For schema and cloud-specific limitations, see [MCP Servers for cloud agents](/agent-platform/cloud-agents/mcp/). ### Share an MCP server with a team [Section titled “Share an MCP server with a team”](#share-an-mcp-server-with-a-team) Use shared MCP servers when multiple teammates or workflows need the same tool connection. For local agents, share the server from the MCP settings page. Warp scrubs sensitive environment values and prompts teammates to provide their own values when they install it. For cloud agents, reference a Warp-shared MCP server by UUID with the Oz CLI: ```sh oz mcp list ``` Then pass the UUID to an agent run: ```sh oz agent run-cloud --mcp "" --prompt "Summarize the latest production incidents" ``` See [MCP servers (CLI reference)](/reference/cli/mcp-servers/) for all `--mcp` formats. ## Local MCP setup paths [Section titled “Local MCP setup paths”](#local-mcp-setup-paths) For local agents, choose one of these paths: * **Warp settings** - Best for one-off setup and interactive use. In the Warp app, add servers from **Settings** > **Agents** > **MCP servers**. * **Warp Drive** - Best for MCP servers you want to manage as Warp Drive objects. * **File-based config** - Best when MCP config should live with a repo or follow you across Warp, Claude Code, Codex, and other agent tools. * **`/agent-add-mcp` skill** - Best when you want Warp’s agent to create or update `.warp/.mcp.json` with your approval. File-based MCP is useful for teams because config can be versioned with a project, but it also needs review. Warp requires approval before project-scoped servers start so cloned repos cannot silently launch commands. ## Cloud MCP setup paths [Section titled “Cloud MCP setup paths”](#cloud-mcp-setup-paths) For cloud agents, choose one of these paths: * **Warp-shared MCP UUID** - Best when a server is already configured and shared in Warp. * **Inline JSON** - Best for quick experiments. * **JSON file** - Best for reusable scripts. * **Agent config file** - Best for production workflows where model, environment, prompt, and MCP servers should live together. Cloud agents run away from your desktop. Any secrets required by MCP tools should be available in the cloud run through [Agent Secrets](/agent-platform/cloud-agents/secrets/) or the execution environment, not only in your local shell. Caution OAuth-based MCP servers are not currently supported directly for cloud agents. If a server requires browser-based OAuth, use it with a local agent, choose a token-based/server-side configuration if the provider supports it, or pass the relevant artifact as context another way. ## Example tools MCP can connect [Section titled “Example tools MCP can connect”](#example-tools-mcp-can-connect) Warp supports MCP servers for many developer tools, including: * **GitHub** - Read issues, PRs, files, and repository metadata. * **Linear** - Fetch issues, update tickets, and reason over project context. * **Sentry** - Inspect errors, traces, and release context. * **Figma** - Pull design context for UI work. * **Notion** - Retrieve docs, specs, and project notes. * **Internal tools** - Expose your own APIs through a custom MCP server. For example configurations and demos, see the MCP server examples in [Model Context Protocol (MCP)](/agent-platform/capabilities/mcp/#mcp-server-configuration-examples) and the [MCP guides listed on the Guides page](/guides/). ## Security checklist [Section titled “Security checklist”](#security-checklist) Before giving an agent tool access through MCP: * Use the narrowest credentials and scopes that let the workflow run. * Prefer service accounts for team or scheduled workflows. * Store cloud-run credentials in [Agent Secrets](/agent-platform/cloud-agents/secrets/). * Review file-based MCP config before approving it, especially commands, args, environment variables, and URLs. * Treat MCP logs as sensitive if they contain API responses, tokens, request headers, or private data. * For cloud agents, confirm whether the MCP server can be reached from the cloud environment or self-hosted worker. ## Next steps [Section titled “Next steps”](#next-steps) * [Model Context Protocol (MCP)](/agent-platform/capabilities/mcp/) - Configure MCP servers for local agents in the Warp app. * [MCP Servers for cloud agents](/agent-platform/cloud-agents/mcp/) - Configure MCP servers for cloud runs and automation. * [MCP servers (CLI reference)](/reference/cli/mcp-servers/) - Use `--mcp` with UUIDs, inline JSON, or files. * [Agent Secrets](/agent-platform/cloud-agents/secrets/) - Store credentials for cloud agent runs.
# Code UI that matches your mockup
Canonical page: [/guides/frontend/how-to-actually-code-ui-that-matches-your-mockup-react-tailwind/](https://docs.warp.dev/guides/frontend/how-to-actually-code-ui-that-matches-your-mockup-react-tailwind/)
> Prompt Warp to generate pixel-perfect React + Tailwind code from design mockups, with structured specs and iterative refinement.
Learn how to prompt Warp’s AI to produce accurate, design-faithful UI code using your preferred framework.  *** ## Intro [Section titled “Intro”](#intro) This tutorial walks you through generating pixel-perfect front-end code using Warp.\ \ By treating the AI like a **UI engineer**, you can get closer to real implementation fidelity — especially when working from design mockups. Although this example uses **React** and **Tailwind**, the same method applies to **Vue**, **Next.js**, or **Svelte**. *** 1. #### The Problem [Section titled “The Problem”](#the-problem) When designing UI with AI, your intended design often gets lost in translation.\ AI struggles with visual fidelity — but structured prompts can help fix that. 2. #### The Prompt [Section titled “The Prompt”](#the-prompt) Step — Generate full specifications: ```plaintext Analyze this web design mockup as a senior UI engineer would. Create a complete technical specification: 1. DESIGN SYSTEM TOKENS: - Extract the color palette with semantic naming (primary, secondary, surface, text) - Identify the type scale (heading levels, body text sizes) - Document the spacing scale pattern (4px, 8px, 16px, etc.) - List border radius values used consistently 2. LAYOUT ARCHITECTURE: - Describe the overall page structure using semantic HTML5 elements - Identify CSS Grid vs Flexbox usage for each section 3. COMPONENT SPECIFICATIONS: For each unique component, provide: - Semantic HTML structure - CSS layout method - All visual states (default, hover, focus, active, disabled) - Exact dimensions and spacing - Animation/transition properties 4. RESPONSIVE BEHAVIOR: - Describe how the layout adapts (even if only desktop is shown) - Note which elements stack, hide, or resize - Identify touch targets that need enlarging on mobile 5. ACCESSIBILITY REQUIREMENTS: - Color contrast ratios for text/background combinations - Interactive element sizes (minimum 44x44px touch targets) - Focus indicator styles - Screen reader considerations for decorative elements Format as a structured spec that includes both the visual description AND implementation notes. Flag any ambiguous design decisions that need clarification. ``` Next, give Warp the right prompt to start the code implementation: ```plaintext Using this design specification, build a responsive React component with Tailwind CSS: Requirements: - Create reusable components for each element in the spec - Use CSS variables for the design tokens - Implement all interactive states - Ensure mobile-first responsive design - Add proper semantic HTML and ARIA labels - Include Framer Motion for any animations mentioned - Match the spacing system exactly using Tailwind's spacing scale Create a pixel-perfect implementation that matches the original design. ``` 3. #### Validate and Iterate [Section titled “Validate and Iterate”](#validate-and-iterate) Warp outputs component files and layout structure.\ You can review spacing, font weights, and responsive behavior directly in preview. If details feel off, prompt again with clarifications like: ```plaintext Tighten vertical spacing between header and subtext. ``` 4. #### Recap [Section titled “Recap”](#recap) You’ve learned how to: * Prompt AI for structured UI specs * Generate React + Tailwind implementations * Iterate visually for design parity > Treating the AI like a teammate — not a tool — yields interfaces that finally match your vision.
# Replace a UI element in Warp (Rust codebase)
Canonical page: [/guides/frontend/how-to-replace-a-ui-element-in-warp-rust-codebase/](https://docs.warp.dev/guides/frontend/how-to-replace-a-ui-element-in-warp-rust-codebase/)
> Use Agent Mode in Warp to plan and execute icon replacements across a large Rust codebase — with live diffs, auto-compilation, and self-correction.
Learn how to use Warp’s AI coding features to make live code changes — in this example, replacing an icon throughout Warp’s massive Rust codebase using an agentic workflow.  1. #### Define the Task [Section titled “Define the Task”](#define-the-task) The goal here is to replace all instances of the **sparkle icon** with the new **agent icon**, especially within the history menu. Open your project in Warp and start by prompting the agent directly (either by typing or speaking): ```plaintext Please create a new branch for me according to the format in the attached Linear URL. I’ve attached screenshots of what the Agent Mode and sparkle icons look like. I would like you to understand those icons, search for their use in the code, and wherever we’re using sparkles, replace them with the Agent Mode icon. Specifically, make sure this happens in the history menu. Please give me a plan before making any coding changes. ``` Attach any relevant Linear issue links or screenshots to help the agent identify assets accurately. 2. #### Review the Plan [Section titled “Review the Plan”](#review-the-plan) Warp’s agent parses your request and generates a plan for code edits.\ It identifies files and functions where the sparkle icon is used. If the plan looks correct, approve it to proceed. Follow-up prompt example: ```plaintext Yes, proceed — and please rename the function from renderAISparklesIcon to something like renderAgentModeIcon. ``` Warp automatically updates function names, asset references, and component usage. 3. #### View AI Diffs in Real Time [Section titled “View AI Diffs in Real Time”](#view-ai-diffs-in-real-time) Warp lets you view live diffs as the agent edits your files. * Diffs show changes to both render logic and function naming. * You can choose to auto-accept or manually review diffs. * These settings can be adjusted under AI Settings → Apply Changes Automatically. 4. #### Compilation and Fixes [Section titled “Compilation and Fixes”](#compilation-and-fixes) After editing, Warp’s agent runs: ```bash cargo check ``` to verify compilation. If compilation fails (e.g., missing imports), the agent automatically corrects and retries — mimicking a human debugging process. 5. #### Testing the Change [Section titled “Testing the Change”](#testing-the-change) Once compiled: * Run your project locally to confirm visual changes. * Check that the agent icon now replaces the sparkle icon in all targeted locations. 6. #### Recap [Section titled “Recap”](#recap) Warp’s agent completed the full flow: 1. Understood a Linear ticket and visual context 2. Created a new branch 3. Planned and executed the icon replacement 4. Auto-fixed compile issues 5. Verified the final result in-app
# 10 coding features you should know
Canonical page: [/guides/getting-started/10-coding-features-you-should-know/](https://docs.warp.dev/guides/getting-started/10-coding-features-you-should-know/)
> Discover 10 essential coding features in Warp — file search, tabbed editor, find and replace, syntax highlighting, code review panel, and more.
## 10 Coding Features You Should Know in Warp [Section titled “10 Coding Features You Should Know in Warp”](#10-coding-features-you-should-know-in-warp) If you didn’t already know, you can code directly in Warp. Warp includes a full set of features that make editing, reviewing, and navigating your codebase far easier than in a traditional dev tool.  Let’s walk through the 10 core features you need to know to get started. *** ### 1. Search for Files [Section titled “1. Search for Files”](#1-search-for-files) Open the **Command Palette**: * **Mac:** `Cmd + P` * **Windows/Linux:** `Ctrl + Shift + P` Then press: * **Mac:** `Cmd + O` * **Windows/Linux:** `Ctrl + O` From here, you can search and open any file in your project — no need to `cd` around or remember long paths. *** ### 2. Tabbed File Viewer [Section titled “2. Tabbed File Viewer”](#2-tabbed-file-viewer) When you open files, Warp shows them in **tabs** rather than split panes.\ This keeps your workspace clean while still allowing you to switch quickly between multiple files. *** ### 3. Full Editor Support [Section titled “3. Full Editor Support”](#3-full-editor-support) You can edit code directly inside Warp — just like any modern editor. No need for memorized shortcuts: * Click and type normally * Highlight, copy, paste, or undo using familiar shortcuts *** ### 4. Find and Replace [Section titled “4. Find and Replace”](#4-find-and-replace) Warp supports full **find and replace** with: * Regular expressions * Multi-cursor editing * Replace-all * Preserve-case rules These features make renaming variables or refactoring code fast and consistent. *** ### 5. Syntax Highlighting [Section titled “5. Syntax Highlighting”](#5-syntax-highlighting) Warp supports syntax highlighting for **dozens of languages and frameworks**.\ It appears both in: * Agent-generated diffs * The file editor view This makes it easy to visually scan code at a glance. *** ### 6. Linked File References [Section titled “6. Linked File References”](#6-linked-file-references) When Warp’s agent references a file, it automatically **links to the exact line of code**.\ Clicking the link opens that file at that line inside Warp — perfect for tracing logic or verifying changes. > ⚙️ **Tip:** In **Settings → Features**, set Warp as your default editor for these file links so they open directly in Warp. *** ### 7. Code Review Panel [Section titled “7. Code Review Panel”](#7-code-review-panel) Warp provides a **dedicated review panel** summarizing all files and diffs touched by an agent.\ You can: * Review and approve changes * Edit them inline * Reference diffs in your next prompt This reduces hallucinations and keeps agents grounded in your actual code. *** ### 8. Code Snippet References [Section titled “8. Code Snippet References”](#8-code-snippet-references) When Warp explains something about your codebase, it surfaces the **exact code snippet**.\ You can attach that snippet as fresh context for your next prompt. This keeps token usage lean and the agent’s focus sharp. *** ### 9. Codebase Indexing [Section titled “9. Codebase Indexing”](#9-codebase-indexing) Warp can automatically **index your repositories** for faster, more context-aware responses.\ This makes it easier for agents to: * Summarize large codebases * Fix bugs * Handle refactors intelligently *** ### 10. File Tree View [Section titled “10. File Tree View”](#10-file-tree-view) Click the file-tree icon in Warp to **browse your entire repo** and open any file with a single click.
# Customize Warp's appearance
Canonical page: [/guides/getting-started/how-to-customize-warps-appearance/](https://docs.warp.dev/guides/getting-started/how-to-customize-warps-appearance/)
> Customize Warp's themes, input placement, AI settings, codebase indexing, team collaboration, and visual appearance to fit your workflow.
 Warp is highly customizable — from appearance and keyboard shortcuts to agent behavior and autonomy.\ \ Here’s a quick walkthrough of how to make Warp feel like *your* development environment. *** ### 1. Changing Themes [Section titled “1. Changing Themes”](#1-changing-themes) Open the **Command Palette** with: * `Cmd + P` (Mac) * `Ctrl + Shift + P` (Windows/Linux) Type **“themes”** to open the theme picker. You can preview and apply any theme instantly — for example, switching from the default theme to *Phenomenon*. *** ### 2. Adjusting Input Placement [Section titled “2. Adjusting Input Placement”](#2-adjusting-input-placement) Warp’s **input bar** can live in three different positions: 1. **Bottom-pinned** — chat-style; commands flow upward. 2. **Scrolling input** — traditional terminal style; input stays near the bottom as output moves up. 3. **Top-pinned** *(Warp-exclusive)* — input stays fixed at the top; results appear below. *** ### 3. Managing AI & Agent Settings [Section titled “3. Managing AI & Agent Settings”](#3-managing-ai--agent-settings) Open **Settings → AI** to control: * Which **model** Warp uses (e.g., Claude 3.5 for code generation, GPT-4o for planning). * How much **autonomy** agents have for: * Reading files * Generating diffs * Running commands * Planning tasks You can also allowlist or block specific commands that always require confirmation. *** ### 4. Indexing Your Codebases [Section titled “4. Indexing Your Codebases”](#4-indexing-your-codebases) Warp prompts you to index your codebase the first time you `cd` into it.\ Indexing enables faster: * Code navigation * Summaries and searches * Refactors and bug fixes You can also manually re-index a folder from the sidebar anytime. *** ### 5. Team Collaboration [Section titled “5. Team Collaboration”](#5-team-collaboration) In the Teams tab, you can: * Invite teammates * Share Warp Drive assets like prompts, templates, and environment variables This makes Warp a shared, contextual workspace — not just an individual tool. *** ### 6. Look & Feel [Section titled “6. Look & Feel”](#6-look--feel) Under Appearance, you can tweak: * Fonts * App icons * Padding and editor density * VIM mode for command editing * Custom key bindings
# How to Make Warp’s UI More Minimal
Canonical page: [/guides/getting-started/how-to-make-warps-ui-more-minimal/](https://docs.warp.dev/guides/getting-started/how-to-make-warps-ui-more-minimal/)
> Reduce visual noise in Warp by disabling UI elements, switching to a minimal theme, using the classic prompt, and hiding the tab bar.
 ### 1. Start with the Command Palette [Section titled “1. Start with the Command Palette”](#1-start-with-the-command-palette) Open the Command Palette: * Mac: `Cmd + P` * Windows/Linux: `Ctrl + Shift + P` From here, type “Disable” to see a full list of UI toggles.\ Warp will surface options that let you quickly hide features and visual elements. *** ### 2. Key UI Toggles to Disable [Section titled “2. Key UI Toggles to Disable”](#2-key-ui-toggles-to-disable) #### Inline & AI Features [Section titled “Inline & AI Features”](#inline--ai-features) * Disable Auto Suggestions → removes inline code hints. * Disable Active AI → hides the ghost prompt that suggests agent queries. * Disable Completion Menu → prevents popup completions from appearing. * Disable Voice Input → hides the microphone icon. #### Interface & Layout [Section titled “Interface & Layout”](#interface--layout) * Disable Block Dividers → removes the horizontal lines between commands. * Disable Tab Indicators → hides the colored status markers across your tab bar. * Disable Dimming Inactive Panes → keeps all split panes at equal brightness. * Disable VIM Status Bar → removes the VIM indicator if you’re not using VIM mode. *** ### 3. Choose a Simpler Theme [Section titled “3. Choose a Simpler Theme”](#3-choose-a-simpler-theme) Visual noise can come from colors too.\ Try switching to a calmer theme from the Command Palette: 1. Open the palette again (`Cmd + P`) 2. Type “Theme” 3. Pick one with softer tones — for example: * Adeberry → calm, gray, minimal aesthetic * Classic Dark → familiar and focused A consistent neutral palette makes Warp feel lighter and easier on the eyes. *** ### 4. Switch to the Classic Prompt [Section titled “4. Switch to the Classic Prompt”](#4-switch-to-the-classic-prompt) Warp’s Universal Prompt is great for AI workflows — it supports: * Slash commands * Voice input * Image context * Agent Mode But if you just want a terminal that behaves like a classic shell, switch to the Classic Prompt: 1. Open the Command Palette → search “Prompt” 2. Choose Classic Prompt 3. (Optional) Open the Prompt Customizer to toggle chips: * Keep only what you need (e.g., file path) * Hide everything else (branch name, context icons, etc.) This instantly gives Warp a retro, text-first look — no clutter, no distractions. *** ### 5. Reduce Tab Bar Visibility [Section titled “5. Reduce Tab Bar Visibility”](#5-reduce-tab-bar-visibility) You can make the tab bar appear only when you hover: * Open the Settings → Appearance * Enable “Show Tabs on Hover” This keeps your workspace focused while still letting you access tabs when needed.
# Master Warp's Code Review panel
Canonical page: [/guides/getting-started/how-to-master-warps-code-review-panel/](https://docs.warp.dev/guides/getting-started/how-to-master-warps-code-review-panel/)
> Use Warp's Code Review Panel to view file diffs, edit code inline, componentize changes, and commit directly — all without leaving the terminal.
 ### 1. Why Use the Code Review Panel [Section titled “1. Why Use the Code Review Panel”](#1-why-use-the-code-review-panel) Warp’s Code Review Panel helps you stay focused while coding by showing all active file diffs, additions, and deletions — without leaving your workspace. *** ### 2. Start with a Coding Task [Section titled “2. Start with a Coding Task”](#2-start-with-a-coding-task) The app has a UI issue: the hover text is black on dark gray, making it unreadable. Warp’s agent generates diffs with proposed fixes — but for larger projects, scrolling through them is inefficient. *** ### 3. Opening the Code Review Panel [Section titled “3. Opening the Code Review Panel”](#3-opening-the-code-review-panel) Click: * View Changes (top-left), or * The Dirty Chip in your input bar This opens the Code Review Panel — available only when inside a Git repo. The panel shows: * Changed files * Lines added/deleted * File-by-file diff summaries *** ### 4. Editing and Reviewing Code [Section titled “4. Editing and Reviewing Code”](#4-editing-and-reviewing-code) You can open any file directly from the panel in Warp’s **built-in editor**: * Syntax highlighting * Find & replace * Inline editing Save changes — and they’ll reflect instantly in the diff view. *** ### 5. Componentizing Changes [Section titled “5. Componentizing Changes”](#5-componentizing-changes) Want that same hover fix across the app?\ Prompt Warp to componentize the hover style. Attach the recent diff as context so Warp can generalize it.\ The agent then creates a `Tooltip` component that reuses your schema everywhere. *** ### 6. Reviewing and Committing [Section titled “6. Reviewing and Committing”](#6-reviewing-and-committing) Once the fix looks correct: * Review in the code panel * Commit directly from Warp * Watch the panel reset to its “no changes” state You can also click to compare your branch against `main` instantly.
# Welcome to Warp
Canonical page: [/guides/getting-started/welcome-to-warp/](https://docs.warp.dev/guides/getting-started/welcome-to-warp/)
> Get oriented with Warp's agentic terminal. Learn the basics of prompt-based coding, blending terminal and agent workflows, and navigating the interface.
 ### 1. Welcome to Warp [Section titled “1. Welcome to Warp”](#1-welcome-to-warp) When you open Warp, you’ll see something familiar — a command line interface — but it’s much more than a traditional terminal.\ \ Warp is an Agentic Development Environment (ADE), meaning it’s a space where your primary mode of interaction is through prompts to an agent. You can still use Warp just like any terminal: ```bash ls pwd ``` Warp executes those commands exactly as you’d expect.\ \ But when you type natural language — like *“describe my open git changes”* — Warp interprets it as a prompt to launch the agent. *** ### 2. Prompt-Based Coding [Section titled “2. Prompt-Based Coding”](#2-prompt-based-coding) When you ask something in plain English, Warp’s agent automatically: * Gathers relevant context (your repo, files, or command output) * Runs whatever commands are needed * Returns a structured answer or takes the requested action Example: > “Describe my open git changes.” Warp’s agent will review your current branch, run git commands in the background, and summarize what’s pending. *** ### 3. Blending Terminal and Agentic Workflows [Section titled “3. Blending Terminal and Agentic Workflows”](#3-blending-terminal-and-agentic-workflows) The beauty of Warp is in how seamlessly it blends traditional CLI workflows with AI-driven automation.\ You can: * Type commands like a normal shell * Or prompt an agent to do things like debugging, code review, or environment setup No context-switching between apps — it’s all one environment.