Getting Started: Installation, quickstart, and migration guides.
# Getting started with Warp and Oz
Canonical page: [/](https://docs.warp.dev/)
> Get started with Warp, the Agentic Development Environment, and Oz, the orchestration platform for cloud agents.
Warp is an [open source](https://github.com/warpdotdev/warp) **Agentic Development Environment** that combines a modern, high-performance terminal with powerful agents to help you build, test, deploy, and debug code. Warp’s agents are powered by **Oz**, the orchestration platform for running agents locally or in the cloud at scale. 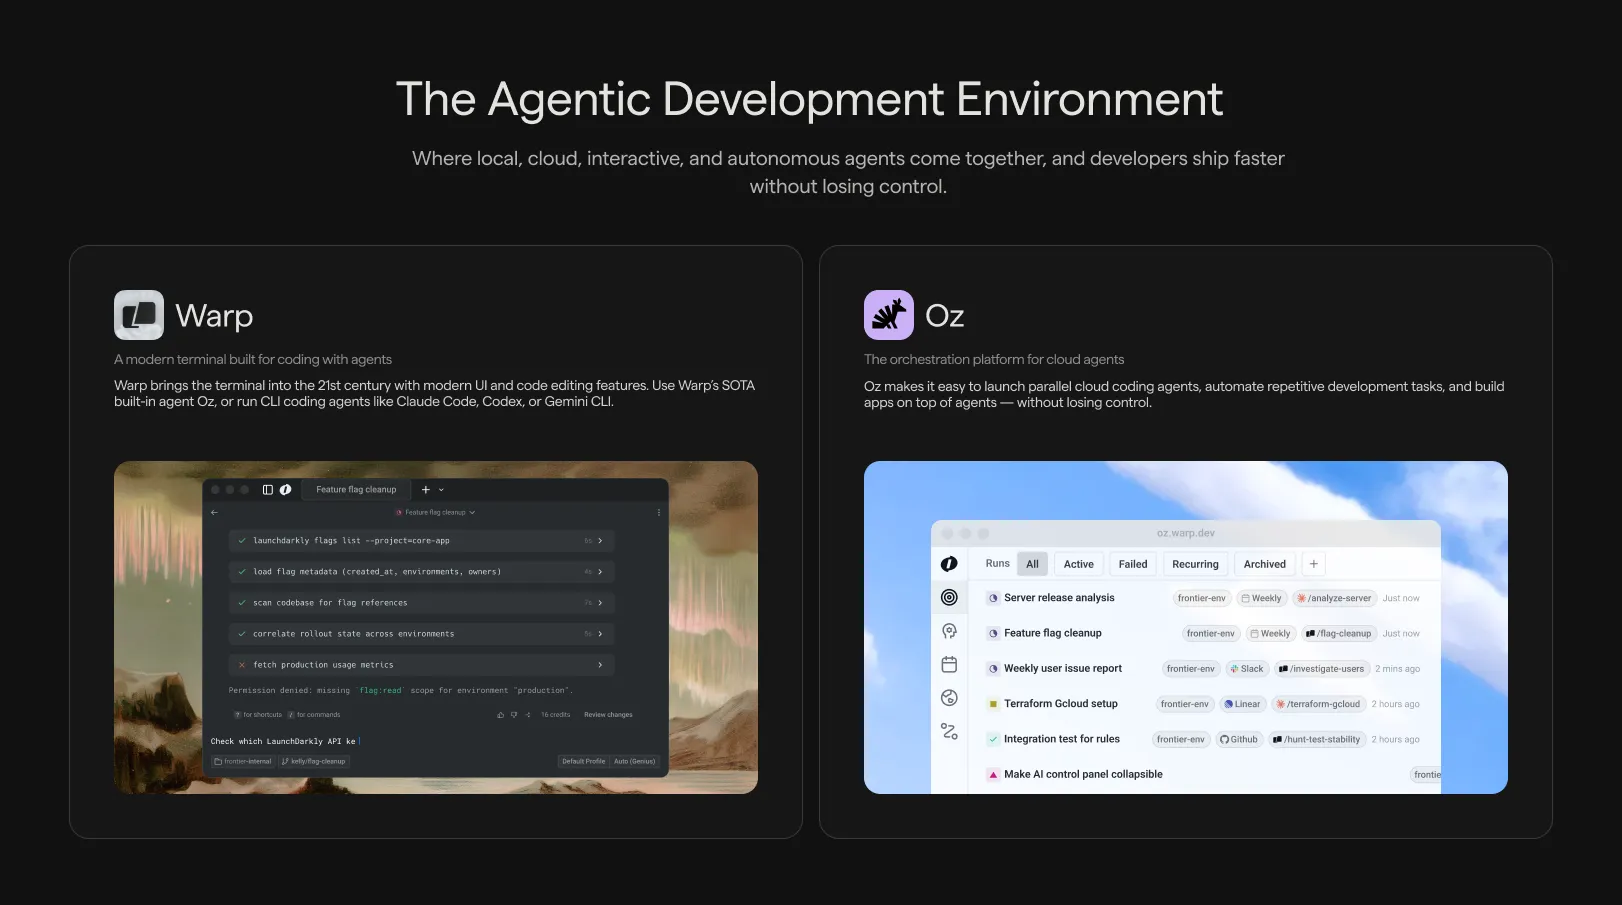 Warp terminal with Oz orchestration. *** ## Warp [Section titled “Warp”](#warp) Warp is where you work — a fast, modern terminal built for coding with agents. **Key capabilities:** * [**Terminal and Agent modes**](/agent-platform/local-agents/interacting-with-agents/terminal-and-agent-modes/): Switch between a clean terminal for commands and a dedicated conversation view for multi-turn agent workflows. * [**Modern terminal UX**](/terminal/editor/): Cursor movement, block-based navigation, multi-line editing, syntax highlighting, and rich completions. Built with Rust for high performance. * [**Code editor**](/code/overview/): File tree, code editor with LSP support, and interactive code review experience. * [**Third-Party CLI Agents**](/agent-platform/cli-agents/overview/): Run third-party CLI agents like Claude Code, Codex, and OpenCode with Warp’s agent toolbelt — rich input, code review, notifications, and more.  *** ## Oz: The orchestration platform for cloud agents [Section titled “Oz: The orchestration platform for cloud agents”](#oz-the-orchestration-platform-for-cloud-agents) Oz is the orchestration platform for cloud agents that powers all of Warp’s intelligent features. Oz is designed to coordinate agents at scale—understanding your codebase, executing tasks autonomously, and adapting to your workflows. Oz is multi-model by design, giving you flexibility to choose the best LLM for each task. Oz operates in two modes: ### Local agents [Section titled “Local agents”](#local-agents) Run directly in the Warp app for real-time, interactive coding assistance. * Write and refactor code across your codebase * Debug issues and fix errors * Run commands and interpret results * Plan and execute multi-step tasks Local agents keep you in control. You can review changes, steer the agent mid-task, and approve actions before they execute. → [Get started with local agents](/agent-platform/local-agents/overview/) ### Cloud agents [Section titled “Cloud agents”](#cloud-agents) Cloud agents run in the background on Warp’s infrastructure (or your own) for automation at scale. * **Triggers**: React to events from Slack, Linear, GitHub, or custom webhooks * **Schedules**: Run recurring tasks like dependency updates or dead code removal * **Parallelism**: Run many agents concurrently across repos or tasks * **Observability**: Every run is tracked, auditable, and shareable with your team Cloud agents are ideal for work that doesn’t need your immediate attention, like PR reviews, issue triage, routine maintenance, and integration-driven workflows. → [Learn about cloud agents](/agent-platform/cloud-agents/overview/) *** ## How they work together [Section titled “How they work together”](#how-they-work-together) Warp and Oz provide a unified experience across local and cloud development: * **Same agent, anywhere**: Whether you’re working interactively in Warp or running agents in the cloud, you’re using the same underlying agent capabilities. * **Seamless handoff**: Start a task in the cloud and take over locally in Warp when you want hands-on control, without losing progress or context. * **Shared context**: [Warp Drive](/knowledge-and-collaboration/warp-drive/), [Rules](/agent-platform/capabilities/rules/), and [MCP servers](/agent-platform/capabilities/mcp/) work across both local and cloud agents, so your team’s knowledge and tools are always available. * **Team collaboration**: Share agent sessions, review agents’ actions, and steer running tasks, regardless of who started them. *** ## Multi-model support [Section titled “Multi-model support”](#multi-model-support) Oz is multi-model by design. You can [choose your preferred LLM](/agent-platform/inference/model-choice/) from a curated set of top models. *** ## Open source [Section titled “Open source”](#open-source) Warp’s client is open source under [AGPL v3](https://github.com/warpdotdev/warp/blob/master/LICENSE-AGPL). The source lives at [`warpdotdev/warp`](https://github.com/warpdotdev/warp), where you can read the code, file issues, and contribute alongside the Warp team. Development happens in the open with an agent-first workflow managed by Oz. → [Contributing to Warp](/support-and-community/community/contributing/) explains how to file issues, claim work, and ship code or themes. *** ## Privacy and security [Section titled “Privacy and security”](#privacy-and-security) Warp is **SOC 2 compliant** and has **Zero Data Retention** policies with all contracted LLM providers. No customer AI data is retained, stored, or used for training. Warp’s AI features can be globally disabled in **Settings** > **Agents** > **Warp Agent**. → [Read more about data privacy](https://www.warp.dev/privacy) *** ## Next steps [Section titled “Next steps”](#next-steps) * [**Quickstart**](/quickstart/): Get Warp installed and start coding * [**Warp Agents overview**](/agent-platform/local-agents/overview/): Explore all AI features available in Warp * [**Cloud Agents Overview**](/agent-platform/cloud-agents/overview/): Set up background automation * [**Oz Platform**](/agent-platform/cloud-agents/platform/): Learn about the CLI, API, SDK, and infrastructure
# Keyboard Shortcuts
Canonical page: [/getting-started/keyboard-shortcuts/](https://docs.warp.dev/getting-started/keyboard-shortcuts/)
> View, customize, and remap keyboard shortcuts for all Warp features.
Warp opens with a shortcut screen showing some of the most commonly used keyboard shortcuts. Hide the shortcut screen by clicking the x button. Quickly view keyboard shortcuts via the [Command Palette](/terminal/command-palette/) or the Resource Center keyboard shortcut sidebar. ## Custom keyboard shortcuts [Section titled “Custom keyboard shortcuts”](#custom-keyboard-shortcuts) Set custom, clear, or default keyboard shortcuts by navigating to **Settings** > **Keyboard shortcuts**. Search through the re-mappable actions or existing shortcuts using the search bar. Remap the keyboard shortcuts using a file. See our [keysets repository](https://github.com/warpdotdev/keysets/tree/main) for instructions. Caution Keybinds that conflict with others are highlighted with an orange border. 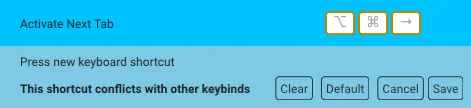 An example of a keybinding conflict warning. ## All available shortcuts [Section titled “All available shortcuts”](#all-available-shortcuts) * macOS **Warp Essentials** | Shortcut | Command | Action | | -------------- | ---------------------------- | ---------------------------------------------- | | `CMD-D` | Split Pane Right | `pane_group:add_right` | | `CTRL-CMD-L` | Launch Configuration Palette | `workspace:toggle_launch_config_palette` | | `CTRL-CMD-T` | Open Theme Picker | `workspace:show_theme_chooser` | | `CTRL-R` | Command Search | `workspace:show_command_search` | | `CTRL-SHIFT-R` | Workflows | `input:toggle_workflows` | | `` CTRL-` `` | Generate | `input:toggle_natural_language_command_search` | | `CMD-L` | Focus Terminal Input | `terminal:focus_input` | | `CTRL-I` | Warpify Subshell | `terminal:trigger_subshell_bootstrap` | | `CMD-\` | Warp Drive | `terminal:toggle_warp_drive` | | `CMD-O` | File search | | | `CMD-P` | Open Command Palette | | **Blocks** | Shortcut | Command | Action | | ----------------- | --------------------------------- | ------------------------------------------------------ | | `ALT-DOWN` | Select the Closest Bookmark Down | `terminal:select_bookmark_down` | | `ALT-SHIFT-CMD-C` | Copy Command Output | `terminal:copy_outputs` | | `ALT-UP` | Select the Closest Bookmark Up | `terminal:select_bookmark_up` | | `CMD-A` | Select All Blocks | `terminal:select_all_blocks` | | `CMD-K` | Clear Blocks | `terminal:clear_blocks` | | `CMD-B` | Bookmark Selected Block | `terminal:bookmark_selected_block` | | `CMD-DOWN` | Select Next Block | `terminal:select_next_block` | | `CMD-I` | Reinput Selected Commands | `terminal:reinput_commands` | | `CMD-UP` | Select Previous Block | `terminal:select_previous_block` | | `CTRL-M` | Open Block Context Menu | `terminal:open_block_list_context_menu_via_keybinding` | | `SHIFT-CMD-C` | Copy Command | `terminal:copy_commands` | | `SHIFT-CMD-I` | Reinput Selected Commands as Root | `terminal:reinput_commands_with_sudo` | | `SHIFT-CMD-S` | Share Selected Block | `terminal:open_share_modal` | | `SHIFT-DOWN` | Expand Selected Blocks Below | `terminal:expand_block_selection_below` | | `SHIFT-UP` | Expand Selected Blocks Above | `terminal:expand_block_selection_above` | **Scrolling** | Shortcut | Command | Action | | ---------------- | ------------------------------------ | --------------------------------------------- | | `PAGE UP` | Scroll Up One Page | `terminal:page_up` | | `PAGE DOWN` | Scroll Down One Page | `terminal:page_down` | | `HOME` | Scroll to Top | `terminal:home` | | `END` | Scroll to Bottom | `terminal:end` | | `SHIFT-CMD-UP` | Scroll to Top of Selected Block | `terminal:scroll_to_top_of_selected_block` | | `SHIFT-CMD-DOWN` | Scroll to Bottom of Selected Block | `terminal:scroll_to_bottom_of_selected_block` | | | Scroll Terminal Output Up One Line | `terminal:scroll_up_one_line` | | | Scroll Terminal Output Down One Line | `terminal:scroll_down_one_line` | **Input Editor** | Shortcut | Command | Action | | ----------------- | ----------------------------------------- | ------------------------------------------ | | `ALT-BACKSPACE` | Delete Word Left | `editor:delete_word_left` | | `ALT-CMD-F` | Fold Selected Ranges | `editor_view:fold_selected_ranges` | | `ALT-CMD-[` | Fold | `editor_view:fold` | | `ALT-CMD-]` | Unfold | `editor_view:unfold` | | `ALT-DELETE` | Delete Word Right | `editor:delete_word_right` | | `CMD-A` | Select All | `editor_view:select_all` | | `CMD-BACKSPACE` | Delete All Left | `editor_view:delete_all_left` | | `CMD-DELETE` | Delete All Right | `editor_view:delete_all_right` | | `CMD-DOWN` | Move Cursor to the Bottom | `editor_view:cmd_down` | | `CMD-I` | Inspect Command | `editor_view:cmd_i` | | `CMD-LEFT` | Home | `editor_view:home` | | `CMD-RIGHT` | End | `editor_view:end` | | `CTRL-A` | Move to Start of Line | `editor_view:move_to_line_start` | | `CTRL-B` | Move Cursor Left | `editor_view:left` | | `CTRL-C` | Clear Command Editor | `editor_view:clear_buffer` | | `CTRL-D` | Delete | `editor_view:delete` | | `CTRL-E` | Move to End of Line | `editor_view:move_to_line_end` | | `CTRL-F` | Move Cursor Right / Accept Autosuggestion | `editor_view:right` | | `CTRL-G` | Add Selection for Next Occurrence | `editor_view:add_next_occurrence` | | `CTRL-H` | Remove the Previous Character | `editor_view:backspace` | | `CTRL-J` | Insert Newline | `editor_view:insert_newline` | | `CTRL-K` | Cut All Right | `editor_view:cut_all_right` | | `CTRL-L` | Clear Screen | `input:clear_screen` | | `CTRL-N` | Move Cursor Down | `editor_view:down` | | `CTRL-P` | Move Cursor Up | `editor_view:up` | | `CTRL-SHIFT-A` | Select to Start of Line | `editor_view:select_to_line_start` | | `CTRL-SHIFT-B` | Select One Character to the Left | `editor_view:select_left` | | `CTRL-SHIFT-DOWN` | Add Cursor Below | `editor_view:add_cursor_below` | | `CTRL-SHIFT-E` | Select to End of Line | `editor:select_to_line_end` | | `CMD-Z` | Undo | `editor:undo` | | `CMD-SHIFT-Z` | Redo | `editor:redo` | | `CTRL-SHIFT-F` | Select One Character to the Right | `editor:select_right` | | `CTRL-SHIFT-N` | Select Down | `editor_view:select_down` | | `CTRL-SHIFT-P` | Select Up | `editor_view:select_up` | | `CTRL-SHIFT-UP` | Add Cursor Above | `editor_view:add_cursor_above` | | `CTRL-U` | Copy and Clear Selected Lines | `editor_view:clear_and_copy_lines` | | `CTRL-W` | Cut Word Left | `editor_view:cut_word_left` | | `META-.` | Insert Last Word of Previous Command | `editor:insert_last_word_previous_command` | | `META-A` | Move to the Start of the Paragraph | `editor_view:move_to_paragraph_start` | | `META-B` | Move Backward One Word | `editor_view:move_backward_one_word` | | `META-D` | Cut Word Right | `editor_view:cut_word_right` | | `META-E` | Move to the End of the Paragraph | `editor_view:move_to_paragraph_end` | | `META-F` | Move Forward One Word | `editor_view:move_forward_one_word` | | `CTRL-OPT-LEFT` | Move Backward One Subword | `editor_view:move_backward_one_subword` | | `CTRL-OPT-RIGHT` | Move Forward One Subword | `editor_view:move_forward_one_subword` | | `SHIFT-CMD-K` | Clear Selected Lines | `editor_view:clear_lines` | | `SHIFT-META-<` | Move to the Start of the Buffer | `editor_view:move_to_buffer_start` | | `SHIFT-META->` | Move to the End of the Buffer | `editor_view:move_to_buffer_end` | | `SHIFT-META-B` | Select One Word to the Left | `editor_view:select_left_by_word` | | `SHIFT-META-F` | Select One Word to the Right | `editor_view:select_right_by_word` | **Terminal** | Shortcut | Command | Action | | ----------------- | ------------------------------------------------- | -------------------------------------------- | | `ALT-CMD-DOWN` | Switch Panes Down | `pane_group:navigate_down` | | `ALT-CMD-LEFT` | Switch Panes Left | `pane_group:navigate_left` | | `ALT-CMD-RIGHT` | Switch Panes Right | `pane_group:navigate_right` | | `ALT-CMD-UP` | Switch Panes Up | `pane_group:navigate_up` | | `ALT-CMD-V` | \[a11y] Set Concise Accessibility Announcements | `workspace:set_a11y_concise_verbosity_level` | | `ALT-CMD-V` | \[a11y] Set Verbose Accessibility Announcements | `workspace:set_a11y_verbose_verbosity_level` | | `CMD-,` | Open Settings | `workspace:show_settings_modal` | | `CMD-,` | Open Settings: Account | `workspace:show_settings_account_page` | | `CMD-G` | Find the Next Occurrence of Your Search Query | `find:find_next_occurrence` | | `CMD-P` | Toggle Command Palette | `workspace:toggle_command_palette` | | | Toggle Mouse Reporting | `workspace:toggle_mouse_reporting` | | `CMD-[` | Activate Previous Pane | `pane_group:navigate_prev` | | `CMD-]` | Activate Next Pane | `pane_group:navigate_next` | | `CTRL-CMD-DOWN` | Resize Pane > Move Divider Down | `pane_group:resize_down` | | `CTRL-CMD-K` | Open Keybindings Editor | `workspace:show_keybinding_settings` | | `CTRL-CMD-LEFT` | Resize Pane > Move Divider Left | `pane_group:resize_left` | | `CTRL-CMD-RIGHT` | Resize Pane > Move Divider Right | `pane_group:resize_right` | | `CTRL-CMD-UP` | Resize Pane > Move Divider Up | `pane_group:resize_up` | | `CTRL-SHIFT-?` | Open Resource Center | `workspace:toggle_resource_center` | | `SHIFT-CMD-D` | Split Pane Down | `pane_group:add_down` | | `SHIFT-CMD-ENTER` | Toggle Maximize Active Pane | `pane_group:toggle_maximize_pane` | | `SHIFT-CMD-G` | Find the Previous Occurrence of Your Search Query | `find:find_prev_occurrence` | | `SHIFT-CMD-P` | Toggle Navigation Palette | `workspace:toggle_navigation_palette` | **Fundamentals** | Shortcut | Command | Action | | ------------------ | -------------------------- | -------------------------------- | | `CMD--` | Decrease Font Size | `workspace:decrease_font_size` | | `CMD-0` | Reset Font Size to Default | `workspace:reset_font_size` | | `CMD-1` | Switch to 1st Tab | `workspace:activate_first_tab` | | `CMD-2` | Switch to 2nd Tab | `workspace:activate_second_tab` | | `CMD-3` | Switch to 3rd Tab | `workspace:activate_third_tab` | | `CMD-4` | Switch to 4th Tab | `workspace:activate_fourth_tab` | | `CMD-5` | Switch to 5th Tab | `workspace:activate_fifth_tab` | | `CMD-6` | Switch to 6th Tab | `workspace:activate_sixth_tab` | | `CMD-7` | Switch to 7th Tab | `workspace:activate_seventh_tab` | | `CMD-8` | Switch to 8th Tab | `workspace:activate_eighth_tab` | | `CMD-9` | Switch to Last Tab | `workspace:activate_last_tab` | | `CMD-=` | Increase Font Size | `workspace:increase_font_size` | | `CMD-C` | Copy | `terminal:copy` | | `CMD-F` | Find | `terminal:find` | | `CMD-V` | Paste | `terminal:paste` | | `CMD-T` | Open New Tab | `workspace:open_new_tab` | | `SHIFT-CMD-T` | Reopen Closed Tab | `workspace:reopen_closed_tab` | | `CTRL-SHIFT-LEFT` | Move Tab Left | `workspace:move_tab_left` | | `CTRL-SHIFT-RIGHT` | Move Tab Right | `workspace:move_tab_right` | | `SHIFT-CMD-{` | Activate Previous Tab | `workspace:activate_prev_tab` | | `SHIFT-CMD-}` | Activate Next Tab | `workspace:activate_next_tab` | * Windows **Warp Essentials** | Shortcut | Command | Action | | -------------- | ---------------------------- | ---------------------------------------------- | | `CTRL-SHIFT-D` | Split Pane Right | `pane_group:add_right` | | | Launch Configuration Palette | `workspace:toggle_launch_config_palette` | | | Open Theme Picker | `workspace:show_theme_chooser` | | `CTRL-R` | Command Search | `workspace:show_command_search` | | `CTRL-SHIFT-R` | Workflows | `input:toggle_workflows` | | `` CTRL-` `` | Generate | `input:toggle_natural_language_command_search` | | `CTRL-SHIFT-L` | Focus Terminal Input | `terminal:focus_input` | | `CTRL-I` | Warpify Subshell | `terminal:trigger_subshell_bootstrap` | | `CTRL-SHIFT-\` | Warp Drive | `terminal:toggle_warp_drive` | **Blocks** | Shortcut | Command | Action | | ------------------ | --------------------------------- | ------------------------------------------------------ | | `ALT-DOWN` | Select the Closest Bookmark Down | `terminal:select_bookmark_down` | | `CTRL-SHIFT-ALT-C` | Copy Command Output | `terminal:copy_outputs` | | `ALT-UP` | Select the Closest Bookmark Up | `terminal:select_bookmark_up` | | `CTRL-SHIFT-A` | Select All Blocks | `terminal:select_all_blocks` | | `CTRL-SHIFT-K` | Clear Blocks | `terminal:clear_blocks` | | `CTRL-SHIFT-B` | Bookmark Selected Block | `terminal:bookmark_selected_block` | | `CTRL-DOWN` | Select Next Block | `terminal:select_next_block` | | `CTRL-SHIFT-I` | Reinput Selected Commands | `terminal:reinput_commands` | | `CTRL-UP` | Select Previous Block | `terminal:select_previous_block` | | | Open Block Context Menu | `terminal:open_block_list_context_menu_via_keybinding` | | `CTRL-SHIFT-C` | Copy Command | `terminal:copy_commands` | | | Reinput Selected Commands as Root | `terminal:reinput_commands_with_sudo` | | `CTRL-SHIFT-S` | Share Selected Block | `terminal:open_share_modal` | | `SHIFT-DOWN` | Expand Selected Blocks Below | `terminal:expand_block_selection_below` | | `SHIFT-UP` | Expand Selected Blocks Above | `terminal:expand_block_selection_above` | **Scrolling** | Shortcut | Command | Action | | ----------------- | ------------------------------------ | --------------------------------------------- | | `PAGE UP` | Scroll Up One Page | `terminal:page_up` | | `PAGE DOWN` | Scroll Down One Page | `terminal:page_down` | | `HOME` | Scroll to Top | `terminal:home` | | `END` | Scroll to Bottom | `terminal:end` | | `CTRL-SHIFT-UP` | Scroll to Top of Selected Block | `terminal:scroll_to_top_of_selected_block` | | `CTRL-SHIFT-DOWN` | Scroll to Bottom of Selected Block | `terminal:scroll_to_bottom_of_selected_block` | | | Scroll Terminal Output Up One Line | `terminal:scroll_up_one_line` | | | Scroll Terminal Output Down One Line | `terminal:scroll_down_one_line` | **Input Editor** | Shortcut | Command | Action | | ------------------ | ----------------------------------------- | ------------------------------------------ | | `CTRL-BACKSPACE` | Delete Word Left | `editor:delete_word_left` | | `CTRL-ALT-F` | Fold Selected Ranges | `editor_view:fold_selected_ranges` | | `CTRL-ALT-[` | Fold | `editor_view:fold` | | `CTRL-ALT-]` | Unfold | `editor_view:unfold` | | `CTRL-DELETE` | Delete Word Right | `editor:delete_word_right` | | `CTRL-A` | Select All | `editor_view:select_all` | | `CTRL-Y` | Delete All Left | `editor_view:delete_all_left` | | | Delete All Right | `editor_view:delete_all_right` | | `CTRL-END` | Move Cursor to the Bottom | `editor_view:cmd_down` | | `CTRL-I` | Inspect Command | `editor_view:cmd_i` | | `HOME` | Home | `editor_view:home` | | `END` | End | `editor_view:end` | | `CTRL-A` | Move to Start of Line | `editor_view:move_to_line_start` | | `CTRL-B` | Move Cursor Left | `editor_view:left` | | `CTRL-C` | Clear Command Editor | `editor_view:clear_buffer` | | `CTRL-D` | Delete | `editor_view:delete` | | `CTRL-E` | Move to End of Line | `editor_view:move_to_line_end` | | `CTRL-F` | Move Cursor Right / Accept Autosuggestion | `editor_view:right` | | `CTRL-G` | Add Selection for Next Occurrence | `editor_view:add_next_occurrence` | | `CTRL-H` | Remove the Previous Character | `editor_view:backspace` | | `CTRL-J` | Insert Newline | `editor_view:insert_newline` | | `CTRL-K` | Cut All Right | `editor_view:cut_all_right` | | `CTRL-L` | Clear Screen | `input:clear_screen` | | `CTRL-N` | Move Cursor Down | `editor_view:down` | | `CTRL-P` | Move Cursor Up | `editor_view:up` | | | Select to Start of Line | `editor_view:select_to_line_start` | | `CTRL-SHIFT-B` | Select One Character to the Left | `editor_view:select_left` | | `CTRL-SHIFT-DOWN` | Add Cursor Below | `editor_view:add_cursor_below` | | | Select to End of Line | `editor:select_to_line_end` | | `CTRL-Z` | Undo | `editor:undo` | | `CTRL-SHIFT-Z` | Redo | `editor:redo` | | `CTRL-SHIFT-F` | Select One Character to the Right | `editor:select_right` | | | Select Down | `editor_view:select_down` | | `CTRL-SHIFT-P` | Select Up | `editor_view:select_up` | | `CTRL-SHIFT-UP` | Add Cursor Above | `editor_view:add_cursor_above` | | `CTRL-U` | Copy and Clear Selected Lines | `editor_view:clear_and_copy_lines` | | `CTRL-W` | Cut Word Left | `editor_view:cut_word_left` | | `META-.` | Insert Last Word of Previous Command | `editor:insert_last_word_previous_command` | | `META-A` | Move to the Start of the Paragraph | `editor_view:move_to_paragraph_start` | | `CTRL-LEFT` | Move Backward One Word | `editor_view:move_backward_one_word` | | `ALT-D` | Cut Word Right | `editor_view:cut_word_right` | | `META-E` | Move to the End of the Paragraph | `editor_view:move_to_paragraph_end` | | `CTRL-RIGHT` | Move Forward One Word | `editor_view:move_forward_one_word` | | `CTRL-ALT-LEFT` | Move Backward One Subword | `editor_view:move_backward_one_subword` | | `CTRL-ALT-RIGHT` | Move Forward One Subword | `editor_view:move_forward_one_subword` | | `SHIFT-META-<` | Move to the Start of the Buffer | `editor_view:move_to_buffer_start` | | `SHIFT-META->` | Move to the End of the Buffer | `editor_view:move_to_buffer_end` | | `CTRL-SHIFT-LEFT` | Select One Word to the Left | `editor_view:select_left_by_word` | | `CTRL-SHIFT-RIGHT` | Select One Word to the Right | `editor_view:select_right_by_word` | **Terminal** | Shortcut | Command | Action | | ------------------ | ------------------------------------------------- | -------------------------------------------- | | `CTRL-ALT-DOWN` | Switch Panes Down | `pane_group:navigate_down` | | `CTRL-ALT-LEFT` | Switch Panes Left | `pane_group:navigate_left` | | `CTRL-ALT-RIGHT` | Switch Panes Right | `pane_group:navigate_right` | | `CTRL-ALT-UP` | Switch Panes Up | `pane_group:navigate_up` | | `CTRL-ALT-V` | \[a11y] Set Concise Accessibility Announcements | `workspace:set_a11y_concise_verbosity_level` | | `CTRL-ALT-V` | \[a11y] Set Verbose Accessibility Announcements | `workspace:set_a11y_verbose_verbosity_level` | | `CTRL-,` | Open Settings | `workspace:show_settings_modal` | | `CTRL-,` | Open Settings: Account | `workspace:show_settings_account_page` | | `F3` | Find the Next Occurrence of Your Search Query | `find:find_next_occurrence` | | `CTRL-SHIFT-P` | Toggle Command Palette | `workspace:toggle_command_palette` | | | Toggle Mouse Reporting | `workspace:toggle_mouse_reporting` | | `CTRL-SHIFT-[` | Activate Previous Pane | `pane_group:navigate_prev` | | `CTRL-SHIFT-]` | Activate Next Pane | `pane_group:navigate_next` | | | Resize Pane > Move Divider Down | `pane_group:resize_down` | | `CTRL-CMD-K` | Open Keybindings Editor | `workspace:show_keybinding_settings` | | | Resize Pane > Move Divider Left | `pane_group:resize_left` | | | Resize Pane > Move Divider Right | `pane_group:resize_right` | | | Resize Pane > Move Divider Up | `pane_group:resize_up` | | `CTRL-SHIFT-/` | Open Resource Center | `workspace:toggle_resource_center` | | `CTRL-SHIFT-E` | Split Pane Down | `pane_group:add_down` | | `CTRL-SHIFT-ENTER` | Toggle Maximize Active Pane | `pane_group:toggle_maximize_pane` | | `SHIFT-F3` | Find the Previous Occurrence of Your Search Query | `find:find_prev_occurrence` | | | Toggle Navigation Palette | `workspace:toggle_navigation_palette` | **Fundamentals** | Shortcut | Command | Action | | ------------------ | -------------------------- | -------------------------------- | | `CTRL--` | Decrease Font Size | `workspace:decrease_font_size` | | `CTRL-0` | Reset Font Size to Default | `workspace:reset_font_size` | | `CTRL-1` | Switch to 1st Tab | `workspace:activate_first_tab` | | `CTRL-2` | Switch to 2nd Tab | `workspace:activate_second_tab` | | `CTRL-3` | Switch to 3rd Tab | `workspace:activate_third_tab` | | `CTRL-4` | Switch to 4th Tab | `workspace:activate_fourth_tab` | | `CTRL-5` | Switch to 5th Tab | `workspace:activate_fifth_tab` | | `CTRL-6` | Switch to 6th Tab | `workspace:activate_sixth_tab` | | `CTRL-7` | Switch to 7th Tab | `workspace:activate_seventh_tab` | | `CTRL-8` | Switch to 8th Tab | `workspace:activate_eighth_tab` | | `CTRL-9` | Switch to Last Tab | `workspace:activate_last_tab` | | `CTRL-=` | Increase Font Size | `workspace:increase_font_size` | | `CTRL-SHIFT-C` | Copy | `terminal:copy` | | `CTRL-SHIFT-F` | Find | `terminal:find` | | `CTRL-SHIFT-V` | Paste | `terminal:paste` | | `CTRL-SHIFT-T` | Open New Tab | `workspace:open_new_tab` | | `CTRL-ALT-T` | Reopen Closed Tab | `workspace:reopen_closed_tab` | | `CTRL-SHIFT-LEFT` | Move Tab Left | `workspace:move_tab_left` | | `CTRL-SHIFT-RIGHT` | Move Tab Right | `workspace:move_tab_right` | | `CTRL-PAGEUP` | Activate Previous Tab | `workspace:activate_prev_tab` | | `CTRL-PAGEDOWN` | Activate Next Tab | `workspace:activate_next_tab` | * Linux **Warp Essentials** | Shortcut | Command | Action | | -------------- | ---------------------------- | ---------------------------------------------- | | `CTRL-SHIFT-D` | Split Pane Right | `pane_group:add_right` | | | Launch Configuration Palette | `workspace:toggle_launch_config_palette` | | | Open Theme Picker | `workspace:show_theme_chooser` | | `CTRL-R` | Command Search | `workspace:show_command_search` | | `CTRL-SHIFT-R` | Workflows | `input:toggle_workflows` | | `` CTRL-` `` | Generate | `input:toggle_natural_language_command_search` | | `CTRL-SHIFT-L` | Focus Terminal Input | `terminal:focus_input` | | `CTRL-I` | Warpify Subshell | `terminal:trigger_subshell_bootstrap` | | `CTRL-SHIFT-\` | Warp Drive | `terminal:toggle_warp_drive` | **Blocks** | Shortcut | Command | Action | | ------------------ | --------------------------------- | ------------------------------------------------------ | | `ALT-DOWN` | Select the Closest Bookmark Down | `terminal:select_bookmark_down` | | `CTRL-SHIFT-ALT-C` | Copy Command Output | `terminal:copy_outputs` | | `ALT-UP` | Select the Closest Bookmark Up | `terminal:select_bookmark_up` | | `CTRL-SHIFT-A` | Select All Blocks | `terminal:select_all_blocks` | | `CTRL-SHIFT-K` | Clear Blocks | `terminal:clear_blocks` | | `CTRL-SHIFT-B` | Bookmark Selected Block | `terminal:bookmark_selected_block` | | `CTRL-DOWN` | Select Next Block | `terminal:select_next_block` | | `CTRL-SHIFT-I` | Reinput Selected Commands | `terminal:reinput_commands` | | `CTRL-UP` | Select Previous Block | `terminal:select_previous_block` | | | Open Block Context Menu | `terminal:open_block_list_context_menu_via_keybinding` | | `CTRL-SHIFT-C` | Copy Command | `terminal:copy_commands` | | | Reinput Selected Commands as Root | `terminal:reinput_commands_with_sudo` | | `CTRL-SHIFT-S` | Share Selected Block | `terminal:open_share_modal` | | `SHIFT-DOWN` | Expand Selected Blocks Below | `terminal:expand_block_selection_below` | | `SHIFT-UP` | Expand Selected Blocks Above | `terminal:expand_block_selection_above` | **Scrolling** | Shortcut | Command | Action | | ----------------- | ------------------------------------ | --------------------------------------------- | | `PAGE UP` | Scroll Up One Page | `terminal:page_up` | | `PAGE DOWN` | Scroll Down One Page | `terminal:page_down` | | `HOME` | Scroll to Top | `terminal:home` | | `END` | Scroll to Bottom | `terminal:end` | | `CTRL-SHIFT-UP` | Scroll to Top of Selected Block | `terminal:scroll_to_top_of_selected_block` | | `CTRL-SHIFT-DOWN` | Scroll to Bottom of Selected Block | `terminal:scroll_to_bottom_of_selected_block` | | | Scroll Terminal Output Up One Line | `terminal:scroll_up_one_line` | | | Scroll Terminal Output Down One Line | `terminal:scroll_down_one_line` | **Input Editor** | Shortcut | Command | Action | | ------------------ | ----------------------------------------- | ------------------------------------------ | | `CTRL-BACKSPACE` | Delete Word Left | `editor:delete_word_left` | | `CTRL-ALT-F` | Fold Selected Ranges | `editor_view:fold_selected_ranges` | | `CTRL-ALT-[` | Fold | `editor_view:fold` | | `CTRL-ALT-]` | Unfold | `editor_view:unfold` | | `CTRL-DELETE` | Delete Word Right | `editor:delete_word_right` | | `CTRL-A` | Select All | `editor_view:select_all` | | `CTRL-Y` | Delete All Left | `editor_view:delete_all_left` | | | Delete All Right | `editor_view:delete_all_right` | | `CTRL-END` | Move Cursor to the Bottom | `editor_view:cmd_down` | | `CTRL-I` | Inspect Command | `editor_view:cmd_i` | | `HOME` | Home | `editor_view:home` | | `END` | End | `editor_view:end` | | `CTRL-A` | Move to Start of Line | `editor_view:move_to_line_start` | | `CTRL-B` | Move Cursor Left | `editor_view:left` | | `CTRL-C` | Clear Command Editor | `editor_view:clear_buffer` | | `CTRL-D` | Delete | `editor_view:delete` | | `CTRL-E` | Move to End of Line | `editor_view:move_to_line_end` | | `CTRL-F` | Move Cursor Right / Accept Autosuggestion | `editor_view:right` | | `CTRL-G` | Add Selection for Next Occurrence | `editor_view:add_next_occurrence` | | `CTRL-H` | Remove the Previous Character | `editor_view:backspace` | | `CTRL-J` | Insert Newline | `editor_view:insert_newline` | | `CTRL-K` | Cut All Right | `editor_view:cut_all_right` | | `CTRL-L` | Clear Screen | `input:clear_screen` | | `CTRL-N` | Move Cursor Down | `editor_view:down` | | `CTRL-P` | Move Cursor Up | `editor_view:up` | | | Select to Start of Line | `editor_view:select_to_line_start` | | `CTRL-SHIFT-B` | Select One Character to the Left | `editor_view:select_left` | | `CTRL-SHIFT-DOWN` | Add Cursor Below | `editor_view:add_cursor_below` | | | Select to End of Line | `editor:select_to_line_end` | | `CTRL-Z` | Undo | `editor:undo` | | `CTRL-SHIFT-Z` | Redo | `editor:redo` | | `CTRL-SHIFT-F` | Select One Character to the Right | `editor:select_right` | | | Select Down | `editor_view:select_down` | | `CTRL-SHIFT-P` | Select Up | `editor_view:select_up` | | `CTRL-SHIFT-UP` | Add Cursor Above | `editor_view:add_cursor_above` | | `CTRL-U` | Copy and Clear Selected Lines | `editor_view:clear_and_copy_lines` | | `CTRL-W` | Cut Word Left | `editor_view:cut_word_left` | | `META-.` | Insert Last Word of Previous Command | `editor:insert_last_word_previous_command` | | `META-A` | Move to the Start of the Paragraph | `editor_view:move_to_paragraph_start` | | `CTRL-LEFT` | Move Backward One Word | `editor_view:move_backward_one_word` | | `ALT-D` | Cut Word Right | `editor_view:cut_word_right` | | `META-E` | Move to the End of the Paragraph | `editor_view:move_to_paragraph_end` | | `CTRL-RIGHT` | Move Forward One Word | `editor_view:move_forward_one_word` | | `CTRL-ALT-LEFT` | Move Backward One Subword | `editor_view:move_backward_one_subword` | | `CTRL-ALT-RIGHT` | Move Forward One Subword | `editor_view:move_forward_one_subword` | | `SHIFT-META-<` | Move to the Start of the Buffer | `editor_view:move_to_buffer_start` | | `SHIFT-META->` | Move to the End of the Buffer | `editor_view:move_to_buffer_end` | | `CTRL-SHIFT-LEFT` | Select One Word to the Left | `editor_view:select_left_by_word` | | `CTRL-SHIFT-RIGHT` | Select One Word to the Right | `editor_view:select_right_by_word` | **Terminal** | Shortcut | Command | Action | | ------------------ | ------------------------------------------------- | -------------------------------------------- | | `CTRL-ALT-DOWN` | Switch Panes Down | `pane_group:navigate_down` | | `CTRL-ALT-LEFT` | Switch Panes Left | `pane_group:navigate_left` | | `CTRL-ALT-RIGHT` | Switch Panes Right | `pane_group:navigate_right` | | `CTRL-ALT-UP` | Switch Panes Up | `pane_group:navigate_up` | | `CTRL-ALT-V` | \[a11y] Set Concise Accessibility Announcements | `workspace:set_a11y_concise_verbosity_level` | | `CTRL-ALT-V` | \[a11y] Set Verbose Accessibility Announcements | `workspace:set_a11y_verbose_verbosity_level` | | `CTRL-,` | Open Settings | `workspace:show_settings_modal` | | `CTRL-,` | Open Settings: Account | `workspace:show_settings_account_page` | | `F3` | Find the Next Occurrence of Your Search Query | `find:find_next_occurrence` | | `CTRL-SHIFT-P` | Toggle Command Palette | `workspace:toggle_command_palette` | | | Toggle Mouse Reporting | `workspace:toggle_mouse_reporting` | | `CTRL-SHIFT-[` | Activate Previous Pane | `pane_group:navigate_prev` | | `CTRL-SHIFT-]` | Activate Next Pane | `pane_group:navigate_next` | | | Resize Pane > Move Divider Down | `pane_group:resize_down` | | `CTRL-CMD-K` | Open Keybindings Editor | `workspace:show_keybinding_settings` | | | Resize Pane > Move Divider Left | `pane_group:resize_left` | | | Resize Pane > Move Divider Right | `pane_group:resize_right` | | | Resize Pane > Move Divider Up | `pane_group:resize_up` | | `CTRL-SHIFT-/` | Open Resource Center | `workspace:toggle_resource_center` | | `CTRL-SHIFT-E` | Split Pane Down | `pane_group:add_down` | | `CTRL-SHIFT-ENTER` | Toggle Maximize Active Pane | `pane_group:toggle_maximize_pane` | | `SHIFT-F3` | Find the Previous Occurrence of Your Search Query | `find:find_prev_occurrence` | | | Toggle Navigation Palette | `workspace:toggle_navigation_palette` | **Fundamentals** | Shortcut | Command | Action | | ------------------ | -------------------------- | -------------------------------- | | `CTRL--` | Decrease Font Size | `workspace:decrease_font_size` | | `CTRL-0` | Reset Font Size to Default | `workspace:reset_font_size` | | `CTRL-1` | Switch to 1st Tab | `workspace:activate_first_tab` | | `CTRL-2` | Switch to 2nd Tab | `workspace:activate_second_tab` | | `CTRL-3` | Switch to 3rd Tab | `workspace:activate_third_tab` | | `CTRL-4` | Switch to 4th Tab | `workspace:activate_fourth_tab` | | `CTRL-5` | Switch to 5th Tab | `workspace:activate_fifth_tab` | | `CTRL-6` | Switch to 6th Tab | `workspace:activate_sixth_tab` | | `CTRL-7` | Switch to 7th Tab | `workspace:activate_seventh_tab` | | `CTRL-8` | Switch to 8th Tab | `workspace:activate_eighth_tab` | | `CTRL-9` | Switch to Last Tab | `workspace:activate_last_tab` | | `CTRL-=` | Increase Font Size | `workspace:increase_font_size` | | `CTRL-SHIFT-C` | Copy | `terminal:copy` | | `CTRL-SHIFT-F` | Find | `terminal:find` | | `CTRL-SHIFT-V` | Paste | `terminal:paste` | | `CTRL-SHIFT-T` | Open New Tab | `workspace:open_new_tab` | | `CTRL-ALT-T` | Reopen Closed Tab | `workspace:reopen_closed_tab` | | `CTRL-SHIFT-LEFT` | Move Tab Left | `workspace:move_tab_left` | | `CTRL-SHIFT-RIGHT` | Move Tab Right | `workspace:move_tab_right` | | `CTRL-PAGEUP` | Activate Previous Tab | `workspace:activate_prev_tab` | | `CTRL-PAGEDOWN` | Activate Next Tab | `workspace:activate_next_tab` |
# Migrate to Warp
Canonical page: [/getting-started/migrate-to-warp/](https://docs.warp.dev/getting-started/migrate-to-warp/)
> Move your settings and mental model into Warp. Pick the tool you're coming from for step-by-step guidance and Warp equivalents.
Warp users come from every kind of terminal, editor, and AI coding tool. This section has a dedicated page for each of the most common sources, with step-by-step migration guidance, notes on what transfers automatically, and a cross-reference for the Warp features that replace what you use today. If you want to preserve your existing keyboard workflow while switching tools, compare Warp’s default [keyboard shortcuts](/getting-started/keyboard-shortcuts/) with the migration guide for your current terminal or editor. Pick the tool you’re switching from: * [**Claude Code**](/getting-started/migrate-to-warp/migrate-to-warp-from-claude-code/) - use Claude Code inside Warp, or switch from Claude Code to Warp’s built-in Agent Mode. Covers context, rules, and model setup. * [**Cursor**](/getting-started/migrate-to-warp/migrate-to-warp-from-cursor/) - use Warp alongside Cursor as your agent terminal, or replace Cursor entirely with Warp’s built-in code editor and Agent Mode. * [**Ghostty**](/getting-started/migrate-to-warp/migrate-to-warp-from-ghostty/) - translate your Ghostty config to Warp and find equivalents for quick terminal, tabs, and GPU rendering. * [**iTerm2**](/getting-started/migrate-to-warp/migrate-to-warp-from-iterm2/) - use Warp’s built-in iTerm2 importer to transfer themes, fonts, keybindings, and hotkey windows in a few clicks. * [**macOS Terminal**](/getting-started/migrate-to-warp/migrate-to-warp-from-macos-terminal/) - match your Terminal.app setup and discover the split panes, tabs, and Agent Mode features Terminal.app lacks. * [**VS Code terminal**](/getting-started/migrate-to-warp/migrate-to-warp-from-vs-code-terminal/) - use Warp alongside VS Code for a richer terminal, or replace VS Code entirely with Warp’s built-in code editor. * [**Windows Terminal**](/getting-started/migrate-to-warp/migrate-to-warp-from-windows-terminal/) - map Windows Terminal profiles, PowerShell settings, and color schemes into Warp on Windows. ## Coming from something else? [Section titled “Coming from something else?”](#coming-from-something-else) Warp works well for developers migrating from many other sources. If you’re switching from a tool that isn’t listed above - for example, Alacritty, WezTerm, Kitty, Hyper, or a Linux default like GNOME Terminal or Konsole - drop a note in our [Discord community](https://discord.gg/warpdotdev) so we can prioritize coverage.
# Migrate to Warp from Claude Code
Canonical page: [/getting-started/migrate-to-warp/migrate-to-warp-from-claude-code/](https://docs.warp.dev/getting-started/migrate-to-warp/migrate-to-warp-from-claude-code/)
> Keep using Claude Code in Warp — with rich input, code review, and notifications — or switch from Claude Code to Warp's Agent Mode as your primary coding agent.
Claude Code is different from the other sources in this section: it’s not a terminal emulator, it’s a CLI agent that runs inside any terminal. Warp is an agentic development environment with a built-in [code editor](/code/code-editor/), [Code Review](/code/code-review/), [team collaboration](/knowledge-and-collaboration/warp-drive/), and [MCP](/agent-platform/capabilities/mcp/) support — so you have two paths to choose from: * **[Using Claude Code inside Warp](#using-claude-code-inside-warp)** - you want to keep using Claude Code as your coding agent and run it in Warp’s terminal. * **[Switching to Agent Mode from Claude Code](#switching-to-agent-mode-from-claude-code)** - you want to replace Claude Code with Warp’s built-in [Agent Mode](/agent-platform/local-agents/overview/). ## Using Claude Code inside Warp [Section titled “Using Claude Code inside Warp”](#using-claude-code-inside-warp) Warp provides first-class support for Claude Code through its [third-party CLI agents](/agent-platform/cli-agents/overview/) integration. Open a new tab and run: ```bash claude ``` Warp auto-detects Claude Code and unlocks IDE-level features on top of the TUI: * **[Rich input editor](/agent-platform/cli-agents/rich-input/)** (`Ctrl+G`) - compose multi-line prompts with `@` mentions, voice input, and slash commands. * **[Agent notifications](/agent-platform/capabilities/agent-notifications/)** - in-app and desktop alerts when Claude Code needs your input. Requires a one-time plugin install (Warp prompts you). * **Inline code review** - send review comments directly to the agent from Warp’s [Code Review](/code/code-review/) panel. * **[Vertical tabs with agent metadata](/terminal/windows/vertical-tabs/)** - track multiple Claude Code sessions across tabs with status indicators. * **[Remote control](/agent-platform/cli-agents/remote-control/)** - share or steer a Claude Code session from another device. * **[Tab Configs](/terminal/windows/tab-configs/)** - save and reopen Claude Code session layouts. For full setup steps (notification plugin, productivity tips, troubleshooting), see [Claude Code in Warp](/agent-platform/cli-agents/claude-code/) and the [How to set up Claude Code](/guides/external-tools/how-to-set-up-claude-code/) guide. ### Tips [Section titled “Tips”](#tips) * **Run Claude Code in [terminal mode](/agent-platform/local-agents/interacting-with-agents/terminal-and-agent-modes/)**, not Agent Mode. Press `⌘+I` (macOS) or `Ctrl+I` (Linux/Windows) to toggle modes if you’re in Agent Mode by accident. * **`Shift+Enter` for newlines.** Use `Shift+Enter` to insert a newline in Claude Code’s prompt. If it submits the message instead, check that you’re in terminal mode (not Agent Mode) and that you’re on a recent Warp version. * **Copy/paste handling.** Warp enables bracketed paste by default, so multi-line pastes into Claude Code work without extra configuration. * **Resuming after a Warp restart.** Warp’s [session restoration](/terminal/sessions/session-restoration/) preserves tabs and panes, but not running CLI processes — closing Warp ends Claude Code’s session. Use Claude Code’s built-in resume options (e.g., `claude --resume`) to continue a conversation after reopening Warp. ### API keys and authentication [Section titled “API keys and authentication”](#api-keys-and-authentication) Claude Code’s authentication (API key or Anthropic account) is handled by Claude Code itself, not Warp. Warp does not proxy or modify Claude Code’s network calls. Configure your `ANTHROPIC_API_KEY` environment variable via [Warp Drive environment variables](/knowledge-and-collaboration/warp-drive/environment-variables/) to share it across sessions without committing it to shell config files. ## Switching to Agent Mode from Claude Code [Section titled “Switching to Agent Mode from Claude Code”](#switching-to-agent-mode-from-claude-code) If you’re ready to replace Claude Code with Warp’s built-in Agent, the core workflow is: 1. Open a new tab in Warp. 2. From terminal mode, press `⌘+Enter` (macOS) or `Ctrl+Shift+Enter` (Linux/Windows) to switch to [Agent Mode](/agent-platform/local-agents/overview/). 3. Describe what you want in natural language. Warp’s Agent reads your codebase, runs commands, and edits files the same way Claude Code does. ### What transfers: context and rules [Section titled “What transfers: context and rules”](#what-transfers-context-and-rules) A recurring question from Claude Code users: **what files and context does Warp’s Agent read automatically?** Warp picks up project rules from an `AGENTS.md` (or `WARP.md`) at your repo root — the direct equivalent of Claude Code’s `CLAUDE.md`. Run `/init` in Agent Mode to generate one, or rename your existing rules file and you’re done — no rewriting needed. Warp’s Agent also pulls context from several other explicit sources: * **[Codebase Context](/agent-platform/capabilities/codebase-context/)** - when you open a directory, Warp indexes your Git-tracked files so the Agent can search and reference your code without you pasting snippets. * **[Rules](/agent-platform/capabilities/rules/)** - global and project-scoped rules. `AGENTS.md` and `WARP.md` are automatically picked up at the project root; additional rules live in Warp Drive. * **[Warp Drive](/knowledge-and-collaboration/warp-drive/)** - notebooks, workflows, and environment variables you’ve saved are available to the Agent as context. * **[Agent Mode context](/knowledge-and-collaboration/warp-drive/agent-mode-context/)** - pin specific files or notebooks to a conversation so the Agent always has them in scope. * **[MCP](/agent-platform/capabilities/mcp/)** - any MCP servers you’ve configured give the Agent access to external tools and data. ### What to reconfigure [Section titled “What to reconfigure”](#what-to-reconfigure) * **Bring over your `CLAUDE.md`.** Rename it to `AGENTS.md` (or copy it into a Warp [Rule](/agent-platform/capabilities/rules/) if you want it scoped beyond the repo). Warp applies it automatically to new conversations. * **Set up [MCP servers](/agent-platform/capabilities/mcp/)** you relied on in Claude Code. * **Pick a model** per conversation using the model selector. See [model choice](/agent-platform/inference/model-choice/). Warp supports Claude, GPT, Gemini, and Auto. * **Configure [agent profiles and permissions](/agent-platform/capabilities/agent-profiles-permissions/)** for what the Agent can auto-execute. ### Key differences from Claude Code [Section titled “Key differences from Claude Code”](#key-differences-from-claude-code) * **Tight terminal integration.** Agent Mode runs inside Warp and sees the full state of your terminal session — open files, command history, environment variables — without needing you to paste context. * **Parallel agents.** Warp runs multiple agent conversations across tabs simultaneously, each with its own state, which you can track in the Agent Management Panel. * **Code Review built in.** Agent-generated diffs open in Warp’s [Code Review](/code/code-review/) panel, not the terminal. * **Cloud orchestration.** Long-running or scheduled agent work can be offloaded to [Oz](/agent-platform/cloud-agents/overview/). ## Warp-native equivalents [Section titled “Warp-native equivalents”](#warp-native-equivalents) Use this table to find the closest Warp equivalent for Claude Code concepts: | From Claude Code | In Warp | | -------------------------- | ----------------------------------------------------------------------------------------------------------------------------------------------------------------------------------------------------- | | `CLAUDE.md` | `AGENTS.md` (or `WARP.md`) at the project root, picked up as a [Rule](/agent-platform/capabilities/rules/) | | Claude Code slash commands | Warp’s own [slash commands](/agent-platform/capabilities/slash-commands/) (`/init`, `/plan`, `/model`, etc.); save your own as [Warp Drive prompts](/knowledge-and-collaboration/warp-drive/prompts/) | | Tool definitions | [MCP](/agent-platform/capabilities/mcp/) | | Resume conversation | Warp persists agent conversations per tab; pair with [tab configs](/terminal/windows/tab-configs/) to reopen the same project layout | For a deeper tour of Agent Mode, see [Coding in Warp](/getting-started/quickstart/coding-in-warp/) and the [Warp Agents docs](/agent-platform/local-agents/overview/).
# Migrate to Warp from Cursor
Canonical page: [/getting-started/migrate-to-warp/migrate-to-warp-from-cursor/](https://docs.warp.dev/getting-started/migrate-to-warp/migrate-to-warp-from-cursor/)
> Reconfigure your terminal and agent settings when switching to Warp from Cursor, or run Warp alongside Cursor as your agent terminal.
Warp gives Cursor users two migration paths: keep Cursor as your editor and use Warp for terminal and Agent work, or move fully to Warp’s built-in code editor and Agent Mode. This page walks through both options. ## What Warp can help transfer [Section titled “What Warp can help transfer”](#what-warp-can-help-transfer) Warp doesn’t have a one-click Cursor importer. Cursor is built on the VS Code codebase, so its terminal settings live in `settings.json` under keys like `terminal.integrated.fontFamily` and `terminal.integrated.defaultProfile.*`. Because that file is readable, Warp’s Agent can translate matching terminal values into Warp’s `settings.toml`. In Cursor, open the Command Palette and select **Preferences: Open User Settings (JSON)** to reference your settings while you reconfigure Warp. ## Use Warp’s Agent to migrate your settings (recommended) [Section titled “Use Warp’s Agent to migrate your settings (recommended)”](#use-warps-agent-to-migrate-your-settings-recommended) The fastest way to bring over your Cursor terminal setup is to ask Warp’s Agent to translate your `settings.json` directly. Warp ships a [`settings.toml` file](/terminal/settings/) and a bundled `modify-settings` skill that lets the Agent read your existing config and write equivalent values into Warp’s settings. 1. In the Warp app, open a new tab and switch to [Agent Mode](/agent-platform/local-agents/overview/) with `⌘+I` (macOS) or `Ctrl+I` (Linux/Windows). 2. Copy and paste this prompt into the Agent Mode input, then press `Enter`. > Read my Cursor `settings.json` (`~/Library/Application Support/Cursor/User/settings.json` on macOS) and port the equivalent terminal settings (font, cursor style, default profile) into my Warp `settings.toml` using the `modify-settings` skill. Show me a diff before applying. 3. Review the proposed diff, then approve the changes. Warp hot-reloads `settings.toml`, so changes take effect immediately. If you’d rather configure each setting manually through the Settings UI, the steps below cover the most common cases. ## What to reconfigure manually [Section titled “What to reconfigure manually”](#what-to-reconfigure-manually) ### Terminal settings [Section titled “Terminal settings”](#terminal-settings) Terminal settings in Cursor follow the same schema as VS Code. The migration steps are identical to the VS Code terminal migration. See [Migrate to Warp from VS Code terminal](/getting-started/migrate-to-warp/migrate-to-warp-from-vs-code-terminal/) for step-by-step guidance on shell, font, theme, and keybinding setup. ### Agent and AI settings [Section titled “Agent and AI settings”](#agent-and-ai-settings) Cursor’s Composer and Agent features don’t have a one-to-one migration path; they map to different Warp concepts. * **Composer / Agent** - In Cursor, these features map to Warp’s [Agent Mode](/agent-platform/local-agents/overview/). Start an Agent conversation in any tab. * **Rules files** - Warp uses [Rules](/agent-platform/capabilities/rules/) stored in Warp Drive or committed to your repo as `AGENTS.md` (or `WARP.md`). Run `/init` in Agent Mode to generate an `AGENTS.md`, or copy your `.cursorrules` content directly. * **MCP servers** - Warp supports MCP natively. See [MCP](/agent-platform/capabilities/mcp/) for configuration. ### Model choice [Section titled “Model choice”](#model-choice) Cursor lets you pick a model per conversation. Warp does the same; use the model selector in any Agent conversation. See [model choice](/agent-platform/inference/model-choice/). ### Keybindings [Section titled “Keybindings”](#keybindings) Warp’s [keyboard shortcuts](/getting-started/keyboard-shortcuts/) differ from Cursor’s. Most notably, `⌘+I` (or `Ctrl+I` on Linux/Windows) toggles between terminal and Agent Mode. From terminal mode you can also press `⌘+Enter` (or `Ctrl+Shift+Enter`) as an alternate shortcut into Agent Mode. ## Choosing your setup [Section titled “Choosing your setup”](#choosing-your-setup) ### Use Warp alongside Cursor [Section titled “Use Warp alongside Cursor”](#use-warp-alongside-cursor) Keep Cursor as your editor for tight in-file AI assistance, and use Warp as the terminal you switch to for: * Long-running commands and SSH. * [Agent Mode](/agent-platform/local-agents/overview/) conversations that execute commands, not just edit files. * [Code Review](/code/code-review/) for managing diffs. * [Warp Drive](/knowledge-and-collaboration/warp-drive/) for team knowledge. ### Replace Cursor with Warp [Section titled “Replace Cursor with Warp”](#replace-cursor-with-warp) Warp’s built-in [code editor](/code/code-editor/) supports Language Server Protocol, a [file tree](/code/code-editor/file-tree/), [find and replace](/code/code-editor/find-and-replace/), and [Vim keybindings](/code/code-editor/code-editor-vim-keybindings/). Combined with Agent Mode, Code Review, and Warp Drive, the full Cursor workflow is reachable in Warp without a separate editor. ## Warp-native equivalents [Section titled “Warp-native equivalents”](#warp-native-equivalents) Use this table to find Warp equivalents for Cursor features you might look for after switching: | From Cursor | In Warp | | ----------------------------- | ------------------------------------------------------------------------------------------------------------------------- | | Composer / Agent panel | [Agent Mode](/agent-platform/local-agents/overview/) in any tab (toggle with `⌘+I` on macOS or `Ctrl+I` on Linux/Windows) | | Agent tabs | Multiple [agents in parallel](/agent-platform/local-agents/overview/) across tabs | | `.cursorrules` | `AGENTS.md` / `WARP.md` at the project root, picked up as a [Rule](/agent-platform/capabilities/rules/) | | MCP servers | [MCP](/agent-platform/capabilities/mcp/) | | Model choice per conversation | [Model selector](/agent-platform/inference/model-choice/) | | Codebase indexing | [Codebase Context](/agent-platform/capabilities/codebase-context/) | | Inline diff review | [Code Review](/code/code-review/) | See [Coding in Warp](/getting-started/quickstart/coding-in-warp/) for a tour of the development workflow.
# Migrate to Warp from Ghostty
Canonical page: [/getting-started/migrate-to-warp/migrate-to-warp-from-ghostty/](https://docs.warp.dev/getting-started/migrate-to-warp/migrate-to-warp-from-ghostty/)
> Moving to Warp from Ghostty? Here's how to bring over your themes, fonts, and keybindings, plus where to find Warp's equivalents for Ghostty's native features.
Warp gives Ghostty users a fast path to bring over themes, fonts, and keybindings, plus native equivalents for the Ghostty features you rely on, from the quick terminal to native tabs and splits. ## What Warp can help transfer [Section titled “What Warp can help transfer”](#what-warp-can-help-transfer) Warp doesn’t have a one-click Ghostty importer. Because Ghostty stores its configuration in a plain-text key-value file at `~/.config/ghostty/config`, Warp’s Agent can read that file and translate matching values into Warp’s `settings.toml`. ## Use Warp’s Agent to migrate your settings (recommended) [Section titled “Use Warp’s Agent to migrate your settings (recommended)”](#use-warps-agent-to-migrate-your-settings-recommended) The fastest way to bring over your Ghostty setup is to ask Warp’s Agent to translate your config directly. Warp ships a [`settings.toml` file](/terminal/settings/) and a bundled `modify-settings` skill that lets the Agent read your existing config and write equivalent values into Warp’s settings, including translating your Ghostty theme into a Warp [custom theme](/terminal/appearance/custom-themes/). 1. In the Warp app, open a new tab and switch to [Agent Mode](/agent-platform/local-agents/overview/) with `⌘+I` (macOS) or `Ctrl+I` (Linux/Windows). 2. Paste this prompt into Agent Mode, then press `Enter`. > Read my Ghostty config at `~/.config/ghostty/config` and any referenced theme files in `~/.config/ghostty/themes/`. Port the equivalent settings (theme, font, keybindings, shell) into my Warp `settings.toml` using the `modify-settings` skill, and create a matching custom theme. Show me a diff before applying. 3. Review the proposed diff, then approve the changes. Warp hot-reloads `settings.toml`, so changes take effect immediately. If you’d rather configure each setting manually through the Settings UI, the steps below cover the most common cases. ## What to reconfigure manually [Section titled “What to reconfigure manually”](#what-to-reconfigure-manually) ### Theme and colors [Section titled “Theme and colors”](#theme-and-colors) 1. In the Warp app, open **Settings** > **Appearance** > **Themes**. 2. Choose a built-in theme that matches your Ghostty setup, or [create a custom theme](/terminal/appearance/custom-themes/) by translating your Ghostty colors into a YAML theme file. 3. If your Ghostty config references a custom theme, open the matching file in `~/.config/ghostty/themes/` and copy the foreground, background, and 16 ANSI color values. ### Font and text [Section titled “Font and text”](#font-and-text) 1. In the Warp app, open **Settings** > **Appearance** > **Text, fonts, & cursor** and match your Ghostty `font-family` and `font-size` values. 2. If you use font ligatures, toggle **Ligatures** on. ### Keybindings [Section titled “Keybindings”](#keybindings) Warp’s [default keyboard shortcuts](/getting-started/keyboard-shortcuts/) cover most Ghostty bindings. For custom bindings from your Ghostty `keybind` lines, open **Settings** > **Keyboard shortcuts** in the Warp app and add them manually. ### Shell and prompt [Section titled “Shell and prompt”](#shell-and-prompt) Warp detects your login shell automatically. To override it, open **Settings** > **Features** > **Session** in the Warp app and choose a shell from **Startup shell for new sessions**. For prompts, choose between Warp’s [native prompt](/terminal/appearance/prompt/#warp-prompt) (drag-and-drop context chips) or the [shell prompt (PS1)](/terminal/appearance/prompt/#custom-prompt) if you want to keep your existing prompt configuration. ### Quick terminal (Quake mode) [Section titled “Quick terminal (Quake mode)”](#quick-terminal-quake-mode) In the Warp app, configure Warp’s equivalent from **Settings** > **Features** > **Window** > **Global hotkey**. See [global hotkey](/terminal/windows/global-hotkey/) for the full configuration. ## Warp-native equivalents [Section titled “Warp-native equivalents”](#warp-native-equivalents) Use this table to find the closest Warp equivalent for Ghostty features you might look for after switching: | From Ghostty | In Warp | | --------------------------------- | ------------------------------------------------------------------------------------------------------------------------------------------------------- | | Quick terminal / dropdown window | [Global hotkey](/terminal/windows/global-hotkey/) | | Native tabs and splits | [Tabs](/terminal/windows/tabs/), [vertical tabs](/terminal/windows/vertical-tabs/), [split panes](/terminal/windows/split-panes/) | | Command palette | [Command Palette](/terminal/command-palette/) (`⌘+P` on macOS, `Ctrl+Shift+P` on Linux/Windows) | | GPU-accelerated rendering | GPU-rendered natively on all supported platforms | | Kitty graphics protocol | Image rendering for most common workflows (see [more features](/terminal/more-features/)) | | Shaders and custom visual effects | Not supported; closest: [size, opacity, and blurring](/terminal/appearance/size-opacity-blurring/) + [pane dimming](/terminal/appearance/pane-dimming/) | Beyond parity, Warp adds [Agent Mode](/agent-platform/local-agents/overview/), [Code Review](/code/code-review/), and [Warp Drive](/knowledge-and-collaboration/warp-drive/) for AI-assisted development and team collaboration. For more on what you can configure, see [Customizing Warp](/getting-started/quickstart/customizing-warp/).
# Migrate to Warp from iTerm2
Canonical page: [/getting-started/migrate-to-warp/migrate-to-warp-from-iterm2/](https://docs.warp.dev/getting-started/migrate-to-warp/migrate-to-warp-from-iterm2/)
> Import your iTerm2 profile into Warp to transfer themes, fonts, keybindings, hotkey windows, and more in a few clicks.
Warp imports your iTerm2 profile automatically, bringing over theme, font, keybindings, hotkey window, and more in a few clicks. This page walks through the importer, what it covers, and what to reconfigure manually after. ## What transfers automatically [Section titled “What transfers automatically”](#what-transfers-automatically) Warp ships a built-in iTerm2 importer that reads your default profile from `~/Library/Preferences/com.googlecode.iterm2.plist`. It imports: * **Theme** - foreground, background, cursor, and all 16 ANSI colors (light and dark variants if configured). * **Font** - family and size (when the font exists on your system and is supported by Warp). * **Default shell** - if you’ve set a custom Command in your iTerm2 profile. * **Working directory behavior** - Warp translates iTerm2’s “Reuse previous session’s directory” and similar options. * **Window dimensions** - rows and columns. * **Opacity and blur.** * **Copy-on-select, mouse and scroll reporting, and Option-as-Meta settings.** * **Global hotkey** - if you use a hotkey window or hotkey activation, Warp maps it. To run the importer: 1. In Warp, open the [Command Palette](/terminal/command-palette/). 2. Search for **Import External Settings**. 3. Select **iTerm2 Profile: Default**. Warp only imports the profile marked as your Default Bookmark in iTerm2. 4. Choose which settings to keep or skip on the preview screen. 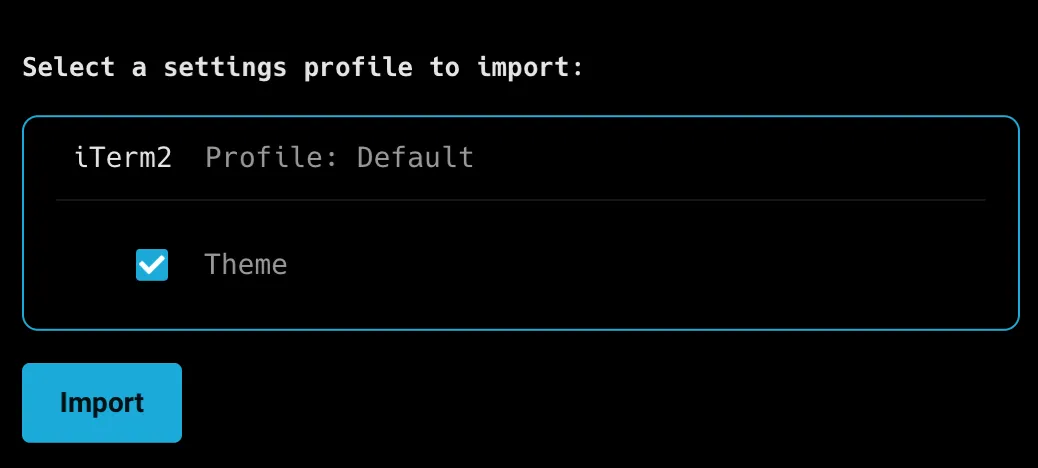 Select a settings profile to import. ## Use Warp’s Agent for follow-up settings [Section titled “Use Warp’s Agent for follow-up settings”](#use-warps-agent-for-follow-up-settings) If the importer doesn’t pick up something you care about, such as a non-default profile, an unusual keybinding, or a specific setting, ask Warp’s Agent to translate it directly. Warp ships a [`settings.toml` file](/terminal/settings/) and a bundled `modify-settings` skill that lets the Agent read your iTerm2 plist and write equivalent values into Warp’s settings. 1. In the Warp app, switch to [Agent Mode](/agent-platform/local-agents/overview/) with `⌘+I`. 2. Paste this prompt into Agent Mode, then press `Enter`. > Read my iTerm2 preferences with `defaults read com.googlecode.iterm2` and port any settings that the importer didn’t cover (extra profiles, custom keybindings) into my Warp `settings.toml` using the `modify-settings` skill. Show me a diff before applying. 3. Review the proposed diff, then approve the changes. Warp hot-reloads `settings.toml`. ## What to reconfigure manually [Section titled “What to reconfigure manually”](#what-to-reconfigure-manually) A few iTerm2 features don’t map directly and need a manual pass after import: * **Multiple profiles.** Warp imports only your Default profile. If you rely on multiple iTerm2 profiles, create equivalent [tab configs](/terminal/windows/tab-configs/) in Warp. * **Keyboard shortcuts.** Warp’s [keyboard shortcuts](/getting-started/keyboard-shortcuts/) cover most iTerm2 bindings out of the box, but custom bindings need to be recreated in **Settings** > **Keyboard shortcuts**. * **Split panes and arrangements.** Rebuild using [split panes](/terminal/windows/split-panes/) and [tab configs](/terminal/windows/tab-configs/). * **Triggers.** Warp doesn’t have a direct equivalent. Reach similar outcomes through [YAML workflows](/terminal/entry/yaml-workflows/) or Agent Mode. ### Choose your prompt [Section titled “Choose your prompt”](#choose-your-prompt) After the import, choose which [prompt](/terminal/appearance/prompt/) to use: 1. [**Warp prompt**](/terminal/appearance/prompt/#warp-prompt) - Warp’s native prompt with drag-and-drop context chips for git branch, directory, timestamps, and more. Configure in **Settings** > **Appearance** > **Prompt**. 2. [**Shell prompt (PS1)**](/terminal/appearance/prompt/#custom-prompt) - inherits your existing shell prompt configuration unchanged. Pick this if you want Warp to match your iTerm2 prompt exactly. ## Warp-native equivalents [Section titled “Warp-native equivalents”](#warp-native-equivalents) Use this table to find Warp equivalents for iTerm2 features you might look for after switching: | From iTerm2 | In Warp | | ---------------------------- | ---------------------------------------------------------------------------------------------------------------------------------------- | | Hotkey window (Quake mode) | [Global hotkey](/terminal/windows/global-hotkey/) (imported automatically when detected in your iTerm2 profile) | | Triggers | [YAML workflows](/terminal/entry/yaml-workflows/) for repeatable actions; Agent Mode for pattern-based automation | | Profiles | [Tab configs](/terminal/windows/tab-configs/) for layouts; [Warp Drive](/knowledge-and-collaboration/warp-drive/) for shared team setups | | Autocomplete menu | [Autosuggestions](/terminal/command-completions/autosuggestions/) + [tab completions](/terminal/command-completions/completions/) | | Instant replay | [Session restoration](/terminal/sessions/session-restoration/) | | Password manager integration | [Warp Drive environment variables](/knowledge-and-collaboration/warp-drive/environment-variables/) | For more on what you can configure after migrating, see the [Warp quickstart](/quickstart/) and [Customizing Warp](/getting-started/quickstart/customizing-warp/).
# Migrate to Warp from macOS Terminal
Canonical page: [/getting-started/migrate-to-warp/migrate-to-warp-from-macos-terminal/](https://docs.warp.dev/getting-started/migrate-to-warp/migrate-to-warp-from-macos-terminal/)
> Switch from the default macOS Terminal app to Warp. Match your setup and discover what Warp adds beyond the basics.
Warp gives Terminal.app users everything they already have, including shell, theme, font, and prompt settings, plus split panes, tabs, blocks, and Agent Mode for an AI-assisted workflow. This page walks through both an Agent-driven migration and the manual GUI steps. ## What Warp can help transfer [Section titled “What Warp can help transfer”](#what-warp-can-help-transfer) Warp doesn’t have a one-click Terminal.app importer. Because Terminal.app stores profile data in macOS preferences, Warp’s Agent can read those preferences with `defaults read com.apple.Terminal` and translate matching theme, font, and window settings into Warp’s `settings.toml`. Most Terminal.app users run near-default settings, so the migration usually takes only a few minutes either way. ## Use Warp’s Agent to migrate your settings (recommended) [Section titled “Use Warp’s Agent to migrate your settings (recommended)”](#use-warps-agent-to-migrate-your-settings-recommended) The fastest way to bring over a Terminal.app theme is to ask Warp’s Agent to translate it directly. Warp ships a [`settings.toml` file](/terminal/settings/) and a bundled `modify-settings` skill that lets the Agent read your Terminal.app preferences and write equivalent values into Warp’s settings, including creating a matching [custom theme](/terminal/appearance/custom-themes/). 1. In the Warp app, open a new tab and switch to [Agent Mode](/agent-platform/local-agents/overview/) with `⌘+I`. 2. Paste this prompt into Agent Mode, then press `Enter`. > Read my Terminal.app preferences with `defaults read com.apple.Terminal` and port the active profile (theme, font, window size) into my Warp `settings.toml` using the `modify-settings` skill. Create a matching custom theme. Show me a diff before applying. 3. Review the proposed diff, then approve the changes. Warp hot-reloads `settings.toml`. If you’d rather configure each setting manually through the Settings UI, the steps below cover the most common cases. ## What to reconfigure manually [Section titled “What to reconfigure manually”](#what-to-reconfigure-manually) ### Shell [Section titled “Shell”](#shell) Warp auto-detects your login shell on first launch. macOS has shipped with `zsh` as the default since Catalina (2019); if you changed your shell with `chsh`, Warp picks that up too. To change it later, open **Settings** > **Features** > **Session** in the Warp app and choose a shell from **Startup shell for new sessions**. ### Theme and colors [Section titled “Theme and colors”](#theme-and-colors) Terminal.app ships with a handful of profiles (Basic, Pro, Homebrew, Ocean, etc.). Match them in Warp: 1. In the Warp app, open **Settings** > **Appearance** > **Themes**. 2. Choose a preset theme. Warp’s built-in library includes many themes similar to Terminal.app’s defaults. 3. For exact color matches, [create a custom theme](/terminal/appearance/custom-themes/) using ANSI color values from Terminal.app. In Terminal.app, open **Settings**, select **Profiles**, and click **Text** to inspect those values. ### Font [Section titled “Font”](#font) 1. In the Warp app, open **Settings** > **Appearance** > **Text, fonts, & cursor**, then choose your font family and size to match what you use in Terminal.app. ### Window size and transparency [Section titled “Window size and transparency”](#window-size-and-transparency) Configure window appearance in the Warp app from **Settings** > **Appearance** > **Size, opacity, & blurring**. See [size, opacity, and blurring](/terminal/appearance/size-opacity-blurring/). ### Prompt [Section titled “Prompt”](#prompt) Terminal.app uses whatever prompt your shell’s PS1 (or zsh’s PROMPT) defines. In Warp, choose: 1. [**Warp prompt**](/terminal/appearance/prompt/#warp-prompt) - Warp’s native prompt with drag-and-drop chips for git branch, directory, and more. 2. [**Shell prompt (PS1)**](/terminal/appearance/prompt/#custom-prompt) - keeps your existing shell prompt exactly as it appears in Terminal.app. Configure either prompt in the Warp app from **Settings** > **Appearance** > **Prompt**. ## Warp-native equivalents [Section titled “Warp-native equivalents”](#warp-native-equivalents) Most Terminal.app features have a Warp equivalent with additional capabilities on top: | From Terminal.app | In Warp | | ---------------------------- | ------------------------------------------------------------------------------------------------------------------------------------------------------------------------- | | Profiles | [Tab configs](/terminal/windows/tab-configs/) for layouts and startup commands; [themes](/terminal/appearance/themes/) for appearance (Warp has no single profile object) | | Window groups / arrangements | [Tab configs](/terminal/windows/tab-configs/) | | Tabs | [Tabs](/terminal/windows/tabs/), [vertical tabs](/terminal/windows/vertical-tabs/) | | Split panes | [Split panes](/terminal/windows/split-panes/) (Terminal.app doesn’t support) | | Copy-on-select | **Settings** > **Features** > **Session** | | Inspector | [Command inspector](/terminal/editor/command-inspector/) (exit code, duration, working directory) | Beyond matching Terminal.app, Warp adds [Agent Mode](/agent-platform/local-agents/overview/) for natural-language commands, [blocks](/terminal/blocks/) for structured command output, and [Warp Drive](/knowledge-and-collaboration/warp-drive/) for shared workflows. New to Warp? Start with the [Warp quickstart](/quickstart/).
# Migrate to Warp from VS Code terminal
Canonical page: [/getting-started/migrate-to-warp/migrate-to-warp-from-vs-code-terminal/](https://docs.warp.dev/getting-started/migrate-to-warp/migrate-to-warp-from-vs-code-terminal/)
> Replicate your VS Code integrated terminal setup in Warp - shell, fonts, keybindings - or run Warp alongside VS Code as a richer terminal.
Warp lets VS Code users choose their own path: keep VS Code for editing and run Warp as the terminal alongside it, or replace both with Warp’s built-in code editor. This page walks through reconfiguring your terminal settings for either path. ## What Warp can help transfer [Section titled “What Warp can help transfer”](#what-warp-can-help-transfer) Warp doesn’t have a VS Code importer because it’s a standalone application, not a VS Code extension. Because your VS Code terminal settings live in a readable user `settings.json`, Warp’s Agent can translate matching `terminal.integrated.*` values into Warp’s `settings.toml`: ```json { "terminal.integrated.defaultProfile.osx": "zsh", "terminal.integrated.fontFamily": "MesloLGS NF", "terminal.integrated.fontSize": 14, "terminal.integrated.cursorStyle": "line", "terminal.integrated.profiles.osx": { "zsh": { "path": "zsh" } } } ``` ## Use Warp’s Agent to migrate your settings (recommended) [Section titled “Use Warp’s Agent to migrate your settings (recommended)”](#use-warps-agent-to-migrate-your-settings-recommended) The fastest way to bring over your VS Code terminal setup is to ask Warp’s Agent to translate `settings.json` directly. Warp ships a [`settings.toml` file](/terminal/settings/) and a bundled `modify-settings` skill that lets the Agent read your existing config and write equivalent values into Warp’s settings. 1. In the Warp app, open a new tab and switch to [Agent Mode](/agent-platform/local-agents/overview/) with `⌘+I` (macOS) or `Ctrl+I` (Linux/Windows). 2. Paste this prompt into Agent Mode, then press `Enter`. > Read my VS Code `settings.json` (`~/Library/Application Support/Code/User/settings.json` on macOS) and port the equivalent terminal settings (`terminal.integrated.*` keys) into my Warp `settings.toml` using the `modify-settings` skill. Show me a diff before applying. 3. Review the proposed diff, then approve the changes. Warp hot-reloads `settings.toml`. If you’d rather configure each setting manually through the Settings UI, the steps below cover the most common cases. ## What to reconfigure manually [Section titled “What to reconfigure manually”](#what-to-reconfigure-manually) ### Shell [Section titled “Shell”](#shell) Warp auto-detects your login shell. To override it, for example, to match `terminal.integrated.defaultProfile.*`, open **Settings** > **Features** > **Session** in the Warp app and choose a shell from **Startup shell for new sessions**. ### Font and cursor [Section titled “Font and cursor”](#font-and-cursor) In the Warp app, open **Settings** > **Appearance** > **Text, fonts, & cursor**, then set the font family and size to match `terminal.integrated.fontFamily` and `terminal.integrated.fontSize`. ### Theme [Section titled “Theme”](#theme) VS Code’s terminal uses the color scheme from your overall editor theme. In the Warp app, choose a comparable theme from **Settings** > **Appearance** > **Themes**, or [create a custom theme](/terminal/appearance/custom-themes/) that matches your VS Code theme’s `terminal.*` color tokens. ### Keybindings [Section titled “Keybindings”](#keybindings) Warp’s [default keyboard shortcuts](/getting-started/keyboard-shortcuts/) are largely consistent with VS Code terminal shortcuts (splits, new tab, find). For any custom bindings you configured in VS Code, add them in **Settings** > **Keyboard shortcuts** in the Warp app. ## Choosing your setup [Section titled “Choosing your setup”](#choosing-your-setup) ### Use Warp alongside VS Code [Section titled “Use Warp alongside VS Code”](#use-warp-alongside-vs-code) Many developers keep VS Code as their editor and use Warp as the terminal they switch to for long-running commands, SSH sessions, or AI-assisted workflows. You don’t need to change VS Code. Install Warp and open it when you want a richer terminal. VS Code’s integrated terminal still works; use it for quick one-off commands, and jump to Warp when you need [blocks](/terminal/blocks/), [Agent Mode](/agent-platform/local-agents/overview/), or [persistent sessions](/terminal/sessions/session-restoration/). ### Replace VS Code with Warp [Section titled “Replace VS Code with Warp”](#replace-vs-code-with-warp) Warp includes a built-in [code editor](/code/code-editor/) with Language Server Protocol (LSP) support, a [file tree](/code/code-editor/file-tree/), [find and replace](/code/code-editor/find-and-replace/), and [Vim keybindings](/code/code-editor/code-editor-vim-keybindings/). Combined with [Code Review](/code/code-review/), many developers use Warp as their primary editor and drop VS Code entirely. Open a directory with `warp .` from the command line to start editing. ## Warp-native equivalents [Section titled “Warp-native equivalents”](#warp-native-equivalents) Use this table to find Warp equivalents for VS Code terminal features you might look for after switching: | From VS Code terminal | In Warp | | ------------------------------ | ---------------------------------------------------------------------------------------------------------------------------- | | Split terminal | [Split panes](/terminal/windows/split-panes/) | | Multiple terminals (tab strip) | [Tabs](/terminal/windows/tabs/), [vertical tabs](/terminal/windows/vertical-tabs/) | | Tasks (`tasks.json`) | [YAML workflows](/terminal/entry/yaml-workflows/) or [tab configs](/terminal/windows/tab-configs/) | | Terminal profiles | [Tab configs](/terminal/windows/tab-configs/) + per-session shell overrides | | Shell integration | Built in via [Warpify](/terminal/warpify/); enables working-directory tracking and command-level [blocks](/terminal/blocks/) | For an overview of what Warp adds beyond a terminal, see [Coding in Warp](/getting-started/quickstart/coding-in-warp/).
# Migrate to Warp from Windows Terminal
Canonical page: [/getting-started/migrate-to-warp/migrate-to-warp-from-windows-terminal/](https://docs.warp.dev/getting-started/migrate-to-warp/migrate-to-warp-from-windows-terminal/)
> Switch from Windows Terminal to Warp on Windows. Reconfigure profiles, shells, fonts, keybindings, and find Warp equivalents.
Warp on Windows covers everything you use Windows Terminal for today, including profiles, PowerShell, color schemes, and keybindings, with Agent Mode and blocks on top. This page walks through the migration. ## What Warp can help transfer [Section titled “What Warp can help transfer”](#what-warp-can-help-transfer) Warp doesn’t have a one-click Windows Terminal importer. Because Windows Terminal stores profiles, color schemes, and keybindings in a single JSON file, Warp’s Agent can read that file and translate matching values into Warp’s `settings.toml`: ```powershell %LOCALAPPDATA%\Packages\Microsoft.WindowsTerminal_8wekyb3d8bbwe\LocalState\settings.json ``` ## Use Warp’s Agent to migrate your settings (recommended) [Section titled “Use Warp’s Agent to migrate your settings (recommended)”](#use-warps-agent-to-migrate-your-settings-recommended) The fastest way to bring over your Windows Terminal setup is to ask Warp’s Agent to translate `settings.json` directly. Warp ships a [`settings.toml` file](/terminal/settings/) and a bundled `modify-settings` skill that lets the Agent read your existing config and write equivalent values into Warp’s settings, including translating your color schemes into a Warp [custom theme](/terminal/appearance/custom-themes/). 1. In the Warp app, open a new tab and switch to [Agent Mode](/agent-platform/local-agents/overview/) with `Ctrl+I`. 2. Paste this prompt into Agent Mode, then press `Enter`. > Read my Windows Terminal `settings.json` at `%LOCALAPPDATA%\Packages\Microsoft.WindowsTerminal_8wekyb3d8bbwe\LocalState\settings.json` and port the active profile and color scheme into my Warp `settings.toml` using the `modify-settings` skill. Create a matching custom theme. Show me a diff before applying. 3. Review the proposed diff, then approve the changes. Warp hot-reloads `settings.toml`. If you’d rather configure each setting manually through the Settings UI, the steps below cover the most common cases. ## What to reconfigure manually [Section titled “What to reconfigure manually”](#what-to-reconfigure-manually) ### Default shell [Section titled “Default shell”](#default-shell) Warp on Windows supports PowerShell (`pwsh` and `powershell.exe`), Command Prompt (`cmd`), bash, zsh, and fish. Warp auto-detects your login shell. To override it, open **Settings** > **Features** > **Session** in the Warp app and choose a shell from **Startup shell for new sessions**. If you use PowerShell modules or a custom `$PROFILE`, Warp loads them the same way Windows Terminal does. ### Profiles [Section titled “Profiles”](#profiles) Windows Terminal uses profiles to group shell, theme, starting directory, and font together. Warp doesn’t have a single profile concept; instead, match each dimension separately: * **Shell** - Configure from **Settings** > **Features** > **Session** in the Warp app. * **Starting directory** - Configure **Working directory** from **Settings** > **Features** > **Session** in the Warp app. * **Font family and size** - Configure from **Settings** > **Appearance** > **Text, fonts, & cursor** in the Warp app. * **Color scheme** - Configure from **Settings** > **Appearance** > **Themes** in the Warp app. Translate your Windows Terminal color scheme into a [custom Warp theme](/terminal/appearance/custom-themes/) using the same 16 ANSI color values. * **Reusable layouts** - create a [tab config](/terminal/windows/tab-configs/) for each workflow that used to be a profile. ### Color scheme [Section titled “Color scheme”](#color-scheme) Windows Terminal’s `schemes` array defines foreground, background, cursor, and ANSI colors. To match an existing scheme: 1. Copy the color values from the scheme you use in your `settings.json`. 2. In the Warp app, open **Settings** > **Appearance** > **Themes**, then choose a preset that matches or [create a custom theme](/terminal/appearance/custom-themes/). ### Keybindings [Section titled “Keybindings”](#keybindings) Warp’s [default keyboard shortcuts](/getting-started/keyboard-shortcuts/) cover most Windows Terminal bindings. For custom bindings from `settings.json`’s `actions` array, add them in **Settings** > **Keyboard shortcuts** in the Warp app. ### Prompt [Section titled “Prompt”](#prompt) If you use `oh-my-posh` or a custom PowerShell prompt, it continues to work in Warp. To choose between Warp’s native prompt and your existing shell prompt, open **Settings** > **Appearance** > **Prompt** in the Warp app. See [prompt](/terminal/appearance/prompt/). ## Warp-native equivalents [Section titled “Warp-native equivalents”](#warp-native-equivalents) Use this table to find Warp equivalents for Windows Terminal features you might look for after switching: | From Windows Terminal | In Warp | | --------------------- | --------------------------------------------------------------------------------------------------------------------------------- | | Profiles | [Tab configs](/terminal/windows/tab-configs/) + [themes](/terminal/appearance/themes/) + per-session shell settings | | Tabs and panes | [Tabs](/terminal/windows/tabs/), [vertical tabs](/terminal/windows/vertical-tabs/), [split panes](/terminal/windows/split-panes/) | | Command palette | [Command Palette](/terminal/command-palette/) (`Ctrl+Shift+P`) | | Oh My Posh prompts | Keep using them; pick [Shell prompt (PS1)](/terminal/appearance/prompt/#custom-prompt) in Warp | | Quake mode | [Global hotkey](/terminal/windows/global-hotkey/) | Beyond Windows Terminal’s feature set, Warp adds [Agent Mode](/agent-platform/local-agents/overview/), [blocks](/terminal/blocks/), and [Warp Drive](/knowledge-and-collaboration/warp-drive/). See [Warp for Windows installation](/getting-started/quickstart/installation-and-setup/) if you haven’t installed yet.
# Coding in Warp
Canonical page: [/getting-started/quickstart/coding-in-warp/](https://docs.warp.dev/getting-started/quickstart/coding-in-warp/)
> Agents can generate and edit code directly from within Warp.
When you enter a Git repo for the first time, Warp will enter an initialization flow to index your codebase and generate an AGENTS.md file. As you’re in the repo, Warp will enter an advanced code generation flow that supports both single-line and multi-file changes when it detects an opportunity to write code. For example, Warp may write code when you prompt: * **Code creation**: “Write a function in JavaScript to debounce an input” * **Based on error outputs, suggest fixes**: “Fix this TypeScript error.” * **Edit a single file**: “Update all instances of ‘var’ to ‘let’ in this file.” * **Make batch changes**: “Add headers to all .py files in this directory” **The best way to experience this is to try it yourself —** [*open the Prompt below in Warp*](https://app.warp.dev/drive/prompt/Generate-a-custom-Warp-theme-K8oloLrCZAHuaYKfz2cNqI) ```text Detect the correct Warp themes directory based on the current operating system: - On macOS, use ~/.warp/themes/ - On Linux, use ${XDG_DATA_HOME:-$HOME/.local/share}/warp-terminal/themes/ - On Windows, use $env:APPDATA\warp\Warp\data\themes\ Create the directory if it doesn’t already exist. Then, generate a custom Warp theme named {{theme_name}} in valid YAML format, following the official structure from Warp’s documentation. Exclude the background_image field, and do not include any extra or missing fields. Save the theme as {{theme_name}}.yaml in the detected themes directory. Once the theme is created and verified, confirm completion by telling me where the theme file was saved. ``` *** ### Context [Section titled “Context”](#context) #### Codebase Context [Section titled “Codebase Context”](#codebase-context) Warp can index your Git-tracked codebases to help agents understand your code and generate accurate, context-aware responses. **No code is stored on Warp servers**. You can view and manage your indexed codebases in **Settings** > **Code** > **Indexing and projects** under “Initialized/ indexed folders”. You can also specify whether to automatically index new folders as you navigate them. If your codebase is large, you can exclude specific files by adding them to a `.warpindexingignore` file. #### Other types of context [Section titled “Other types of context”](#other-types-of-context) You can provide different types of input as context directly to the agent to guide its behavior and improve response quality. This includes: * [Blocks](/agent-platform/local-agents/agent-context/blocks-as-context/) from your terminal output * [Images](/agent-platform/local-agents/agent-context/images-as-context/) * [Files and code](/agent-platform/local-agents/agent-context/using-to-add-context/) (using the @ symbol) * [Public websites](/agent-platform/local-agents/agent-context/urls-as-context/) via URLs #### Warp Drive as Context [Section titled “Warp Drive as Context”](#warp-drive-as-context) Agents pull directly from your [**Warp Drive**](/knowledge-and-collaboration/warp-drive/) contents to generate more accurate responses — including your **Workflows**, **Notebooks**, **Prompts**, and **Environment Variables**. * When used, context appears under the “References” or “Derived from” section in the conversation. * This setting is **enabled by default** and can be managed via: **Settings** > **Agents** > **Knowledge** > **Warp Drive as Agent Mode Context**. #### Rules [Section titled “Rules”](#rules) **Rules** let you provide persistent context to Agents, enabling smarter and more personalized responses. You can create global rules (accessed through [Warp Drive](/knowledge-and-collaboration/warp-drive/) >**Personal** > **Rules**) or project scoped rules, defined in an `AGENTS.md` file. Note: the filename must be in all caps for Warp to recognize it. **Examples of Rules include:** * Coding standards and best practices * Project- or workspace-specific guidelines * Personal preferences for tools, formatting, or behavior How to access project-specific Rules 1. From the file-searcher, CMD+O and search “AGENTS.md” 2. From the file tree, click the “code” icon when in a repo How to access Global Rules 1. From the [Warp Drive](/knowledge-and-collaboration/warp-drive/) >**Personal** > **Rules** 2. From the [Command Palette](/terminal/command-palette/), search for “Open AI Rules” 3. From the Settings panel, **Settings** > **Agents** > **Knowledge** > **Manage Rules** 4. From the macOS Menu, `AI > Open Rules`
# Customizing Warp
Canonical page: [/getting-started/quickstart/customizing-warp/](https://docs.warp.dev/getting-started/quickstart/customizing-warp/)
> A complete guide to customizing Warp: themes, vertical tabs, tab configs, prompt chips, keybindings, AI models, and more.
Warp is deeply customizable. Whether you use Warp primarily as a modern terminal or as an AI-powered development environment, you can tailor the experience to fit how you work. Configure the terminal side (themes, keybindings, vertical tabs, tab configs) and the AI side (model choice, agent autonomy, default mode) independently. Use the quick-reference table to find what you need, or browse the sections below for more details. If you want to go further than configuration, Warp’s client is open source under [AGPL v3](https://github.com/warpdotdev/warp/blob/master/LICENSE-AGPL) — see [Contributing to Warp](/support-and-community/community/contributing/) to build a custom variant or contribute changes upstream. ## Quick reference [Section titled “Quick reference”](#quick-reference) | What to customize | Where to find it | Quick action | | ----------------- | ------------------------------------------------------ | -------------------------------------------------------------------------------------- | | Theme | **Settings** > **Appearance** | Pick a preset or [create a custom YAML theme](/terminal/appearance/custom-themes/) | | Prompt chips | Right-click prompt area > **Edit prompt** | Drag and drop context chips (directory, git branch, time, etc.) | | AI model | Model selector in agent conversation | Choose Claude, GPT, Gemini, or Auto | | Keybindings | **Settings** > **Keyboard shortcuts** | Import from another terminal or set custom shortcuts | | Vertical tabs | **Settings** > **Appearance** > **Tabs** | Switch to a sidebar tab layout for more horizontal space | | Tab configs | **Settings** > **Features** or `/` menu | Save and restore tab layouts with startup commands | | Settings file | **Open settings file** button in the Settings footer | Edit [`settings.toml`](/terminal/settings/) directly for version control and scripting | | Input format | **Settings** > **Appearance** > **Input** | Choose Standard or Classic | | App icon | **Settings** > **Appearance** > **Icon** | Pick a custom icon (macOS) | | Font & text | **Settings** > **Appearance** > **Text** | Change font, size, and cursor style | | Agent autonomy | **Settings** > **Agents** > **Profiles** | Set what the agent can do without asking | | Default mode | **Settings** > **Agents** > **Warp Agent** > **Input** | Choose whether new tabs open in terminal mode or Agent Mode | *** ## Appearance [Section titled “Appearance”](#appearance) In Warp, navigate to **Settings** > **Appearance** to access these options and control how Warp looks: * **[Themes](/terminal/appearance/themes/)** - Choose from pre-loaded themes or create your own [custom theme](/terminal/appearance/custom-themes/) using YAML or a background image. * **[Prompt chips](/terminal/appearance/prompt/)** - Customize the context chips in your Warp prompt. Right-click the prompt area and select **Edit prompt** to drag and drop chips like directory, git branch, Kubernetes context, and time. * **[App icons](/terminal/appearance/app-icons/)** - Choose a custom app icon to distinguish Warp in your dock (macOS). * **[Text, fonts, and cursor](/terminal/appearance/text-fonts-cursor/)** - Change your font type, size, and cursor style. * **[Input position](/terminal/appearance/input-position/)** - Move your prompt and command line to the top or bottom of the window. * **[Size, opacity, and blurring](/terminal/appearance/size-opacity-blurring/)** - Adjust window transparency and blur effects. * **[Pane dimming](/terminal/appearance/pane-dimming/)** - Dim inactive panes to focus on the active one. ## Layout [Section titled “Layout”](#layout) Organize your workspace with tabs, panes, and window configurations. * **[Vertical tabs](/terminal/windows/vertical-tabs/)** - Switch to a vertical sidebar layout for tabs, giving you more horizontal space and better visibility when you have many open sessions. * **[Tabs](/terminal/windows/tabs/)** - Organize sessions into tabs with custom titles and colors. Right-click a tab to pick a color. * **[Split panes](/terminal/windows/split-panes/)** - Divide any tab into multiple panels, side-by-side or stacked. * **[Tab configs](/terminal/windows/tab-configs/)** - Save and restore tab layouts with predefined pane arrangements and startup commands. * **[Global hotkey](/terminal/windows/global-hotkey/)** - Set up a dedicated hotkey window (Quake Mode) that appears and hides with a keyboard shortcut. ## Input and editor [Section titled “Input and editor”](#input-and-editor) Configure how you type and interact with the terminal input. * **[Standard vs Classic input](/terminal/input/classic-input/)** - Standard input provides easier access to AI features and is the default for new users. Classic input resembles a traditional terminal prompt. Switch between them in **Settings** > **Appearance** > **Input**. * **[Keyboard shortcuts](/getting-started/keyboard-shortcuts/)** - Warp supports common shortcuts and lets you create custom ones. Manage them from **Settings** > **Keyboard shortcuts**, or import keybindings from another terminal during [migration](/getting-started/migrate-to-warp/). * **[Vim keybindings](/terminal/editor/vim/)** - Enable Vim keybindings for keyboard-driven text editing in the input editor. * **Tab key behavior** - Configure what `Tab` does in **Settings** > **Features**. Options include accepting autosuggestions or triggering completions. ## AI and models [Section titled “AI and models”](#ai-and-models) Control how Warp’s agents behave and which models they use. * **[Model choice](/agent-platform/inference/model-choice/)** - Choose your preferred AI model (Claude, GPT, Gemini, or Auto) from the model selector in any agent conversation. * **[Agent profiles and permissions](/agent-platform/capabilities/agent-profiles-permissions/)** - Configure how much autonomy the agent has: what it can auto-execute, what requires approval, and command allowlists/denylists. * **Default mode for new sessions** - Choose whether new tabs open in terminal mode or Agent Mode by default. Set this in **Settings** > **Agents** > **Warp Agent** > **Input**. ## Import and sync [Section titled “Import and sync”](#import-and-sync) Bring your existing settings into Warp or keep settings synchronized across machines. * **[Migrate from another terminal](/getting-started/migrate-to-warp/)** - Per-source guides for switching to Warp from iTerm2, Ghostty, macOS Terminal, Windows Terminal, VS Code, Cursor, Claude Code, and more. Includes automatic settings import for iTerm2. * **[Settings sync](/terminal/more-features/settings-sync/)** - Sync your Warp settings across machines (Beta). *** ## Next steps [Section titled “Next steps”](#next-steps) Now that Warp looks and feels like yours, the next step is to put it to work on a real project. Open a codebase to unlock context-aware agents, or start an agent conversation to see how terminal commands and AI work together. * **[Codebase Context](/agent-platform/capabilities/codebase-context/)** - Open a project and index your codebase so agents give you context-aware answers about your code. * **[Terminal and Agent modes](/agent-platform/local-agents/interacting-with-agents/terminal-and-agent-modes/)** - Learn how terminal mode and agent conversations work together.
# Installation and setup
Canonical page: [/getting-started/quickstart/installation-and-setup/](https://docs.warp.dev/getting-started/quickstart/installation-and-setup/)
> Install Warp on macOS, Windows, or Linux. All installation options include auto-update for new features, bug fixes, and performance improvements.
## Install Warp [Section titled “Install Warp”](#install-warp) Caution **Visit** [Known Issues](/support-and-community/troubleshooting-and-support/known-issues/) **to get more details on setting up and troubleshooting Warp.** * macOS **Download Warp and drag into your Applications folder** [Download Warp](https://www.warp.dev/download) **Install using Homebrew by running the command below** ```bash brew install --cask warp ``` After installation, you can find Warp in your Applications folder. * Windows **Download Warp, then open and run the installer** [Download Warp](https://www.warp.dev/download) **Install using WinGet by running the command below** ```powershell winget install Warp.Warp ``` After installation, you can find Warp in the Start menu. * Linux **Visit the Warp download page for the full list of Linux installation options** [Download Warp](https://www.warp.dev/download) **Debian- and Ubuntu-based distributions** The easiest way to install Warp is to download [x64 .deb package](https://app.warp.dev/download?package=deb) or [ARM64 deb package](https://app.warp.dev/download?package=deb_arm64). After downloading, you can install the package with: ```plaintext sudo apt install ./.deb ``` Installing the .deb package will automatically set up the Warp apt repository and signing key needed to automatically update Warp and verify the integrity of the downloaded packages. Alternatively, you can manually configure the Warp apt repository and install Warp by running the following commands: ```plaintext sudo apt-get install wget gpg wget -qO- https://releases.warp.dev/linux/keys/warp.asc | gpg --dearmor > warpdotdev.gpg sudo install -D -o root -g root -m 644 warpdotdev.gpg /etc/apt/keyrings/warpdotdev.gpg sudo sh -c 'echo "deb [arch=amd64 signed-by=/etc/apt/keyrings/warpdotdev.gpg] https://releases.warp.dev/linux/deb stable main" > /etc/apt/sources.list.d/warpdotdev.list' rm warpdotdev.gpg sudo apt update && sudo apt install warp-terminal ``` **RHEL-, Fedora-, and CentOS-based distributions** The easiest way to install Warp is to download the [x64 .rpm package](https://app.warp.dev/download?package=rpm) or [ARM64 .rpm package](https://app.warp.dev/download?package=rpm_arm64). After downloading, you can install the package with: ```bash sudo dnf install ./.rpm ``` Installing the .rpm package will automatically set up the Warp yum repository. On first update, `dnf` will retrieve the signing key needed to verify the integrity of the downloaded packages. Alternatively, you can manually configure the Warp yum repository and install Warp by running the following commands: ```bash sudo rpm --import https://releases.warp.dev/linux/keys/warp.asc sudo sh -c 'echo -e "[warpdotdev]\nname=warpdotdev\nbaseurl=https://releases.warp.dev/linux/rpm/stable\nenabled=1\ngpgcheck=1\ngpgkey=https://releases.warp.dev/linux/keys/warp.asc" > /etc/yum.repos.d/warpdotdev.repo' sudo dnf install warp-terminal ``` **Arch Linux-based distributions** The easiest way to install Warp is to download the [x64 .pkg.tar.zst package](https://app.warp.dev/download?package=pacman) or [ARM64 pacman package](https://app.warp.dev/download?package=pacman_arm64). After downloading, you can install the package with: ```bash sudo pacman -U ./.pkg.tar.zst ``` The first time you update Warp through the app, it will guide you through setting up the Warp pacman repository and signing key. Alternatively, you can manually configure the Warp pacman repository and install Warp by running the following commands: ```bash sudo sh -c "echo -e '\n[warpdotdev]\nServer = https://releases.warp.dev/linux/pacman/\$repo/\$arch' >> /etc/pacman.conf" sudo pacman-key -r "linux-maintainers@warp.dev" sudo pacman-key --lsign-key "linux-maintainers@warp.dev" sudo pacman -Sy warp-terminal ``` **OpenSUSE- and SLE-based distributions** The Warp yum repository also works for OpenSUSE- and SLE-based systems. Download the [x64 .rpm package](https://app.warp.dev/download?package=rpm) or [ARM64 .rpm package](https://app.warp.dev/download?package=rpm_arm64). After downloading, you can install the package with: ```bash sudo zypper install ./.rpm ``` Installing the .rpm package will automatically set up the Warp yum repository. On first update, `zypper` will retrieve the signing key needed to verify the integrity of the downloaded packages. Alternatively, you can manually configure the Warp yum repository and install Warp by running the following commands: ```bash sudo rpm --import https://releases.warp.dev/linux/keys/warp.asc sudo sh -c 'echo -e "[warpdotdev]\nname=warpdotdev\ntype=rpm-md\nbaseurl=https://releases.warp.dev/linux/rpm/stable\nenabled=1\nautorefresh=1\ngpgcheck=1\ngpgkey=https://releases.warp.dev/linux/keys/warp.asc\nkeeppackages=0" > /etc/zypp/repos.d/warpdotdev.repo' sudo zypper install warp-terminal ``` **AppImage** We also provide an [AppImage](https://appimage.org), a single-file executable version of Warp. Installing Warp via a package manager is recommended, as it will ensure your system has all necessary dependencies installed. You can download the Warp AppImage with the following commands: ```bash # On x64 systems curl -L "https://app.warp.dev/download?package=appimage" -o Warp-x64.AppImage chmod +x Warp-x64.AppImage ``` ```bash # On ARM64 systems curl -L "https://app.warp.dev/download?package=appimage_arm64" -o Warp-ARM64.AppImage chmod +x Warp-ARM64.AppImage ``` **Running Warp on Linux** If you installed a package, find Warp in your desktop manager or run `warp-terminal` on your terminal. If you’re using the AppImage, you can launch it by navigating to the directory where the AppImage is located and running `./Warp-*.AppImage`. ## Build from source [Section titled “Build from source”](#build-from-source) Warp’s client is open source under [AGPL v3](https://github.com/warpdotdev/warp/blob/master/LICENSE-AGPL), so you can build it yourself from [`warpdotdev/warp`](https://github.com/warpdotdev/warp). Clone the repo, bootstrap toolchain dependencies, and start a development build: ```bash git clone https://github.com/warpdotdev/warp.git cd warp ./script/bootstrap cargo run ``` `cargo run` launches a `warp-oss` binary built from your local checkout. See the repo’s `README.md` and `CONTRIBUTING.md` for full prerequisites (Xcode on macOS, the pinned Rust toolchain, `protoc`) and development setup. ## Initial setup [Section titled “Initial setup”](#initial-setup) ### Log in to Warp (Optional) [Section titled “Log in to Warp (Optional)”](#log-in-to-warp-optional) After installation, you have the option to create a Warp account through the “Sign up” button (top right), or by navigating to **Settings** > **Account** > **Sign up**. Optionally, you can skip this step. If you’re having issues logging in, see the [Login Troubleshooting](/support-and-community/troubleshooting-and-support/troubleshooting-login-issues/) page. ### Use Warp offline [Section titled “Use Warp offline”](#use-warp-offline) You will only need an active internet connection when you open the Warp app for the first time. Once opened, [Warp is able to run with no internet connection](/support-and-community/troubleshooting-and-support/using-warp-offline/), although certain features that require an internet connection like AI and real-time collaboration features will be unavailable. ### Import your settings [Section titled “Import your settings”](#import-your-settings) If you are migrating to Warp from another terminal, editor, or AI coding tool, see the [Migrate to Warp](/getting-started/migrate-to-warp/) docs for per-source guides including settings-import steps and feature equivalents. ### Set up your Warp default shell [Section titled “Set up your Warp default shell”](#set-up-your-warp-default-shell) Warp tries to load your login shell by default. Currently, Warp supports bash, fish, zsh, and PowerShell (pwsh). If your login shell is set to something else (for example, Nushell) Warp will load zsh by default. Zsh is the default login and interactive shell on macOS (starting with macOS Catalina in 2019), replacing the bash shell. For most Linux distributions, the default shell is bash. You can change your default shell by going to **Settings** > **Features** > **Session**. In the Startup shell for new sessions section, you can choose which shell you want Warp to use.
# Supported Shells
Canonical page: [/getting-started/supported-shells/](https://docs.warp.dev/getting-started/supported-shells/)
> Warp supports bash, zsh, fish, PowerShell, and WSL2 across macOS, Windows, and Linux.
Warp supports bash, zsh, fish, and PowerShell (pwsh) across macOS, Windows, and Linux, loading your login shell by default. You can change the default shell per-session, customize each shell’s configuration files and environment variables, and install additional shells like fish or PowerShell on macOS. ## Warp default shell [Section titled “Warp default shell”](#warp-default-shell) Warp tries to load your login shell by default. Currently, Warp supports bash, fish, zsh, and PowerShell (pwsh). If your login shell is set to something else (e.g. Nushell) Warp will show a banner indicating it’s not supported and load the default shells listed below: * On macOS, zsh is the default shell. * On Windows, PowerShell (pwsh) is the default shell. * On Linux, bash is the default shell. ### Changing what shell Warp uses [Section titled “Changing what shell Warp uses”](#changing-what-shell-warp-uses) To change the default shell, we recommend you choose a shell in Warp by going to **Settings** > **Features** and scrolling to the `Session` section, then select the “Startup shell for new sessions” ## Customizing your shell environment [Section titled “Customizing your shell environment”](#customizing-your-shell-environment) ### Customize your zsh shell environment [Section titled “Customize your zsh shell environment”](#customize-your-zsh-shell-environment) Zsh can be customized via the `~/.zshrc` file, which runs whenever a new session starts (window, tab, or pane). Use it to set environment variables, aliases, and customize the [prompt](/terminal/appearance/prompt/). #### Editing the .zshrc file [Section titled “Editing the .zshrc file”](#editing-the-zshrc-file) Edit `~/.zshrc` using `nano ~/.zshrc` or `vi ~/.zshrc`. #### Reloading the zshrc file [Section titled “Reloading the zshrc file”](#reloading-the-zshrc-file) Apply changes by running `source ~/.zshrc` or restarting Warp/opening a new session. ### Customize your Bash shell environment [Section titled “Customize your Bash shell environment”](#customize-your-bash-shell-environment) Bash is pre-installed on macOS and can be customized using `~/.bashrc` (for non-login shells) or `~/.bash_profile` (for login shells). Use these files to set environment variables, aliases, and customize the [prompt](/terminal/appearance/prompt/). #### Editing the .bashrc file [Section titled “Editing the .bashrc file”](#editing-the-bashrc-file) Edit `~/.bashrc` using `nano ~/.bashrc` or `vi ~/.bashrc`. #### Reloading the bashrc file [Section titled “Reloading the bashrc file”](#reloading-the-bashrc-file) Apply changes by running `source ~/.bashrc` or restarting Warp/opening a new session. ### Customize your Fish shell environment [Section titled “Customize your Fish shell environment”](#customize-your-fish-shell-environment) Fish is a user-friendly shell with autosuggestions and syntax highlighting. Its configuration file is `~/.config/fish/config.fish`. #### Editing the config.fish file [Section titled “Editing the config.fish file”](#editing-the-configfish-file) Edit `~/.config/fish/config.fish` using `nano ~/.config/fish`. Use it to set environment variables, aliases, and functions. #### Reloading the config.fish file [Section titled “Reloading the config.fish file”](#reloading-the-configfish-file) Apply changes by running `source ~/.config/fish` or restarting Warp/opening a new session. ### Customize your PowerShell shell environment [Section titled “Customize your PowerShell shell environment”](#customize-your-powershell-shell-environment) PowerShell can be customized via its profile script, located at `$PROFILE`. Check if it exists with `Test-Path $PROFILE`, and create it if needed with `New-Item -Path $PROFILE -ItemType File -Force`. #### Editing the PowerShell profile [Section titled “Editing the PowerShell profile”](#editing-the-powershell-profile) Edit the profile using `code $PROFILE`, and use it to set environment variables, aliases, custom prompts, and scripts. #### Reloading the PowerShell profile [Section titled “Reloading the PowerShell profile”](#reloading-the-powershell-profile) Apply changes by restarting Warp or opening a new session. ## Additional shell guidance for macOS [Section titled “Additional shell guidance for macOS”](#additional-shell-guidance-for-macos) #### Setting up zsh on Warp [Section titled “Setting up zsh on Warp”](#setting-up-zsh-on-warp) By default, macOS ships with [zsh](https://zsh.sourceforge.io/Doc/Release/zsh_toc.html) located in `/bin/zsh`. You can confirm this location by typing `which zsh` in Warp. You can also check the version of zsh installed on your system by simply typing the following: `$ zsh --version` ### Using fish shell with Warp on macOS [Section titled “Using fish shell with Warp on macOS”](#using-fish-shell-with-warp-on-macos) #### Step 1: Install fish [Section titled “Step 1: Install fish”](#step-1-install-fish) While bash, and zsh come pre-installed on macOS systems, fish shell does not. So before using fish with Warp, you will need to install it. Install fish 3.6 or above using one of the methods listed below - 1. With Homebrew: If you already have homebrew installed, you can simply type `brew install fish`, and follow the instructions. 2. Download the installer at [fishshell.com](https://fishshell.com/) #### Step 2: Switch to fish as the default shell [Section titled “Step 2: Switch to fish as the default shell”](#step-2-switch-to-fish-as-the-default-shell) Once you’ve installed fish on your computer, you can set it as your default shell, so Warp will use it every time a new tab, pane, or window is opened. You can either make fish the default shell for only Warp, from the session settings (**Settings** > **Features** > **Session**), or for your user account. To change your account’s default shell, you need to run two commands. **If you used Homebrew to install fish on macOS or if you used the macOS installer** available on fishshell.com to install fish, type the following two commands in Warp: ```plaintext echo $(which fish) | sudo tee -a /etc/shells chsh -s $(which fish) ``` ### Using PowerShell (pwsh) with Warp on macOS [Section titled “Using PowerShell (pwsh) with Warp on macOS”](#using-powershell-pwsh-with-warp-on-macos) #### Step 1: Install PowerShell [Section titled “Step 1: Install PowerShell”](#step-1-install-powershell) While bash, and zsh come pre-installed on macOS systems, PowerShell shell does not. So before using PowerShell with Warp, you will need to install it. Install PowerShell 7.0 or above using one of the methods listed below - 1. With Homebrew: If you already have homebrew installed, you can simply type `brew install powershell/tap/powershell`, and follow the instructions. 2. Download from the [official Microsoft website](https://learn.microsoft.com/en-us/powershell/scripting/install/installing-powershell). #### Step 2: Switch to pwsh as the default shell [Section titled “Step 2: Switch to pwsh as the default shell”](#step-2-switch-to-pwsh-as-the-default-shell) Once you’ve installed PowerShell on your computer, you can set it as your default shell, so Warp will use it every time a new tab, pane, or window is opened. You can either make pwsh the default shell for only Warp, from the session settings (**Settings** > **Features** > **Session**), or for your user account. To change your account’s default shell, you need to run two commands. ```plaintext echo $(which pwsh) | sudo tee -a /etc/shells chsh -s $(which pwsh) ``` ## Using Warp with shells on Windows [Section titled “Using Warp with shells on Windows”](#using-warp-with-shells-on-windows) On Windows, Warp’s default shell is PowerShell 7 (pwsh). Warp for Windows supports several shells: * PowerShell 7 (default) * PowerShell 5 * Windows Subsystem for Linux (WSL2) * Git Bash
# Warp quickstart
Canonical page: [/quickstart/](https://docs.warp.dev/quickstart/)
> Get up and running with Warp in about 10 minutes. Install, run your first commands, talk to an agent, and discover what makes Warp different.
Get up and running with Warp in about 10 minutes. Install the app, run your first commands using Blocks and the modern text editor, and start an agent conversation to write code, debug issues, or explore your codebase, all from natural language prompts inside the terminal. *** ## Prerequisites [Section titled “Prerequisites”](#prerequisites) * **macOS, Windows, or Linux** - See [Installation and setup](/getting-started/quickstart/installation-and-setup/) for minimum requirements per platform. *** ## 1. Install Warp [Section titled “1. Install Warp”](#1-install-warp) Download Warp from the [Warp download page](https://www.warp.dev/download) and follow the installer for your platform. * macOS Download and drag Warp into your Applications folder, or install with Homebrew: ```bash brew install --cask warp ``` * Windows Download and run the installer, or install with WinGet: ```powershell winget install Warp.Warp ``` * Linux Download the package for your distribution from the [Warp download page](https://www.warp.dev/download). For Debian/Ubuntu: ```bash sudo apt install ./warp-terminal.deb ``` See [Installation and setup](/getting-started/quickstart/installation-and-setup/) for all Linux options. When you launch Warp, you’ll see a terminal session ready for input. You can optionally sign up for an account (top right), or skip and start using Warp immediately. ## 2. Run a command and see Blocks [Section titled “2. Run a command and see Blocks”](#2-run-a-command-and-see-blocks) Run any command you’d normally use, for example: ```bash ls -la ``` You’ll notice the output looks different from a traditional terminal. Every command and its output is grouped into a **Block** — a contained unit you can copy, search, filter, and navigate independently. Blocks are the foundation of how Warp organizes your terminal. **What you can do with Blocks:** * Click a Block to select it, then press `⌘C` (macOS) or `Ctrl+Shift+C` (Windows/Linux) to copy the output * Use `⌘↑`/`⌘↓` (macOS) or `Ctrl+↑`/`Ctrl+↓` (Windows/Linux) to navigate between Blocks * Click the filter icon on a Block to search within its output Learn more about navigating, selecting, and acting on output in [Block basics](/terminal/blocks/block-basics/). ## 3. Try the input editor [Section titled “3. Try the input editor”](#3-try-the-input-editor) Warp’s input isn’t a standard terminal prompt, it’s a real text editor. Try the following functionality: * **Multi-line editing** - Press `Shift+Enter` to add a new line. Try typing three separate `echo` lines, pressing `Shift+Enter` between each, then `Enter` to run them all at once. * **Click to place your cursor** - Click anywhere in your input to move the cursor, just like a text editor. * **Select and edit** - Click and drag to select text, then type to replace it. All three commands run in sequence, and each produces its own Block. No need to run commands one at a time. Learn more about cursor movement, selections, and multi-line input in [Modern text editing](/terminal/editor/). ## 4. See autosuggestions and completions [Section titled “4. See autosuggestions and completions”](#4-see-autosuggestions-and-completions) Start typing a command you’ve run before. You’ll see a faded suggestion appear inline based on your shell history. Press `→` to accept it instantly. Press `Tab` while typing to see completions for commands, flags, and file paths. Warp provides enhanced completions beyond what your shell offers natively. If you mistype a command, Warp detects the error and suggests a correction. Accept the fix or dismiss it and continue. Learn more about [Autosuggestions](/terminal/command-completions/autosuggestions/) and [Tab completions](/terminal/command-completions/completions/). ## 5. Ask your first agent question [Section titled “5. Ask your first agent question”](#5-ask-your-first-agent-question) Everything you’ve done so far has been in **terminal mode**, running shell commands the way you normally would. Warp also has **Agent Mode**, a dedicated conversation view where you interact with Oz, Warp’s built-in agent, using natural language. Start an agent conversation by pressing `⌘↩` (macOS) or `Ctrl+Shift+Enter` (Windows/Linux). Then type a prompt: ```plaintext Explain the architecture of this project ``` Oz reads your codebase, understands its structure, and responds with a context-aware explanation. From here you can ask follow-up questions, have Oz write or refactor code, debug errors, or run commands on your behalf — all within the same conversation. Warp also works with third-party CLI agents like Claude Code and Codex. Learn more about [third-party CLI agents](/agent-platform/cli-agents/overview/). To learn more about switching between modes, see [Terminal and Agent modes](/agent-platform/local-agents/interacting-with-agents/terminal-and-agent-modes/). *** ## What to explore next [Section titled “What to explore next”](#what-to-explore-next) Now that you have the basics, check out the features that make Warp a full development environment: * **[Customizing Warp](/getting-started/quickstart/customizing-warp/)** — Pick a theme, configure your prompt, choose your AI model, and import keybindings from another terminal. * **[Codebase Context](/agent-platform/capabilities/codebase-context/)** — Index your Git repositories so agents understand your code and give context-aware answers across large, multi-repo systems. * **[Cloud agents](/agent-platform/cloud-agents/overview/)** — Run agents in the background for PR review, issue triage, dependency updates, and other tasks that don’t need your immediate attention. * **[Keyboard shortcuts](/getting-started/keyboard-shortcuts/)** — The full shortcut reference for power users.