Agents: Agents in Warp: capabilities, local agents, and CLI agents.
# Agents overview
Canonical page: [/agents/](https://docs.warp.dev/agents/)
> The Warp Agent runs commands in a real terminal, carries your context across every surface, and works interactively or in the background.
The **Warp Agent** is Warp’s built-in coding agent. It works through multi-step tasks on its own, running commands in a real terminal and using the output to decide what to do next. You stay in the loop, approving actions and reviewing diffs before anything lands. This page covers where to run the agent, the third-party CLI agents Warp supports, and the [Automation Platform](/platform/overview/), which runs and coordinates agents at scale. *** ## Where to use the Warp Agent [Section titled “Where to use the Warp Agent”](#where-to-use-the-warp-agent) You reach the same agent three ways. Which one you pick depends on where you’re working, not on what the agent can do. * **In the Warp app** - The full experience, with code review, agent management, and the terminal beside your conversation. * [**In any terminal, with the Warp Agent CLI**](/agents/cli/) - Run the `warp` command to start a conversation in any terminal emulator, over SSH, or on a machine where the Warp app isn’t installed. * [**In the cloud, as a cloud agent**](/platform/) - Run the agent in the background from a trigger, a schedule, or an integration, without keeping a session open. Cloud agents run on the [Automation Platform](/platform/overview/), Warp’s platform for environments, triggers, orchestration, and observability. *** ## What makes the Warp Agent different [Section titled “What makes the Warp Agent different”](#what-makes-the-warp-agent-different) * **It works in a real terminal** - The agent runs shell commands, reads live output, and drives interactive programs like REPLs, database shells, and full-screen apps. See [Full terminal use](/agents/capabilities/full-terminal-use/). * **Your context follows it everywhere** - [Rules](/agents/capabilities/rules/), [Skills](/agents/capabilities/skills/), [MCP servers](/agents/capabilities/mcp/), and [Codebase Context](/agents/capabilities/codebase-context/) apply the same way in the app, the CLI, and the cloud. * **Interactive or delegated, and you can switch mid-task** - Steer a conversation while it runs, or [hand it off](/platform/handoff/) to a cloud agent and pick it back up locally when it’s done. * **You approve before anything lands** - The agent asks before it runs commands, edits files, or calls MCP servers. Set how much it does on its own with [Agent Profiles and permissions](/agents/capabilities/agent-profiles-permissions/), and review generated changes in [interactive code review](/agents/local-agents/interactive-code-review/). * **Many agents at once** - Run several conversations in parallel and track them in the [Agent Management Panel](/platform/managing-cloud-agents/), or use [orchestration](/platform/orchestration/) to have a parent agent spawn and coordinate children.  **Try this prompt** — [*open in Warp*](https://app.warp.dev/drive/prompt/Clone-and-install-Warps-themes-repository-PkK9Zw16SCD3JKzOUoGuj4)
```text
Detect my current operating system. Based on that, navigate to the appropriate Warp themes directory (e.g. ~/.warp/ on macOS).
Then, clone the official Warp themes repository using SSH (git@github.com:warpdotdev/themes.git) into that directory, following the structure and instructions provided in the repo's README. If SSH does not work, try HTTPS (https://github.com/warpdotdev/themes.git) or via the GitHub CLI (gh repo clone warpdotdev/themes).
```
*** ## Third-party CLI agents [Section titled “Third-party CLI agents”](#third-party-cli-agents) Separately from the Warp Agent, Warp gives third-party CLI coding agents first-class support. Run Claude Code, Codex, OpenCode, and others inside Warp and get rich input, agent notifications, inline code review, and remote session control. → [Learn about third-party CLI agents](/agents/cli-agents/overview/) *** ## The platform behind the agent [Section titled “The platform behind the agent”](#the-platform-behind-the-agent) The [**Automation Platform**](/platform/overview/) is Warp’s programmable system for running and coordinating agents at scale. It provides the environments, triggers, integrations, orchestration, and observability that cloud agents run on, along with a CLI, API, and SDK for driving agents programmatically. To automate an entire workflow rather than a single task, use [Warp Factories](/factories/). Built on the Automation Platform, a factory runs a team of cloud agents that triage, spec, implement, review, and verify work. The Automation Platform tab covers the platform in full. *** ## Privacy and security [Section titled “Privacy and security”](#privacy-and-security) Warp is **SOC 2 compliant** and has **Zero Data Retention** policies with all contracted LLM providers. No customer AI data is retained, stored, or used for training. You can disable Warp’s AI features entirely in **Settings** > **Agents** > **Warp Agent**. → [Read more about data privacy](https://www.warp.dev/privacy) *** ## Where to go next [Section titled “Where to go next”](#where-to-go-next) * [**Interacting with agents**](/agents/local-agents/interacting-with-agents/) - Conversations, context, code review, and voice in the Warp app. * [**Agent capabilities**](/agents/capabilities/) - Planning, skills, rules, MCP servers, task lists, and model choice. * [**Warp Agent CLI quickstart**](/agents/cli/quickstart/) - Install the CLI and run your first conversation. * [**Cloud agents quickstart**](/platform/quickstart/) - Run your first agent in the cloud, or put one on a [schedule](/platform/triggers/scheduled-agents/). For a comparison of triggers across schedules, Slack, Linear, GitHub Actions, the CLI, and the API, see [Run unattended agents](/guides/agent-workflows/how-to-run-unattended-agents/). * [**Agent FAQs**](/agents/getting-started/faqs/) - Models, privacy, credits, and limits. *** ## Open source [Section titled “Open source”](#open-source) Warp’s client is open source under [AGPL v3](https://github.com/warpdotdev/warp/blob/master/LICENSE-AGPL), so the editor and terminal that host your agents are fully auditable. See [Contributing to Warp](/support-and-community/community/contributing/).
# Agent Memory (Research Preview)
Canonical page: [/agents/agent-memory/](https://docs.warp.dev/agents/agent-memory/)
> Agent Memory gives agents in Warp persistent memory across supported harnesses, including the Warp Agent, Claude Code, and Codex.
Caution Agent Memory is in **research preview** and is enabled per team for design partners. [Join the waitlist](https://www.warp.dev/oz/agent-memory#waitlist) to request access for your team. Agent Memory is a persistent memory system that lives on Warp and is shared across every supported [agent harness](/platform/harnesses/), including the built-in Warp Agent, Claude Code, Codex, and others as they’re added. Agents read from and write to this memory system as they run, so durable facts, decisions, and outcomes from one conversation are available to the next — regardless of which harness, machine, or teammate triggers the work. Memory creation and retrieval are asynchronous and run in the background, so they don’t consume tokens or add latency to the active task. Watch this short preview to see Agent Memory in context.  [Join the Agent Memory waitlist](https://www.warp.dev/oz/agent-memory#waitlist). ## Key features [Section titled “Key features”](#key-features) * **Cross-harness memory** - One memory system is shared across the Warp Agent, Claude Code, Codex, and other harnesses as they’re added. Third-party harnesses are covered when they run as cloud agents. * **Both local and cloud agents** - Supports interactive local agents in Warp and background cloud agents. * **Asynchronous by design** - Memory creation runs after a conversation ends. Retrieval runs in the background during a run. Neither consumes tokens or adds latency to the active task. * **Automatic memory creation from conversations** - When a conversation ends, Warp extracts durable facts, learnings, and outcomes and writes them as memories. New knowledge merges with existing memories or supersedes them on conflict. * **Shareable stores** - Memory is organized into stores. A store can be attached to one or more agents, so the same knowledge is available wherever those agents run. To share knowledge across a team, attach a store to an agent the whole team uses. * **Auto-memory for new agents** - New agents get a dedicated, agent-owned memory store by default, so they start building long-term memory from their first run. You can turn this off when you create the agent. * **Per-agent access and instructions** - Attach stores to specific agents with read-only or read-write access. Per-store instructions tell each agent how and when to use the store. * **Traceability** - Each memory records where it came from, so teams can trace a memory back to its source. * **Auditability** - Every change to a memory is recorded so teams can inspect how a memory has changed over time. ## Where Agent Memory runs [Section titled “Where Agent Memory runs”](#where-agent-memory-runs) Agent Memory is part of Warp. Storage, memory creation, and retrieval all run on Warp alongside your agents. The same memory is accessible from any agent you run in Warp: * The local Warp Agent. * [Cloud agents](/platform/) triggered from the CLI, web app, [schedules](/platform/triggers/scheduled-agents/), or [integrations](/platform/integrations/). * Third-party harnesses running as cloud agents: Claude Code, Codex, and others as they’re added. (Running third-party harnesses locally isn’t supported during the research preview.) Memory stays bound to its owner (a user, an agent, or a team), independent of which harness reads or writes. ## Memory stores [Section titled “Memory stores”](#memory-stores) A memory store is a collection of memories. Stores are used by attaching them to agents: a store can be attached to a single agent or to several agents that need the same knowledge. To make knowledge available across a team, attach a store to an agent the whole team uses; there’s no separate step for sharing a store with individual teammates. Stores differ by who owns them: * **Personal stores** - Owned by a user. Hold memories about preferences, working notes, and individual patterns. * **Agent stores** - Owned by an agent. A new agent gets one by default as its auto-memory store (see below). * **Team stores** - Owned by a team. Hold shared knowledge like deployment runbooks, code review conventions, or on-call procedures. Attach a team store to any agent the team uses so everyone’s work draws on the same knowledge. Teams can use multiple stores to keep contexts separate, and attach the same store to several agents when needed. For example, a code review agent can use a dedicated store of review patterns, while a repo-specific store of architectural decisions is attached to both the code review agent and a Sentry triage agent so both reason about the same codebase. ### Auto-memory for new agents [Section titled “Auto-memory for new agents”](#auto-memory-for-new-agents) When you create an agent in the Oz web app, **Auto-memory** is on by default. With it enabled, Warp creates a dedicated memory store owned by that agent and uses it as the agent’s default long-term memory: the agent reads relevant memories before it acts and writes durable facts, decisions, and preferences for future runs. Each agent has a single auto-memory store. Auto-memory is different from automatic memory creation from conversations, described below: auto-memory is the store an agent gets by default, while automatic memory creation from conversations is how memories are written to a store after a conversation ends. You can turn Auto-memory off when you create the agent, and you can attach existing team stores at the same time, each with its own access level and instructions. ## Automatic memory creation from conversations [Section titled “Automatic memory creation from conversations”](#automatic-memory-creation-from-conversations) When a conversation finishes, Warp extracts durable facts, learnings, and outcomes from the transcript and writes them as memories. Memory creation runs in the background after the conversation ends, so it doesn’t consume tokens or add latency during that run. * **Memories evolve over time** - Agents update and supersede their own memories as new information arrives, including to resolve contradictions with prior memories. You can also explicitly ask an agent to remember something during a conversation. Warp saves that memory to the appropriate store. ## How agents use memory [Section titled “How agents use memory”](#how-agents-use-memory) When an agent starts a task, Warp searches the stores the agent can access for relevant memories and injects them as context. The search runs in the background, so the agent only sees the memories returned. Agents can also retrieve additional memories on demand mid-conversation when they determine it’s relevant, similar to how they consult [Rules](/agents/capabilities/rules/) or [Codebase Context](/agents/capabilities/codebase-context/). You don’t need to write retrieval queries or pre-load memory. ## Attaching memory to your agents [Section titled “Attaching memory to your agents”](#attaching-memory-to-your-agents) Attach stores to agents with read-only or read-write access. Each attachment includes per-store instructions that tell the agent how and when to use the store. For example, use instructions like “Reference this store for team naming conventions” or “Write a new memory after each successful deployment.” Instructions are required on every attachment so the agent knows the purpose of each store. ## Coming soon [Section titled “Coming soon”](#coming-soon) These capabilities aren’t part of the research preview yet, but they’re on the way: * **Programmatic API access** - Read and manage memories and stores through the [Warp Platform API](/factories/api-and-sdk/), in addition to managing them in the Oz web app. * **Self-hosting support** - Run Agent Memory on a [self-hosted Automation Platform](/factories/self-hosting/) instance to meet security, privacy, and compliance requirements. ## Join the waitlist [Section titled “Join the waitlist”](#join-the-waitlist) Agent Memory is rolling out to design partner teams during research preview. [Join the waitlist](https://www.warp.dev/oz/agent-memory#waitlist) to request access. ## Related pages [Section titled “Related pages”](#related-pages) * [Harnesses in the Automation Platform](/platform/harnesses/) - Run Warp Agent, Claude Code, or Codex as cloud agents with shared platform features. * [Codebase Context](/agents/capabilities/codebase-context/) - Let agents understand your codebase through semantic indexing. * [Rules](/agents/capabilities/rules/) - Define global and project-level guidelines that shape agent behavior. * [Skills](/agents/capabilities/skills/) - Reusable, scoped instructions that teach agents how to perform specific tasks. * [Agent profiles and permissions](/agents/capabilities/agent-profiles-permissions/) - Control what permissions and autonomy agents have.
# Capabilities overview
Canonical page: [/agents/capabilities/](https://docs.warp.dev/agents/capabilities/)
> Core capabilities and configuration options that shape how agents behave, what context they have access to, and how they execute tasks.
Agent capabilities are the core building blocks that define how agents operate, including the context sources agents can access, the rules that guide their behavior, the tools they can use, and the models they run on. Configure these capabilities to match your workflows and preferences. ## Capabilities in this section [Section titled “Capabilities in this section”](#capabilities-in-this-section) * [Slash Commands](/agents/capabilities/slash-commands/) - Quick actions and saved prompts accessible by typing `/` in Agent Mode. * [Skills](/agents/capabilities/skills/) - Reusable, scoped instructions that teach agents how to perform specific tasks in your codebase. * [Planning](/agents/capabilities/planning/) - Turn agent requests into organized, editable plans that execute step-by-step with full visibility. * [Task Lists](/agents/capabilities/task-lists/) - Track complex workflows with automatic task lists that update progress in real time. * [Rules](/agents/capabilities/rules/) - Define global and project-level guidelines that shape agent behavior and responses. * [Full Terminal Use](/agents/capabilities/full-terminal-use/) - Let the agent drive interactive terminal apps, seeing live output and running commands. * [Computer Use](/agents/capabilities/computer-use/) - Let agents interact with desktop environments by taking screenshots, clicking, typing, and controlling the GUI. * [MCP](/agents/capabilities/mcp/) - Connect external data sources and tools to agents via the Model Context Protocol. * [Codebase Context](/agents/capabilities/codebase-context/) - Let agents understand your codebase through semantic indexing of your Git-tracked files. * [Agent Profiles & Permissions](/agents/capabilities/agent-profiles-permissions/) - Control what permissions and autonomy agents have to run commands and apply changes. * [Web Search](/agents/capabilities/web-search/) - Allow agents to search the web for up-to-date information. ## Related [Section titled “Related”](#related) * [Inference & providers](/agents/inference/model-choice/) - Pick the model that powers your agents, bring your own API key, or connect a custom inference endpoint. * [Agents overview](/agents/) - What the Warp Agent does, how to control it, and where to run it.
# Agent Notifications
Canonical page: [/agents/capabilities/agent-notifications/](https://docs.warp.dev/agents/capabilities/agent-notifications/)
> Warp surfaces notifications from coding agents, both in-app and via desktop alerts, so you know exactly when an agent needs your attention.
Warp delivers notifications from any supported coding agent so you always know when an agent finishes a task, encounters an error, or needs your input. Notifications work whether you’re in a different tab or a different app.  ## Notification types [Section titled “Notification types”](#notification-types) Warp categorizes agent notifications by what happened: * **Complete** - the agent finished its task successfully. You can review the output and continue working. * **Request** - the agent is blocked and needs your input. This includes command approval, permission requests, and idle prompts where the agent is waiting for you. * **Error** - the agent encountered an error that requires your attention. ## In-app notifications [Section titled “In-app notifications”](#in-app-notifications) When you’re working in Warp but not looking at the agent’s tab, Warp provides several visual signals. ### Toast notifications [Section titled “Toast notifications”](#toast-notifications) Floating toast notifications appear in the corner of the Warp window when an agent in another tab needs attention. Toasts auto-dismiss after a few seconds. Hover over a toast to pause the timer, or click it to jump directly to the agent’s session. Up to two toasts are visible at a time. If additional notifications arrive, the oldest toast is replaced. 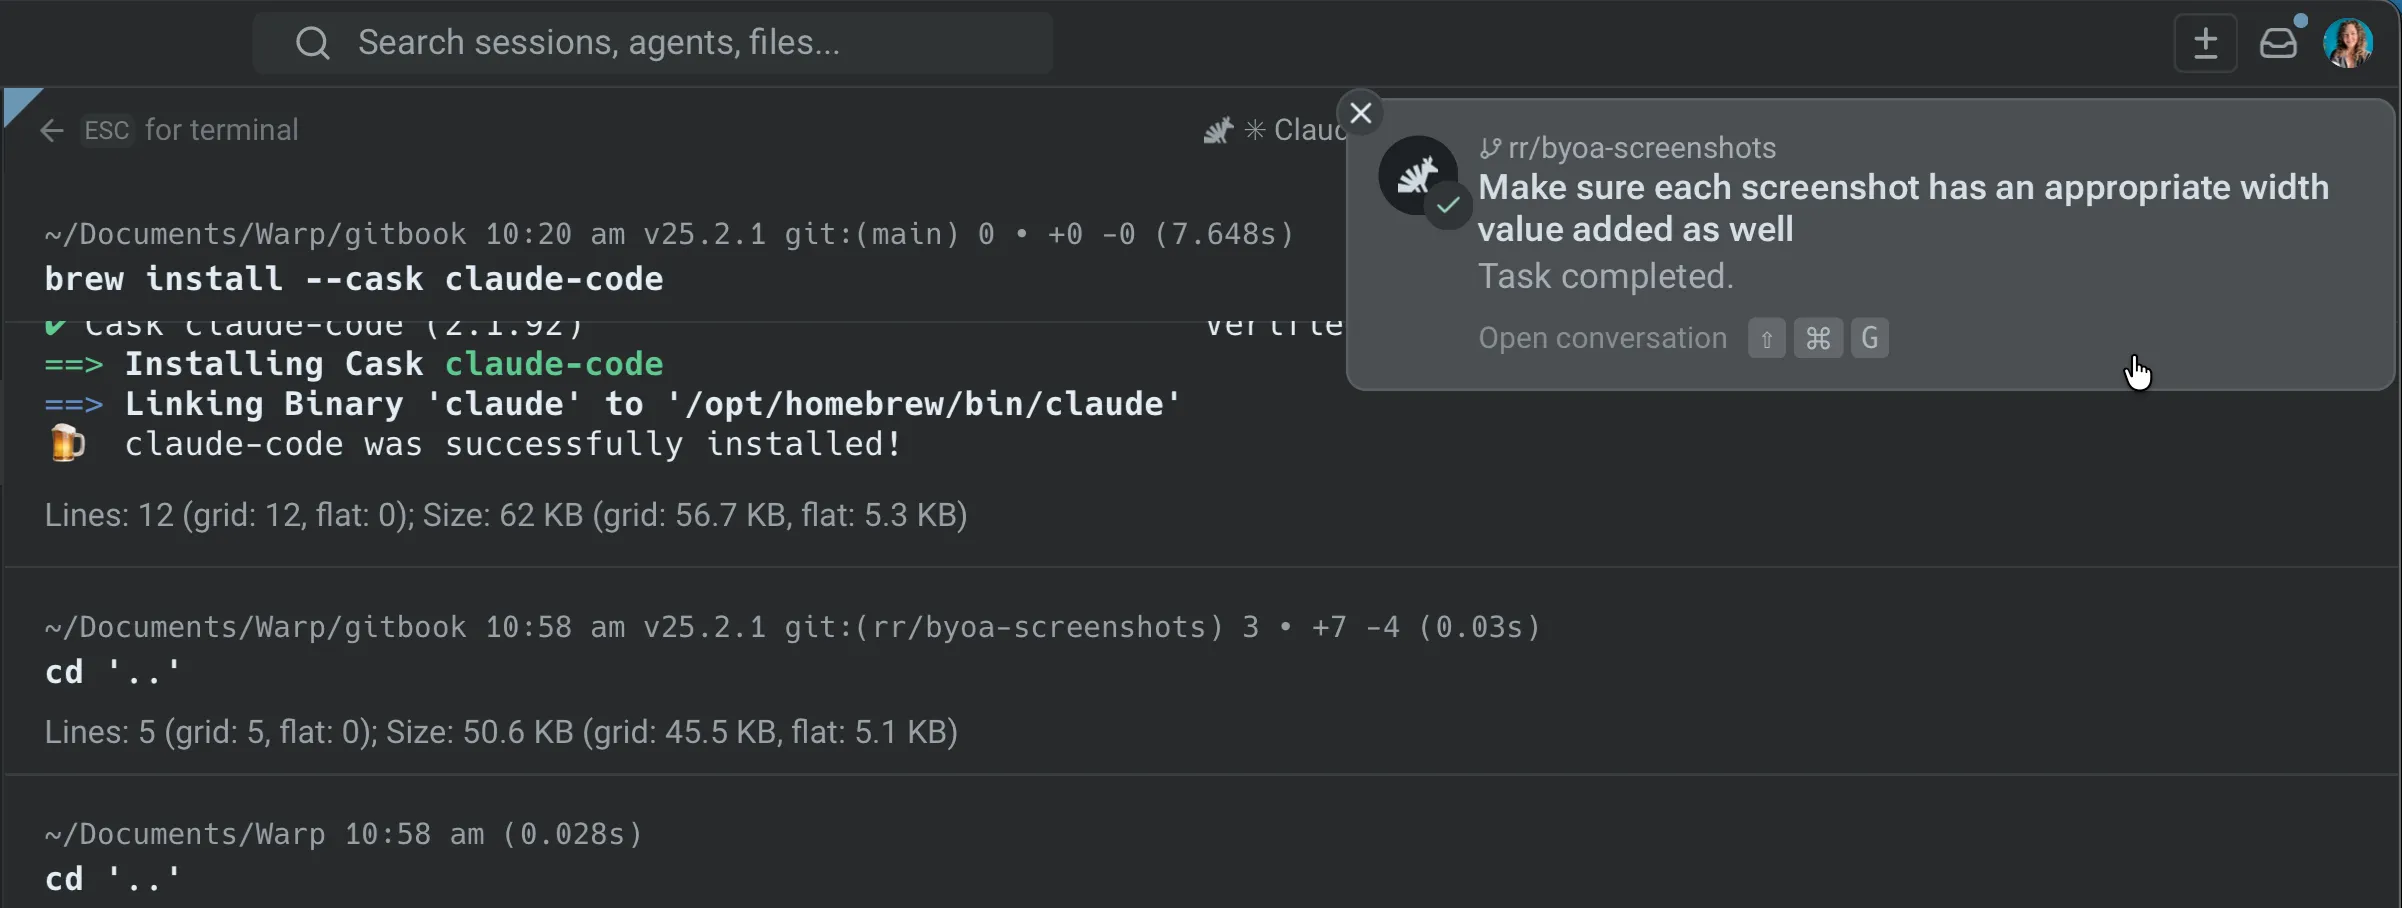 Agent task completion notification. ### Notification mailbox [Section titled “Notification mailbox”](#notification-mailbox) The notification mailbox is a sidebar panel that collects all agent notifications in one place. Open it from the bell icon in the top-right corner of Warp. 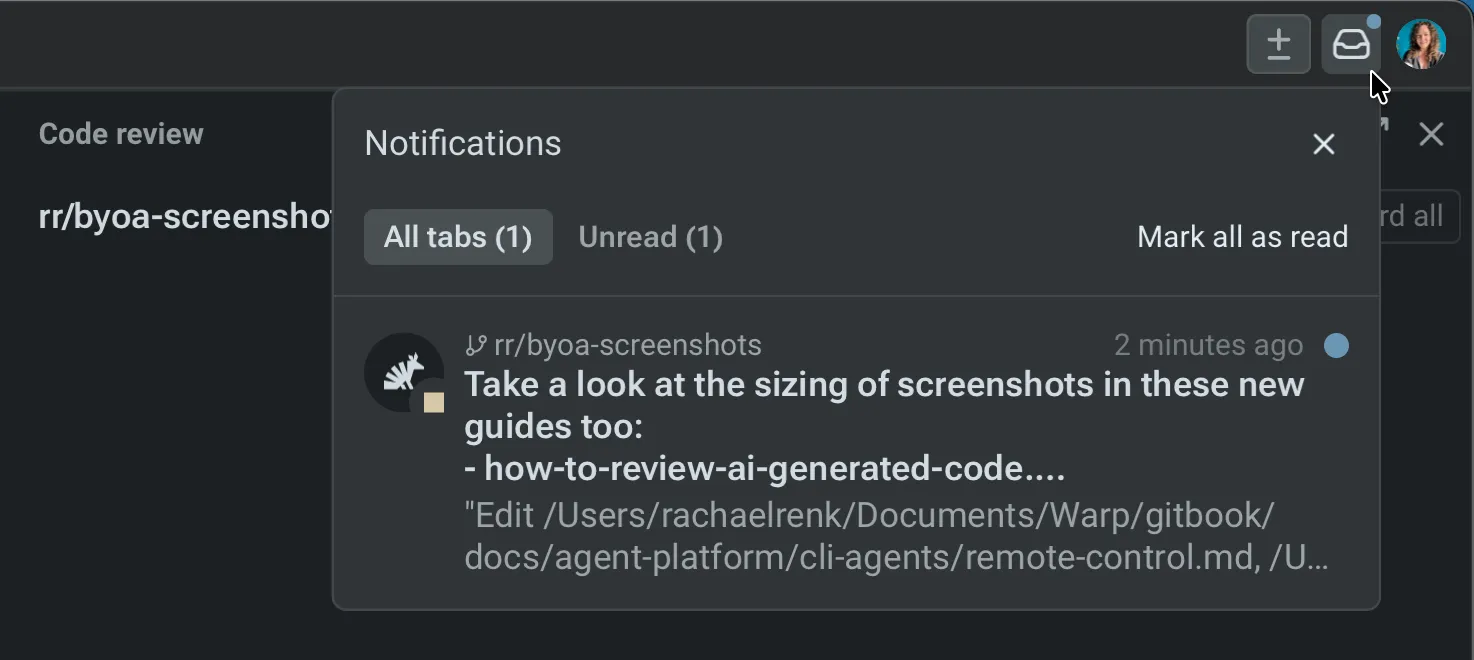 Agent notification mailbox. The mailbox includes: * **Filter tabs** - switch between **All tabs**, **Unread**, and **Errors** to find what needs attention. If there are no unreads or errors, those filters don’t appear. * **Mark all as read** - clear all unread indicators at once * **Click to navigate** - click any notification to jump directly to that agent’s tab **Keyboard shortcuts:** * `↑` / `↓` - select previous / next notification * `Enter` - open the selected notification’s session * `Shift+Tab` - cycle through filter tabs * `Esc` - close the mailbox ### Tab status indicators [Section titled “Tab status indicators”](#tab-status-indicators) Each tab displays an icon reflecting its agent’s current state — working, blocked, completed, or errored. Tabs with unread notifications show an attention badge so you can spot which sessions need action, even with many tabs open. Notifications are automatically marked as read when you navigate to the agent’s tab. ## Desktop notifications [Section titled “Desktop notifications”](#desktop-notifications) When Warp is in the background or minimized, agent notifications are delivered as native system-level desktop alerts. This ensures you’re aware of agent activity even while working in other apps. ## Supported agents [Section titled “Supported agents”](#supported-agents) Agent notifications currently work with: * **Warp Agent** - supported out of the box. No setup required. * **Claude Code** - full support via notification plugin. * **Codex** - full support via native Codex configuration. * **OpenCode** - full support via notification plugin. ## Setting up notifications [Section titled “Setting up notifications”](#setting-up-notifications) For the **Warp Agent**, notifications work out of the box — no setup needed. For **third-party CLI agents**, each agent requires a one-time setup. The process varies by agent: * **Claude Code** - one-click auto-install via a chip in Warp, or manual plugin commands. See [Claude Code setup](/agents/cli-agents/claude-code/#setting-up-notifications). * **Codex** - add `notification_condition = "always"` under `[tui]` in `~/.codex/config.toml`, then restart Codex. See [Codex setup](/agents/cli-agents/codex/#setting-up-notifications). * **OpenCode** - add `"@warp-dot-dev/opencode-warp"` to the `plugin` array in your OpenCode config. See [OpenCode setup](/agents/cli-agents/opencode/#setting-up-notifications). 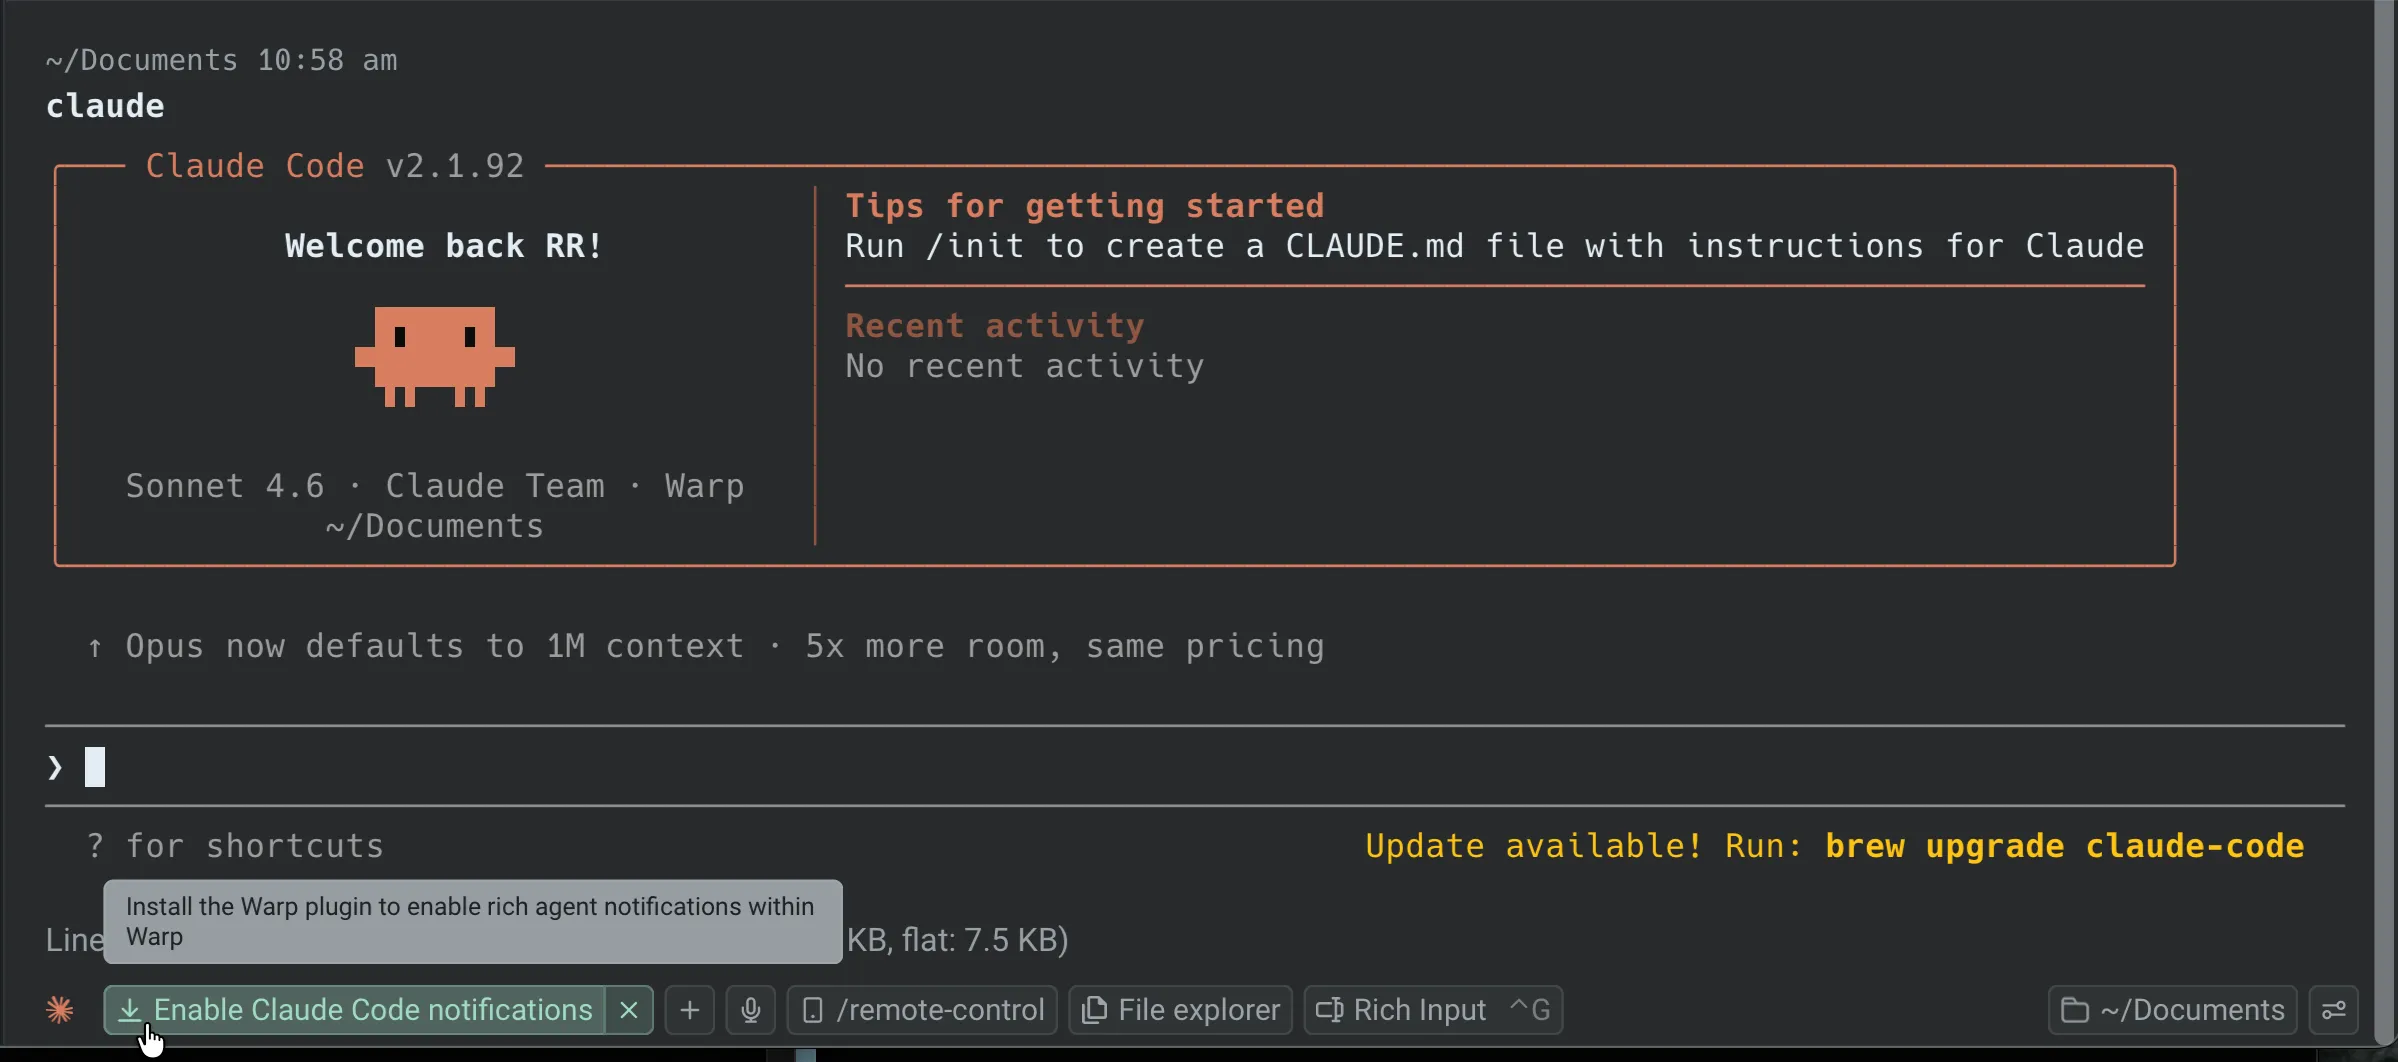 Notification plugin install chip. If auto-install doesn’t work or you’re running an agent over SSH, Warp displays an installation-instructions chip in the terminal with setup steps you can follow directly. ## Notifications in orchestrated runs [Section titled “Notifications in orchestrated runs”](#notifications-in-orchestrated-runs) In a [multi-agent orchestration](/platform/orchestration/), the parent agent and each child agent are separate conversations. Today, in-app notifications fire on the parent’s conversation only: child agent conversations are excluded from the toast stream and the notification mailbox so the mailbox doesn’t get cluttered with per-child status churn. That means: * **Toasts and the mailbox** - watch the parent’s conversation for `Complete`, `Request`, and `Error` notifications. * **Per-child state** - use the orchestration pill bar above the agent view header (in the Warp app) or the parent’s **Sub-agents** tab on the [Runs page](https://oz.warp.dev/runs) (in the Oz web app) to see each child’s live status. Both surfaces update as children transition through `INPROGRESS`, `SUCCEEDED`, `BLOCKED`, `FAILED`, `ERROR`, and `CANCELLED`. * **Blocked children** - if a child blocks on user input (for example, a command approval request), open that child from the pill bar to resolve the block. The parent’s transcript also reflects the child’s `BLOCKED` state so the parent can wait, send a follow-up, or cancel the child. ## Related pages [Section titled “Related pages”](#related-pages) * [Desktop Notifications](/terminal/more-features/notifications/) - configure system-level notification permissions and troubleshoot delivery * [Managing Agents](/platform/managing-cloud-agents/) - monitor all agent conversations, filter by status, and inspect sessions * [Multi-agent orchestration](/platform/orchestration/) - parent/child model, run state transitions, and the orchestration pill bar * [Third-party CLI agents](/agents/cli-agents/overview/) - overview of supported CLI agents and Warp features * [Claude Code](/agents/cli-agents/claude-code/) - setup and notification plugin installation * [Codex](/agents/cli-agents/codex/) - setup and notification configuration * [OpenCode](/agents/cli-agents/opencode/) - setup and notification plugin installation
# Profiles & Permissions
Canonical page: [/agents/capabilities/agent-profiles-permissions/](https://docs.warp.dev/agents/capabilities/agent-profiles-permissions/)
> Agent Profiles let you customize how your Agent behaves, from its models and autonomy to the tools and permissions it can use.
Agent Profiles let you configure how agents behave in different situations, including autonomy level, base model, tool access, and command permissions. Create multiple profiles for different workflows, control which commands run automatically, and set MCP server access rules per profile. ## Agent Profiles [Section titled “Agent Profiles”](#agent-profiles) Agent Profiles let you configure how your Agent behaves in different situations. Each profile defines the Agent’s autonomy, base models, and tool access. You can create multiple profiles and edit them directly in **Settings** > **Agents** > **Profiles**. * **Default profile**: Every user starts with a default profile, you can edit it at any time, and new profiles will copy its settings as a starting point. * **Other profiles**: Set up different profiles for different workflows (e.g., “Safe & cautious”, “YOLO mode”, etc.). Manage them in the Profiles settings menu. 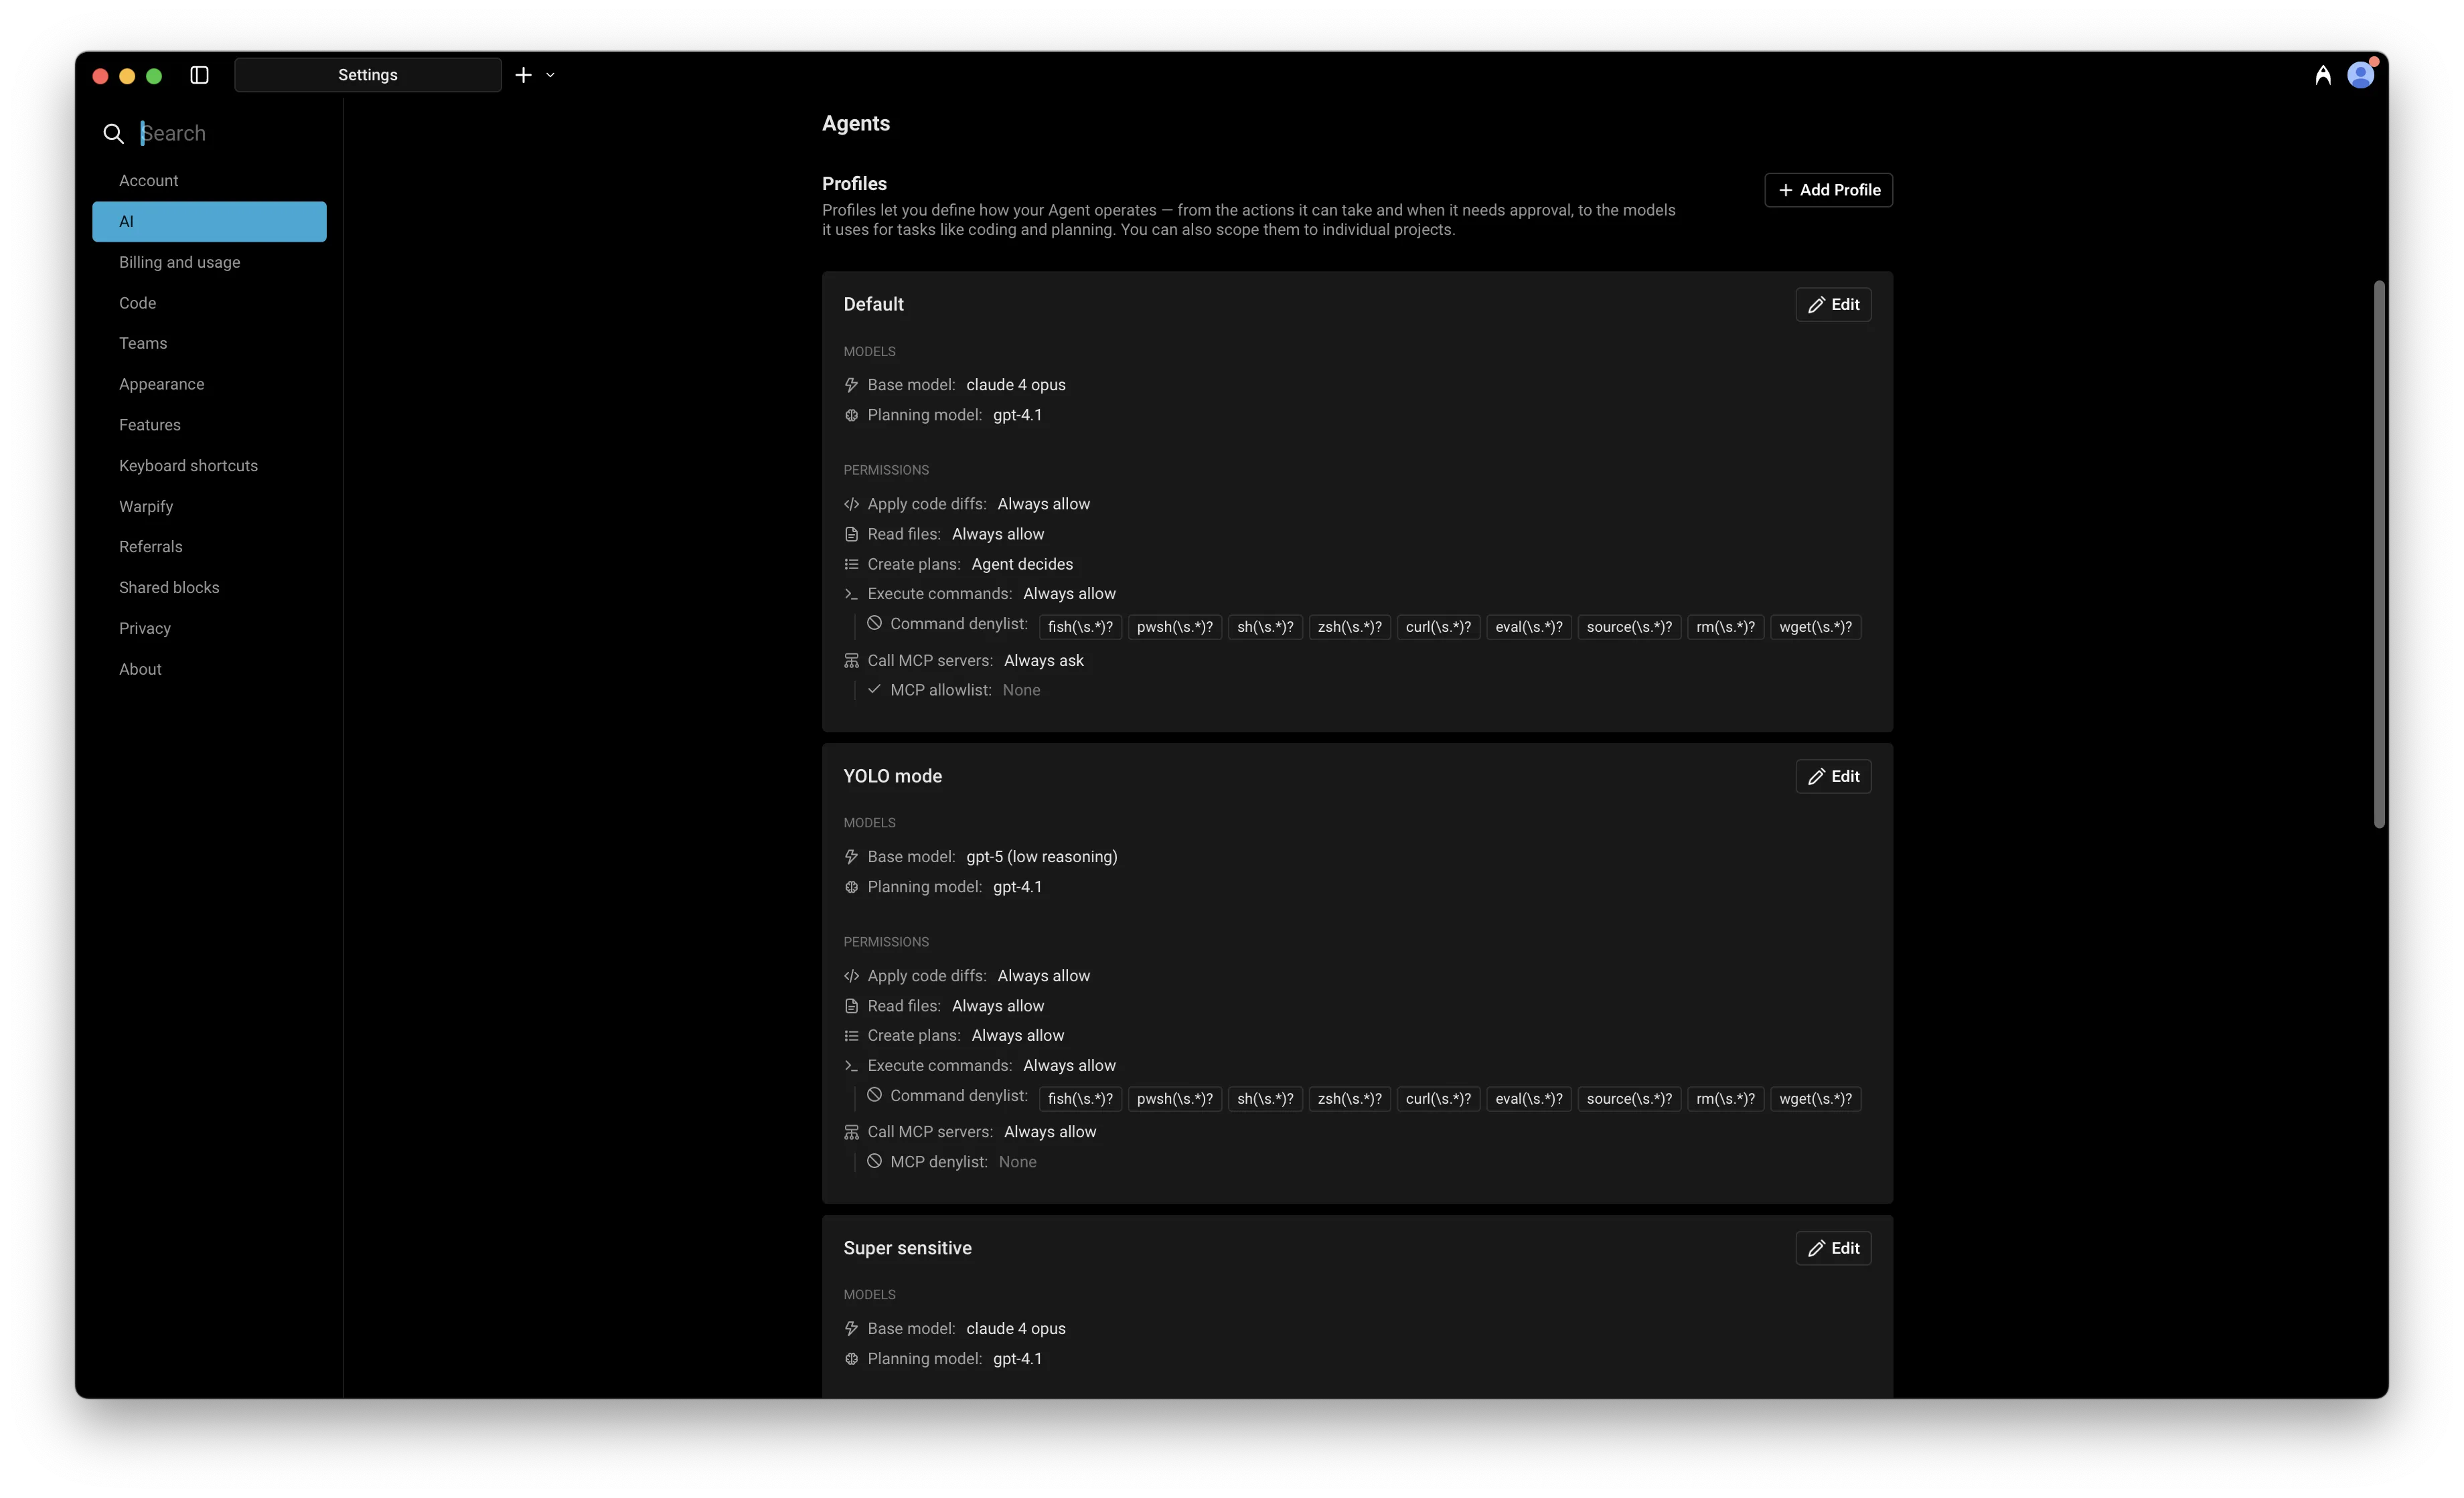 Agent Profile settings. **In each Agent Profile, you can configure:** * The name of the profile * **Base model**: The core engine for your Agent. It handles most interactions and invokes other models when needed (e.g. for code generation). This model is also used for [Planning](/agents/capabilities/planning/) by default, though you can configure a separate planning model. * Agent autonomy and permissions 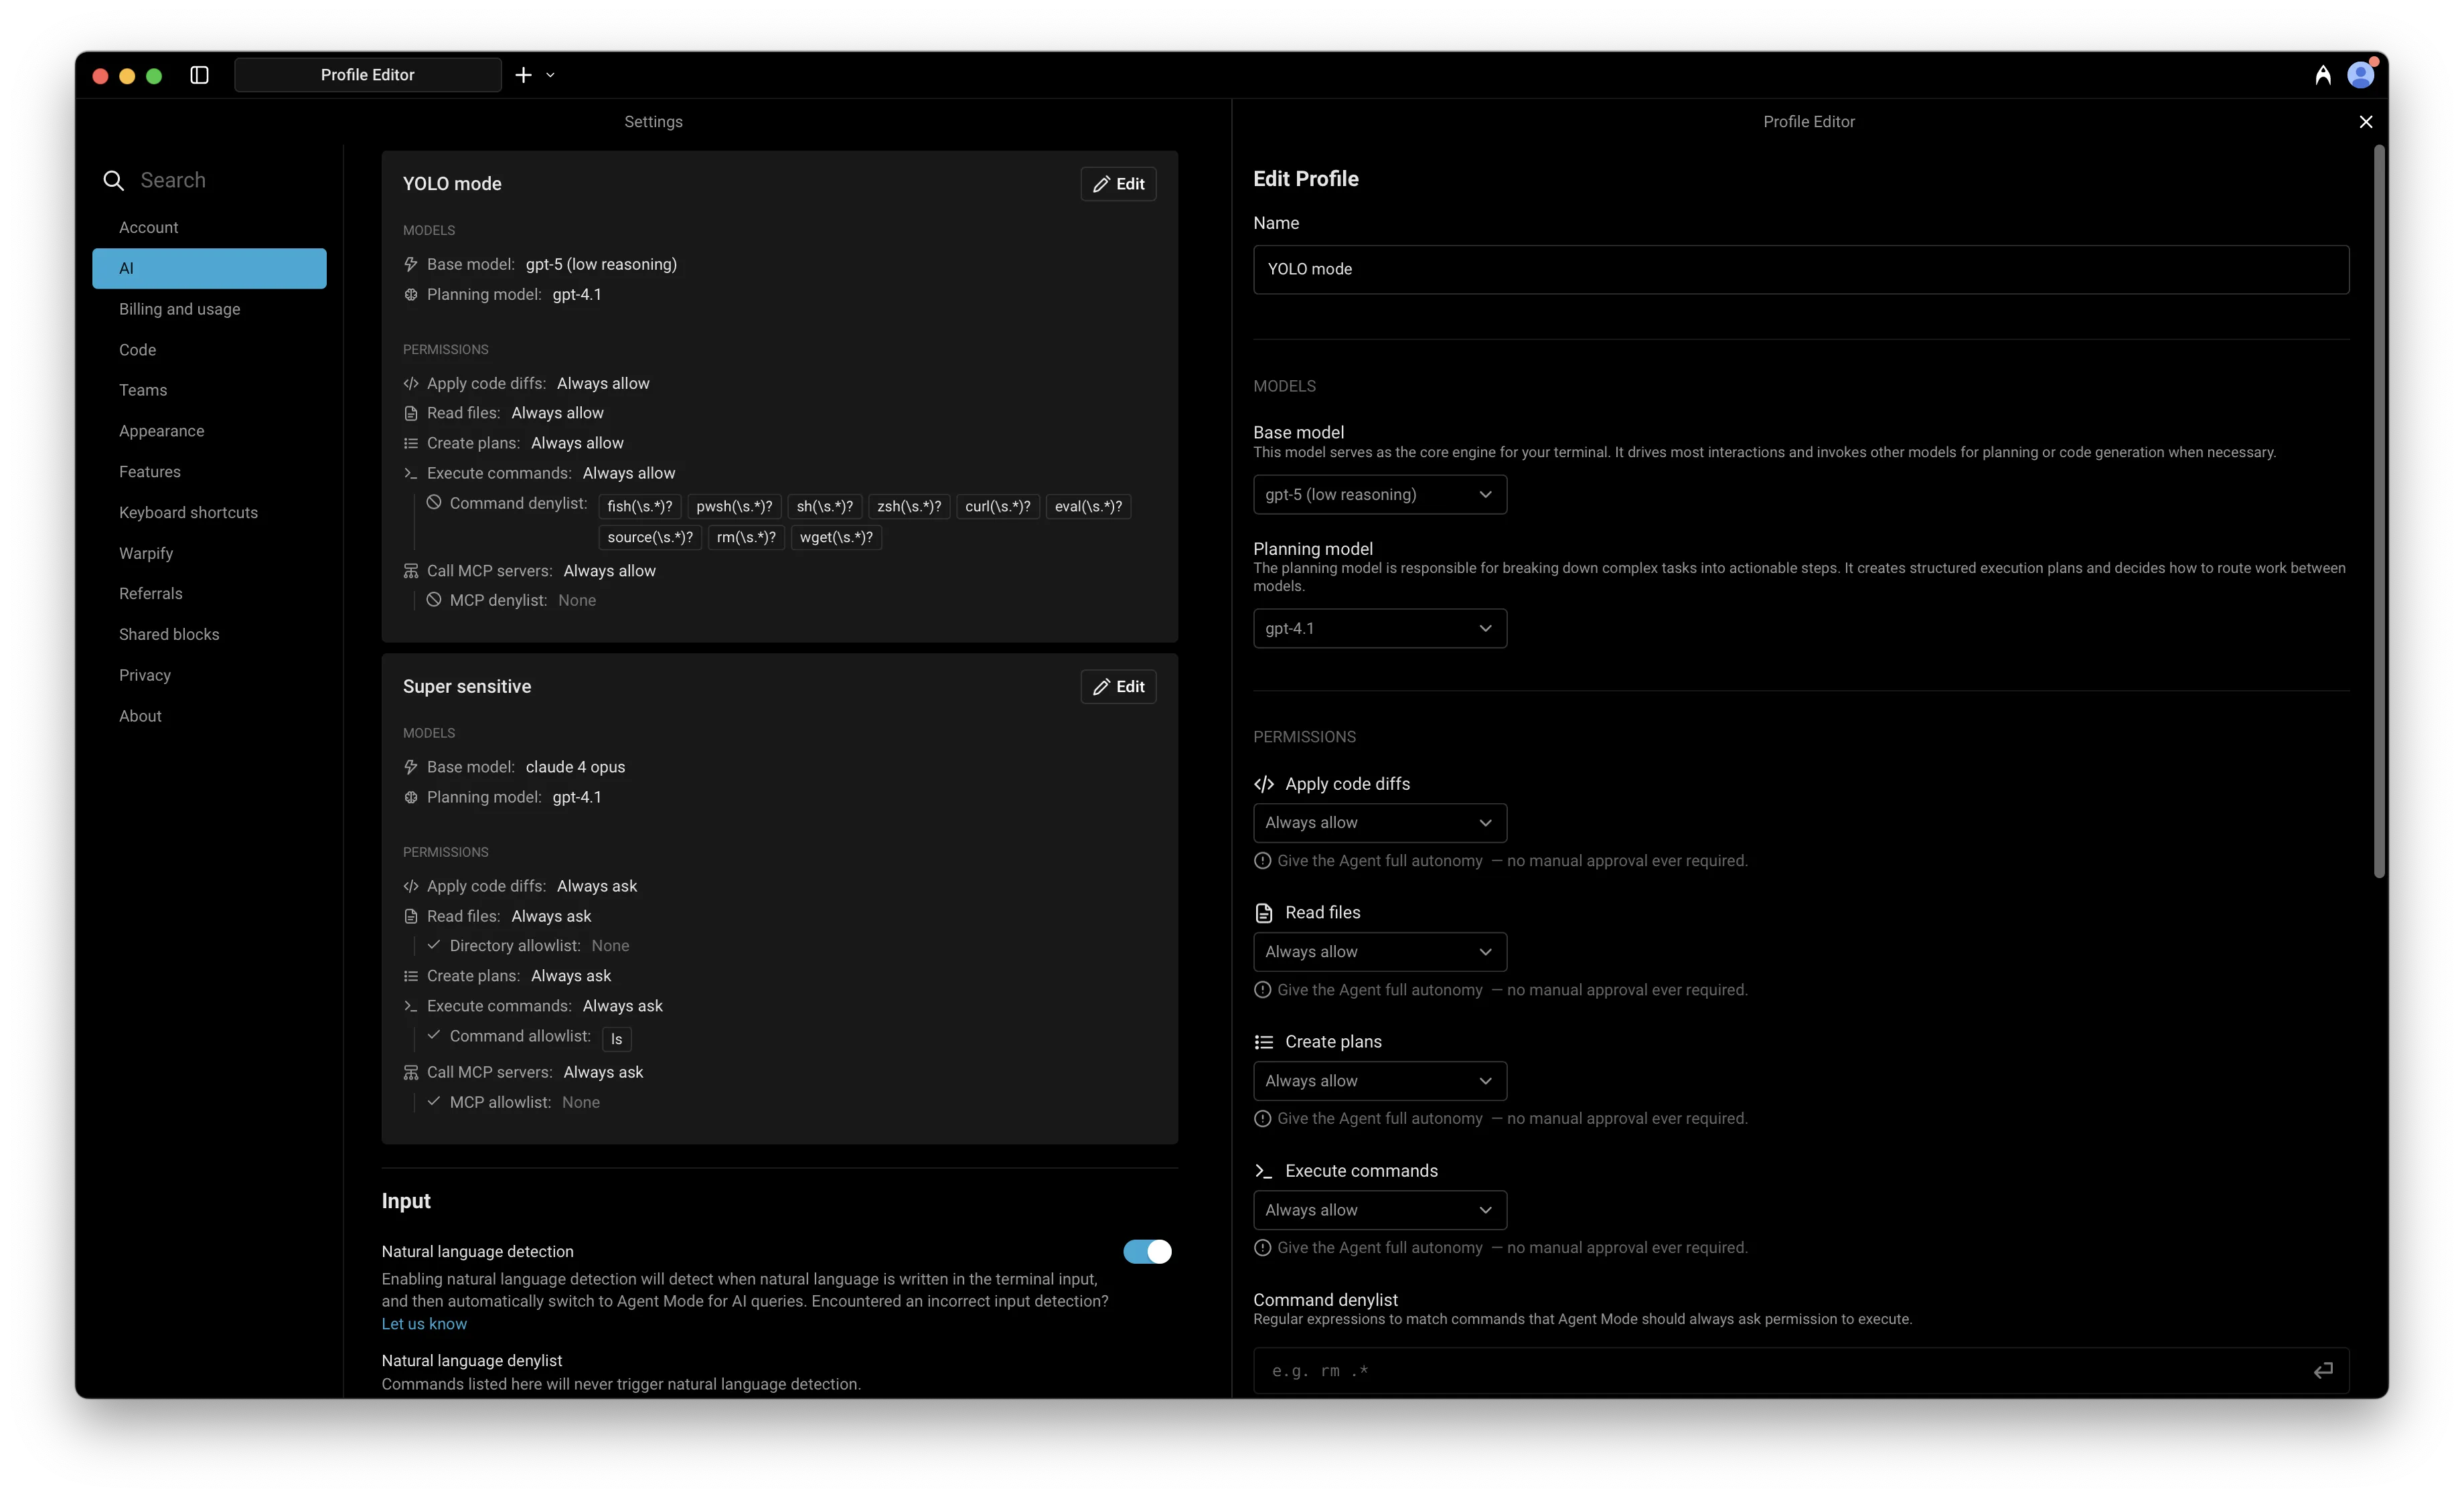 Editing an Agent Profile. ## Agent Permissions [Section titled “Agent Permissions”](#agent-permissions) Agent Permissions let you define how your Agent in a specific Profile operates — control its autonomy, choose what tools or MCP servers it can access, and set when it should act independently or ask for approval. Caution **Still getting approval prompts?** If the Agent keeps asking for permission to run certain commands (like `curl`, `rm`, or `wget`) even though you’ve set permissions to “Always allow,” check your **Command denylist** in **Settings** > **Agents** > **Profiles**. The denylist takes precedence over your other permission settings. Remove commands from the denylist to allow them to auto-execute, or use [Run until completion](#run-until-completion) to bypass the denylist for the current task. You can control how much autonomy the Agent has when performing different types of actions under **Settings** > **Agents** > **Profiles** > **Permissions**. Agent permission types: * Apply code diffs * Read files * Create plans * Execute commands * Interact with running commands (via [Full Terminal Use](/agents/capabilities/full-terminal-use/)) * Ask clarifying questions (via [Agent questions](/agents/local-agents/interacting-with-agents/agent-questions/)) 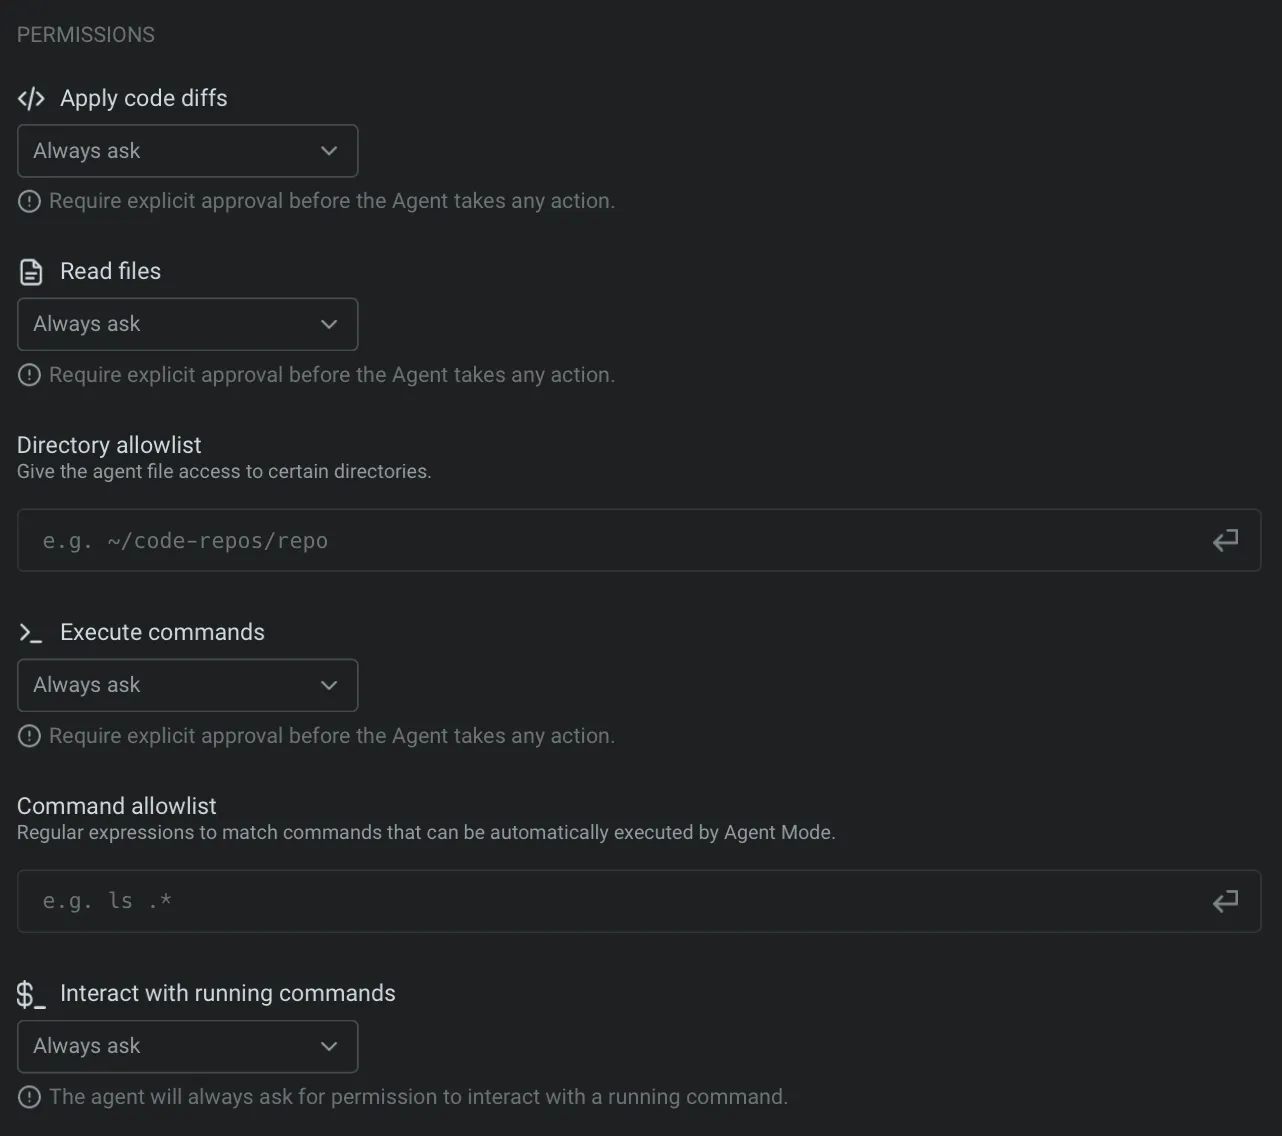 **Each permission has different levels of autonomy:** | Autonomy level | Description | | -------------- | ----------------------------------------------------------------------------------------------------------------------------------------------------------------------------------------------------------------------------------------------------- | | Agent Decides | Agent will act autonomously when it’s confident, but prompt for approval when uncertain. This option balances speed with control, allowing the Agent to go ahead with common workflows while keeping you in the loop for more complex or risky steps. | | Always ask | Agent will request explicit user approval before taking any action. Choose this for sensitive actions. | | Always allow | Agent will perform the action without ever requesting explicit confirmation. Use this for tasks you fully trust the Agent to handle on its own. | | Never | Agent will not ever take the action (i.e. Create plans). | ### Ask questions [Section titled “Ask questions”](#ask-questions) The **Ask questions** permission controls whether the Agent can pause a conversation to ask you clarifying questions before continuing. The available settings are: * **Never ask** - The Agent does not pause for clarifying questions and continues with its best judgment. * **Ask unless auto-approve** - The Agent can ask during normal conversations, but questions are skipped while auto-approve is on. * **Always ask** - The Agent can pause for your answer even when auto-approve is on. For the full user flow, see [Agent questions](/agents/local-agents/interacting-with-agents/agent-questions/). ### Command allowlist [Section titled “Command allowlist”](#command-allowlist) The Agent lets you define an allowlist of commands that run automatically without confirmation. It’s empty by default, but users often add read-only commands such as: * `which .*` - Find executable locations * `ls(\s.*)?` - List directory contents * `grep(\s.*)?` - Search file contents * `find .*` - Search for files * `echo(\s.*)?` - Print text output You can add your own regular expressions to this list in **Settings** > **Agents** > **Profiles** > **Command allowlist**. Commands in the allowlist will always auto-execute, even if they are not read-only operations. 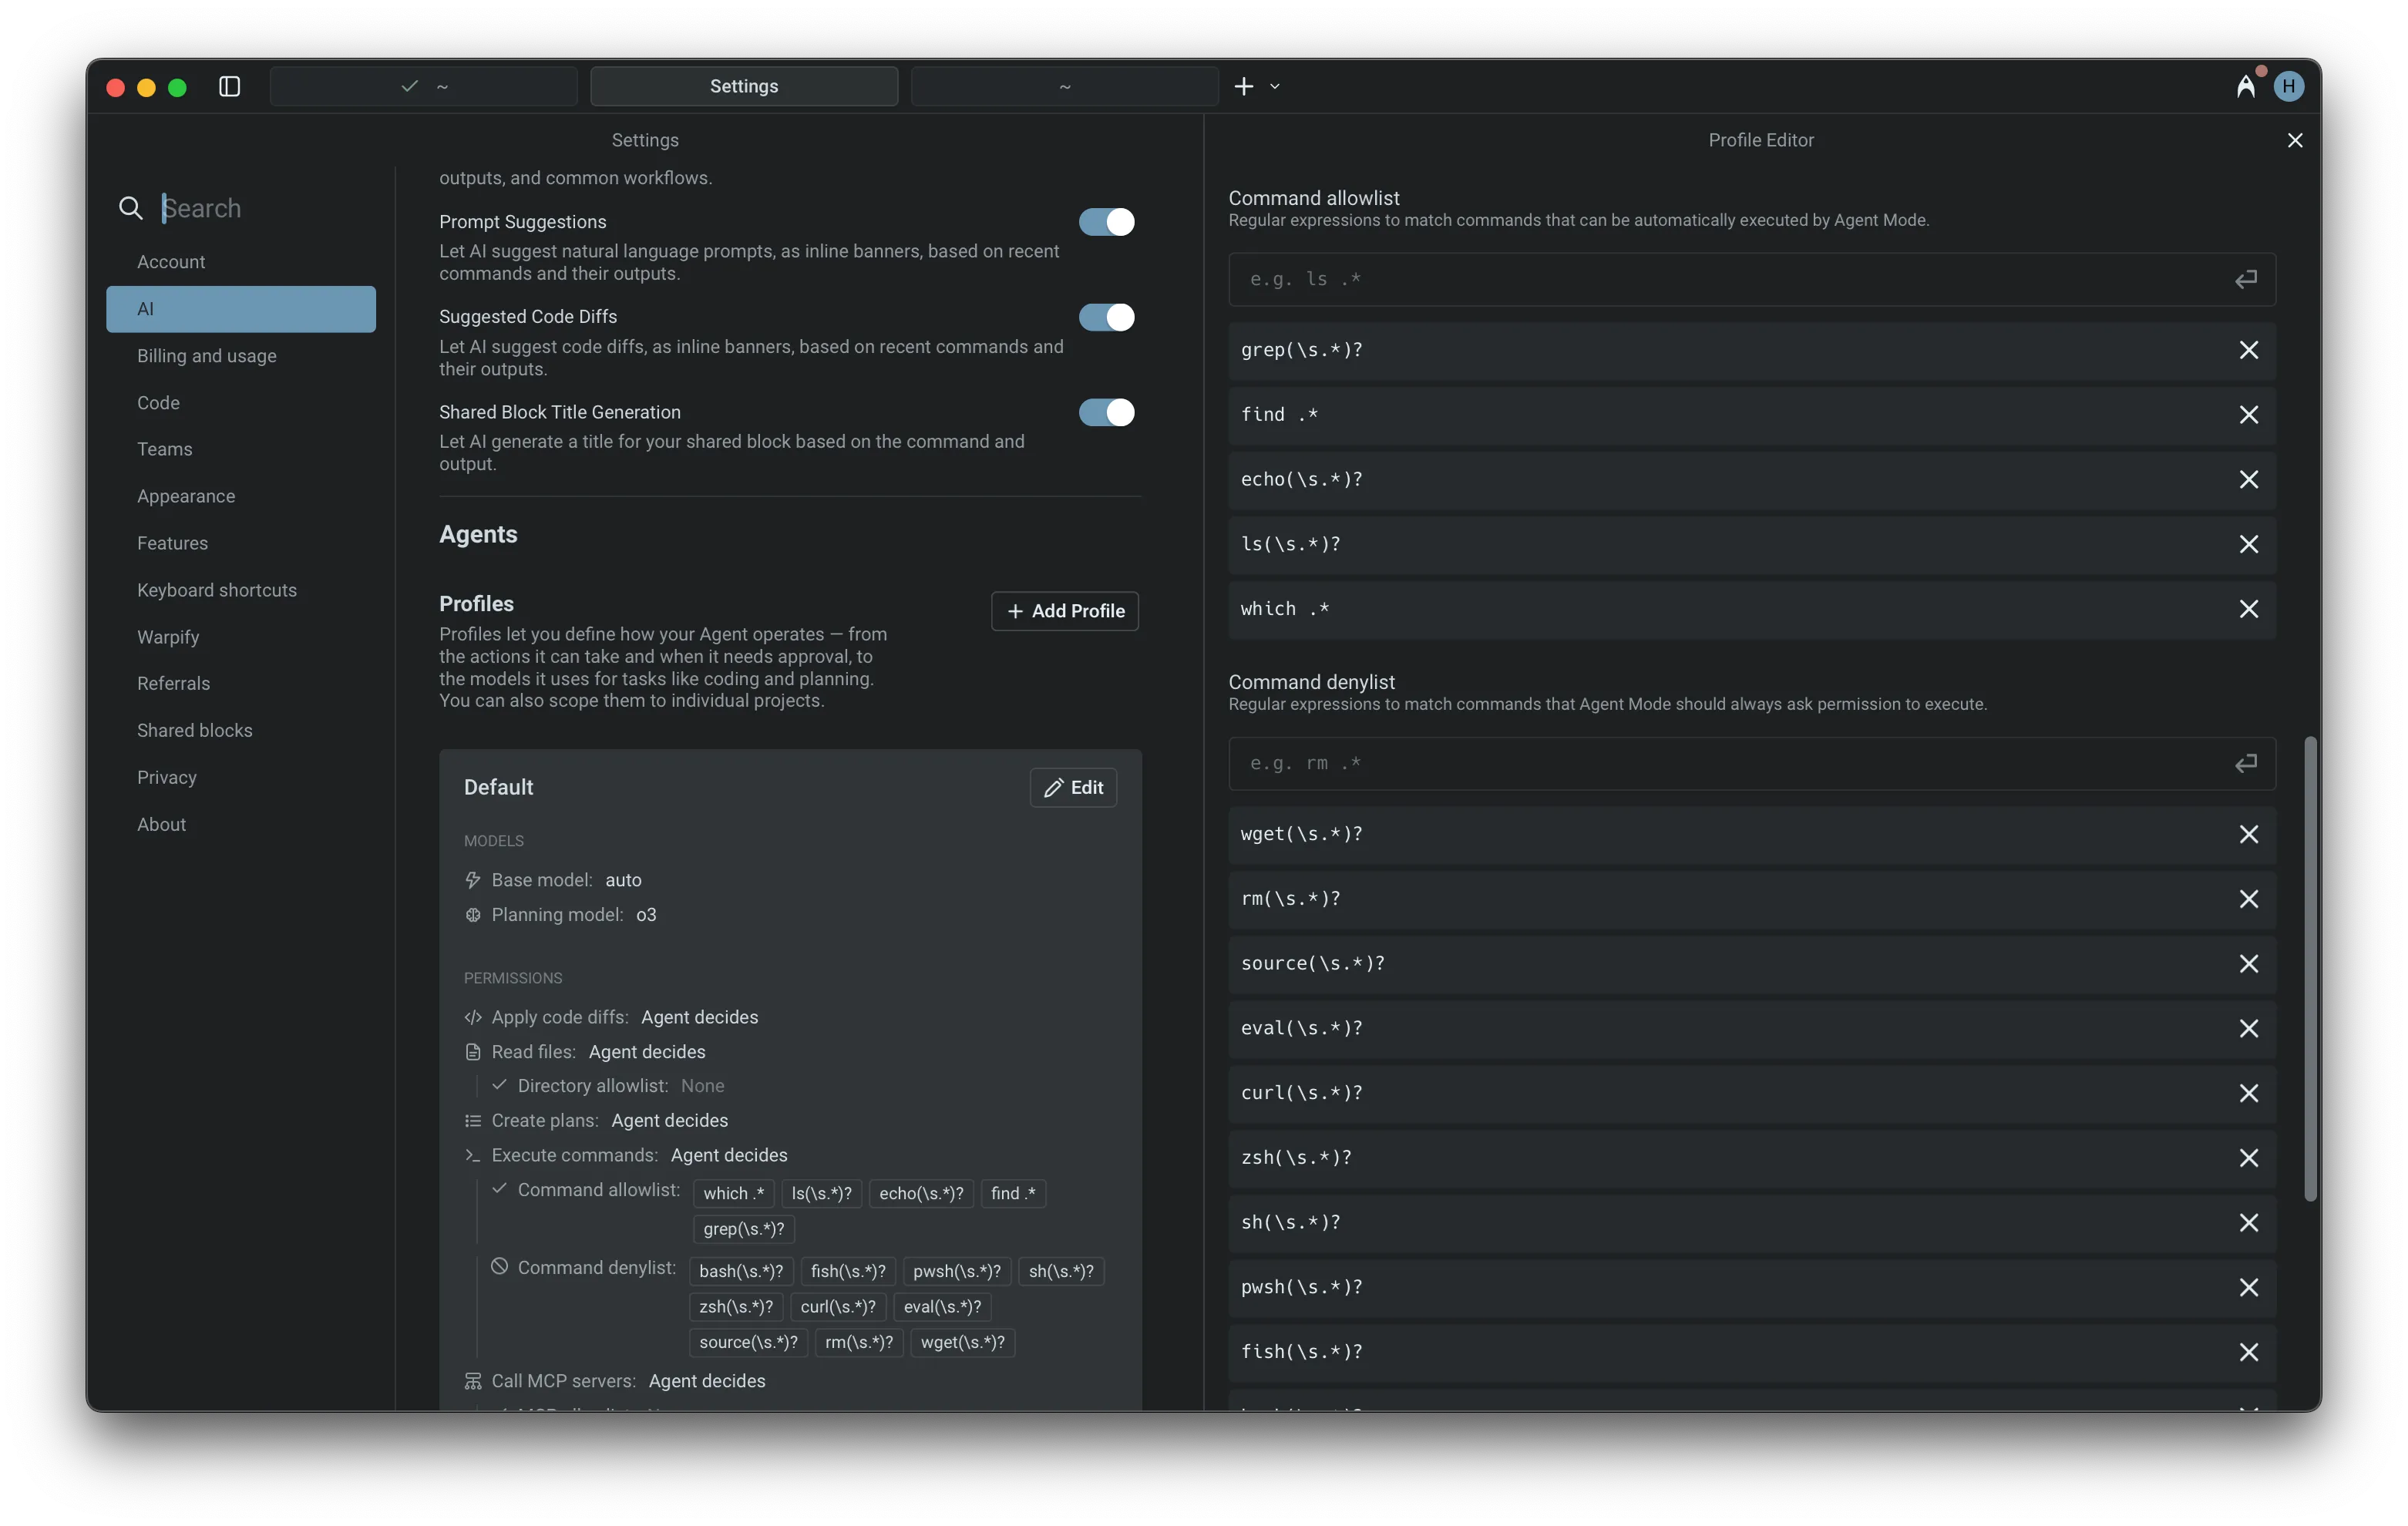 Command allowlist and denylists as part of an Agent Profile. ### Command denylist [Section titled “Command denylist”](#command-denylist) For safety, the Agent always prompts for confirmation before executing potentially risky commands. The default denylist includes several examples, such as: * `wget(\s.*)?` - Network downloads * `curl(\s.*)?` - Network requests * `rm(\s.*)?` - File deletion * `eval(\s.*)?` - Shell code execution The denylist takes precedence over both the allowlist and `Agent decides`: if a command matches the denylist, the Agent asks for permission even when that action type is set to **Always allow**. Add your own regular expressions to this list in **Settings** > **Agents** > **Profiles** > **Command denylist**. The one exception is [Run until completion](#run-until-completion), which bypasses your denylist by default. ### MCP permissions [Section titled “MCP permissions”](#mcp-permissions) MCP servers let you extend the Agent with custom tools and data sources using standardized, plugin-like modules. In this settings menu, you can configure which MCP servers the Agent is allowed to call: * Use the MCP allowlist to give the Agent permission to call specific servers without asking. * Use the MCP denylist to require approval before calling certain servers, even if they’re also in the allowlist. * Or set the Agent to “decide” — it will act autonomously when confident, and ask for confirmation when uncertain. 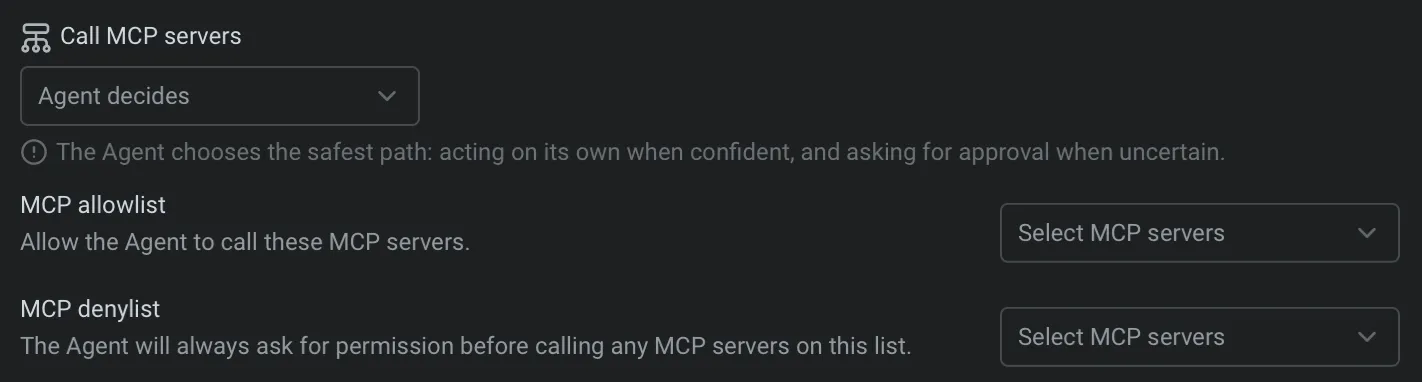 MCP server interaction settings in an Agent Profile. ## Run until completion [Section titled “Run until completion”](#run-until-completion) During an Agent interaction, you can give the Agent full autonomy for the current task. When auto-approve is on, every suggested command runs immediately until the task finishes, or you stop it with `Ctrl+C`. * macOS Auto-approve all Agent actions with: `⌘+Shift+I` * Windows Auto-approve all Agent actions with: `Ctrl+Shift+I` * Linux Auto-approve all Agent actions with: `Ctrl+Shift+I`  Auto-approve and take-over controls. Caution *Run until completion* is the purest form of “YOLO” mode: the Agent proceeds without asking for confirmation, and by default it also runs commands that match your command denylist. To keep your denylist in force during *Run until completion*, turn off **Allow auto-approve to bypass command denylist** in **Settings** > **Agents** > **Warp Agent** > **Input**. Denylist rules your team enforces through the [Admin Panel](/enterprise/team-management/admin-panel/) always require approval and are never bypassed. *** ## Next steps [Section titled “Next steps”](#next-steps) Once you’ve configured how your agent operates, try giving it a larger task to plan and execute. * **[Planning](/agents/capabilities/planning/)** - Break down complex tasks into structured, executable plans that the agent runs step by step. * **[Code diffs](/agents/local-agents/code-diffs/)** - Review, refine, and apply code changes the agent generates. * **[Interactive Code Review](/agents/local-agents/interactive-code-review/)** - Leave inline comments on agent-generated diffs and have the agent address your feedback.
# Codebase Context
Canonical page: [/agents/capabilities/codebase-context/](https://docs.warp.dev/agents/capabilities/codebase-context/)
> Warp indexes your Git-tracked codebase to help Agents understand your code and generate accurate, context-aware responses. No code is stored on Warp servers.
Codebase Context helps Agents understand your project by indexing your local codebase. This allows Agents to generate more accurate completions, suggest context-aware edits, and answer questions using real knowledge of your code. ## Get started [Section titled “Get started”](#get-started) Index a project and see the difference in agent responses in a few minutes. 1. **Open a project folder in Warp.** Navigate to a Git repository using `cd` or open a folder from the file tree. Warp automatically detects the Git repo and begins indexing. 2. **Verify indexing status.** In Warp, go to **Settings** > **Code** > **Indexing and projects** and check the status under “Initialized / indexed folders.” Once the status shows **Synced**, your codebase is ready. 3. **Ask the Agent a question about your code.** Start an Agent conversation (`⌘+Enter` on macOS, `Ctrl+Shift+Enter` on Windows/Linux) and try a prompt like: * “Explain the architecture of this project” * “What are the main entry points?” * “Walk me through the most important modules” 4. **See the difference.** The Agent grounds its responses in actual files, functions, and line numbers from your codebase, producing more accurate and context-aware answers. *** ## Indexing your codebase [Section titled “Indexing your codebase”](#indexing-your-codebase) When you open a directory in Warp, we check if it is part of a Git repository. If it is, Warp begins indexing the source code to provide rich context for Agents. Warp also detects [Git worktree](/code/git-worktrees/) checkouts — each worktree is indexed as its own repository, so Agents always have accurate context for the branch you’re working on. 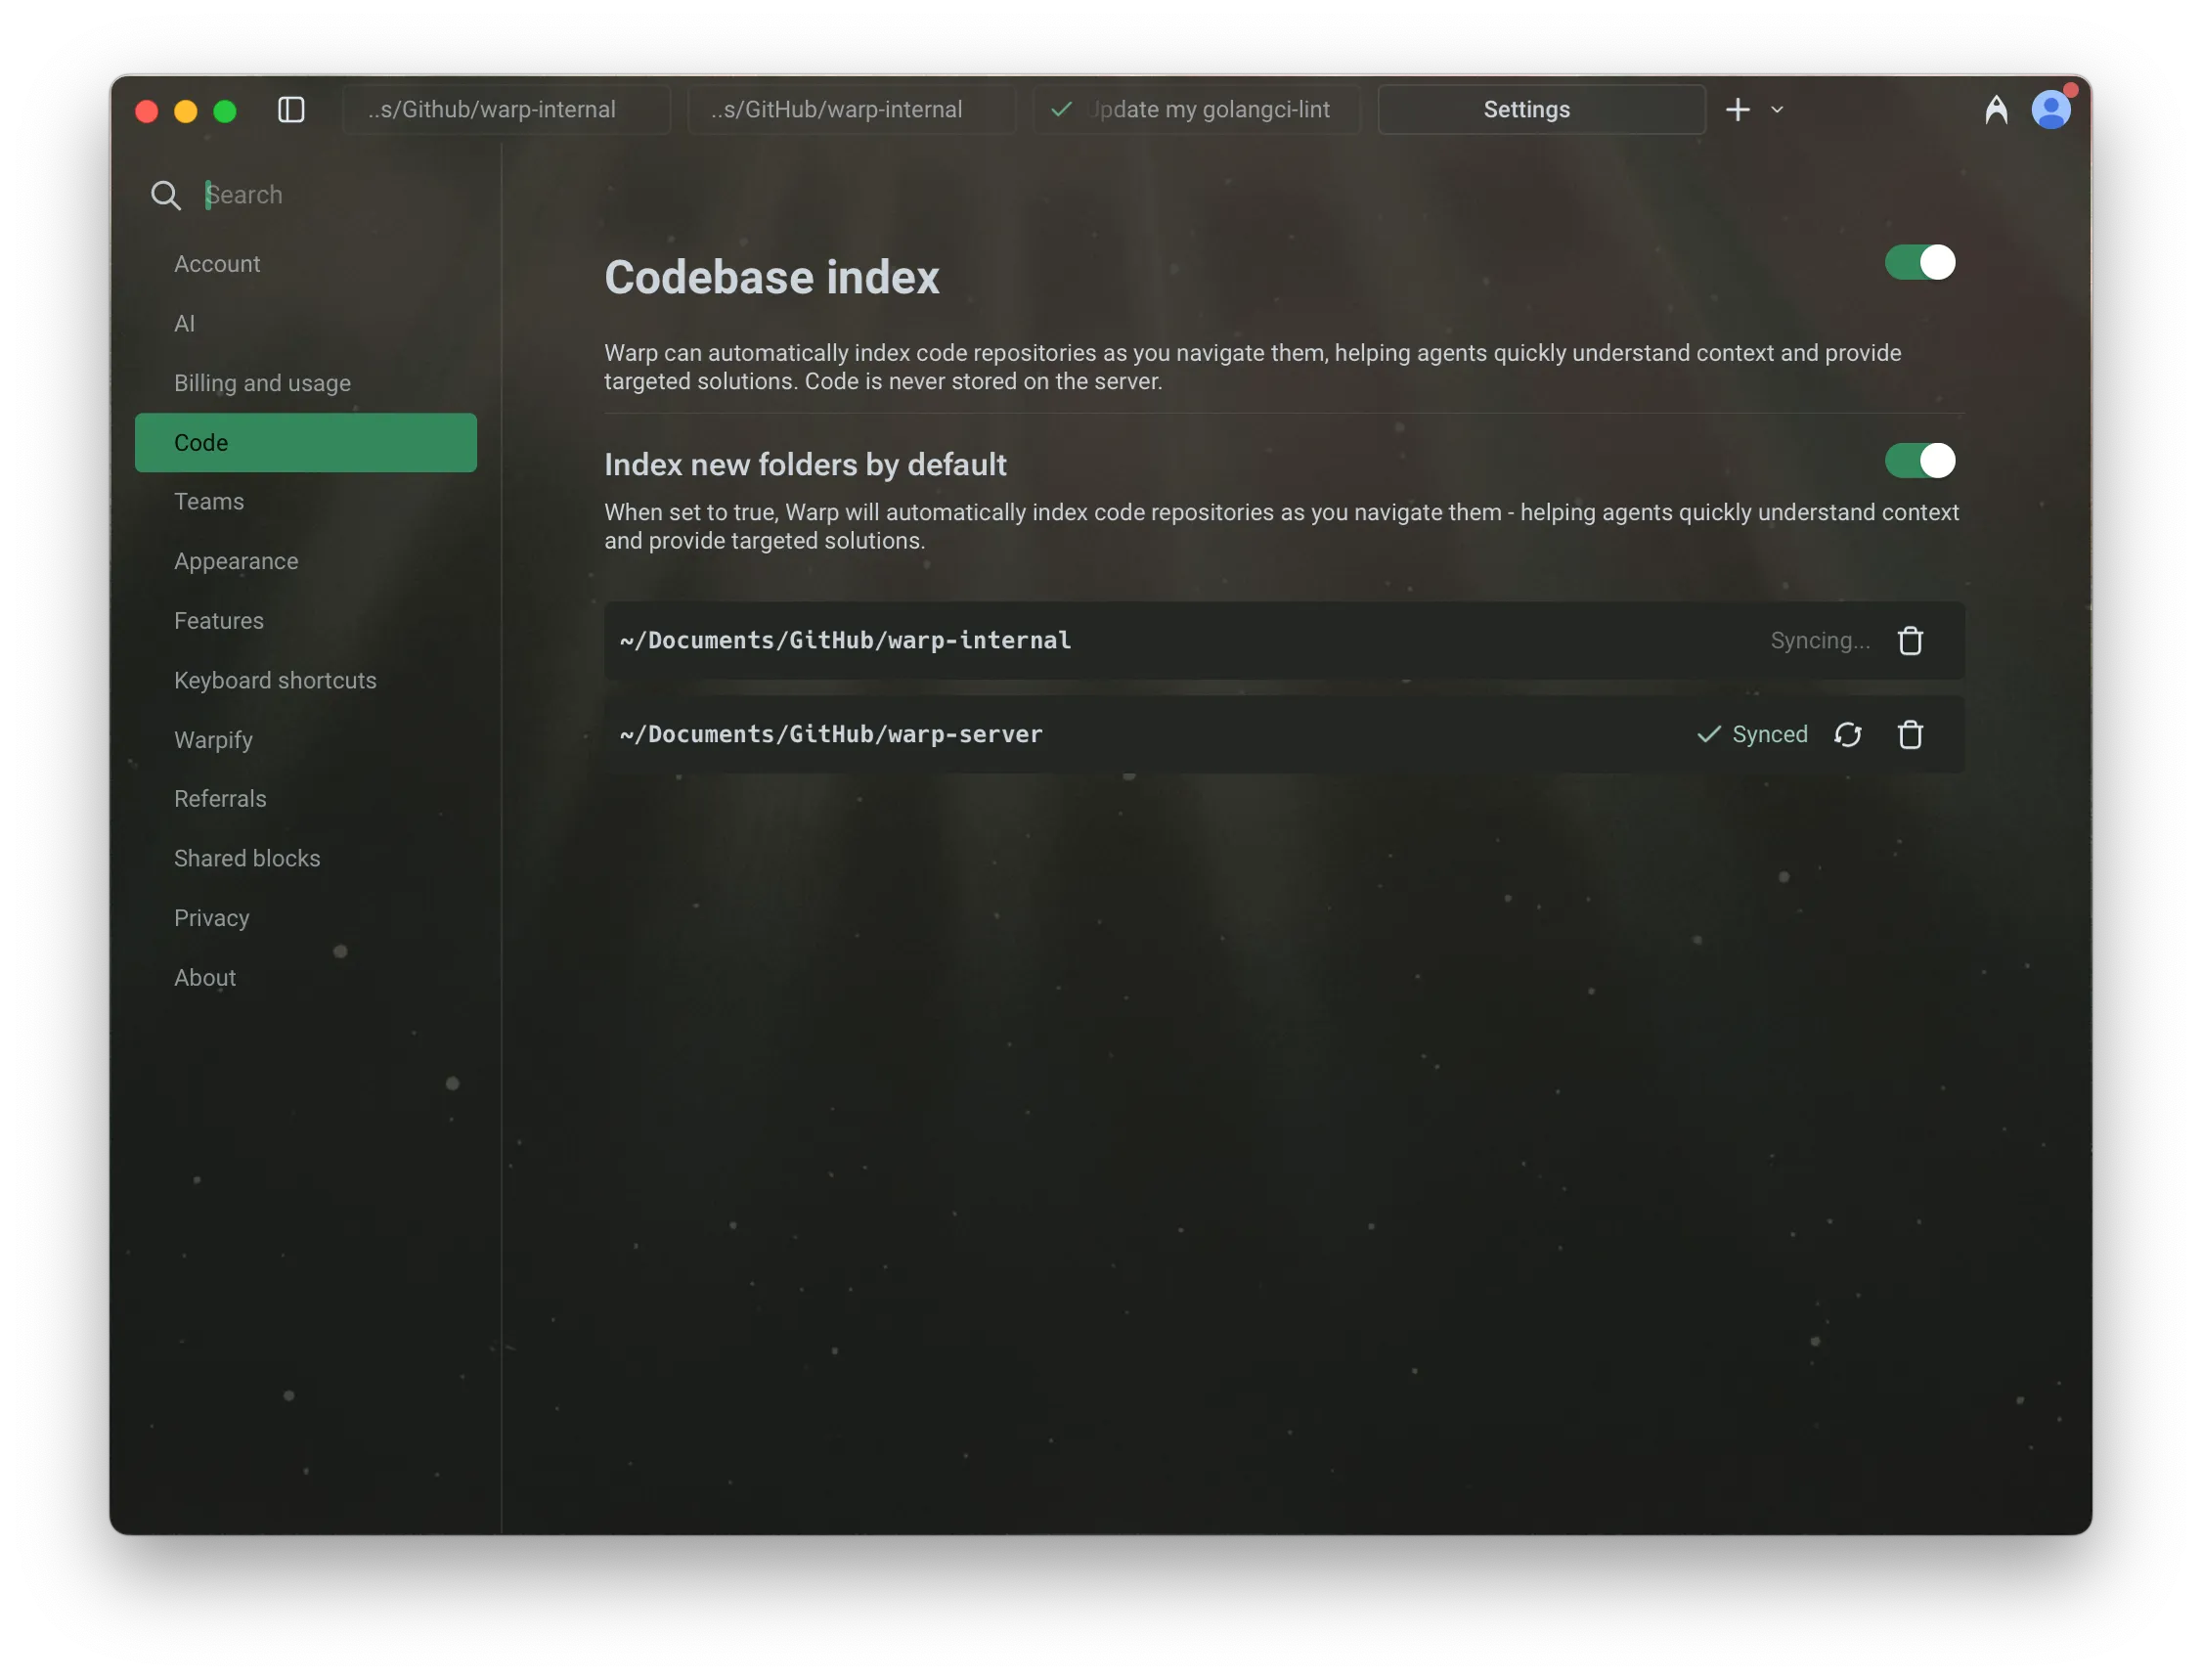 Codebase indexing settings. **Codebase indexing intervals and triggers:** * Initially when you have Codebase Context enabled. * Warp automatically triggers a codebase index periodically. * Whenever a new Agent conversation begins. * When you click on the sync 🔄 button in **Settings** > **Code** > **Indexing and projects**. **This embeddings index helps Agents:** * Understand your project structure and reference relevant code * Generate completions that match your style and patterns * Suggest edits in the correct locations based on real context For large projects, indexing may take a few minutes. Agents will not use Codebase Context until indexing is complete, but **agentic coding features remain fully available in the meantime**.  ### Codebase indexing states [Section titled “Codebase indexing states”](#codebase-indexing-states) When viewing indexed codebases in Warp under **Settings** > **Code** > **Indexing and projects**, you may see different status indicators: * **Synced** — Indexing is complete and the codebase is ready to be used as context. * **Discovering files** – Warp is currently scanning and indexing files in the codebase. * **Failed** – Indexing failed. Common reasons include unreadable `.git` directories or corrupted repositories. Try re-cloning the repo and syncing again. * **Codebase too large** – The number of files in the codebase exceeds your current plan’s limit. You can either reduce the number of files being indexed using `.warpindexingignore`, or [contact sales](https://www.warp.dev/contact-sales) for support with larger codebases. 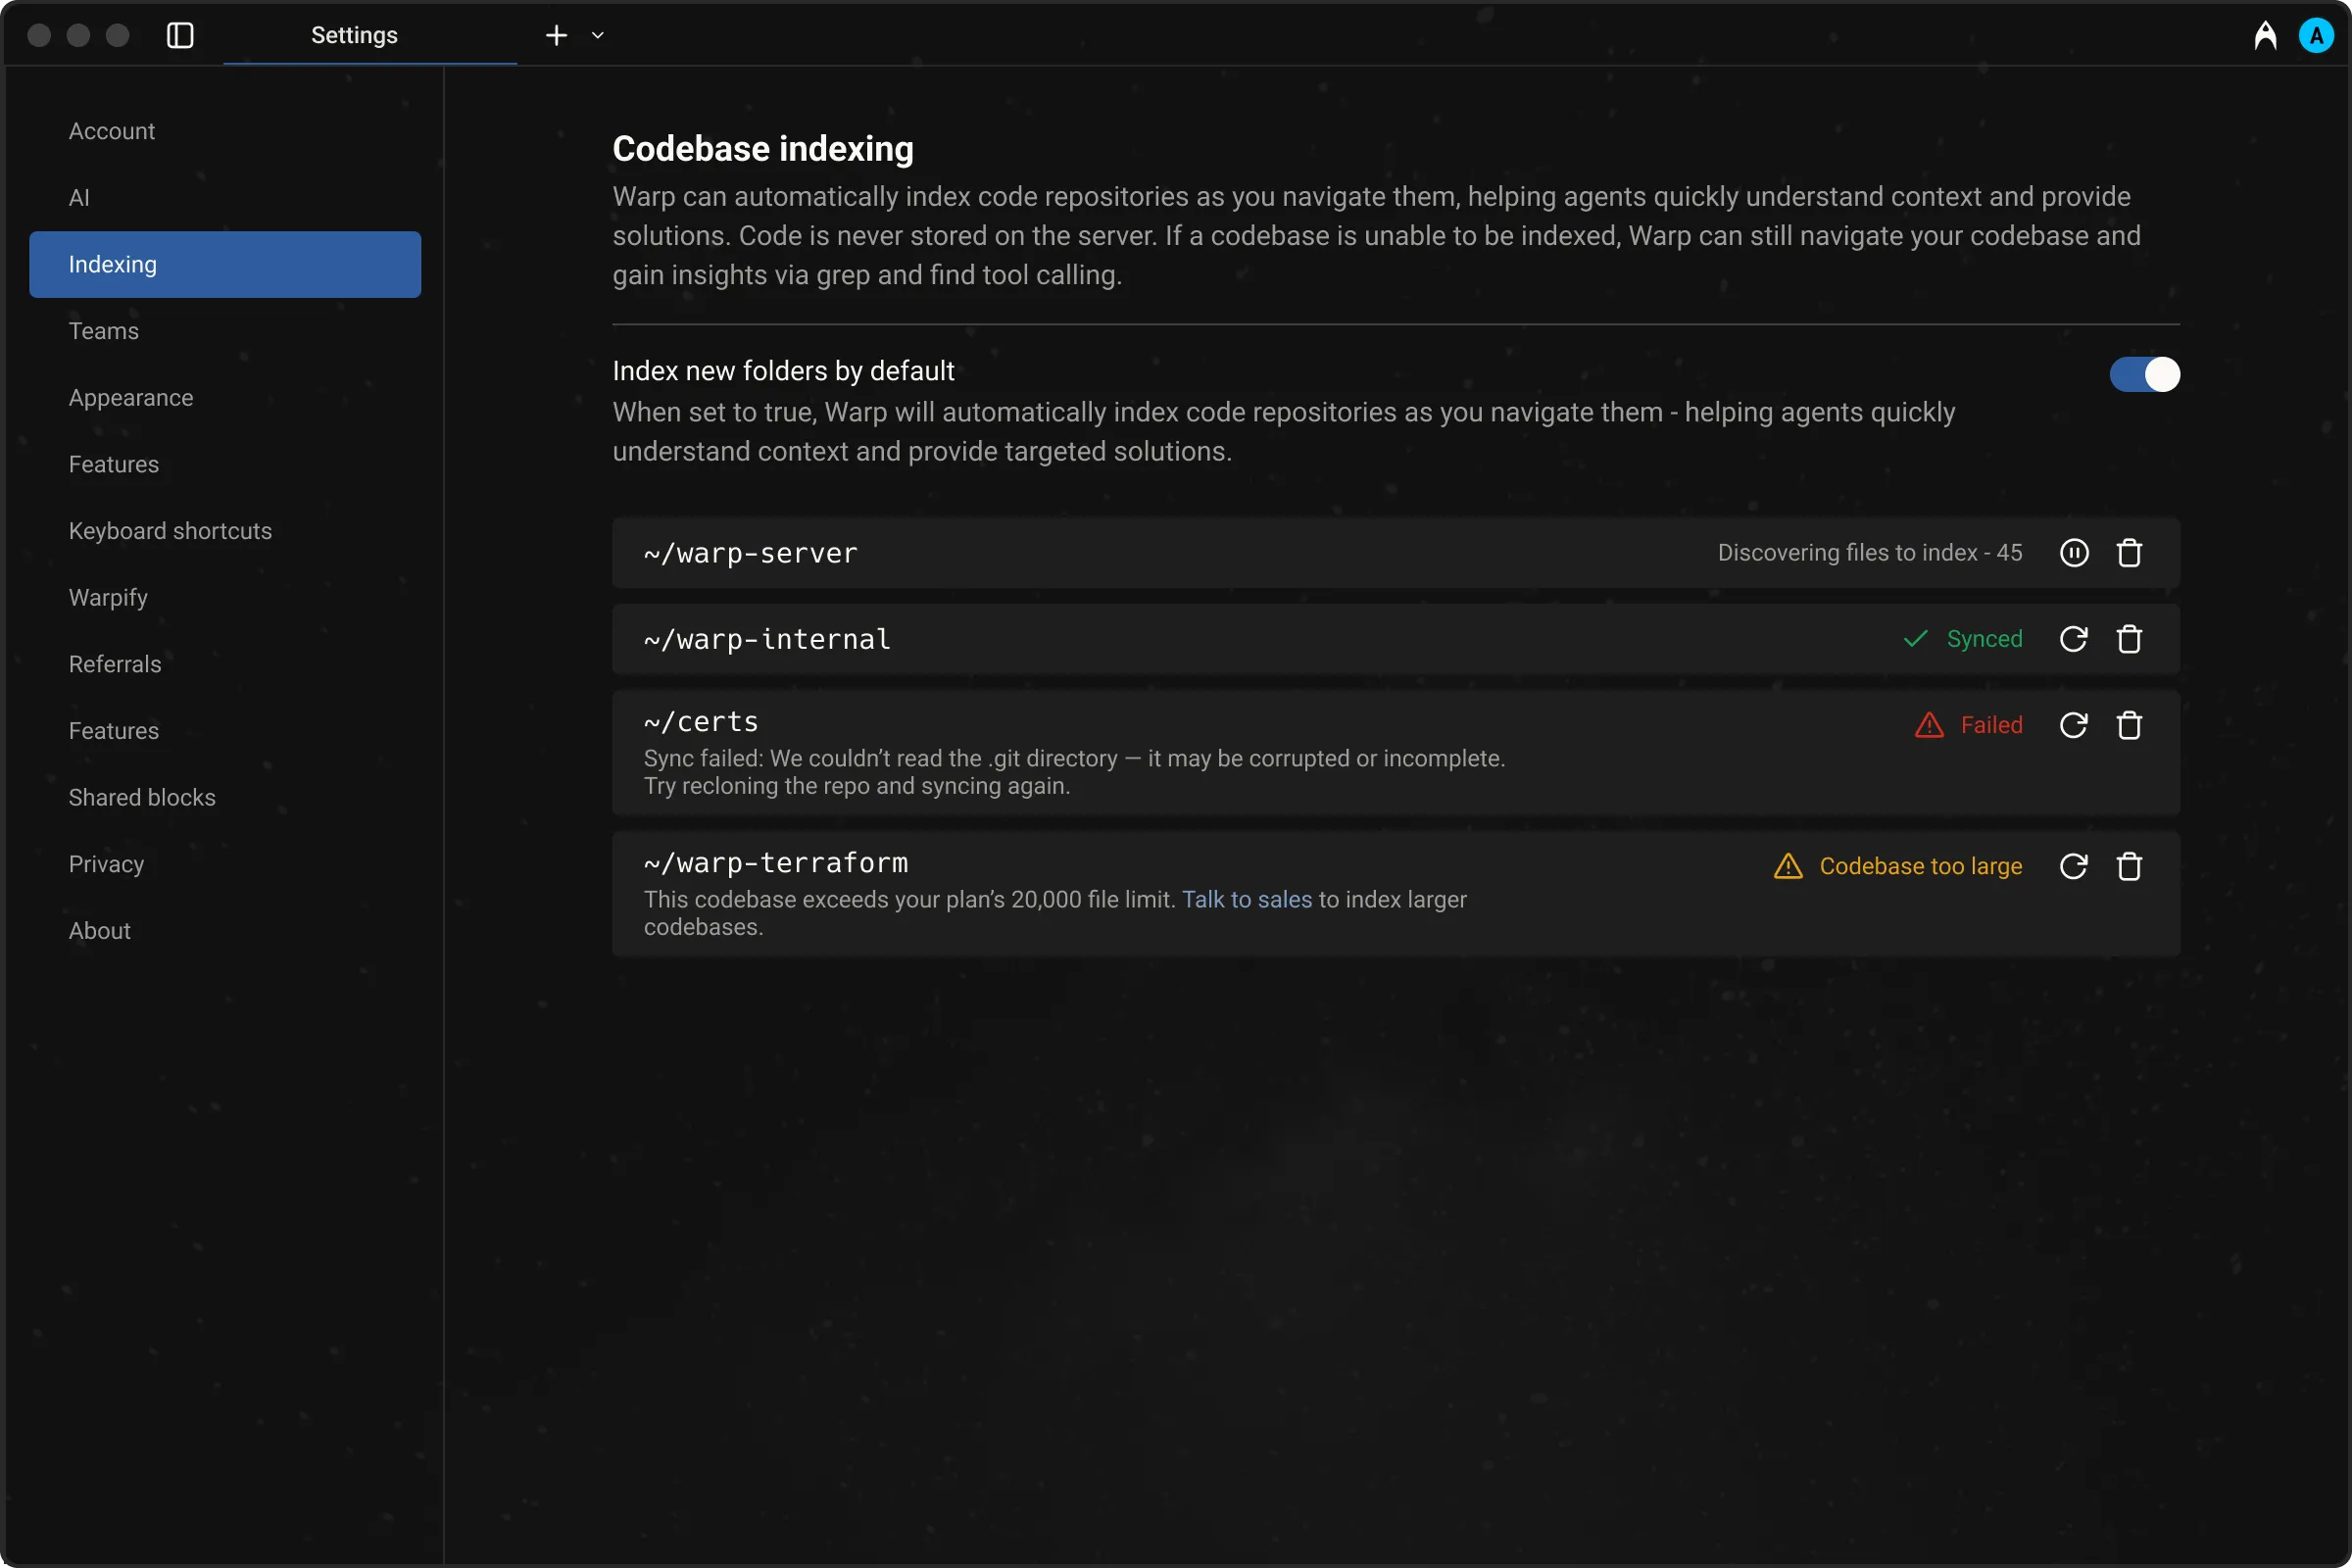 Codebase indexing status overview. ### When does codebase syncing happen? [Section titled “When does codebase syncing happen?”](#when-does-codebase-syncing-happen) Warp automatically triggers a codebase sync initially and periodically, when you click on the sync 🔄 button in **Settings** > **Code** > **Indexing and projects**, or when you start a new Agent conversation. However, if many files have changed or the network is slow, the sync may not complete before the Agent tries to access context. ### File and codebase limits [Section titled “File and codebase limits”](#file-and-codebase-limits) The number of codebases you can index and the maximum number of files per repository vary by plan. The Free plan supports indexing **up to 5,000 files per repository**. Higher tiers support larger repositories and additional codebases. For full details, visit our [pricing page](https://www.warp.dev/pricing). ### Ignore files [Section titled “Ignore files”](#ignore-files) For large codebases, Warp supports several ignore files to give you control over what gets indexed. This allows each developer to focus context on the parts of the codebase most relevant to their work. Warp respects the following ignore files: * `.gitignore` * `.warpindexingignore` * `.cursorignore` * `.cursorindexingignore` * `.codeiumignore` Use these files to skip indexing of folders, generated files, or any content you don’t want agents to reference. This can improve performance and result quality. ## Codebase Context in cloud agent runs [Section titled “Codebase Context in cloud agent runs”](#codebase-context-in-cloud-agent-runs) Codebase Context is available in all [cloud agent runs](/platform/viewing-cloud-agent-runs/) — including runs triggered from the CLI, API/SDK, integrations (Slack, Linear, GitHub Actions), and schedules — as long as Codebase Context is enabled for your account. **No additional configuration is needed.** If Codebase Context is enabled, cloud agents use it automatically. ## Multi-repo context [Section titled “Multi-repo context”](#multi-repo-context) Warp supports referencing context across multiple indexed repositories. Note that you don’t need to be inside a specific repo for agents to use its context. **This is especially useful when:** * Implementing a feature across multiple repos, such as full-stack work across client and server * Using one repo as a reference while building in another, for example: “copy the implementation from repo A into my repo B” Agents will only reference other repositories if they are already indexed. During cross-repo tasks, Warp’s Agents have access to the file paths of all indexed repos. It is more likely to use cross-repo context when you mention the exact name of the repo in your prompt. ## Demo: Explain my codebase with Warp [Section titled “Demo: Explain my codebase with Warp”](#demo-explain-my-codebase-with-warp) Here’s an example from [Warp Guides](/guides/), where Zach demonstrates how Warp uses Codebase Context to search for and use the relevant files as context:  *** ## Next steps [Section titled “Next steps”](#next-steps) With your codebase indexed, you can browse your project directly in Warp and start letting agents take action on your code. * **[File Tree](/code/code-editor/file-tree/)** - Browse your project structure in Warp’s sidebar and open files directly. * **[Code editor](/code/code-editor/)** - Edit files with syntax highlighting, LSP support, and find-and-replace without leaving Warp. * **[Agent profiles and permissions](/agents/capabilities/agent-profiles-permissions/)** - Configure how much autonomy the agent has when working with your code.
# Computer Use for agents
Canonical page: [/agents/capabilities/computer-use/](https://docs.warp.dev/agents/capabilities/computer-use/)
> Let agents interact with desktop GUIs in sandboxed cloud environments for automated UI testing and validation.
Computer Use enables agents to interact with desktop environments. The agent can see what’s displayed on screen, click and drag, type text, use keyboard shortcuts, and perform other GUI interactions—all within a secure, isolated sandbox. A key use case is **testing UI changes** with a self-contained feedback loop, where the agent can verify that your code changes produce the expected visual and behavioral results without requiring manual testing. ## Capabilities [Section titled “Capabilities”](#capabilities) With Computer Use, agents can: * **Take screenshots** - Capture and analyze the current display * **Record video** - Capture sessions as annotated video recordings; see [Testing and recordings](/agents/capabilities/computer-use/testing-and-recordings/) * **Interact with applications** - Click buttons, fill forms, navigate interfaces * **Type and control keyboard** - Enter text and use keyboard shortcuts * **Automate testing workflows** - Test UI changes end-to-end without manual intervention * **Work with browser-based interfaces** - Test web apps and navigate the web Computer Use is only available in Warp’s sandboxed cloud environments, not in local interactive terminal sessions. ## In this section [Section titled “In this section”](#in-this-section) * [Browser use](/agents/capabilities/computer-use/browser-use/) - Drive the bundled Chromium browser, visually or with scripted Playwright commands. * [Testing and recordings](/agents/capabilities/computer-use/testing-and-recordings/) - Validate changes end-to-end and capture annotated video recordings as proof. * [Screenshots and videos in pull requests](/agents/capabilities/computer-use/artifacts-in-prs/) - Attach captured screenshots and recordings to pull request descriptions automatically. *** ## Enabling Computer Use [Section titled “Enabling Computer Use”](#enabling-computer-use) Computer Use is **enabled by default** for cloud agent runs on Warp’s built-in harness: when a run’s configuration doesn’t specify a Computer Use setting, the agent runs with Computer Use available. Runs on [third-party harnesses](/platform/harnesses/) (Claude Code and Codex) default to Computer Use disabled because third-party harnesses don’t integrate with Warp’s Computer Use tooling. You can control Computer Use per run or per configuration through several entry points: ### Warp app settings [Section titled “Warp app settings”](#warp-app-settings) Runs started from the Warp app don’t use the server default: they always follow the app’s **Computer use in Cloud Agents** setting ([`cloud_agent_computer_use_enabled`](/terminal/settings/all-settings/)), which is off by default. To control Computer Use for [Cloud Agents](/platform/) started from the Warp app, navigate to **Settings** > **Agents** > **Warp Agent** > **Experimental** > **Computer use in Cloud Agents**. ### CLI [Section titled “CLI”](#cli) When running cloud agents with the [Oz CLI](/agents/cli/oz-cli/), use flags to control Computer Use per run:
```bash
oz agent run-cloud --computer-use --prompt ""
oz agent run-cloud --no-computer-use --prompt ""
```
### API [Section titled “API”](#api) When creating a cloud agent run with the [Warp Platform API](/factories/api-and-sdk/), the optional `config.computer_use_enabled` field controls Computer Use. When omitted, it defaults to `true` for runs on Warp’s built-in harness and `false` for runs on third-party harnesses. Set it to `false` to disable Computer Use for the run:
```json
{
"prompt": "Build a button component that matches this design, then test it in the browser",
"config": {
"computer_use_enabled": false,
"environment_id": "optional-environment-id"
}
}
```
For full API documentation, see the [Warp Platform API](/factories/api-and-sdk/) reference. ### Web app [Section titled “Web app”](#web-app) In the [Oz web app](https://oz.warp.dev), you can enable or disable Computer Use for: * **New agent runs** - Configure Computer Use when starting a new agent run from the web app * **Scheduled agent runs** - Enable Computer Use for [scheduled agents](/platform/triggers/scheduled-agents/) managed from the web app * **Integrations** - Configure Computer Use for Slack, Linear, and other [integration-triggered agents](/platform/integrations/) *** ## How Computer Use works [Section titled “How Computer Use works”](#how-computer-use-works) ### Setup and requirements [Section titled “Setup and requirements”](#setup-and-requirements) Computer Use runs in a containerized sandbox, allowing headless cloud environments to render and interact with graphical applications. The sandbox is fully isolated—it does not have access to your local machine, credentials, or sensitive data outside the sandbox environment. Your cloud environment must include any desktop applications you want the agent to control in your [environment configuration](/platform/environments/). Browser-based tasks need no extra setup: every Computer Use environment includes a bundled Chromium browser. Learn more in [Browser use](/agents/capabilities/computer-use/browser-use/). ### Model selection [Section titled “Model selection”](#model-selection) Computer Use currently supports Anthropic Claude models. Warp uses an auto model selector to choose the best-suited model for each Computer Use task. *** ## Recording sessions [Section titled “Recording sessions”](#recording-sessions) Agents can record their Computer Use sessions as annotated video artifacts — capturing clicks, key presses, and cursor movement alongside the interaction, with idle time trimmed out. Recordings are captured entirely inside the sandbox and never include your local desktop or credentials. For the recording pipeline, what the finished video contains, and where to find recordings, see [Testing and recordings](/agents/capabilities/computer-use/testing-and-recordings/). For how recordings and screenshots land on pull requests, see [Screenshots and videos in pull requests](/agents/capabilities/computer-use/artifacts-in-prs/). *** ## Security considerations [Section titled “Security considerations”](#security-considerations) Computer Use comes with unique security considerations. These risks are heightened when interacting with the internet. To minimize risks when using Computer Use: * **Avoid sensitive data** - Do not pass API keys, authentication tokens, or personal information to agents using Computer Use * **Limit internet access** - If your environment has internet access, consider restricting to an allowlist of known-safe domains * **Require human confirmation** - For tasks with real-world consequences (e.g., financial transactions, accepting legal terms), ask a human to confirm before the agent proceeds * **Review agent actions** - Regularly review what agents are doing on your behalf, especially when testing new workflows *** ## Example workflows [Section titled “Example workflows”](#example-workflows) ### Testing UI changes [Section titled “Testing UI changes”](#testing-ui-changes) Verify that code changes produce the expected visual results and behavior: * **Build from mockups** - Receive a Figma design or mockup image, build the UI, and test it matches * **Visual regression testing** - After code changes, verify UI renders correctly * **Form and interaction testing** - Test form submissions, validation, error handling * **Responsive design validation** - Test layout on different screen sizes For complete end-to-end examples with demo recordings — validating UI changes, QA of critical flows, and bug reproduction — see [Testing and recordings](/agents/capabilities/computer-use/testing-and-recordings/). ### Browsing and web interaction [Section titled “Browsing and web interaction”](#browsing-and-web-interaction) Computer Use can also help with general web tasks: browsing websites, filling out and submitting forms, and navigating multi-step workflows in web applications. See [Browser use](/agents/capabilities/computer-use/browser-use/) for how agents drive the browser. *** ## Related capabilities [Section titled “Related capabilities”](#related-capabilities) * [Images as Context](/agents/local-agents/agent-context/images-as-context/) - Pass design mockups and screenshots as context * [Full Terminal Use](/agents/capabilities/full-terminal-use/) - Let agents drive interactive terminal apps, see live output, and run commands * [Viewing cloud agent runs](/platform/viewing-cloud-agent-runs/) - Open the cloud run transcript and artifacts after a Computer Use session finishes
# Screenshots and videos in pull requests
Canonical page: [/agents/capabilities/computer-use/artifacts-in-prs/](https://docs.warp.dev/agents/capabilities/computer-use/artifacts-in-prs/)
> Share Computer Use screenshots and recordings in pull requests, Slack, Linear, issue comments, and chat while controlling access.
When a cloud agent run opens or updates a pull request, the screenshots and video recordings it captured with [Computer Use](/agents/capabilities/computer-use/) are attached to the PR description automatically. Reviewers get visual proof of the change — a rendered UI state, a recorded flow, a bug reproduction — without leaving the pull request. ## What gets attached [Section titled “What gets attached”](#what-gets-attached) * **Screenshots** - UI states the agent captures during its Computer Use session. Up to 10 screenshots are attached per pull request. * **Video recordings** - Session recordings the agent produces. See [Testing and recordings](/agents/capabilities/computer-use/testing-and-recordings/) for how recordings are captured and processed. Attachment is automatic: once a screenshot or recording artifact is associated with the run, the agent includes it the next time it creates or updates a pull request. You can encourage captures in your prompt — for example, “take screenshots of the before and after states” or “record the flow and attach it to the PR.” ## Attachment modes [Section titled “Attachment modes”](#attachment-modes) A team-level **Agent artifact attachments** setting controls how agents share captures in pull requests and other destinations: * **Link only (default)** - Screenshots and recordings are attached as private links to a media page that shows one capture. Warp checks each viewer’s access when they open the link. * **Embed** - Screenshots render inline, and recordings appear as links with preview thumbnails when available. The linked media is published at stable, publicly accessible URLs. * **Disabled** - No screenshots or recordings are attached to pull requests. Caution In **Embed** mode, attached screenshots and recordings become publicly downloadable by anyone with the URL — including anyone who can read the PR description. Use **Link only** if your Computer Use sessions may capture content that shouldn’t leave your team. ### Changing the attachment mode [Section titled “Changing the attachment mode”](#changing-the-attachment-mode) Team admins control the attachment mode from the [Admin Panel](https://app.warp.dev/admin/): 1. In the Admin Panel sidebar, select your team under **Team admin**. 2. Click the **Platform** tab. 3. Under **Agent artifact attachments**, choose **Disabled**, **Link only**, or **Embed**. ## Sharing captures outside pull requests [Section titled “Sharing captures outside pull requests”](#sharing-captures-outside-pull-requests) Ask an agent to share Computer Use screenshots or video recordings in a Slack message, Linear comment, issue or pull request comment, or chat reply. The agent receives links for captures from its current run and chooses the relevant ones. Captures from child agents stay with those child runs, so each child agent must share its own links. Each private link opens a Warp media page that shows one capture. Viewers who aren’t signed in are directed to sign in, and Warp checks whether they can view the artifact. Public artifacts created for embeds open without signing in. The **Agent artifact attachments** setting also controls these links: * **Link only (default)** - The agent gets private media-page links. * **Embed** - When the destination supports inline media, the agent can request direct image, video, and video thumbnail URLs. Requesting those URLs makes the media public to anyone with the link. * **Disabled** - The agent can’t get links for sharing captures. Tell the agent where to share the captures. For example: “Post the screenshots to #eng-releases” or “Reply with a link to the recording.” ## Where else artifacts appear [Section titled “Where else artifacts appear”](#where-else-artifacts-appear) Pull requests aren’t the only place captures end up: * **In the conversation** - Screenshots and recordings appear as blocks in the agent’s conversation as they’re captured. * **On the run page** - Open the run in the [Oz web app](/platform/oz-web-app/#runs) to view, play, or download all artifacts the run produced. ## Related pages [Section titled “Related pages”](#related-pages) * [Computer Use](/agents/capabilities/computer-use/) - Control Computer Use and understand security considerations. * [Testing and recordings](/agents/capabilities/computer-use/testing-and-recordings/) - How the recording pipeline works and what finished videos contain. * [Admin Panel for teams](/enterprise/team-management/admin-panel/) - The full reference for team settings, including the Platform section. * [Viewing cloud agent runs](/platform/viewing-cloud-agent-runs/) - Open and inspect cloud agent run transcripts. * [Privacy](/support-and-community/privacy-and-security/privacy/) - Warp’s data handling policies, including how run artifacts are stored.
# Browser use for agents
Canonical page: [/agents/capabilities/computer-use/browser-use/](https://docs.warp.dev/agents/capabilities/computer-use/browser-use/)
> Computer Use environments include bundled Chromium and the Playwright CLI, so agents can test web apps and browse without extra setup.
Agents with [Computer Use](/agents/capabilities/computer-use/) enabled can drive a real browser inside their sandboxed cloud environment — opening web apps, exercising flows, filling forms, and verifying what renders on screen. Every Computer Use environment includes a browser out of the box, so browser-based tasks work without any changes to your [environment configuration](/platform/environments/). ## The bundled browser [Section titled “The bundled browser”](#the-bundled-browser) Computer Use environments ship with a bundled Chromium browser that runs on any environment base image — you don’t need to install Chrome, Firefox, or any browser dependencies yourself. * **Available as `chromium`** - The browser is on the agent’s `PATH` as `chromium`, and the `CHROMIUM_BIN` and `BROWSER` environment variables point to it. * **Your own browser wins** - If your environment’s base image already provides a browser, the agent uses that instead of the bundled one. ## Two ways to drive the browser [Section titled “Two ways to drive the browser”](#two-ways-to-drive-the-browser) Agents can interact with the browser in two complementary ways, and choose the right one for each task: * **Visual interaction** - The agent takes screenshots, then clicks, types, and scrolls like a person would. This is the right mode for verifying what a user actually sees: layout, styling, visual regressions, and rendering issues. * **Scripted control with Playwright** - Computer Use environments also bundle the Playwright CLI (`playwright-cli`), which lets the agent drive the browser through shell commands — navigating to URLs, clicking elements, filling forms, and reading page content — without taking a screenshot for every step. Scripted control is faster and more token-efficient for functional flows, like stepping through a multi-page form or asserting that an element exists. You don’t need to tell the agent which mode to use, but you can steer it in your prompt — for example, “verify the layout visually” or “use Playwright to step through the signup flow.” The bundled Playwright CLI drives the bundled Chromium rather than downloading its own browser build, so it works on base images that don’t provide Playwright’s system dependencies. ### Attaching to a running browser [Section titled “Attaching to a running browser”](#attaching-to-a-running-browser) For advanced workflows, the agent can attach the Playwright CLI to a browser it launched manually with a Chrome DevTools Protocol (CDP) endpoint:
```bash
chromium --remote-debugging-port=9222
playwright-cli attach --cdp=http://localhost:9222
```
This is useful when a task needs to set up specific browser state (for example, launching with custom flags) before scripted control takes over. Caution Browsing the open internet is where Computer Use risks are highest. Prefer non-root containers, which let Chromium run its own process sandbox properly, and consider restricting your environment’s internet access to an allowlist of known-safe domains. See the [security considerations for Computer Use](/agents/capabilities/computer-use/#security-considerations). ## Example workflows [Section titled “Example workflows”](#example-workflows) * **Test a web app end-to-end** - “Start the dev server, then walk through the checkout flow in the browser and verify each step works.” * **Verify a UI change visually** - “Open the settings page and confirm the new toggle renders correctly in both light and dark mode.” * **Automate a web task** - “Fill out the staging signup form with test data and confirm the verification email screen appears.” ## Related pages [Section titled “Related pages”](#related-pages) * [Computer Use](/agents/capabilities/computer-use/) - Control Computer Use and understand how the sandbox works. * [Testing and recordings](/agents/capabilities/computer-use/testing-and-recordings/) - Record browser sessions as annotated videos for review. * [Environments](/platform/environments/) - Configure the cloud environment your agents run in.
# Testing with Computer Use and video recordings
Canonical page: [/agents/capabilities/computer-use/testing-and-recordings/](https://docs.warp.dev/agents/capabilities/computer-use/testing-and-recordings/)
> Use Computer Use to test desktop UIs in a sandbox and capture annotated recordings for UI validation, end-to-end QA, and bug reproduction.
Agents don’t just write code; with [Computer Use](/agents/capabilities/computer-use/) enabled they can drive a real desktop GUI in an isolated sandbox, record everything they do, and hand you a trimmed, annotated video as concrete proof of the result. This page explains when to use Computer Use with recordings, how the recording pipeline works, where your recordings end up, what the finished video contains, and how to handle common recording failures. Here’s Warp engineer Varoon Kodithala to walk you through it. [Testing with Computer Use and video recordings walkthrough](https://www.loom.com/embed/fb3190a2e4c442aba76e5145da019b20) ## When to use it [Section titled “When to use it”](#when-to-use-it) Computer Use with recordings fits a wide range of tasks. Three common examples: * **UI change evidence** - After a code change lands, ask an agent to boot the app, exercise the affected surface, and record the session. You get a video showing the change works without running the app yourself. * **End-to-end QA of existing flows** - Run an agent through a critical workflow (for example, Warp’s onboarding flow or a multi-step form) and capture the full interaction as a single clip for review or a regression archive. * **Reproducing a bug** - Ask an agent to reproduce the exact steps from a bug report and record them. The resulting video is the definitive reproduction artifact: shareable, time-stamped, and independent of local environment differences. You don’t need to ask the agent to record explicitly. Prompts like “test this change”, “verify the fix works”, or “produce evidence” naturally lead an agent with Computer Use enabled to start and stop a recording as part of its workflow. ## How it works [Section titled “How it works”](#how-it-works) 1. **Confirm Computer Use is enabled.** Computer Use is enabled by default for cloud agent runs on Warp’s built-in harness, so no setup is needed unless it was turned off for your run. See the [Computer Use](/agents/capabilities/computer-use/#enabling-computer-use) page for how to control it via the Warp app, the Oz CLI, or the Automation Platform API. 2. **Agent starts recording.** Once Computer Use is active, the agent begins a screen capture inside the sandbox. The recording is gated by your session’s Computer Use approval. If you’ve already approved Computer Use for the run, recording starts automatically without a separate prompt. 3. **Agent exercises the UI.** The agent takes screenshots, clicks, types, scrolls, and drives the interface. Each successful interaction is tracked: when it started, when it finished, what actions it contained, and where the cursor moved. 4. **Agent stops and processes.** When the task is complete (or when the recording’s configured time or size limit is reached), the agent stops capture. Before upload, the recording is post-processed: idle and thinking gaps are cut, leaving only the windows where real interaction happened, and action overlays are burned in so the video is annotated. 5. **Artifact is published.** The processed video is uploaded as a run artifact, ready to view wherever the run’s artifacts appear. ## Where to find recordings [Section titled “Where to find recordings”](#where-to-find-recordings) ### In Warp [Section titled “In Warp”](#in-warp) After the agent finishes its Computer Use session, any video recording appears as a block in the conversation. Clicking the block opens the full conversation view alongside the recording artifact. If the recording was produced by a cloud agent run, you can also access it by opening that run’s transcript as a [cloud-synced conversation](/platform/viewing-cloud-agent-runs/). ### In the web app [Section titled “In the web app”](#in-the-web-app) Cloud agent runs are listed on the [Runs page of the Oz web app](/platform/oz-web-app/#runs). Open a run to see its artifacts section, which lists any video recordings produced during that run. You can play the video directly from the run page or download it. ### On pull requests [Section titled “On pull requests”](#on-pull-requests) Recordings are also attached to the PR description when the agent opens or updates a pull request — see [Screenshots and videos in pull requests](/agents/capabilities/computer-use/artifacts-in-prs/). ## What’s in a recording [Section titled “What’s in a recording”](#whats-in-a-recording) The finished video is not raw screen capture. After the agent stops recording, Warp post-processes the video before uploading it: * **Smart cut of idle and thinking time** - Gaps where the agent is planning, waiting on a network call, or idle between actions are removed. What remains are only the windows where real interaction happened, played back at normal speed. This makes recordings significantly shorter than the raw capture duration. * **Action overlays** - Each interaction is burned into the video as overlay pills. Keyboard shortcuts (such as `Ctrl+C`, `Return`, or `Escape`) appear as labels on the frame where they were pressed, so non-visible keys like modifier chords show up clearly. Text typing is labeled “typing…” to avoid leaking sensitive input. Scroll events show a directional label. * **Click ripples and drag trails** - Pointer events (mouse clicks, drags, and moves) are captured with their coordinates and burned into the video as click ripples and movement trails, so cursor activity is visible even when the cursor itself is small on screen. * **Sandbox-only capture** - The recording is taken from inside the isolated sandbox environment. It never captures your local desktop, terminal, credentials, or anything outside the sandbox. ## Example recordings [Section titled “Example recordings”](#example-recordings) ### UI change evidence [Section titled “UI change evidence”](#ui-change-evidence) An agent validates a visual change, records the before-and-after behavior, and attaches the recording to the pull request for the reviewer. Example prompt:
```text
Add a feature to tab groups where each new tab group is assigned a default color that differs from colors already in use. Disable it by default and expose it as a Setting users can toggle on. Once implemented, record a demo that first shows new tab groups getting no color while the setting is off, then enables the setting and shows new tab groups receiving sequential palette colors that cycle back to the start once the palette is exhausted.
```
The finished recording is attached to the pull request, giving a reviewer proof that both states behave correctly without building the change themselves. [](/assets/agent-platform/tab-group-demo.mp4) ### End-to-end QA of an existing flow [Section titled “End-to-end QA of an existing flow”](#end-to-end-qa-of-an-existing-flow) An agent walks through a critical user journey, such as the “New run” creation flow in the Oz web app, capturing the complete interaction. Example prompt:
```text
Build the Oz web app and walk through the entire "New run" creation flow end to end. Exercise every entrypoint into the flow: the primary New run button, the Command Palette, and any contextual entrypoints. Then step through each stage from opening the New run surface to submitting a run.
```
This gives you a reproducible, time-stamped clip of the flow that can be archived, diffed across releases, or shared with the team as a baseline. [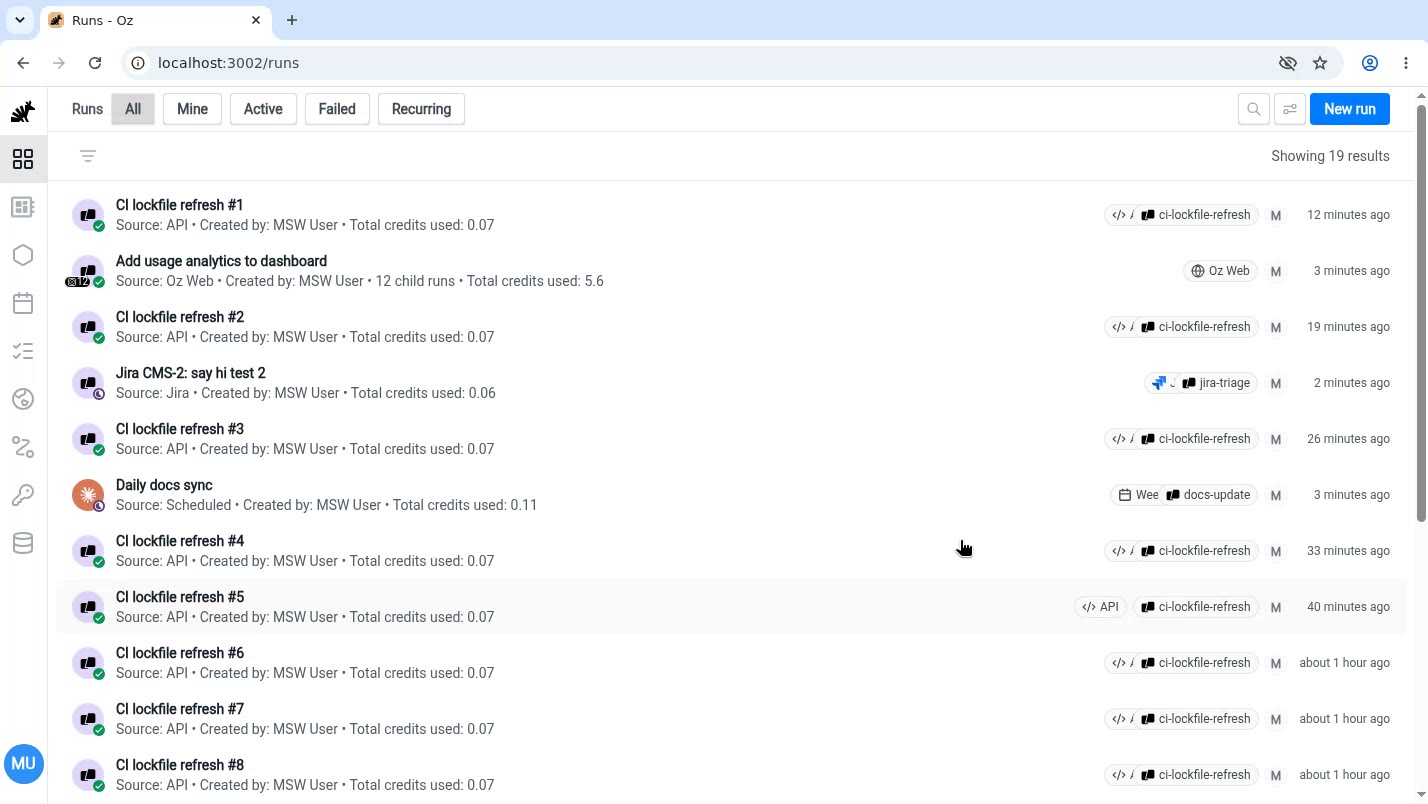](/assets/agent-platform/new-run-demo.mp4) ### Reproducing a bug [Section titled “Reproducing a bug”](#reproducing-a-bug) An agent follows the exact steps from a bug report and records them, producing a shareable reproduction artifact. This is a core part of Warp’s open-source workflow: when a user files a bug against [warpdotdev/warp](https://github.com/warpdotdev/warp), we spin off a cloud agent to reproduce and verify it before reviewing any contribution that claims to fix it. Example prompt:
```text
Reproduce warpdotdev/warp#13480 ("ctrl+c does not set focus on prompt"): build warp-oss, select a command block, then press Ctrl+C. The block should be deselected and focus should return to the prompt. Record the session so it can be attached to the issue as reproduction proof.
```
In [warpdotdev/warp#13480](https://github.com/warpdotdev/warp/issues/13480), pressing Ctrl+C while a block is selected fails to return focus to the prompt: the block stays selected and its focus annotations linger. The agent reproduces the bug by driving a sandboxed Warp build and pressing Ctrl+C on a selected block on camera. Bug reproductions are one of the strongest use cases because the video is unambiguous: the recording either shows the bug or it doesn’t. [](/assets/agent-platform/ctrl-c-bug.mp4) ## Troubleshooting [Section titled “Troubleshooting”](#troubleshooting) ### Recording was cut short [Section titled “Recording was cut short”](#recording-was-cut-short) Each recording has a maximum duration of **10 minutes** and a maximum file size of **1 GiB**. When either limit is hit, the capture is stopped and finalized automatically. If the conversation is cancelled while a recording is active, the recording is discarded rather than uploaded. ### Retry guidance [Section titled “Retry guidance”](#retry-guidance) Most recording failures are transient. If a recording fails or produces an unexpected result: 1. Check the agent’s output for the specific error message. 2. Retry the run; recording substrate errors typically clear on the next attempt. 3. If the failure repeats consistently across multiple runs, file an issue on the [open-source Warp client repository](https://github.com/warpdotdev/warp/issues) with the error message. ## Related [Section titled “Related”](#related) * [Computer Use](/agents/capabilities/computer-use/) - enable Computer Use, understand security considerations, and configure models for Computer Use sessions. * [Screenshots and videos in pull requests](/agents/capabilities/computer-use/artifacts-in-prs/) - how captured artifacts are attached to PR descriptions and the team setting that controls it. * [Viewing cloud agent runs](/platform/viewing-cloud-agent-runs/) - open and inspect cloud agent run transcripts in Warp or the browser. * [Security considerations](/agents/capabilities/computer-use/#security-considerations) - understand the sandboxed environment and data isolation model. * [Privacy](/support-and-community/privacy-and-security/privacy/) - Warp’s data handling policies, including how run artifacts are stored.
# Full Terminal Use
Canonical page: [/agents/capabilities/full-terminal-use/](https://docs.warp.dev/agents/capabilities/full-terminal-use/)
> Full Terminal Use means agents can interact with active terminal apps to monitor live output and run commands.
Full Terminal Use lets the Warp Agent operate directly inside interactive terminal applications like database shells, debuggers, text editors, and long-running servers. The agent can see the live terminal buffer, write commands, respond to prompts, and hand control back to you at any time. The agent can see the live terminal buffer (terminal state), write to the PTY to run commands, respond to prompts, and continue working inside the running process while you stay in control.  ## Overview [Section titled “Overview”](#overview) With Full Terminal Use, the Warp Agent can attach to interactive tools like `psql`, `vim`, `python`, `gdb`, `top`, or your dev server, read the terminal output as it changes, and interact with the application as if you were typing. You can either ask the agent to start an interactive program, or you can start it yourself and then tag the agent in once the tool is already running. In both cases, the agent sees the same terminal buffer (and PTY session) you do and can act on it. ## How Full Terminal Use works [Section titled “How Full Terminal Use works”](#how-full-terminal-use-works) #### Start an interactive command [Section titled “Start an interactive command”](#start-an-interactive-command) You can either ask the agent to run an interactive command, or start one manually and then tag the agent in: * **Ask the agent to start an interactive tool** * Example: * “Open a Postgres shell and help me inspect the orders table.” * “Start the dev server and debug this 500 error.” * **Or start the command yourself, then tag the agent in** * Example: * If you’ve already launched an interactive tool (for example `psql` or `npm run dev`), you can bring the agent into the running session using the **Use Agent** button in the terminal footer or via `Cmd+I`. 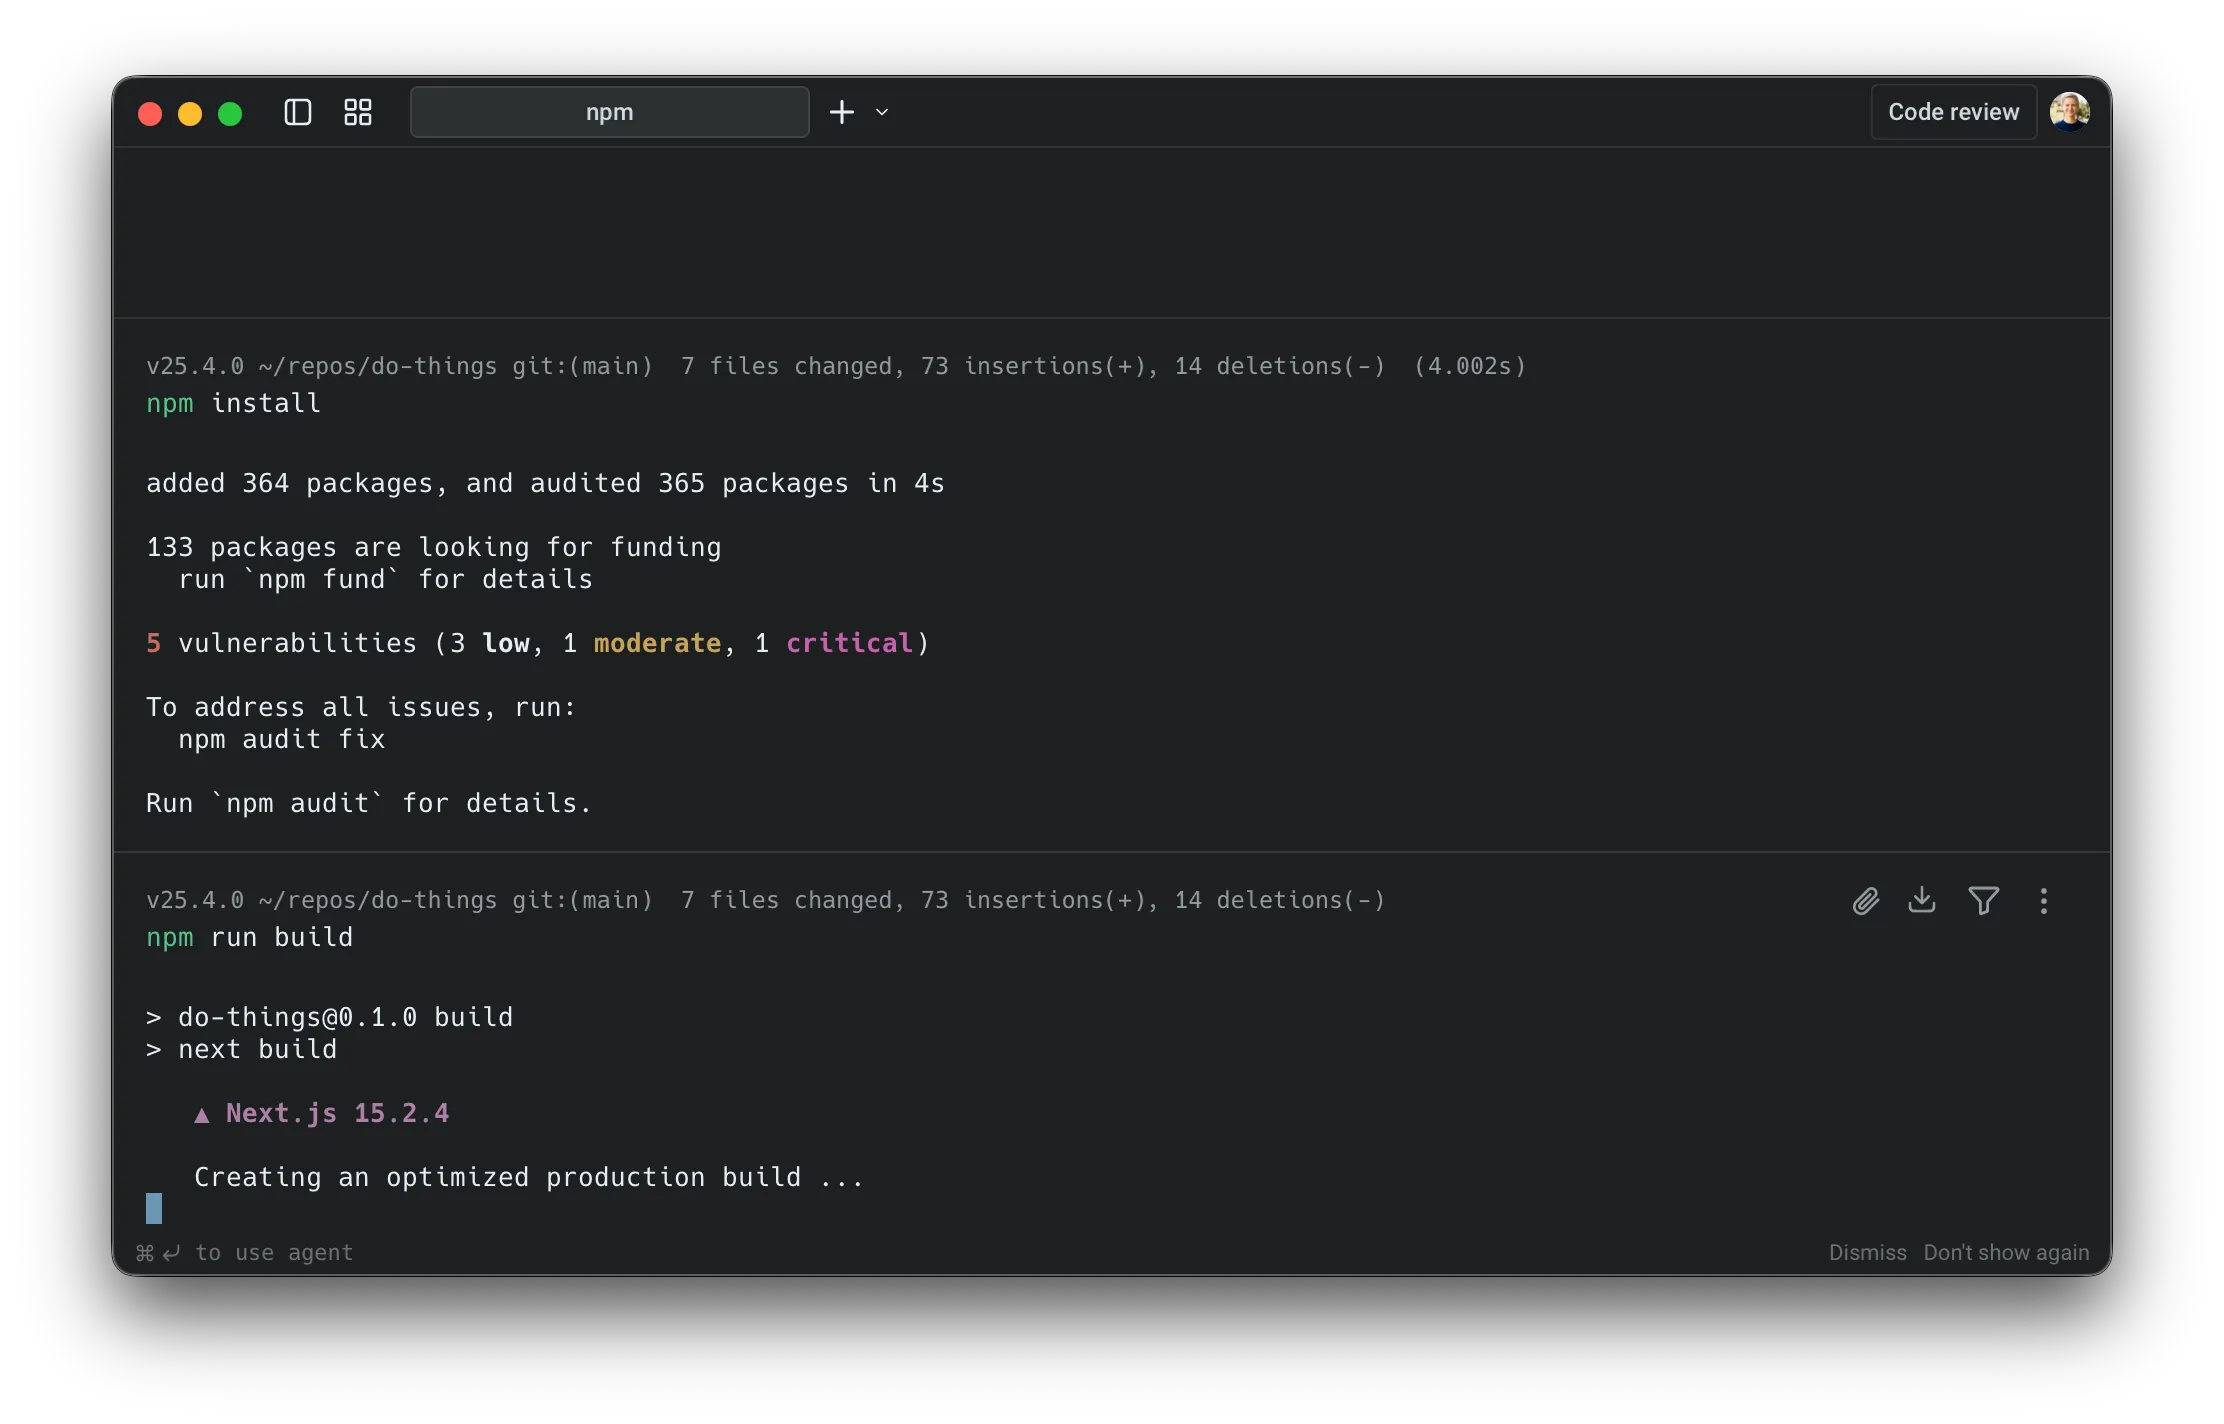 Option to tag the agent into a running command. * Once the agent is tagged in, you can follow up with natural-language requests such as: “Watch this process and help debug the error on the /session endpoint.” * Warp then attaches the agent to the active PTY so it can see the current terminal buffer and propose actions inside the session. [Tagging in the agent.](https://www.loom.com/embed/bcedc521071a4b6a9bbcf74b5156f903) 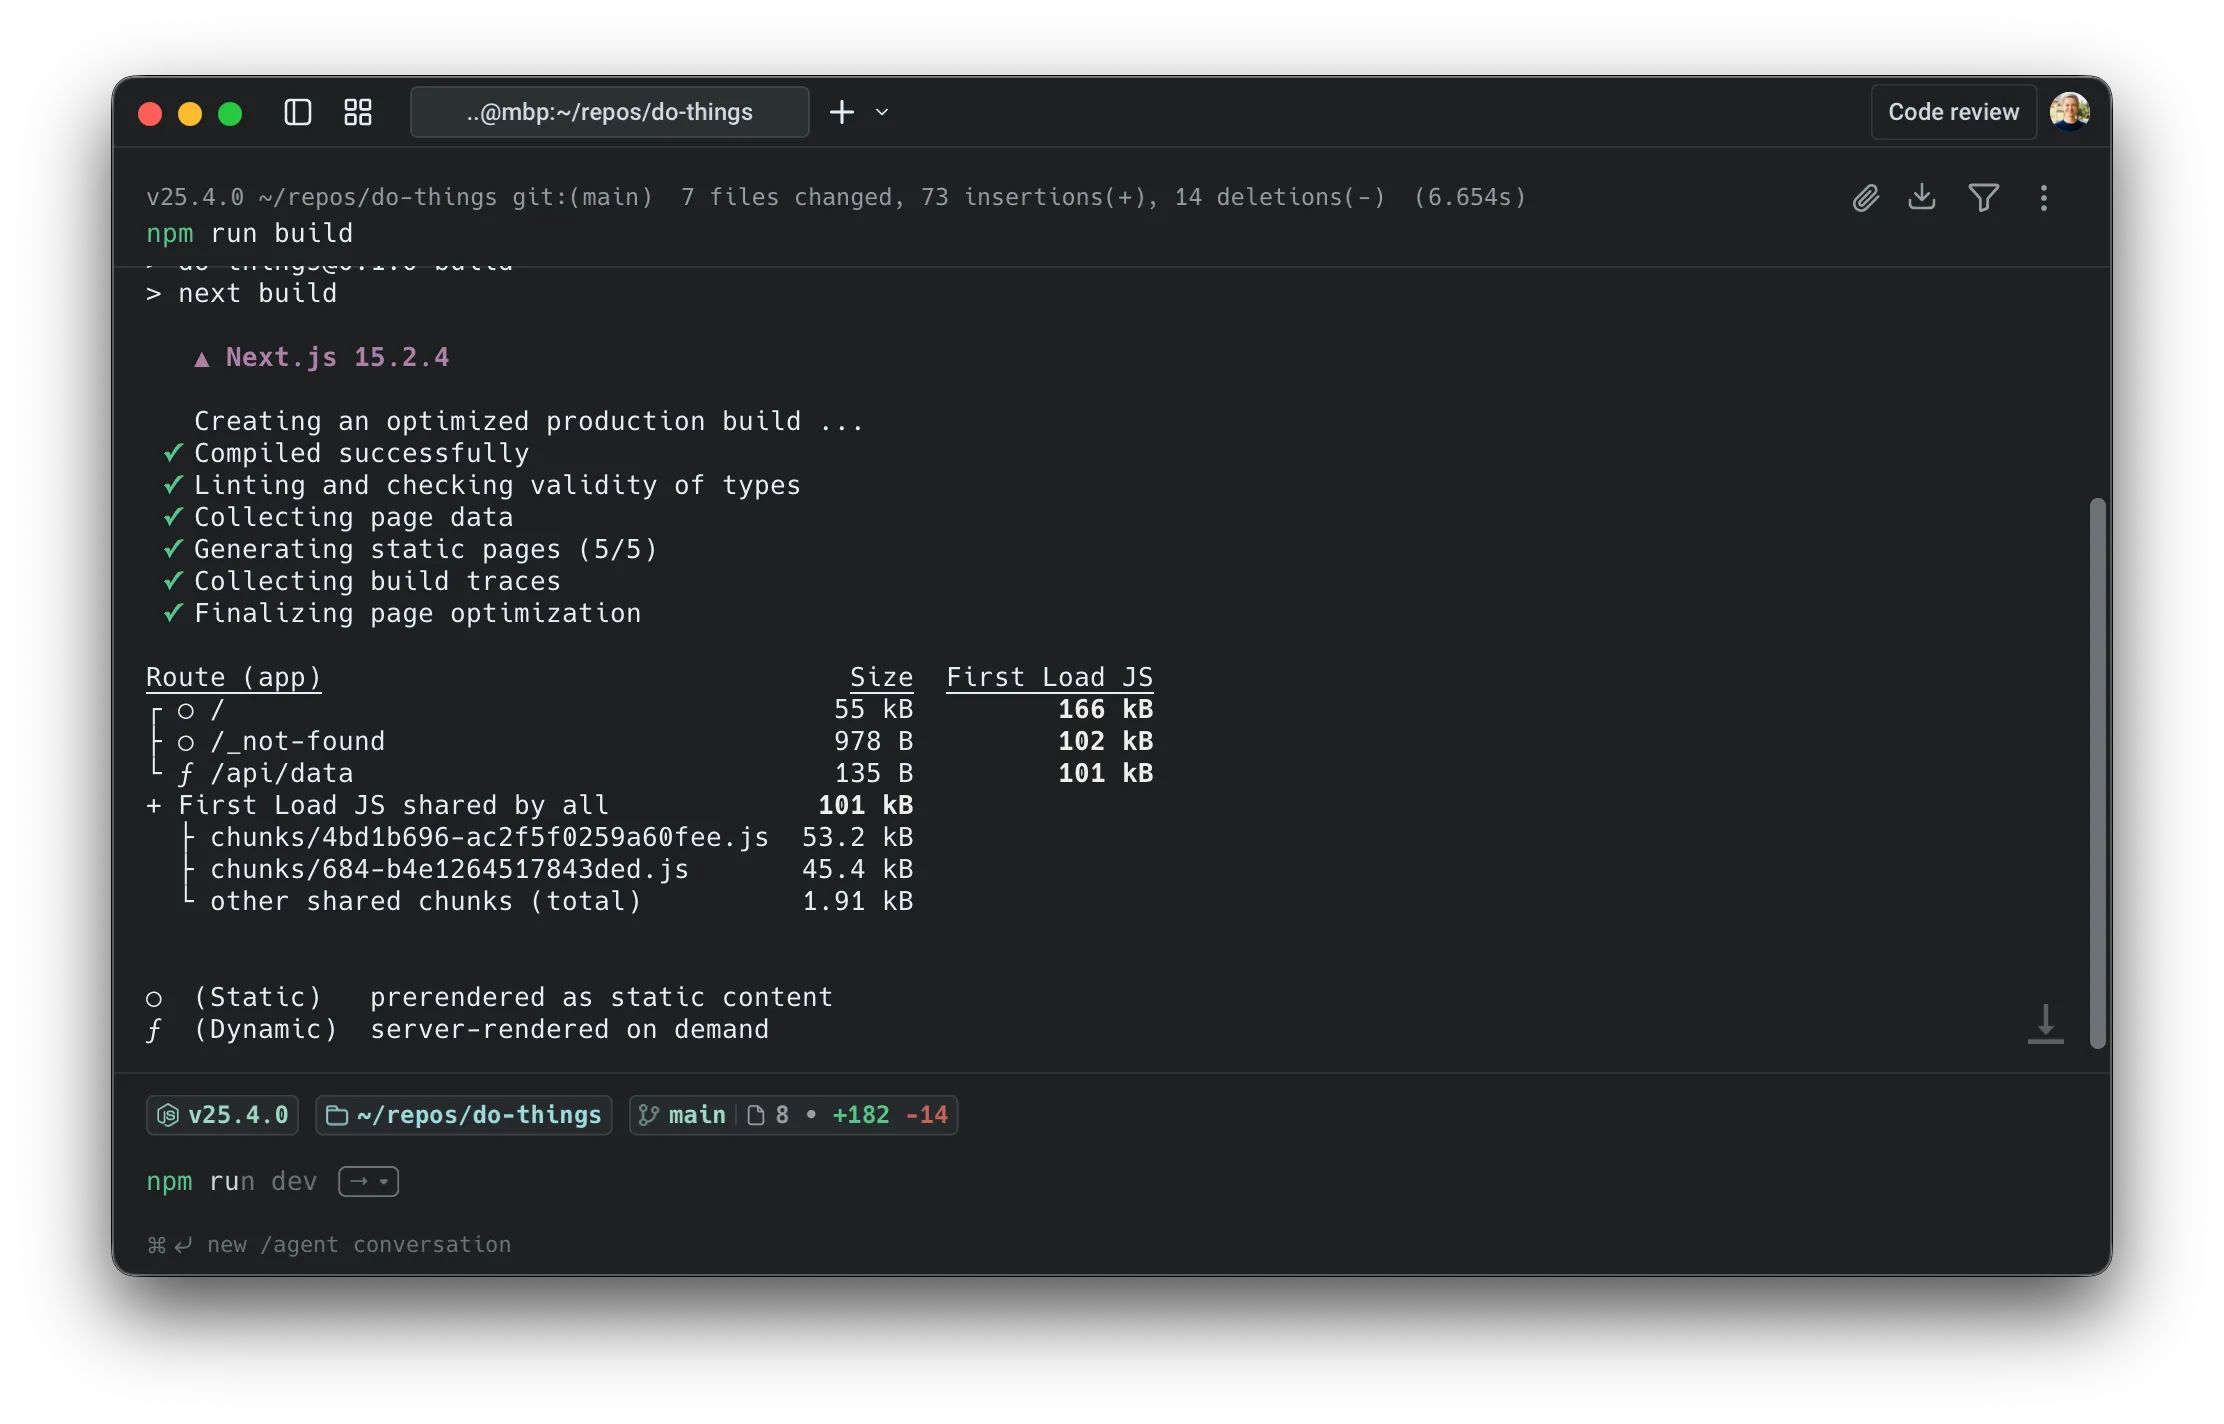 Running a build command. 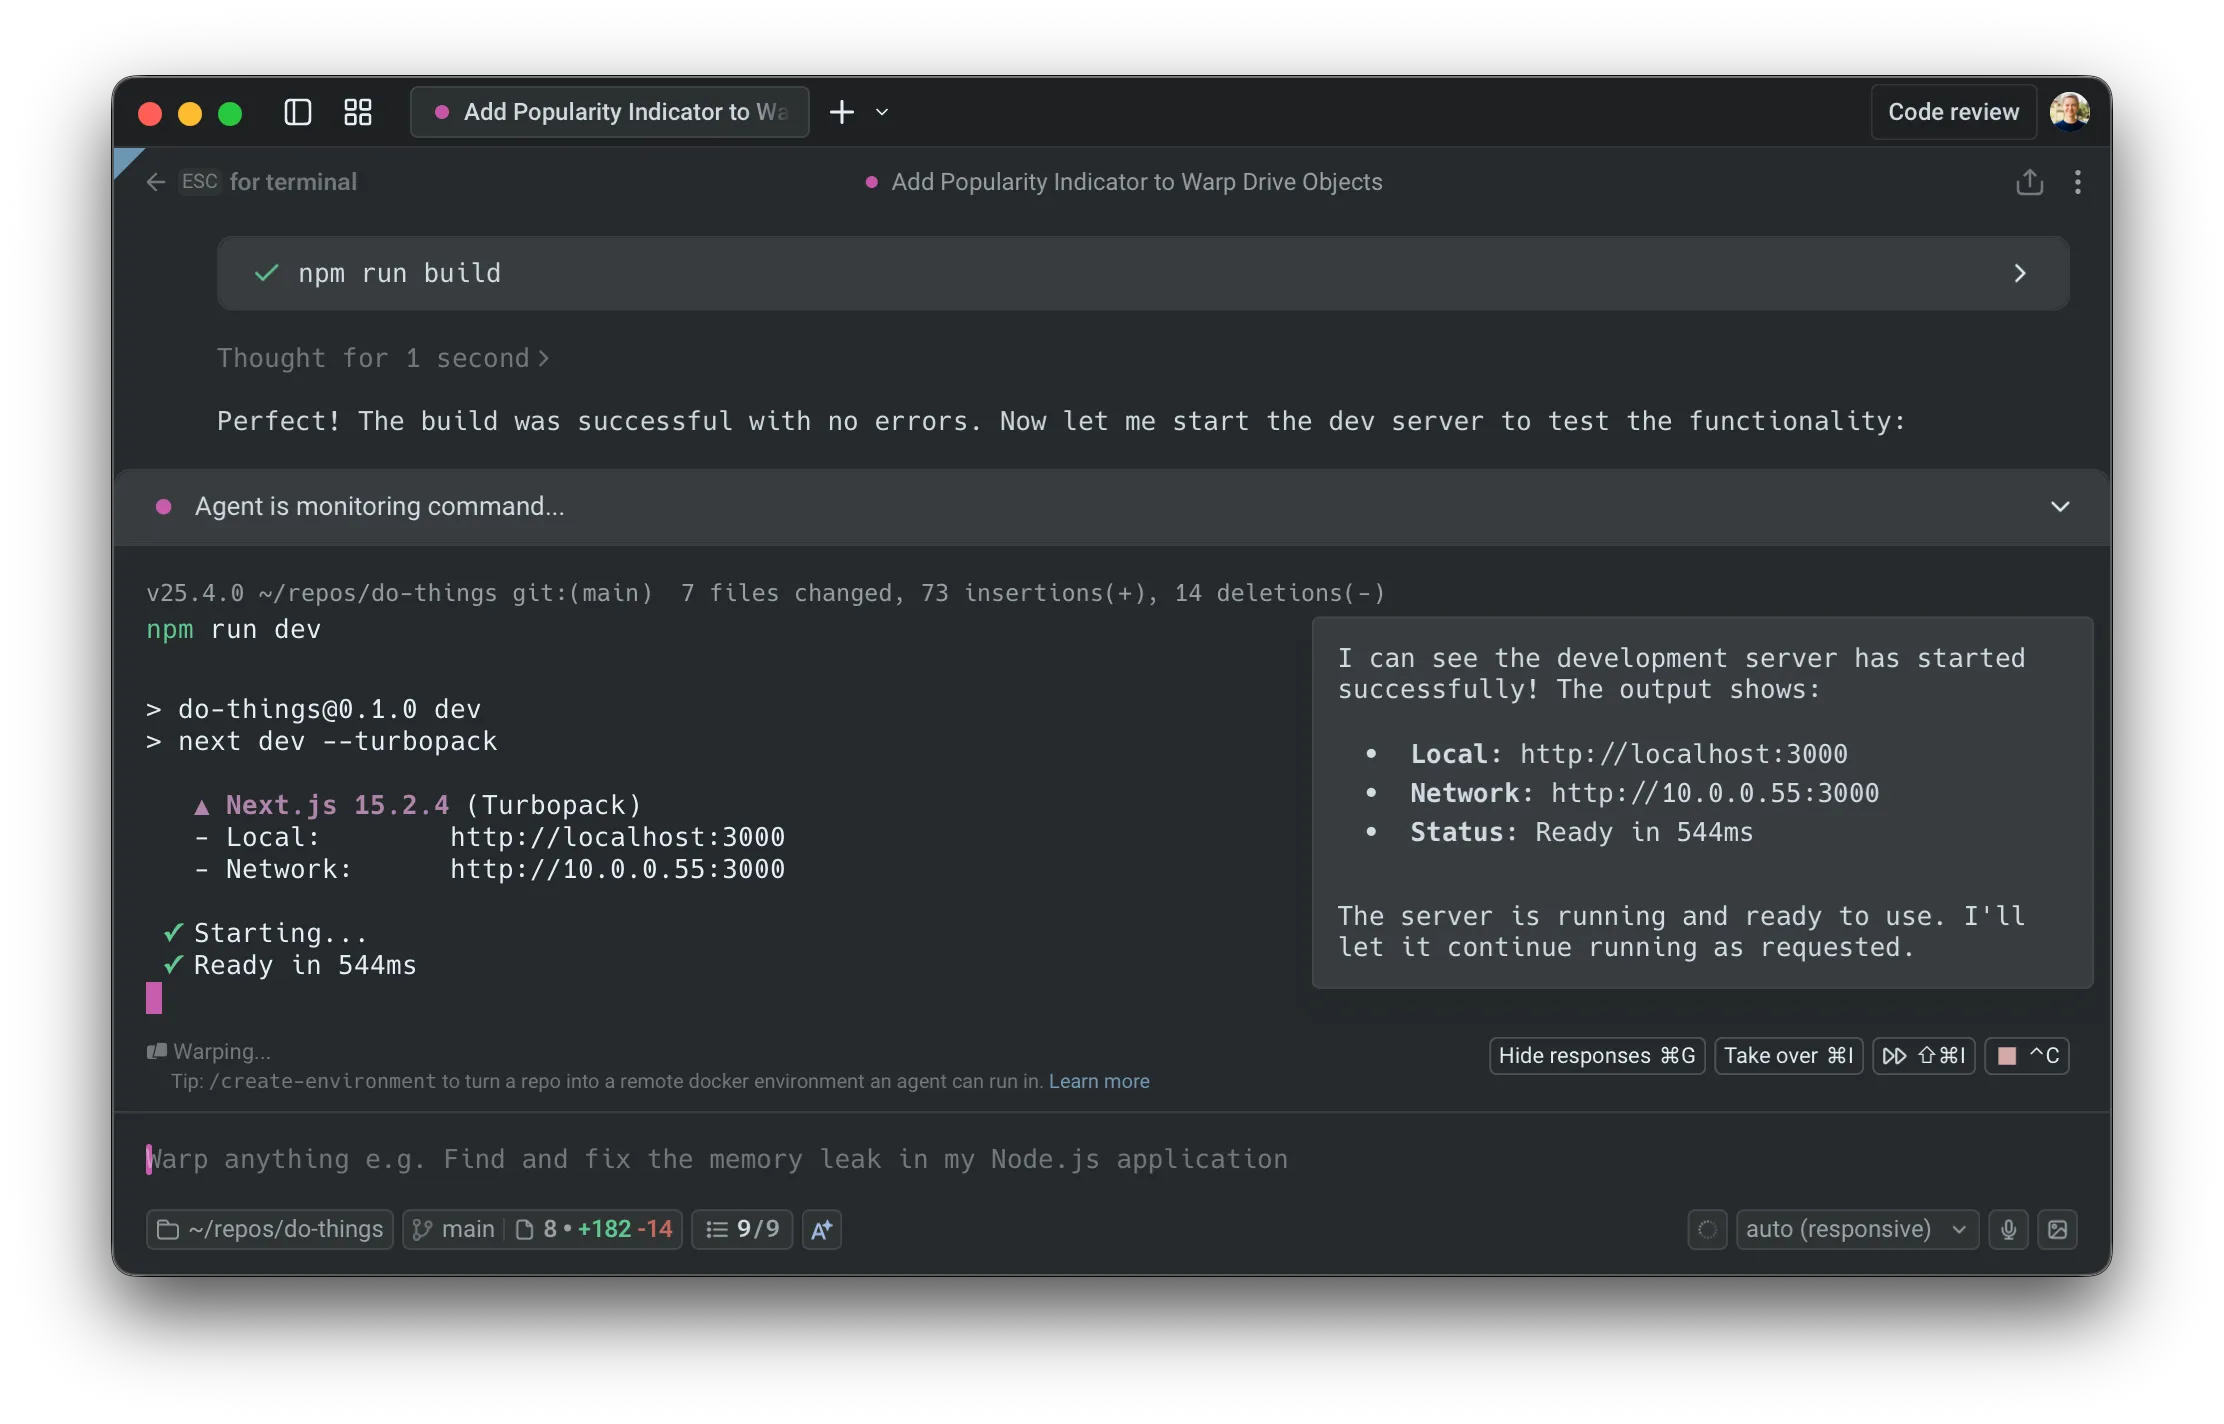 Tagging in the Agent to monitor the dev server. Warp attaches the agent to the running command so it can see and control the terminal buffer. #### Agents propose actions inside the session [Section titled “Agents propose actions inside the session”](#agents-propose-actions-inside-the-session) Once attached, you can continue using natural language and the agent turns your requests into concrete terminal actions. For example, in a Postgres shell: * You: “Show me all the tables and describe the orders table.” * Agent: proposes running commands like: `\dt` —> `\d+ orders` In the UI, you’ll see a request to: * Run a specific command * Optionally enable auto-approval for similar commands in this session #### Switching control between user and the agent [Section titled “Switching control between user and the agent”](#switching-control-between-user-and-the-agent) You can swap control at any time. **Take over** * Use the Takeover control to stop the agent from typing or performing any actions. * The shell stays open, and you can type directly into the same session. 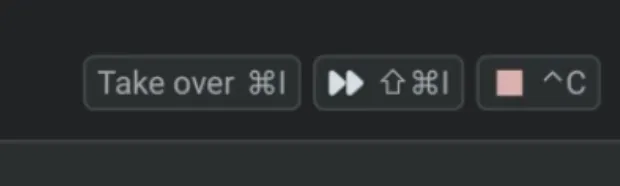 Option to take over from agent in the footer. **Hand back control** * When you’re ready for the agent to continue, click the control again. * The agent resumes where you left off, with full access to the current terminal state. 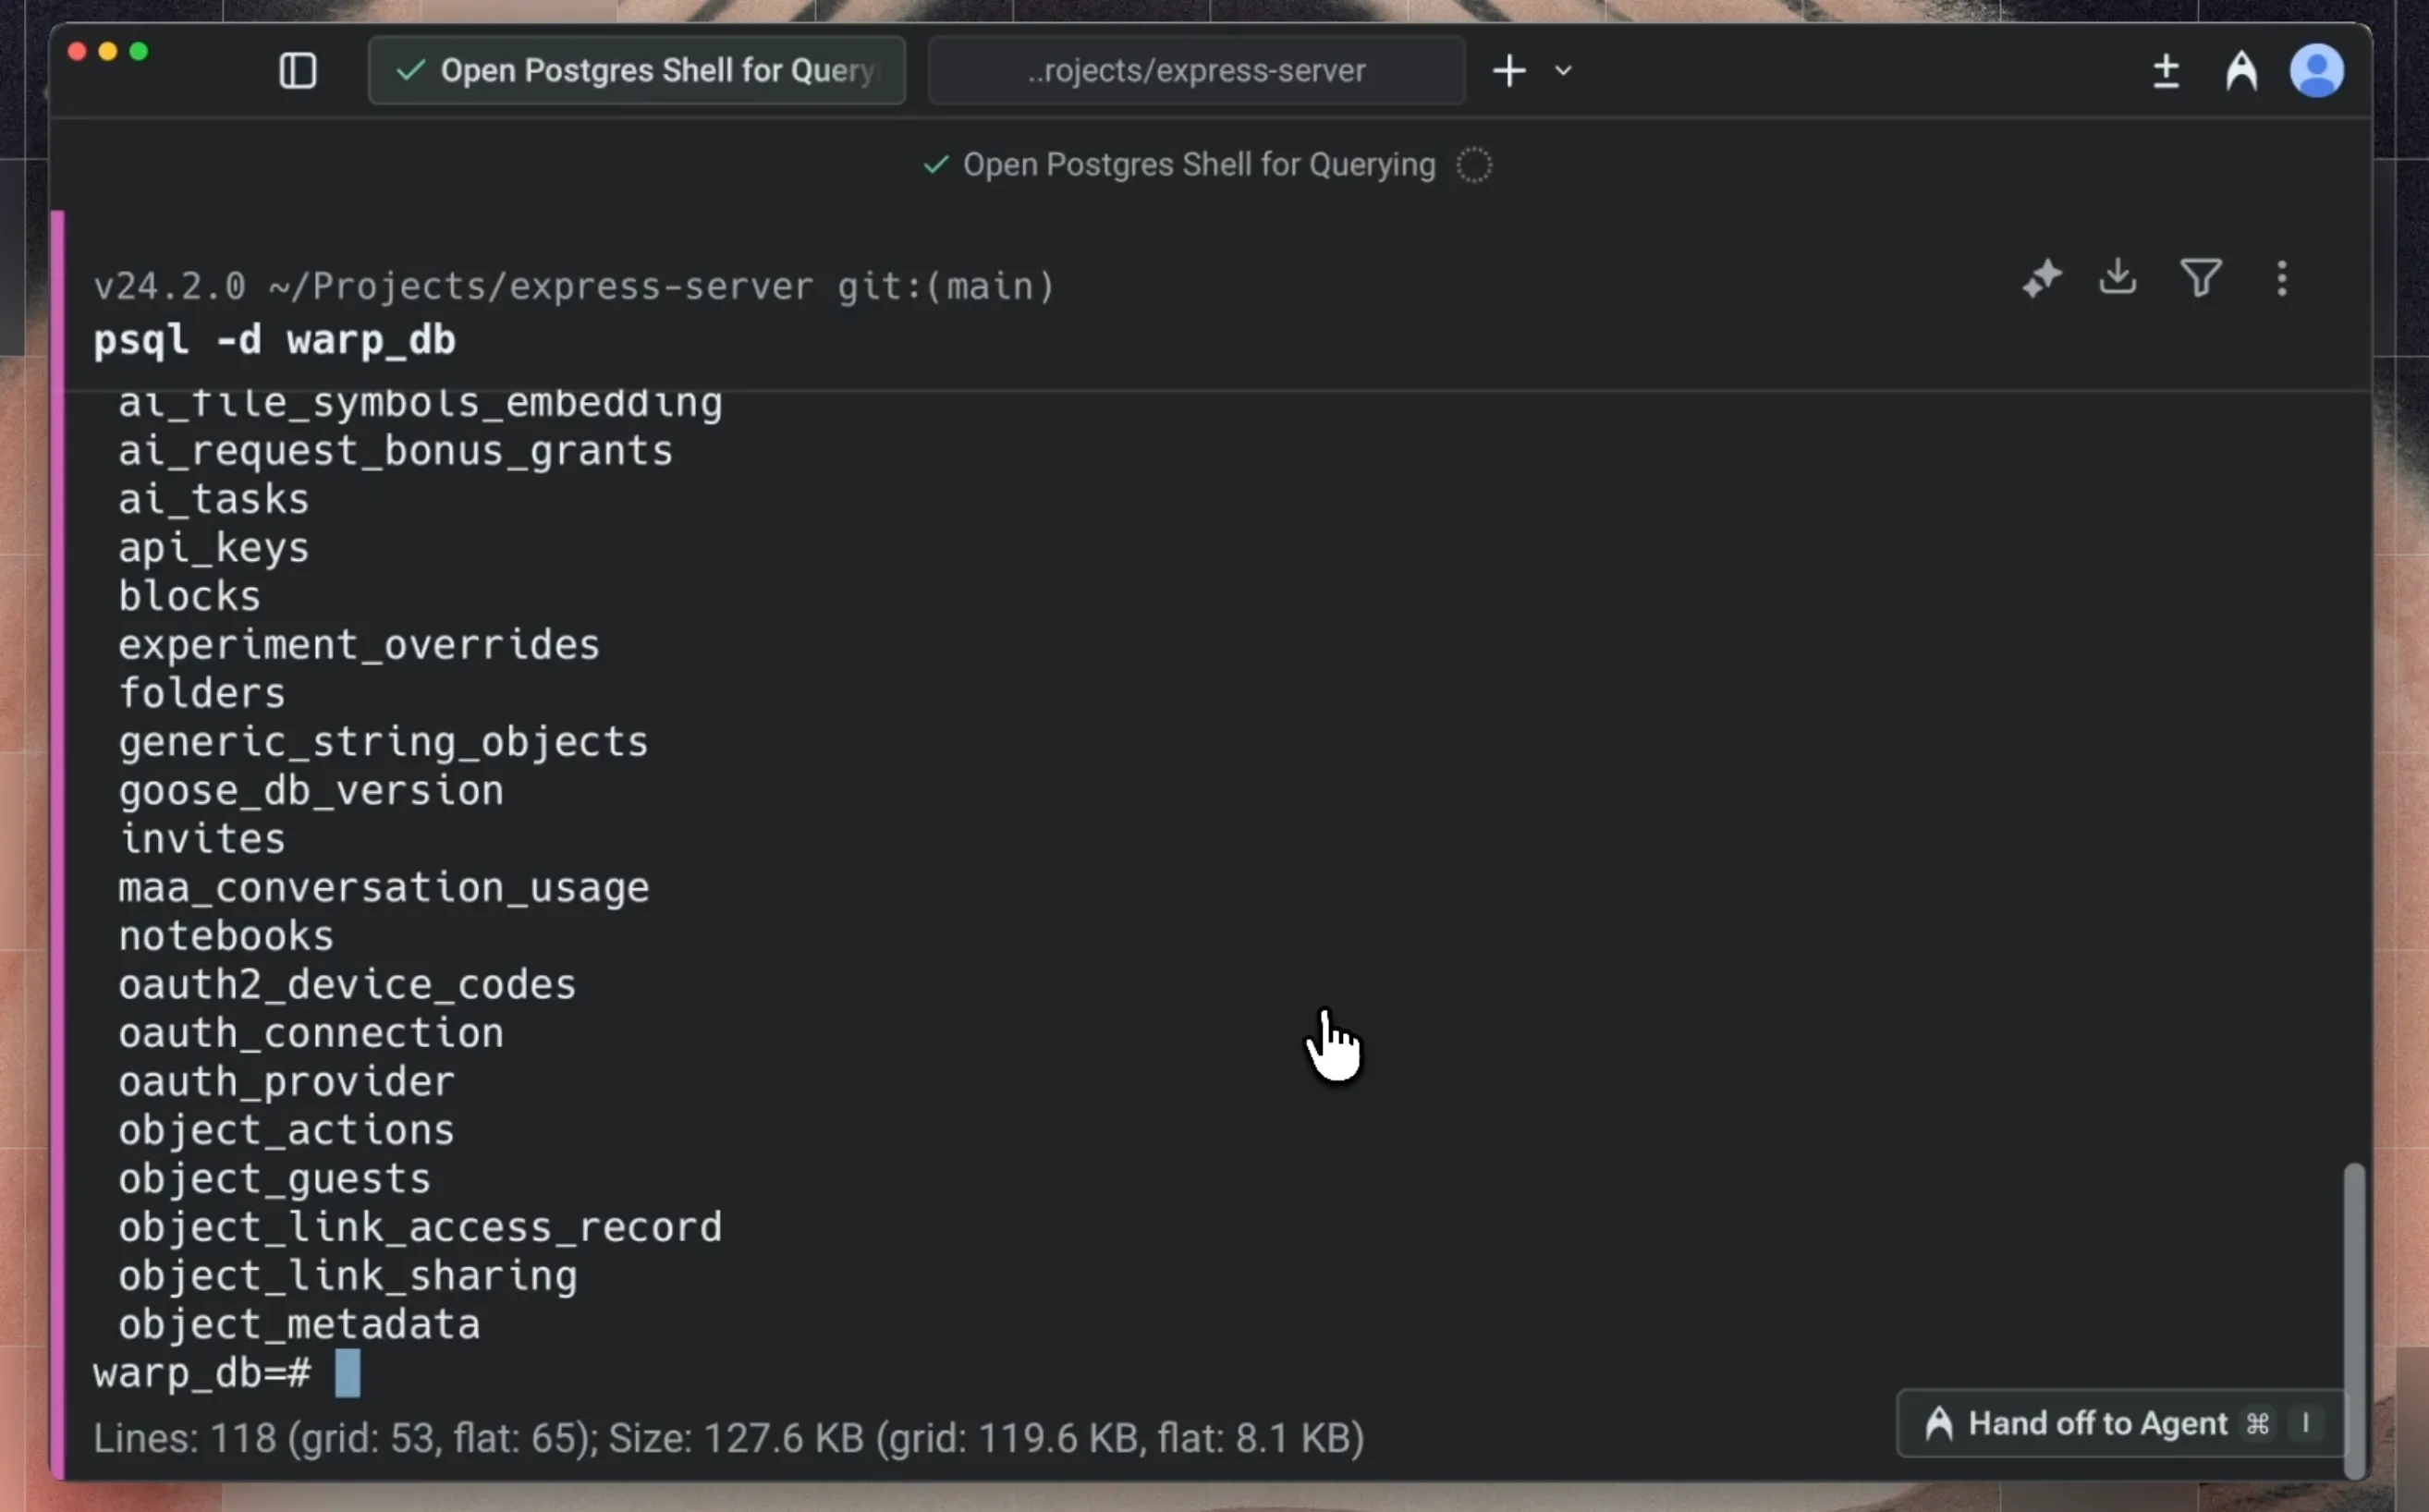 Option to hand-off to the agent in the conversation footer. This makes it easy to: * Let the agent do mechanical work (paging output, trying variants of a command) * Step in for delicate or security-sensitive actions * Then let the agent continue once the critical step is done #### Prompts queue while the agent drives a command it started [Section titled “Prompts queue while the agent drives a command it started”](#prompts-queue-while-the-agent-drives-a-command-it-started) When the agent starts a long-running command itself, prompts you submit while it drives that command are queued by default instead of steering the agent mid-command. They appear in the queued prompts panel with a *(queued until the command finishes)* suffix, and Warp sends them to the agent automatically when the command finishes. This applies only to commands the agent started; if you start a command and tag the agent in, your prompts keep steering the agent immediately. To steer the agent immediately during an agent-started command, toggle auto-queue off for the remainder of the command, or change the **Default long-running command submission mode** setting in the Warp app under **Settings** > **Agents** > **Warp Agent** > **Input**. For the full behavior, including the setting’s options and when it applies, see [Queueing during long-running commands](/agents/local-agents/interacting-with-agents/prompt-queueing/#queueing-during-long-running-commands). #### Long-running commands in terminal vs agent view [Section titled “Long-running commands in terminal vs agent view”](#long-running-commands-in-terminal-vs-agent-view) The behavior differs based on where you start the long-running command: * From terminal view 1. Run an interactive command (e.g., `python`, `psql`) 2. Press `⌘+Enter` (macOS) or `Ctrl+Shift+Enter` (Windows/Linux), or use `⌘+I` (macOS) / `Ctrl+I` (Windows/Linux), to tag in the agent 3. The input switches to Agent Mode with full controls 4. When you exit, an agent conversation block appears in your terminal block list 5. Click the block to reopen the full conversation with your LRC interaction context * From agent view 1. The agent runs an interactive command as part of your conversation 2. Use `⌘+Enter` (macOS) or `Ctrl+Shift+Enter` (Windows/Linux) to tag in if the agent isn’t already interacting 3. The UI stays the same since you’re already in agent view 4. When you exit, the interaction remains part of your conversation. No separate block is created in the terminal block list 5. Commands run in agent view are automatically included as context #### Showing and hiding agent responses [Section titled “Showing and hiding agent responses”](#showing-and-hiding-agent-responses) Warp gives you control over how much agent output appears in Full Terminal Use. **Toggle visibility** Use the `Hide responses` or `Show responses` button or `⌘+G` in the interactive command footer to switch between showing all agent output or hiding it from the terminal view. Note that this only affects the agent’s messages and proposals; your terminal state and command output remain unchanged. **Behavior when hidden** * When agent responses are hidden, your own agent requests automatically dismiss after **4 seconds** to keep the terminal clear. * You can also manually dismiss any user query at any time by hovering over it and clicking the X. [Hiding and showing agent responses in Full Terminal Use demo](https://www.loom.com/embed/c639fb4ab33343a39037b2083c66858a) *** ### Configuring agent permissions and autonomy [Section titled “Configuring agent permissions and autonomy”](#configuring-agent-permissions-and-autonomy) You control how much autonomy the agent has when interacting with the terminal. #### Session-level approvals [Section titled “Session-level approvals”](#session-level-approvals) Each time the agent wants to take an action inside an interactive shell, you’ll see the agent’s reasoning, a brief explanation, and the proposed command. From there you can: * Allow the command once (for example by approving it or pressing `Enter`). * Turn on auto-approval for similar commands in this session (for example with `⌘+Shift+I`). * Refine the request with `Ctrl+C`, which clears the proposed action and lets you follow up with a different query. * Take over manually with `⌘+I`, which stops the agent from issuing any further PTY writes until you hand control back. 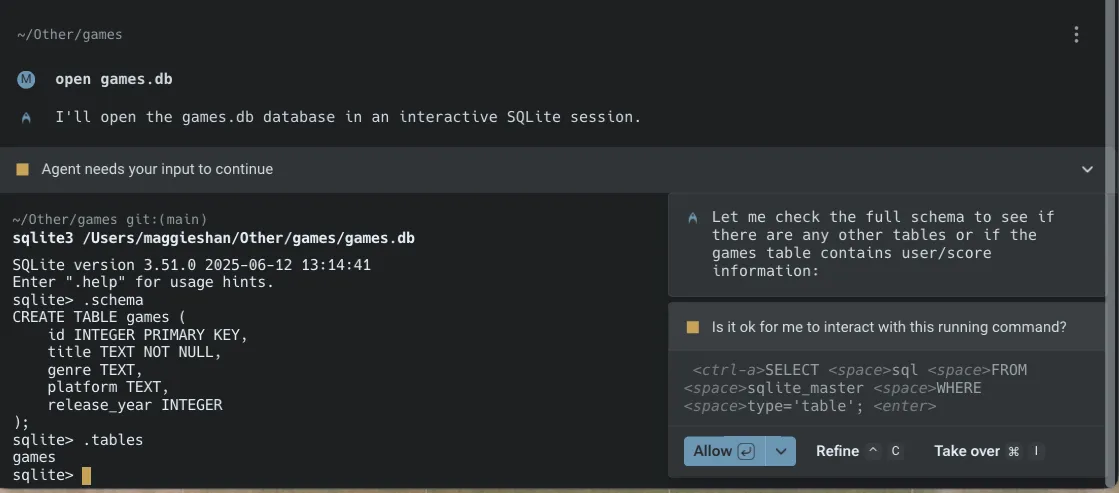 Allow, Refine, or Take over an agent response. 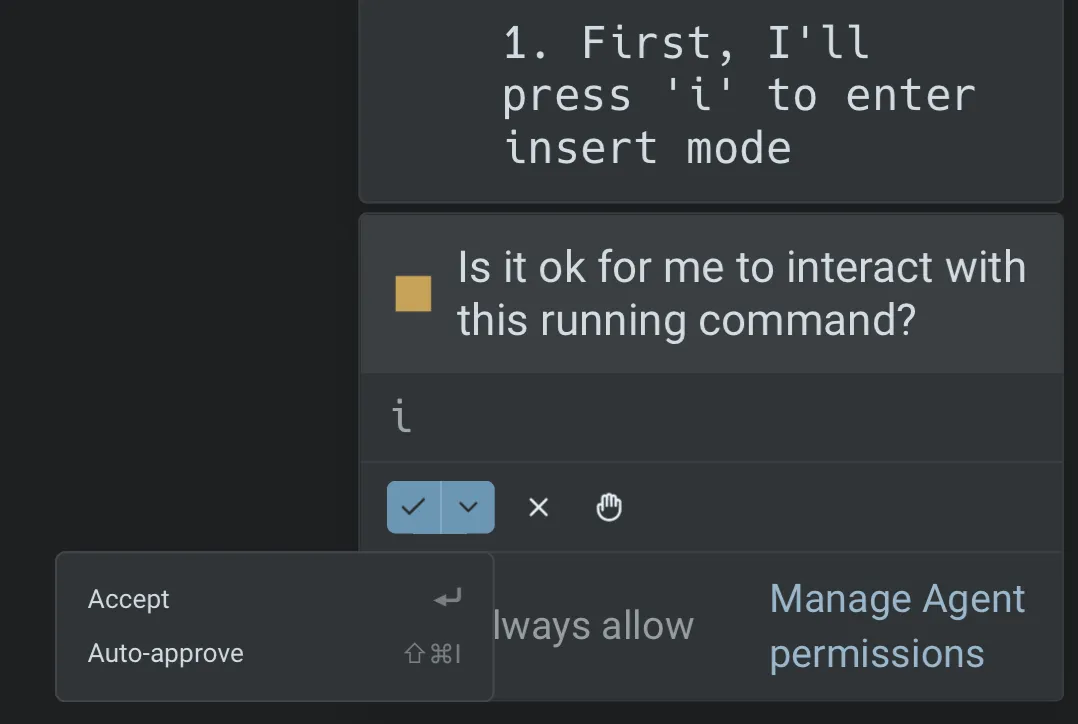 This lets you tighten or loosen control for the current task: * For exploratory work, use **Always allow** to reduce friction. * For production systems or sensitive operations, use **Allow once** and review each step. #### Global permission settings [Section titled “Global permission settings”](#global-permission-settings) You can configure global defaults from your [Agent Profiles & Permissions](/agents/capabilities/agent-profiles-permissions/) settings: * **Ask on first write**: The first write to a shell process requires approval. After that, all subsequent writes for that specific process/command will be approved. * **Always ask**: Every write to the shell process from the agent requires your explicit approval. * **Always allow**: The agent can write to the shell process without prompting you each time. These settings apply to every session that uses Full Terminal Use. You can still override them on a per-session basis when prompted. For example, you can enable **auto-approval** for similar commands in the current session using the fast-forward control, or switch to a **different AI profile** with its own permission settings for that conversation. ### Credits usage [Section titled “Credits usage”](#credits-usage) All AI interactions from Full Terminal Use consume [credits](/support-and-community/plans-and-billing/credits/), including understanding your natural language requests. Credits are consumed in a similar way as other Warp actions that use the same model and a similar context size. **Interactive sessions can consume more credits if:** * The agent runs many commands in an interactive shell on your behalf. * There is a significant amount of terminal output to read and summarize. **To manage credit usage:** * Use tighter scopes: * “Describe just the orders table.” instead of “Explain the entire database.” * Pause autonomy for high-volume tasks with copious terminal output: * Take over manual control when running large batches or long logs. * Use stricter permissions: * Set global permissions to “Ask on first write” or “Always ask”, then approve only what you need. ## Example workflows [Section titled “Example workflows”](#example-workflows) Here’s a demo from one of our engineers, Maggie, that walks through a couple of Full Terminal Use examples. [Full Terminal Use example workflows demo](https://www.loom.com/embed/d47ee09153df417983df65a339a9d6f2) Below are some common interactive tools where Full Terminal Use is particularly useful: database shells (Postgres, MySQL, SQLite), debuggers such as gdb, language-specific REPLs like python or node, text editors and file explorers, and long-running dev servers or monitoring tools such as top and htop. | Tool | Example tasks | Agents can… | | --------------------------------------------------------------------------------------- | ----------------------------------------------------------------------------------------------------------------------------------------------------------------------------------------------------------------------------------------------------------------------- | --------------------------------------------------------------------------------------------------------------------------------------------------------------------------------- | | **Database shells (REPLs)** e.g. `psql`, `mysql`, `sqlite`, etc. | * “List all tables and describe the users and orders tables.” * “Create a new table to store archived user sessions.” * “Show me all rows in orders from the last 30 days, grouped by status.” * “Generate and run a query that finds the top 10 customers by revenue.” | - Navigate `\d`, `\dt`, `DESCRIBE`, etc. - Write and execute SQL queries - Summarize results in plain language | | **Text editors** e.g. `vim`, `nano`, etc. | * “Open this file in vim and add a Markdown header and a boilerplate section.” * “Insert a docstring above this function explaining what it does.” * “Generate a CSS utility class block and insert it in this file.” | - Navigate within the editor using keystrokes - Insert, edit, and delete text - Save and quit when done | | **Python REPLs** e.g. `python`, `ipython` | * “Start a Python REPL and define a function that calculates a moving average.” * “Write a unit test for this function and run it.” * “Plot x from 0 to 10 and y = sin(x).” | - Import modules - Define functions and classes - Run tests and small scripts - Print or summarize results back to you | | **Debuggers** e.g. `gdb`, `lldb`, language-specific debuggers | * “Start gdb for this binary and set a breakpoint on `handle_request`.” * “Run until the breakpoint, then show the stack and local variables.” * “Inspect this pointer and tell me if it looks invalid.” | - Issue debugger commands (break, run, next, continue, bt, etc.) - Walk through execution step by step - Summarize relevant state so you don’t have to remember every command | | **Long-running servers and services** e.g. `npm run dev`, `uvicorn`, Rails servers, etc | * “Run the dev server and debug the internal server error on /session.” * “Send a sample request to this endpoint and explain the failure.” * “Kill the server once you identify the error and propose a code diff.” | - Watch server logs in real time - Notice new errors as they appear - Stop the server when appropriate - Propose code changes (for example, via a diff) based on what it observes | | **Version control workflows** e.g. `git rebase -i`, complex git commands | * “Interactively rebase master onto `feature-branch` to squash these commits into one.” * “Resolve these merge conflicts and ensure tests pass.” | - Navigate interactive rebase prompts - Edit commit messages - Apply conflict resolutions you approve | | **Cloud provider CLIs** e.g. `gcloud`, `aws`, `az`, etc. | * “Use gcloud to create a new Kubernetes cluster with these settings.” * “Provision a new RDS instance for staging and show me the connection details.” | - Walk through multi-step CLI workflows - Handle prompts and confirmations - Summarize the resulting resources |
# Model Context Protocol (MCP)
Canonical page: [/agents/capabilities/mcp/](https://docs.warp.dev/agents/capabilities/mcp/)
> Configure MCP servers in the Warp app to extend local agents with custom tools and data sources through a standardized interface.
MCP servers extend Warp’s [local agents](/agents/local-agents/interacting-with-agents/) in a modular, flexible way by exposing custom tools or data sources through a standardized interface — essentially acting as plugins for Warp. Warp supports a variety of connection protocols, including Streamable HTTP and SSE, along with custom headers and environment variables. MCP is an open source protocol. Check out the official [MCP documentation](https://modelcontextprotocol.io/introduction) for more detailed information on how this protocol is engineered. ### How to access MCP Server settings [Section titled “How to access MCP Server settings”](#how-to-access-mcp-server-settings) You can navigate to the MCP servers page in any of the following ways: * From the [Settings Page](warp://settings/mcp): **Settings** > **Agents** > **MCP servers** * From [Warp Drive](/knowledge-and-collaboration/warp-drive/): under **Personal** > **MCP Servers** * From the [Command Palette](/terminal/command-palette/): search for `Open MCP Servers` * From the Warp app: **Settings** > **Agents** > **Warp Agent** > **Manage MCP servers** This will show a list of all configured MCP servers, including which are currently running. If you close Warp with an MCP server running, it will run again on next start of Warp. MCP servers that are stopped will remain so on next launch of Warp. 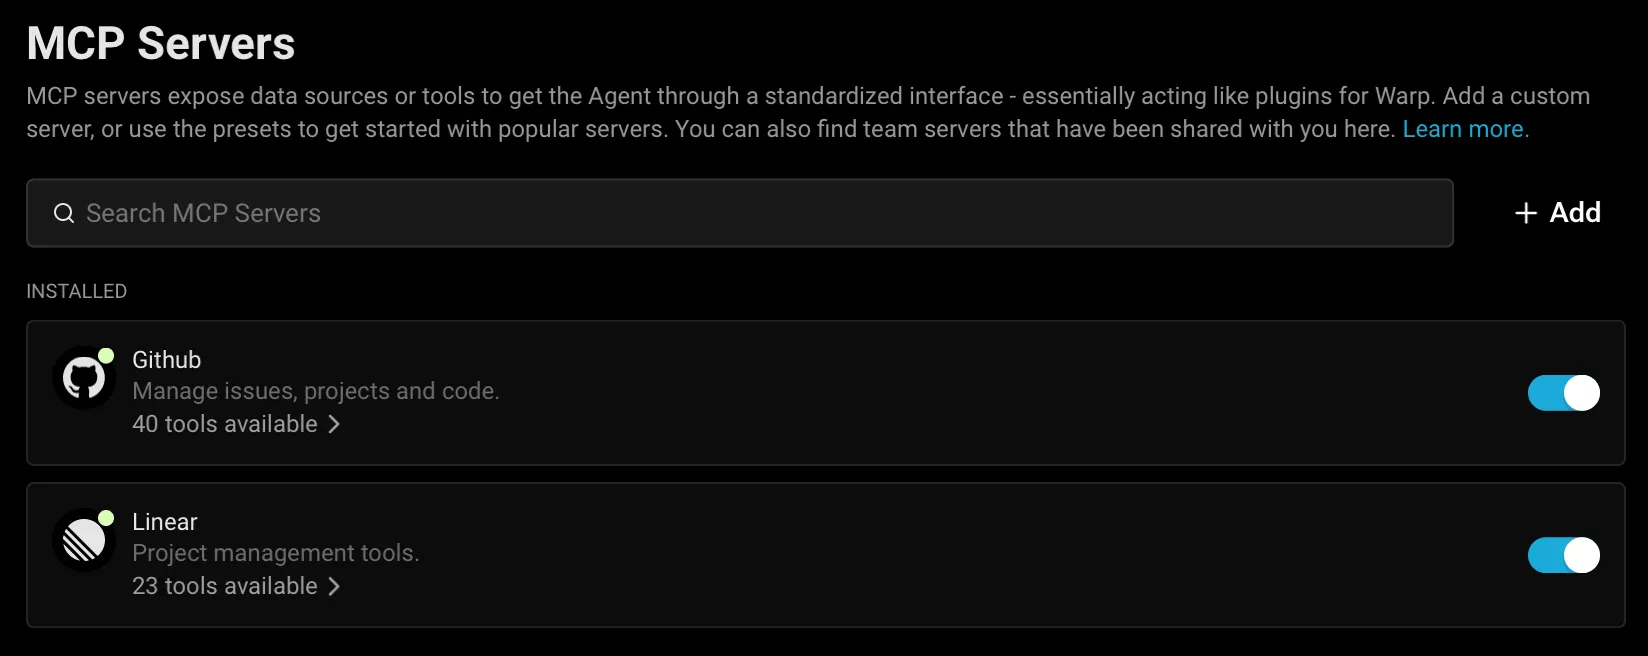 MCP servers page. ### Adding an MCP Server [Section titled “Adding an MCP Server”](#adding-an-mcp-server) To add a new MCP server, you can click the **+ Add** button. Configurations from most MCP clients can be directly copied and pasted. MCP server types you can add: * CLI Server (Command) Provide a startup command. Warp will launch this command when starting up and shut it down on exit. 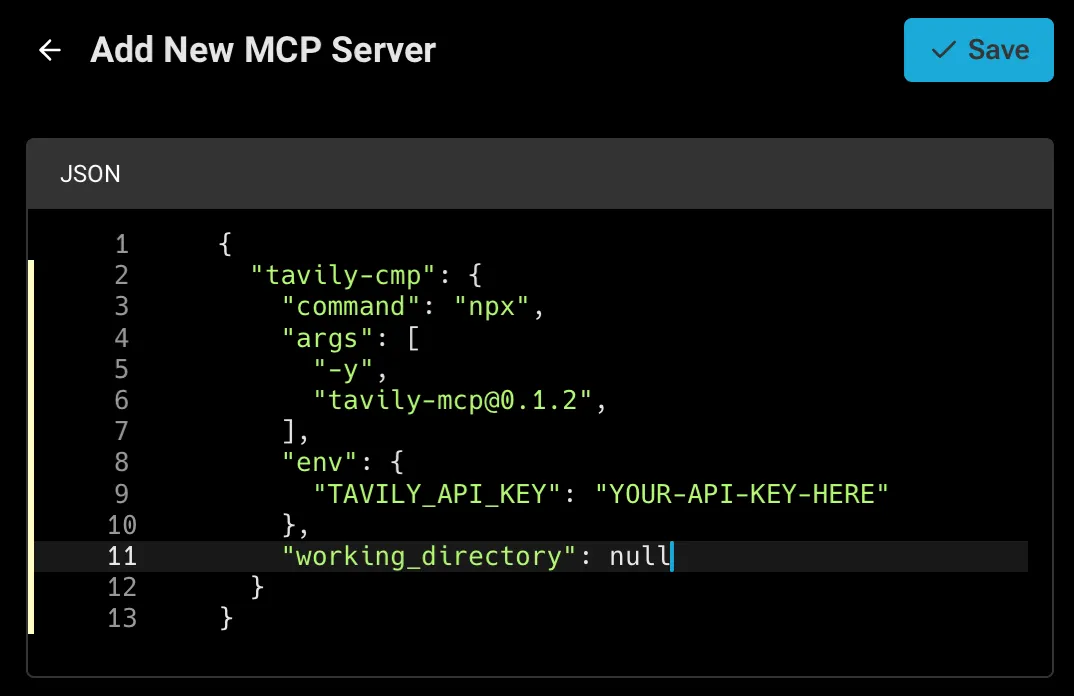 Adding a CLI MCP Server (Command). **CLI Server (Command) MCP Configuration Properties** | Property | Type | Required | Description | | ------------------- | --------- | -------- | ----------------------------------------------------------------------------------- | | `command` | string | Yes | The executable to launch (e.g., `npx`). | | `args` | string\[] | Yes | Array of command-line arguments passed to `command` (e.g., module name, paths). | | `env` | object | No | Key-value object of environment variables (e.g., API Tokens). | | `working_directory` | string | No | Working directory path where the command is run, used for resolving relative paths. | * Streamable HTTP or SSE Server (URL) Provide a URL where Warp can reach an already-running MCP server that supports Server-Sent Events. 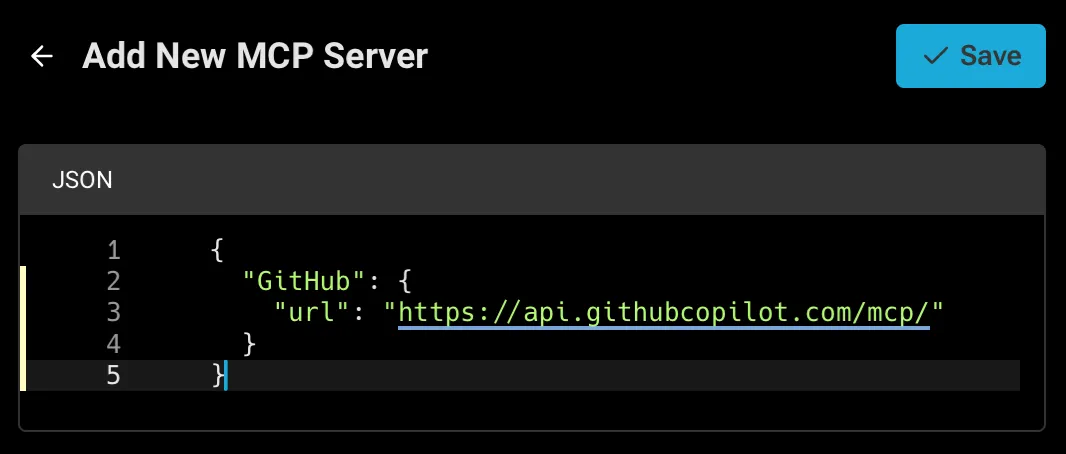 Adding an SSE MCP Server (URL). **Streamable HTTP or SSE Server (URL) MCP Configuration Properties** | Property | Type | Required | Description | | --------- | ------ | -------- | ----------------------------------------------------------------- | | `url` | string | Yes | The HTTP endpoint URL to connect to via Server-Sent Events (SSE). | | `headers` | object | No | Key-value object of header variables (e.g., Authorization). | ### Adding multiple MCP servers [Section titled “Adding multiple MCP servers”](#adding-multiple-mcp-servers) Warp supports configuring **multiple MCP servers** using a JSON snippet. Each entry under `mcpServers` is keyed by a unique name (`filesystem`, `github`, `notes`, etc.). All servers defined in the example are added automatically — no manual setup required. To add multiple MCP servers, you can click the **+ Add** button then paste in a JSON snippet like the example below:
```json
{
"mcpServers": {
"filesystem": {
"command": "npx",
"args": ["-y", "@modelcontextprotocol/server-filesystem", "/path/to/allowed/files"]
},
"notes": {
"command": "npx",
"args": ["-y", "@modelcontextprotocol/server-notes", "--notes-dir", "/Users/you/Documents/notes"]
},
"externalDocs": {
"url": "http://localhost:4000/mcp/stream",
"headers": {
"my-header": "my-header-value"
}
}
}
}
```
### File-based MCP servers [Section titled “File-based MCP servers”](#file-based-mcp-servers) Compared to manually adding a server in the Warp settings, file-based servers are defined in config files that Warp detects and can spawn automatically. They offer a few additional benefits: * **Configurable directly with an agent** - Use the [bundled skill](#using-agent-add-mcp) `/agent-add-mcp` so the Warp Agent can add or update an MCP server without leaving the conversation. * **Inherited across providers and repos** - Warp reads `.warp/.mcp.json` files and also picks up config from third-party agent providers (Claude Code, Codex, and others). The same server definition follows you across tools and repos. #### Supported providers [Section titled “Supported providers”](#supported-providers) Warp reads MCP server definitions from the following providers: | Provider | Global config | Project-scoped config | Auto-spawn | | ------------ | ---------------------- | ------------------------------------ | --------------- | | Warp | `~/.warp/.mcp.json` | `.warp/.mcp.json` at project root | On by default | | Claude Code | `~/.claude.json` | `.mcp.json` at project root | Requires toggle | | Codex | `~/.codex/config.toml` | `.codex/config.toml` at project root | Requires toggle | | Other agents | `~/.agents/.mcp.json` | `.agents/.mcp.json` at project root | Requires toggle | Global Warp servers auto-spawn by default. Global servers from all other providers auto-spawn only when **Auto-spawn servers from third-party agents** is enabled. Project-scoped servers from any provider require explicit approval. For provider-specific setup, see the [Claude Code MCP docs](https://code.claude.com/docs/en/mcp#user-scope) and [Codex MCP docs](https://developers.openai.com/codex/mcp/#connect-codex-to-an-mcp-server). #### Auto-spawn behavior [Section titled “Auto-spawn behavior”](#auto-spawn-behavior) Global Warp servers auto-spawn by default. Third-party agent servers require you to enable auto-spawn first. To auto-spawn global servers from third-party agents: 1. In the Warp app, go to **Settings** > **Agents** > **MCP servers**. 2. Toggle **Auto-spawn servers from third-party agents** on. 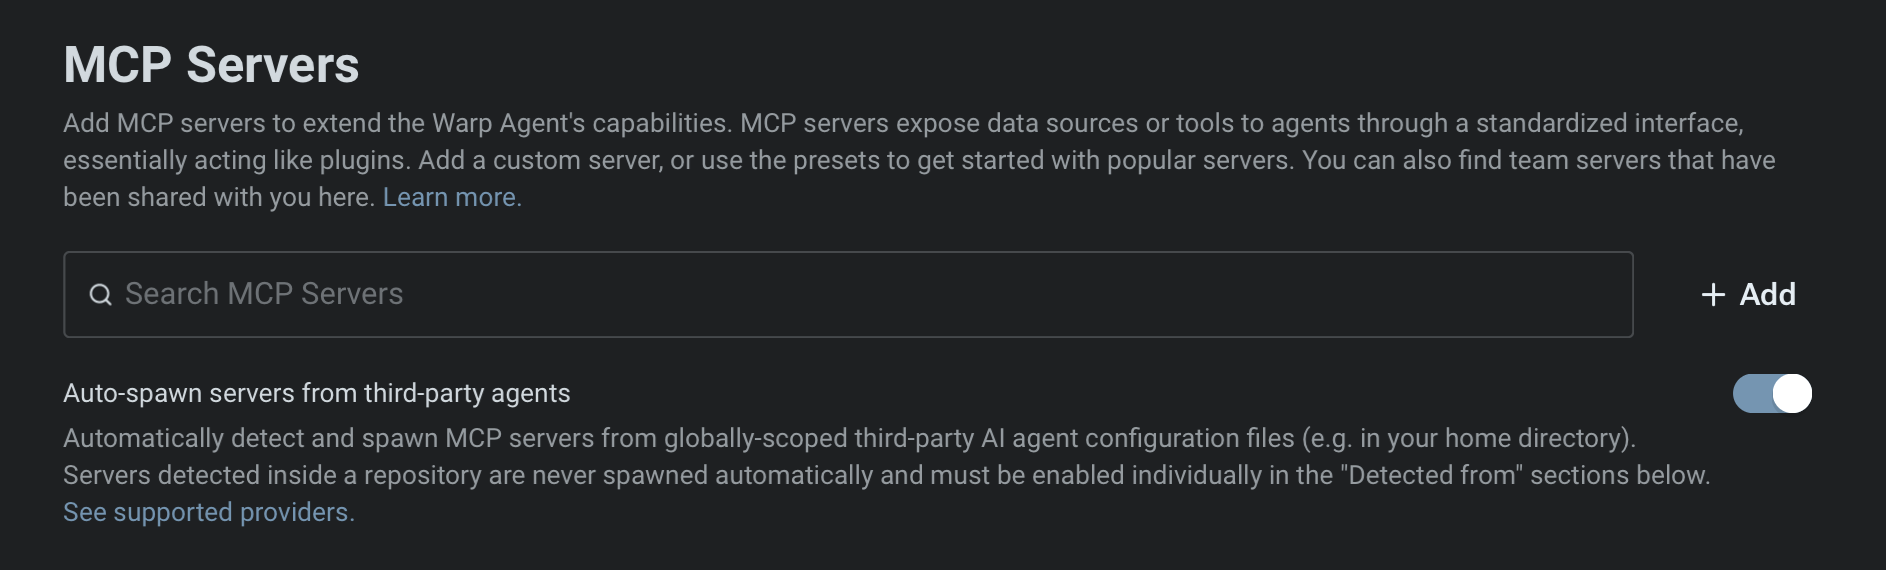 File-based MCP server settings. Project-scoped servers from any provider must be toggled on individually from the MCP servers page. These are session-scoped — after restarting Warp, toggle them on again if you still trust the repo. #### Using `/agent-add-mcp` [Section titled “Using /agent-add-mcp”](#using-agent-add-mcp) The built-in `/agent-add-mcp` skill lets the Warp Agent create or update file-based MCP server definitions. Choose whether to save globally or in the current project — the skill writes the server definition to the matching file: * **Global:** `~/.warp/.mcp.json` * **Project-scoped:** `{repo_root}/.warp/.mcp.json` [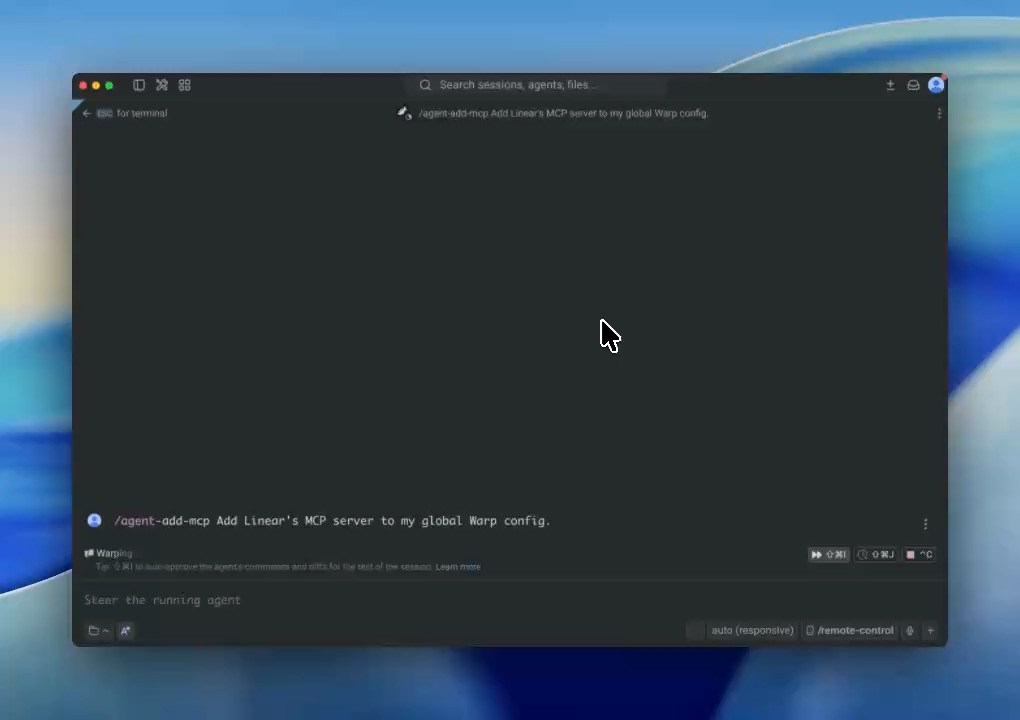](/assets/agent-platform/file-based-mcp-demo.mp4) The demo shows how to use `/agent-add-mcp` to add an MCP server, choose where Warp saves the file-based configuration, and review the generated `.warp/.mcp.json` file before using the server. #### Security mitigations [Section titled “Security mitigations”](#security-mitigations) MCP config files can start local commands and send data to external tools. Warp adds approval gates around file-based MCP servers to reduce the risk of untrusted config changes: * **Config edits require approval** - Warp prevents edits to MCP config files unless you explicitly approve the change. This keeps an agent or automation from silently adding a server that can run commands or access data. * **Project-scoped servers never auto-spawn** - Warp detects project-scoped MCP config files in cloned repos, but requires you to start each server manually. This prevents a cloned repo from automatically starting an MCP server that runs arbitrary local commands. ### Managing MCP servers [Section titled “Managing MCP servers”](#managing-mcp-servers) After MCP servers are registered in Warp, you can **Start** or **Stop** them from the MCP servers page. Each running server will have a list of available tools and resources. You can rename and edit a server’s name, as well as delete the server. If you are a part of a Team, you can also share an MCP server with your teammates. ### Sharing MCP servers [Section titled “Sharing MCP servers”](#sharing-mcp-servers) MCP servers can be shared with your teammates by clicking the share icon. When sharing, sensitive values in the `env` configuration will be automatically scrubbed and replaced with variables. 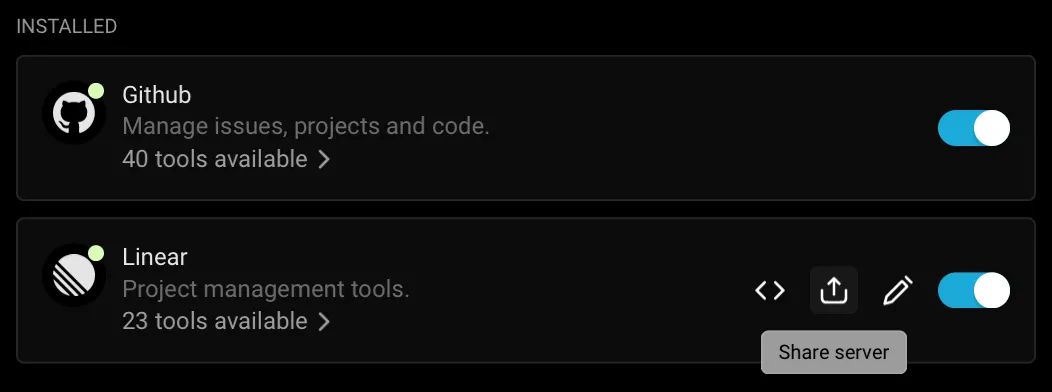 Sharing an MCP Server. Your teammates can find shared MCP servers under the `Shared` section of their MCP settings. When your teammates install your server configuration, they will be prompted to enter any scrubbed `env` values. Warp also provides out-of-the-box MCP servers that can be installed by anyone. These can be found under the `Shared` section of your MCP settings. ### Authentication in MCP servers [Section titled “Authentication in MCP servers”](#authentication-in-mcp-servers) Most MCP servers require authentication to connect to external services. Warp supports the following methods: * **Environment variables**: pass an API key or access token via the server’s environment variables. * **OAuth login (one-click installation)**: simplifies configuration by handling authentication through your browser. Warp stores credentials securely on your device and reuses them for future sessions. Re-authentication is required when opening Warp on a new machine. * Starting a server without existing credentials automatically opens a browser-based authentication flow. * Credentials can be revoked at any time from the MCP Servers pane in Warp. * **Custom Headers**: pass an Authentication Bearer token via the headers variable. ### Debugging MCP [Section titled “Debugging MCP”](#debugging-mcp) If you’re having trouble with an MCP server, you can check the logs for any errors or messages to help you diagnose the problem by clicking the **View Logs** button on a server from the MCP servers page. Caution If you choose to share your MCP server logs with anybody, **make sure to remove any sensitive information before sharing**, as they may contain API keys. Many SSE based MCP servers will state that your URL should be treated like a password, and can be used with no additional authentication. #### Debugging MCP authentication issues [Section titled “Debugging MCP authentication issues”](#debugging-mcp-authentication-issues) In some cases you may need to reset the auth token for some MCP servers. To do this, delete the local MCP auth files by running the following: `rm -rf ~/.mcp-auth` Caution Note this will delete all your MCP auth tokens stored locally so you will need to login and re-authenticate. If the above doesn’t help and you need to reset or change authentication, you may need to switch to a CLI-based MCP server configuration and provide the token via environment variables. See the Sentry tab under [MCP server configuration examples](/agents/capabilities/mcp/#mcp-server-configuration-examples). ### Where MCP logs are stored [Section titled “Where MCP logs are stored”](#where-mcp-logs-are-stored) Warp saves the MCP logs locally on your computer. You can open the files directly and inspect the full contents in the following location: * macOS
```bash
cd "$HOME/Library/Group Containers/2BBY89MBSN.dev.warp/Library/Application Support/dev.warp.Warp-Stable/mcp"
```
* Windows
```powershell
Set-Location $env:LOCALAPPDATA\warp\Warp\data\logs\mcp
```
* Linux
```bash
cd "${XDG_STATE_HOME:-$HOME/.local/state}/warp-terminal/mcp"
```
## MCP server configuration examples [Section titled “MCP server configuration examples”](#mcp-server-configuration-examples) Below are examples for popular Model Context Protocol (MCP) servers. * **CLI Server (Command)** — local `npx` or `docker` command based MCP servers. * **Streamable HTTP or SSE Server (URL)** — remote or locally hosted MCP endpoints. ### **Engineering & Ops** [Section titled “Engineering & Ops”](#engineering--ops) * GitHub [GitHub MCP Docs](https://github.com/github/github-mcp-server) **GitHub CLI Server (Command)**
```json
{
"GitHub": {
"command": "docker",
"args": ["run","-i","--rm","-e","GITHUB_PERSONAL_ACCESS_TOKEN","ghcr.io/github/github-mcp-server"],
"env": {
"GITHUB_PERSONAL_ACCESS_TOKEN": ""
}
}
}
```
**GitHub SSE Server (URL)**
```json
{
"GitHub": {
"url": "https://api.githubcopilot.com/mcp/"
}
}
```
* Sentry [Sentry MCP Docs](https://docs.sentry.io/product/sentry-mcp/) **Sentry CLI Server (Command)**
```json
{
"Sentry": {
"command": "npx",
"args": ["-y","mcp-remote@latest","https://mcp.sentry.dev/mcp"]
}
}
```
**Sentry Streamable HTTP Server (URL)**
```json
{
"Sentry": {
"url": "https://mcp.sentry.dev/mcp"
}
}
```
* Grafana [Grafana MCP Docs](https://github.com/grafana/mcp-grafana) **Grafana CLI Server (Command)**
```json
{
"Grafana": {
"command": "docker",
"args": ["run","--rm","-i","-e","GRAFANA_URL","-e","GRAFANA_API_KEY","mcp/grafana","-t","stdio","-debug"],
"env": {
"GRAFANA_URL": "http://localhost:3000",
"GRAFANA_API_KEY": ""
}
}
}
```
**Grafana SSE Server (URL)**
```json
{
"Grafana": {
"url": "https://your-mcp-host.com/api/mcp/grafana/sse"
}
}
```
* Linear [Linear MCP Docs](https://linear.app/docs/mcp) **Linear CLI Server (Command)**
```json
{
"Linear": {
"command": "npx",
"args": ["-y","mcp-remote","https://mcp.linear.app/mcp"]
}
}
```
**Linear Streamable HTTP Server (URL)**
```json
{
"Linear": {
"url": "https://mcp.linear.app/mcp"
}
}
```
* Chroma **Chroma Package Search CLI Server (Command)** 1. Visit Chroma’s [Package Search](http://trychroma.com/package-search) page. 2. Click “Get API Key” to create or log into your Chroma account and issue an API key for Package Search. 3. After issuing your API key, click the “Other” tab and copy your API key. 4. Add the following to your Warp MCP config. Make sure to click “Start” on the server after adding. More info in [Chroma’s Package Search MCP Docs](https://docs.trychroma.com/cloud/package-search/mcp)
```json
{
"package-search": {
"command": "npx",
"args": ["mcp-remote", "https://mcp.trychroma.com/package-search/v1", "--header", "x-chroma-token: ${X_CHROMA_TOKEN}"],
"env": {
"X_CHROMA_TOKEN": ""
}
}
}
```
### **Design & Collaboration** [Section titled “Design & Collaboration”](#design--collaboration) * Figma **Figma Remote MCP Server (Recommended)** The official Figma remote MCP server supports OAuth for simple, one-click setup. 1. In Warp, go to **Warp Drive** > **MCP Servers** > **+ Add** and paste the configuration below. 2. Warp will open a browser window to authenticate with Figma. 3. After approving access, credentials are stored securely on your device.
```json
{
"Figma": {
"url": "https://mcp.figma.com/mcp"
}
}
```
**Figma Local MCP Server** 1. Enable the Official Figma MCP Server. [Figma MCP Docs](https://help.figma.com/hc/en-us/articles/32132100833559-Guide-to-the-Figma-MCP-server) 2. Open the [Figma desktop app](https://www.figma.com/downloads/) and make sure you’ve [updated to the latest version](https://help.figma.com/hc/en-us/articles/5601429983767-Guide-to-the-Figma-desktop-app#h_01HE5QD60DG6FEEDTZVJYM82QW). 3. Create or open a Figma Design file. 4. In the upper-left corner, open the Figma menu. 5. Under **Preferences**, select **Enable local MCP Server**. 6. Enter the following configuration into **Warp** > **Warp Drive** > **MCP Servers** > **+ Add**.
```json
{
"Figma (Local)": {
"url": "http://127.0.0.1:3845/mcp"
}
}
```
* Slack [Slack MCP Docs](https://github.com/korotovsky/slack-mcp-server/) **Slack CLI Server (Command)** Enter the following configuration into **Warp** > **Warp Drive** > **MCP Servers** > **+ Add**.
```json
{
"Slack": {
"command": "npx",
"args": ["-y", "@modelcontextprotocol/server-slack"],
"env": {
"SLACK_BOT_TOKEN": "xoxb-",
"SLACK_APP_TOKEN": "xapp-",
"SLACK_TEAM_ID": "T",
"SLACK_CHANNEL_IDS": ", ",
"MCP_MODE": "stdio"
}
}
}
```
**Slack SSE Server (URL)** Enter the following configuration into **Warp** > **Warp Drive** > **MCP Servers** > **+ Add**.
```json
{
"Slack": {
"url": "https://your-mcp-host.com/api/mcp/slack/sse"
}
}
```
* Atlassian [Atlassian MCP Docs](https://support.atlassian.com/rovo/docs/setting-up-ides/) **Atlassian CLI Server (Command)** Enter the following configuration into **Warp** > **Warp Drive** > **MCP Servers** > **+ Add**.
```json
{
"Atlassian": {
"command": "npx",
"args": ["-y", "mcp-remote", "https://mcp.atlassian.com/v1/sse"]
}
}
```
* Notion [Notion MCP Docs](https://developers.notion.com/docs/mcp) **Notion CLI Server (Command)** Enter the following configuration into **Warp** > **Warp Drive** > **MCP Servers** > **+ Add**.
```json
{
"Notion": {
"command": "npx",
"args": ["-y", "mcp-remote", "https://mcp.notion.com/mcp"]
}
}
```
**Notion SSE Server (URL)** Enter the following configuration into **Warp** > **Warp Drive** > **MCP Servers** > **+ Add**.
```json
{
"Notion": {
"url": "https://mcp.notion.com/sse"
}
}
```
### MCP server demos [Section titled “MCP server demos”](#mcp-server-demos) [Warp Guides](/guides/) hosts a collection of demos and walkthroughs showing how MCP servers can extend your workflows. Each example highlights practical use cases you can try today: * [**GitHub**](/guides/external-tools/github-mcp-summarizing-open-prs-and-creating-gh-issues/) — access repositories, issues, and pull requests through MCP. * [**Sentry**](/guides/external-tools/sentry-mcp-fix-sentry-error-in-empower-website/) — surface error monitoring and alerts as agent-usable data. * [**Linear**](/guides/external-tools/linear-mcp-retrieve-issue-data/) — integrate project management tasks and tickets. * [**Puppeteer**](/guides/external-tools/puppeteer-mcp-scraping-amazon-web-reviews/) — run automated browser workflows via MCP. * [**Context7**](/guides/external-tools/context7-mcp-update-astro-project-with-best-practices/) — experiment with external data integrations.
# Agent planning and execution
Canonical page: [/agents/capabilities/planning/](https://docs.warp.dev/agents/capabilities/planning/)
> Turn requests into structured, editable plans that agents execute step-by-step with version control.
Warp has native planning functionality that helps you break down complex engineering tasks into structured, executable steps. Planning is tightly integrated with Warp’s coding agent and provides a persistent plan editor, version history, selective execution, and deep links into your workspace.  *** ### Creating a plan [Section titled “Creating a plan”](#creating-a-plan) You can generate a plan using the `/plan` [slash command](/agents/capabilities/slash-commands/) or by asking the agent in natural language.  Creating a plan with the /plan command. The agent then creates a structured plan inside Warp’s native rich text editor, which is designed for long, multi-step workflows. The editor includes clean formatting, inline code blocks, and clickable file paths so you can open referenced files immediately in Warp (see below) or in your external editor. ### Reviewing and editing [Section titled “Reviewing and editing”](#reviewing-and-editing) Once a plan is generated, you can review it, reorganize steps, or refine details. You can edit the document manually or ask the agent to revise sections for you. 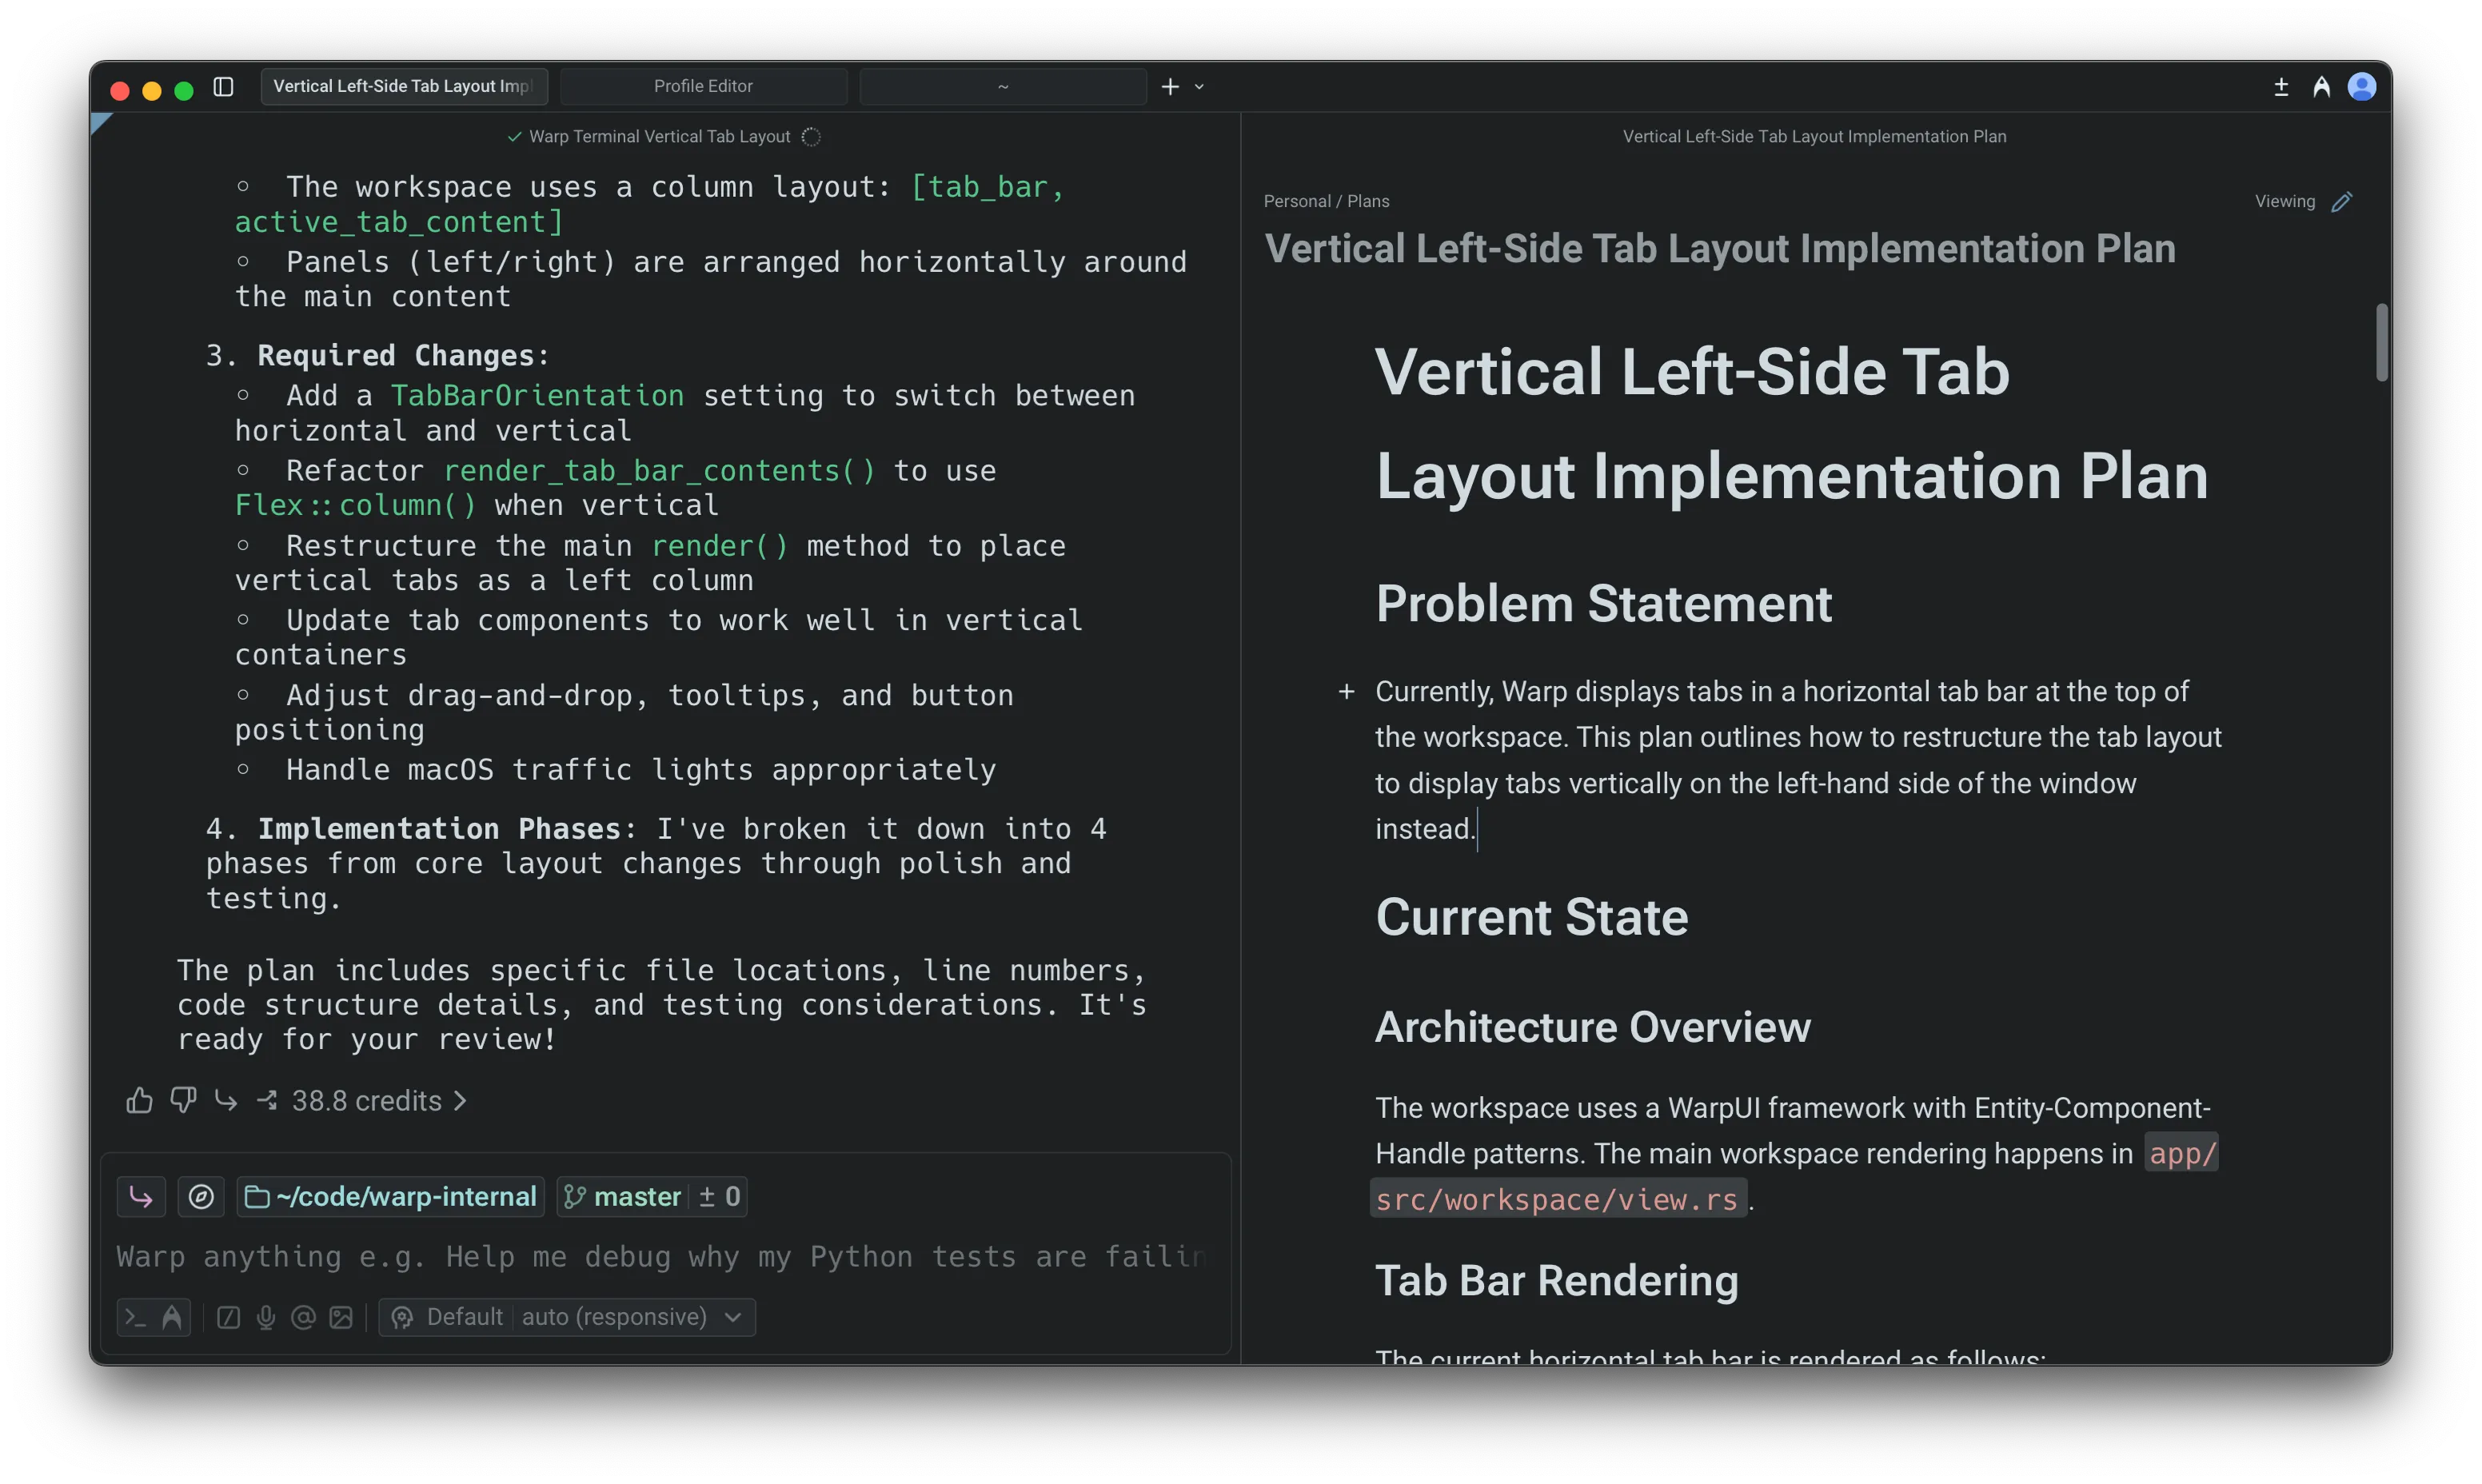 Plan editor in Warp. Any update made by the agent **creates a new version**. Version history lets you compare past iterations and restore an older version if you want to revert your approach, preserving a clear decision trail as the plan evolves. 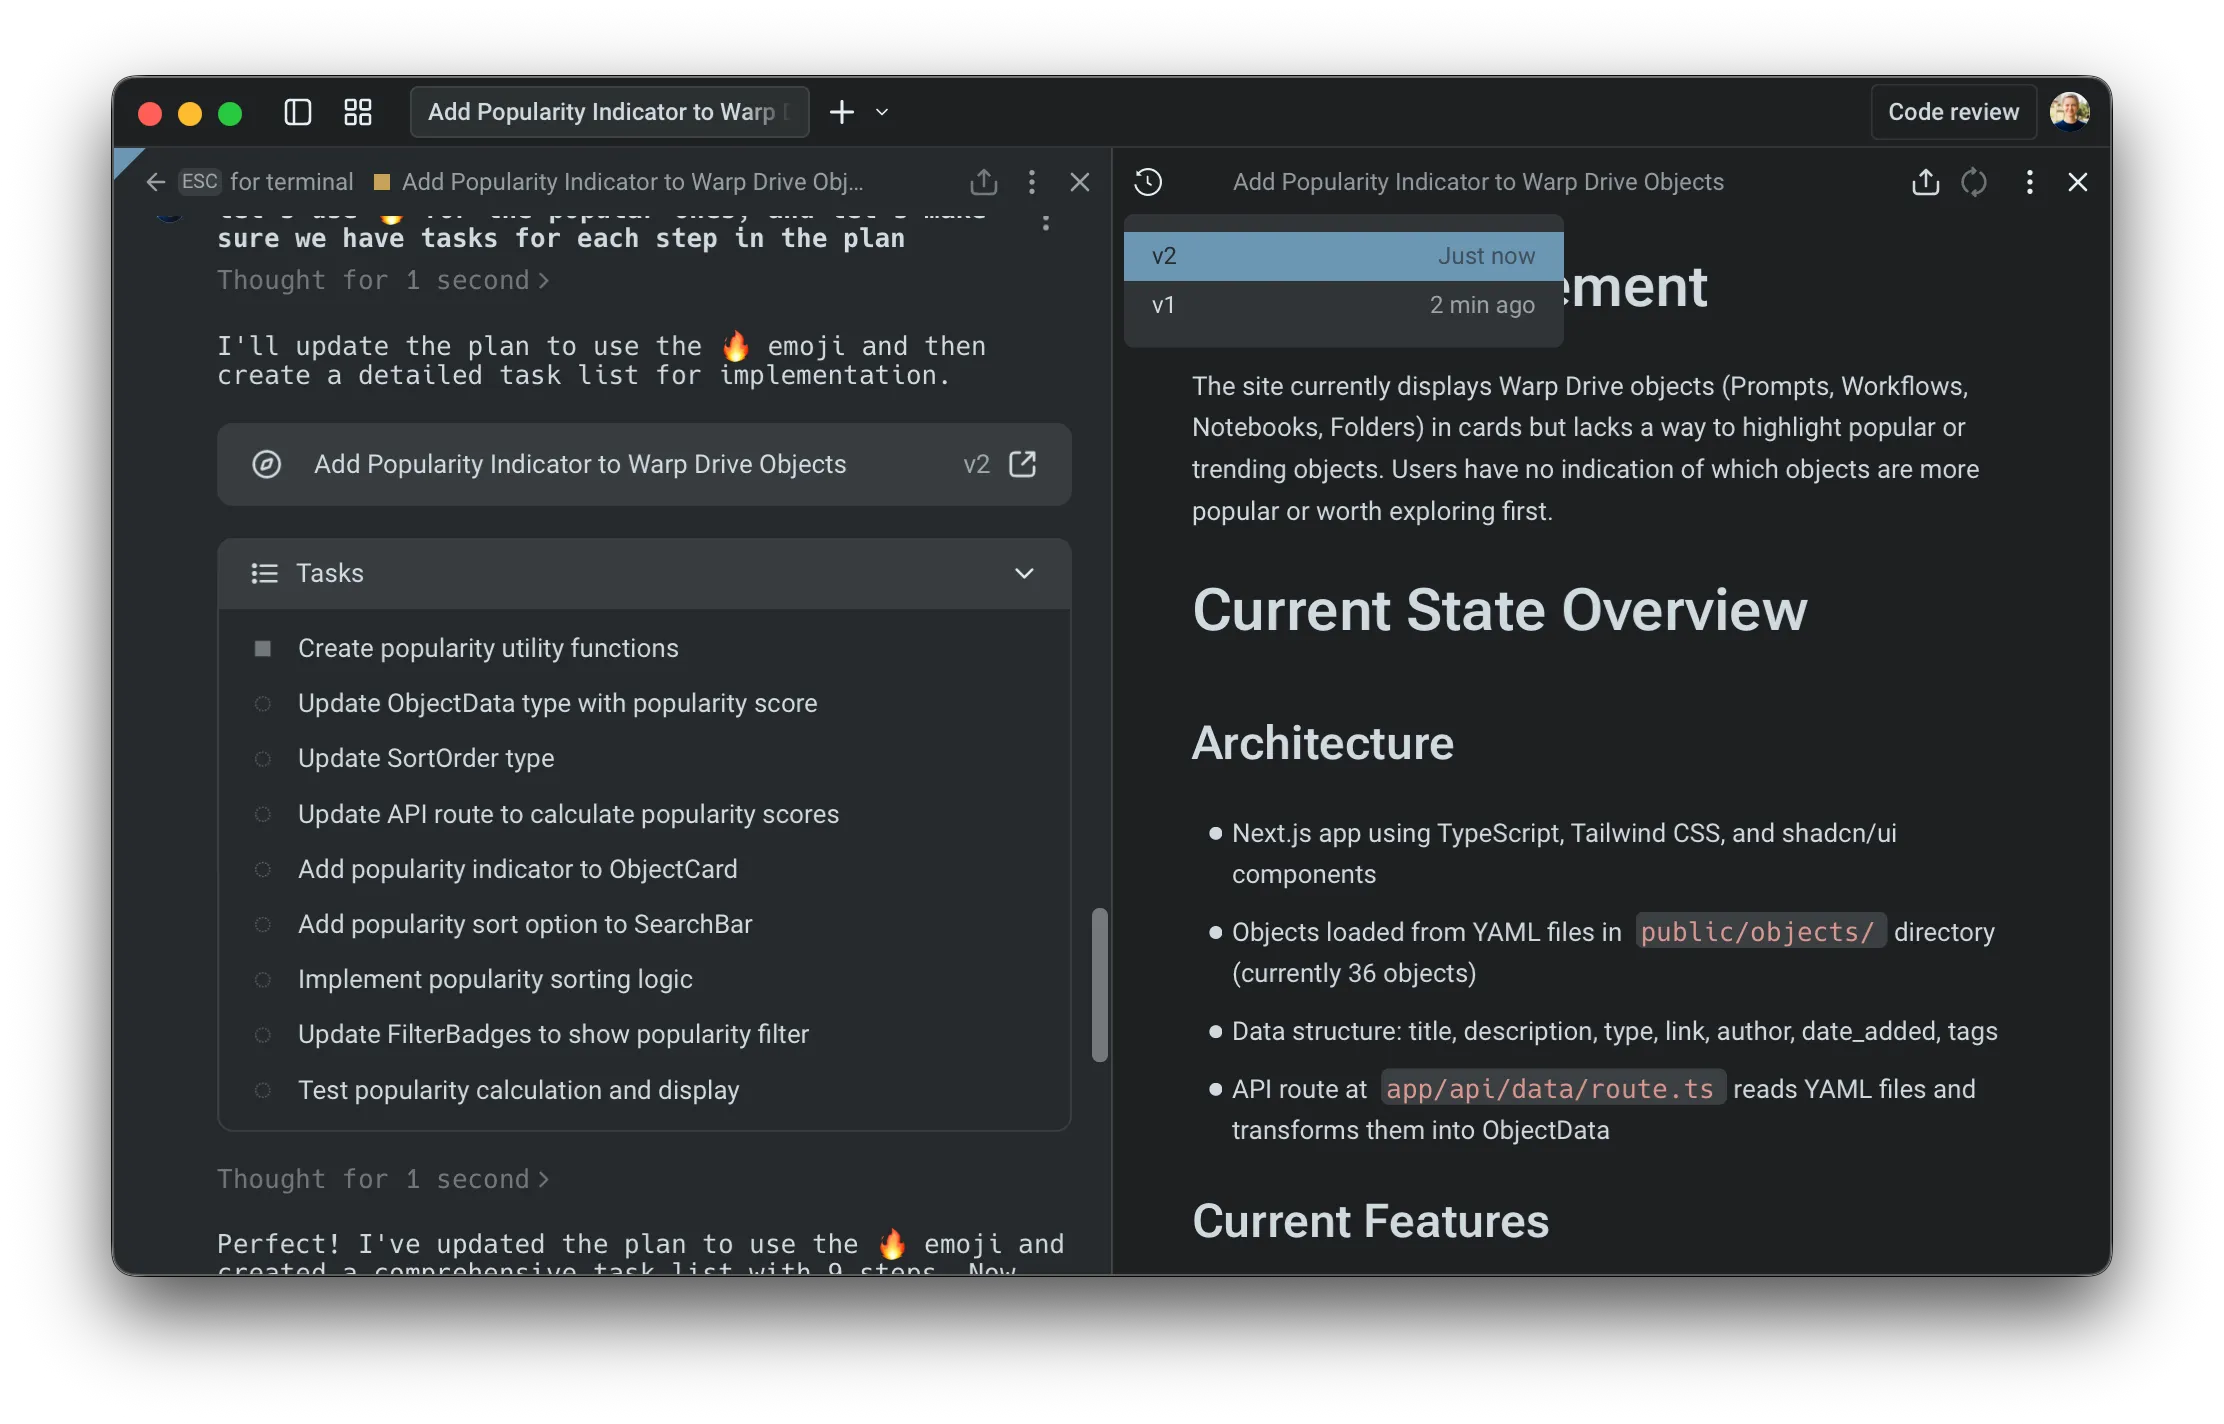 Access previous versions of your plan. ### Executing a plan [Section titled “Executing a plan”](#executing-a-plan) When you’re ready to start implementing, prompt the agent to run the plan. You can ask it to execute the full set of steps or only a specific section, such as “Implement phase 1 of the plan.” 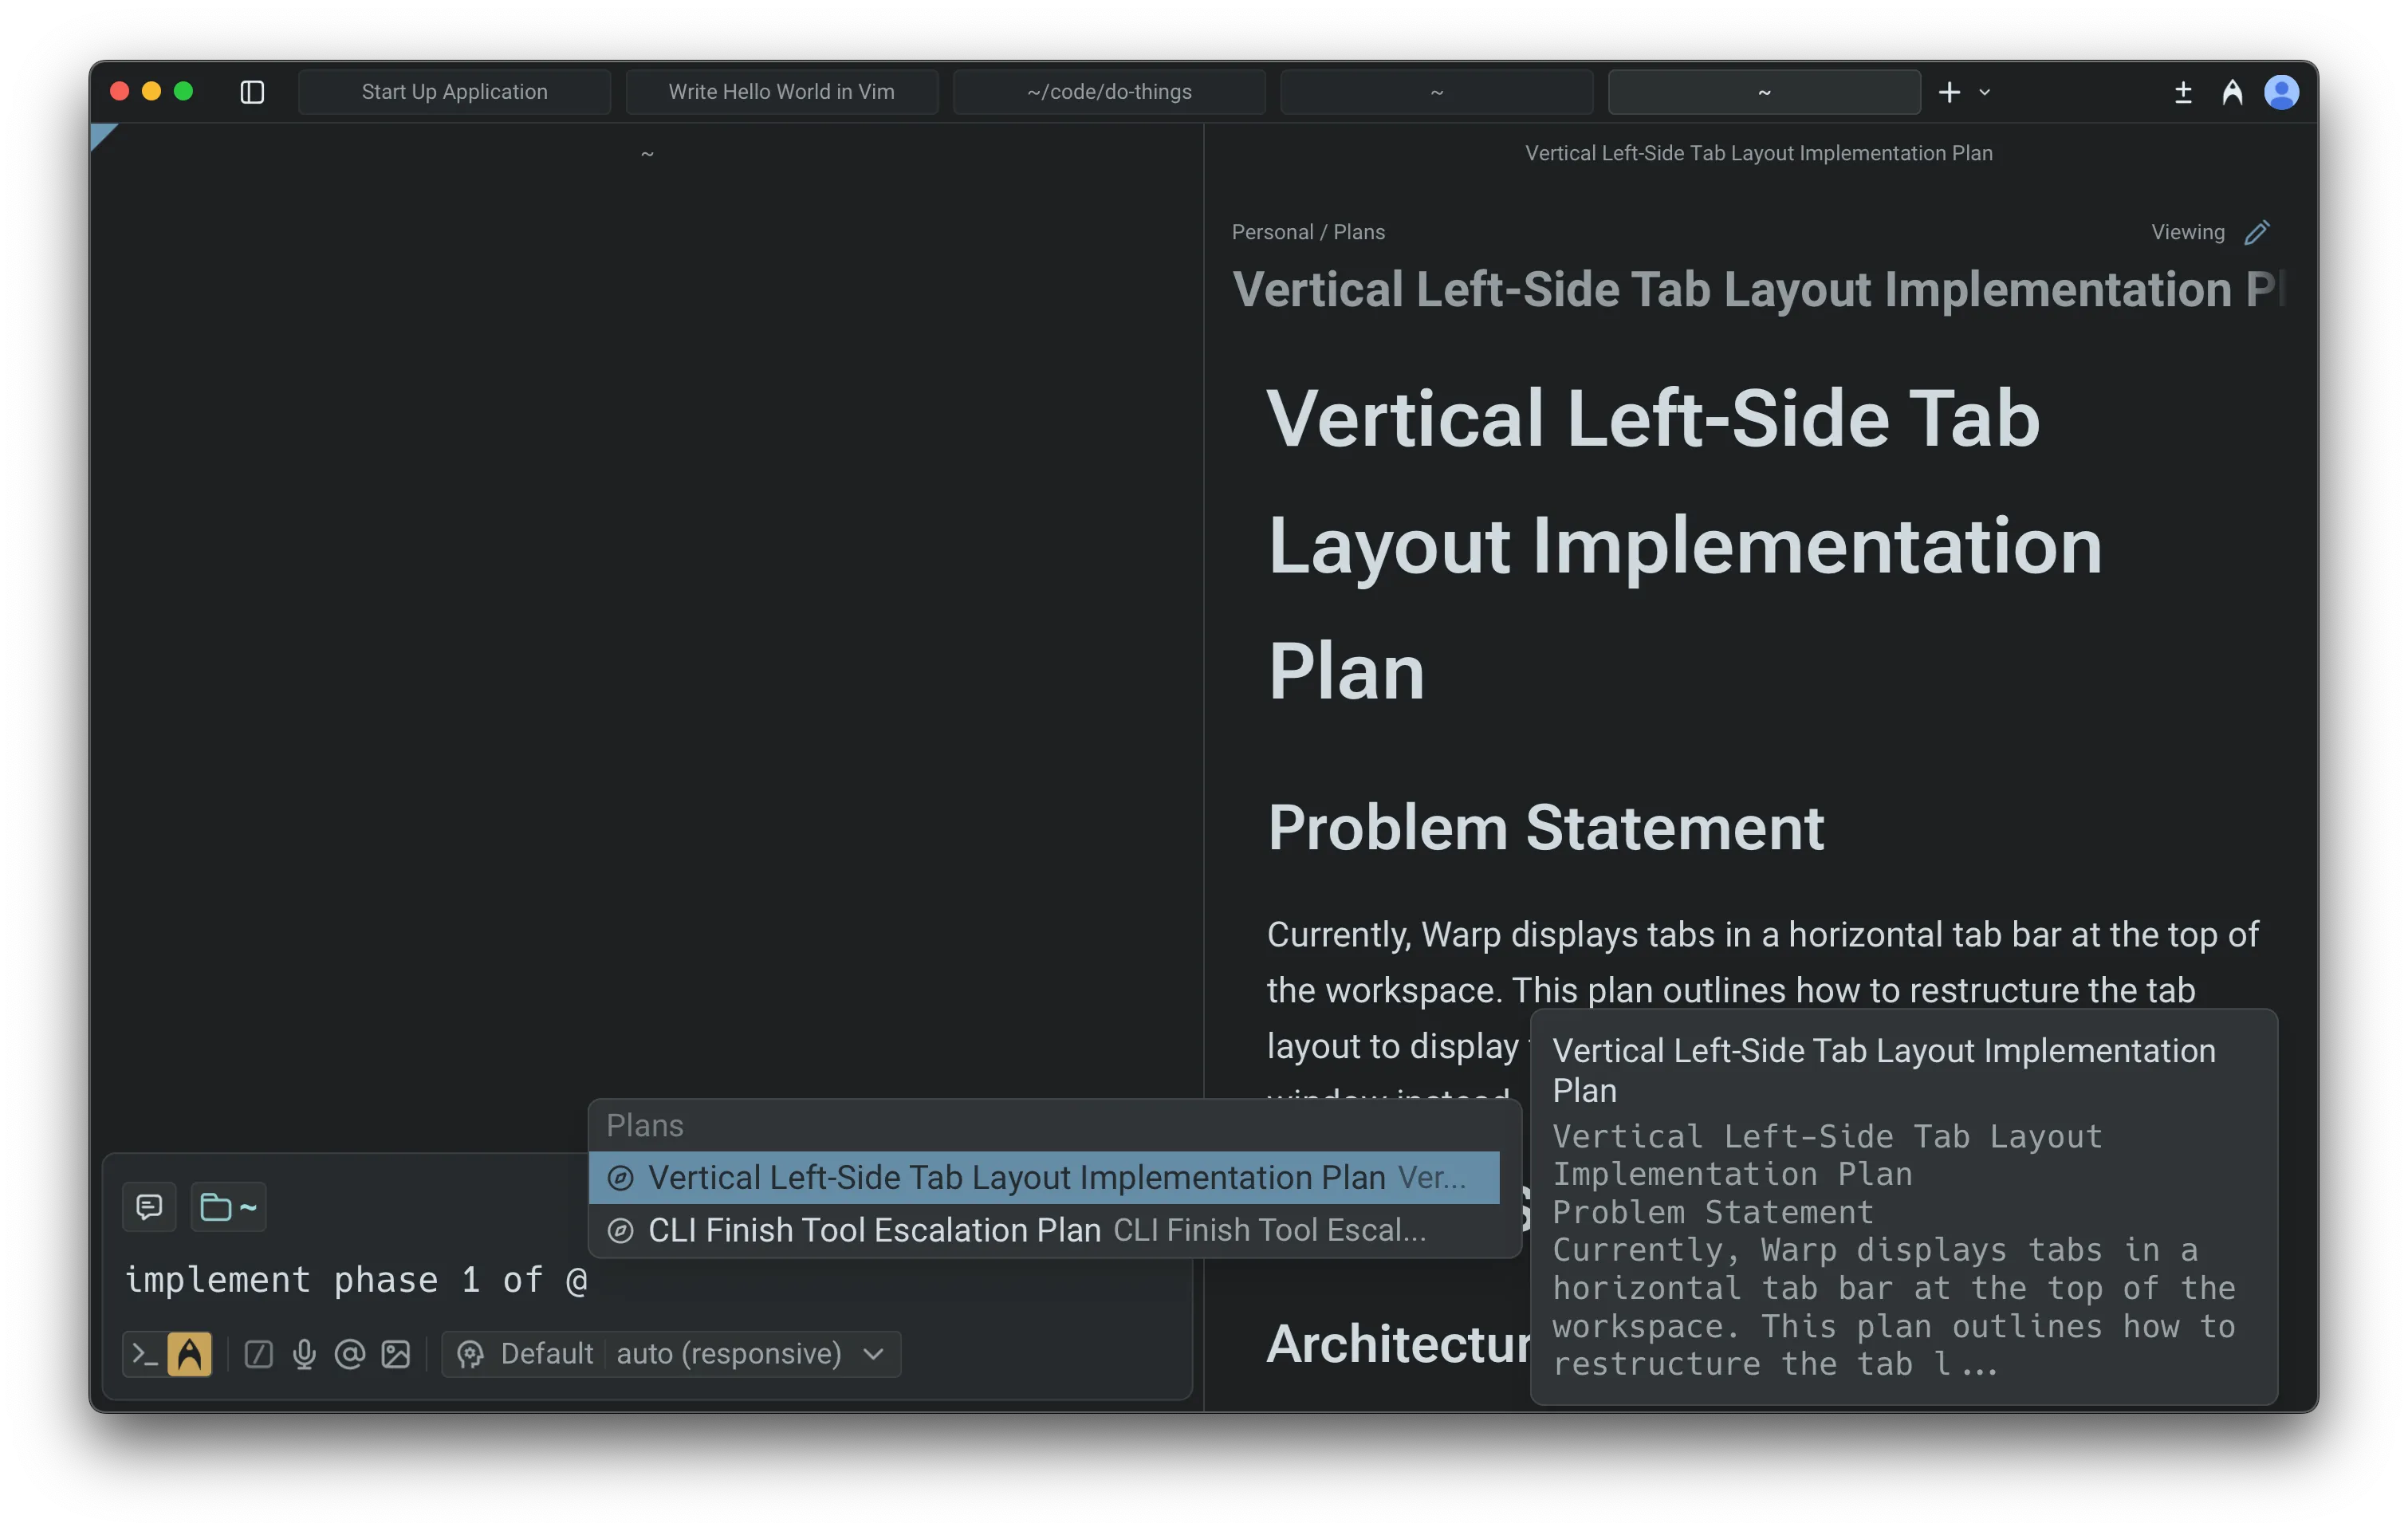 Referencing a plan using @. The agent applies changes incrementally and updates files as it proceeds. This makes it easy to validate early steps before moving forward, adjust the plan mid-run, or try alternative paths without committing to the full workflow. If you revise the plan while the agent is running, you can notify it directly; the agent will adjust its execution based on your updates. 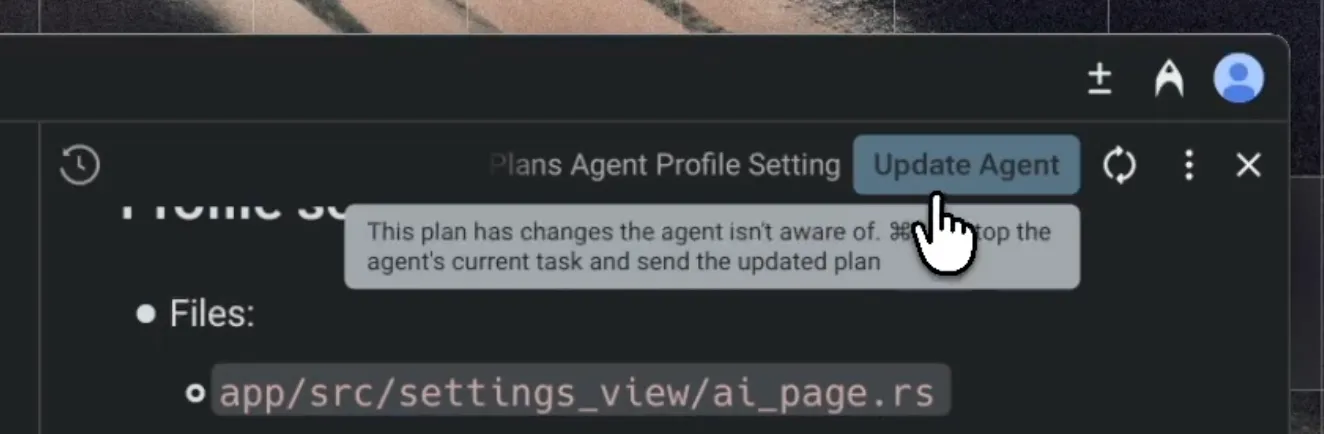 Prompt to update the agent’s plan during execution. ### Monitoring progress [Section titled “Monitoring progress”](#monitoring-progress) While the agent is running, you can reopen the plan at any time by selecting **View plan** in the input. You can also follow each change in real time through the [Code Review](/code/code-review/) panel and add comments or guidance using [Interactive Code Review](/agents/local-agents/interactive-code-review/). 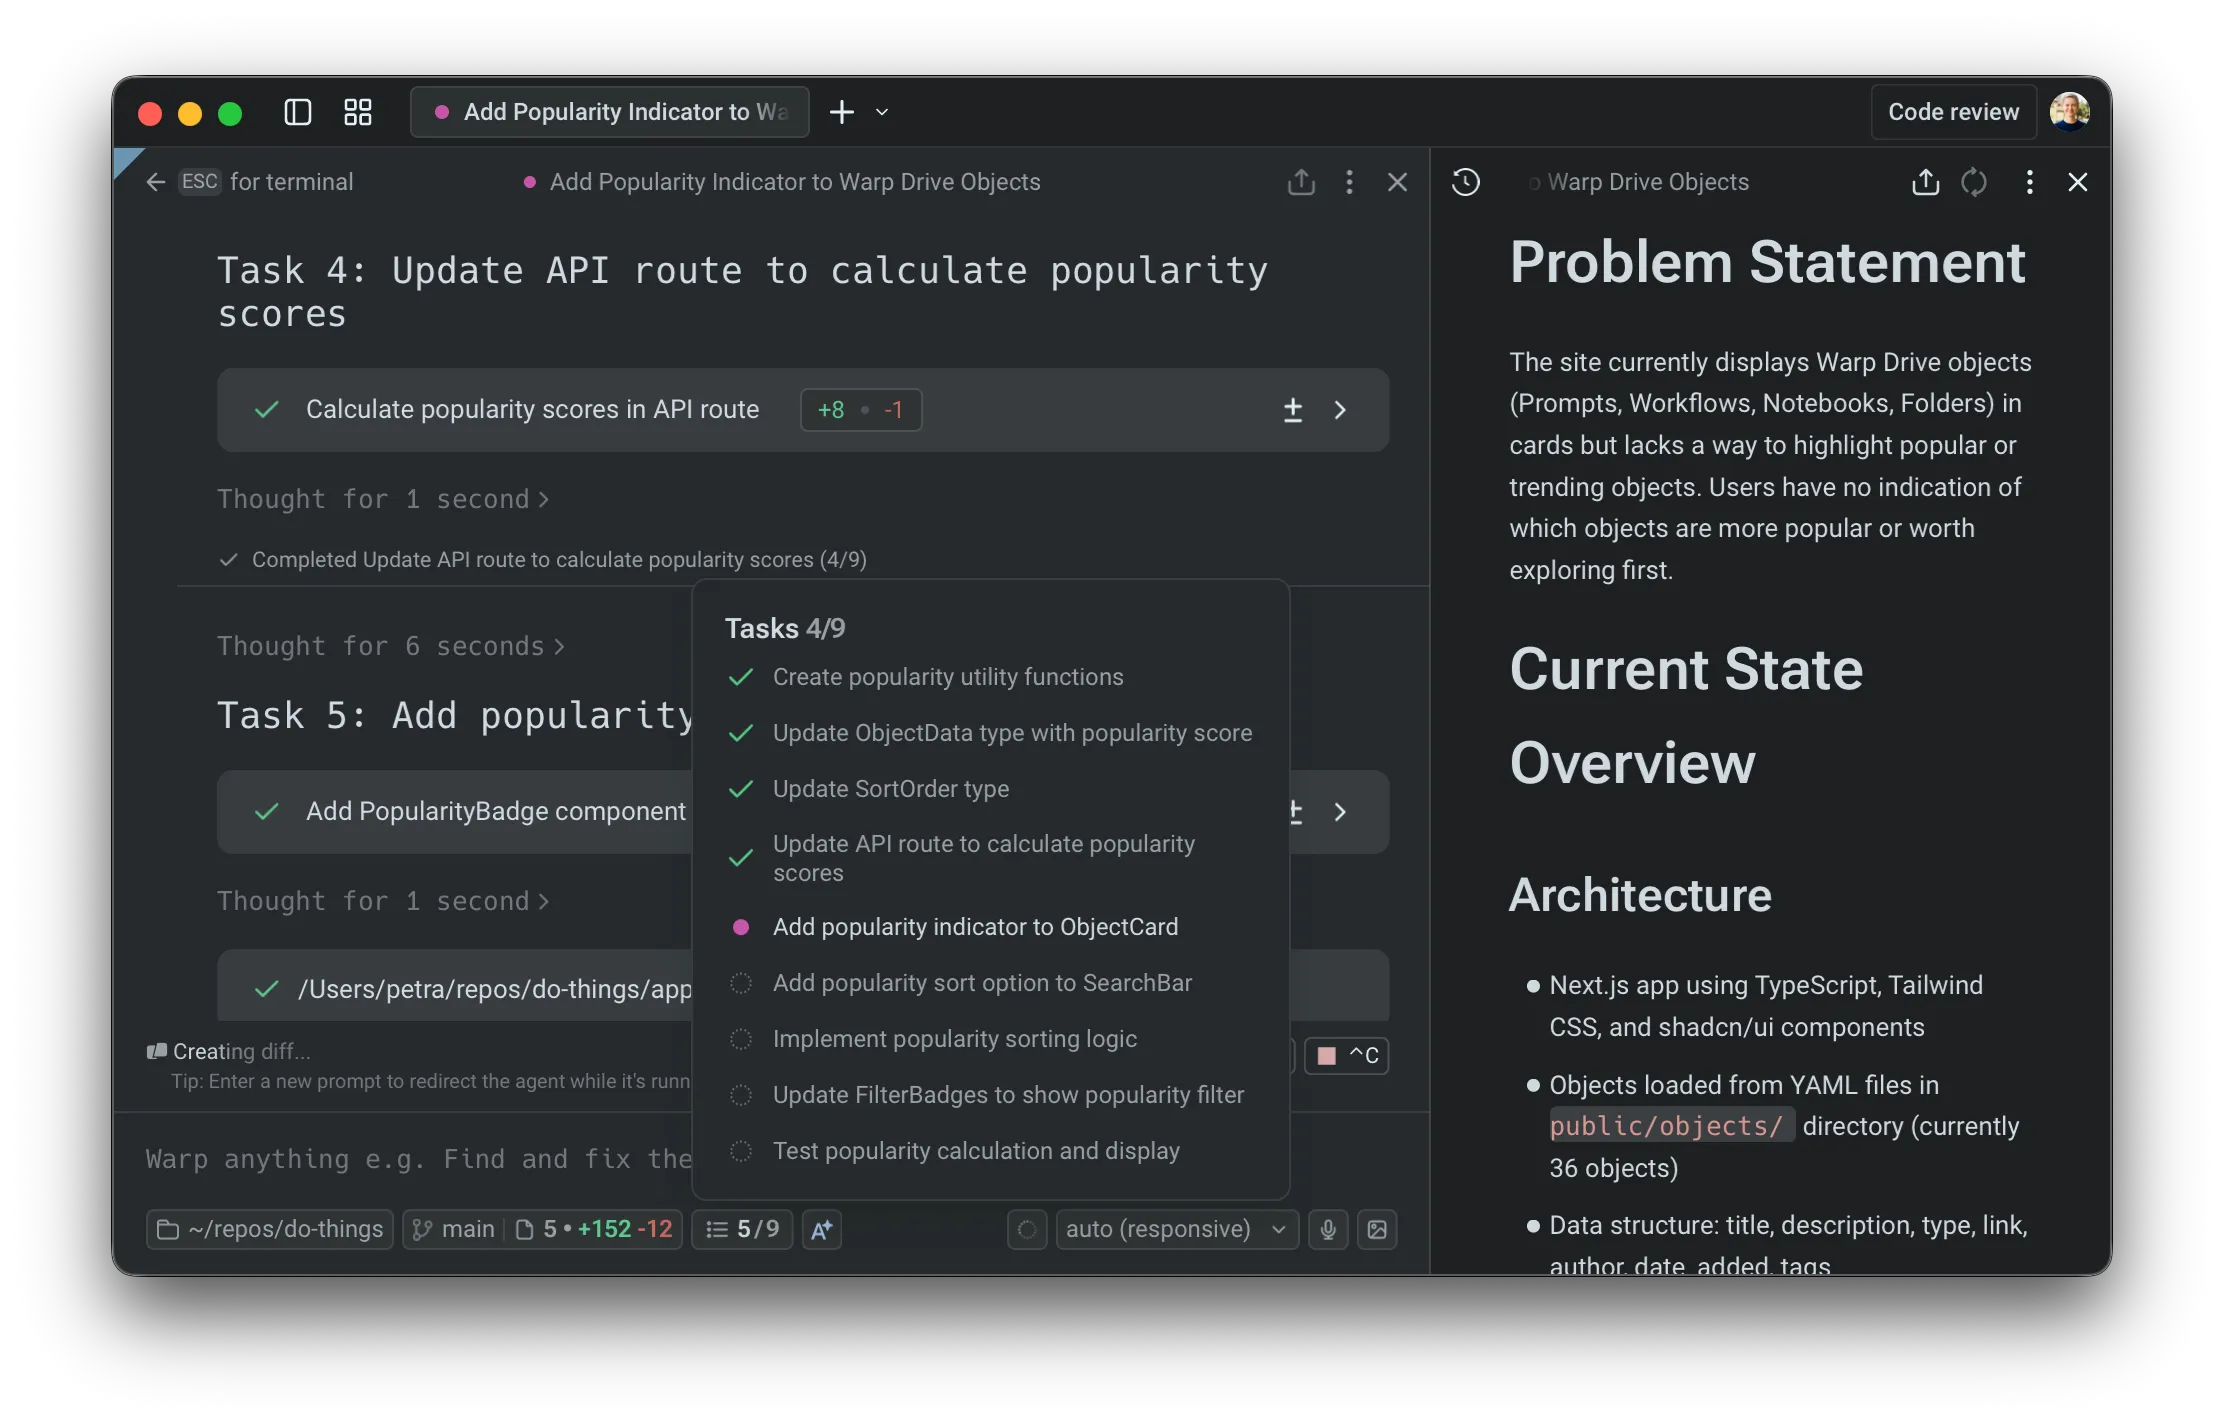 Monitoring progress with the task list and plan view. This gives you clear oversight, helps confirm expected behavior, and lets you intervene quickly if something needs correction. ### Saving and sharing [Section titled “Saving and sharing”](#saving-and-sharing) Warp automatically saves all plans in the *Plans* folder in [Warp Drive](/knowledge-and-collaboration/warp-drive/). You’ll see a confirmation when your plan is synced. 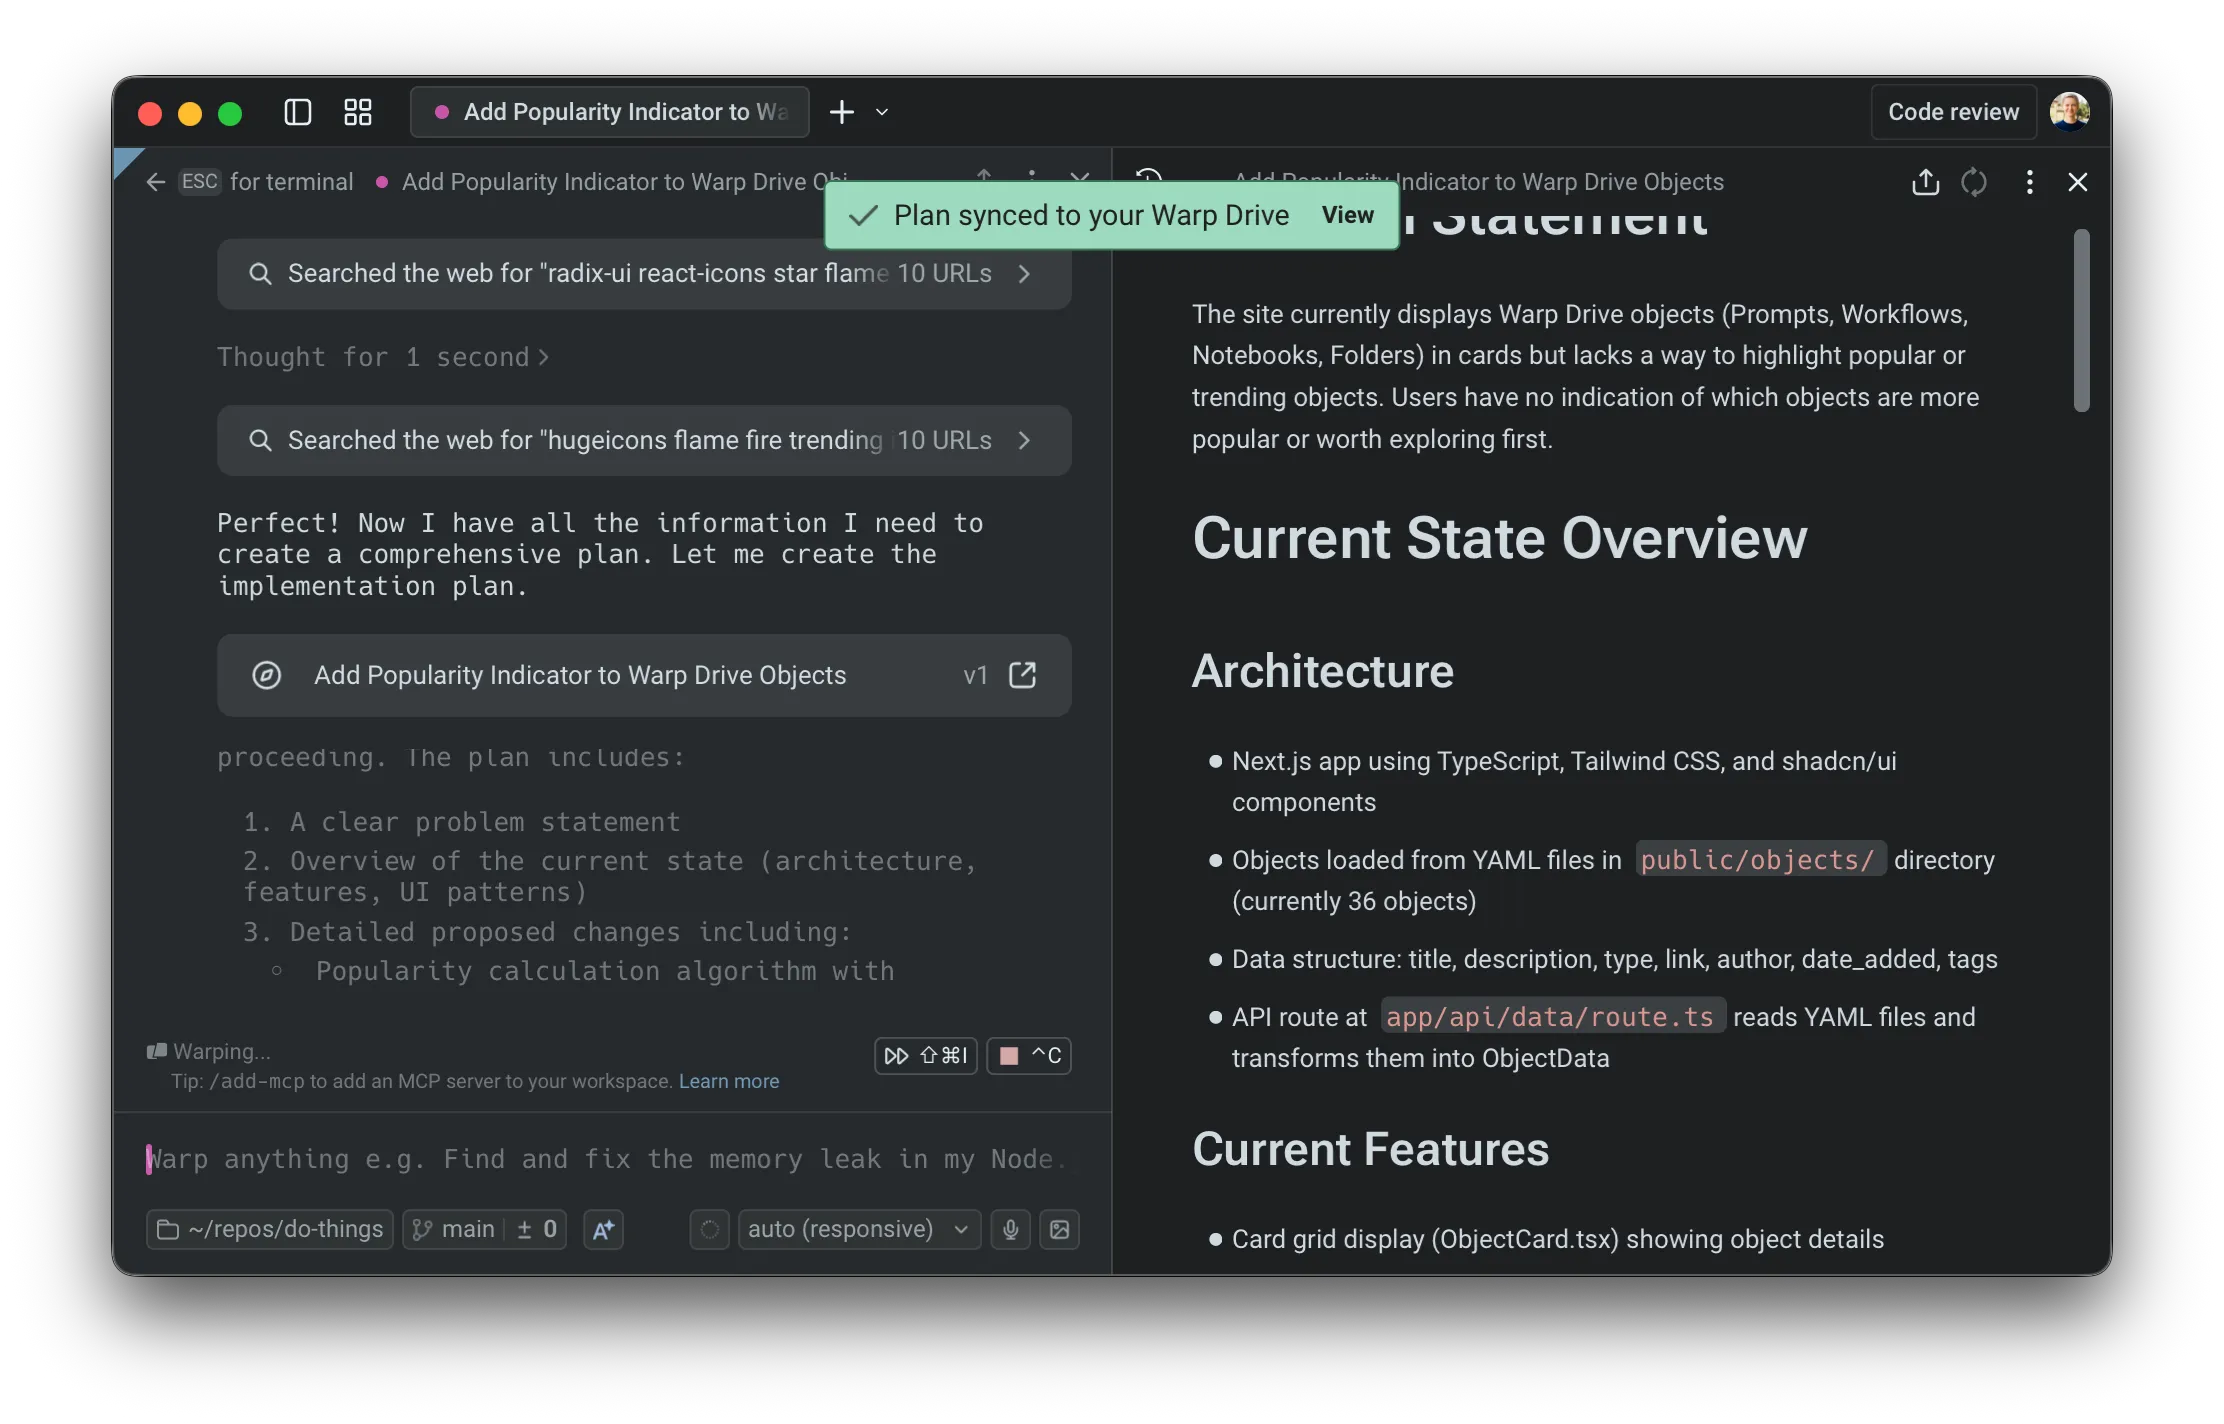 Plans are automatically synced to Warp Drive. You can export any plan as Markdown, check it into your repository, or share a link—useful for GitHub PRs, design reviews, or async collaboration. 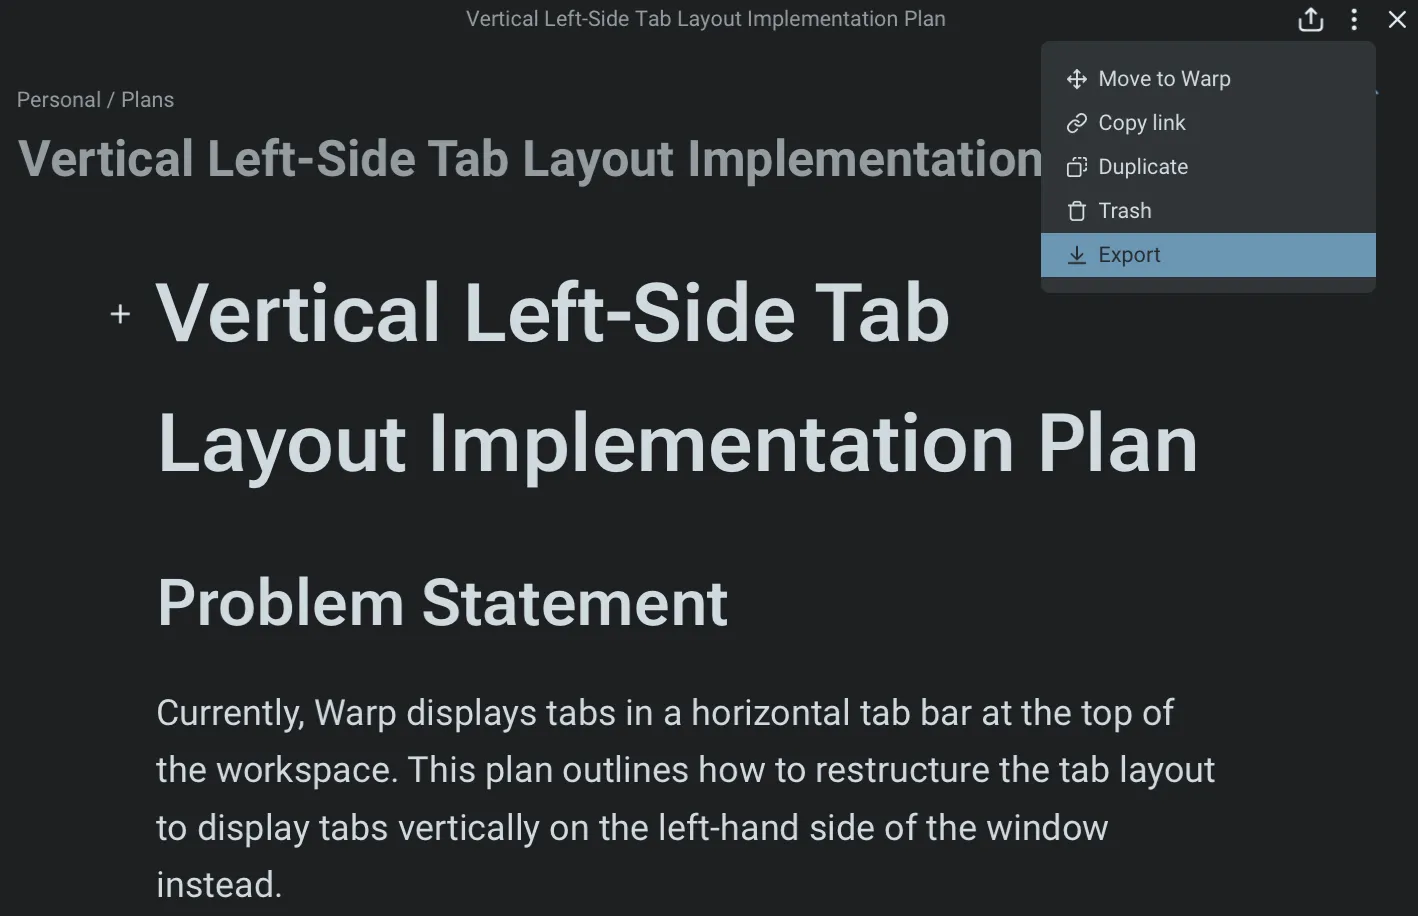 Different ways to share a plan. Because plans persist in Warp Drive, you can return to them later, reuse them for new work, or treat them as documentation for ongoing projects. This is also naturally passed to the agent as context. 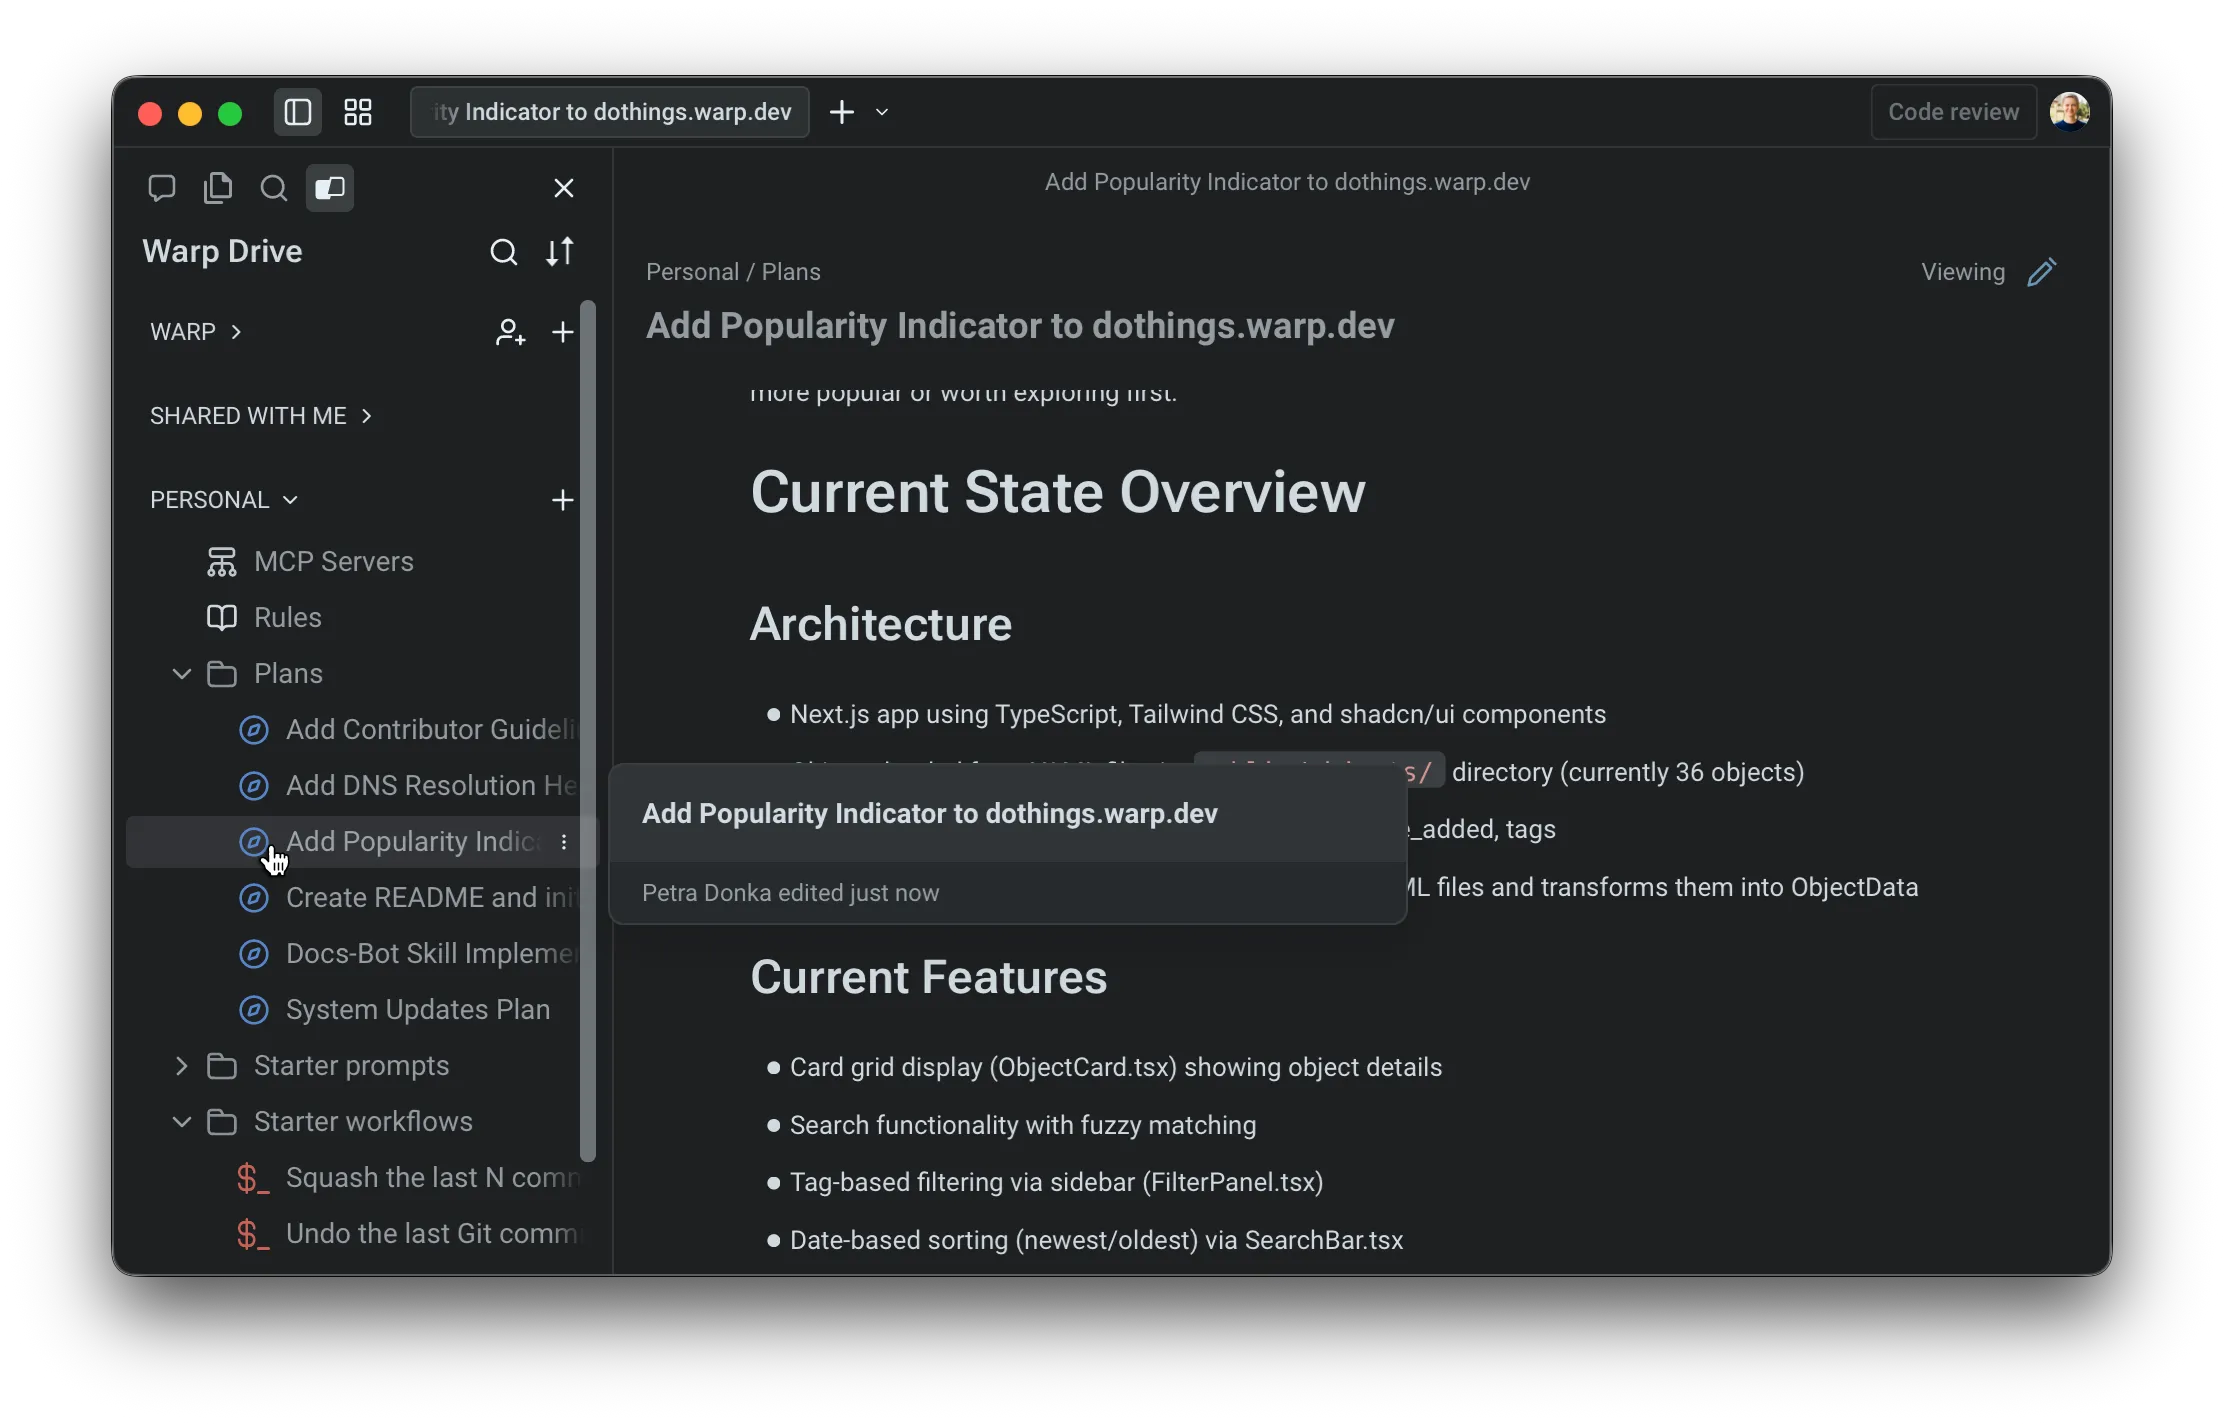 Plans are accessible directly from the Warp Drive side panel. You can configure whether your plans will be automatically added and synced to Warp Drive in your [Agent Profiles & Permissions](/agents/capabilities/agent-profiles-permissions/) under **Settings** > **Agents** > **Profiles**.  ### Using plans across conversations [Section titled “Using plans across conversations”](#using-plans-across-conversations) Plans are reusable across tasks and sessions. You can reference them in future prompts, continue where you left off, or build follow-up plans that rely on earlier work. The **@plans** command helps you quickly search for and reopen previously saved plans, making planning a consistent part of your development workflow rather than a one-off step. See [attaching context with @ references](/agents/local-agents/agent-context/using-to-add-context/) for more ways to add files, folders, diffs, and saved objects to an agent conversation. 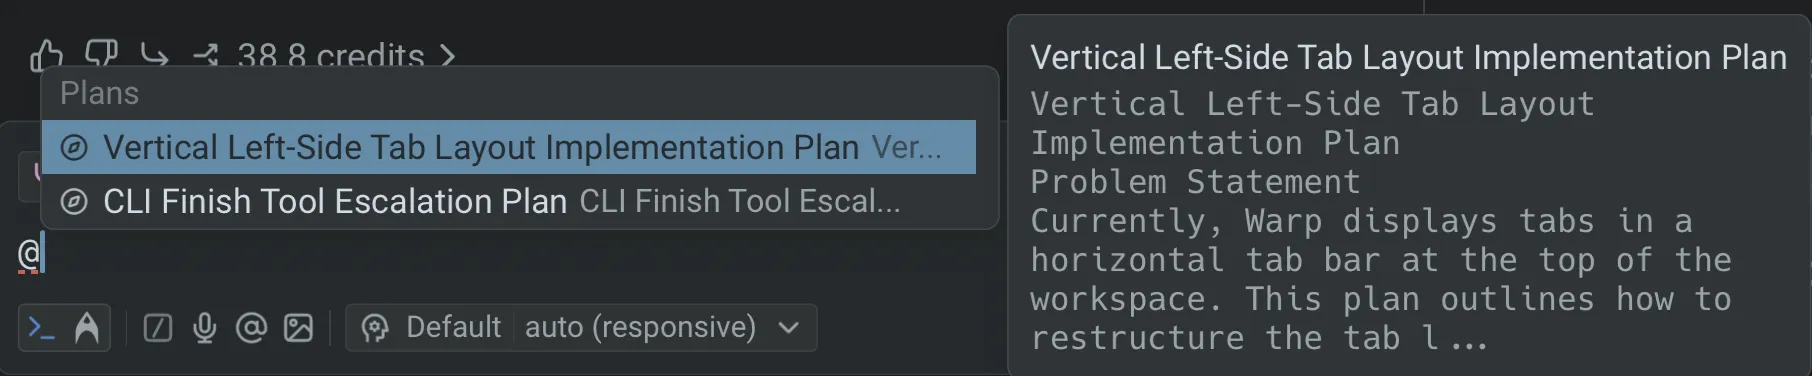 *** ## Next steps [Section titled “Next steps”](#next-steps) As the agent executes your plan, you’ll review code changes and may want to scale work to the cloud. * **[Interactive Code Review](/agents/local-agents/interactive-code-review/)** - Leave inline comments on agent-generated diffs and have the agent revise in one pass. * **[Cloud Agents quickstart](/platform/quickstart/)** - Run agents in the cloud for longer tasks, background automation, or parallel work across repos.
# Rules for agents
Canonical page: [/agents/capabilities/rules/](https://docs.warp.dev/agents/capabilities/rules/)
> Create reusable Global or Project Rules to ensure agents follow your coding standards, project conventions, and personal preferences.
Warp’s **Rules** feature lets you create reusable guidelines that inform how agents respond to your prompts. Rules help tailor responses to match your coding standards, project conventions, and personal preferences, making agent interactions smarter and more consistent. Warp supports two types of rules: **Global Rules** and **Project Rules**.  ## Global Rules [Section titled “Global Rules”](#global-rules) Global Rules apply across all projects and contexts. They’re ideal for: * Coding standards and best practices * Workspace-wide guidelines * Tool configurations or preferences you want applied everywhere Warp may also suggest Global Rules based on your usage patterns to make future interactions smarter and more consistent. ## Project Rules [Section titled “Project Rules”](#project-rules) Project Rules live in your codebase and apply automatically when working within that project. They’re stored in an `AGENTS.md` file (or `WARP.md` for backwards compatibility) and can be: * Placed in the root of your repository * Added in subdirectories for more targeted guidance Caution The filename must be in **all caps** for Warp to recognize it (e.g., `AGENTS.md`, not `agents.md` or `Agents.md`). We recommend creating `AGENTS.md` for new projects. **When you’re in a directory:** * Warp automatically applies the `AGENTS.md` (or `WARP.md`) in the root and in the current directory. * If you edit files in another subdirectory, Warp makes a best-effort attempt to include that subdirectory’s rules file as well. Example project structure: How Warp applies these Project Rules: * **If the current directory is `ui/`** * Automatically applied: `project/AGENTS.md` and `project/ui/AGENTS.md` * Best effort: `project/api/AGENTS.md` if editing files there * **If the current directory is `api/`** * Automatically applied: `project/AGENTS.md` and `project/api/AGENTS.md` * Best effort: `project/ui/AGENTS.md` if editing files there ### Rules precedence [Section titled “Rules precedence”](#rules-precedence) When multiple rules apply, Warp follows this order of precedence: 1. Rules in the current subdirectory’s project rules file 2. Rules in the root directory’s project rules file 3. Global Rules This ensures the most specific, project-relevant rules take priority over broader ones. *** ## How to access Rules [Section titled “How to access Rules”](#how-to-access-rules) * From [Warp Drive](/knowledge-and-collaboration/warp-drive/): **Personal** > **Rules** * From the [Command Palette](/terminal/command-palette/): search for “Open AI Rules” * From the Settings panel: **Settings** > **Agents** > **Knowledge** > **Manage Rules** * Here, you can manage both Global as well as Project Rules. * From the Warp menu bar: **AI** > **Open Rules** * From the Slash Commands menu: `/open-project-rules` to open Project Rules directly in Warp’s code editor 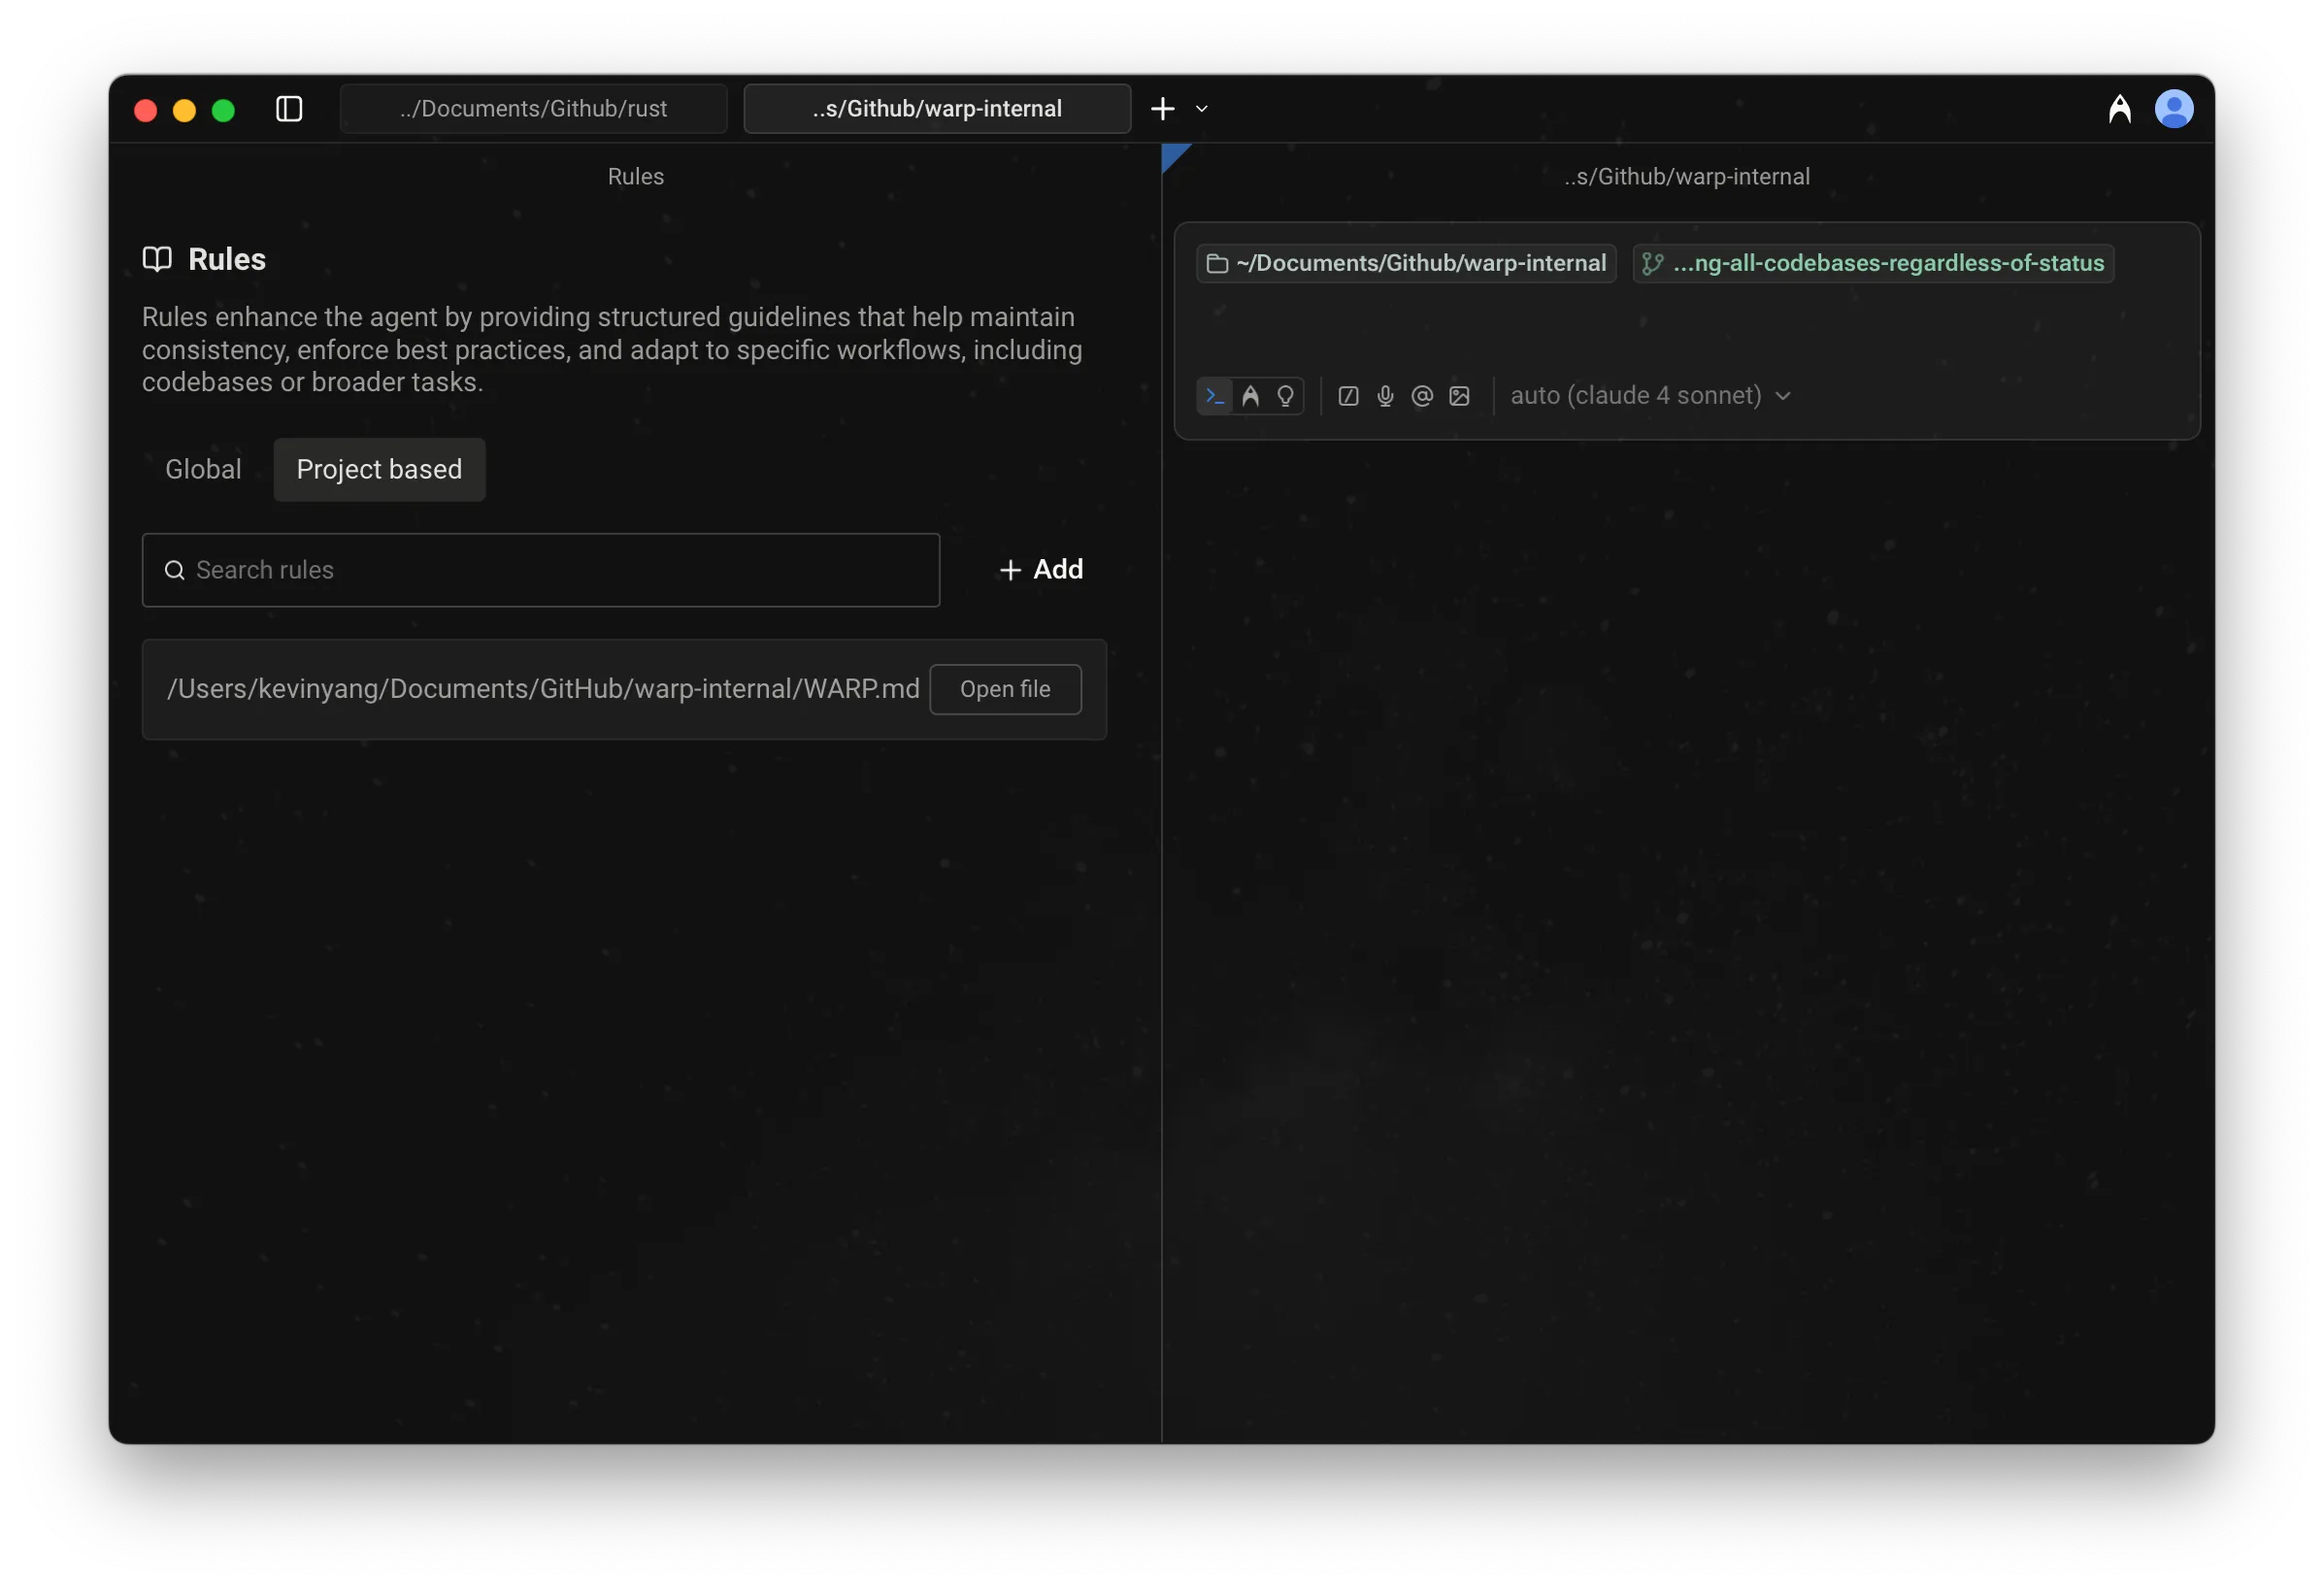 Project Rules UI open in a Rules pane. ## How to create, edit, or delete Rules [Section titled “How to create, edit, or delete Rules”](#how-to-create-edit-or-delete-rules) #### Global Rules [Section titled “Global Rules”](#global-rules-1) * **From Warp Drive Rules pane:** **Personal** > **Rules** > **Global**\ Add, edit, or delete any number of rules. Each rule can include: * Name (optional) * Description (what the rule does and when to apply it) * **From the Slash Commands menu:** Use `/add-rule` to create a new Global Rule (automatically opens the Warp Drive Rules pane). [Rules Demo (legacy) with just Global Rules. Project rules can also be found there.](https://www.loom.com/embed/3a49462c01e149cf9c040130cebe1184) #### Project Rules [Section titled “Project Rules”](#project-rules-1) * **When in a directory, set up Project Rules with a slash command:** Use `/init` to: * Begin indexing your codebase or display indexing status * Generate an `AGENTS.md` file with initial context, or * Link an existing Rules file to `AGENTS.md` * Warp currently supports linking the following external Rules files: `CLAUDE.md`, `.cursorrules`, `AGENT.md`, `GEMINI.md`, `.clinerules`, `.windsurfrules`, `.github/copilot-instructions.md` To view all Project Rules and open them in Warp, access it via the Warp Drive Rules pane: **Personal** > **Rules** > **Project-based** ### Rules as Agent context [Section titled “Rules as Agent context”](#rules-as-agent-context) When relevant, Agents automatically pull in applicable rules to guide their responses. Rules used in an interaction will appear in the conversation under **References** or marked as derived from a specific rule. 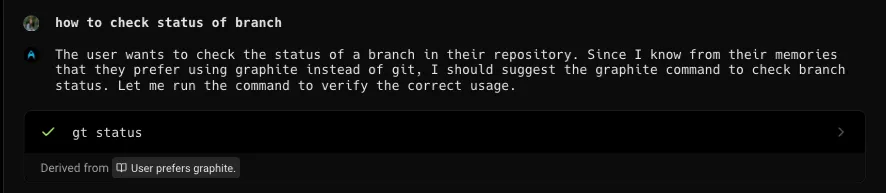 An agent response showing which rules were applied. 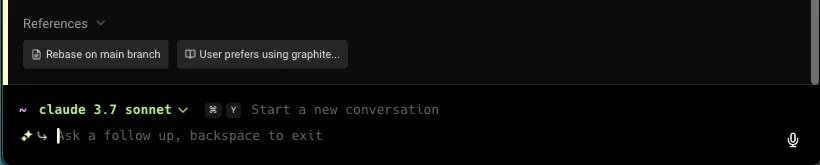 Rules listed as references in an agent conversation. ### Rules privacy [Section titled “Rules privacy”](#rules-privacy) See our [Privacy page](/support-and-community/privacy-and-security/privacy/) for more information on how we handle data with Rules.
# Skills for agents
Canonical page: [/agents/capabilities/skills/](https://docs.warp.dev/agents/capabilities/skills/)
> Create reusable instruction sets that teach agents specific tasks and share expertise across your team.
Skills allow you to create reusable, shareable instructions that agents can invoke when performing tasks. Instead of repeating detailed prompts, you can encapsulate common workflows, coding patterns, or domain expertise into skill files that agents automatically discover and use. ## Key features [Section titled “Key features”](#key-features) * **Reusable instructions** - Define a task once and let Agents use it whenever relevant * **Project and global scopes** - Create skills specific to a project or available across all projects * **Automatic discovery** - Agents are aware of all available skills and invoke them when appropriate * **Simple markdown format** - Skills are just markdown files with a small amount of metadata * **Supporting files** - Include scripts, templates, or other resources alongside your skill instructions * **Slash command invocation** - Invoke any skill directly with `/{skill-name}` * **Parameterized skills** - Use argument placeholders to create dynamic, reusable skill templates ## How Skills work [Section titled “How Skills work”](#how-skills-work) When you start an [Agent conversation](/agents/local-agents/interacting-with-agents/), the Agent receives a list of all available skills with their names and descriptions. When the Agent determines that a skill would help accomplish your task, it loads the skill’s full instructions and follows them to complete the task. Caution Skill discovery is based on your current working directory. For Git repositories, Warp includes all skills from your current directory up through the repository root. If you’re working in project A, you won’t have access to skills from project B. ### Skill name conflicts [Section titled “Skill name conflicts”](#skill-name-conflicts) If you have skills with the same name in multiple directories, Warp handles the conflict differently depending on how the skill is invoked: * **Natural language** - The Agent receives a list of all in-scope skills including their names, descriptions, and file paths. The Agent can see all available options and chooses the appropriate skill based on its path. * **Slash commands** - When multiple skills share the same name, Warp displays all matching skills in the menu. You select which one to use based on the description. * **Background resolution** - When Warp resolves skill names automatically (without direct user selection), it prioritizes home directory (global) skills first, then skills from higher directories (closer to the repository root). ### Example interactions [Section titled “Example interactions”](#example-interactions) You can invoke skills in two ways: **Using natural language** - Describe what you want to accomplish: * “Use the deploy skill to push to staging” * “Check the docs for broken links” (invokes a link-checking skill) * “Create a DOCX file with my project’s README content” * “Draft documentation for the new API endpoint based on this PR” **Using slash commands** - Invoke a skill directly with `/{skill-name}`: * `/deploy` - Invokes the deploy skill * `/add-feature-flag` - Invokes the add-feature-flag skill The Agent recognizes when your request matches a skill’s purpose, loads the skill instructions, and follows them to complete the task. ### Identify skill sources in conversation data [Section titled “Identify skill sources in conversation data”](#identify-skill-sources-in-conversation-data) The [Conversation API](/api) returns skill loads as `read_skill` actions. The action’s `input` identifies the skill source: | Input field | Skill source | | ------------------ | -------------------------------------------------------------------------------------------------------------------------------------------- | | `bundled_skill_id` | A Warp-provided bundled reference when this field is present. | | `skill_path` | The path used to resolve the skill. It can refer to a file-based skill or a path-referenced bundled skill, including one from a remote host. | To measure usage of skills your team owns, exclude `read_skill` actions whose `input` contains `bundled_skill_id`. From the remaining actions, count only `skill_path` values under skill roots your team manages. Don’t classify other path-based entries as customer-owned because Warp-bundled skills can also use `skill_path`. See the [bundled skill ID catalog](/factories/api-and-sdk/#skill-actions-in-conversation-data) for Warp-provided IDs and availability details. ## Skill file format [Section titled “Skill file format”](#skill-file-format) Skills are markdown files with YAML frontmatter. Each skill must have: * **name** - A unique identifier for the skill (typically kebab-case) * **description** - A brief explanation of what the skill does and when to use it ### Basic structure [Section titled “Basic structure”](#basic-structure)
```markdown
---
name: your-skill-name
description: Brief description of what this skill does and when to use it
---
# Your Skill Name
## Instructions
Provide clear, step-by-step guidance for the agent.
You can use argument placeholders like $ARGUMENTS or $0 in the body (see [Skill arguments](#skill-arguments)).
## Examples
Show concrete examples of using this skill.
```
### Example skill file [Section titled “Example skill file”](#example-skill-file) Here’s a complete example of a skill that helps create feature flags:
```markdown
---
name: add-feature-flag
description: Add a new feature flag to the codebase with proper configuration and documentation
---
# Add Feature Flag
## Instructions
1. Ask the user for the feature flag name and default value
2. Add the flag definition to `config/feature_flags.yaml`
3. Create a helper function in `src/utils/flags.ts`
4. Update the feature flags documentation in `docs/FEATURE_FLAGS.md`
## Configuration Format
Feature flags should follow this format in the YAML file:
feature_name:
default: false
description: "What this flag controls"
owner: "team-name"
## Examples
- "Add a feature flag for the new checkout flow"
- "Create a flag to enable dark mode for beta users"
```
## Skill arguments [Section titled “Skill arguments”](#skill-arguments) Skills can include argument placeholders that are automatically substituted with values you provide when invoking the skill. This lets you create reusable, parameterized skill templates. [Using Skill Arguments in Warp](https://www.loom.com/embed/4cb0a80e567c41788816cd9b5acbc7ed) ### Argument syntax [Section titled “Argument syntax”](#argument-syntax) Three placeholder formats are supported: * **`$ARGUMENTS`** — Replaced with the full raw argument string (everything after the skill name). * **`$ARGUMENTS[N]`** — Replaced with the Nth whitespace-separated argument (0-indexed). For example, `$ARGUMENTS[0]` is the first argument, `$ARGUMENTS[1]` is the second, etc. * **`$N`** — Shorthand for `$ARGUMENTS[N]`. For example, `$0` is equivalent to `$ARGUMENTS[0]`. ### How argument substitution works [Section titled “How argument substitution works”](#how-argument-substitution-works) When you invoke a skill, any text you type after the skill name is treated as the argument string. The argument string is split on whitespace to produce individual indexed arguments. **If the skill contains argument placeholders** (`$ARGUMENTS`, `$ARGUMENTS[N]`, or `$N`), the placeholders are replaced with the corresponding argument values before the skill instructions are sent to the agent. **If the skill does not contain any argument placeholders**, the extra text you provide is passed to the agent as a separate user message alongside the skill instructions. This means you can always add context when invoking a skill, whether or not it uses argument placeholders. ### Example: Skill with arguments [Section titled “Example: Skill with arguments”](#example-skill-with-arguments) Here’s a skill that uses arguments to explain a topic for a specific audience:
```markdown
---
name: explain-topic
description: Explain a topic for a specific audience in a given tone
---
# Explain Topic
Explain $0 for an audience of $1 professionals.
Use a $2 tone.
Full request: $ARGUMENTS
```
Invoking this skill with:
```plaintext
/explain-topic bears engineering fun
```
Produces the following instructions for the agent:
```plaintext
Explain bears for an audience of engineering professionals.
Use a fun tone.
Full request: bears engineering fun
```
### Example: Skill without arguments [Section titled “Example: Skill without arguments”](#example-skill-without-arguments) If a skill has no argument placeholders:
```markdown
---
name: greet
description: Greet the user with an Australian-style hello
---
# Greet
Greet the user warmly in an Australian style.
```
Invoking with extra text:
```plaintext
/greet say it in French
```
The skill instructions are sent first, then “say it in French” is passed as a follow-up user message. The agent sees both and can combine them — in this case, greeting in French with an Australian flair. ## Skill locations [Section titled “Skill locations”](#skill-locations) Skills can be stored at two levels: project-level (accessible only within that project) and user-level (accessible from any project). ### Project skills [Section titled “Project skills”](#project-skills) Project skills live in your repository and are available when you’re working in that project. We recommend storing them at your project root, but skills in subdirectories are also discovered when you’re working within that subdirectory. This is useful for monorepos with separate `./frontend` and `./backend` directories. Store them in any of these directories: * **`.agents/skills/`** (recommended) * **`.warp/skills/`** * **`.claude/skills/`** * **`.codex/skills/`** * **`.cursor/skills/`** * **`.gemini/skills/`** * **`.copilot/skills/`** * **`.factory/skills/`** * **`.github/skills/`** * **`.opencode/skills/`** Each skill must be in its own subdirectory with a `SKILL.md` file. Any supporting files (scripts, templates, configs) should be referenced in `SKILL.md` so the Agent knows they exist: ### Root directory skills (global) [Section titled “Root directory skills (global)”](#root-directory-skills-global) Root directory skills are stored in your home directory and are available across all projects on your machine. These are useful for personal workflows, coding patterns, or procedures you use regardless of the specific project. Store global skills in any of these directories in your home folder: * **`~/.agents/skills/`** (recommended) * **`~/.warp/skills/`** * **`~/.claude/skills/`** * **`~/.codex/skills/`** * **`~/.cursor/skills/`** * **`~/.gemini/skills/`** * **`~/.copilot/skills/`** * **`~/.factory/skills/`** * **`~/.github/skills/`** * **`~/.opencode/skills/`** The directory structure is the same as project skills: ### Project vs Root directory skills [Section titled “Project vs Root directory skills”](#project-vs-root-directory-skills) Understanding when to use each level: **Project skills** are best for: * Project-specific workflows (deployment, testing, migrations) * Team-shared procedures and standards * Repository-specific automation and tooling * Domain-specific patterns for that codebase **Root directory skills** are best for: * Personal coding preferences and patterns * General-purpose workflows used across all projects * Cross-project automation (git workflows, documentation templates) * Professional standards you apply everywhere ### Extra directories for cloud runs [Section titled “Extra directories for cloud runs”](#extra-directories-for-cloud-runs) [Cloud agents](/platform/) discover skills from the repositories in their [environment](/platform/environments/). To index skills that live outside those repositories — for example, skills baked into a custom Docker image — set the `WARP_SKILL_DIRS` environment variable. See [extra skill directories in cloud runs](/platform/skills-as-agents/#extra-skill-directories-in-cloud-runs). ## Creating skills [Section titled “Creating skills”](#creating-skills) ### Step 1: Choose a location [Section titled “Step 1: Choose a location”](#step-1-choose-a-location) Decide whether your skill should be: * **Project-specific** - Place it in one of your project’s skill directories (`.agents/skills/`, `.warp/skills/`, `.claude/skills/`, etc.) * **Global** - Place it in one of your home directory’s skill folders (`~/.agents/skills/`, `~/.warp/skills/`, `~/.claude/skills/`, etc.) ### Step 2: Create the directory structure [Section titled “Step 2: Create the directory structure”](#step-2-create-the-directory-structure) Create a subdirectory for your skill with a descriptive name:
```bash
mkdir -p .agents/skills/my-new-skill
```
### Step 3: Write the skill file [Section titled “Step 3: Write the skill file”](#step-3-write-the-skill-file) Create `SKILL.md` in your skill directory:
```bash
touch .agents/skills/my-new-skill/SKILL.md
```
### Step 4: Add content [Section titled “Step 4: Add content”](#step-4-add-content) Write your skill with clear instructions:
```markdown
---
name: my-new-skill
description: One-line description of what this skill does
---
# My New Skill
## When to use
Explain the scenarios where this skill is helpful.
## Instructions
1. First step the Agent should take
2. Second step with specific details
3. Continue with clear, actionable steps
## Important notes
- Any constraints or requirements
- Common pitfalls to avoid
```
## Skills with supporting files [Section titled “Skills with supporting files”](#skills-with-supporting-files) Skills can include supporting files like scripts, templates, or configuration files. Place these files in the same directory as your `SKILL.md`: In your skill instructions, reference these files using relative paths. For example, in your `SKILL.md`:
```plaintext
## Running the check
From the project root:
python3 .agents/skills/check-broken-links/check_links.py --internal-only
```
This pattern is useful for: * **Automation scripts** - Python, shell, or Node scripts that perform complex tasks * **Templates** - Boilerplate files the Agent can copy and customize * **Configuration** - Default settings or schemas the skill references ## Managing skills [Section titled “Managing skills”](#managing-skills) ### Viewing available skills [Section titled “Viewing available skills”](#viewing-available-skills) Ask the Agent what skills are available:
```plaintext
What skills do I have?
```
The Agent lists all discovered skills with their names and descriptions. This includes skills from all supported directories in both your current project and your home directory. ### Editing skills [Section titled “Editing skills”](#editing-skills) Use the [`/open-skill`](/agents/capabilities/slash-commands/) slash command to modify existing skills:
```plaintext
/open-skill
```
This opens an interactive menu where you can: * Browse project and root directory skills * See which directory each skill is located in * Open the skill file in your editor ### Best practices [Section titled “Best practices”](#best-practices) * **Write clear descriptions** - The description is how Agents decide whether to use your skill * **Be specific in instructions** - Include exact file paths, command syntax, and expected formats * **Include examples** - Show concrete use cases to help Agents understand intent * **Keep skills focused** - Each skill should do one thing well * **Use consistent naming** - Follow a naming convention like `verb-noun` (e.g., `add-feature-flag`, `run-migrations`) * **Version control your skills** - Commit project skills to your repo so the whole team benefits ## Pre-built skills [Section titled “Pre-built skills”](#pre-built-skills) Warp maintains a public collection of ready-to-use skills in the [warpdotdev/oz-skills](https://github.com/warpdotdev/oz-skills) repository. You can browse these skills for inspiration, copy them directly into your project’s `.agents/skills/` directory, or adapt them to fit your team’s workflows. These same skills also appear as suggested agents in the [Oz web app](/platform/oz-web-app/), where you can run them directly in the cloud. ## Suggested skills from Agent Memory [Section titled “Suggested skills from Agent Memory”](#suggested-skills-from-agent-memory) Promoting recurring patterns from [Agent Memory](/agents/agent-memory/) into reviewable skill drafts is in design as part of the research preview. See the Agent Memory page for a current status. ## Invoking skills with a prompt [Section titled “Invoking skills with a prompt”](#invoking-skills-with-a-prompt) You can pass additional context or instructions to a skill when invoking it with a slash command. **Using slash commands with a prompt:** * `/deploy push the latest changes to staging` — Invokes the deploy skill with additional instructions to target staging * `/code-review focus on error handling and edge cases` — Invokes the code-review skill with guidance on what to prioritize This is useful when you want to reuse a skill’s workflow but tailor the execution to a specific situation without modifying the skill itself. ## Running agents from skills [Section titled “Running agents from skills”](#running-agents-from-skills) Skills can be used with both local and [cloud agents](/platform/) to create reusable, automated workflows. When running an agent via the CLI, web app, or API, you can specify a skill to provide the base instructions for the agent. For a complete guide to running skill-based agents—including CLI usage, the Oz web app, scheduling, skill discovery, and API integration—see [Skills as Agents](/platform/skills-as-agents/). ## Related features [Section titled “Related features”](#related-features) * [**Rules**](/agents/capabilities/rules/) - Set persistent guidelines and constraints for Agent behavior * [**MCP Servers**](/agents/capabilities/mcp/) - Expose external data sources and tools to Agents * [**Cloud Agents**](/platform/) - Run Agents in the cloud on schedules or triggers * [**Agent Profiles**](/agents/capabilities/agent-profiles-permissions/) - Control Agent permissions and autonomy *** ## Next steps [Section titled “Next steps”](#next-steps) Skills become even more powerful when you automate and share them. * **[Scheduled Agents quickstart](/platform/triggers/scheduled-agents-quickstart/)** - Run a skill on a recurring cron schedule for tasks like weekly dependency checks or daily code cleanup. * **[Integrations quickstart](/platform/integrations/quickstart/)** - Trigger skills from Slack or Linear so your team can invoke agent workflows from the tools they already use.
# Slash Commands
Canonical page: [/agents/capabilities/slash-commands/](https://docs.warp.dev/agents/capabilities/slash-commands/)
> Use Slash Commands in terminal mode or Agent Mode to quickly run built-in actions or saved prompts without leaving the input field.
Slash Commands are quick actions and saved prompts you can invoke by typing `/` in terminal mode or Agent Mode. They provide instant access to built-in actions like starting conversations, creating environments, switching models, opening static flows, and running saved prompts from Warp Drive. 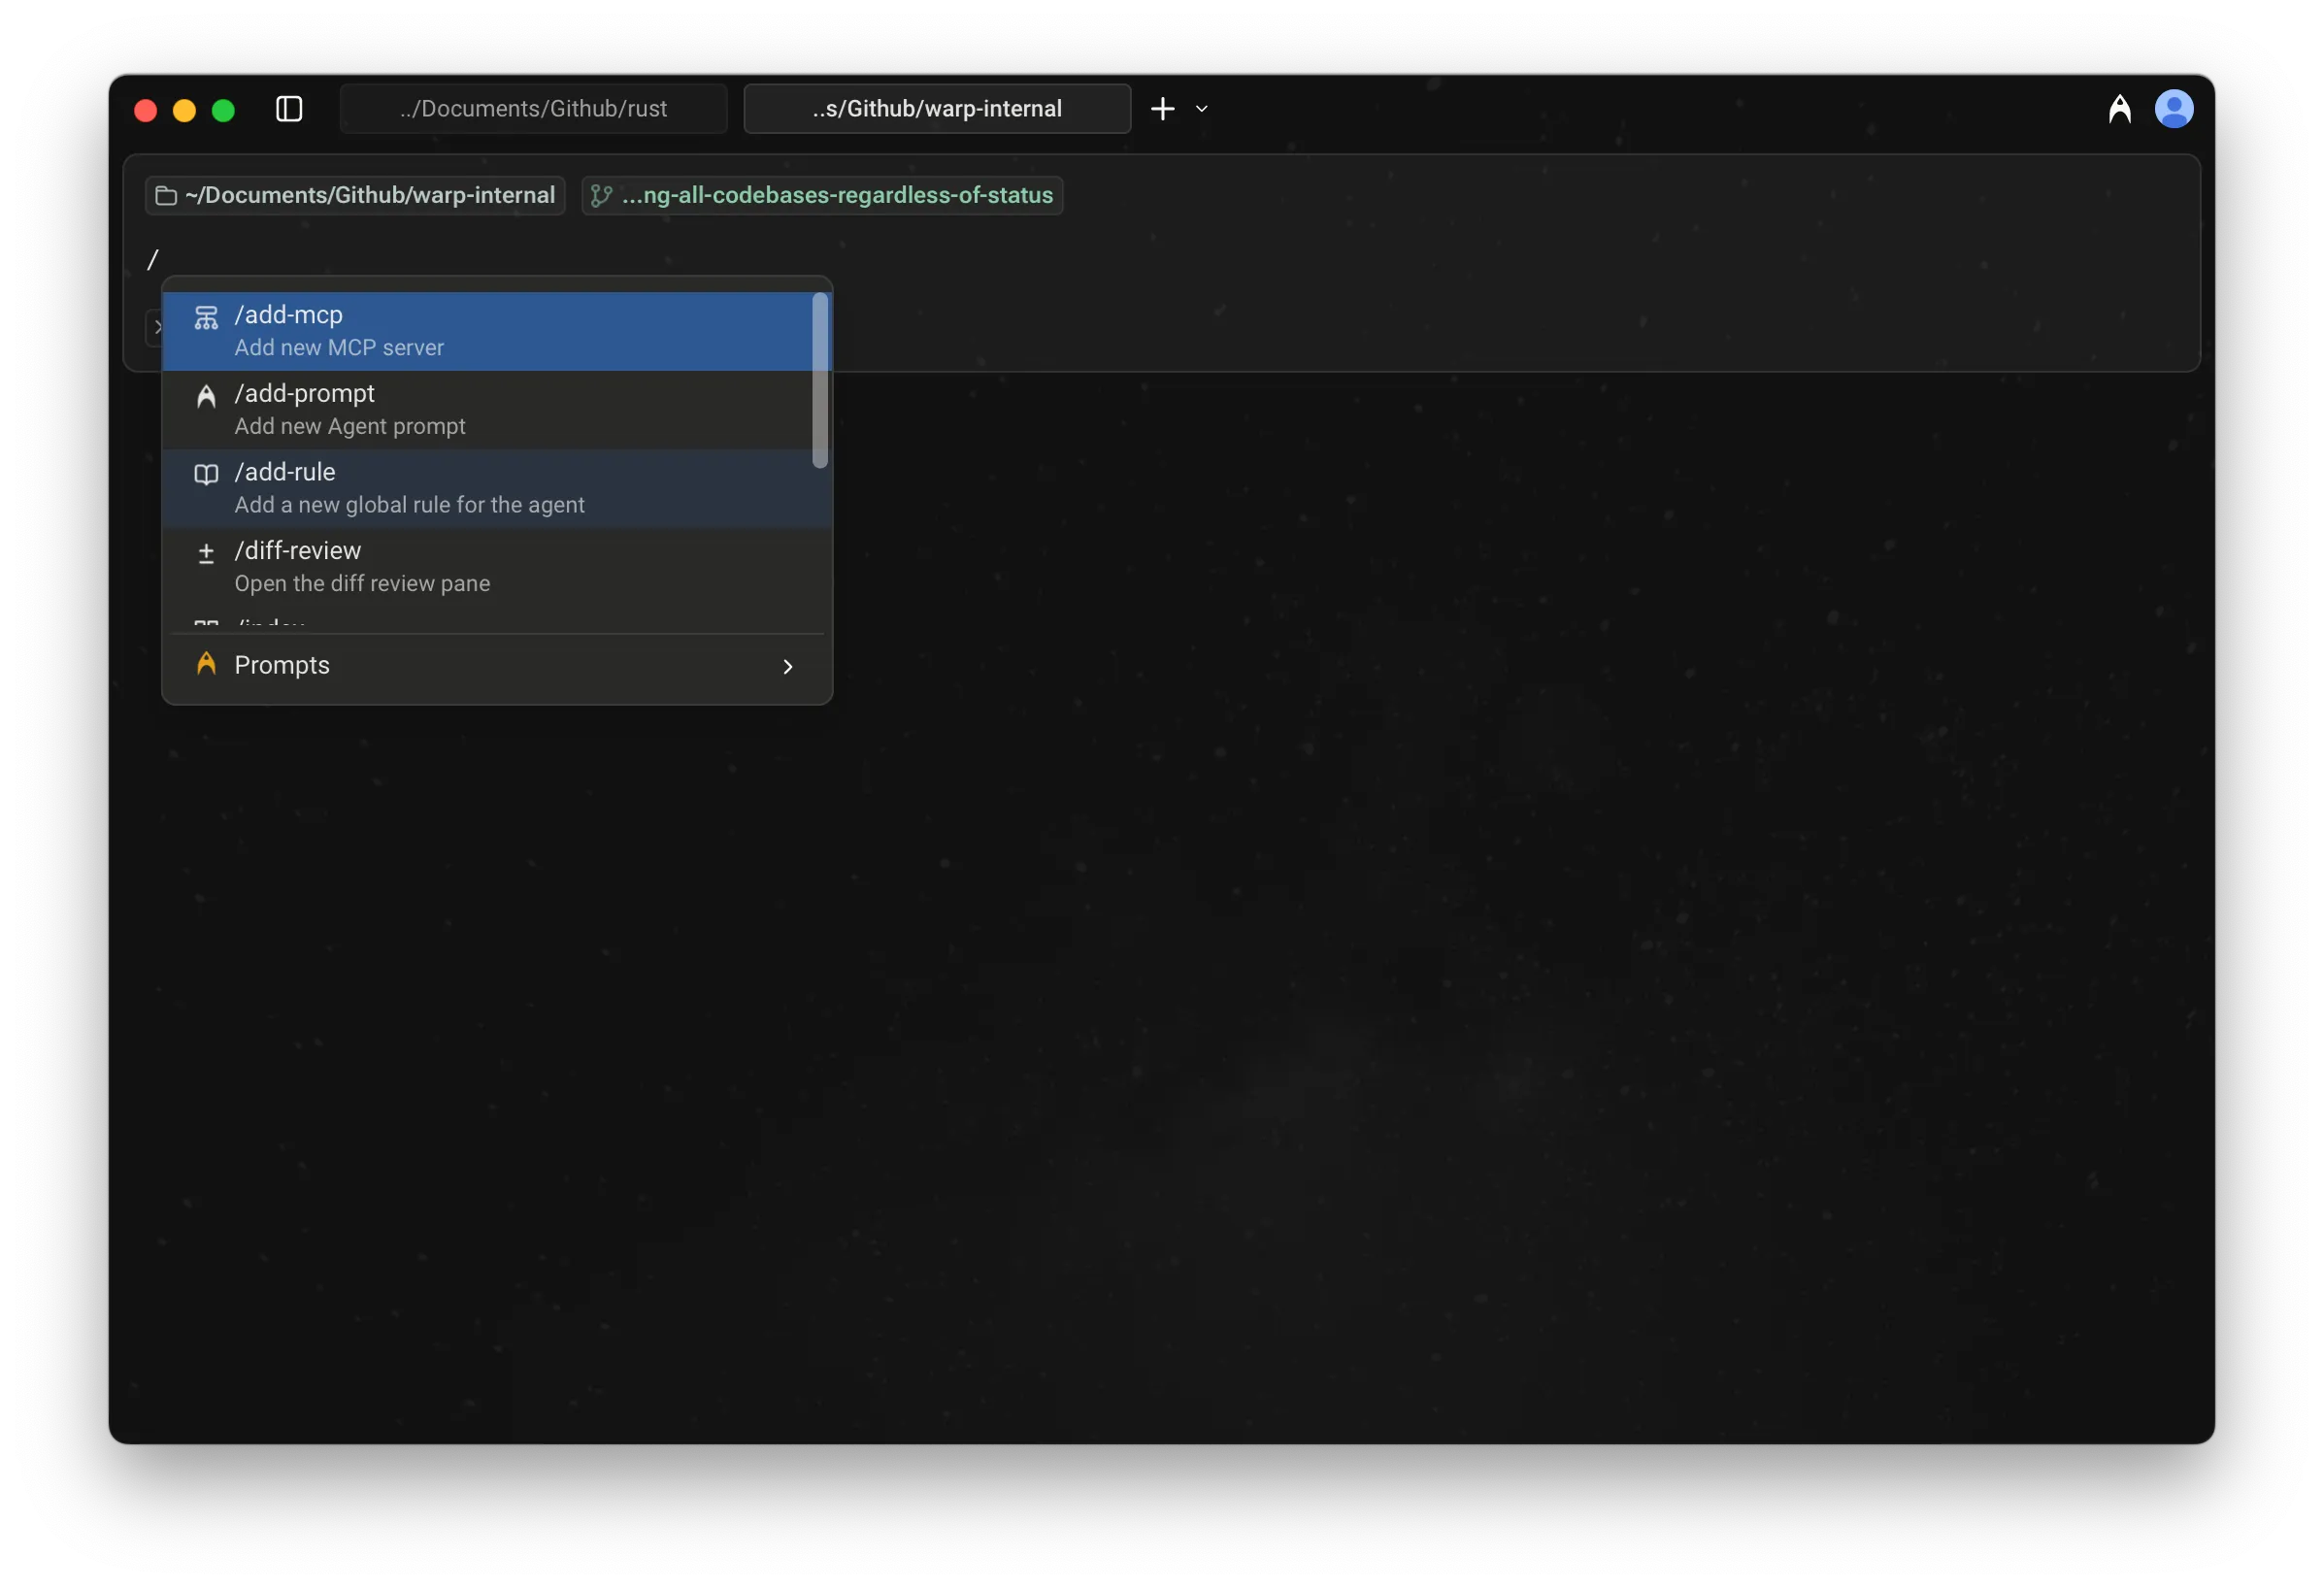 Slash Commands menu. As you type, the menu filters results in real time, making it easy to find and run the command or prompt you need. ## Static slash commands [Section titled “Static slash commands”](#static-slash-commands) Warp currently supports the following built-in Slash Commands: | Slash Command | Description | | ---------------------- | ----------------------------------------------------------------------------------------------------------------------------------------------------------------------------------------------------------------------------------------------------------------------- | | `/add-mcp` | Add a new [MCP server](/agents/capabilities/mcp/). | | `/add-prompt` | Add a new [Agent Prompt](/knowledge-and-collaboration/warp-drive/prompts/) in Warp Drive. | | `/add-rule` | Add a new [Global Rule](/agents/capabilities/rules/) for the Agent. | | `/agent` | Start a new [agent conversation](/agents/local-agents/interacting-with-agents/). Optionally include a prompt to send immediately. | | `/changelog` | Open the latest Warp [changelog](/changelog/). | | `/cloud-agent` | Start a new [cloud agent conversation](/platform/). `*` | | `/compact` | Free up context by summarizing conversation history. | | `/compact-and` | Compact the current conversation and then send a follow-up prompt. | | `/continue-locally` | Fork the current cloud agent conversation into a local Warp session. See [Handoff between local and cloud agents](/platform/handoff/). Available while a cloud agent conversation is active. | | `/conversations` | Open [conversation history](/agents/local-agents/interacting-with-agents/). | | `/copy-debugging-id` | Copy debugging information for the current conversation to your clipboard, so you can include it when [reporting an issue](/support-and-community/troubleshooting-and-support/sending-us-feedback/). Available while a conversation is active. | | `/cost` | Toggle credit usage details in the current conversation. | | `/create-environment` | Create a [Warp Environment](/platform/environments/) (Docker image + repos) via guided setup. `*` | | `/create-new-project` | Have the Agent walk you through creating a new coding project. `*` | | `/environment` | Switch the [environment](/platform/environments/) for the current cloud agent conversation. | | `/export-to-clipboard` | Export the current conversation to clipboard in markdown format. | | `/export-to-file` | Export the current conversation to a markdown file. | | `/feedback` | Open the static feedback experience. See [Using `/feedback` in Warp](/support-and-community/troubleshooting-and-support/sending-us-feedback/#using-feedback-in-warp) for details. | | `/fork` | [Forks the current conversation](/agents/local-agents/interacting-with-agents/conversation-forking/) into a new thread with the full context and history of the original. You can optionally include a prompt that will be sent immediately in the forked conversation. | | `/fork-and-compact` | [Forks the current conversation](/agents/local-agents/interacting-with-agents/conversation-forking/) and automatically compacts the forked version. Useful when you want a fresh, summarized starting point that preserves relevant context while trimming the rest. | | `/fork-from` | Open a searchable menu to [fork the conversation](/agents/local-agents/interacting-with-agents/conversation-forking/) from a specific query. Select a query to create a fork that includes everything up to that point. | | `/handoff` | Hand the current local conversation off to a cloud agent, carrying its history and a snapshot of your uncommitted changes. See [Handoff from local to cloud](/platform/handoff/local-to-cloud/). You can optionally include a follow-up prompt. `*` | | `/harness` | Switch the [harness](/platform/harnesses/) for the current cloud agent conversation. | | `/host` | Switch the execution host for the current cloud agent conversation. | | `/index` | Index the current codebase using [Codebase Context](/agents/capabilities/codebase-context/). | | `/init` | Index the current codebase and generate an [AGENTS.md file](/agents/capabilities/rules/). `*` | | `/model` | Switch the base agent model for the current conversation. | | `/new` | Start a new [agent conversation](/agents/local-agents/interacting-with-agents/) (alias for `/agent`). | | `/open-code-review` | Open the [code review](/code/code-review/) pane. | | `/open-file` | Open a file for editing in Warp’s [code editor](/code/code-editor/). | | `/open-mcp-servers` | View the status of your [MCP servers](/agents/capabilities/mcp/). | | `/open-project-rules` | Open the [Project Rules](/agents/capabilities/rules/#project-rules) file (`AGENTS`). | | `/open-repo` | Switch to another indexed repository. | | `/open-rules` | View all of your global and project [rules](/agents/capabilities/rules/). | | `/open-settings-file` | Open the Warp [settings file](/terminal/settings/) (`settings.toml`) in Warp’s code editor. | | `/open-skill` | Open an interactive menu to browse and edit project or global [skills](/agents/capabilities/skills/). | | `/orchestrate` | Break a task into subtasks and run them in parallel with multiple agents. See [Multi-agent orchestration](/platform/orchestration/). `*` | | `/plan` | Prompt the Agent to research and create a [plan](/agents/capabilities/planning/) for a task. When the work benefits from parallel agents, the plan can include [multi-agent orchestration](/platform/orchestration/). | | `/profile` | Switch the active [execution profile](/agents/capabilities/agent-profiles-permissions/). | | `/prompts` | Search saved [prompts](/knowledge-and-collaboration/warp-drive/prompts/). | | `/queue` | Queue a prompt to send after the agent finishes responding. See [Prompt Queueing](/agents/local-agents/interacting-with-agents/prompt-queueing/). | | `/remote-control` | Publish the current third-party CLI agent session to the cloud so you can monitor and steer it from another device. See [Remote Control](/agents/cli-agents/remote-control/). | | `/rename-conversation` | Rename the current conversation. | | `/rename-tab` | Rename the current tab. Include the new tab name as an argument (for example, `/rename-tab deploy`). | | `/rewind` | Rewind to a previous point in the conversation. | | `/set-tab-color` | Set the color of the current tab. Takes a required color argument: `red`, `green`, `yellow`, `blue`, `magenta`, `cyan`, or `none` to clear it. See [Tab colors](/terminal/windows/tabs/#tab-colors). | | `/skills` | Invoke a [skill](/agents/capabilities/skills/) from a searchable menu. | | `/usage` | Open [billing and usage](/support-and-community/plans-and-billing/) settings. | Caution Slash commands marked with a `*` consume credits to complete the task. #### Using Agent Prompts via Slash Commands [Section titled “Using Agent Prompts via Slash Commands”](#using-agent-prompts-via-slash-commands) In addition to static commands, the menu also shows [Agent Prompts](/knowledge-and-collaboration/warp-drive/prompts/) saved in your [Warp Drive](/knowledge-and-collaboration/warp-drive/). * These prompts can be custom ones you’ve created or ones shared with you. * As you type after `/`, prompts are filtered dynamically, so you can quickly run them without leaving the input field. 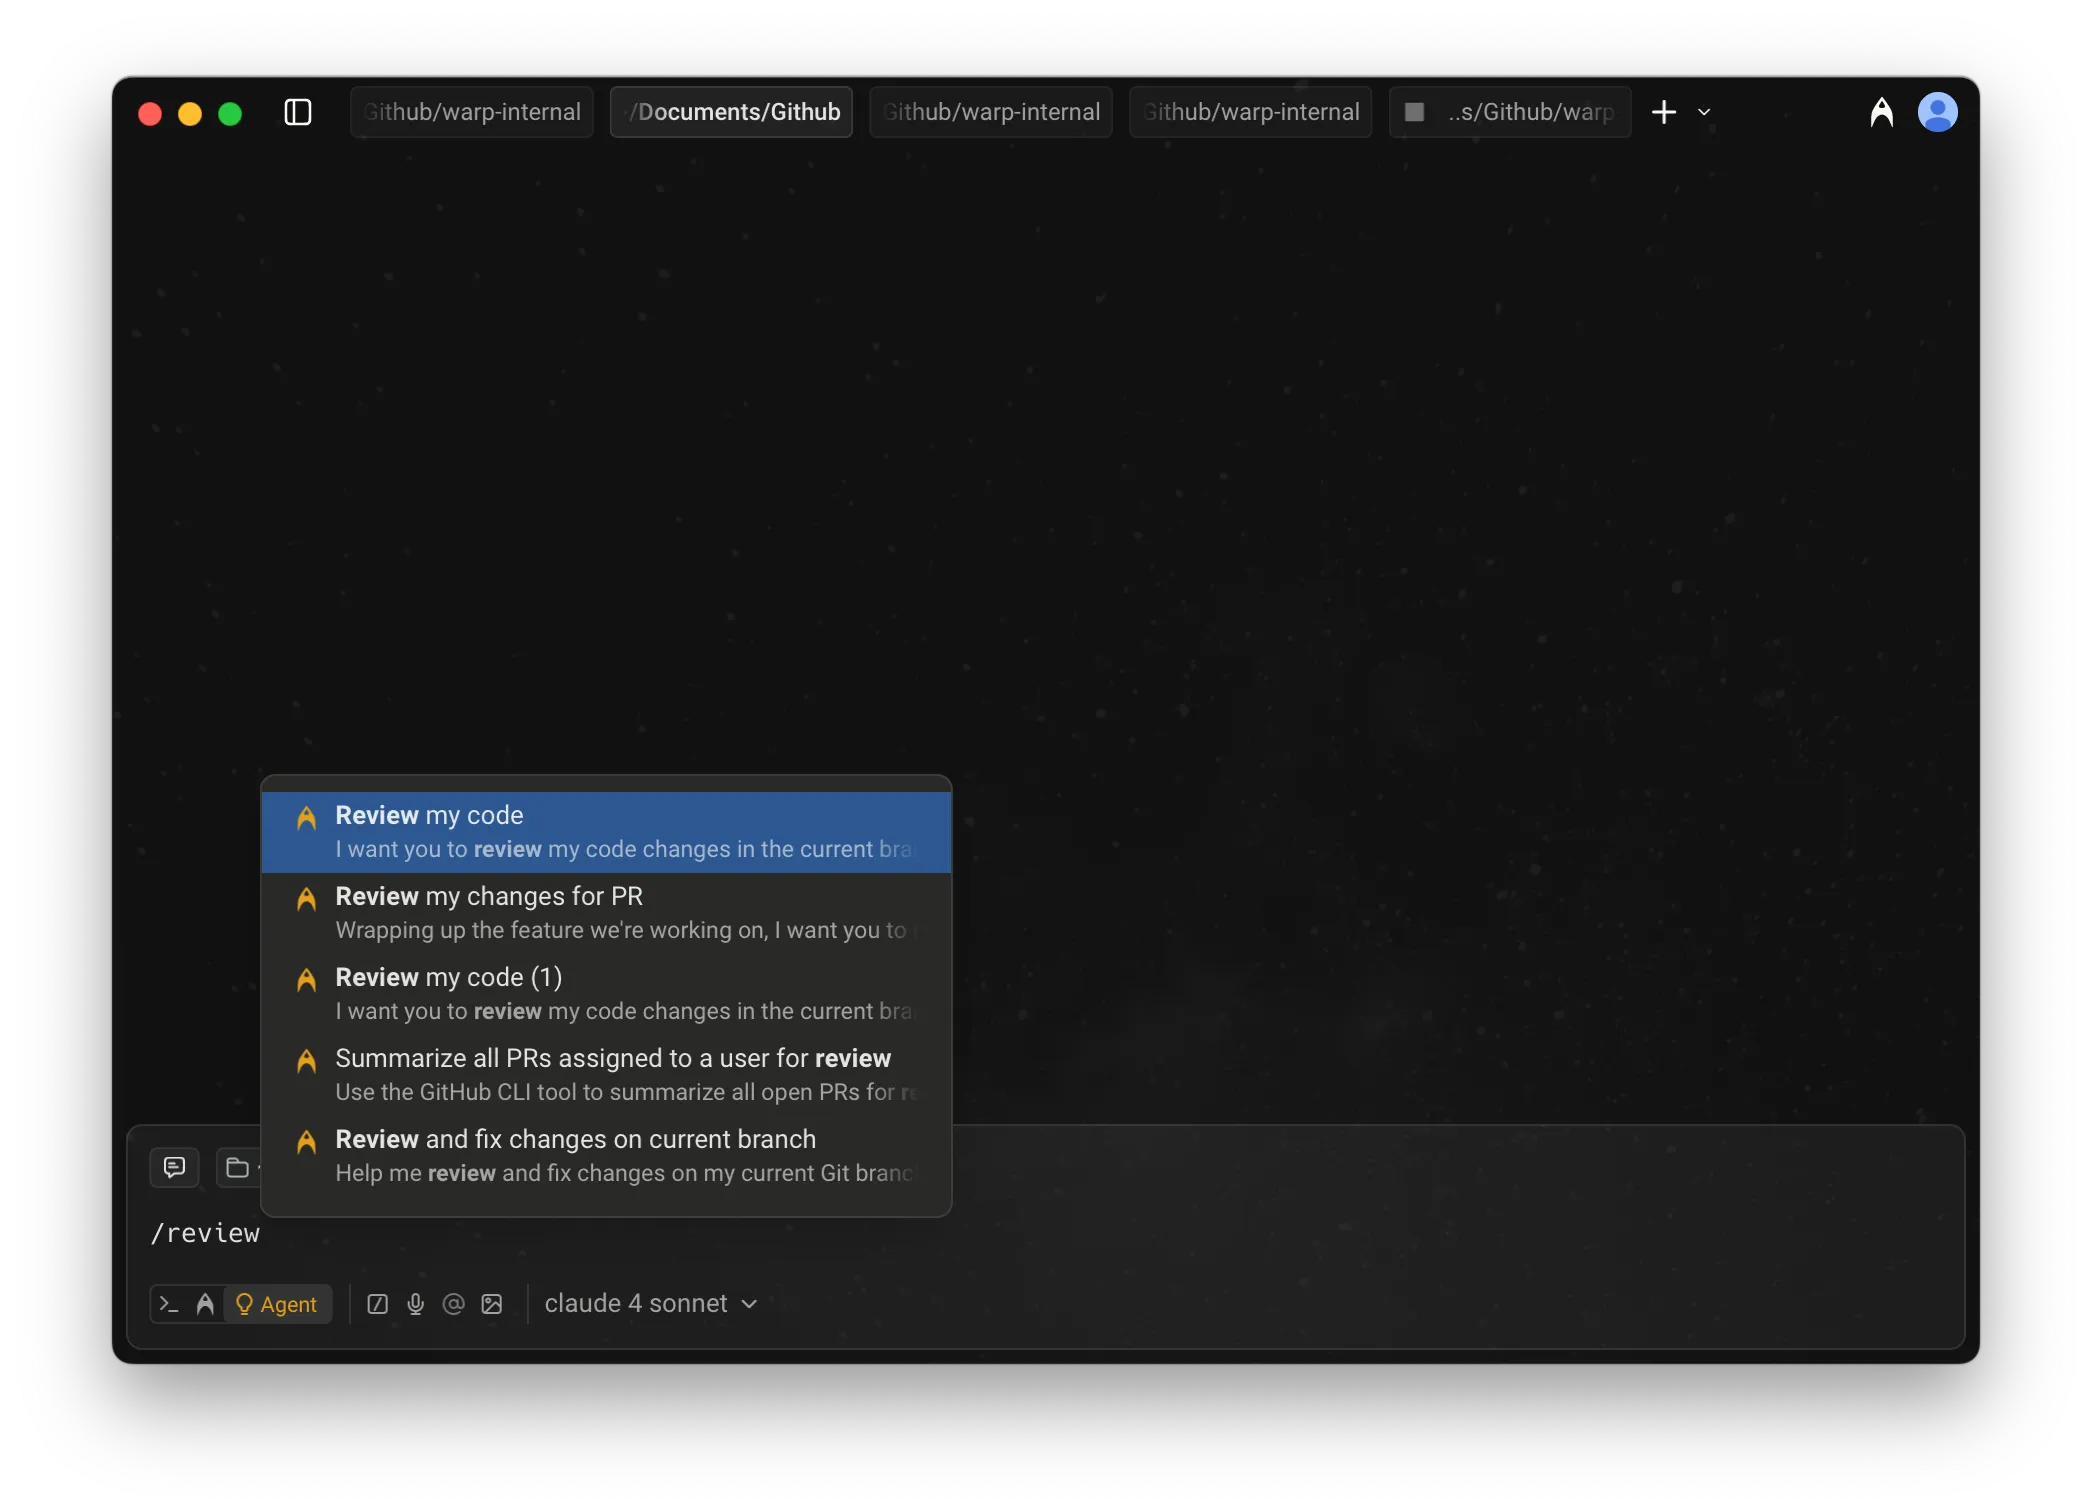 Slash Commands menu with filtered Agent Prompts. ### Tips [Section titled “Tips”](#tips) * **Context-aware:** Many Slash Commands use your current working directory or file selection as context. * **Quick access:** Use `/` from terminal mode or Agent Mode to avoid navigating through menus. ### Example of using a Slash Command [Section titled “Example of using a Slash Command”](#example-of-using-a-slash-command) Below is an example interaction when `/init` is run: 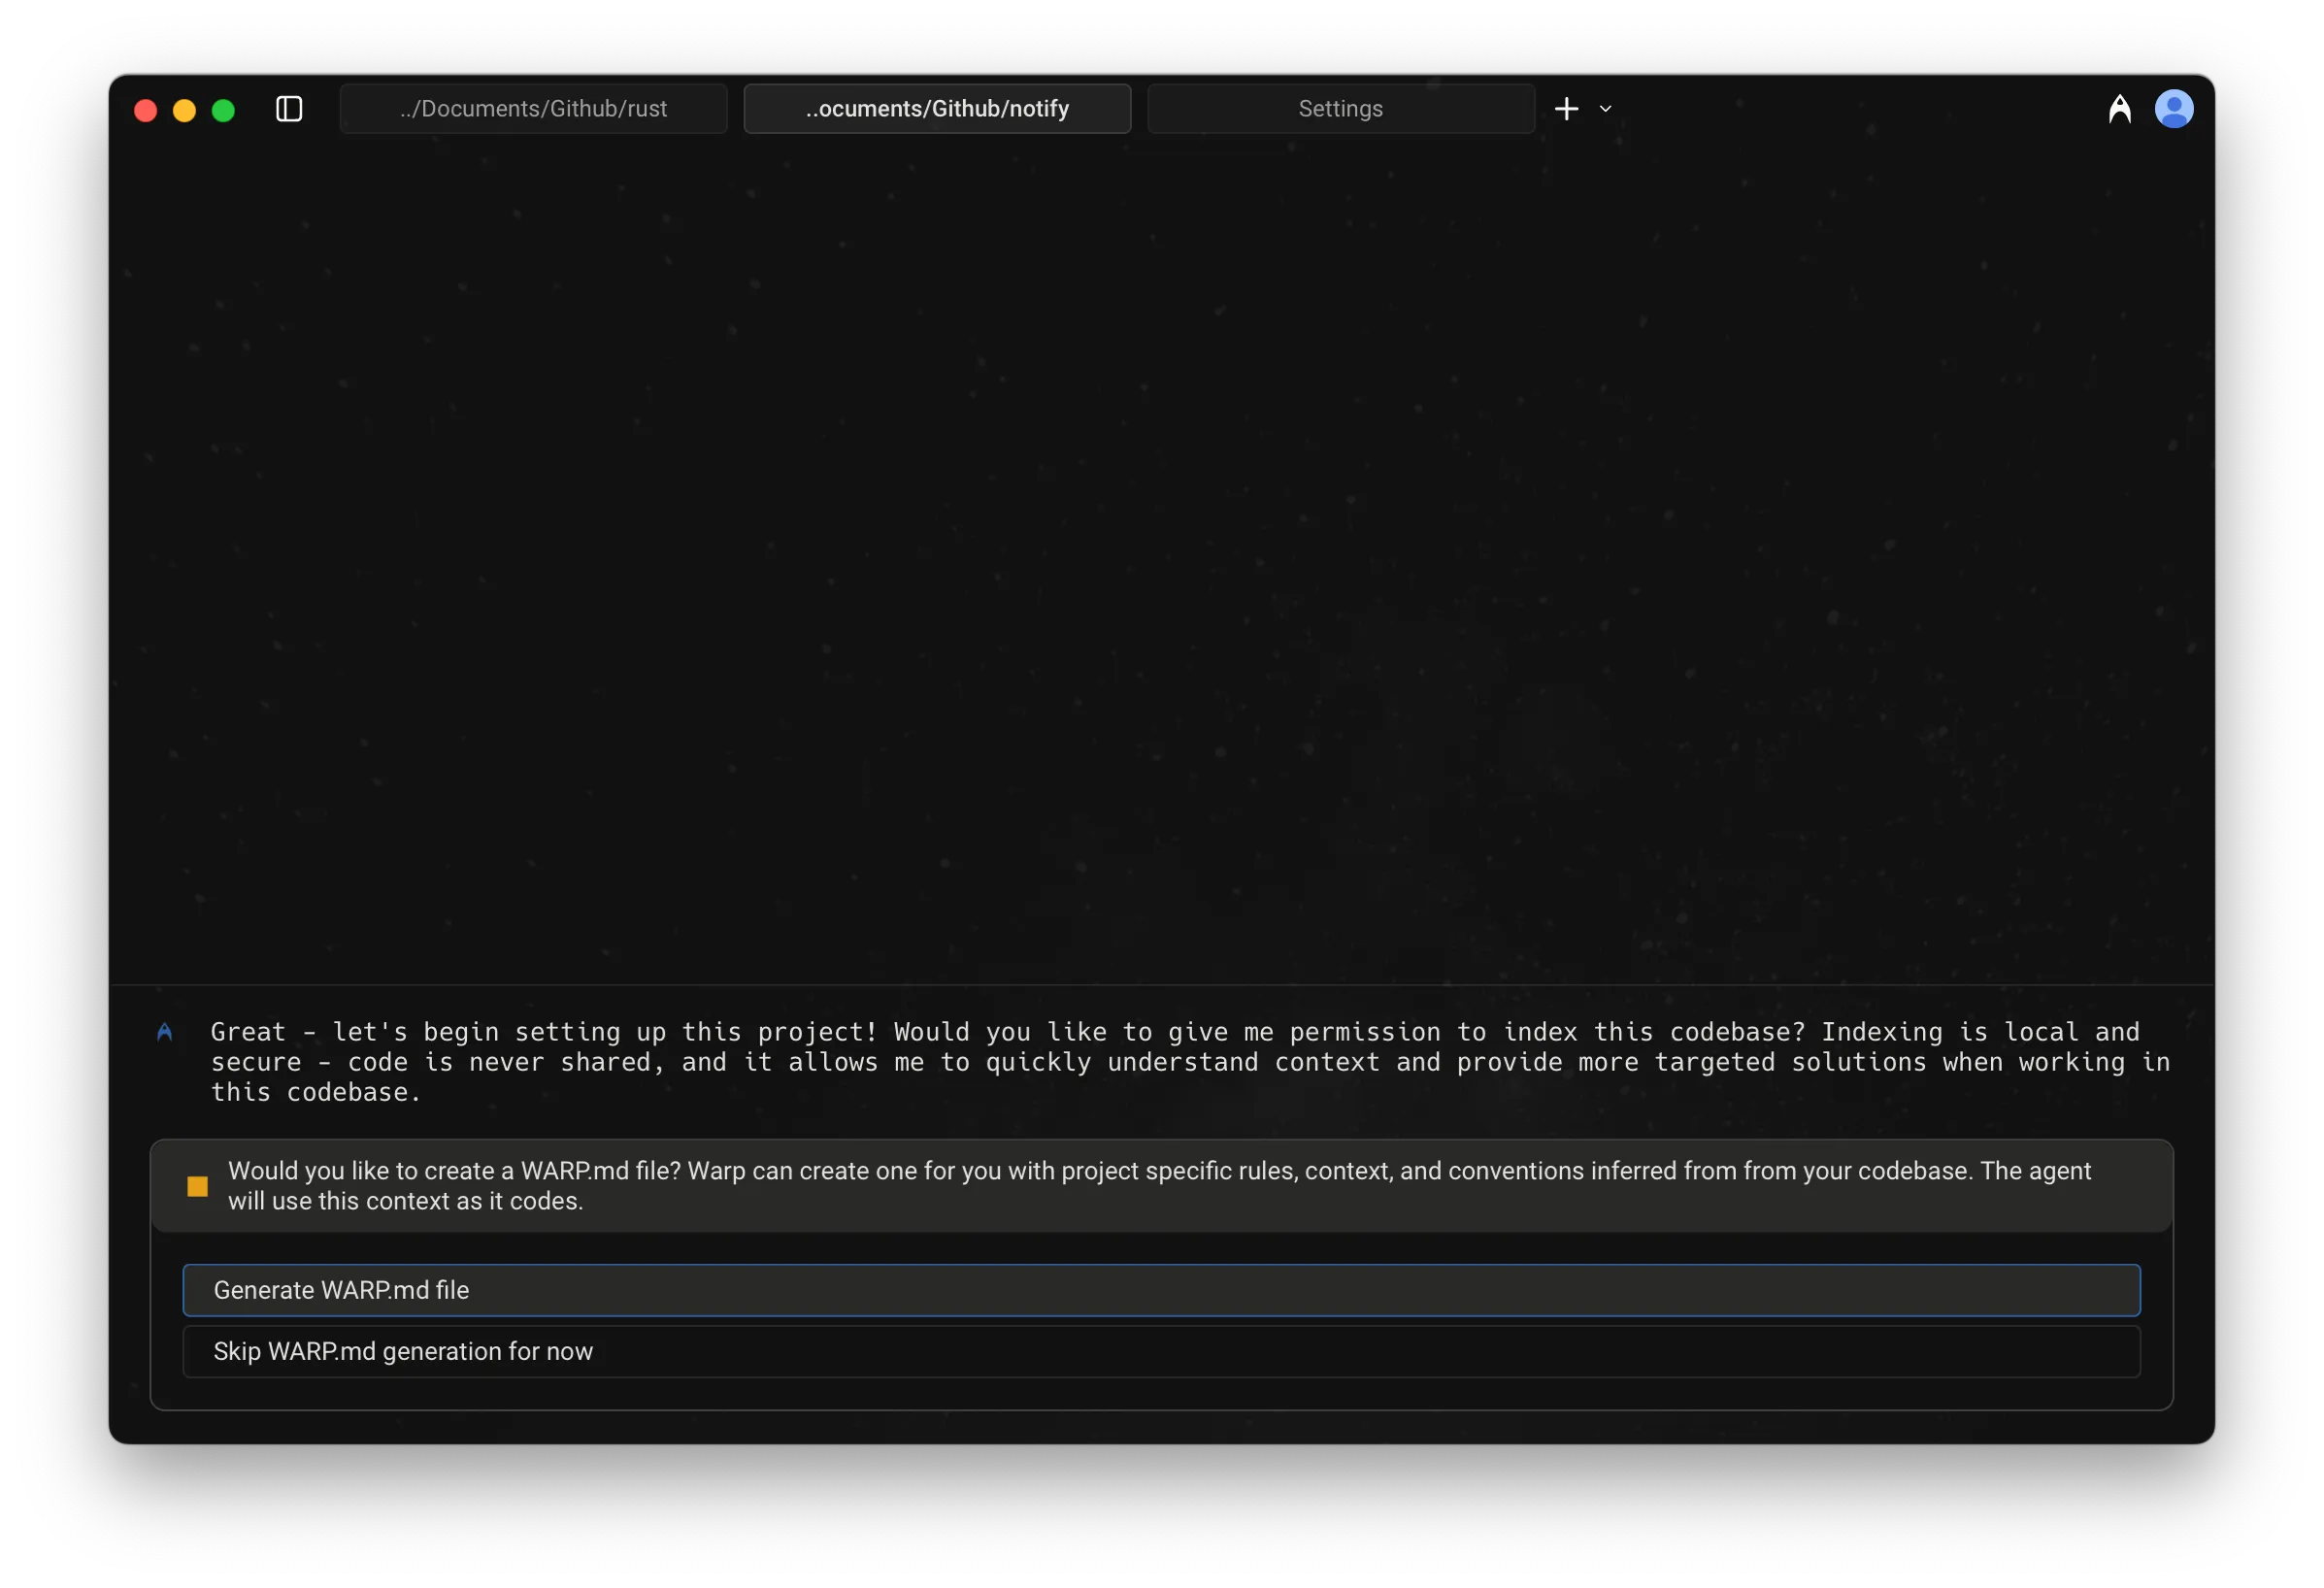 The /init setup flow, step 1 of 2. 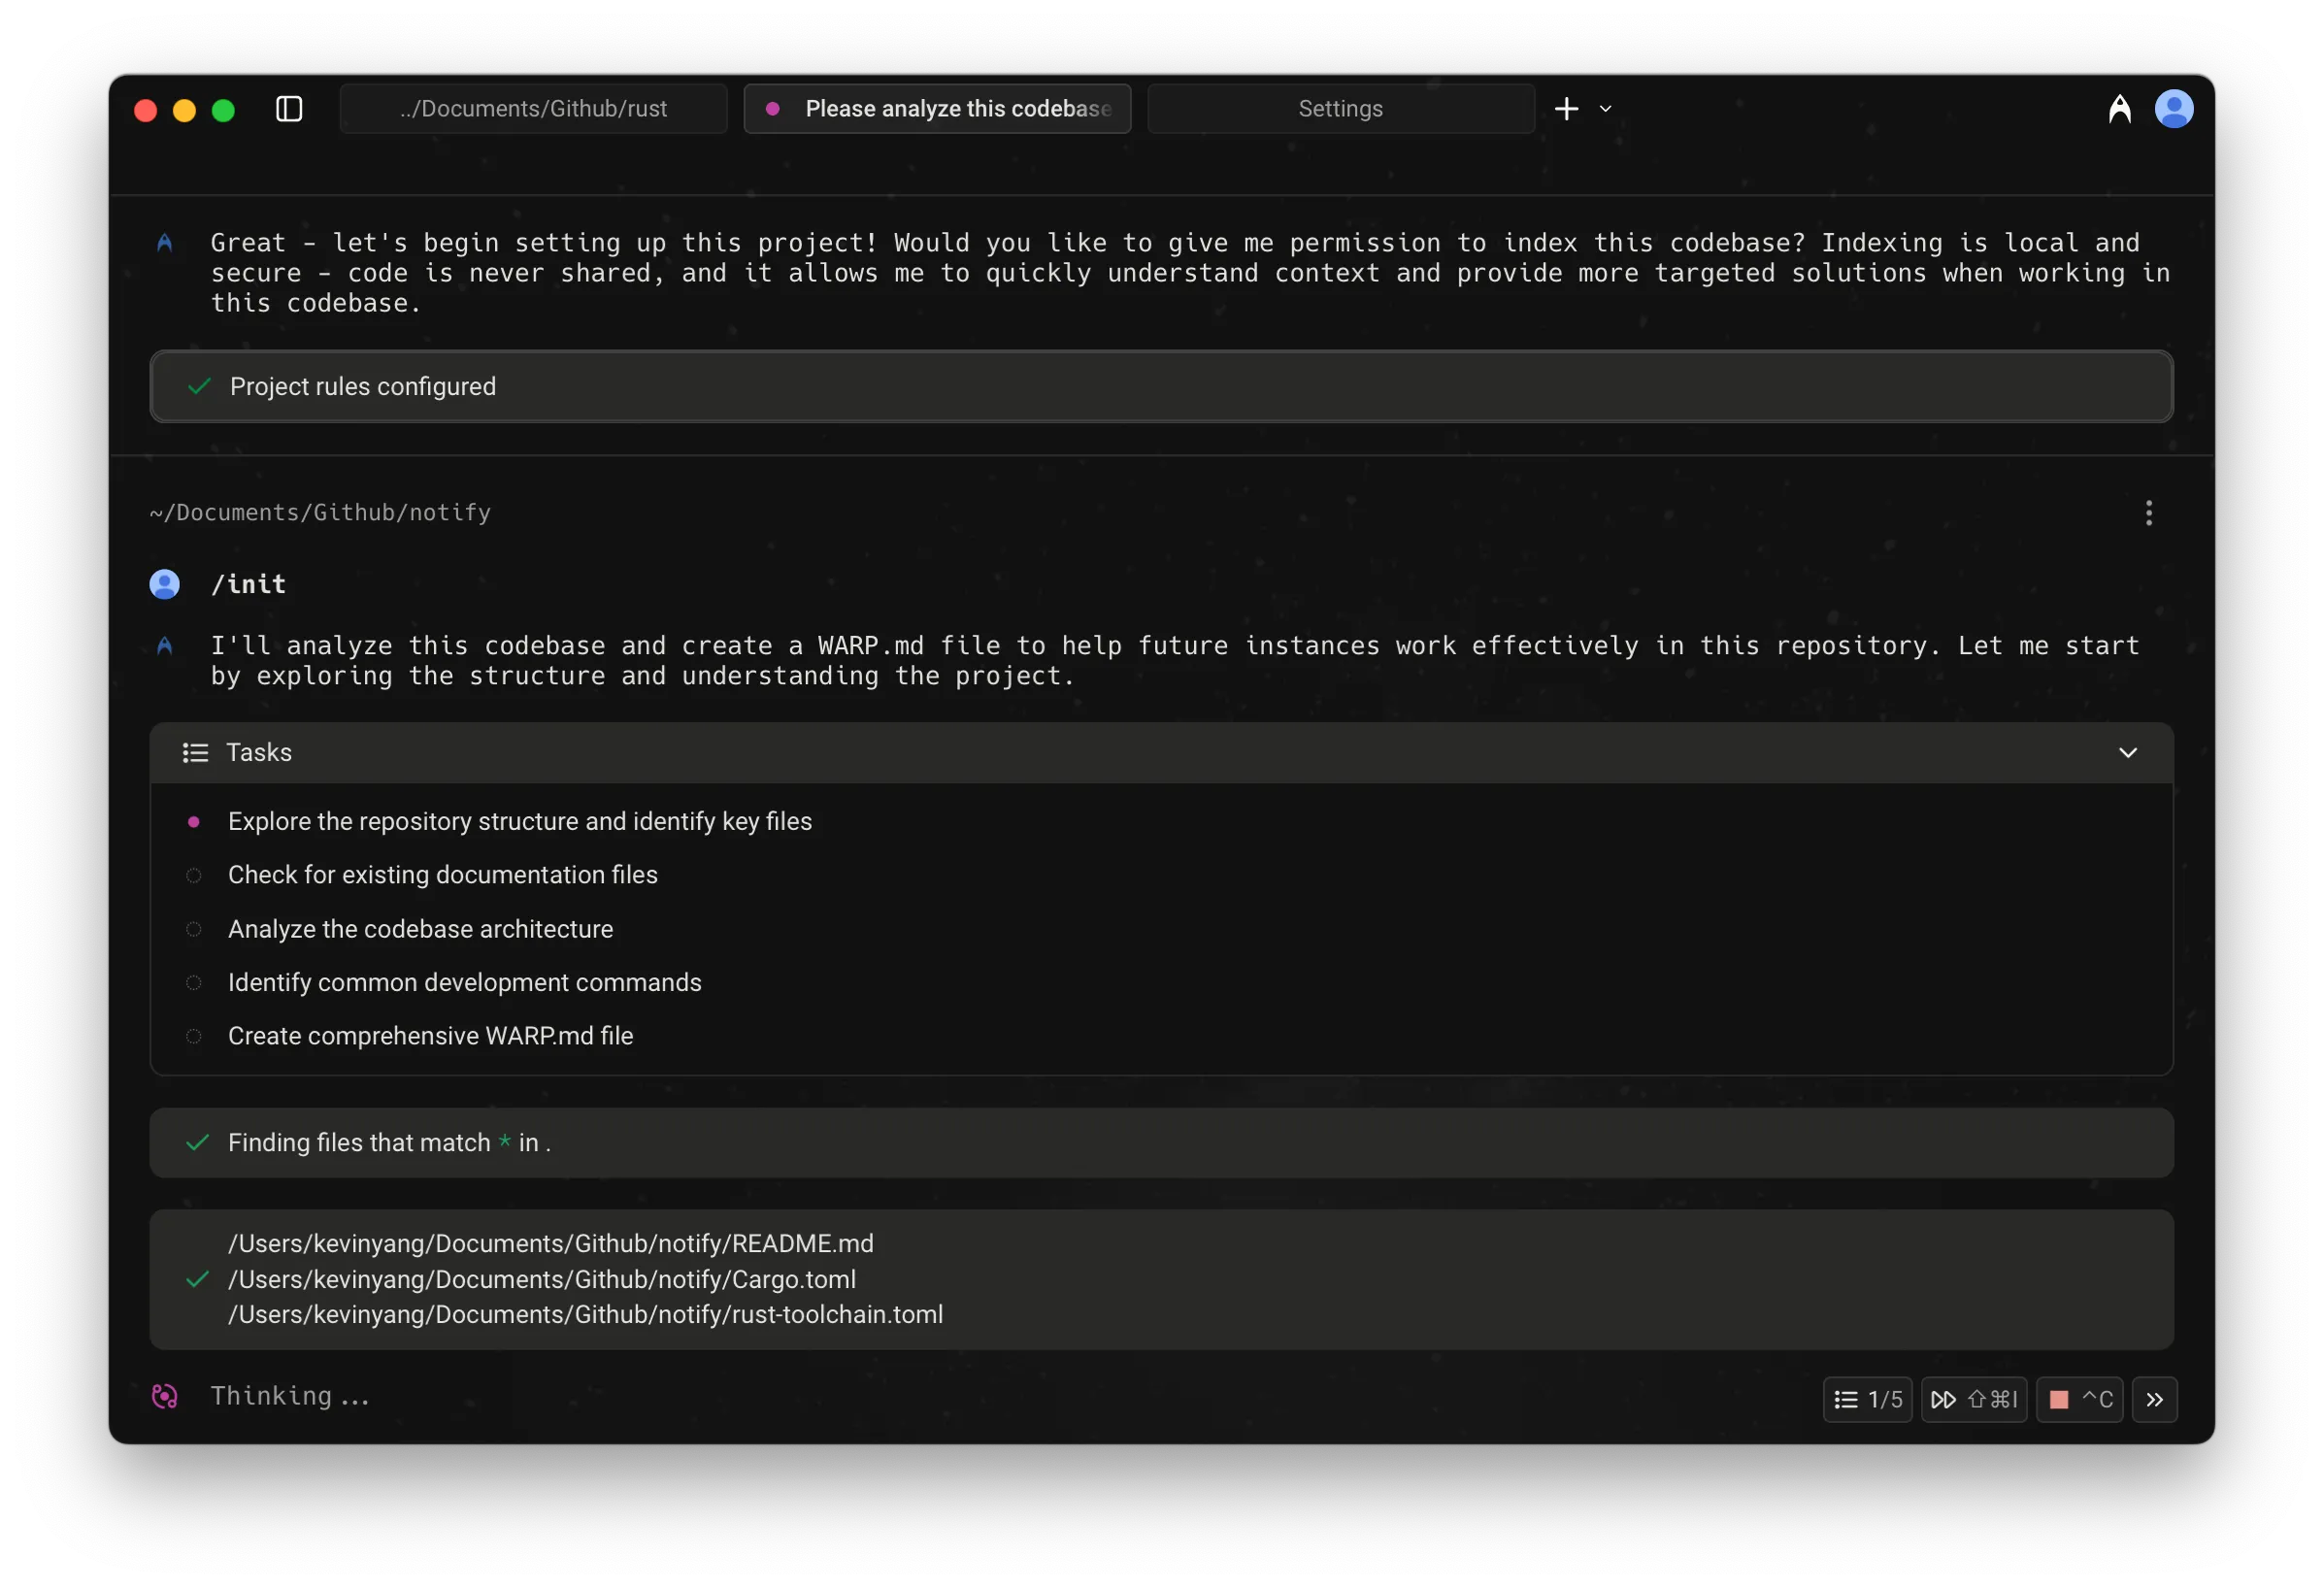 The /init setup flow, step 2 of 2.
# Agent Task Lists
Canonical page: [/agents/capabilities/task-lists/](https://docs.warp.dev/agents/capabilities/task-lists/)
> Track and manage complex Agent workflows with automatic task lists that break requests into clear, actionable steps and update progress in real time.
Task Lists let the Warp Agent automatically break down complex requests into clear, trackable steps. When a request requires multiple actions, the agent creates a structured list, executes each step in order, and tracks progress in real time. No configuration is needed—the agent detects and creates task lists automatically. 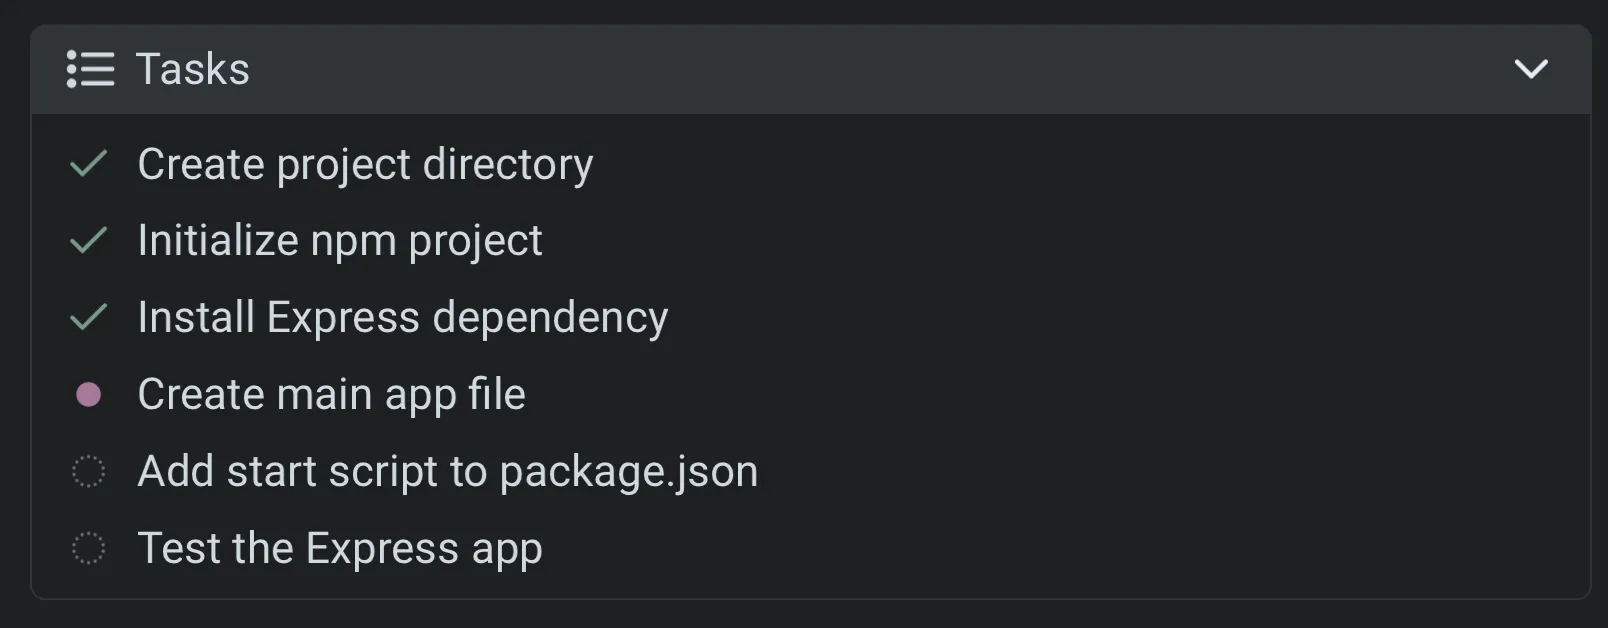 An example of a Task List in progress. ### How task lists work [Section titled “How task lists work”](#how-task-lists-work) 1. **Automatic task creation** — For complex requests, the Agent generates a structured list of tasks to complete. 2. **Step-by-step execution** — The Agent works through each task in sequence, updating statuses in real time. 3. **Summary** — Once all tasks are complete, the Agent provides a concise summary of what was done, including outputs, results, and relevant context. If any tasks were skipped or couldn’t be completed, it explains why. After each step is completed, there is also a completion marker in the Agent conversation. 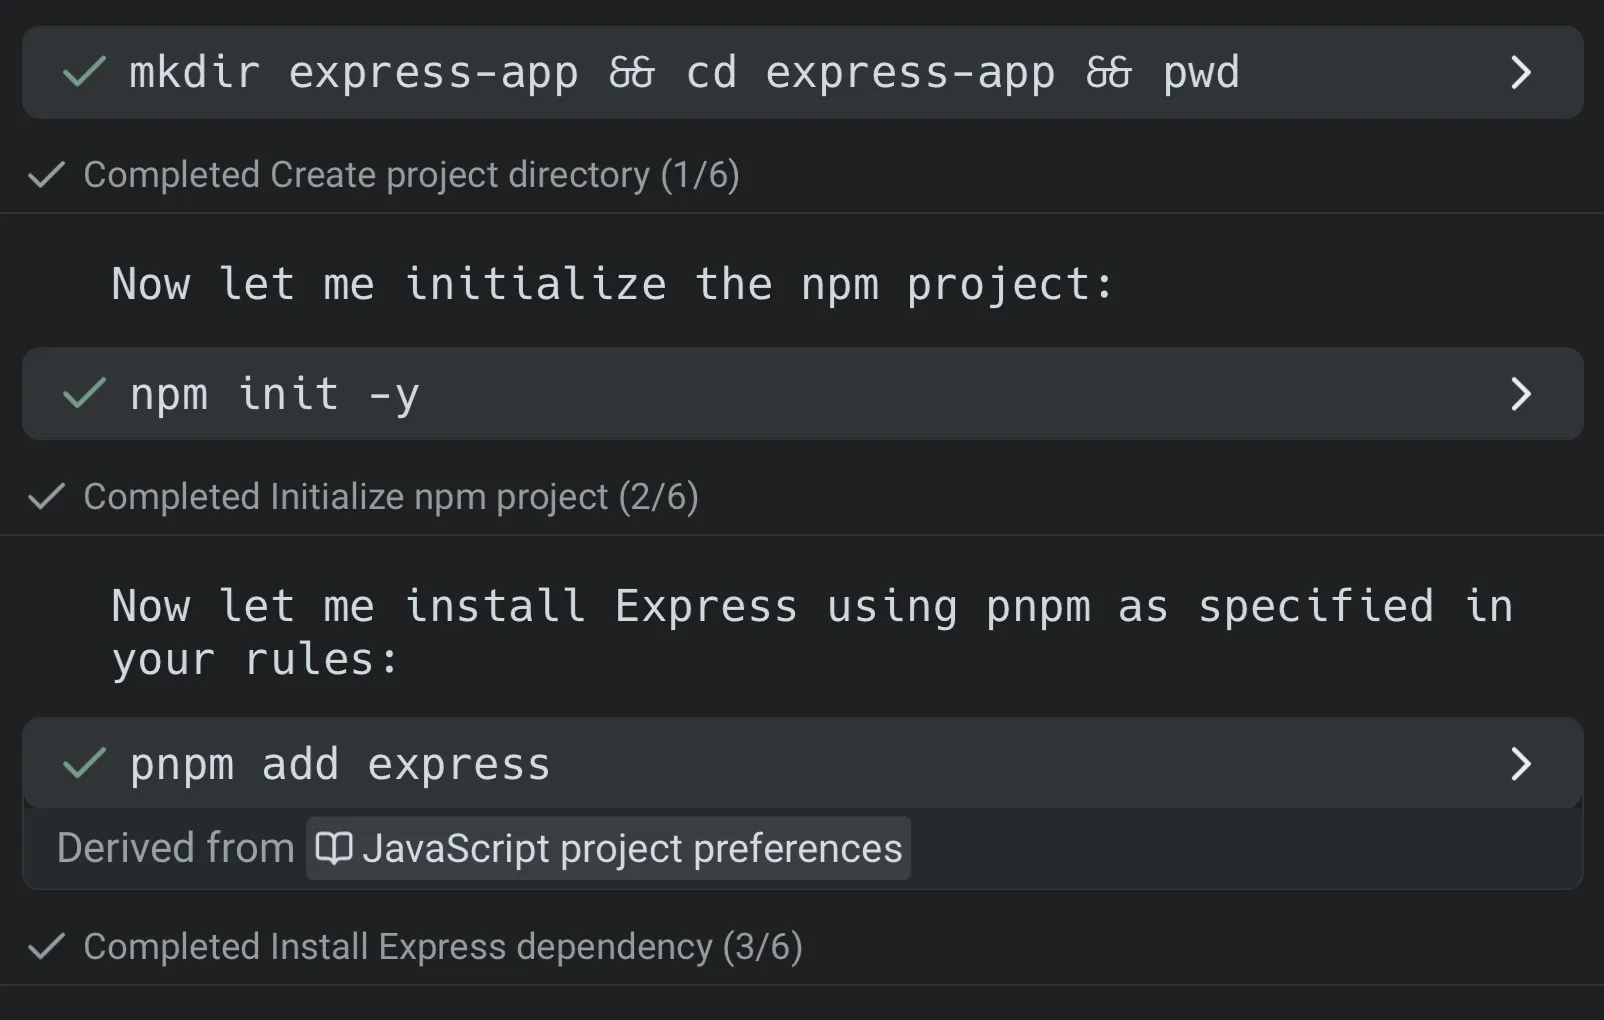 Task completion markers in a conversation. ### Task statuses [Section titled “Task statuses”](#task-statuses) Each task in the list has a visual indicator so you can quickly see its progress. | Status | Icon | Meaning | | ------------ | ----------------- | ----------------------------------------------- | | Current task | ● (filled circle) | The Agent is actively working on this task. | | Completed | ✔︎ | The Agent has finished this task successfully. | | Not started | ○ (empty circle) | The task is in the queue but work hasn’t begun. | | Cancelled | ■ (filled square) | The task was stopped before completion. | 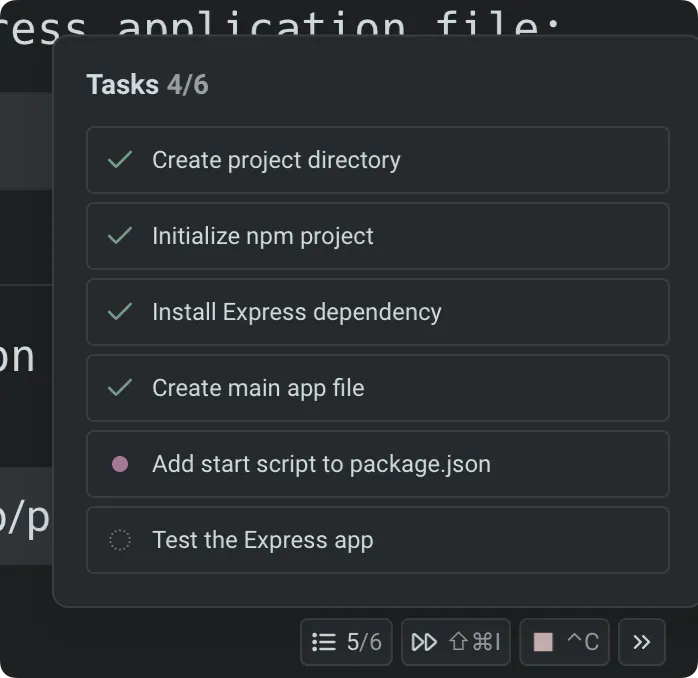 ### Task list access [Section titled “Task list access”](#task-list-access) During any Agent conversation, a task list chip appears at the bottom-right of the screen (when input is pinned to the bottom; otherwise, it may appear along the right side). * Click the chip to open the current task list. * You can collapse or expand the view at any time without interrupting the Agent. 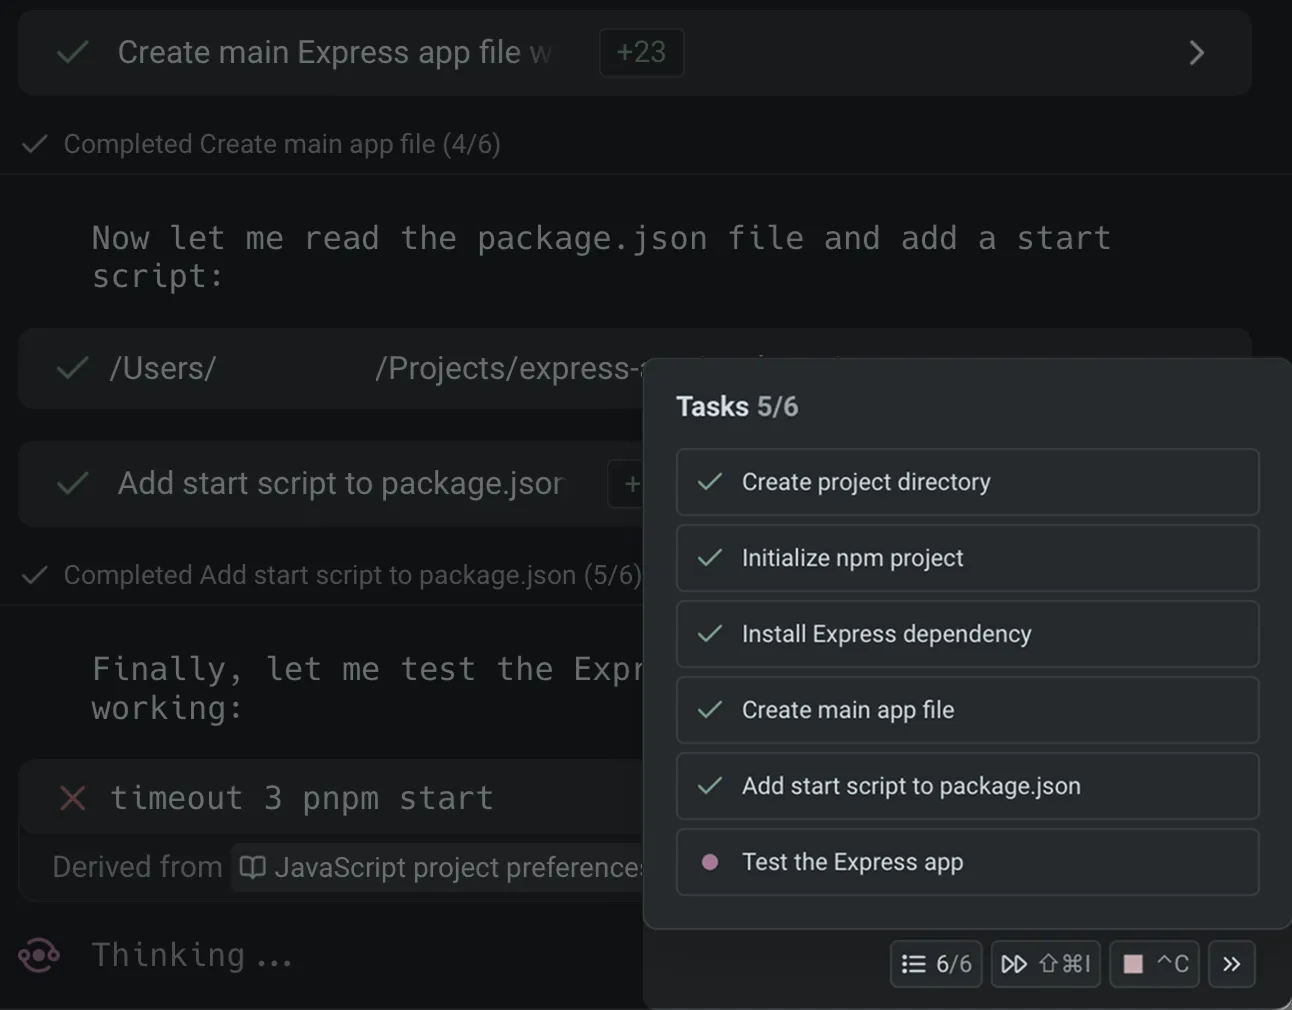 Task List chip in an agent conversation.
# Agent web search
Canonical page: [/agents/capabilities/web-search/](https://docs.warp.dev/agents/capabilities/web-search/)
> Warp’s web search lets agents pull in real-time information, documentation, and cited sources whenever it improves an answer.
Warp includes native web search for models that support first-party search tools. When enabled, agents can look up information in real time, consult documentation, retrieve current version numbers, and cite the sources used to generate responses. [Web search in Warp](https://www.loom.com/embed/06a4ba98f2e0446d80cb37aa4c23848c) This page covers how web search works, supported models, what you can expect inside Warp, configuration options, and how this differs from attaching URLs directly to a prompt. *** ### When the Agent uses web search [Section titled “When the Agent uses web search”](#when-the-agent-uses-web-search) Models initiate a web search when it improves the quality or accuracy of an answer. **Common scenarios include:** * Retrieving official documentation or API references * Getting the latest version of a library or tool * Checking error messages, GitHub issues, or Stack Overflow discussions * Looking up ongoing incidents or recent changes * Answering questions where recency matters (e.g., “best approach in 2025 to…”) Web searches are automatically triggered when the model considers them useful. You don’t need special syntax. ### How web search works in Warp [Section titled “How web search works in Warp”](#how-web-search-works-in-warp) **When a search occurs:** 1. Warp shows a “Searching the web…” indicator inside the conversation. 2. You can expand the search result to view: * The query issued * The pages retrieved 3. **The model reads results and produces a grounded response.** * Claude models cite sources in the references footer. * OpenAI models use inline citations and also show references in the footer. ### Supported and unsupported models [Section titled “Supported and unsupported models”](#supported-and-unsupported-models) Web search is available only for models that offer a native web search integration, that works in tandem with other custom tools. **Models that support web search** * Anthropic: `Claude Opus 5.5`, `Claude 4.6 Series`, `Claude 4.5 Series`, `Claude 4 Series` * OpenAI: * `GPT-6 Astra`, `GPT-6.1 Sol`, `GPT-6 Sol`, `GPT-6 Luna` * `GPT-5.4`, `GPT-5.3 Codex`, `GPT-5.2 Codex`, `GPT-5.2` Warp uses each vendor’s official tool: * [Claude web search tool documentation](https://docs.claude.com/en/docs/agents-and-tools/tool-use/web-search-tool) * [OpenAI web search tool documentation](https://developers.openai.com/api/docs/guides/tools-web-search) ### Viewing search results [Section titled “Viewing search results”](#viewing-search-results) You can inspect the web search UI at any time: * Expand the **Web Search** section in the agent response * You can see: * The list of pages fetched * The text used to answer your question * Citations and reference metadata 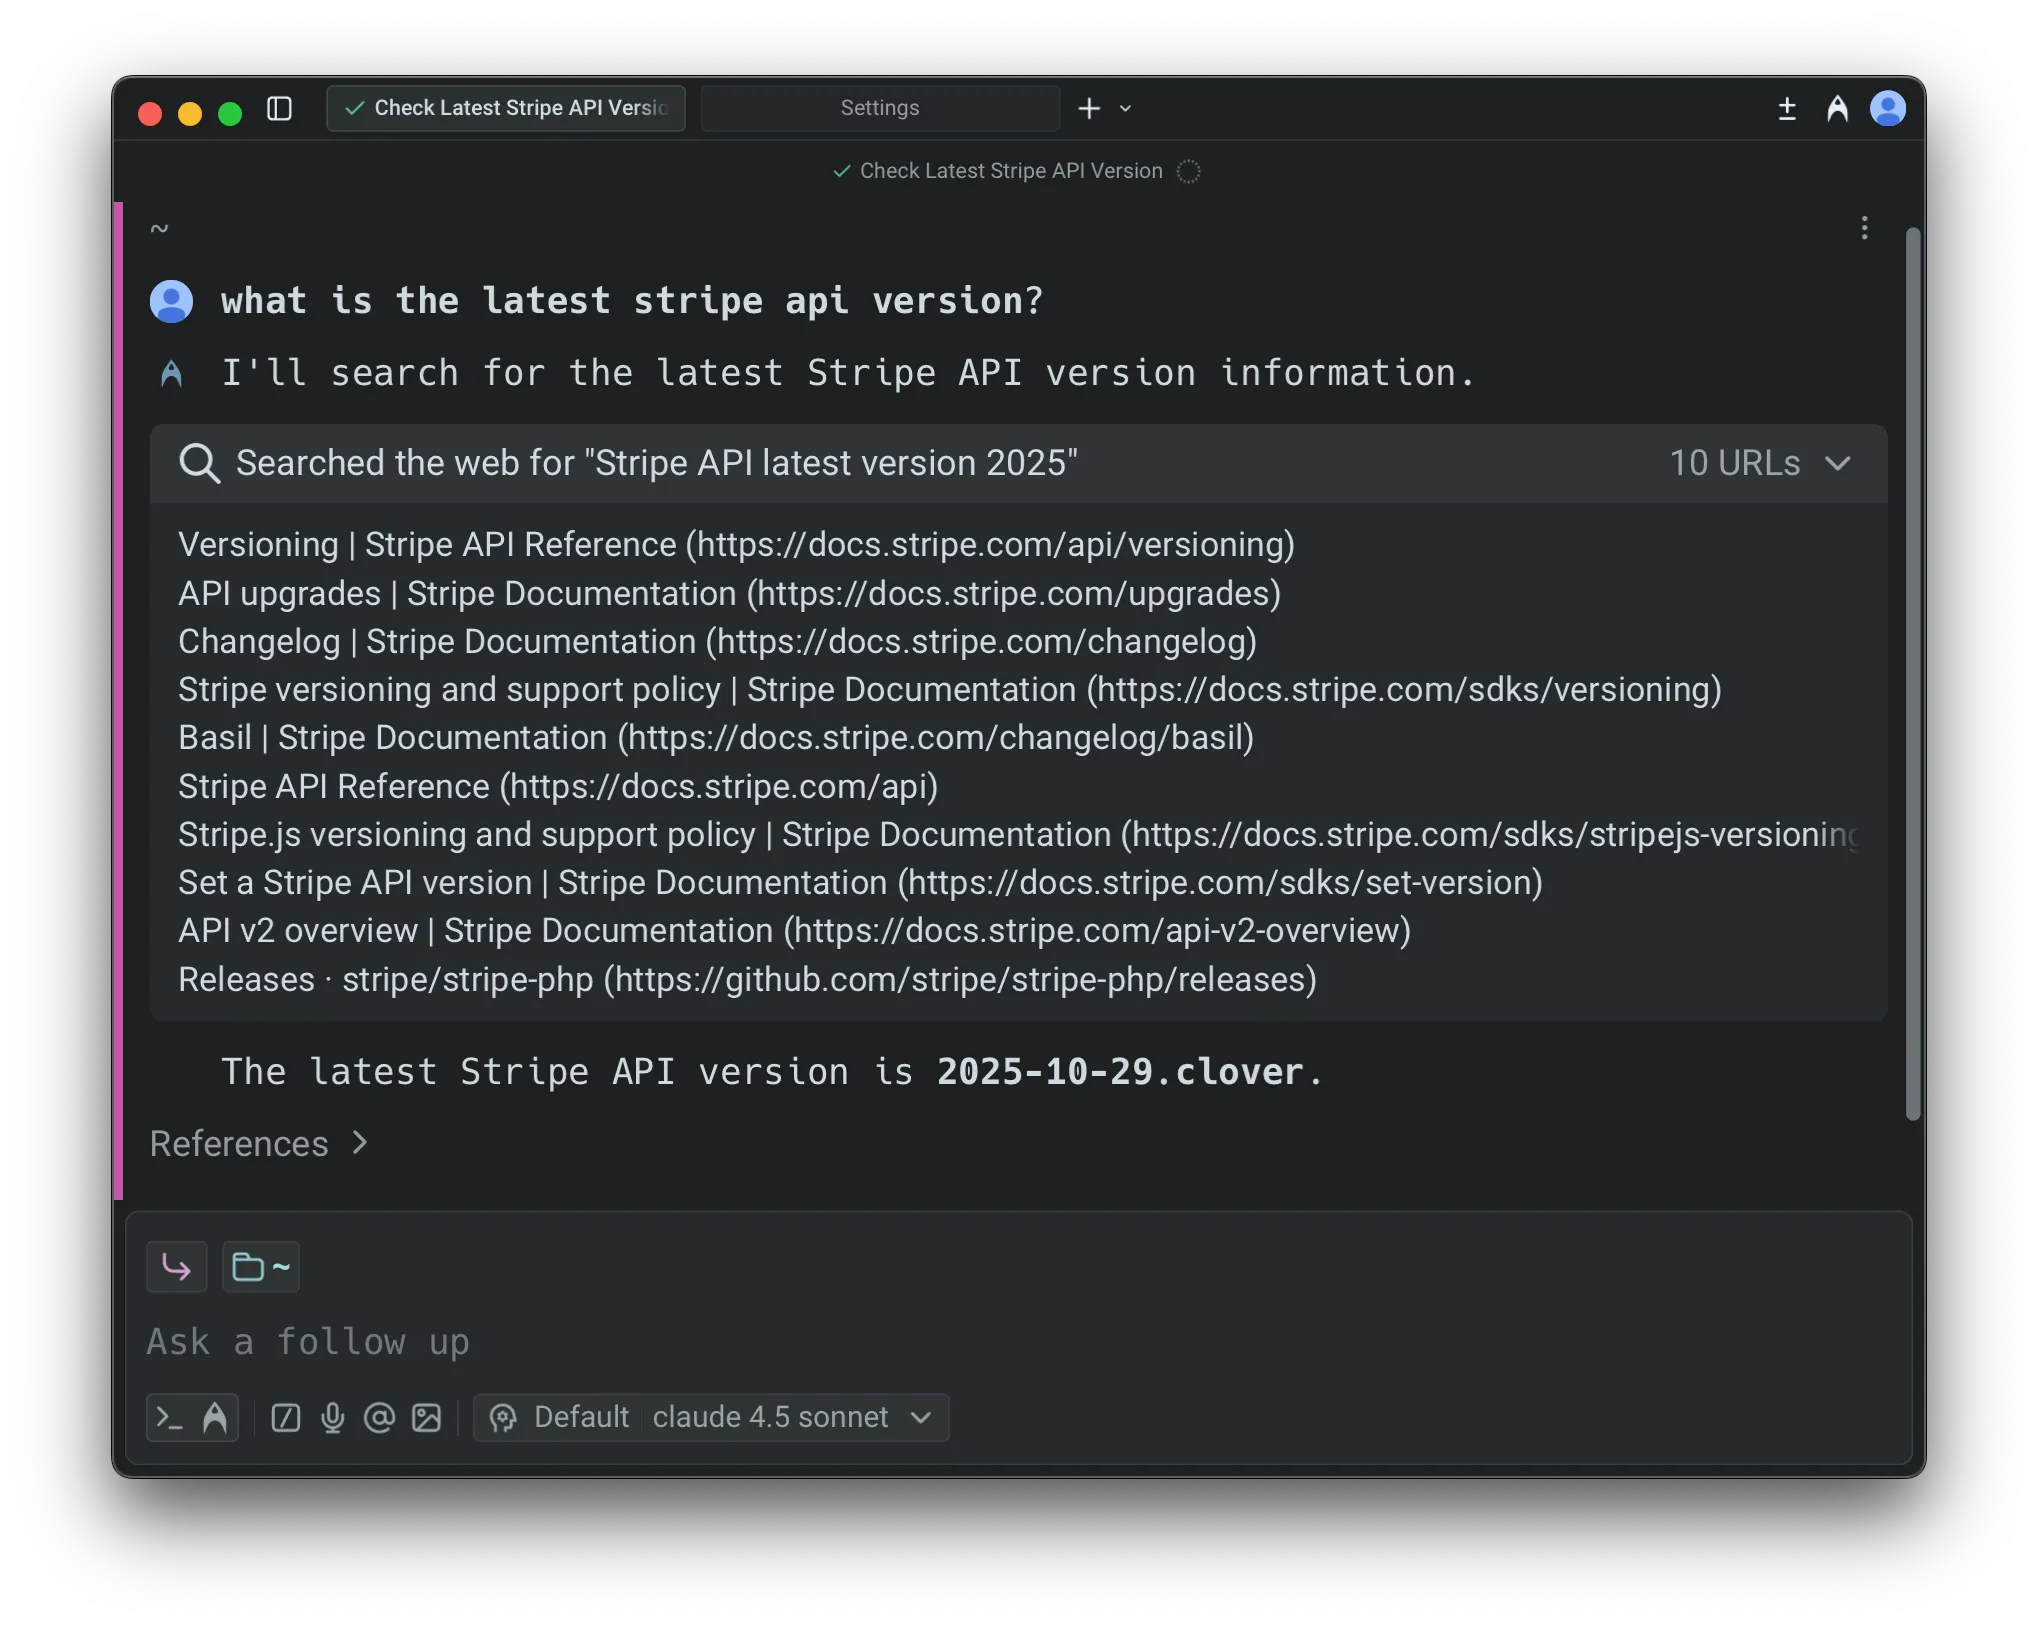 This makes it easy to verify accuracy, audit reasoning, and validate sources. ### Enabling or disabling web search [Section titled “Enabling or disabling web search”](#enabling-or-disabling-web-search) Web search is controlled per [Profiles & Permissions](/agents/capabilities/agent-profiles-permissions/). To configure: 1. In the Warp app, navigate to **Settings** > **Agents** > **Profiles**. 2. Next to the agent profile, click **Edit**. 3. Scroll to **Call web tools** and toggle the setting on or off. 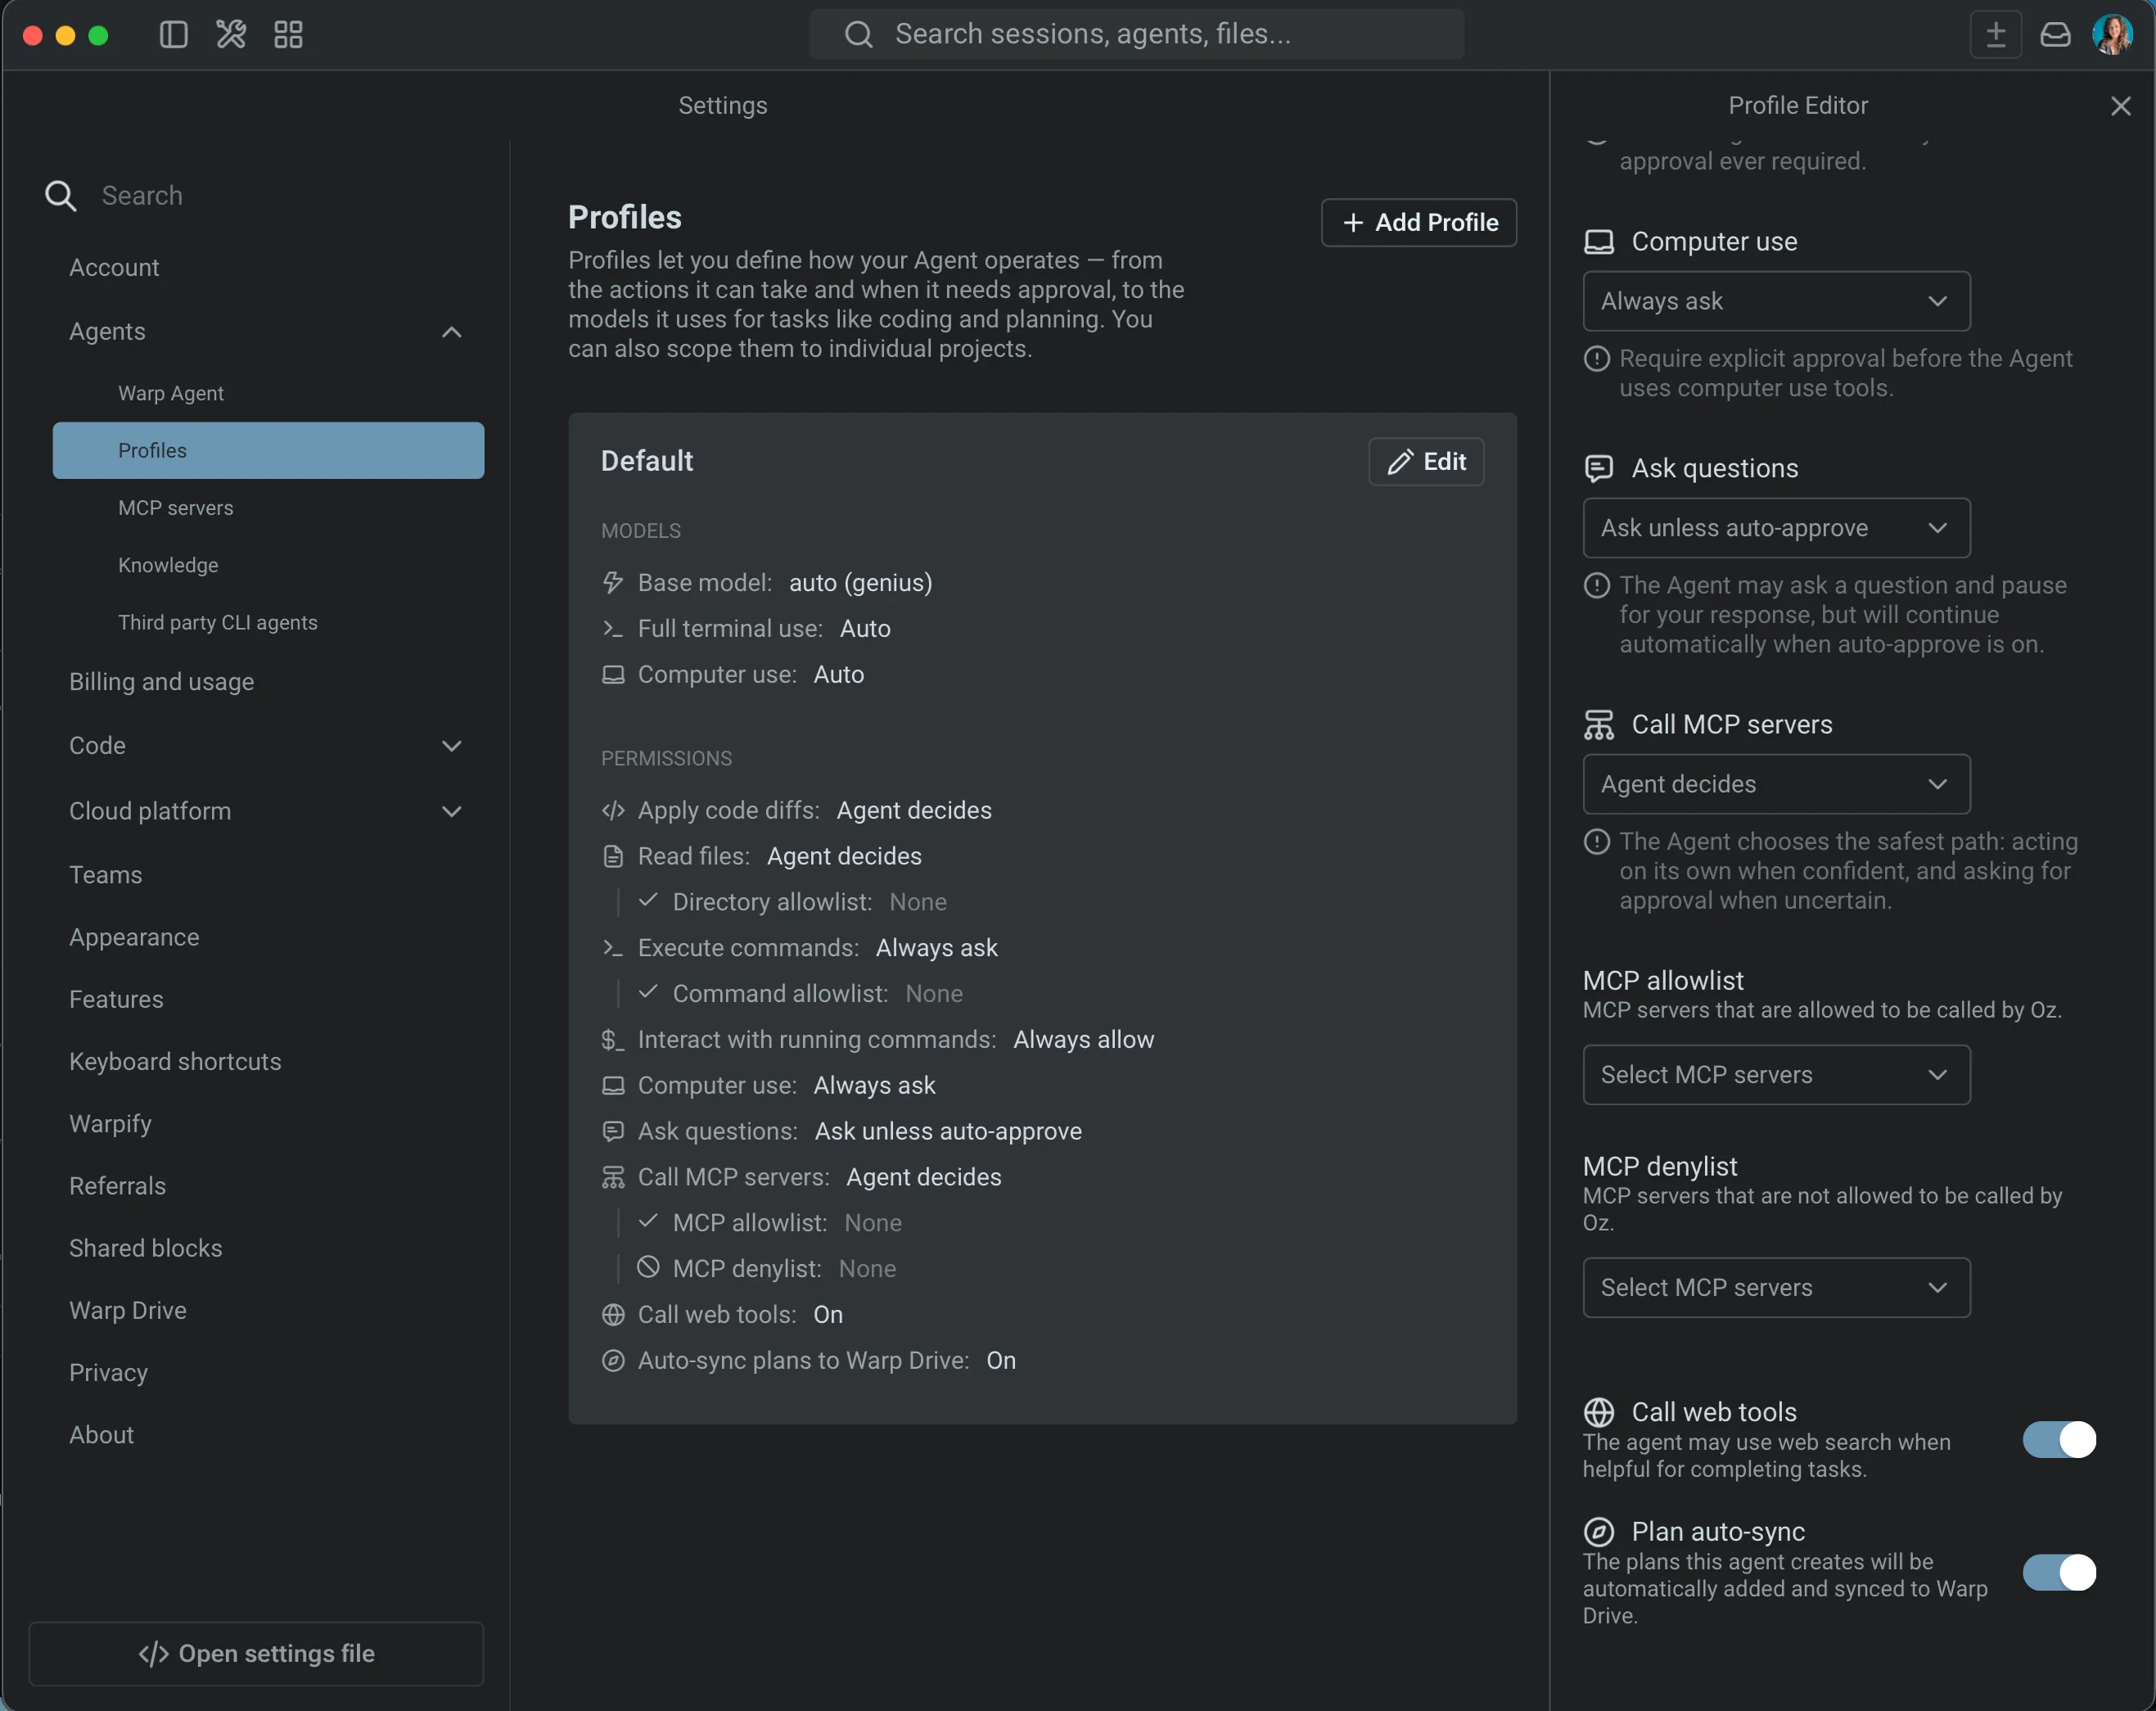 Disabling this prevents the agent from performing searches, even if a model would normally use them. ### Credit usage [Section titled “Credit usage”](#credit-usage) Web search incurs two types of credit usage: 1. A small fixed cost per search invocation 2. Additional cost proportional to retrieved content, since retrieved text is passed to the model You’ll see these contributions itemized in the conversation’s credit usage footer, alongside model calls, planning calls, and other tool usage.
# Warp Agent CLI overview
Canonical page: [/agents/cli/](https://docs.warp.dev/agents/cli/)
> Run the Warp Agent in any terminal with the Warp Agent CLI. Prompt the agent, run shell commands, and hand work off to cloud agents.
The Warp Agent CLI brings the Warp Agent from the Warp app to the terminal you already use. Run the `warp` command to start an agent conversation. You can prompt the agent in natural language, review and approve its actions, and run shell commands in the same input, without changing your terminal setup. ## What is the Warp Agent CLI? [Section titled “What is the Warp Agent CLI?”](#what-is-the-warp-agent-cli) The Warp Agent CLI is a standalone terminal program that runs [the Warp Agent](/platform/harnesses/warp-agent/), the same agent that powers the Warp app. It renders conversations as a scrolling transcript in your terminal, with streaming responses, code diffs, tool calls, and permission requests you approve inline. The CLI is also a native terminal multiplexer. It creates and maintains its own pseudoterminal (PTY), which lets you and the agent execute commands and interact with running processes through the same terminal, including prompts and full-screen terminal apps. Because it’s a regular command-line program, it works in any terminal emulator, including over SSH. To get a working setup in a few minutes, follow the [quickstart](/agents/cli/quickstart/). ## Key features [Section titled “Key features”](#key-features) * **[Agent conversations](/agents/cli/agent-conversations/)** - Follow the agent’s work in a scrollable transcript with streamed responses, Markdown formatting, file-edit diffs, tool calls, plans, and task lists. * **[Shell commands](/agents/cli/input-and-shell-commands/#shell-mode)** - Run shell commands from the same input you use to prompt the agent, including long-running and interactive ones. * **[Permissions and profiles](/agents/cli/permissions-and-profiles/)** - Approve commands and file edits from inline request cards, or configure execution profiles and auto-approve. * **[Persistent conversations](/agents/cli/agent-conversations/#managing-conversations)** - Conversations save to your Warp account, so you can exit and resume later or switch between them. * **[Cloud handoff and orchestration](/agents/cli/cloud-and-orchestration/)** - Hand off a conversation to a cloud agent, continue cloud runs in the CLI, and coordinate multiple agents. * **[Project context](/agents/cli/configuration/#project-context-and-rules)** - The agent automatically picks up your project’s rules (like `AGENTS.md`), skills, and MCP servers. * **[Model choice](/agents/cli/models-and-usage/)** - Pick a model per conversation, bring your own provider API keys, and track credit usage. * **[Customization](/agents/cli/configuration/)** - Configure themes, the statusline, and the start screen through a local settings file. ## How it relates to the Warp app and cloud agents [Section titled “How it relates to the Warp app and cloud agents”](#how-it-relates-to-the-warp-app-and-cloud-agents) * **The Warp app** - The CLI runs the same [Warp Agent](/platform/harnesses/warp-agent/) harness as the Warp app, so your account, plan, model access, rules, and skills work the same in both. The CLI doesn’t require the Warp app to be installed. * **Automation Platform** - The Automation Platform is Warp’s programmable platform for running and coordinating agents at scale. The CLI connects to the same platform. Conversations sync to your Warp account, and you can hand work off to [cloud agents](/agents/cli/cloud-and-orchestration/) or continue a cloud run from your terminal. ## Checking your account, plan, and billing [Section titled “Checking your account, plan, and billing”](#checking-your-account-plan-and-billing) The CLI has slash commands for the account details you’d otherwise look up in the Warp app or the Oz web app. * **Session and account status** - Run `/status` to open a read-only panel with the installed version, the current conversation’s name and ID, the working directory, and the organization and email you’re signed in as. Press `Esc` to close it. Include these details when you report a problem. * **Upgrade your plan** - Run `/upgrade` to open Warp’s upgrade page in your browser. * **Manage team billing** - Run `/manage-billing` to open your team’s billing page in your browser. The command is listed only when you administer billing for your team. For how usage is metered as you work, see [models and usage](/agents/cli/models-and-usage/#usage-and-cost). ## Coming from the Warp app [Section titled “Coming from the Warp app”](#coming-from-the-warp-app) If you already use the Warp app, most of your setup carries over. Rules and skills are discovered from the same shared paths, and your saved Warp Drive prompts are available after you log in (other Warp Drive object types aren’t available in the CLI). To copy compatible settings and global MCP server configurations, run the bundled `/tui-migrate-setup` skill and follow the agent’s instructions. Credentials are never copied, so MCP servers that require authentication must be reauthenticated in the CLI. ## Next steps [Section titled “Next steps”](#next-steps) * [Quickstart](/agents/cli/quickstart/) - Install the CLI, log in, run your first prompt, and see the supported platforms. * [Agent conversations](/agents/cli/agent-conversations/) - Learn how the transcript, diffs, and approvals work. * [Input and shell commands](/agents/cli/input-and-shell-commands/) - Compose prompts and run shell commands from the same input. * [Configuration](/agents/cli/configuration/) - Customize the CLI with the settings file. * [Reference](/agents/cli/reference/) - Flags, slash commands, and keyboard shortcuts. * [Uninstall the Warp Agent CLI](/support-and-community/troubleshooting-and-support/logging-out-and-uninstalling/#uninstalling-the-warp-agent-cli) - Remove the CLI without removing the Warp app.
# Claude Code in Warp
Canonical page: [/agents/cli-agents/claude-code/](https://docs.warp.dev/agents/cli-agents/claude-code/)
> Set up Claude Code in Warp with full notification support, rich input, code review, and more.
Claude Code is Anthropic’s agentic coding tool that operates directly in your terminal. It understands your codebase, executes commands, edits files, and manages Git workflows — all through natural language. For full documentation, see the [official Claude Code docs](https://code.claude.com/docs). Warp auto-detects Claude Code when you run it, giving you access to rich input controls, code review, agent notifications, and other integrated features. For a product overview, see [Claude Code in Warp](https://www.warp.dev/agents/claude-code). For installation, authentication, project configuration, and productivity tips, see the [How to set up Claude Code](/guides/external-tools/how-to-set-up-claude-code/) guide. ## Setting up notifications [Section titled “Setting up notifications”](#setting-up-notifications) Warp supports agent notifications for Claude Code through a plugin. Once installed, Warp surfaces in-app and desktop alerts when Claude Code needs your input — such as command approval, code review, or error intervention. ### Auto-install [Section titled “Auto-install”](#auto-install) Each time you run Claude Code in Warp without the notification plugin installed, a notification chip appears offering one-click installation. Click the chip to install the plugin automatically. After installation, Warp immediately starts receiving notifications from Claude Code. ### Manual install [Section titled “Manual install”](#manual-install) If the auto-install chip doesn’t appear or fails to install the plugin, install it manually. From inside Claude Code, run:
```bash
/plugin marketplace add warpdotdev/claude-code-warp
/plugin install warp@claude-code-warp
```
Or from your terminal (outside of Claude Code):
```bash
claude plugin marketplace add warpdotdev/claude-code-warp
claude plugin install warp@claude-code-warp
```
After installing, restart Claude Code or run `/reload-plugins` to activate the plugin. ### Installation instructions banner [Section titled “Installation instructions banner”](#installation-instructions-banner) If the auto-install chip doesn’t work, or if you’re running Claude Code over SSH or on a remote machine, Warp displays an installation instructions banner directly in the terminal. The banner shows step-by-step commands that you can run in place — no need to switch between tabs or copy-paste from external documentation. For plugin source and updates, see the [claude-code-warp GitHub repository](https://github.com/warpdotdev/claude-code-warp). ## Supported Warp features [Section titled “Supported Warp features”](#supported-warp-features) Claude Code supports Warp’s full set of agent integration features: * **Agent notifications** - Receive in-app and desktop alerts when Claude Code needs your attention. The notification UI displays your current git branch alongside agent status. * **Rich input editor** - Press `Ctrl-G` to open an expanded input editor for composing longer prompts. * **Code review** - Send inline review comments directly to the agent from Warp’s code review panel. * **Attach code as context** - Select code and send it to the agent as context. * **Vertical tabs with agent metadata** - Monitor Claude Code sessions with status indicators in Warp’s tab bar. * **Tab Configs** - Save and restore Claude Code session configurations. * **[Remote Control](/agents/cli-agents/remote-control/)** - Publish your Claude Code session so you can monitor and steer it from another device. Claude Code sessions do **not** appear in the Conversation Panel or Agent Management Panel. Those surfaces list Warp Agent conversations and cloud runs. For where third-party CLI agents show up, see [Third-party CLI agents overview](/agents/cli-agents/overview/#where-third-party-cli-agents-appear). ## Related pages [Section titled “Related pages”](#related-pages) * [How to set up Claude Code](/guides/external-tools/how-to-set-up-claude-code/) — step-by-step setup guide * [Claude Code in Warp](https://www.warp.dev/agents/claude-code) — product overview * [Third-party CLI agents overview](/agents/cli-agents/overview/) — supported CLI agent integrations * [Remote Control](/agents/cli-agents/remote-control/) — publish a Claude Code session to monitor and steer it remotely * [Claude Code with the Automation Platform](/platform/harnesses/claude-code/) — Claude Code as a cloud harness * [OpenCode](/agents/cli-agents/opencode/) — OpenCode in Warp * [Codex](/agents/cli-agents/codex/) — Codex in Warp
# Codex CLI in Warp
Canonical page: [/agents/cli-agents/codex/](https://docs.warp.dev/agents/cli-agents/codex/)
> Set up Codex in Warp with notification support, rich input, code review, and more.
Codex is OpenAI’s open-source coding agent that runs in your terminal. It can write and edit code, execute commands, and navigate your codebase through natural language. For full documentation, see the [Codex GitHub repository](https://github.com/openai/codex). Warp auto-detects Codex when you run it, giving you access to rich input controls, code review, and other integrated features. For a product overview, see [Codex in Warp](https://www.warp.dev/agents/codex). For installation, authentication, project configuration, and productivity tips, see the [How to set up Codex CLI](/guides/external-tools/how-to-set-up-codex-cli/) guide. ## Setting up notifications [Section titled “Setting up notifications”](#setting-up-notifications) Warp surfaces Codex activity as in-app and desktop alerts — such as when Codex completes a task, encounters an error, or needs your input. This is powered by the Warp plugin for Codex, published from the [warpdotdev/codex-warp](https://github.com/warpdotdev/codex-warp) plugin marketplace. When Warp detects a Codex session without the plugin, it shows an install chip in the terminal. Click the chip to install the plugin, then restart Codex. Warp shows an update chip the same way when a newer plugin version is required. To install the plugin yourself, add the marketplace and the plugin:
```bash
codex plugin marketplace add warpdotdev/codex-warp
codex plugin add warp@codex-warp
```
Restart Codex to activate the plugin. To update it later, upgrade the marketplace and reinstall the plugin:
```bash
codex plugin marketplace upgrade codex-warp
codex plugin add warp@codex-warp
```
## Supported Warp features [Section titled “Supported Warp features”](#supported-warp-features) Codex supports Warp’s full set of agent integration features: * **Agent notifications** - Receive in-app and desktop alerts when Codex needs your attention. Requires the Warp plugin for Codex (see [Setting up notifications](#setting-up-notifications)). * **Rich input editor** - Press `Ctrl-G` to open an expanded input editor for composing longer prompts. * **Code review** - Send inline review comments directly to the agent from Warp’s code review panel. * **Attach code as context** - Select code and send it to the agent as context. * **Vertical tabs with agent metadata** - Monitor Codex sessions with status indicators in Warp’s tab bar. * **Tab Configs** - Save and restore Codex session configurations. * **[Remote Control](/agents/cli-agents/remote-control/)** - Publish your Codex session so you can monitor and steer it from another device. ## Related pages [Section titled “Related pages”](#related-pages) * [How to set up Codex CLI](/guides/external-tools/how-to-set-up-codex-cli/) — step-by-step setup guide * [Codex in Warp](https://www.warp.dev/agents/codex) — product overview * [Third-party CLI agents overview](/agents/cli-agents/overview/) — supported CLI agent integrations * [Codex with the Automation Platform](/platform/harnesses/codex/) — Codex as a cloud harness * [Claude Code](/agents/cli-agents/claude-code/) — Claude Code in Warp * [OpenCode](/agents/cli-agents/opencode/) — OpenCode in Warp
# OpenCode in Warp
Canonical page: [/agents/cli-agents/opencode/](https://docs.warp.dev/agents/cli-agents/opencode/)
> Set up OpenCode in Warp with notification support, rich input, code review, and more.
OpenCode is an open-source terminal-based coding agent. It connects to multiple LLM providers and supports tool use, file editing, and command execution from your terminal. For full documentation, see the [OpenCode docs](https://opencode.ai/docs). Warp auto-detects OpenCode when you run it, giving you access to rich input controls, code review, agent notifications, and other integrated features. For a product overview, see [OpenCode in Warp](https://www.warp.dev/agents/opencode). For installation, authentication, project configuration, and productivity tips, see the [How to set up OpenCode](/guides/external-tools/how-to-set-up-opencode/) guide. ## Setting up notifications [Section titled “Setting up notifications”](#setting-up-notifications) Warp supports agent notifications for OpenCode through a plugin. Once installed, Warp surfaces in-app and desktop alerts when OpenCode needs your input. To set up the plugin, add `"@warp-dot-dev/opencode-warp"` to the `plugin` array in your `opencode.jsonc` configuration file (or `opencode.json` if you use plain JSON):
```json
{
"plugin": ["@warp-dot-dev/opencode-warp"]
}
```
If the plugin isn’t installed, Warp displays an installation chip in the terminal when you run OpenCode, with setup steps you can follow directly. For plugin source and updates, see the [opencode-warp GitHub repository](https://github.com/warpdotdev/opencode-warp). ## Supported Warp features [Section titled “Supported Warp features”](#supported-warp-features) OpenCode supports Warp’s full set of agent integration features: * **Agent notifications** - Receive in-app and desktop alerts when OpenCode needs your attention. The notification UI displays your current git branch alongside agent status. * **Rich input editor** - Press `Ctrl-G` to open an expanded input editor for composing longer prompts. * **Code review** - Send inline review comments directly to the agent from Warp’s code review panel. * **Attach code as context** - Select code and send it to the agent as context. * **Vertical tabs with agent metadata** - Monitor OpenCode sessions with status indicators in Warp’s tab bar. * **Tab Configs** - Save and restore OpenCode session configurations. * **[Remote Control](/agents/cli-agents/remote-control/)** - Publish your OpenCode session so you can monitor and steer it from another device. ## Related pages [Section titled “Related pages”](#related-pages) * [How to set up OpenCode](/guides/external-tools/how-to-set-up-opencode/) — step-by-step setup guide * [OpenCode in Warp](https://www.warp.dev/agents/opencode) — product overview * [Third-party CLI agents overview](/agents/cli-agents/overview/) * [Claude Code](/agents/cli-agents/claude-code/) * [Codex](/agents/cli-agents/codex/)
# Third-party CLI agents overview
Canonical page: [/agents/cli-agents/overview/](https://docs.warp.dev/agents/cli-agents/overview/)
> Warp provides first-class support for third-party CLI coding agents with a rich input editor, notifications, code review, and more.
Warp auto-detects supported CLI agents and enhances them with IDE-level features — a rich input editor, agent notifications, inline code review, [Remote Control](/agents/cli-agents/remote-control/), and more. Run your preferred coding agent inside Warp and get a better experience out of the box. This feature set is also known as **universal agent support**. Looking for Warp’s own CLI instead? The [Warp Agent CLI](/agents/cli/) runs the Warp Agent itself in any terminal. This page covers running third-party coding agents inside the Warp app. ## Supported agents [Section titled “Supported agents”](#supported-agents) Warp currently supports the following CLI coding agents: * [**Claude Code**](/agents/cli-agents/claude-code/) — Anthropic’s CLI coding agent * [**OpenAI Codex**](/agents/cli-agents/codex/) — OpenAI’s CLI coding agent * [**OpenCode**](/agents/cli-agents/opencode/) — Open-source CLI coding agent * **Amp** — Sourcegraph’s CLI coding agent * **Auggie** — Augment Code’s CLI coding agent * **Copilot CLI** — GitHub’s CLI coding agent * **Cursor CLI** — Cursor’s CLI coding agent * **Gemini CLI** — Google’s CLI coding agent * **Droid** — Factory’s CLI coding agent * **Pi** — Open-source CLI coding agent * **Goose** — Block’s CLI coding agent * **Antigravity** — the Antigravity CLI coding agent (invoked with `agy`) * **Hermes** — Nous Research’s CLI coding agent * **Mistral Vibe** — Mistral’s CLI coding agent * **Grok Build** — xAI’s CLI coding agent (invoked with `grok`) * **Kiro CLI** — Amazon’s CLI coding agent (invoked with `kiro-cli` or `kiro`) When you launch a supported agent inside Warp, the **agent toolbelt** appears automatically, giving you quick access to Warp’s enhanced features.  The agent toolbelt for CLI agents. ## Where third-party CLI agents appear [Section titled “Where third-party CLI agents appear”](#where-third-party-cli-agents-appear) Third-party CLI agents run inside a terminal pane. Warp detects the session and shows status on that pane and in [vertical tabs](/terminal/windows/vertical-tabs/), not as Warp Agent conversation threads. * **Conversation Panel** - Lists Warp Agent conversations and cloud agent runs. Claude Code, Codex, OpenCode, and other third-party CLI agents do **not** appear there. * **Agent Management Panel** - Manages Warp-managed agents and cloud runs. Third-party CLI agents do **not** appear there. * **Vertical tabs and the agent toolbelt** - Show live third-party CLI agent status while the process is running in a pane. * **Remote Control** - Publishes a running third-party session so you can monitor or steer it from another device. See [Remote Control](/agents/cli-agents/remote-control/). If you expected a Claude Code session in the Conversation Panel, that is expected behavior today. Keep the session in its tab, use vertical-tab status, or publish it with Remote Control. ## Feature support [Section titled “Feature support”](#feature-support) Not every feature is available for every agent. The table below shows current support. | Feature | Claude Code | Codex | OpenCode | Amp | Auggie | Copilot CLI | Cursor | Gemini CLI | Droid | Pi | | ------------------------------------- | ----------- | ----- | -------- | --- | ------ | ----------- | ------ | ---------- | ----- | -- | | Rich input editor (`Ctrl-G`) | ✓ | ✓ | ✓ | ✓ | ✓ | ✓ | ✓ | ✓ | ✓ | ✓ | | Agent notifications | ✓ | ✓ | ✓ | ✗ | ✗ | ✗ | ✗ | ✗ | ✗ | ✗ | | Code review comments | ✓ | ✓ | ✓ | ✓ | ✓ | ✓ | ✓ | ✓ | ✓ | ✓ | | Attach code as context | ✓ | ✓ | ✓ | ✓ | ✓ | ✓ | ✓ | ✓ | ✓ | ✓ | | Vertical tabs + metadata | ✓ | ✓ | ✓ | ✓ | ✓ | ✓ | ✓ | ✓ | ✓ | ✓ | | Tab Configs | ✓ | ✓ | ✓ | ✓ | ✓ | ✓ | ✓ | ✓ | ✓ | ✓ | | Remote Control | ✓ | ✓ | ✓ | ✓ | ✓ | ✓ | ✓ | ✓ | ✓ | ✓ | **Goose**, **Antigravity** (`agy`), **Hermes**, **Mistral Vibe**, **Grok Build** (`grok`), and **Kiro CLI** (`kiro-cli` or `kiro`) are also recognized. They get the same enhanced features as the agents above — rich input editor, code review comments, attach code as context, vertical tabs and metadata, Tab Configs, and Remote Control — but don’t support agent notifications yet. Agent notifications require a one-time setup. Claude Code and OpenCode use a Warp notification plugin. Codex uses a native config change. See the individual agent pages for setup instructions. ## Customizing the toolbelt [Section titled “Customizing the toolbelt”](#customizing-the-toolbelt) The chips and buttons on the CLI agent toolbelt can be reordered, hidden, or moved between the left and right sides. Your layout is saved and persists across app restarts. In the Warp app, open the **Edit CLI agent toolbelt** modal in one of two ways: * Right-click the input area while a supported CLI coding agent is running and select **Edit CLI agent toolbelt**. * Go to **Settings** > **Agents** > **Third party CLI agents**, then click the **Toolbar layout** preview. ## Getting started [Section titled “Getting started”](#getting-started) Run a supported agent inside Warp — that’s it. Warp detects the agent automatically and activates the agent toolbelt with all available features. For **agent notifications**, each agent requires a one-time setup — either a notification plugin or a config change. See the individual agent pages for instructions. *** ## Related pages [Section titled “Related pages”](#related-pages) * [Remote Control](/agents/cli-agents/remote-control/) — publish a CLI agent session to monitor and steer it from another device * [Cloud handoff and orchestration](/agents/cli/cloud-and-orchestration/) — hand off a Warp Agent CLI conversation to a cloud agent, or run multi-agent orchestration from the terminal * [Agent Notifications](/agents/capabilities/agent-notifications/) * [How to run multiple AI coding agents](/guides/agent-workflows/how-to-run-multiple-ai-coding-agents/) — run CLI agents in parallel with worktrees and cloud fan-out * [Tabs](/terminal/windows/tabs/) * [Tab Configs](/terminal/windows/tab-configs/)
# Remote Control
Canonical page: [/agents/cli-agents/remote-control/](https://docs.warp.dev/agents/cli-agents/remote-control/)
> Publish any third-party agent session to the cloud so you can monitor progress, steer the agent, and check in from your phone or another computer.
Remote Control lets you publish a running third-party agent session — such as Claude Code, Codex, or OpenCode — to the cloud with a single click. Once published, you can monitor progress, review output, and steer the agent from your phone, a web browser, or another computer without staying at the original machine. See [Third-party CLI agents](/agents/cli-agents/overview/) for the full list of supported agents. This is especially useful for long-running agent tasks. Start a coding agent, publish the session, and check back whenever you want.  ## Key capabilities [Section titled “Key capabilities”](#key-capabilities) * **One-click publish** - Click the `/remote-control` chip in the agent utility bar to publish instantly. The shareable link is copied to your clipboard automatically. * **Monitor from anywhere** - Check on agent progress from a phone, tablet, or another computer — no install required for web viewers * **Steer remotely** - Send input, approve commands, or redirect the agent without being at your original machine * **Team access** - Share the link with teammates so they can observe or collaborate on the session * **Persistent cloud access** - The session stays in sync while it’s active. New agent output and terminal activity appear for all viewers in real time. Syncing stops when you close or stop publishing the session. ## How it works [Section titled “How it works”](#how-it-works) When you publish a session through Remote Control, Warp uploads the session state to the cloud and generates a shareable link. The link stays live and in sync — any new agent output, tool use, or terminal activity appears for all connected viewers in real time. You control who can view and who can steer the agent. Remote Control differs from standard [Agent Session Sharing](/agents/local-agents/session-sharing/) in its intent: Session Sharing is designed for live collaborative work (pair-programming, interactive debugging), while Remote Control is designed for async monitoring and steering when you’re away from your machine. ## Publishing a session [Section titled “Publishing a session”](#publishing-a-session) 1. Start or resume a third-party agent session in Warp (for example, Claude Code or Codex). 2. Click the **`/remote-control`** chip in the agent utility bar. Warp publishes the session to the cloud and copies the shareable link to your clipboard.  The /remote-control chip in the agent utility bar. 3. A **Sharing link copied** toast notification confirms the link is on your clipboard, and the pane’s status icon changes to a red broadcast indicator to show that publishing is active. 4. Open the link on another device, or share it with a teammate. To stop publishing, click the **Stop sharing** button in the agent utility bar. The status icon returns to its normal state, confirming the session is no longer accessible remotely. ## Accessing a remote session [Section titled “Accessing a remote session”](#accessing-a-remote-session) Published sessions are accessible from: * **Web browser** - Open the shared link in any browser. No app install required. * **Warp desktop app** - Paste the link into Warp on a different machine for the full desktop experience * **Mobile** - Open the link on your phone or tablet browser to check on progress while away from your desk The web experience mirrors the desktop view, showing complete agent activity including thinking steps, tool use, and terminal output. ## Permissions [Section titled “Permissions”](#permissions) When you publish a session, you control access: * **View access** - Anyone with the link can watch the session, see agent output, and review terminal activity * **Edit access** - You can grant viewers permission to send input, approve commands, or redirect the agent Only you (the publisher) can revoke access or stop publishing the session. ## Related pages [Section titled “Related pages”](#related-pages) * [Agent Session Sharing](/agents/local-agents/session-sharing/) * [Third-party CLI agents](/agents/cli-agents/overview/) * [Viewing Cloud Agent Runs](/platform/viewing-cloud-agent-runs/) * [Handoff between local and cloud agents](/platform/handoff/) - Move work off your laptop into a cloud agent run when you need longer-running or unattended execution. * [How to run multiple AI coding agents](/guides/agent-workflows/how-to-run-multiple-ai-coding-agents/) - Run parallel CLI agents locally, then monitor or fan work out further.
# Rich input editor
Canonical page: [/agents/cli-agents/rich-input/](https://docs.warp.dev/agents/cli-agents/rich-input/)
> Warp's rich input editor gives you IDE-style editing, voice input, context attachment, and slash commands for any supported CLI coding agent.
Warp’s rich input editor lets you write prompts for any CLI coding agent with the same editing experience you’d expect from an IDE — mouse support, context attachment, voice, and more. Press `Ctrl-G` (configurable) or click the **Rich Input** button in the agent utility bar to open it.  ## Key capabilities [Section titled “Key capabilities”](#key-capabilities) * **IDE-style editing** - Click, select, and navigate your prompt with your mouse. Copy, cut, paste, undo, and word-level navigation all work. Write multi-line prompts with line breaks and soft wrapping. Vim keybindings are also supported. See [Modern text editing](/terminal/editor/) for the full list of shortcuts. * **Rich context with @mentions** - Reference files, folders, and code symbols with `@` mentions. Attach images for visual context. Search for specific symbols directly from the editor. See [Agent Context](/agents/local-agents/agent-context/) for details. * **Voice input** - Dictate prompts instead of typing. See [Voice](/agents/local-agents/interacting-with-agents/voice/) for details. * **Slash commands and skills** - Access saved `/prompts`, `/skills`, and [Warp Drive](/knowledge-and-collaboration/warp-drive/) content with `/`. The editor shows skills specific to the running agent’s provider (e.g., Claude-specific skills when running Claude Code). See [Slash Commands](/agents/capabilities/slash-commands/) for details. * **Agent toolbar** - Browse files, view code changes, and manage the agent session from the toolbar. ## How to open [Section titled “How to open”](#how-to-open) There are two ways to open the rich input editor: 1. **Keyboard shortcut** - Press `Ctrl-G` (configurable) while a supported agent is running in the active pane. 2. **Rich Input button** - Click the **Rich Input** button in the agent utility bar at the bottom of the pane.  The Rich Input button in the agent utility bar. The rich input editor also auto-opens when an agent resumes from a blocked state (for example, after you approve a command). This requires the agent’s plugin to be supported and installed. Toggle **Auto show/hide based on agent status** in [Rich input settings](#rich-input-settings) to control this behavior. When the rich input editor is active, Warp hides the cursor inside the CLI agent and moves focus to the editor input. Submit your prompt from here and it goes directly to the running agent.  The rich input editor. ## Rich input settings [Section titled “Rich input settings”](#rich-input-settings) In the Warp app, go to **Settings** > **Agents** > **Third party CLI agents** to configure the following: * **Auto show/hide based on agent status** - Automatically open the rich input editor when the agent needs input, and hide it when the agent is working. Works with agents that have plugin support and the plugin installed (Claude Code and OpenCode). * **Auto open on session start** - Automatically open the rich input editor when a CLI agent session starts. * **Auto dismiss after submission** - Close the editor after you send a prompt. * **Keyboard shortcut** - The default shortcut is `Ctrl-G`. Customize this in **Settings** > **Keyboard shortcuts**. * **Disable the Rich Input button** - Right-click the agent utility bar and remove the **Rich Input** chip, or disable the footer entirely in **Settings** > **Agents** > **Third party CLI agents**. 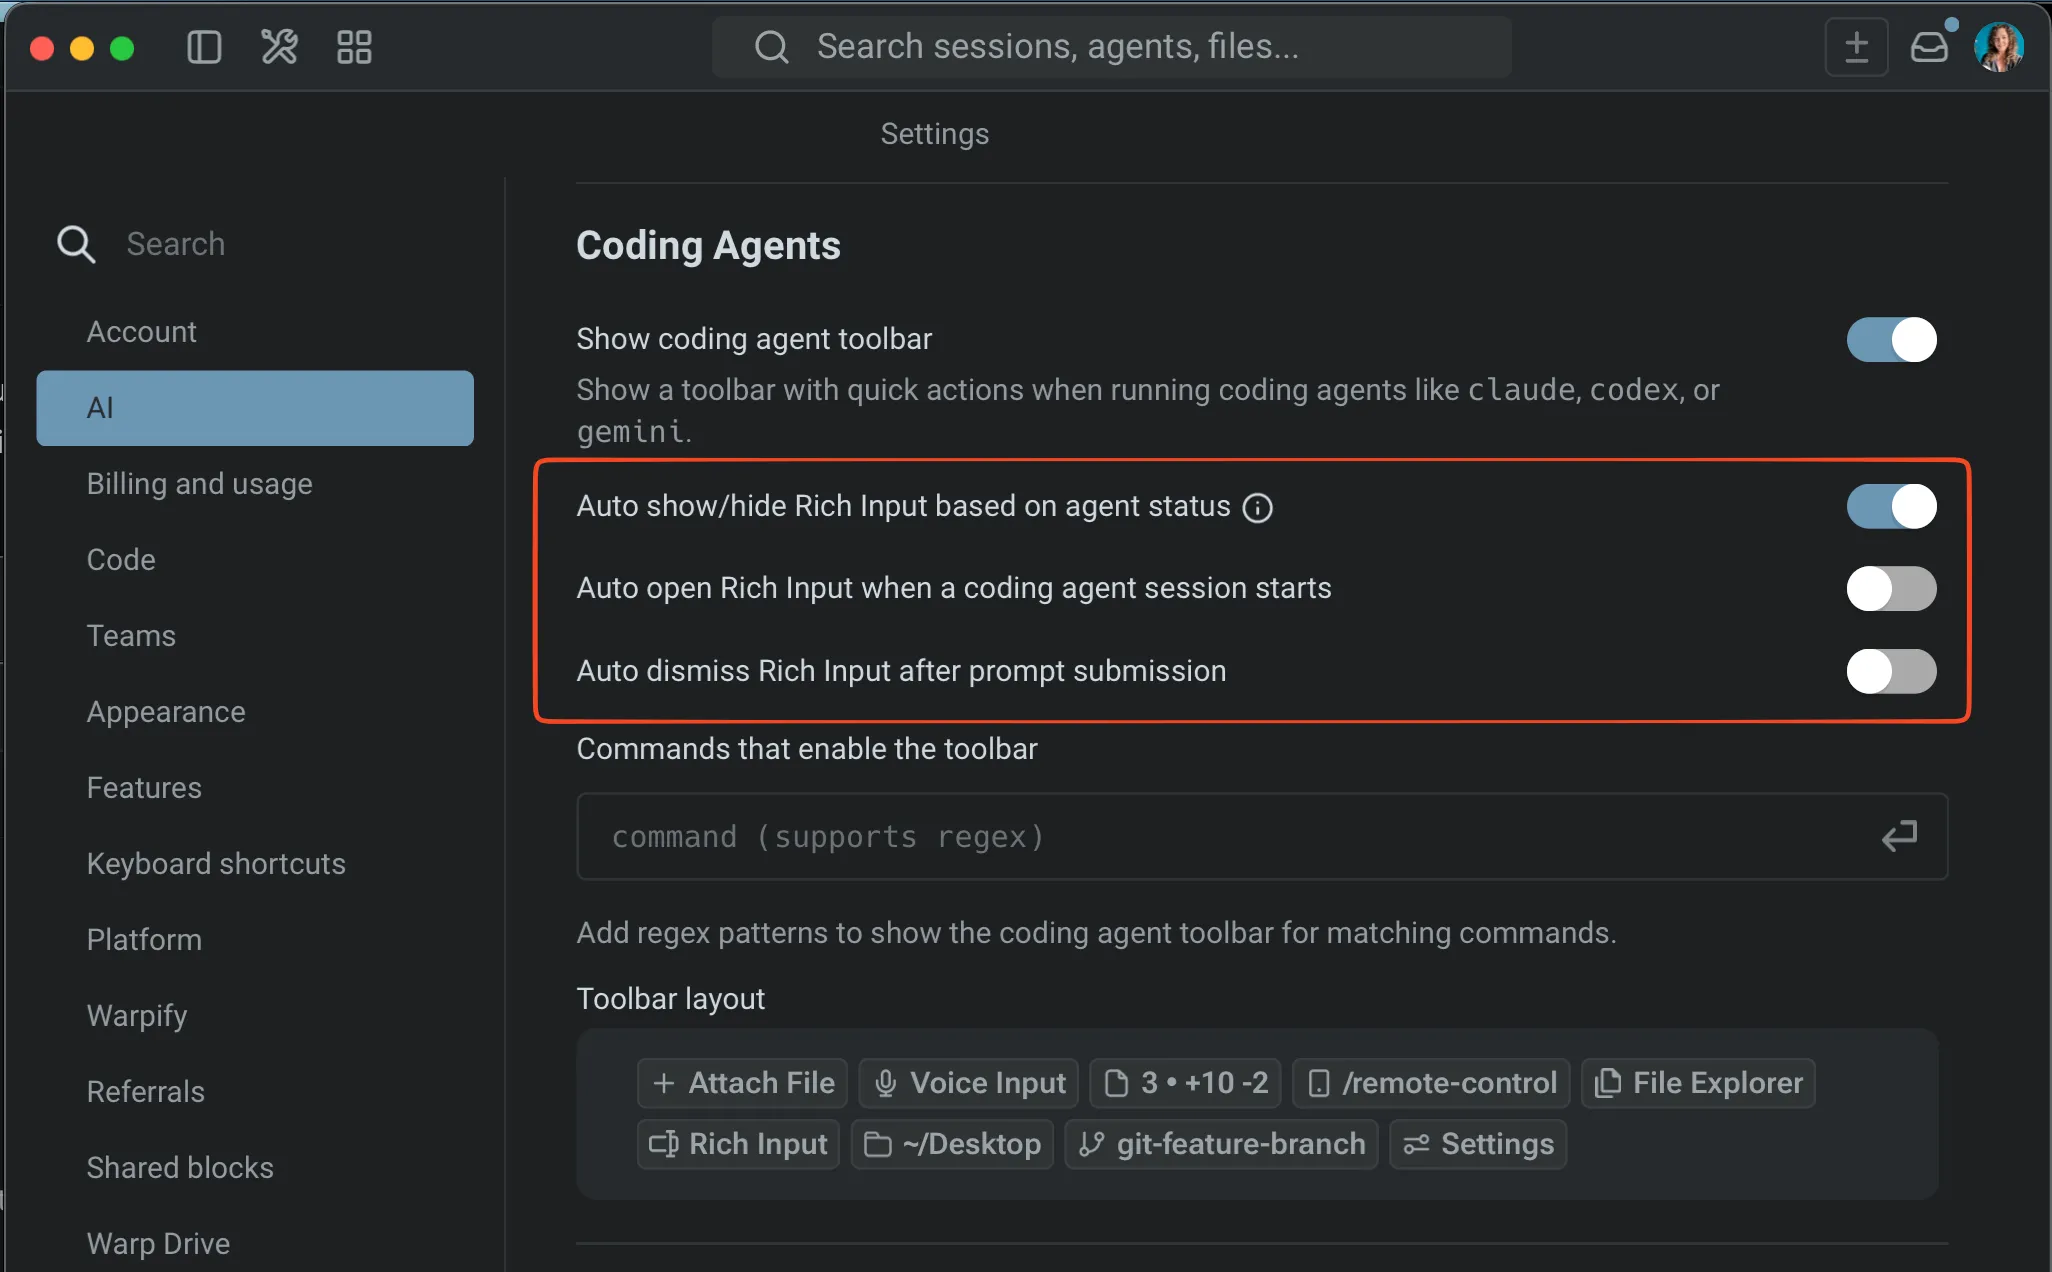 Rich input settings in Warp. ## Related pages [Section titled “Related pages”](#related-pages) * [Third-party CLI agents overview](/agents/cli-agents/overview/) * [Remote Control](/agents/cli-agents/remote-control/) * [Voice](/agents/local-agents/interacting-with-agents/voice/) * [Slash Commands](/agents/capabilities/slash-commands/) * [Agent Context](/agents/local-agents/agent-context/)
# Agent conversations in the Warp Agent CLI
Canonical page: [/agents/cli/agent-conversations/](https://docs.warp.dev/agents/cli/agent-conversations/)
> Read, manage, and resume agent conversations in the Warp Agent CLI, including streamed responses, tool calls, file diffs, plans, and task lists.
When you send the agent a prompt in the Warp Agent CLI, the conversation appears as a scrollable transcript directly in your terminal. Responses stream in as they’re generated, and everything the agent does renders inline: tool calls, file diffs, questions, task lists, and plans. Conversations persist as you work. You can start a new conversation, browse history, compact context, and [resume after exiting](#resuming-conversations). ## The conversation transcript [Section titled “The conversation transcript”](#the-conversation-transcript) The agent’s response streams into the transcript below your prompt as it’s generated. Press `Ctrl+C` once to stop a response that’s still in progress. Responses render as formatted Markdown, including syntax-highlighted code blocks and tables. Be aware of a few terminal-specific caveats: Mermaid diagrams appear as their source in a code block, images show their alt text instead of rendering inline, and very long code blocks are truncated to keep the transcript responsive. ## Tool calls [Section titled “Tool calls”](#tool-calls) Every tool call the agent makes appears inline in the transcript, in the order it happens. Most render as a one-line status row with a state glyph and a label describing the action, like “reading a file” or “searching your codebase”. Some tool calls render richer, interactive content: * **[Shell commands](/agents/cli/input-and-shell-commands/#shell-mode)** - Commands run in your session, with output streamed into the transcript. * **[File edits](#code-diffs)** - Expandable diffs with per-file headers. * **[Questions](#agent-questions)** - Interactive option prompts. * **[Plans](#planning)** - Inline plan documents. When a tool call needs your approval before it runs, an approval card appears in place of the input. See [permissions in the CLI](/agents/cli/permissions-and-profiles/) to learn how approvals work. ## Code diffs [Section titled “Code diffs”](#code-diffs) When the agent edits files, the edit renders as a diff in the transcript: * **Per-file sections** - Each edited file gets its own header showing the action taken and the lines added or removed. * **Multi-file edits** - Each file’s section nests, indented, under one collapsible summary header (for example, `Edited 3 files`). Diffs are fully expanded while the agent waits for your approval, then collapse to their headers once the edits are applied. Press `E` while the approval card is active to expand or collapse all diffs at once. The CLI renders diffs inline rather than in a separate editor. For how agent-generated changes work in the Warp app, including refining a diff in natural language, see [Agent code diffs and review](/agents/local-agents/code-diffs/). ## Thinking blocks [Section titled “Thinking blocks”](#thinking-blocks) For models that expose their reasoning, the agent’s thinking streams into a collapsible section with the header `Thinking...`, which collapses to a single `Thought for` row once it finishes. ## Agent questions [Section titled “Agent questions”](#agent-questions) When the agent needs a decision from you mid-task, it asks a question with an interactive option list that temporarily replaces the input. Use the arrow keys to navigate between options, or press an option’s number on your keyboard to select it. **Other…** accepts a free-form answer when the listed options don’t fit. Options the agent suggests as the best fit are labeled `(recommended)`. For multi-select questions, chosen options are marked with a check mark so you can select more than one. When the agent asks several questions at once, the card advances through them. To control whether the agent pauses to ask questions, see [Agent questions](/agents/local-agents/interacting-with-agents/agent-questions/). ## Task lists [Section titled “Task lists”](#task-lists) For multi-step work, the agent tracks its progress with a task list rendered directly in the transcript under a `≡ Tasks` header. Each task row starts with a status glyph: * `◌` - Pending * `●` - In progress * `✓` - Completed Canceled tasks appear struck through. As the agent finishes tasks, compact confirmation rows (e.g., `✓ Completed (2/5)`) track progress without repeating the whole list. Task lists in the CLI reflect the same agent behavior as in the Warp app. Learn more about [how task lists work](/agents/capabilities/task-lists/). ## Planning [Section titled “Planning”](#planning) To have the agent first research and produce a plan before making changes, use the `/plan` slash command followed by a description of your task. You can also ask for a plan in natural language. The plan renders inline in the transcript as a formatted document with its own header row showing the plan’s status. An `Updated plan` entry appears when the agent revises it. Press `Ctrl+Shift+P` to expand or collapse the latest plan. Planning in the CLI follows the same workflow as the Warp app. See [Planning](/agents/capabilities/planning/) to learn how to create, review, and execute plans. ## Selecting and copying output [Section titled “Selecting and copying output”](#selecting-and-copying-output) Select text anywhere in the transcript by clicking and dragging with the mouse. Releasing the mouse button copies the selection automatically. To copy an entire conversation as Markdown, use the `/export-to-clipboard` slash command, or use `/export-to-file` to save it to a file. ## Managing conversations [Section titled “Managing conversations”](#managing-conversations) The CLI saves every agent conversation as you work, so closing your terminal won’t lose your progress. ### Conversation persistence [Section titled “Conversation persistence”](#conversation-persistence) The CLI shows one conversation at a time. Opening a past conversation replaces the current transcript, and the previous one remains available in history. You can’t switch conversations while the current conversation is responding or a command is running. Finish or stop it with `Ctrl+C` first. Conversations sync to your Warp account, so the same history is available in the Warp app and on your other devices. See [Cloud-synced conversations](/agents/local-agents/cloud-conversations/) for details about syncing, restoring, and sharing work. ### Starting a new conversation [Section titled “Starting a new conversation”](#starting-a-new-conversation) Use any of these slash commands to clear the transcript and start a fresh conversation: * `/new` * `/agent` * `/clear` Each command accepts an optional prompt. For example, `/new write tests for the parser` starts a new conversation and immediately sends that prompt to the agent. To keep the history but reduce its size instead, use [`/compact`](#compacting-context). For guidance on when to start fresh rather than follow up, see [Interacting with agents](/agents/local-agents/interacting-with-agents/). ### Conversation history [Section titled “Conversation history”](#conversation-history) To browse and reopen past conversations, you can open the conversation menu in two ways: * **`/conversations`** - Run the slash command from the input. * **`←`** - Press the left arrow key when the input is empty and the cursor is at the start. The menu lists your Warp Agent conversations, including conversations started in the Warp app and completed cloud agent runs tied to your account. Start typing to filter the list by title. Caution If the CLI can’t load conversation data from Warp’s servers, the menu shows conversations from your local device only and displays a warning. Conversations from other devices reappear once the connection recovers. To continue a cloud agent run from the CLI, or to hand the current conversation off to a cloud agent, see [cloud handoff and orchestration](/agents/cli/cloud-and-orchestration/). ### Resuming conversations [Section titled “Resuming conversations”](#resuming-conversations) There are two ways to pick a past conversation back up: * **The [conversation menu](#conversation-history)** `(recommended)` - From a running session, press `←` or run `/conversations`, then filter to the conversation you want. * **`warp --resume`** - Reopens a specific conversation from your shell as the CLI starts, without going through the menu. When you exit the CLI with a non-empty conversation, it prints the `--resume` command for that conversation:
```bash
To continue this conversation, run:
warp --resume YOUR_CONVERSATION_TOKEN
```
`YOUR_CONVERSATION_TOKEN` is a conversation identifier generated by Warp. For the complete list of command-line flags, see the [CLI reference](/agents/cli/reference/). ### Compacting context [Section titled “Compacting context”](#compacting-context) Long conversations eventually fill the model’s [context window](/agents/local-agents/interacting-with-agents/#context-window-management), which can degrade response quality. The `/compact` command frees up context by asking the agent to summarize the conversation history so far and carry only the summary forward. * **`/compact`** - Summarizes the conversation history with default instructions. * **`/compact `** - Adds custom summarization instructions. For example, `/compact keep the API design decisions` tells the agent what to preserve in the summary. After compaction, a collapsed **Conversation summary** block appears in the transcript, and the conversation keeps working normally with the summary standing in for the compacted history. ## Related pages [Section titled “Related pages”](#related-pages) * [Permissions and profiles](/agents/cli/permissions-and-profiles/) - Approve, reject, or auto-approve the agent’s tool calls. * [Input and shell commands](/agents/cli/input-and-shell-commands/) - How commands the agent (or you) run appear in the transcript. * [Cloud handoff and orchestration](/agents/cli/cloud-and-orchestration/) - Hand off conversations to cloud agents and resume cloud runs. * [Warp Agent CLI reference](/agents/cli/reference/) - Command-line flags, slash commands, and keyboard shortcuts. * [Planning](/agents/capabilities/planning/) - The full planning workflow. * [Task lists](/agents/capabilities/task-lists/) - How agents create and update task lists. * [Agent code diffs and review](/agents/local-agents/code-diffs/) - Reviewing and refining agent-generated changes. * [Cloud-synced conversations](/agents/local-agents/cloud-conversations/) - How conversations sync, restore, and share across devices.
# Cloud handoff and orchestration in the Warp Agent CLI
Canonical page: [/agents/cli/cloud-and-orchestration/](https://docs.warp.dev/agents/cli/cloud-and-orchestration/)
> Hand off Warp Agent CLI conversations to cloud agents, resume cloud runs, and run multi-agent orchestration from your terminal.
The Warp Agent CLI connects your terminal sessions to the Automation Platform. You can hand off a local conversation to a cloud agent, pick a finished cloud run back up in your terminal, and coordinate multiple agents working in parallel, all without leaving the CLI. ## Hand off to a cloud agent [Section titled “Hand off to a cloud agent”](#hand-off-to-a-cloud-agent) Handoff promotes your Warp Agent CLI conversation into a cloud agent run. Use it when a task outgrows your machine: long-running work you don’t want to keep your laptop awake for, or work you want to check on later from another device. The [Handoff overview](/platform/handoff/) explains the feature across all Warp surfaces. This section covers the CLI flow. The cloud agent receives the same context as a handoff from the Warp app: * **Conversation history** - Warp forks the conversation, so the cloud agent sees the full transcript and your local conversation stays untouched. * **Workspace changes** - Warp snapshots your uncommitted repository changes, including untracked files, and applies them in the cloud run. * **Pending input** - The optional follow-up prompt and any images attached to the input move to the cloud run. See [what carries over](/platform/handoff/#what-carries-over) for the full behavior, and [Handoff from local to cloud](/platform/handoff/local-to-cloud/) for prerequisites. ### Hand off a conversation [Section titled “Hand off a conversation”](#hand-off-a-conversation) 1. In an active conversation, run `/handoff`, or `/handoff ` to give the cloud agent a follow-up prompt. The **Hand off to cloud** card replaces the input area while your transcript stays visible. 2. The card suggests your most recent environment (preferring one that contains the current repository) and preselects your conversation’s current model if it can run in the cloud. If the model is incompatible, it’s flagged so you can choose another before continuing. 3. To open the searchable environment and model selectors, press `Ctrl+E`. 4. From the card summary, press `Enter` to hand off. The card shows progress, then reports that the cloud run was created along with a link to the run. Press `Ctrl+C` at any point before confirming to cancel the handoff. Your prompt and attachments return to the input. From the created card: * **`Enter`** - Opens the cloud run in your browser. * **`C`** - Continues the conversation locally. The card collapses into a transcript banner with the run link, and the input reopens. * **`N`** - Starts a new conversation. Handoff needs the conversation in a state it can fork. You can’t hand off while a command is still running, or while the conversation has child agents that are in progress or blocked. Cancel the command or let the children finish first. Handing off an orchestrator forks only its own conversation. The orchestration and its child agents stay local. ## Resume cloud conversations [Section titled “Resume cloud conversations”](#resume-cloud-conversations) There are two ways to pick up a cloud agent’s work: * **In the browser** - Open the run in the Oz web app to review its transcript and changes, steer it, or continue the conversation there. [Viewing cloud agent runs](/platform/viewing-cloud-agent-runs/) covers that flow. * **In the CLI** - Pull a finished cloud run into your terminal. It appears in the conversation history alongside local conversations. Press `←` in an empty input, or run `/conversations`, to open the conversation list, then select the cloud run. Your next prompt continues the conversation locally. Resuming in the CLI has two constraints: * **The run must be finished** - Cloud runs that are still in progress or blocked can’t be opened in the CLI. * **Warp Agent runs only** - Conversations that ran with a different harness, such as Claude Code or Codex, can’t be opened in the CLI. You can also open a conversation directly at startup with `warp --resume `. See [managing conversations in the CLI](/agents/cli/agent-conversations/#managing-conversations) to learn more about conversation history and resume details. ## Multi-agent orchestration [Section titled “Multi-agent orchestration”](#multi-agent-orchestration) Orchestration lets one conversation spawn child agents that work in parallel, on your machine or in the cloud. The CLI runs the same parent/child model as the rest of the platform. [Multi-agent orchestration](/platform/orchestration/) covers the model, run states, and common patterns. To start an orchestration, ask the agent to parallelize the work, for example “split this migration across three agents”. You can also shape the configuration in your prompt. For example, ask for a specific model to manage token spend: keep the parent on a premium model while child agents handle research on a cheaper open-source model. When the agent decides to spawn child agents, the CLI shows an approval card titled **Can I start additional agents for this task?** that summarizes the agents it wants to launch and the run-wide configuration. By default, no child agents launch until you approve. The **Run orchestrated agents** permission in your profile controls this: **Always allow** skips the approval card, and **Never** blocks child agents entirely. See [Permissions and profiles](/agents/cli/permissions-and-profiles/). From the approval card: * **`Enter`** - Approves the request and launches the child agents. * **`Ctrl+E`** - Edits the configuration first: where the agents run (on your machine or in the cloud) and which model they use. Cloud agents add pages for the harness, environment, and host, plus an API key page for harnesses that need one. * **`Ctrl+C`** - Rejects the request. After launch, a tab bar labeled **Agents:** appears above the session with one tab for the orchestrator and one tab per child agent. Messages between the parent and child agents appear in each agent’s transcript.  The Agents: tab bar with one child agent running and two finished. * **Local child agents** - Each local child runs on your machine as its own session, starting in the parent’s working directory. Local children always run the Warp Agent. * **Cloud child agents** - Each cloud child runs in a cloud [environment](/platform/environments/), and can run a different harness than the parent, such as Claude Code or Codex, chosen on the approval card’s harness page. A cloud child’s session shows the run’s live status and a link. Press `Enter` or click the link to open the run in the Oz web app. If a cloud child can’t start because GitHub authentication is required, its session shows the authentication link. Authenticate, then ask the agent to run the orchestration again. Caution Cloud child sessions in the CLI only show status. They don’t accept input. To send prompts to a cloud child or respond to its approvals, open the run in the Oz web app. ## Managing child agents [Section titled “Managing child agents”](#managing-child-agents) The **Agents:** tab bar is how you move around an orchestration. * **Focus the tab bar** - Press `Shift+↑` from the input. The bar highlights the active conversation. * **Switch agents** - `Tab` or `→` selects the next agent and `Shift+Tab` or `←` the previous one, wrapping across the orchestrator and all children. Switching keeps the bar focused so you can keep cycling. * **Jump to an end** - `Shift+←` selects the first child and `Shift+→` selects the last one. * **Return to the conversation** - `↓` moves focus back to the current session’s input. `Esc` jumps back to the orchestrator. * **Use the mouse** - Tabs are clickable, and when there are more children than fit, arrows at the ends of the bar page through them without changing your selection. Each agent keeps its own session. Transcript position, input drafts, and running work are all preserved while you view another agent, and child agents keep working in the background. Tabs reorder as statuses change, moving children that need attention, such as blocked ones, toward the front of the bar. A focused local child behaves like a regular conversation. You can send it follow-up prompts and respond to its permission requests. If a child’s tab shows a blocked status, switch to that child to respond to its pending request. ### Kill a child agent [Section titled “Kill a child agent”](#kill-a-child-agent) `Ctrl+C` kills a child agent. It stops the child’s work, cancels the cloud run if the child is a cloud agent, and removes the child’s tab and conversation, returning you to the orchestrator. * **From the tab bar** - With the tab bar focused and a child tab selected, a single `Ctrl+C` kills the selected child. The footer shows `Ctrl+C to kill sub-agent` as a reminder. * **While viewing a child** - Press `Ctrl+C` twice. The first press arms a short confirmation window and the footer shows `ctrl-c again to kill child agent`. A second press within the window kills the child. In the orchestrator’s own session, `Ctrl+C` keeps its usual behavior. ## Related pages [Section titled “Related pages”](#related-pages) * [Handoff overview](/platform/handoff/) - Directions of handoff and what carries over in each. * [Handoff from local to cloud](/platform/handoff/local-to-cloud/) - Prerequisites, the Warp app flow, and troubleshooting. * [Multi-agent orchestration](/platform/orchestration/) - The parent/child model, run states, and orchestration patterns. * [Viewing cloud agent runs](/platform/viewing-cloud-agent-runs/) - Open, inspect, and continue cloud runs in the Oz web app. * [Agent conversations in the CLI](/agents/cli/agent-conversations/#managing-conversations) - Conversation history, `/conversations`, and `--resume`. * [Environments](/platform/environments/) - Configure the repos, image, and setup commands cloud agents run with.
# Customizing the Warp Agent CLI
Canonical page: [/agents/cli/configuration/](https://docs.warp.dev/agents/cli/configuration/)
> Configure Warp Agent CLI themes, the statusline, and the start screen, and give the agent context from project rules, skills, and MCP servers.
The Warp Agent CLI keeps its configuration in a plain TOML settings file on your machine. You can change settings by editing the file directly, by running slash commands like `/theme` and `/statusline`, or by asking the agent to update a setting for you. Beyond the CLI’s own settings, this page also covers the agent’s context, which includes the project rules, skills, and MCP servers the agent picks up as you work. ## The settings file [Section titled “The settings file”](#the-settings-file) The CLI reads its settings from a `settings.toml` file: * **macOS** - `~/.warp_cli/settings.toml` * **Linux** - `~/.config/warp-terminal/cli/settings.toml` (respects `$XDG_CONFIG_HOME`) * **Windows** - `%LOCALAPPDATA%\warp\Warp\config\cli\settings.toml` The file is created the first time you change a setting, and you can also create it yourself. Settings use dotted TOML sections. For example: settings.toml
```toml
[appearance]
theme = "dark"
```
## Edit settings [Section titled “Edit settings”](#edit-settings) Change settings any of these ways: ### Edit the file directly [Section titled “Edit the file directly”](#edit-the-file-directly) Open the settings file in your editor and change values directly. The CLI watches the file while it’s running and reloads most values as you save, so edits take effect without a restart. Theme edits are the exception: they apply the next time you run `/theme` or restart the CLI. If a value is invalid, the CLI logs the problem and uses the default for that setting instead. If the file can’t be parsed at all, the CLI starts with default settings. ### Use slash commands [Section titled “Use slash commands”](#use-slash-commands) Commands like `/theme` and `/statusline` open interactive panels for specific settings and save your choice to the settings file automatically. See [Themes](#themes) and [Statusline](#statusline). ### Ask the agent [Section titled “Ask the agent”](#ask-the-agent) Describe the change to the agent in your CLI session, in plain language. The CLI ships with a bundled skill and a schema of every available setting, which the agent uses to find the right key, validate the value, and update the settings file for you. Try prompts like: * “Switch my theme to light.” * “Add the time to my [statusline](#statusline).” * “What CLI settings can I change?” The agent’s edits follow the same hot-reload behavior as editing the file directly (see [Edit the file directly](#edit-the-file-directly)). For the full list of built-in skills, see [Bundled skills](#bundled-skills). ## Themes [Section titled “Themes”](#themes) The CLI renders with a light or dark color theme. Set it with the `/theme` slash command: * **`/theme auto`** - Matches the host terminal’s background (default). * **`/theme light`** - Always uses the light theme. * **`/theme dark`** - Always uses the dark theme. Running `/theme` applies the change immediately and persists it across sessions as the `theme` key under `[appearance]` in the settings file. In auto mode, detection runs at startup, so if you switch your terminal’s colors while the CLI is running, restart it or set a theme explicitly. ## Statusline [Section titled “Statusline”](#statusline) The statusline is the row below the CLI’s input box that shows session information at a glance. By default it shows the auto-approve indicator, the active model, the working directory, the Git branch, and the Git diff status inside a repository, plus the Vim mode indicator when Vim mode is on. You can enable any of these items:  The statusline with credit usage, context window usage, and task list chips enabled. * **Auto-approve indicator** - A clickable `▶▶` toggle for auto-approve, highlighted when it’s on. * **Vim mode indicator** - The active Vim mode (such as `NOR` or `INS`), shown only when Vim mode is enabled. * **Model** - The active model. Click it to open the model picker. * **Working directory** - The current working directory. * **Git branch** - The current branch, when the directory is a Git repository. * **Git branch status** - The branch, plus how far it is ahead of or behind its upstream (for example, `master • ↑1`). Enabling this replaces the plain Git branch chip, rather than adding a second one. * **Git diff status** - Files changed, with line additions and deletions. * **GitHub pull request** - The pull request for the current branch. Click it to open the PR on GitHub. * **Credit usage** - Credits used by the current conversation. Click it to switch between credits and provider cost. * **Context window usage** - How much of the model’s context window the conversation has used. * **Agent to-do list** - The agent’s progress through its current task list. You can also add the date, the time (12- or 24-hour), and a voice input control. Items only appear when they have something to show. For example, the Git items appear only inside a repository. In shell mode, the statusline always leads with a shell mode label. ### Customizing the statusline [Section titled “Customizing the statusline”](#customizing-the-statusline) Choose which items appear and in what order: 1. Run `/statusline`. The **Configure statusline** panel opens with every available item. 2. Select an item and press `Enter` to toggle its visibility. 3. Press `←` and `→` to move the highlighted item earlier or later in the row. 4. Press `Esc` to save and close. Press `Ctrl+C` to cancel without saving. Your choices are saved to the settings file, so the layout persists across sessions. To start over, run `/reset-statusline`, which restores the default items and ordering. ## Start screen [Section titled “Start screen”](#start-screen) The start screen appears when you launch the CLI, showing a rotating ASCII object alongside sections for your account, the changelog, project info, and MCP servers. Customize it with the `appearance.zero_state` settings: * **`object`** - The rotating object. Keep the built-in one, or point the setting at your own ASCII art file (a path relative to the CLI settings directory). Changing the setting reloads the object. Edits to the linked file take effect after a restart. * **`rotation_period_seconds`** - Seconds per full rotation, from 1 through 60. * **`show_signed_in_user`, `show_changelog`, `show_project_info`, `show_mcp`, `show_animation`** - Toggle individual start-screen sections. * **`freeze_animation_when_unfocused`** - Stop repainting the animation while your terminal window is unfocused, so an idle start screen doesn’t use CPU in the background. Off by default, and applied as soon as you save the setting. The fastest way to change these is to [ask the agent](#ask-the-agent), for example “use my own ASCII art for the start screen object”. ## Project context and rules [Section titled “Project context and rules”](#project-context-and-rules) The CLI gives its agent the same layered context system as the Warp app, combining your working directory, project rules, skills, and MCP servers, all scoped to the directory you’re working in. The agent works in your session’s current directory. When you `cd`, project rules and skills re-scope to the new directory automatically. Within a project, the CLI picks up the same rule files as the Warp app: * **Project rules** - `AGENTS.md` (or `WARP.md`) files in your repository apply automatically, starting from the repository root and your current directory. See [Rules](/agents/capabilities/rules/) for the file format, nested rules in subdirectories, and precedence. * **Global rules** - A rule file at `~/.agents/AGENTS.md` applies across all projects on your machine. Because rules and skills come from the same shared locations, a repository already configured for agents in the Warp app (or any tool that reads `AGENTS.md`) works in the CLI immediately. ## Skills [Section titled “Skills”](#skills) [Skills](/agents/capabilities/skills/) are reusable instruction sets the agent can invoke to perform specific tasks. The CLI discovers the same skills as the Warp app. Project skills come from your repository’s skill directories (e.g., `.agents/skills/`), and personal skills come from your home directory (e.g., `~/.agents/skills/`), scoped to your current working directory. Run `/skills` to browse every skill in scope. Selecting a skill inserts `/skill-name` into the input so you can add extra instructions before running it. Any text after the skill name is passed along, either as [skill arguments](/agents/capabilities/skills/#skill-arguments) or as additional context for the agent. You can also invoke a skill directly by typing `/` followed by its name, for example `/deploy push the latest changes to staging`. ### Bundled skills [Section titled “Bundled skills”](#bundled-skills) The CLI ships with built-in skills that appear in the skills menu alongside your own: * **`/modify-settings`** - Updates CLI settings using the bundled settings schema to find and edit the right key. See [Ask the agent](#ask-the-agent). * **`/tui-migrate-setup`** - Sets up the CLI from an existing Warp app installation. The agent copies compatible settings and global MCP server definitions from the app, and asks for approval before changing anything. Credentials and OAuth state are never copied, so MCP servers that require authentication prompt you to re-authenticate. Rules and skills don’t need migration: the CLI and the Warp app both discover them from the same file locations (see [Project context and rules](#project-context-and-rules) and [Skills](#skills)). ## MCP servers [Section titled “MCP servers”](#mcp-servers) [MCP servers](/agents/capabilities/mcp/) extend the agent with external tools and data sources. The CLI keeps its own MCP server configuration, separate from the Warp app’s, so each can run its own set of servers. Servers are defined in a JSON config file using the same `mcpServers` format as [file-based MCP servers](/agents/capabilities/mcp/#file-based-mcp-servers) in the Warp app (on macOS, the file is `~/.warp_cli/.mcp.json`). Edit the file to add or remove servers. The CLI picks up changes automatically. Configured servers start automatically once you’re logged in. ### Managing servers with `/mcp` [Section titled “Managing servers with /mcp”](#managing-servers-with-mcp) Type `/mcp` to open the MCP management view. The header shows the path to the config file the CLI is reading. Each configured server is listed with its transport (`stdio` or `HTTP/SSE`) and current status, including the number of tools a running server exposes. Press `Enter` on a server to start, stop, or retry it depending on its state. Failed rows show the error message. Servers awaiting authentication reopen the OAuth page in your browser, and servers with saved credentials show a **Log out** row that clears them. ## Related pages [Section titled “Related pages”](#related-pages) * [Rules](/agents/capabilities/rules/) - Full guide to project and global rules. * [Skills](/agents/capabilities/skills/) - Authoring skills, skill arguments, and skill locations. * [MCP servers](/agents/capabilities/mcp/) - Config format, server examples, and authentication. * [Codebase Context](/agents/capabilities/codebase-context/) - Codebase indexing in the Warp app. * [Warp Agent CLI reference](/agents/cli/reference/) - Command-line flags, slash commands, and keyboard shortcuts.
# Input and shell commands in the Warp Agent CLI
Canonical page: [/agents/cli/input-and-shell-commands/](https://docs.warp.dev/agents/cli/input-and-shell-commands/)
> Compose prompts, edit input, and run shell commands in the Warp Agent CLI, including menus, history, completions, images, voice, and interactive commands.
The Warp Agent CLI is a full terminal as well as an agent. Every session runs a real shell, so you can run commands in the same place you prompt the agent. The input is a multiline editor that combines readline-style editing with inline menus for slash commands, history, and completions, plus mouse support, image attachments, and voice input. For the complete list of flags, slash commands, and keyboard shortcuts, see the [Warp Agent CLI reference](/agents/cli/reference/). ## Editing basics [Section titled “Editing basics”](#editing-basics) The input is a multiline editor. * **Insert a newline** - Press `Ctrl+J`, or `Shift+Enter` in terminals that support distinguishing it. `Alt+Enter` also works. * **Edit with readline-style keys** - The editor supports familiar bindings such as `Ctrl+A` and `Ctrl+E` (start and end of line), `Ctrl+W` (delete the previous word), `Ctrl+K` and `Ctrl+U` (delete to the end or start of the line), `Ctrl+Y` (reinsert the last deleted text), and `Ctrl+Z` (undo). * **Use macOS Command shortcuts** - When the Kitty keyboard protocol is enabled in your terminal, the editor supports Command-modified shortcuts such as `⌘+X` to cut and `⌘+Shift+←` or `⌘+Shift+→` to extend the selection. The full editing and selection table is in the [keyboard shortcuts reference](/agents/cli/reference/#keyboard-shortcuts). ### Vim mode [Section titled “Vim mode”](#vim-mode) If you prefer modal editing, run `/vim-mode` to toggle Vim keybindings in the input. The setting persists across sessions. Turn on the [statusline](/agents/cli/configuration/#statusline) Vim mode item to see the active mode (such as `NOR` or `INS`) while you type. ## Slash commands [Section titled “Slash commands”](#slash-commands) Type `/` at the start of an empty input to open the slash command menu. Entries for toggles and pickers show their current state, for example `/theme (currently auto: Dark)` or `/auto-approve (currently off)`. When a command takes an argument, the input shows a ghost-text argument hint after the full command name, for example `/theme `. Your [skills](/agents/cli/configuration/#skills) also appear in the slash command menu, so you can invoke a skill by typing `/` followed by its name. The [slash commands reference](/agents/cli/reference/#slash-commands) lists every command. ## Input history [Section titled “Input history”](#input-history) Press `↑` with the cursor on the first row of the input to open the history menu. * **What’s listed** - In Agent Mode, the menu combines your previous prompts and shell commands in one list, with commands marked by a `!` prefix. In [shell mode](#shell-mode), the menu lists commands only. * **Preview** - Moving the selection previews each entry in the input and switches the input to the matching mode: recalled commands run as shell commands, and recalled prompts go to the agent. * **Submit** - `Enter` runs the selection immediately. It doesn’t insert it for editing. * **Dismiss** - `Esc` restores what you had typed. Pressing `↓` past the newest entry does the same. ## Tab completions [Section titled “Tab completions”](#tab-completions) In [shell mode](#shell-mode), press `Tab` to complete the command you’re typing, including file and directory paths. * If exactly one completion matches, the CLI applies it immediately. * If several completions match, the CLI inserts the longest shared prefix and opens a completion menu. Press `Tab` again to cycle through the suggestions. ## Selection and clipboard [Section titled “Selection and clipboard”](#selection-and-clipboard) * **Highlight to copy** - Finishing a mouse selection in the input or the [conversation transcript](/agents/cli/agent-conversations/) automatically copies it. * **Keyboard selection** - Extend the selection with `Shift` plus the arrow keys, or select everything with `Ctrl+Shift+A`. Copy with `Ctrl+Shift+C` and cut with `Ctrl+X`. * **Paste** - Press `Ctrl+V` or `Ctrl+Shift+V` (also `Alt+V` on Windows). Your terminal’s own paste shortcut works as well. * **Click controls** - Interactive elements such as the **Voice** footer entry and the attachment bar controls respond to clicks. ## Attach images [Section titled “Attach images”](#attach-images) Attach images to a prompt so the agent can analyze them: * **Paste an image** - Copy an image to your clipboard and press `Ctrl+V`. * **Paste or drop a file path** - Paste the path to an image file, or drag the file onto your terminal window to insert its path. Absolute paths, paths relative to the working directory, and `~` paths all resolve. Supported formats are PNG, JPEG, GIF, and WebP. Attaching an image locks the input to Agent Mode, since images are sent to the agent rather than the shell. Attached images appear in an attachment bar above the input. Press `Tab` to focus the bar, `Backspace` to remove the selected attachment, and `Esc` to return to the input. ## Voice input [Section titled “Voice input”](#voice-input) Dictate prompts instead of typing them: Caution Voice input isn’t currently included in the official Linux build. Linux support is planned. 1. Start listening with `Ctrl+S`, the `/voice` slash command, or by clicking **Voice** in the footer. The footer shows **Listening** while recording. 2. Press `Enter`, or click the footer entry again, to stop recording. The transcribed text lands in the input so you can review and edit it before submitting. Press `Esc` while transcription is in progress to cancel it. `/voice` clears the input before recording, and `Ctrl+S` keeps what you’ve already typed. Voice input in the CLI uses the same transcription service as the Warp app. See [voice input for agents](/agents/local-agents/interacting-with-agents/voice/) for microphone setup, privacy, and usage limits. ## Keyboard hints and the shortcuts menu [Section titled “Keyboard hints and the shortcuts menu”](#keyboard-hints-and-the-shortcuts-menu) The CLI shows its shortcuts in context, so you rarely need to memorize them: * **Placeholder hints** - An empty input shows the key triggers for the current mode. * **Shortcuts menu** - Type `?` in an empty input to open a shortcuts overview. Its contents adapt to what you’re doing: Agent Mode lists the menu triggers and input history, shell mode shows how to return to Agent Mode, and extra sections appear during multi-agent sessions or agent-controlled terminal use. Press `Esc`, or start typing, to close it. ## Shell mode [Section titled “Shell mode”](#shell-mode) The input is agent-first: by default, pressing `Enter` sends your text to the agent as a prompt. Use shell mode to run a command instead: 1. Press `!` at the start of the input. The prompt marker changes from `>` to `!`, and the statusline below the input shows **Shell mode**. 2. Run a command. The input returns to Agent Mode afterward. To leave shell mode without running a command, press `Esc`, or press `Backspace` at the start of the input. Any text you typed stays in the input. In shell mode, press `Tab` to complete commands and paths. See [Tab completions](#tab-completions). ## Natural language detection [Section titled “Natural language detection”](#natural-language-detection) Out of the box, the CLI never guesses what your input is: everything goes to the agent unless you enter shell mode. To type commands directly without the `!` prefix, turn on natural language detection: * **Toggle detection** - Run `/natural-language-detection` to turn detection on or off. The statusline confirms the change, and the setting persists across sessions. * **Automatic classification** - With detection on, the CLI classifies your input as you type. When the input looks like a shell command (for example, `git status`), the input switches to shell mode, and `Enter` runs it as a command. Everything else is sent to the agent. * **Ambiguous input** - Short or ambiguous input stays in Agent Mode, and a single word switches to shell mode only when it matches a command available in your shell. The prompt marker and statusline always show the current mode before you press `Enter`. If detection classifies input differently than you intended, press `Esc` to switch back to Agent Mode, or press `!` at the start of the input to force shell mode. ## Long-running and interactive commands [Section titled “Long-running and interactive commands”](#long-running-and-interactive-commands) When a command keeps running, such as a dev server, a package install, or an interactive prompt, the CLI hands input over to it: * **Input passthrough** - Keystrokes and pasted text are forwarded to the running process, so password requests, confirmation prompts, and other interactive programs work as they do in a plain terminal. * **Type ahead** - If you start typing your next command before the current one finishes, the typed characters are carried into the input when the command completes, with the cursor at the end. This matches type-ahead behavior in shells like zsh and bash. One command runs in the session at a time. If the terminal is already busy, for example while the agent is running a command of its own, submitting a shell command shows a notice in the statusline and keeps your text in the input. ## Full-screen terminal apps [Section titled “Full-screen terminal apps”](#full-screen-terminal-apps) Commands that switch the terminal to the alternate screen, such as `vim`, `htop`, or `less`, take over the whole CLI view: * The app renders full-screen and receives keyboard, paste, scroll, and mouse input, so editors and other terminal UIs are fully usable inside the CLI. * When the app exits, the transcript returns with your conversation intact. ## Stopping commands and exiting [Section titled “Stopping commands and exiting”](#stopping-commands-and-exiting) `Ctrl+C` performs one contextual action per press: * **While a command is running** - `Ctrl+C` interrupts the running command, as in a plain terminal. It doesn’t exit the CLI. * **While the agent is responding** - `Ctrl+C` cancels the in-progress response. Text in the input is preserved. * **At an idle prompt** - `Ctrl+C` clears the input if it has text. After a press at the prompt, the statusline shows `ctrl-c again to exit` for about one second. Press `Ctrl+C` a second time within that window to exit the CLI. This works even while the agent is responding. While a shell command is running, `Ctrl+C` keeps interrupting the command instead. There are two other ways to exit: * **`Ctrl+D`** - Exits immediately when the input is empty. * **`/exit`** - Exits from the slash command menu. When you exit, the CLI prints a command you can use to pick the conversation back up later. See [Managing conversations](/agents/cli/agent-conversations/#managing-conversations) for resuming and switching conversations. ## Related pages [Section titled “Related pages”](#related-pages) * [Warp Agent CLI reference](/agents/cli/reference/) - Flags, environment variables, slash commands, and keyboard shortcuts. * [Agent conversations in the Warp Agent CLI](/agents/cli/agent-conversations/) - The transcript, tool calls, diffs, and managing conversations.
# Models and usage in the Warp Agent CLI
Canonical page: [/agents/cli/models-and-usage/](https://docs.warp.dev/agents/cli/models-and-usage/)
> Choose models in the Warp Agent CLI, bring your own API key, and track credit usage and per-response cost.
The Warp Agent CLI gives you the same model options as the Warp app. You can pick the model that powers your conversations, bring your own provider API keys, route requests through custom model routers, and see what every response costs as you work. ## Choosing a model [Section titled “Choosing a model”](#choosing-a-model) Run `/model` to open the model picker. You can also click the model name in the [statusline](/agents/cli/configuration/#statusline) to open the same picker. Models that your plan or your team’s settings don’t allow appear disabled in the picker. Your choice is saved as the base model of your active profile, so it persists across sessions. See [permissions and profiles](/agents/cli/permissions-and-profiles/) for how profiles work in the CLI. For the full list of supported models and to learn more about how Warp’s Auto models pick for you, see [Model choice](/agents/inference/model-choice/). ## Bring your own API key [Section titled “Bring your own API key”](#bring-your-own-api-key) The CLI supports [Bring Your Own API Key (BYOK)](/agents/inference/bring-your-own-api-key/) for OpenAI, Anthropic, and Google models, and can connect an [X Premium or SuperGrok subscription](/agents/inference/grok-subscription/) for Grok models. When you select a model covered by one of your keys, requests are billed through your provider account and don’t consume your Warp [credits](/support-and-community/plans-and-billing/credits/). Run `/api-keys` to open the key management menu. It lists each provider with its connection state, plus a Warp credit fallback toggle: * **Set a key** - Press `Enter` on OpenAI, Anthropic, or Google and enter the key. Input is masked, so the key never appears in your transcript or shell history, and it’s saved to your device’s secure storage. Warp does not store provider keys on its servers. * **Replace or clear a key** - On a connected provider, `Enter` loads the stored key (still masked) for editing, and saving an empty field clears it. `Ctrl+X` clears the highlighted provider’s key from the list. * **Connect X Premium or SuperGrok** - Press `Enter` on the subscription row and the CLI opens your browser to sign in to your xAI account. `Ctrl+X` disconnects it. Running `/connect-grok` jumps straight to this row and starts the sign-in. * **Warp credit fallback** - Press `Enter` to toggle whether a request that fails through your key is retried with Warp credits. See [failover and fallback behavior](/agents/inference/bring-your-own-api-key/#failover-and-fallback-behavior). You can also store or clear keys outside a session with the `--set-provider-api-key` and `--clear-provider-api-key` flags. See the [Warp Agent CLI reference](/agents/cli/reference/#command-line-flags). X Premium/SuperGrok connections can only be managed from inside a session, with `/api-keys` or `/connect-grok`. ## Custom model routing [Section titled “Custom model routing”](#custom-model-routing) [Custom routers](/agents/inference/custom-routers/) appear in the `/model` picker alongside individual models. Select one and each prompt resolves to a concrete model using the routing logic you defined. The CLI loads the same router definitions as the Warp app. These are YAML files in `~/.warp/custom_model_routers/`, plus any team-synced routers your admin shares. [Authoring a router as a file](/agents/inference/custom-routers/#author-a-router-as-a-file) documents the file format. ## Usage and cost [Section titled “Usage and cost”](#usage-and-cost) The CLI shows usage at three levels: * **Account usage** - Run `/usage` to open a read-only panel with your plan, credit balances and consumption, and links to manage billing or upgrade. Press `Esc` to close it. Unlike `/cost`, this is account-level, not conversation-level. * **Conversation total** - Once a conversation has reported any usage, the [statusline](/agents/cli/configuration/#statusline) shows its accumulated credits (e.g., `2.5 credits`). Click the entry to switch between credits and the equivalent provider cost in dollars. Your choice persists across sessions. * **Per-response details** - Run `/cost` to toggle a summary row under the latest response showing how long it took and how many credits it spent (e.g., `12s • 1.2 credits`). The summary appears once the response finishes. Credits are Warp’s unit of usage for agent requests. For what credits cover and how plans differ, see [Credits](/support-and-community/plans-and-billing/credits/). ## Related pages [Section titled “Related pages”](#related-pages) * [Model choice](/agents/inference/model-choice/) - Supported models and how automatic model selection works. * [Bring Your Own API Key](/agents/inference/bring-your-own-api-key/) - How BYOK works, key storage, and billing behavior. * [SuperGrok subscription](/agents/inference/grok-subscription/) - Use Grok models through your xAI account. * [Custom routers](/agents/inference/custom-routers/) - Define routing logic that picks a model per task. * [Warp Agent CLI reference](/agents/cli/reference/) - Flags and slash commands, including the API key commands.
# Oz CLI reference
Canonical page: [/agents/cli/oz-cli/](https://docs.warp.dev/agents/cli/oz-cli/)
> Use the Oz CLI to run, configure, and manage agents from the terminal.
Caution The Oz CLI (the `oz` binary, which previously shipped as `warp-cli`) is a supported legacy interface. Existing users do not need to change their workflows. For new multi-stage development workflows, use [Warp Factories](/factories/). Warp will publish guidance before any support change. The Oz CLI is the command-line tool for running and managing Warp’s cloud agents from any terminal, script, or CI pipeline. Use it to start agents locally or in the cloud, connect MCP servers, configure integrations, and authenticate without requiring the Warp desktop app. ## What is the CLI? [Section titled “What is the CLI?”](#what-is-the-cli) The Oz CLI is the command-line tool that lets you run [Cloud Agents](/platform/) from anywhere, including terminals, scripts, automated systems, or services. It’s the standard runtime entry point that turns a **prompt** plus **configuration** into an **executable agent task** that runs on either a **Warp-hosted or [self-hosted](/factories/self-hosting/) runner**. With the Oz CLI, you can: * Run agents locally for development and debugging * Run agents on remote machines * Connect agents to MCP servers like GitHub and Linear * Configure integrations that connect agents to Slack, Linear, and other trigger surfaces ## Installing the CLI [Section titled “Installing the CLI”](#installing-the-cli) You can install the Oz CLI as part of the Warp desktop app, or as a standalone package. ### Bundled with Warp [Section titled “Bundled with Warp”](#bundled-with-warp) The Oz CLI is automatically distributed with the Warp desktop app and can be used right away in Warp. To make the CLI globally available, add it to your `PATH`. * macOS To add the Oz CLI to your `PATH`: 1. Open the [Command Palette](/terminal/command-palette/) (`Cmd+P`) 2. In the search field, find and select the **Install Oz CLI Command** action. Administrator permissions are required to install the CLI into `/usr/local/bin`. * Windows In the Warp installer, select **Add Warp to PATH**. If you are installing for all users, this will put the CLI on the system path. Otherwise, the CLI is only added to the path for your account. * Linux To run the Oz CLI on Linux, use the same command that you’d use to start Warp normally. If you installed Warp via a package manager, it should already be on the system `PATH`. ### Standalone package [Section titled “Standalone package”](#standalone-package) Warp provides standalone packages for the CLI on macOS and Linux, without the Warp app. * macOS On macOS, we recommend that you install and update the standalone CLI with [Homebrew](https://brew.sh/), using the [`warpdotdev/warp` tap](https://github.com/warpdotdev/homebrew-warp):
```sh
$ brew tap warpdotdev/warp
$ brew update
$ brew install --cask oz
```
If you’re using Warp Preview, install the preview version of the CLI instead:
```sh
brew install --cask oz@preview
```
*** You can also download the CLI directly from these URLs: * [Apple Silicon](https://app.warp.dev/download/cli?os=macos\&package=tar\&arch=aarch64) * [Intel](https://app.warp.dev/download/cli?os=macos\&package=tar\&arch=x86_64) * [Apple Silicon, Warp Preview](https://app.warp.dev/download/cli?os=macos\&channel=preview\&package=tar\&arch=aarch64) * [Intel, Warp Preview](https://app.warp.dev/download/cli?os=macos\&channel=preview\&package=tar\&arch=x86_64) These builds do not auto-update. * Linux On Linux, we recommend that you install and update the standalone CLI through your distribution’s package manager. We support `apt`, `yum`, and `pacman`. 1. Add the Warp package repository for your distribution (see the [installation instructions](/getting-started/quickstart/installation-and-setup/)). 2. Install either the stable or Preview package (replace `apt` with `yum` or `pacman` as needed):
```sh
# Stable
sudo apt install oz-stable
# Preview (beta/early-access)
sudo apt install oz-preview
```
The package name (`oz-stable`) differs from the CLI command executable (`oz`). After installation, use the CLI via `oz` commands. *** You can also install the CLI by downloading a package directly. These installers automatically add the Warp repository, so future updates come through your package manager: * x86-64: [`.deb`](https://app.warp.dev/download/cli?os=linux\&package=deb\&arch=x86_64), [`.rpm`](https://app.warp.dev/download/cli?os=linux\&package=rpm\&arch=x86_64), [pacman](https://app.warp.dev/download/cli?os=linux\&package=pacman\&arch=x86_64) * aarch64: [`.deb`](https://app.warp.dev/download/cli?os=linux\&package=deb\&arch=aarch64), [`.rpm`](https://app.warp.dev/download/cli?os=linux\&package=rpm\&arch=aarch64), [pacman](https://app.warp.dev/download/cli?os=linux\&package=pacman\&arch=aarch64) * Windows A standalone CLI package is not currently available on Windows. To use the Oz CLI on Windows, install the Warp app, which bundles the CLI. You can install Warp using [WinGet](https://learn.microsoft.com/en-us/windows/package-manager/winget/):
```powershell
winget install Warp.Warp
```
After installation, see [Bundled with Warp](#bundled-with-warp) for instructions on adding the CLI to your `PATH`. ## Running the CLI [Section titled “Running the CLI”](#running-the-cli) Regardless of your OS or installation method, the CLI command is `oz`. If you’re using [Warp Preview](/support-and-community/community/warp-preview-and-alpha-program/), use `oz-preview` instead. ## Logging in [Section titled “Logging in”](#logging-in) The Oz CLI supports two authentication methods, depending on where and how you’re running agents. * **Interactive login —** best for local machines where you have Warp installed and can authenticate through a browser. * **API keys** — best for automated or remote environments that need to authenticate without human interaction. ### Interactive login (local machines) [Section titled “Interactive login (local machines)”](#interactive-login-local-machines) Use interactive login when you’re working on a machine where you already use the Warp app, or when you can open a browser to complete authentication. If you use the CLI on a host where you’re already signed in to Warp, it automatically reuses your existing credentials. To authenticate interactively:
```bash
oz login
```
The CLI prints out a URL that you can open in any browser to login to Warp. ### Checking who you’re signed in as [Section titled “Checking who you’re signed in as”](#checking-who-youre-signed-in-as) Use `oz whoami` to print information about the currently authenticated principal:
```sh
oz whoami
```
The output includes your user or service account ID, display name, email, and team (when available). When the CLI is authenticated as a service account principal, that principal is a [cloud agent](/platform/agents/) on your team. For machine-readable output, set `--output-format json` or `--output-format text`.
```sh
# JSON output for scripts
oz whoami --output-format json
# Compact "type:id" output
oz whoami --output-format text
```
If `oz whoami` reports that it could not determine your user ID, your credentials are missing or invalid. Run `oz login` (or set `WARP_API_KEY`) and try again. ### Logging out [Section titled “Logging out”](#logging-out) Use `oz logout` to clear the CLI’s cached credentials on this machine:
```sh
oz logout
```
If you weren’t logged in, the command prints `You are not logged in.` and exits. After logging out, run `oz login` to authenticate again. ### API key authentication [Section titled “API key authentication”](#api-key-authentication) Use an API key when the environment must authenticate on its own, such as CI pipelines, headless servers, VMs, Codespaces, or containers. API keys let the CLI authenticate non-interactively. For detailed instructions on creating, managing, and using API keys, see [API Keys](/agents/cli/oz-cli/api-keys/). **Quickstart:**
```sh
$ export WARP_API_KEY="wk-xxx..."
$ oz agent run --prompt "analyze this codebase"
```
*** ## Running agents [Section titled “Running agents”](#running-agents) The Oz CLI offers two ways to run agents, depending on where you want the work to happen: **Use `oz agent run` when:** * You’re developing locally and want immediate feedback * You need the agent to work with files in your current directory * You want to inspect and modify the agent’s work in real time * You’re debugging or iterating on prompts **Use `oz agent run-cloud` when:** * You want the agent to run on a remote machine or standardized environment * You’re triggering agent work from CI/CD or automated systems * You need the agent to run independently of your local session * You’re delegating work that doesn’t require your immediate attention ### Running locally: \`oz agent run\` [Section titled “Running locally: \`oz agent run\`”](#running-locally-oz-agent-run) To start an agent, use the `oz agent run` subcommand. You’ll need to specify a prompt and, optionally, the [MCP servers](/agents/capabilities/mcp/) and [agent profile](/agents/capabilities/agent-profiles-permissions/) to use.
```sh
oz agent run --prompt "set up a new Rust crate named warp-cli"
```
**Key flags:** * `--cwd ` (`-C`) — run from a different directory. * `--name ` (`-n`) — label the run for grouping and traceability. * `--share` — share the session with teammates (see [Collaboration](/agents/cli/oz-cli/#collaboration)). * `--profile ` — use a specific agent profile (see [Using Agent Profiles](/agents/cli/oz-cli/#using-agent-profiles)). * `--model ` — override the default Warp Agent model. Run `oz model list` to see the available IDs, or see [Model choice](/agents/inference/model-choice/). * `--skill ` — use a skill as the base prompt (see [Using Skills](/agents/cli/oz-cli/#using-skills)). * `--mcp ` — start one or more MCP servers before execution (UUID, JSON file path, or inline JSON). Can be repeated. * `--environment ` (`-e`) — run in a specific cloud environment. * `--file ` (`-f`) — load run configuration from a YAML or JSON file. The agent will automatically carry out the task you gave it, printing out tool calls and responses as it works. By default, the agent runs in your current working directory. To run from a different directory, use the `-C/--cwd` flag. ### Running agents remotely: \`oz agent run-cloud\` [Section titled “Running agents remotely: \`oz agent run-cloud\`”](#running-agents-remotely-oz-agent-run-cloud) Cloud runs dispatch tasks to remote environments. Use cloud runs for: * Background processing * Standardized team configurations * Remote execution on servers you don’t directly access
```sh
oz agent run-cloud \
--environment \
--name "Repo summary" \
--prompt "Summarize this repo and list the top 5 risky areas" \
--open
```
**Key flags** * `--environment ` (`-e`) — select the environment to run in. * `--no-environment` — run without an environment (not recommended). * `--open` — view the agent’s session in Warp once it’s available. * `--name ` (`-n`) — label the run for grouping and traceability (see [Naming runs](/agents/cli/oz-cli/#naming-runs) below). * `--title ` — set the title shown for the run and its conversation (see [Titling runs](/agents/cli/oz-cli/#titling-runs) below). * `--parent-run-id <RUN_ID>` — start the run as an orchestration child of an existing run (see [Starting a run as an orchestration child](/agents/cli/oz-cli/#starting-a-run-as-an-orchestration-child) below). * `--agent <UID>` — run as a saved [named agent](/platform/agents/), applying its configuration (skills, secrets, base model, and default environment) and attributing credit usage to it (see [Managing named agents](/agents/cli/oz-cli/#managing-named-agents) below). * `--mcp <SPEC>` — start one or more MCP servers before execution (UUID, JSON file path, or inline JSON). Can be repeated. * `--model <MODEL_ID>` — choose the model for the selected harness. For the Warp Agent harness, use an ID from `oz model list`. For Claude Code or Codex, see [Choosing an execution harness](#choosing-an-execution-harness). * `--skill <SPEC>` — use a skill from the environment’s repository as the base prompt (see [Using Skills](/agents/cli/oz-cli/#using-skills)). * `--host <WORKER_ID>` — run on a specific self-hosted worker instead of Warp-hosted infrastructure. * `--attach <PATH>` — attach a file to the agent query. You can attach up to 25 files, with a maximum size of 10 MB per file. For images in interactive local or cloud conversations, see [Images as Context](/agents/local-agents/agent-context/images-as-context/). * `--computer-use` / `--no-computer-use` — enable or disable [Computer Use](/agents/capabilities/computer-use/) for this run. * `--harness <HARNESS>` — choose the [execution harness](/platform/harnesses/) for the run: `oz` (default, the Warp Agent), `claude` (Claude Code), or `codex` (Codex). `claude-code` is accepted as an alias for `claude`. See [harness identifiers](/platform/harnesses/#harness-identifiers). * `--claude-auth-secret <NAME>` — name of the [Warp-managed secret](/platform/secrets/) that authenticates the Claude Code harness. Use with `--harness claude` or the `--harness claude-code` alias. See [Third-party cloud agent authentication](/platform/harnesses/authentication/). * `--codex-auth-secret <NAME>` — name of the [Warp-managed secret](/platform/secrets/) that authenticates the Codex harness. Only valid with `--harness codex`. See [Third-party cloud agent authentication](/platform/harnesses/authentication/). * `--file <PATH>` (`-f`) — load run configuration from a YAML or JSON file. To run a third-party harness, first store the provider credential as a Warp-managed secret, then pass it with the matching flag:
```sh
# Run Claude Code as a cloud agent, authenticating with a stored Anthropic secret
oz agent run-cloud \
--environment <ENVIRONMENT_ID> \
--harness claude \
--claude-auth-secret ANTHROPIC_API_KEY \
--prompt "Review the latest PR and suggest fixes"
```
**Key differences from `run`** * No `--cwd` — the environment determines the working directory. * No `--share` — sharing options are on `run`, not `run-cloud`. * No `--profile` — cloud runs do not use agent profiles. #### Naming runs [Section titled “Naming runs”](#naming-runs) The `--name` flag assigns a config name to the run. Use it to group related runs under a shared label so you can filter, search, and track them later. **How names work:** * **Skill-based runs** — When you run an agent from a [skill](/agents/capabilities/skills/), the name is automatically set to the skill name. You don’t need to pass `--name` explicitly. * **Custom runs** — When you build your own automation (via the CLI, API, or SDK), set `--name` to a consistent value that describes the workflow’s intent. **Why naming matters:** When your team runs many agents across schedules, integrations, and ad-hoc triggers, `name` lets you answer questions like “how many distinct workflows are we running?” and “how often does this particular workflow run?” You can filter runs by name using the `name` query parameter on `GET /agent/runs` in the [Warp Platform API](/factories/api-and-sdk/). **Examples:**
```sh
# Name a recurring workflow for easy tracking
oz agent run-cloud \
--environment <ENVIRONMENT_ID> \
--name "nightly-dependency-check" \
--prompt "Check for outdated dependencies and open a PR with updates"
# Skill-based runs are named automatically
oz agent run-cloud \
--environment <ENVIRONMENT_ID> \
--skill "myorg/backend:code-review" \
--prompt "review the latest PR"
```
#### Titling runs [Section titled “Titling runs”](#titling-runs) The `--title` flag sets the title shown for the run and its conversation in Warp and the [Oz web app](/platform/oz-web-app/). Use it when the auto-generated title isn’t descriptive enough:
```sh
oz agent run-cloud \
--environment <ENVIRONMENT_ID> \
--title "Upgrade Postgres driver to 5.2" \
--prompt "Upgrade the Postgres driver and fix any resulting build errors"
```
`--title` and `--name` do different things: `--name` sets the run’s config name, which groups related runs under a shared label, while `--title` labels this one run for humans reading it. #### Starting a run as an orchestration child [Section titled “Starting a run as an orchestration child”](#starting-a-run-as-an-orchestration-child) The `--parent-run-id` flag attaches the new run to an existing run as an [orchestration](/platform/orchestration/multi-agent-runs/) child. The child inherits the parent’s lineage and scope, and it appears alongside the parent’s other children instead of as a standalone run:
```sh
oz agent run-cloud \
--environment <ENVIRONMENT_ID> \
--parent-run-id <PARENT_RUN_ID> \
--title "Backfill integration tests" \
--prompt "Add integration tests for the new endpoints"
```
Pass the run ID of the run doing the spawning. Omit the flag for ordinary standalone runs. **When cloud runs fail** * Verify your environment has the correct repository and context. * Check that your profile allows the commands and MCP servers needed. * Ensure environment variables are set in the environment, not your local shell. #### Reusing saved prompts and Warp Drive objects [Section titled “Reusing saved prompts and Warp Drive objects”](#reusing-saved-prompts-and-warp-drive-objects) You can reuse saved prompts with `--saved-prompt`, and reference notebooks, workflows, and rules inline in any `--prompt` string. See [Referencing Warp Drive objects](/agents/cli/oz-cli/warp-drive/) for details. #### Choosing an execution harness [Section titled “Choosing an execution harness”](#choosing-an-execution-harness) By default, cloud runs use the Warp Agent harness (`oz`). To run Claude Code or Codex, pass `--harness` with the matching auth secret.
```bash
oz agent run-cloud \
--environment ENVIRONMENT_ID \
--harness claude \
--claude-auth-secret SECRET_NAME \
--model opus \
--prompt "review the latest PR"
```
Run `oz model list` to list model IDs for the Warp Agent harness. For Claude Code, choose an ID from [available Claude Code models](/platform/harnesses/claude-code/#available-models). For Codex, choose an ID from [available Codex models](/platform/harnesses/codex/#available-models). If the model is not available for the selected harness, the command fails before the run starts. Create the auth secret first with `oz secret create claude api-key SECRET_NAME` (or `oz secret create codex api-key SECRET_NAME` for Codex). See [Third-party cloud agent authentication](/platform/harnesses/authentication/) for the full setup. ## Using agent profiles [Section titled “Using agent profiles”](#using-agent-profiles) Agent profiles control what the agent can do, how it behaves, and where it can act. Use the `--profile` flag with `oz agent run` to apply a specific profile. See [Agent profiles](/agents/cli/oz-cli/agent-profiles/) for how to find profile IDs and apply them. ## Using MCP servers [Section titled “Using MCP servers”](#using-mcp-servers) MCP servers connect agents to external systems like GitHub, Linear, or Sentry. Use the `--mcp` flag with any of three formats: a Warp MCP server UUID, inline JSON, or a path to a JSON config file. See [MCP Servers](/agents/cli/oz-cli/mcp-servers/) for full details, including how to find UUIDs, combine multiple servers, and handle environment variables on remote machines. ## Using skills [Section titled “Using skills”](#using-skills) [Skills](/agents/capabilities/skills/) are reusable instruction sets that teach agents how to perform specific tasks. Use the `--skill` flag to run an agent from a skill stored in a repository. See [Skills](/agents/cli/oz-cli/skills/) for supported spec formats and examples for both local and cloud agent runs. ## Collaboration [Section titled “Collaboration”](#collaboration) In addition to text-based output, the CLI can share the agent’s session for you to access on other devices or in a browser. To enable [Agent Session Sharing](/agents/local-agents/session-sharing/), use the `--share` flag. By default, the session is only accessible to the user running the CLI, but you can also share with [Teams](/knowledge-and-collaboration/teams/) or other Warp users:
```sh
# Share the agent's session with yourself:
$ oz agent run --share --prompt "fix the compiler error"
# Give specific users view-only access to a session:
$ oz agent run --share firstuser@example.com --share otheruser@example.com --prompt "fix the compiler error"
# Let any user on your team edit the session:
$ oz agent run --share team:edit --prompt "fix the compiler error"
```
The `--share` flag can be repeated, and uses the following syntax: * `--share user@email.com` or `--share user@email.com:view` — gives specified user read-only access to the session. * `--share user@email.com:edit` — gives specified user `user@email.com` read/write access to the session. * `--share team` or `--share team:view` — gives all members of your team read-only access to the session. * `--share team:edit` — gives all members of your team read/write access to the session. ## Additional commands [Section titled “Additional commands”](#additional-commands) The following commands are available for managing and inspecting Warp resources. ### Managing named agents [Section titled “Managing named agents”](#managing-named-agents) [Named agents](/platform/agents/) are reusable agent configurations — a name, description, base prompt, skills, secrets, base model, and default environment — that you can run with `oz agent run-cloud --agent <UID>` and scope API keys to. List the named agents on your team, optionally sorting by name or creation time:
```sh
oz agent list
oz agent list --sort-by created-at --sort-order desc
```
Show the full configuration for a single agent by its UID:
```sh
oz agent get <UID>
```
Create a named agent. Only `--name` is required; attach skills and secrets by repeating the flags:
```sh
oz agent create \
--name "release-notes" \
--description "Drafts release notes from merged PRs" \
--prompt "Draft concise release notes grouped by feature area." \
--skill "myorg/repo:release-notes" \
--secret GITHUB_TOKEN \
--base-model <MODEL_ID> \
--environment <ENVIRONMENT_ID>
```
Update an existing agent. Each attribute has an explicit add/remove flag so changes are unambiguous:
```sh
# Rename the agent and swap one of its skills
oz agent update <UID> --name "weekly-release-notes" \
--remove-skill "myorg/repo:old" --add-skill "myorg/repo:release-notes"
# Clear attributes entirely
oz agent update <UID> --remove-description --remove-all-secrets
```
Common `oz agent update` flags: * `--name <NAME>` (`-n`) — rename the agent. * `--description <TEXT>` / `--remove-description` — set or clear the description. * `--prompt <TEXT>` / `--remove-prompt` — set or clear the base prompt applied to the agent’s runs. * `--add-secret <NAME>` / `--remove-secret <NAME>` / `--remove-all-secrets` — manage attached secrets. * `--add-skill <SKILL>` / `--remove-skill <SKILL>` / `--remove-all-skills` — manage attached skills. * `--base-model <MODEL_ID>` / `--remove-base-model` — set or clear the base model. * `--environment <ENVIRONMENT_ID>` (`-e`) / `--remove-environment` — set or clear the default cloud environment. Delete a named agent by its UID:
```sh
oz agent delete <UID>
```
### `oz agent skills` [Section titled “oz agent skills”](#oz-agent-skills) List the agent skills discovered across your environments. Pass `--repo` (`-r`) to list skills from a specific GitHub repository instead:
```sh
oz agent skills
oz agent skills --repo owner/repo
```
### `oz run list` / `oz run get` [Section titled “oz run list / oz run get”](#oz-run-list--oz-run-get) List and inspect cloud agent runs:
```sh
# List recent runs (default: 10)
oz run list
oz run list --limit 20
# Get details for a specific run
oz run get <RUN_ID>
```
### Run conversations and messages [Section titled “Run conversations and messages”](#run-conversations-and-messages) Read an agent run’s transcript and exchange messages between runs — for example, between a parent orchestrator and its [child agents](/platform/orchestration/multi-agent-runs/). Retrieve a conversation transcript by its ID:
```sh
oz run conversation get <CONVERSATION_ID>
```
List and read the messages in a run’s inbox:
```sh
# List inbox message headers
oz run message list <RUN_ID>
oz run message list <RUN_ID> --unread --since 2026-01-01T00:00:00Z --limit 100
# Read one message body
oz run message read <MESSAGE_ID>
# Stream new messages as they arrive (resume reconnects with --since-sequence)
oz run message watch <RUN_ID>
oz run message watch <RUN_ID> --since-sequence 42
```
Send a message from one run to one or more recipient runs, then mark it delivered once handled:
```sh
oz run message send \
--sender-run-id <RUN_ID> \
--to <RECIPIENT_RUN_ID> \
--subject "build status" \
--body "tests are green"
oz run message mark-delivered <MESSAGE_ID>
```
Repeat `--to` to fan a message out to multiple recipient runs. ### `oz model list` [Section titled “oz model list”](#oz-model-list) List available models for the Warp Agent harness:
```sh
oz model list
```
### `oz environment image list` [Section titled “oz environment image list”](#oz-environment-image-list) List suggested base images for cloud environments:
```sh
oz environment image list
```
### `oz artifact get` / `oz artifact download` [Section titled “oz artifact get / oz artifact download”](#oz-artifact-get--oz-artifact-download) Inspect and retrieve files an agent produced during a run. See [Artifacts](/agents/cli/oz-cli/artifacts/) for details. ### `oz federate issue-token` [Section titled “oz federate issue-token”](#oz-federate-issue-token) Issue a short-lived OIDC identity token from inside a running agent to authenticate to cloud providers without long-lived credentials. See [Federated identity tokens](/agents/cli/oz-cli/federate/) for details. *** ## Troubleshooting [Section titled “Troubleshooting”](#troubleshooting) For built-in CLI help commands and solutions to common errors — including authentication issues, agent failures, environment problems, and Docker image issues — see [Troubleshooting](/agents/cli/oz-cli/troubleshooting/).
# Agent profiles
Canonical page: [/agents/cli/oz-cli/agent-profiles/](https://docs.warp.dev/agents/cli/oz-cli/agent-profiles/)
> Use agent profiles with the Oz CLI to control what the agent can access, how it behaves, and where it can act.
Caution The Oz CLI (the `oz` binary) is a supported legacy interface. Existing users do not need to change their workflows. For new multi-stage development workflows, use [Warp Factories](/factories/). Warp will publish guidance before any support change. Agent profiles control what the agent can do, how it behaves, and where it can act when running from the Oz CLI. Create profiles in the Warp app to configure file access, command execution, MCP server usage, model selection, and directory permissions, then reference them by ID in CLI commands. Agent profiles control three things: * **What the agent can do** — file access, command execution, and MCP server usage * **How the agent works** — model selection, autonomy level, and response style * **Where the agent can act** — directory allowlists and denylists You can create and configure agent profiles in the Warp app. For detailed instructions, see [Agent Profiles & Permissions](/agents/capabilities/agent-profiles-permissions/). Agent profiles are automatically synced to each host where you have Warp installed, so you can use them remotely as well. Caution The default profile for CLI usage is broadly permissive and gives the agent the ability to read and write files, apply code diffs, execute commands with a default denylist, and use MCP actions. Its profile MCP allowlist starts empty. Select run-scoped servers with `--mcp`, use a profile that allowlists installed servers, or configure an eligible file-based or global server. See [MCP servers](/agents/cli/oz-cli/mcp-servers/) for details. ## Using a profile with the CLI [Section titled “Using a profile with the CLI”](#using-a-profile-with-the-cli) 1. Find the profile ID using `oz agent profile list`:
```sh
$ oz agent profile list
+--------------+------------------------+
| Name | ID |
+=======================================+
| Default | AnTb02PZfrkVC9l4V15eH1 |
|--------------+------------------------|
| Coding | CWhozDJPdPCsjJ1pSG0HCN |
|--------------+------------------------|
| Command Line | hV6n5dNm7ThQVlOiPF8DLS |
+--------------+------------------------+
```
2. Pass that ID using the `--profile` flag:
```sh
$ oz agent run --profile CWhozDJPdPCsjJ1pSG0HCN --prompt "update my CI pipeline to use nextest"
```
# API keys for the Oz CLI
Canonical page: [/agents/cli/oz-cli/api-keys/](https://docs.warp.dev/agents/cli/oz-cli/api-keys/)
> Create and manage API keys for authenticating the Oz CLI, cloud agents, and self-hosted workers.
Caution The Oz CLI (the `oz` binary) is a supported legacy interface. Existing users do not need to change their workflows. For new multi-stage development workflows, use [Warp Factories](/factories/). Warp will publish guidance before any support change. API keys let the Oz CLI, cloud agents, and self-hosted workers authenticate without human interaction. Use API keys for CI pipelines, headless servers, VMs, Codespaces, containers, and other automated environments. ## Personal vs. agent keys [Section titled “Personal vs. agent keys”](#personal-vs-agent-keys) Choose a key type based on what needs to authenticate: * **Personal API keys** - Authenticate as you. Runs use your GitHub permissions, draw from your credit pool, and inherit your account’s [skills](/agents/capabilities/skills/). Use a personal key when the run should act on your behalf — for example, developer-triggered API automation, or the [Enterprise Analytics API](/enterprise/enterprise-features/analytics-api/), which only accepts personal keys. * **Agent** API keys - Run as a [cloud agent](/platform/agents/) on your team. Use an agent key for scheduled jobs, integrations (Slack, Linear, GitHub Actions), SDK-triggered runs, and other automation that isn’t tied to a specific user. Billing and GitHub permissions are scoped to the team rather than to you. For [self-hosting with an external orchestrator](/factories/self-hosting/external-orchestrators/), create an Agent key associated with the Default Service Account. This key lets the orchestrator create and run tasks without using a person’s identity, and it can authenticate a worker when one job performs both actions. ## Self-hosted worker API keys [Section titled “Self-hosted worker API keys”](#self-hosted-worker-api-keys) Self-hosted worker API keys authenticate managed `oz-agent-worker` daemons as your team. Use this key type with the [Docker](/factories/self-hosting/managed-docker/), [Kubernetes](/factories/self-hosting/managed-kubernetes/), [Direct](/factories/self-hosting/managed-direct/), or [Command](/factories/self-hosting/external-orchestrators/#using-the-command-backend) backend. You don’t need to select an agent when creating one. ## Creating an API key [Section titled “Creating an API key”](#creating-an-api-key) Create personal and agent keys in the [Oz web app](https://oz.warp.dev/settings) or the Warp app. Create self-hosted worker keys in the [Warp Factories web app](https://platform.warp.dev/settings). ### Creating a self-hosted worker API key [Section titled “Creating a self-hosted worker API key”](#creating-a-self-hosted-worker-api-key) 1. Open the [Warp Factories web app user settings page](https://platform.warp.dev/settings). 2. In the API keys section, click **Generate new token**. 3. Under “Type,” select **Self-hosted worker**. The key is tied to your team and does not require an agent selection. 4. Enter a name for the key and choose when it expires. 5. Click **Create key**. 6. In the “Copy API key” dialog, copy the key and store it securely. The key is shown only once. **Expected outcome:** The key appears in the API keys list with a **Team** badge and the expiration you selected. ### From the web app (recommended) [Section titled “From the web app (recommended)”](#from-the-web-app-recommended) 1. Open the [Oz web app settings page](https://oz.warp.dev/settings). 2. In the API keys section, click **Generate new token**. 3. Choose the type: * **Personal** — Tied to your individual Warp account. * **Agent** — Runs as a cloud agent on your team. For an external self-hosting orchestrator, choose **Default Service Account** from the dropdown. 4. Enter a name for the key and choose an expiration (1 day, 30 days, 90 days, or never). 5. Click **Create key**. 6. Copy the raw API key and store it securely. **You won’t be able to see it again after closing the dialog.** ### From the Warp app [Section titled “From the Warp app”](#from-the-warp-app) 1. In the Warp app, click your profile photo in the top-right corner, then click **Settings**. 2. In the sidebar, expand **Cloud platform** and click **API keys**. 3. In the API Keys section, click **+ Create API Key**. 4. Pick **Personal** for a personal key, or **Agent** / **Team** for an agent key tied to your team. (The toggle may still read **Team** in older versions of the desktop app.) 5. Name the key and choose an expiration (1 day, 30 days, 90 days, or never). 6. Click **Create key**. 7. Copy the raw API key and store it securely. **You won’t be able to see it again after closing the dialog.** To create a self-hosted worker key, use the [Warp Factories web app flow](#creating-a-self-hosted-worker-api-key). 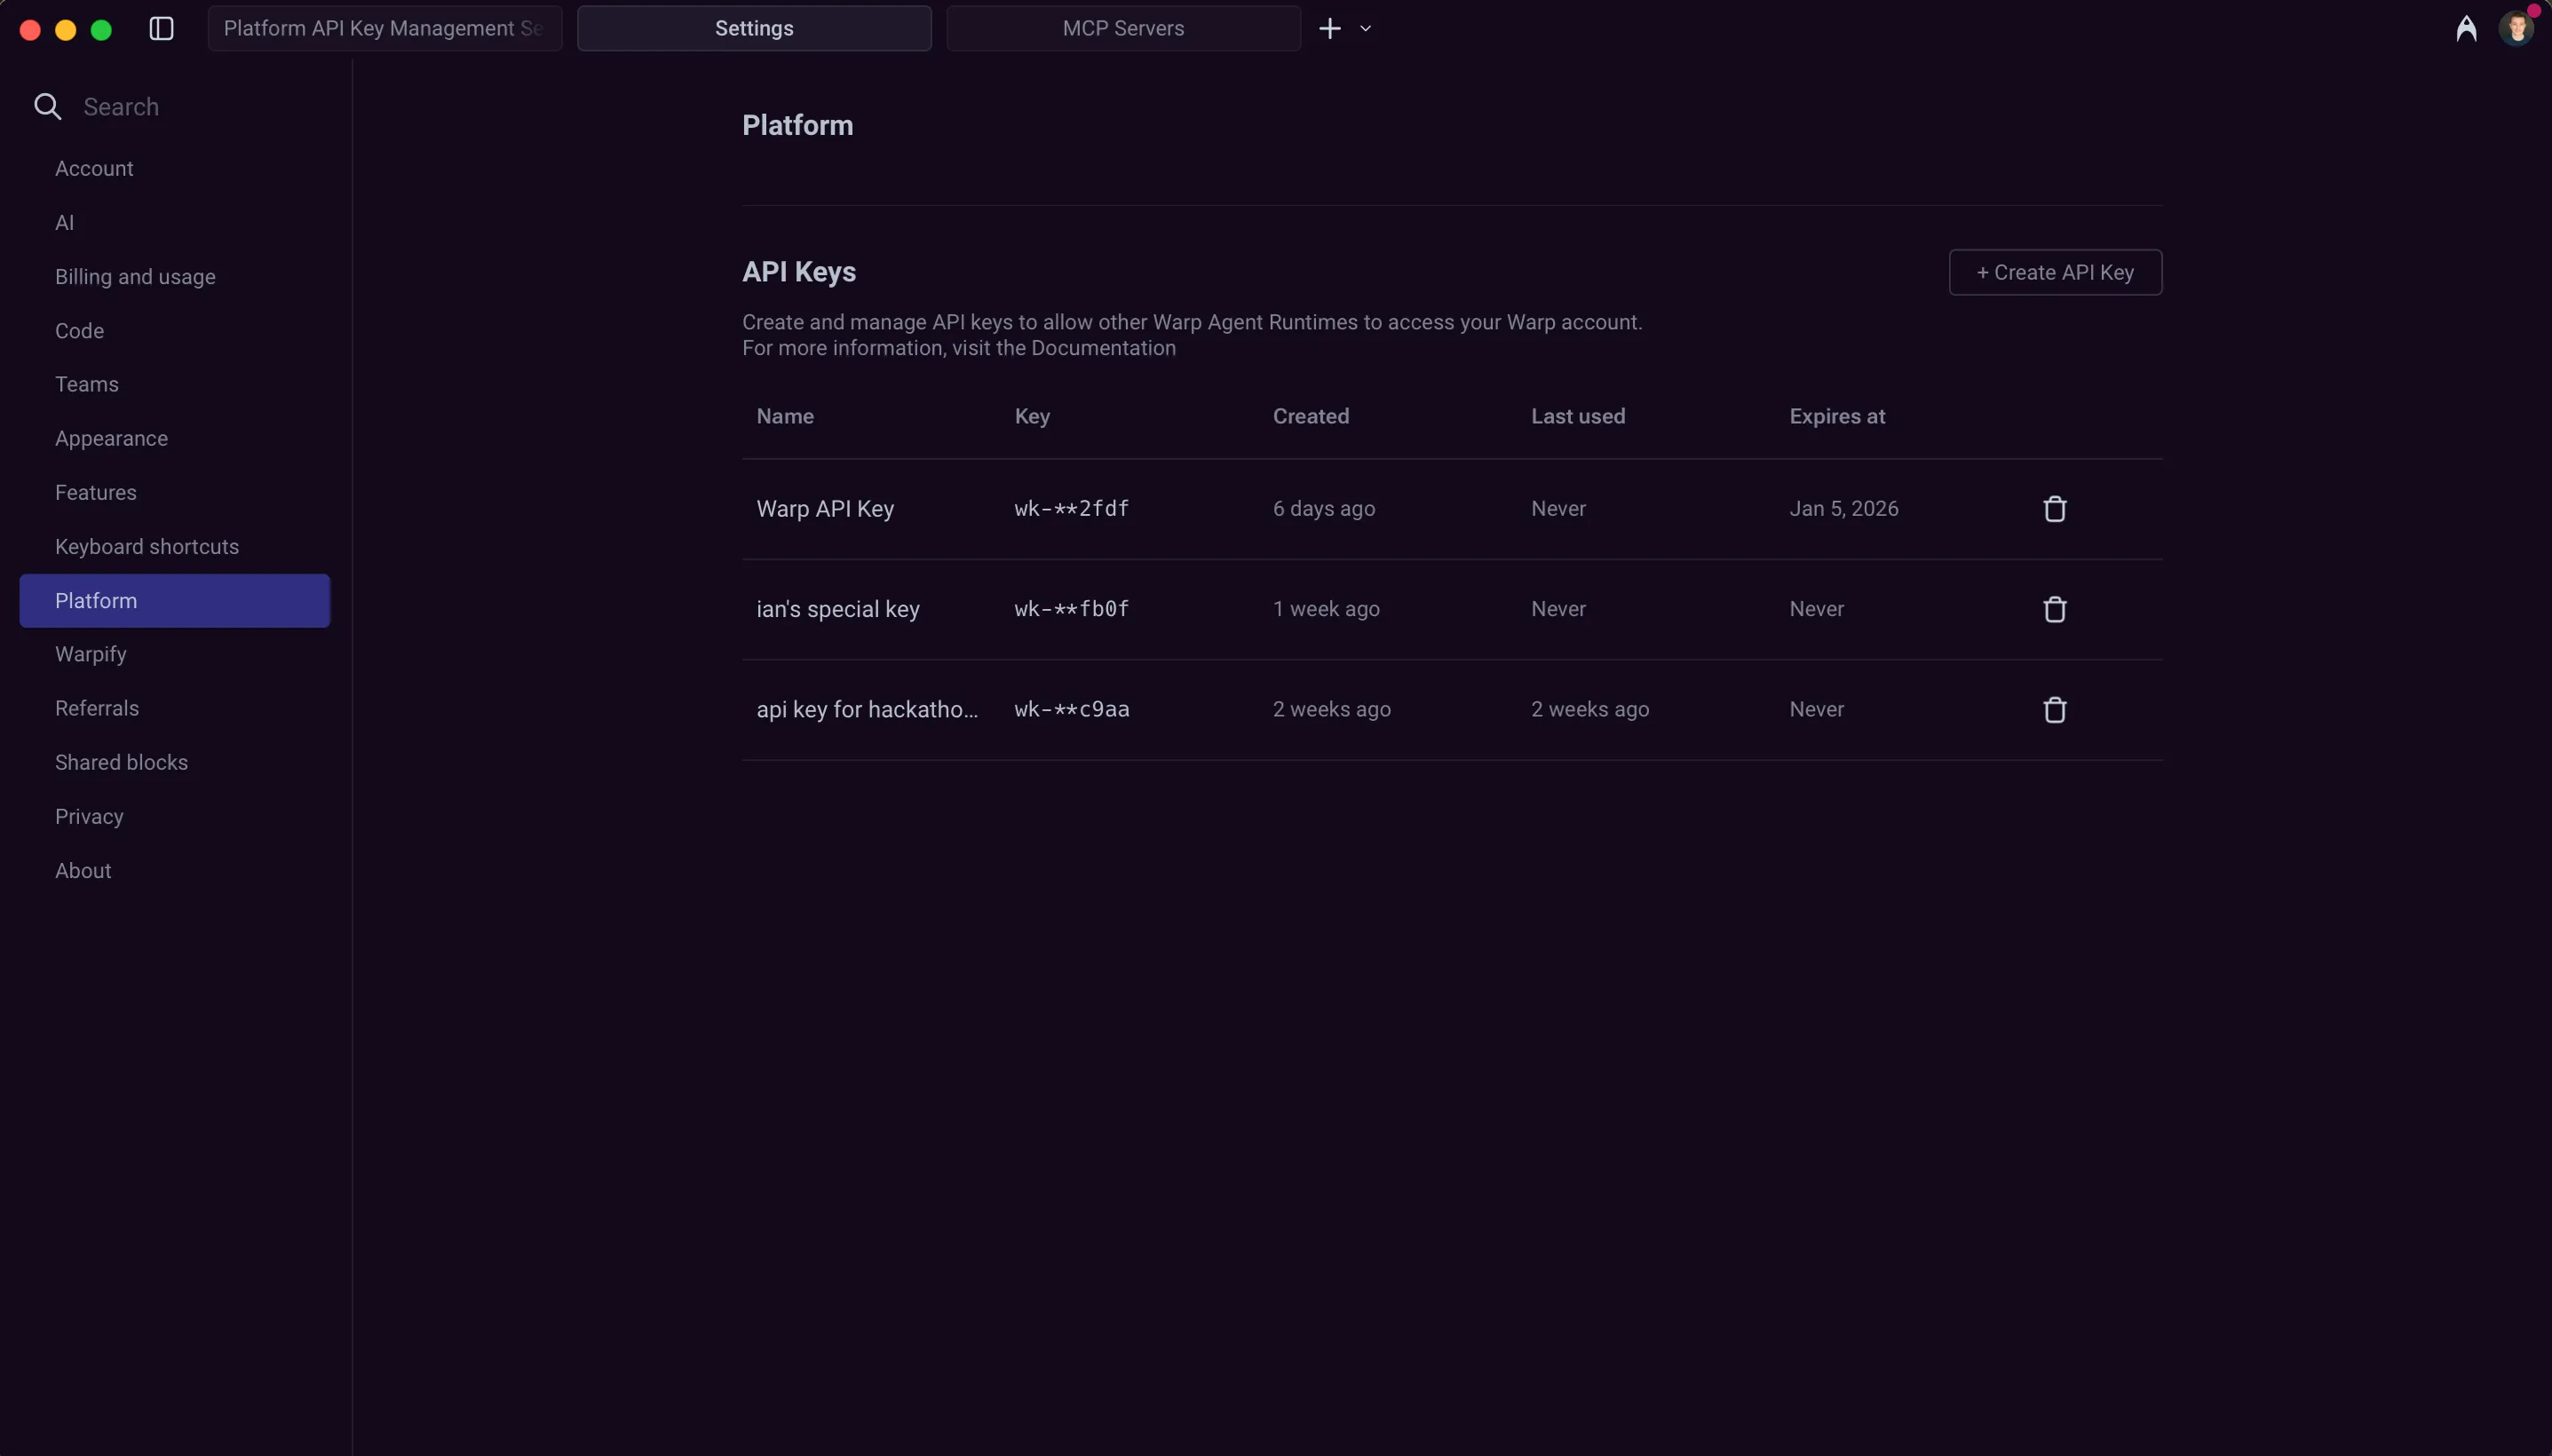 API key management interface in Warp settings. ## How key type affects billing and GitHub access [Section titled “How key type affects billing and GitHub access”](#how-key-type-affects-billing-and-github-access) The key type determines who the run is attributed to, which credit pool is billed, and which GitHub credentials the agent can use. ### Personal API key behavior [Section titled “Personal API key behavior”](#personal-api-key-behavior) * Run as you. * On Build, Max, and Business plans, use your plan-included credits, then your add-on credits. On Enterprise plans, use the team-scoped credit pool. * Use your GitHub permissions. Code changes are attributed to your GitHub account. ### Agent API key behavior [Section titled “Agent API key behavior”](#agent-api-key-behavior) * Run as a cloud agent on your team. * On Build, Max, and Business plans, bill the team owner: the owner’s plan-included credits, then the owner’s add-on credits. With auto-reload on, usage can trigger a reload on the owner’s pool, subject to the team-wide monthly spend cap. On Enterprise plans, use the team-scoped credit pool. * Use the [Warp Factories](/factories/) GitHub App when [team GitHub authorization](/platform/team-access-billing-and-identity/#team-github-authorization) is configured. Without team GitHub authorization, agent keys are still useful for tasks that don’t need to write to GitHub, such as analysis, monitoring, or triage. For the full credit waterfall, see [Access, billing, and identity permissions](/platform/team-access-billing-and-identity/) and [add-on credits](/support-and-community/plans-and-billing/add-on-credits/). ## Authenticating with API keys [Section titled “Authenticating with API keys”](#authenticating-with-api-keys) You can authenticate with an API key in the CLI using either an environment variable or a command flag. Environment variables are recommended for security and easier reuse across multiple commands. **Via environment variable (recommended):**
```sh
$ export WARP_API_KEY="wk-xxx..."
$ oz agent run --prompt "analyze this codebase"
```
**Via command flag:**
```sh
$ oz agent run --api-key "wk-xxx..." --prompt "analyze this codebase"
```
## Managing API keys [Section titled “Managing API keys”](#managing-api-keys) The [Oz web app settings page](https://oz.warp.dev/settings) and the Warp app’s **Settings** > **Cloud platform** > **API keys** both list your active keys. Both surfaces show: * **Name** — The name you assigned when creating the key. * **Scope** — Personal keys show your user; agent keys show the cloud agent the key runs as. * **Expires at** — The key’s expiration date, or “Never” if it doesn’t expire. The Warp app also shows additional metadata that isn’t surfaced in the Oz web app: * **Key** — A masked suffix (`wk-**xxxx`) to help identify the key. * **Created** — When the key was created. * **Last used** — When the key was last used for authentication. ### Deleting API keys [Section titled “Deleting API keys”](#deleting-api-keys) To delete an API key, find it in either the Oz web app or the Warp app’s API Keys list and click the delete icon next to the key. Deleted keys are immediately invalidated and cannot be recovered. Any services or scripts using the deleted key will lose access and may return an [`authentication_required` error](/factories/api-and-sdk/troubleshooting/errors/authentication-required/). ## Manage API keys from the CLI [Section titled “Manage API keys from the CLI”](#manage-api-keys-from-the-cli) In addition to the web and Warp app surfaces, you can manage API keys directly with the [Oz CLI](/agents/cli/oz-cli/). These commands are useful for scripting key rotation and for headless environments. ### List keys [Section titled “List keys”](#list-keys) `oz api-key list` prints your active API keys. * `--sort-by <FIELD>` — Sort by `name`, `created-at`, `last-used-at`, `expires-at`, or `scope`. * `--sort-order <DIR>` — Sort direction: `asc` or `desc`. * `--jq <FILTER>` — Filter the JSON output with a jq expression (for example, `--jq '.[].name'`).
```bash
oz api-key list --sort-by last-used-at --sort-order desc
```
### Create a key [Section titled “Create a key”](#create-a-key) `oz api-key create <NAME>` creates a key and prints the raw secret once. Store it securely — you can’t retrieve it again. * `<NAME>` — A name to identify the key (required). * `--agent <UID>` — Create an agent key that runs as the given cloud agent, instead of a personal key. * One expiration choice is required: `--expires-in <DURATION>` (for example, `30d`, `12h`, or `90m`), `--expires-at <RFC3339>` (an exact timestamp), or `--no-expiration`. * `--jq <FILTER>` — Filter the JSON output with a jq expression.
```bash
# A personal key that expires in 30 days
oz api-key create "ci-pipeline" --expires-in 30d
# An agent key scoped to a cloud agent, with no expiration
oz api-key create "nightly-triage" --agent AGENT_UID --no-expiration
```
### Expire a key [Section titled “Expire a key”](#expire-a-key) `oz api-key expire <NAME_OR_UID>` immediately invalidates a key (also available as `oz api-key delete`). Expired keys can’t be recovered. * `<NAME_OR_UID>` — The name or UID of the key to expire (required). * `--force` — Skip the confirmation prompt.
```bash
oz api-key expire "ci-pipeline" --force
```
## Best practices [Section titled “Best practices”](#best-practices) * **Use personal keys for runs that should act as you.** When code changes should be attributed to your GitHub account, a personal key is the right choice. Use agent keys for automation that isn’t tied to a specific user. * **Use environment variables.** Avoid passing API keys directly in commands where they may be logged or visible in shell history. * **Set appropriate expiration.** Use shorter expiration times for development and testing; consider longer durations for stable production workflows. * **Configure team GitHub authorization for agents that write to GitHub.** Personal keys authenticate as you with your GitHub permissions. Agent keys authenticate via the [Warp Factories GitHub App](/platform/team-access-billing-and-identity/#team-github-authorization) when team GitHub authorization is configured in the Admin Panel. * **Rotate keys periodically.** Create new keys and retire old ones on a regular schedule to limit exposure from compromised credentials. * **Store securely.** Use secret managers (like 1Password CLI, HashiCorp Vault, or cloud provider secret services) rather than plain text files.
# Artifacts
Canonical page: [/agents/cli/oz-cli/artifacts/](https://docs.warp.dev/agents/cli/oz-cli/artifacts/)
> Get metadata for and download files produced by an agent run using the `oz artifact` subcommands.
Caution The Oz CLI (the `oz` binary) is a supported legacy interface. Existing users do not need to change their workflows. For new multi-stage development workflows, use [Warp Factories](/factories/). Warp will publish guidance before any support change. Artifacts are files that an agent produces during a run and uploads to Warp — screenshots, generated reports, build outputs, logs, or any other file the agent saves alongside its conversation. Use `oz artifact` to inspect those files from outside the run and pull them down to your machine. ## When to use artifacts [Section titled “When to use artifacts”](#when-to-use-artifacts) Use artifacts when you need to retrieve files an agent produced after a run completes, without re-running the agent or scraping the conversation output. * **Hand-offs between runs** - A scheduled agent produces a report; a follow-up workflow downloads and processes it. * **Local inspection** - Pull a generated file (HTML, image, CSV) onto your laptop to review. * **CI integration** - Fetch an agent-produced build artifact from a pipeline step that runs after the agent finishes. Artifacts are referenced by an artifact UID. You can find UIDs in the agent’s run detail view, in the JSON returned by [`oz run get`](/agents/cli/oz-cli/), or in the response from the [Warp Platform API](/factories/api-and-sdk/). ## `oz artifact get` [Section titled “oz artifact get”](#oz-artifact-get) Print metadata for an artifact without downloading it.
```sh
oz artifact get <ARTIFACT_UID>
```
The output describes the artifact (file name, content type, size, the run or conversation it’s associated with, and the description supplied when it was uploaded). Use `--output-format json` for a structured response that’s easy to parse from a script:
```sh
oz artifact get <ARTIFACT_UID> --output-format json
```
This command is useful for confirming an artifact exists and inspecting its size before you decide to download it. ## `oz artifact download` [Section titled “oz artifact download”](#oz-artifact-download) Download the file contents of an artifact.
```sh
oz artifact download <ARTIFACT_UID> [--out <PATH>]
```
### Flags [Section titled “Flags”](#flags) * **`<ARTIFACT_UID>`** - The UID of the artifact to download. Required positional argument. * **`--out <PATH>`** (`-o`) - Write the downloaded artifact to a specific file path. When omitted, the file is written to the current directory using the artifact’s stored file name. ### Examples [Section titled “Examples”](#examples) Download an artifact to the current directory, preserving its original name:
```sh
oz artifact download <ARTIFACT_UID>
```
Download to a specific path:
```sh
oz artifact download <ARTIFACT_UID> --out ./reports/nightly.html
```
Use the artifact in a pipeline by combining `oz run get` and `oz artifact download`:
```sh
# Pull the latest run for a scheduled agent, grab its first artifact
RUN_ID=$(oz run list --limit 1 --output-format json | jq -r '.[0].uid')
ARTIFACT_UID=$(oz run get "$RUN_ID" --output-format json | jq -r '.artifacts[0].uid')
oz artifact download "$ARTIFACT_UID" --out ./latest-report.html
```
## Related [Section titled “Related”](#related) * [Warp Platform API](/factories/api-and-sdk/) - retrieve artifacts programmatically over HTTP. * [Scheduled cloud agents](/platform/triggers/scheduled-agents/) - common producer of recurring artifacts that downstream tooling consumes.
# Federated identity tokens
Canonical page: [/agents/cli/oz-cli/federate/](https://docs.warp.dev/agents/cli/oz-cli/federate/)
> Issue short-lived OIDC identity tokens from a running agent so it can authenticate to cloud providers without long-lived credentials.
Caution The Oz CLI (the `oz` binary) is a supported legacy interface. Existing users do not need to change their workflows. For new multi-stage development workflows, use [Warp Factories](/factories/). Warp will publish guidance before any support change. `oz federate` issues short-lived OIDC identity tokens for the agent that’s currently running. Use these tokens to authenticate to cloud providers (AWS, GCP, Azure, and other OIDC-aware systems) without baking long-lived credentials into your environment. This command can only be called from inside a running agent session — typically as part of a [skill](/agents/capabilities/skills/), a tool, or a script the agent executes while a run is in progress. ## When to use federation [Section titled “When to use federation”](#when-to-use-federation) Use federated identity tokens when you want an agent to act against a cloud account without storing service-account keys, access keys, or refresh tokens in the environment. * **Short-lived credentials** - Tokens expire on a schedule you choose. Even if a token leaks, its blast radius is bounded. * **No secret rotation** - Federation removes the need to rotate static keys in environments or secrets. * **Per-run identity** - Each run can claim a different subject (user, team, environment, skill, run ID), giving you fine-grained IAM policies. For background on federation, see your cloud provider’s workload identity federation guide (for example, [Google Cloud’s workload identity federation](https://cloud.google.com/iam/docs/workload-identity-federation) or [AWS IAM Identity Center](https://docs.aws.amazon.com/IAM/latest/UserGuide/id_roles_providers_oidc.html)). ## `oz federate issue-token` [Section titled “oz federate issue-token”](#oz-federate-issue-token) Issue an OIDC identity token for the current run.
```bash
oz federate issue-token \
--run-id <RUN_ID> \
--audience <AUDIENCE> \
[--duration <DURATION>] \
[--subject-template <COMPONENT> ...]
```
### Flags [Section titled “Flags”](#flags) * **`--run-id <RUN_ID>`** - The ID of the cloud agent run requesting the token. Cloud agent runs set `OZ_RUN_ID` to the current run ID, but you must still pass this flag. * **`--audience <AUDIENCE>`** - The `aud` claim for the issued token. Set this to the value your cloud provider’s identity pool expects (for example, an AWS IAM Identity Center audience or a GCP workload identity pool URL). * **`--duration <DURATION>`** - Requested token lifetime from 5 minutes to 3 hours. Accepts human-readable durations such as `30m` or `2h30m` and defaults to `1h`. * **`--subject-template <COMPONENT> ...`** - Controls how the OIDC token’s `sub` claim is formatted. Pass one or more components, which are joined to form the subject. Defaults to `principal` (for example, `user:my-user-id`). ### Subject template components [Section titled “Subject template components”](#subject-template-components) By default, `oz federate issue-token` builds `sub` from `principal`. The result is `user:USER_UID` for a user or `service_account:SERVICE_ACCOUNT_UID` for an agent. Pass each component as a separate argument. Do not quote the whole list. The command joins components in the order you supply them and separates them with commas. It fails if a component isn’t available for the current principal or run. Colons and commas within component values become underscores. Use `principal`, `scoped_principal`, or any available claim listed under [OIDC token claims](/platform/integrations/cloud-providers/#oidc-token-claims), except `user` and `service_account`. Use `principal` in place of those emitted claim names. See [the subject claim](/platform/integrations/cloud-providers/#subject-sub) for the `principal` and `scoped_principal` formats. ### Examples [Section titled “Examples”](#examples) Issue a one-hour token with the default `principal` subject:
```bash
oz federate issue-token \
--run-id "$OZ_RUN_ID" \
--audience AUDIENCE \
--output-format json
```
Replace `AUDIENCE` with the identifier expected by your provider. Issue a 30-minute token whose subject includes the principal, run, and environment:
```bash
oz federate issue-token \
--run-id "$OZ_RUN_ID" \
--audience AUDIENCE \
--duration 30m \
--subject-template principal run_id environment
```
For a user, this template produces a subject such as `user:abc123,run_id:run-456,environment:env-789`. ## Using tokens with cloud providers [Section titled “Using tokens with cloud providers”](#using-tokens-with-cloud-providers) Once you have a token, exchange it for cloud credentials using your provider’s standard OIDC federation flow. The exchange happens between the cloud provider and your script — the Automation Platform only issues the OIDC token. For provider setup instructions and the complete token claim reference, see [Cloud providers](/platform/integrations/cloud-providers/). A typical AWS flow: 1. Run `oz federate issue-token` to get the OIDC JWT. 2. Call `sts:AssumeRoleWithWebIdentity` with the JWT and an IAM role ARN. 3. Use the temporary AWS credentials returned by STS. A typical GCP flow: 1. Run `oz federate issue-token` to get the OIDC JWT. 2. Call the [Security Token Service `token` endpoint](https://cloud.google.com/iam/docs/reference/sts/rest/v1/TopLevel/token) to exchange the JWT for a federated access token. 3. Optionally impersonate a service account for the final credentials. ## Related [Section titled “Related”](#related) * [Cloud environments](/platform/environments/) - configure the environment your agent runs in. * [Secrets](/platform/secrets/) - alternative for credentials that can’t be federated.
# Integration setup
Canonical page: [/agents/cli/oz-cli/integration-setup/](https://docs.warp.dev/agents/cli/oz-cli/integration-setup/)
> Learn how to set up environments and integrations so you can trigger agents from external tools.
Caution The Oz CLI (the `oz` binary) is a supported legacy interface. Existing users do not need to change their workflows. For new multi-stage development workflows, use [Warp Factories](/factories/). Warp will publish guidance before any support change. This article describes the environment and integration setup that is required before you can trigger agents from external tools, like Slack or Linear. You will learn how to: * Create and configure the environment needed to run agents * Connect that environment to your team * Trigger agents using Slack or Linear ## How integrations and environments work [Section titled “How integrations and environments work”](#how-integrations-and-environments-work) Warp integrations connect external tools, like Slack or Linear, to agents that run your code in the background. There are three main components to know: * **Triggers** provide the context that tells Warp *what* to run. A trigger could be a Slack message where you tag @warp, or a Linear issue or comment. * [**Integrations**](/platform/integrations/) are what connect the trigger surface (Slack, Linear) to Warp. An integration links the trigger to your [Warp team](/knowledge-and-collaboration/teams/) and handles posting results to the original tool, for example, replying in Slack. * **Environments** define how and where agents run your code. When an agent is triggered, Warp uses the environment to spin up a container, clone repositories, and execute the agent’s workflow.
```plaintext
Slack or Linear
(trigger)
→
Warp Integration
(connects tools to Warp)
→
Environment
(Docker image + repos + setup)
→
Agent
(runs workflow, opens PRs, posts results)
```
Setting up an integration consists of three steps. 1. **Create an environment** for the agent to run your code. 2. **Authorize GitHub** so Warp can clone repositories, write code, debug issues, open pull requests, and more. 3. **Configure** the Warp app with an integration. *** ## 1. Creating an environment [Section titled “1. Creating an environment”](#1-creating-an-environment) Before you can trigger agents from Slack or Linear, you need an environment. The environment defines how and where Warp runs your code. At a minimum, an environment includes: * A Docker image * One or more GitHub repositories * Optional setup commands Typically, you’ll create **one environment per codebase** (or closely related set of repos) and reuse it across integrations. You can create environments using a guided Agent flow, or directly through the CLI. #### Before you begin [Section titled “Before you begin”](#before-you-begin) Make sure you have: * A GitHub repository (or repositories) that the agent can work in. * A publicly-accessible Docker image that can build and run your code. Official images like `node`, `python`, or `rust` work for many projects. ### Option 1: Guided environment setup (recommended) [Section titled “Option 1: Guided environment setup (recommended)”](#option-1-guided-environment-setup-recommended) The fastest way to get started is to use the guided environment setup. Use the `/create-environment` [slash command](/agents/capabilities/slash-commands/) if you want Warp to analyze your repos and suggest an environment configuration. You can run the command inside a Git repo directory with no argument, or with one or more repo paths or URLs. For example, from Warp: owner/repo
```bash
# File paths
/create-environment ./warp-internal ./warp-server
/create-environment warpdotdev/warp-internal warpdotdev/warp-server
# GitHub URLs
/create-environment https://github.com/warpdotdev/warp-internal.git
```
The guided flow will: 1. Detect the repositories you want the agent to work with and identify languages, frameworks, and tools 2. Look for an existing Dockerfile, recommend an official base image, or help build a custom image (if needed) 3. Suggest setup commands based on your scripts and package managers 4. Create the environment through the CLI and return an environment ID This produces a ready-to-use environment that can immediately be connected to [Slack](/platform/integrations/slack/) or [Linear](/platform/integrations/linear/). ### Option 2: Create an environment with the CLI [Section titled “Option 2: Create an environment with the CLI”](#option-2-create-an-environment-with-the-cli) If you already know how you want to configure your environment, you can create it directly with the CLI. **Use this approach when:** * You already have a custom Docker image * You want full control over repos and setup commands * You’re scripting or automating environment creation From Warp:
```sh
oz environment create \
--name <name> \
--docker-image <image> \
--repo <owner/repo> \
--repo <owner/repo> \
--setup-command "<command1>" \
--setup-command "<command2>" \
--description "Optional description"
```
Key flags: * `--name` (`-n`) – human-readable label for the environment. * `--docker-image` (`-d`) – image name on Docker Hub. If not specified, you’ll be prompted to select from available images (see `oz environment image list`). * `--repo` (`-r`) – can be repeated for each repo. * `--setup-command` (`-c`) – can be repeated; commands run in the order provided. * `--description` – optional description (max 240 characters). You can inspect existing environments with `oz environment list`. To delete an environment, use `oz environment delete <ID>`. Add `--force` to skip confirmation checks for environments used by integrations. For more details about environment configuration, see the [Slack](/platform/integrations/slack/) and [Linear](/platform/integrations/linear/) articles. #### Example environments [Section titled “Example environments”](#example-environments) | Project type | Docker image | Repos | Example setup commands | | --------------- | ----------------------------------- | -------------------------------------------- | ---------------------------------------------------------------------------------------- | | Web dev project | `node:20-bullseye` | your-org/frontend-react your-org/backend-api | `npm install -g pnpm``cd frontend-react && pnpm install``cd backend-api && pnpm install` | | Python project | Custom image based on `python:3.11` | your-org/cool\_python\_project | `cd cool_python_project && pip install -r requirements.txt` | *** ## 2. Authorizing GitHub [Section titled “2. Authorizing GitHub”](#2-authorizing-github) Warp needs GitHub access so agents can clone your repositories and, when permitted, write code and open pull requests. #### How GitHub authorization works [Section titled “How GitHub authorization works”](#how-github-authorization-works) When you create an environment or integration, Warp will prompt you to: * Install or update the Warp GitHub app * Grant access to the repositories in your environment This authorization enables agents to clone repositories into the environment, create branches and commits, and open pull requests. **Public vs private repos** * **Public repos:** Agents can read code without authorization, but cannot write or open PRs. * **Private repos:** The Warp GitHub App must have access and the triggering user must have write permissions. #### Ongoing permissions [Section titled “Ongoing permissions”](#ongoing-permissions) Depending on how the GitHub app is installed in your organization: * You may need to grant access to new repositories over time * An organization admin may need to update the app’s permissions You typically only need to handle this once per team, unless your repo access changes. #### Team-level GitHub authorization [Section titled “Team-level GitHub authorization”](#team-level-github-authorization) For automated workflows that use an [agent API key](/agents/cli/oz-cli/api-keys/) (CI/CD pipelines, scheduled agents, SDK-triggered runs), you can configure team GitHub authorization so the agent authenticates with the Warp Factories GitHub App instead of an individual’s personal token. This requires a Warp team admin to enable the GitHub organization in the Admin Panel (**Settings** > **Admin Panel** > **Platform**). Once configured, tasks initiated with an agent API key can clone repos and open pull requests using the GitHub App installation token. For full setup instructions, see [Team GitHub authorization](/platform/team-access-billing-and-identity/#team-github-authorization). *** ## 3. Setting up an integration [Section titled “3. Setting up an integration”](#3-setting-up-an-integration) Once you have set up at least one environment, you can create integrations that connect it to Slack or Linear. Alternatively, use the CLI where `<ENV_ID>` is your environment ID:
```bash
oz integration create slack --environment <ENV_ID>
# or
oz integration create linear --environment <ENV_ID>
```
The CLI then: 1. Links the integration to your Warp team and environment. 2. Opens a browser flow to install the Warp app into your Slack workspace or Linear workspace. 3. Generates an **integration ID** you can later list or delete. **Additional `integration create` flags:** * `--prompt` — custom instructions applied to all runs for this integration. * `--mcp <SPEC>` — attach MCP servers (inline JSON, file path, or UUID). Can be repeated. * `--model <MODEL_ID>` — override the default model. * `--host <WORKER_ID>` — run on a specific self-hosted worker. * `--file <PATH>` (`-f`) — load configuration from a YAML or JSON file. **Example with a custom prompt:**
```bash
oz integration create slack \
--environment <ENV_ID> \
--prompt "Always prefix PR titles with [WARP-AGENT] and add detailed test steps."
```
### Updating an integration [Section titled “Updating an integration”](#updating-an-integration) You can modify an existing integration using `oz integration update`:
```bash
oz integration update slack \
--environment <ENV_ID> \
--prompt "Updated instructions for the integration."
```
**Update-specific flags:** * `--environment <ID>` — change the environment. * `--remove-environment` — remove the environment from the integration. * `--prompt` — update the custom instructions. * `--mcp <SPEC>` — add MCP servers to the integration. * `--remove-mcp <SERVER_NAME>` — remove an MCP server by name. * `--model <MODEL_ID>` — update the default model. * `--host <WORKER_ID>` — update the execution host. ## How are environments used at runtime? [Section titled “How are environments used at runtime?”](#how-are-environments-used-at-runtime) When you trigger an agent from Slack or Linear, Warp follows a consistent, repeatable execution process using your environment. At a high level, each run works like this: 1. **Warp receives the trigger**\ Warp captures the message content (for example, a Slack thread or Linear issue), along with any linked context. 2. **Warp creates an execution container**\ Warp spins up a fresh container from the Docker image defined in your environment. 3. **Repositories are cloned**\ The GitHub repositories associated with the environment are cloned into the container. 4. **Setup commands are run**\ Any setup commands you configured, like installing dependencies, are executed. 5. **The agent workflow runs**\ The agent executes the task using the provided context, tools, and permissions. 6. **Results are posted back**\ Progress updates, summaries, and results are posted back to Slack or Linear. 7. **The container is destroyed**\ After the run completes, the container is torn down. Each run starts from a clean, isolated environment. ## Next steps [Section titled “Next steps”](#next-steps) You now have everything needed to trigger agents from your team’s tools. From here, you can: * Add or adjust setup commands * Switch to a custom Docker image * Include additional repositories * Add custom prompts for consistent agent behavior * Create separate environments for different workflows or teams **Additional reading** * [Cloud Agents Overview](/platform/) * [Automation Platform](/platform/overview/) * [Slack](/platform/integrations/slack/), [Linear](/platform/integrations/linear/), [GitHub](/platform/integrations/github/), and [GitHub Actions](/platform/integrations/github-actions/) integrations * [Troubleshooting](/agents/cli/oz-cli/troubleshooting/)
# MCP servers (CLI reference)
Canonical page: [/agents/cli/oz-cli/mcp-servers/](https://docs.warp.dev/agents/cli/oz-cli/mcp-servers/)
> Connect agents to external tools like GitHub, Linear, and Sentry by passing MCP servers to the --mcp flag as a UUID, inline JSON, or file path.
Caution The Oz CLI (the `oz` binary) is a supported legacy interface. Existing users do not need to change their workflows. For new multi-stage development workflows, use [Warp Factories](/factories/). Warp will publish guidance before any support change. MCP servers connect agents to external systems like GitHub, Linear, or Sentry. To use a [Model Context Protocol (MCP)](/agents/capabilities/mcp/) server from the CLI, use the `--mcp` flag with `oz agent run` or `oz agent run-cloud`. The CLI does not start every configured MCP server for every run. Explicit `--mcp` values start run-scoped servers. A selected agent profile can start installed servers on its MCP allowlist, while eligible file-based and global servers follow their own discovery path. For help choosing between local, cloud, and shared MCP workflows, see [Connect developer tools to agents with MCP workflows](/guides/external-tools/using-mcp-servers-with-warp/). For a conceptual overview of MCP with cloud agents — including configuration schema, full agent config examples, and limitations — see [MCP Servers](/platform/mcp/) in the Cloud Agents docs. *** ## Using the `--mcp` flag [Section titled “Using the --mcp flag”](#using-the---mcp-flag) The `--mcp` flag accepts four formats: * **UUID** — reference a Warp-shared MCP server by its UUID (find UUIDs with `oz mcp list`) * **Managed integration id** — reference a Warp-managed integration MCP server by its short id, such as `linear` (see [Passing Warp-managed integration servers by id](#passing-warp-managed-integration-servers-by-id)) * **Inline JSON** — pass a full MCP JSON configuration directly as a string * **File path** — path to a JSON file containing the MCP configuration You can repeat `--mcp` to include multiple servers. ### Passing MCP servers by UUID [Section titled “Passing MCP servers by UUID”](#passing-mcp-servers-by-uuid) 1. Locate the MCP server UUID using `oz mcp list`. This command lists all MCP servers configured in your Warp account, including team-shared ones:
```sh
$ oz mcp list
+--------------------------------------+--------+
| UUID | Name |
+===============================================+
| 1deb1b14-b6e5-4996-ae99-233b7555d2d0 | github |
|--------------------------------------+--------|
| 65450c32-9eb1-4c57-8804-0861737acbc4 | linear |
|--------------------------------------+--------|
| d94ade64-0e73-47a6-b3ee-14e5afec3d90 | Sentry |
+--------------------------------------+--------+
```
Alternatively, copy the UUID from Warp in **Settings** > **Agents** > **MCP servers**. 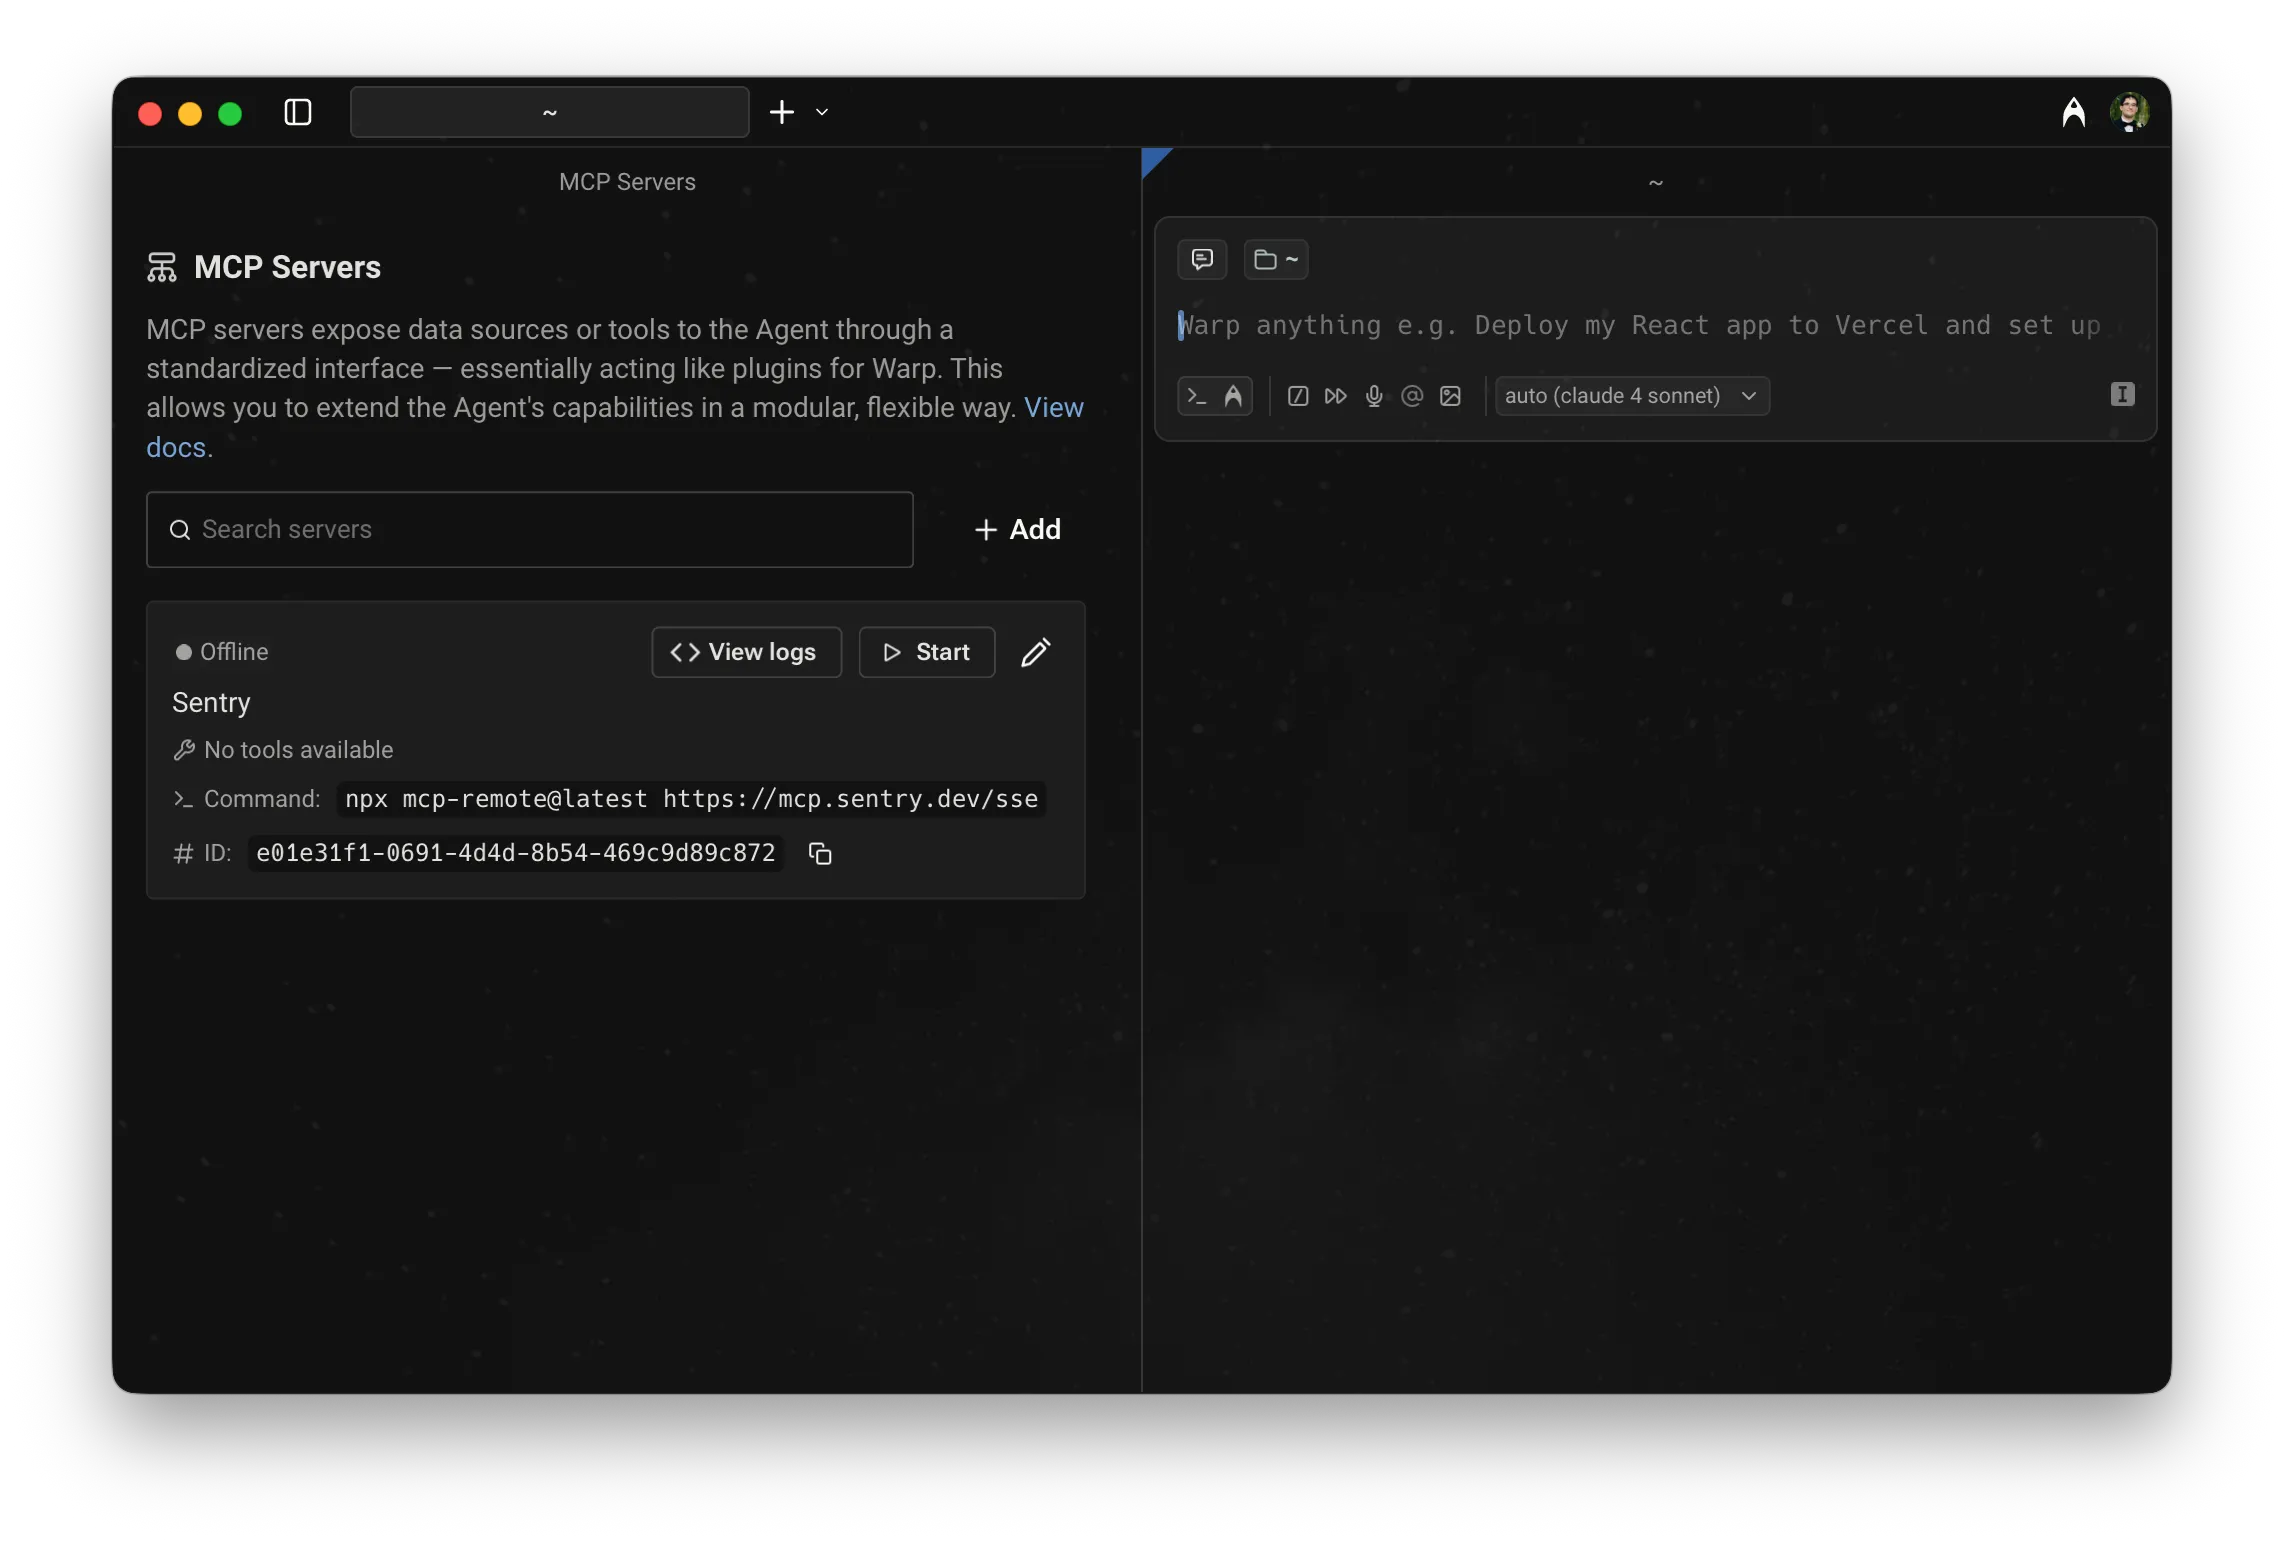 MCP servers page, showing a server with its UUID. 2. Pass the UUID to `--mcp`:
```sh
$ oz agent run --mcp "1deb1b14-b6e5-4996-ae99-233b7555d2d0" --prompt "who last updated the README?"
```
### Passing Warp-managed integration servers by id [Section titled “Passing Warp-managed integration servers by id”](#passing-warp-managed-integration-servers-by-id) Some MCP servers are hosted by Warp and backed by an [integration](/platform/integrations/) your team has already connected, so they have no UUID of their own. Reference them by their short id instead:
```sh
$ oz agent run --mcp linear --prompt "summarize the tickets assigned to me"
```
Warp recognizes these managed integration ids: * `linear` — the hosted [Linear](/platform/integrations/linear/) MCP server * `slack` — the hosted [Slack](/platform/integrations/slack/) MCP server * `jira` — the hosted [Jira](/platform/integrations/jira/) MCP server Caution `linear` and `slack` resolve only for runs executing inside a [factory](/factories/) with that integration connected; `jira` also resolves for a run triggered directly by a Jira event. Outside those cases — including a plain `oz agent run` like the example above — the server is silently skipped and the run continues without it. The id is resolved when the run starts, using the integration connection that belongs to the run’s team. If the id isn’t one Warp recognizes, the server is also skipped. ### Passing MCP servers as inline JSON or a file [Section titled “Passing MCP servers as inline JSON or a file”](#passing-mcp-servers-as-inline-json-or-a-file) You can pass MCP configuration inline or via a file:
```sh
# Inline JSON
$ oz agent run --mcp '{"github": {"url": "https://api.githubcopilot.com/mcp/"}}' --prompt "list open issues"
# From a file
$ oz agent run --mcp ./my-mcp-config.json --prompt "list open issues"
```
The file must contain a valid MCP JSON object. For example:
```json
{
"github": {
"url": "https://api.githubcopilot.com/mcp/"
},
"sentry": {
"command": "npx",
"args": ["-y", "mcp-remote@latest", "https://mcp.sentry.dev/mcp"]
}
}
```
### Combining multiple servers [Section titled “Combining multiple servers”](#combining-multiple-servers) Pass `--mcp` multiple times to combine UUID references, inline JSON, and file-based configs in a single run:
```sh
$ oz agent run \
--mcp "1deb1b14-b6e5-4996-ae99-233b7555d2d0" \
--mcp '{"sentry": {"url": "https://mcp.sentry.dev/mcp"}}' \
--prompt "open a PR that fixes the top Sentry error"
```
*** ## Environment variables on remote machines [Section titled “Environment variables on remote machines”](#environment-variables-on-remote-machines) Warp syncs MCP server configuration between machines logged in with your Warp account, but **does not** sync the environment variables used in that configuration. When running on a remote machine, set any required secrets manually before running the agent:
```sh
export MY_MCP_SERVER_ACCESS_TOKEN="..."
$ oz agent run --mcp "904a8936-fa82-4571-b1d6-166c26197981" --prompt "use my MCP server to check for errors"
```
*** ## Learn more [Section titled “Learn more”](#learn-more) * [MCP Servers (cloud agents)](/platform/mcp/) — configuration schema, full agent config file examples, and cloud agent limitations * [Model Context Protocol (MCP)](/agents/capabilities/mcp/) — configuring MCP servers in Warp for local agents * [Connect developer tools to agents with MCP workflows](/guides/external-tools/using-mcp-servers-with-warp/) — choose the setup path for local sessions, cloud runs, team sharing, and repeatable automation * [Secrets](/platform/secrets/) — store credentials in Warp so agents can access them at run time without exposing them in config files
# CLI quickstart
Canonical page: [/agents/cli/oz-cli/quickstart/](https://docs.warp.dev/agents/cli/oz-cli/quickstart/)
> Set up and run your first cloud agent via the Oz CLI in less than 5 minutes.
Caution The Oz CLI (the `oz` binary) is a supported legacy interface. Existing users do not need to change their workflows. For new multi-stage development workflows, use [Warp Factories](/factories/). Warp will publish guidance before any support change. This guide walks you through the essentials to get up and running with the Oz CLI in less than 5 minutes: installing the CLI, authenticating, running your first local agent, and optionally connecting MCP servers to give the agent access to external tools. Watch this short demo of the Oz CLI workflow:  ## 1. Install the CLI [Section titled “1. Install the CLI”](#1-install-the-cli) If you already have the [Warp desktop app installed](/getting-started/quickstart/installation-and-setup/), the **CLI is included** and available in Warp. If not, see [Installing the CLI](/agents/cli/oz-cli/#installing-the-cli) for installation options for all platforms. ## 2. Authenticate [Section titled “2. Authenticate”](#2-authenticate) For local development and first-time setup, authenticate interactively using the `oz login` command. **For example, on macOS:**
```sh
oz login
```
This command prints a sign-in URL in your terminal. Open the URL in your browser to login to Warp. Your credentials will be stored securely for future CLI use. Interactive login works on both **local** and **remote** machines, and does not require API keys. ## 3. Run an agent [Section titled “3. Run an agent”](#3-run-an-agent) From any directory, run:
```sh
oz agent run --prompt "summarize this directory"
```
This uses the default agent profile and executes the run locally. The default profile permits MCP actions but does not automatically start every configured server. Select run-scoped servers with `--mcp`, or use a profile that allowlists installed servers. See [MCP servers](/agents/cli/oz-cli/mcp-servers/) for the available startup paths. What happens: * The agent runs locally in your current working directory. * The session is tracked on Warp’s backend for observability and collaboration. * The agent autonomously executes commands and streams output to your terminal. ## 4. Run a cloud agent (optional) [Section titled “4. Run a cloud agent (optional)”](#4-run-a-cloud-agent-optional) Cloud agents run in a remote environment with your repositories cloned and dependencies installed, making them useful for tasks that need full codebase access. If you haven’t already created an environment, run `/create-environment` in Warp or follow the [Cloud Agents Quickstart](/platform/quickstart/). Then run the following command:
```sh
oz agent run-cloud --environment <ENV_ID> --prompt "Scan this repo for outdated dependencies"
```
Replace `<ENV_ID>` with your environment ID, which you can find by running `oz environment list` on the Oz CLI. ## 5. Add MCP context (optional) [Section titled “5. Add MCP context (optional)”](#5-add-mcp-context-optional) You can connect MCP servers to give the agent access to external tools like GitHub or Linear. Pass MCP configuration inline or from a file using the `--mcp` flag:
```sh
oz agent run --mcp '{"github": {"url": "https://api.githubcopilot.com/mcp/"}}' --prompt "Open a pull request that fixes TODOs in this repo"
```
See [MCP Servers](/agents/cli/oz-cli/mcp-servers/) for all supported formats, including UUID references and multi-server configurations. ## Next steps [Section titled “Next steps”](#next-steps) Once you’ve successfully set up and run your agent, explore other configurations and workflows with the Oz CLI: * Customize behavior with [agent profiles](/agents/cli/oz-cli/agent-profiles/). * [Reuse prompts](/agents/cli/oz-cli/warp-drive/) with `--saved-prompt`. * Connect agents to external systems using [MCP Servers](/agents/cli/oz-cli/mcp-servers/). * Authenticate with [API keys](/agents/cli/oz-cli/api-keys/) for automated environments or workflows. * Get up-to-date information about the Oz CLI using the [`oz help` command](/agents/cli/oz-cli/troubleshooting/#getting-help). * Run agents in CI with the [GitHub Actions quickstart](/platform/integrations/quickstart-github-actions/). Continue reading the [Oz CLI reference](/agents/cli/oz-cli/) to learn how to install the CLI on different platforms, authenticate in different environments, and configure agents for real-world workflows.
# Skills via the Oz CLI
Canonical page: [/agents/cli/oz-cli/skills/](https://docs.warp.dev/agents/cli/oz-cli/skills/)
> Use skills with the Oz CLI to run agents from reusable skill definitions stored in your repositories.
Caution The Oz CLI (the `oz` binary) is a supported legacy interface. Existing users do not need to change their workflows. For new multi-stage development workflows, use [Warp Factories](/factories/). Warp will publish guidance before any support change. [Skills](/agents/capabilities/skills/) are reusable instruction sets that teach agents how to perform specific tasks. Use the `--skill` flag to run an agent from a skill in a repository accessible to your environment. ## Skill spec format [Section titled “Skill spec format”](#skill-spec-format) The `--skill` flag accepts a skill specification that identifies which skill to use:
```sh
# Fully qualified (recommended)
oz agent run-cloud -e <ENV_ID> --skill "owner/repo:skill-name" --prompt "deploy to staging"
# With full path
oz agent run-cloud -e <ENV_ID> --skill "warpdotdev/warp-server:.warp/skills/deploy/SKILL.md" --prompt "deploy to staging"
```
Supported formats: * `owner/repo:skill-name` — skill by name in a specific repository (recommended) * `owner/repo:path/to/SKILL.md` — skill by full path in a repository * `repo:skill-name` — skill by name (only works when the repo is configured in your environment) ## Using skills with cloud agents [Section titled “Using skills with cloud agents”](#using-skills-with-cloud-agents) Skills are particularly useful with cloud agents (`oz agent run-cloud`) because they define reusable workflows that run consistently across environments:
```sh
# Run a deploy skill from a specific repo
oz agent run-cloud \
--environment SVhg783GBFQHk1OfdPfFU9 \
--skill "myorg/backend:.warp/skills/deploy/SKILL.md" \
--prompt "deploy to staging"
# Run a code review skill
oz agent run-cloud \
--environment SVhg783GBFQHk1OfdPfFU9 \
--skill "myorg/backend:code-review" \
--prompt "review the latest PR"
```
When you run an agent from a skill, the run `name` is automatically set to the skill name — no need to pass `--name` explicitly. ## Using skills with local agents [Section titled “Using skills with local agents”](#using-skills-with-local-agents) For local agent runs, skills from your current repository are automatically discovered. You can also explicitly specify a skill:
```sh
oz agent run --skill "owner/repo:skill-name" --prompt "additional context"
```
For more information about creating and managing skills, see [Skills](/agents/capabilities/skills/).
# CLI Troubleshooting
Canonical page: [/agents/cli/oz-cli/troubleshooting/](https://docs.warp.dev/agents/cli/oz-cli/troubleshooting/)
> Solutions for common Oz CLI errors — including authentication issues, agent failures, environments, GitHub access, and Docker image issues.
Caution The Oz CLI (the `oz` binary) is a supported legacy interface. Existing users do not need to change their workflows. For new multi-stage development workflows, use [Warp Factories](/factories/). Warp will publish guidance before any support change. Solutions for common Oz CLI errors, including authentication issues, agent failures, environment configuration, GitHub access problems, and Docker image compatibility. Use `oz help` for built-in documentation on any command. ## Getting help [Section titled “Getting help”](#getting-help) The CLI includes built-in documentation for all commands:
```bash
# See all available commands
oz help
# Get details on a specific command
oz help agent run
# Explore MCP-related commands
oz help mcp
```
## Common errors [Section titled “Common errors”](#common-errors) **Command not found / CLI not installed correctly**\ Verify your installation path and confirm the CLI version:
```bash
oz --version
```
**Authentication issues** * Interactive login: ensure you’ve completed the browser-based flow with `oz login`. * API keys: confirm the key is valid, not expired, and exported correctly. Invalid, expired, or missing keys can return an [`authentication_required` error](/factories/api-and-sdk/troubleshooting/errors/authentication-required/). **Agent or MCP errors**\ Ensure your agent profile and [MCP servers](/agents/capabilities/mcp/) are configured properly, with correct permissions. See [MCP Servers](/agents/cli/oz-cli/mcp-servers/) and [Agent profiles](/agents/cli/oz-cli/agent-profiles/) for details. *** ## Environments [Section titled “Environments”](#environments) #### How do I see what environment my integration is using? [Section titled “How do I see what environment my integration is using?”](#how-do-i-see-what-environment-my-integration-is-using) List your integrations:
```plaintext
oz integration list
```
This shows each integration, its ID, and the environment it’s linked to. Use this to confirm which environment to inspect or update before making changes. #### How do I see what’s inside that environment? [Section titled “How do I see what’s inside that environment?”](#how-do-i-see-whats-inside-that-environment) Once you know the environment ID, run:
```plaintext
oz environment get <ENV_ID>
```
This prints the full configuration, including: * The **environment ID** (used in other commands) * The **name** * The **Docker image** * Associated **repos** This is the most reliable way to verify what the agent will see when it runs. #### How do I add or remove repos and setup commands? [Section titled “How do I add or remove repos and setup commands?”](#how-do-i-add-or-remove-repos-and-setup-commands) Use `oz environment update`. You can modify environments incrementally without recreating them. **Add a repo:**
```plaintext
oz environment update <ENV_ID> --repo owner/repo
```
**Remove a repo:**
```plaintext
oz environment update <ENV_ID> --remove-repo owner/repo
```
**Add a setup command:**
```plaintext
oz environment update <ENV_ID> --setup-command "your command"
```
**Remove a setup command (must match exactly):**
```plaintext
oz environment update <ENV_ID> --remove-setup-command "exact command"
```
Notes: * Warp may prompt you to adjust GitHub app permissions when adding repos. * Setup commands run in the order they are defined. #### **How do I delete an environment?** [Section titled “How do I delete an environment?”](#how-do-i-delete-an-environment) If an environment is no longer needed:
```plaintext
oz environment delete <ID>
```
Add `--force` to skip confirmation checks for environments used by integrations. Only do this once you’ve confirmed no active integrations are relying on that environment. If an integration points to a deleted environment, requests from Slack/Linear will fail with a [`resource_not_found` error](/factories/api-and-sdk/troubleshooting/errors/resource-not-found/) until you create a new integration with a valid environment. ### Integrations [Section titled “Integrations”](#integrations) #### **How do I figure out what environment my integration is using?** [Section titled “How do I figure out what environment my integration is using?”](#how-do-i-figure-out-what-environment-my-integration-is-using) List your integrations:
```plaintext
oz integration list
```
This shows each integration, its ID, and the environment it’s attached to. Use this when you’re unsure which environment to update or delete. #### **I created a new environment, but don’t see it when running oz integration create** [Section titled “I created a new environment, but don’t see it when running oz integration create”](#i-created-a-new-environment-but-dont-see-it-when-running-oz-integration-create) Check: 1. Environment exists and is healthy: `oz environment list` 2. You’re on the correct Warp team. Make sure your local CLI is logged into the same team where the environment was created. 1. If both look correct and the environment still doesn’t appear, recreate it and confirm there were no errors during creation. ## GitHub & repo access issues [Section titled “GitHub & repo access issues”](#github--repo-access-issues) #### **I’m being asked to authorize GitHub when creating/using an environment** [Section titled “I’m being asked to authorize GitHub when creating/using an environment”](#im-being-asked-to-authorize-github-when-creatingusing-an-environment) This happens when: * You add a repo that Warp doesn’t have access to yet, or * You personally haven’t granted the Warp GitHub app permissions for that repo. Follow the GitHub popup flow to install/adjust the Warp GitHub app. Missing external authorization can return an [`external_authentication_required` error](/factories/api-and-sdk/troubleshooting/errors/external-authentication-required/). #### **The agent can’t open PRs or push changes to my repo** [Section titled “The agent can’t open PRs or push changes to my repo”](#the-agent-cant-open-prs-or-push-changes-to-my-repo) Check the following: 1. **Repo is part of your environment**. 1. Make sure the repo is listed in: `oz environment get <id>` 2. **Warp GitHub app has access to that repo** 1. In GitHub’s settings, confirm the Warp app is installed and that the repo is selected. 3. **You have write access** 1. The agent inherits your GitHub permissions. If you only have read access, Warp can’t open PRs or push branches on your behalf, and the run may return a [`not_authorized` error](/factories/api-and-sdk/troubleshooting/errors/not-authorized/). ### Docker image & environment failures [Section titled “Docker image & environment failures”](#docker-image--environment-failures) #### **I see errors like “pull access denied” or “repository does not exist”** [Section titled “I see errors like “pull access denied” or “repository does not exist””](#i-see-errors-like-pull-access-denied-or-repository-does-not-exist) Check: 1. The Docker image name and tag are correct. 2. The image is public on Docker Hub. 3. You can pull it locally: `docker pull <image_name>` If local docker pull fails, fix the image visibility/name first, then recreate or update the environment with a working image. Image pull and setup failures can surface as [`environment_setup_failed`](/factories/api-and-sdk/troubleshooting/errors/environment-setup-failed/). #### **The agent can’t find tools or runtimes inside the environment** [Section titled “The agent can’t find tools or runtimes inside the environment”](#the-agent-cant-find-tools-or-runtimes-inside-the-environment) This usually means the Docker image is missing required dependencies. Fix by either: * Updating the Dockerfile used to build the image, then pushing a new version to Docker Hub and updating the environment with the new image, or * Adding additional setup commands to install the missing tools: `oz environment update --setup-command "apt-get update && apt-get install -y "` #### **I see “VM failed before the agent could run. This is likely an issue with your Docker image”** [Section titled “I see “VM failed before the agent could run. This is likely an issue with your Docker image””](#i-see-vm-failed-before-the-agent-could-run-this-is-likely-an-issue-with-your-docker-image) This typically means your Docker image uses musl libc instead of glibc. Alpine Linux and other musl-based images are not compatible with the agent runtime, and this can surface as [`environment_setup_failed`](/factories/api-and-sdk/troubleshooting/errors/environment-setup-failed/). Fix: * Switch to a glibc-based image such as Debian, Ubuntu, or the default (non-Alpine) variants of official Docker Hub images (e.g. `node`, `python`, `rust`). * If you’re using an Alpine variant like `node:20-alpine`, replace it with the default tag (e.g. `node:20`).
# Warp Drive context
Canonical page: [/agents/cli/oz-cli/warp-drive/](https://docs.warp.dev/agents/cli/oz-cli/warp-drive/)
> Use saved prompts, notebooks, workflows, and rules from Warp Drive as context in CLI agent commands.
Caution The Oz CLI (the `oz` binary) is a supported legacy interface. Existing users do not need to change their workflows. For new multi-stage development workflows, use [Warp Factories](/factories/). Warp will publish guidance before any support change. Reference saved Warp Drive objects in Oz CLI commands to reuse prompts, notebooks, workflows, and rules as agent context. Pass a saved prompt ID with `--saved-prompt` or inline Warp Drive references using `<workflow:id>`, `<notebook:id>`, or `<rule:id>` syntax. ## Reusing saved prompts [Section titled “Reusing saved prompts”](#reusing-saved-prompts) When you find prompts that work well, save them in [Warp Drive](/knowledge-and-collaboration/warp-drive/) to reuse across sessions, share with teammates, and integrate into automated workflows. For more information, see [Prompts](/knowledge-and-collaboration/warp-drive/prompts/). To reuse a saved prompt, find its ID. The ID is the last segment of its Warp Drive sharing link. For example, in the URL:
```plaintext
https://www.warp.dev/drive/prompt/Fix-compiler-error-sgNpbUgDkmp2IImUVDc8kR
```
…the ID is `sgNpbUgDkmp2IImUVDc8kR`. Then pass the ID using the `--saved-prompt` flag:
```bash
$ oz agent run --saved-prompt sgNpbUgDkmp2IImUVDc8kR
```
## Referencing Warp Drive objects as context [Section titled “Referencing Warp Drive objects as context”](#referencing-warp-drive-objects-as-context) Use `<workflow:id>`, `<notebook:id>`, or `<rule:id>` in prompts to attach [Warp Drive objects](/knowledge-and-collaboration/warp-drive/) and [rules](/agents/capabilities/rules/) as context for the agent.
```bash
$ oz agent run --prompt "Follow the instructions in <notebook:gq1CMAUWLtaL1CpEoTDQ3y>"
```
# Permissions and profiles in the Warp Agent CLI
Canonical page: [/agents/cli/permissions-and-profiles/](https://docs.warp.dev/agents/cli/permissions-and-profiles/)
> Control what the agent can do in the Warp Agent CLI with permission request cards, auto-approve, and execution profiles in the settings file.
The Warp Agent CLI uses the same permission model as the Warp app: you choose how much approval each type of action needs. This page covers how to set permissions in the CLI, what happens when the agent asks for approval, and how to grant full autonomy with auto-approve. For the full permission model, including team-wide controls, see [Profiles & Permissions](/agents/capabilities/agent-profiles-permissions/). ## How permissions work [Section titled “How permissions work”](#how-permissions-work) Every action the agent proposes, such as running a shell command, editing files, or calling an MCP tool, is checked against your active execution profile before it runs. Each action type is set independently to [`always_ask`, `always_allow`, or `agent_decides`](#permission-values). For example, you could require approval for every shell command while letting the agent read files without asking, or allow everything for an agent that never stops to ask. By default, the CLI applies these permission values: * **Shell commands, file edits, file reads, MCP tool calls** - `agent_decides`. For file edits, `agent_decides` still prompts every time, so you always review a diff before it’s applied. * **Typing into a running command, launching child agents** - Always asks. * **Command denylist** - Sits on top of these values. Matching commands require approval even when `execute_commands` is `always_allow`. Change any of this by [editing your execution profile](#execution-profiles). ## Approving agent actions [Section titled “Approving agent actions”](#approving-agent-actions) When an action needs your approval, the agent pauses and shows a permission card with the proposed command or file edits. Beyond approving or rejecting it, you can: * Select **Other** to reply with guidance instead of running the action. The agent adjusts its approach based on what you type. * Press `E` on a command card to edit it before approving. `Esc` exits the editor without rejecting the request. * Press `E` on a file-edits card to expand or collapse all diffs. ## Auto-approve [Section titled “Auto-approve”](#auto-approve) Auto-approve gives the agent full autonomy. Proposed actions run immediately, without permission cards, until the task finishes or you turn it off. Toggle it with `/auto-approve` or `Ctrl+Shift+I`. Auto-approve is scoped to a single conversation, and new conversations start with it off. To start every new conversation in a session with auto-approve already on, launch with `warp --auto-approve`. The statusline’s auto-approve indicator (`▶▶`) shows the current state and is on by default. If your profile sets `ask_user_question = "ask_except_in_auto_approve"`, the agent also skips clarifying questions while auto-approve is on. Danger With auto-approve on, the agent runs commands and applies file edits without review, including commands that match your own command denylist. Press `Ctrl+C` to stop the agent if it starts doing something you didn’t intend. To keep your denylist in force while auto-approve is on, turn off the bypass in your [settings file](/agents/cli/configuration/#the-settings-file): settings.toml
```toml
[agents.warp_agent.other]
auto_approve_bypasses_command_denylist = false
```
Denylist rules enforced by your team in the [Admin Panel](/enterprise/team-management/admin-panel/) always require approval and are never bypassed, regardless of this setting. ## Execution profiles [Section titled “Execution profiles”](#execution-profiles) The CLI reads its permissions from execution profiles stored in its [settings file](/agents/cli/configuration/). Profiles live under the `agents.execution_profiles` table, and the CLI always runs with the profile under the reserved `default` key: settings.toml
```toml
[agents.execution_profiles.default]
name = "Default"
execute_commands = "agent_decides"
apply_code_diffs = "agent_decides"
read_files = "agent_decides"
command_allowlist = ['cargo (build|check|test)(\s.*)?']
```
Caution Setting `command_denylist` replaces the built-in default denylist, which covers `rm`, `curl`, `wget`, `eval`, `ssh`, shells, and other risky command patterns. Omitting the field keeps the defaults. To deny additional commands, extend the generated list in your settings file rather than writing a short list from scratch. Edit the file directly, or ask the agent to change its own permissions and it will update the settings file for you. The CLI picks up saved changes automatically. Profiles in the Warp Agent CLI are local to your machine. They never sync to the cloud, and they are separate from the Agent Profiles you configure in the Warp app. You can define additional profiles in the file, but the CLI currently always runs with `default`. ### Permission values [Section titled “Permission values”](#permission-values) Most permission fields accept one of three values: * **`agent_decides`** - The agent acts on its own when it’s confident and asks when it’s uncertain. * **`always_ask`** - Every action of this type requires approval. * **`always_allow`** - Actions of this type run without prompting. ### Profile fields [Section titled “Profile fields”](#profile-fields) * **`execute_commands`** - Permission to run shell commands. * **`apply_code_diffs`** - Permission to apply file edits. * **`read_files`** - Permission to read files. * **`mcp_permissions`** - Permission to call MCP servers. * **`write_to_pty`** - Permission to type into running interactive commands. Also accepts `ask_on_first_write`. * **`ask_user_question`** - Whether the agent may pause to ask clarifying questions: `always_ask`, `ask_except_in_auto_approve`, or `never`. * **`run_agents`** - Permission to launch child agents: `always_ask`, `always_allow`, or `never_allow`. * **`command_allowlist`** - Regular expressions for commands that run without approval. * **`command_denylist`** - Regular expressions for commands that require approval regardless of the other permission values. [Auto-approve bypasses this list by default](#auto-approve). * **`directory_allowlist`** - Directories the agent may read without approval. Profiles also hold model overrides such as `base_model`, covered in [Models and usage in the Warp Agent CLI](/agents/cli/models-and-usage/). ## Related pages [Section titled “Related pages”](#related-pages) * [Profiles & Permissions](/agents/capabilities/agent-profiles-permissions/) - The full permission model, autonomy levels, and allowlist/denylist behavior. * [Configuring the Warp Agent CLI](/agents/cli/configuration/) - The settings file, themes, statusline, and start screen. * [Agent conversations in the Warp Agent CLI](/agents/cli/agent-conversations/) - How tool calls, diffs, and agent questions render in the transcript.
# Warp Agent CLI quickstart
Canonical page: [/agents/cli/quickstart/](https://docs.warp.dev/agents/cli/quickstart/)
> Install the Warp Agent CLI, log in, and run your first agent conversation in your own terminal in a few minutes.
This guide takes you from installing the Warp Agent CLI to your first agent conversation in about five minutes. ## Prerequisites [Section titled “Prerequisites”](#prerequisites) * **A Warp account** - The login step opens your browser, where you can sign in or [create an account](https://app.warp.dev/signup). The CLI uses the same account as the Warp app, but doesn’t require the app to be installed. * **A supported platform** - macOS (Apple Silicon or Intel), Linux (x64 or Arm64), or Windows (x64 or Arm64). ## 1. Install the Warp Agent CLI [Section titled “1. Install the Warp Agent CLI”](#1-install-the-warp-agent-cli) Install the CLI with the command for your operating system. The install script is the recommended method, because it’s the only one that keeps the CLI up to date on its own. * macOS and Linux
```bash
curl -fsSL https://app.warp.dev/download/agent-cli | bash
```
* Windows Run this command in PowerShell:
```powershell
Invoke-RestMethod "https://app.warp.dev/download/agent-cli.ps1" | Invoke-Expression
```
* Homebrew On macOS 14 or later and on Linux, install the `warp-agent-cli` cask. It’s in the main Homebrew cask repository, so you don’t need to tap anything first:
```bash
brew install --cask warp-agent-cli
```
Caution Homebrew installations don’t update themselves. The CLI still tells you when a new version is available, but you install it by running `brew upgrade --cask warp-agent-cli`. To get background updates instead, use the install script. After installing, verify that the `warp` command is available:
```bash
warp --version
```
The command prints the installed version. ## 2. Log in [Section titled “2. Log in”](#2-log-in) Log in once so the CLI can access your Warp account, models, and saved context. Start the CLI:
```bash
warp
```
The CLI shows a verification link and a device code, and opens the link in your browser. Approve the login there and the CLI unlocks automatically, so you don’t need to restart it. If the browser doesn’t open, visit the link shown in the CLI and enter the code. When login completes, the CLI shows its start screen with the version, a short “What’s new” list, and the rules, skills, and MCP servers it discovered for your current directory. You stay signed in across sessions. To sign out later, run `/logout`, which returns the CLI to its login screen and signs out your browser session too. ## 3. Run your first prompt [Section titled “3. Run your first prompt”](#3-run-your-first-prompt) Type a prompt in plain language, such as `What does this project do?`, and press `Enter`. If the agent wants to run a command or edit a file, it shows a permission request. Choose an option to approve or reject the action. Learn more about the transcript, diffs, and approvals in [Agent conversations](/agents/cli/agent-conversations/) and [Permissions and profiles](/agents/cli/permissions-and-profiles/). ## 4. Run a shell command [Section titled “4. Run a shell command”](#4-run-a-shell-command) You can run shell commands directly without leaving the CLI. Type `!` at the start of an empty input to switch to shell mode. The footer shows **Shell mode**. Type a command, such as `git status`, and press `Enter`. To go back to prompting the agent, press `Backspace` on the empty input. To run recognized shell commands without the `!` prefix, run `/natural-language-detection` to turn on natural language detection. The CLI then classifies input as you type: recognized commands switch to shell mode, while natural-language prompts stay in Agent Mode. The prompt marker and statusline show the active mode before you press `Enter`. See [Input and shell commands](/agents/cli/input-and-shell-commands/) for long-running commands, interactive programs, and full-screen apps. ## 5. Exit and resume [Section titled “5. Exit and resume”](#5-exit-and-resume) Press `Ctrl+C` twice in a row to exit, or run `/exit`. A single `Ctrl+C` press stops the agent’s current response, or clears the input when nothing is running. On exit, the CLI prints a resume command for the conversation:
```bash
warp --resume CONVERSATION_TOKEN
```
Run the printed command later to pick up where you left off. To browse and reopen past conversations from inside the CLI, see [Agent conversations](/agents/cli/agent-conversations/#conversation-history). ## Uninstall the Warp Agent CLI [Section titled “Uninstall the Warp Agent CLI”](#uninstall-the-warp-agent-cli) The CLI is separate from the Warp desktop app. To remove an install-script or Homebrew install, and optional local agent data, see [Uninstalling the Warp Agent CLI](/support-and-community/troubleshooting-and-support/logging-out-and-uninstalling/#uninstalling-the-warp-agent-cli). ## Next steps [Section titled “Next steps”](#next-steps) * [Agent conversations](/agents/cli/agent-conversations/) - Work with the transcript, code diffs, plans, and tasks. * [Customizing the CLI](/agents/cli/configuration/) - Rules, skills, MCP servers, themes, and settings. * [Reference](/agents/cli/reference/) - All flags, slash commands, and keyboard shortcuts. * [Logging out & uninstalling](/support-and-community/troubleshooting-and-support/logging-out-and-uninstalling/#uninstalling-the-warp-agent-cli) - Remove the CLI binary and related local files.
# Warp Agent CLI reference
Canonical page: [/agents/cli/reference/](https://docs.warp.dev/agents/cli/reference/)
> Look up Warp Agent CLI command-line flags, environment variables, slash commands, keyboard shortcuts, and fixes for common issues.
This page is a lookup reference for the Warp Agent CLI, covering the flags and environment variables the `warp` command accepts, every slash command available in a session, the default keyboard shortcuts, and fixes for common issues. ## Command-line flags [Section titled “Command-line flags”](#command-line-flags) Running `warp` with no flags starts an interactive session in the current directory. The following flags change how the CLI starts, or make it perform a one-off action and exit. They are listed alphabetically. ### `--api-key` [Section titled “--api-key”](#--api-key) Authenticates with a Warp API key instead of the interactive browser login. Use it on machines that can’t open a browser, such as CI runners and remote servers. Prefer supplying the key through the `WARP_API_KEY` environment variable:
```bash
WARP_API_KEY=YOUR_API_KEY warp
```
The `--api-key` flag accepts the same value directly:
```bash
warp --api-key YOUR_API_KEY
```
Caution Command-line arguments can be captured in shell history and process listings. Prefer the `WARP_API_KEY` environment variable, ideally populated from a secret manager. Create a key in the Warp app under **Settings** > **Cloud platform** > **API keys**. See the [API keys reference](/agents/cli/oz-cli/api-keys/) for details. ### `--auto-approve` [Section titled “--auto-approve”](#--auto-approve) Starts new conversations with auto-approve enabled, so the agent runs actions without asking for approval first.
```bash
warp --auto-approve
```
This flag applies only to the session you launch with it and doesn’t change your saved settings. You can still toggle auto-approve per conversation with `/auto-approve` or `Ctrl+Shift+I`. See [permissions and profiles](/agents/cli/permissions-and-profiles/) for how approvals work. ### `--clear-provider-api-key` [Section titled “--clear-provider-api-key”](#--clear-provider-api-key) Deletes a stored model-provider API key from your device’s secure storage, then exits.
```bash
warp --clear-provider-api-key <provider>
```
`<provider>` is `openai`, `anthropic`, or `google`. For example:
```bash
warp --clear-provider-api-key anthropic
```
### `--help` [Section titled “--help”](#--help) Prints usage information for all flags and exits.
```bash
warp --help
```
### `--resume` [Section titled “--resume”](#--resume) Reopens a previous conversation from your shell as the CLI starts.
```bash
warp --resume CONVERSATION_TOKEN
```
`CONVERSATION_TOKEN` is the token the CLI prints when you exit a session (“To continue this conversation, run: `warp --resume ...`”). You can also reopen past conversations from inside a session with `/conversations`. See [agent conversations in the CLI](/agents/cli/agent-conversations/#managing-conversations) for how persistence and resuming work. ### `--set-provider-api-key` [Section titled “--set-provider-api-key”](#--set-provider-api-key) Stores a model-provider API key for [Bring Your Own API Key (BYOK)](/agents/inference/bring-your-own-api-key/) in your device’s secure storage, then exits. Warp never stores provider keys on its servers.
```bash
warp --set-provider-api-key <provider>
```
`<provider>` is `openai`, `anthropic`, or `google`. For example:
```bash
warp --set-provider-api-key anthropic
```
The CLI prompts for the key with masked input, so the key never appears in your shell history. When stdin is piped, the key is read from stdin instead, so you can pass it straight from a secret manager without writing it to disk:
```bash
your-secret-manager read anthropic-api-key | warp --set-provider-api-key anthropic
```
Avoid staging keys in plaintext files. If you must use a temporary file, delete it immediately afterward. Inside a session, manage the same keys with the `/api-keys` menu. See [models and usage](/agents/cli/models-and-usage/#bring-your-own-api-key) for how stored keys affect billing. ### `--version` [Section titled “--version”](#--version) Prints the installed version and exits.
```bash
warp --version
```
## Environment variables [Section titled “Environment variables”](#environment-variables) * **`WARP_API_KEY`** - A Warp API key for non-interactive authentication. Equivalent to passing `--api-key`. * **`WARP_TUI_DISABLE_AUTOUPDATE`** - Set it to any value to turn off background updates for a single launch. See [Updating](#updating) for how updates work. ## Slash commands [Section titled “Slash commands”](#slash-commands) Type `/` at the start of the input to open the slash command menu. Commands that take an argument show a hint after the command name. Angle brackets mark required arguments, and square brackets mark optional ones. | Command | Argument | Description | | ----------------------------- | --------------------- | ------------------------------------------------------------------------------------------------------------------------------------------------------------------------- | | `/agent` | `[prompt]` | Start a new conversation | | `/api-keys` | | View and manage model-provider API keys | | `/auto-approve` | | Toggle auto-approve for agent actions | | `/clear` | `[prompt]` | Clear the transcript and start a new conversation | | `/compact` | `[instructions]` | Free up context by summarizing the conversation history | | `/connect-grok` | | Connect an X Premium or SuperGrok subscription for Grok models | | `/conversations` | | Open conversation history | | `/copy-debugging-id` | | Copy the current conversation’s debugging information to the clipboard | | `/cost` | | Toggle per-response credit usage details | | `/create-new-project` | `<description>` | Have the agent walk you through creating a new coding project | | `/exit` | | Exit the CLI | | `/export-to-clipboard` | | Export the current conversation to the clipboard as Markdown | | `/export-to-file` | `[filename]` | Export the current conversation to a Markdown file | | `/fork` | `[prompt]` | Fork the current conversation into a copy, optionally sending a prompt in the copy | | `/handoff` | `[prompt]` | Hand off this conversation to a cloud agent. See [cloud handoff and orchestration](/agents/cli/cloud-and-orchestration/#hand-off-to-a-cloud-agent) | | `/logout` | | Log out of Warp | | `/manage-billing` | | Open your team’s billing page in the browser | | `/mcp` | | View and manage MCP servers | | `/model` | | Switch the base agent model | | `/natural-language-detection` | | Toggle natural language detection for shell input | | `/new` | `[prompt]` | Start a new conversation (alias for `/agent`) | | `/orchestrate` | `[task]` | Break a task into subtasks and run them in parallel with multiple agents. See [multi-agent orchestration](/agents/cli/cloud-and-orchestration/#multi-agent-orchestration) | | `/plan` | `[task]` | Ask the agent to research and create a plan for a task | | `/reset-statusline` | | Restore the statusline to its default items and ordering | | `/skills` | | Browse skills in scope and insert one into the input | | `/status` | | Show session and account status | | `/statusline` | | Configure the statusline | | `/team` | | Switch the active team | | `/theme` | `<auto\|light\|dark>` | Set the color theme | | `/upgrade` | | Open the Warp upgrade page in the browser | | `/usage` | | View plan, credit usage, and billing links | | `/view-logs` | | Bundle your logs into a zip archive | | `/vim-mode` | | Toggle Vim keybindings in the input | | `/voice` | | Start voice input | Some commands appear only when they apply to your account. `/manage-billing` is listed when you administer billing for your team, and opens that team’s billing page; it isn’t available to members without billing access. `/connect-grok` opens the same subscription row as [`/api-keys`](/agents/cli/models-and-usage/#bring-your-own-api-key) and starts the xAI sign-in directly. `/status` opens a read-only panel with the installed version, the current conversation’s name and ID, the working directory, and the organization and email you’re signed in as. Press `Esc` to close it, and include those details when you report a problem. `/usage` opens a read-only panel with your plan, credit balances and consumption, and links to manage billing or upgrade. See [models and usage](/agents/cli/models-and-usage/#usage-and-cost). `/team` opens a searchable list of the teams you belong to, with the active one marked. Type to filter, then press `Enter` to switch. The CLI re-scopes the current session in place, unlike the Warp app, which opens a new window for the team you pick. The active team also appears in the statusline, and clicking it opens the same list. Skills also appear in the same menu under their own names, so you can invoke a skill directly as `/skill-name`. [Customizing the CLI](/agents/cli/configuration/) covers how skills are discovered. ## Keyboard shortcuts [Section titled “Keyboard shortcuts”](#keyboard-shortcuts) Press `?` on an empty input to open the contextual shortcuts panel inside the CLI. The tables below list the default bindings. ### Session [Section titled “Session”](#session) | Shortcut | Action | | ------------------------- | ---------------------------------------------------------------------------------- | | `Ctrl+C` | Stop the current response, or clear the input; press again within a second to exit | | `Ctrl+D` | Exit when the input is empty (deletes the next character otherwise) | | `?` | Show the shortcuts panel (on an empty input) | | `/` | Open the slash command menu | | `!` | Enter shell mode (`Esc` returns to agent input) | | `←` | Open the conversation list (on an empty input) | | `↑` | Browse prompt and command history | | `Esc` | Dismiss the open menu, or leave shell mode | | `Ctrl+Shift+I` | Toggle auto-approve | | `Ctrl+Shift+P` | Expand or collapse the latest plan | | `Ctrl+S` | Start voice input | | `Ctrl+V` / `Ctrl+Shift+V` | Paste from the clipboard, including images | | `Tab` | Focus attached images when present; complete shell commands in shell mode | ### Approvals [Section titled “Approvals”](#approvals) These bindings apply while the agent is waiting for you to approve an action. [Permissions and profiles](/agents/cli/permissions-and-profiles/) explains the approval flow. | Shortcut | Action | | ------------ | ----------------------------------------------------------------------------------- | | `Enter` | Confirm the selected option on the approval card | | `Esc` | Reject or cancel the request | | `E` | Edit the proposed command, or expand and collapse all diffs in a file-edit approval | | `Ctrl+Enter` | Approve a request to type into a running command | ### Terminal control [Section titled “Terminal control”](#terminal-control) These bindings apply while an interactive terminal command is running. | Shortcut | Action | | -------- | ---------------------------------------------------------------------------------- | | `Ctrl+C` | Interrupt a command you started, or take control of a command the agent is running | | `Ctrl+G` | Hand control of the command back to the agent | ### Multi-agent tabs [Section titled “Multi-agent tabs”](#multi-agent-tabs) When an orchestration launches child agents, an **Agents:** tab bar appears above the session. [Cloud and orchestration](/agents/cli/cloud-and-orchestration/) covers the workflow. | Shortcut | Action | | -------------------------------- | ---------------------------------------------------------------- | | `Shift+↑` | Focus the agent tab bar | | `←` / `→` or `Tab` / `Shift+Tab` | Select the previous or next agent | | `Shift+←` / `Shift+→` | Select the first or last child agent | | `↓` | Return focus to the current session’s input | | `Esc` | Return to the orchestrator | | `Ctrl+C` | Kill the selected child agent (press twice when viewing a child) | ### Text editing [Section titled “Text editing”](#text-editing) The input supports readline-style editing. | Shortcut | Action | | --------------------------------------------- | ------------------------------- | | `Shift+Enter`, `Ctrl+J`, or `Alt+Enter` | Insert a newline | | `Ctrl+A` / `Home` | Move to the start of the line | | `Ctrl+E` / `End` | Move to the end of the line | | `Ctrl+B` / `Ctrl+F` | Move left / right | | `Alt+B` / `Alt+F` (or `Alt+←` / `Alt+→`) | Move one word left / right | | `Ctrl+W` or `Alt+Backspace` | Delete the previous word | | `Alt+D` or `Alt+Delete` | Delete the next word | | `Ctrl+K` | Delete to the end of the line | | `Ctrl+U` | Delete to the start of the line | | `Ctrl+Y` | Reinsert the last deleted text | | `Ctrl+Z` / `Ctrl+Shift+Z` | Undo / redo | | `Shift+←` / `Shift+→` / `Shift+↑` / `Shift+↓` | Extend the selection | | `Ctrl+Shift+A` | Select all | | `Ctrl+Shift+C` | Copy the selection | | `Ctrl+X` | Cut the selection | For mouse support, completions, and other input behavior, see [input and shell commands](/agents/cli/input-and-shell-commands/). ## Troubleshooting [Section titled “Troubleshooting”](#troubleshooting) This section covers common issues, including gathering logs for a bug report, fixing sign-in problems, resuming conversations, and keeping the CLI up to date. ### Viewing and sharing logs [Section titled “Viewing and sharing logs”](#viewing-and-sharing-logs) When something goes wrong, logs are the fastest way to help the Warp team diagnose the problem. Run `/view-logs` in a session to bundle the current session’s log and recent previous sessions into a timestamped zip archive. The CLI reveals the archive in your file manager and shows the saved path in the footer, so you can attach it to a bug report or share it with support. On macOS, CLI logs are stored in `~/Library/Logs/warp-cli/`. Logs rotate per session, and older session logs are rotated out over time. The `/view-logs` archive is written to the same directory. When the problem is with the agent’s response rather than the CLI itself, run `/copy-debugging-id` in the session. It copies the conversation’s debugging information to your clipboard so you can paste it into a bug report. See [Gathering AI conversation ID](/support-and-community/troubleshooting-and-support/sending-us-feedback/#gathering-ai-conversation-id). ### The browser doesn’t open during sign-in [Section titled “The browser doesn’t open during sign-in”](#the-browser-doesnt-open-during-sign-in) The CLI signs you in with a browser-based flow. It opens a verification page (or shows you the URL and a code to enter) and continues once you approve the sign-in. On a remote or browser-less machine, the CLI can’t launch a browser, but the sign-in screen still shows the verification URL and code. 1. Open the displayed URL in a browser on any device, including another machine. 2. Enter the code shown in the CLI. 3. Return to the CLI. It proceeds automatically once the sign-in is approved. For machines where the browser flow isn’t practical, authenticate non-interactively with an API key instead, using the `WARP_API_KEY` environment variable or the `--api-key` flag. See [command-line flags](#command-line-flags). ### ”Login failed” [Section titled “”Login failed””](#login-failed) The sign-in attempt was rejected or timed out. The error message in the CLI names the underlying cause. 1. Press `Ctrl+C` to exit. 2. Run `warp` again to restart the sign-in flow. 3. If the failure persists, check your network connection and any proxy or firewall that could block access to Warp’s servers. ### Signed in to the wrong account [Section titled “Signed in to the wrong account”](#signed-in-to-the-wrong-account) 1. Run `/logout` in a session. The CLI signs you out, opens your browser to complete the sign-out on Warp’s website, and returns to the sign-in screen. 2. Sign in with the account you want. ### ”Could not restore conversation” when resuming [Section titled “”Could not restore conversation” when resuming”](#could-not-restore-conversation-when-resuming) `warp --resume` failed to load the conversation for the given token, for example because the token is malformed or the conversation is no longer available. 1. Press `Ctrl+C` to exit, then run `warp` to start normally. 2. Check the token against the resume command printed when you exited the original session. 3. If the conversation exists locally, open it from the [conversation menu](/agents/cli/agent-conversations/#conversation-history) with `/conversations` instead. ### Updating [Section titled “Updating”](#updating) Update behavior depends on the install method. Native managed installs check, download, and stage updates for the next launch. Homebrew installs check for updates but require `brew upgrade --cask warp-agent-cli`. Unmanaged installs do not use either update path. See the [installation and update guidance](/agents/cli/quickstart/#1-install-the-warp-agent-cli) for details. To check which version you’re running, use `/status` in a session, or run:
```bash
warp --version
```
To turn off background updates for a single launch, set the `WARP_TUI_DISABLE_AUTOUPDATE` environment variable to any value. To turn them off persistently, set `general.autoupdate_enabled` to `false` in the [CLI settings file](/agents/cli/configuration/#the-settings-file). If an install becomes corrupted, re-running the install command from the [quickstart](/agents/cli/quickstart/) replaces it with the latest version. ### Getting help [Section titled “Getting help”](#getting-help) * [Sending us feedback](/support-and-community/troubleshooting-and-support/sending-us-feedback/) - How to reach Warp support and share feedback. * [Known issues](/support-and-community/troubleshooting-and-support/known-issues/) - Current known issues across Warp. * [GitHub issues](https://github.com/warpdotdev/Warp/issues) - Search existing reports or file a new one. Attach the `/view-logs` archive to bug reports.
# Frequently asked questions about agents
Canonical page: [/agents/getting-started/faqs/](https://docs.warp.dev/agents/getting-started/faqs/)
> Frequently asked questions about Warp's AI features, including supported models, privacy practices, credit limits, billing, and usage guidelines.
Answers to frequently asked questions about agents in Warp, including supported models, data privacy, credit limits, billing, and common error messages. For billing-specific questions, see the pricing FAQs. ## General [Section titled “General”](#general) ### What data is sent and/or stored when using Agents in Warp? [Section titled “What data is sent and/or stored when using Agents in Warp?”](#what-data-is-sent-andor-stored-when-using-agents-in-warp) See our [Privacy page](/support-and-community/privacy-and-security/privacy/) for more information on how we handle data used by Agents in Warp. ### What happened to the old Warp AI chat panel? [Section titled “What happened to the old Warp AI chat panel?”](#what-happened-to-the-old-warp-ai-chat-panel) Agent Mode has replaced the previous AI chat panel. Agent Mode is more powerful in all of the chat panel’s use cases. Not only can Agent Mode run commands for you, it can also gather context without you needing to copy and paste. To start a similar chat panel, click the AI button in the menu bar to open a new AI pane. ### Is my data used for model training? [Section titled “Is my data used for model training?”](#is-my-data-used-for-model-training) Warp reserves the right to use data collected to train models and improve Warp. Warp has Zero Data Retention with all its model providers (e.g. Anthropic, OpenAI, xAI, etc.). Learn more about telemetry on our [Privacy page](/support-and-community/privacy-and-security/privacy/). ### What model are you using for Agent Mode? [Section titled “What model are you using for Agent Mode?”](#what-model-are-you-using-for-agent-mode) Warp supports a curated list of LLMs from providers like OpenAI, Anthropic, and Gemini. To view the full list of supported models and learn how to switch between them, visit the [Model Choice](/agents/inference/model-choice/) page. ### Can I use my own LLM API key? [Section titled “Can I use my own LLM API key?”](#can-i-use-my-own-llm-api-key) Yes. Warp supports [Bring Your Own API Key (BYOK)](/agents/inference/bring-your-own-api-key/) on the Free plan and all eligible paid plans, so you can connect your own Anthropic, OpenAI, or Google API keys to route requests directly through your account. Because the Free plan doesn’t include bundled AI usage for the Warp Agent, BYOK is one way to keep using the Warp Agent on the Free plan. BYOK and [custom inference endpoints](/agents/inference/custom-inference-endpoint/) are available for individual users and organizations with 10 or fewer employees, subject to Warp’s Terms of Service. Larger organizations need a Warp Business or Enterprise plan. Business and Enterprise admins can centrally manage BYOK and custom endpoints for the whole team with [team-managed API keys and endpoints](/enterprise/enterprise-features/team-managed-keys-and-endpoints/), which also work for cloud agents. Enterprise admins can additionally enable managed [Bring Your Own LLM (BYOLLM)](/enterprise/enterprise-features/bring-your-own-llm/) configurations for cloud-provider routing. ### Can I use a ChatGPT or Claude subscription with Warp? [Section titled “Can I use a ChatGPT or Claude subscription with Warp?”](#can-i-use-a-chatgpt-or-claude-subscription-with-warp) You can [connect a ChatGPT subscription](/agents/inference/chatgpt-subscription/) to use eligible OpenAI models with the Warp Agent in the Warp app. You can connect while signing up or signing in, or link an existing Warp account from Settings. Warp doesn’t support connecting a Claude consumer subscription. To use your own Anthropic account, add an API key with [Bring Your Own API Key (BYOK)](/agents/inference/bring-your-own-api-key/). For xAI’s Grok models, connect a [SuperGrok subscription](/agents/inference/grok-subscription/). ## Billing [Section titled “Billing”](#billing) Paid Warp plans include a set number of credits per user per month for Warp-provided AI usage. The Free plan doesn’t include bundled AI usage for the Warp Agent; to use the Warp Agent, [upgrade to a paid plan](https://www.warp.dev/pricing) or bring your own inference (BYOK, a [custom inference endpoint](/agents/inference/custom-inference-endpoint/), a [ChatGPT subscription](/agents/inference/chatgpt-subscription/), or a [SuperGrok or X Premium subscription](/agents/inference/grok-subscription/)). See [pricing](https://www.warp.dev/pricing) to compare plans. Credit limits apply to Agent Mode, Generate (Legacy), and [AI autofill in Workflows](/knowledge-and-collaboration/warp-drive/workflows/#ai-autofill). For questions about what counts as a credit, what counts as a token, and how often credits refresh, see [Credits](/support-and-community/plans-and-billing/credits/) and the [Plans & Pricing](/support-and-community/plans-and-billing/plans-pricing-refunds/) page. ## Common AI error messages [Section titled “Common AI error messages”](#common-ai-error-messages) #### ”Message token limit exceeded” error [Section titled “”Message token limit exceeded” error”](#message-token-limit-exceeded-error) This error means your input (plus attached context) exceeds the maximum context window of the model you’re using. If you exceed the limit for your selected model, you may receive no output. To fix this, try: * Starting a new conversation * Reducing the number of blocks or lines attached to your query #### ”Monthly request limit exceeded” or “Monthly credit limit exceeded” errors [Section titled “”Monthly request limit exceeded” or “Monthly credit limit exceeded” errors”](#monthly-request-limit-exceeded-or-monthly-credit-limit-exceeded-errors) Once you exceed your monthly credit limit (see [pricing](https://www.warp.dev/pricing) for current limits), premium models will be disabled until your quota resets at the start of your next billing cycle. On paid plans with add-on credits, you can continue using AI with usage-based billing. **Request failed with error: QuotaLimit** Once you exceed your AI token limits, all models will be disabled. Note that credits and tokens are calculated separately, and even though the plans may have a set number of credits, they also have a limited number of tokens. **Request failed with error: ErrorStatus (403, “Your account has been blocked from using AI features”)** This message means your account has been blocked from using AI features, typically due to a violation of our [Terms of Service](https://www.warp.dev/legal/terms-of-service) or suspected abuse (e.g. attempting to bypass credit or token limits). To resolve or clarify this, please contact our team at <appeals@warp.dev> if you believe this was an error. We’ll review your case and respond as soon as possible. Caution Note that any error that does not mention <appeals@warp.dev> isn’t related to being blocked and should be reported as feedback or a bug. See [Sending Us Feedback](/support-and-community/troubleshooting-and-support/sending-us-feedback/) for more. ## Gathering AI conversation ID [Section titled “Gathering AI conversation ID”](#gathering-ai-conversation-id) In cases where you have issues with the Agent, we may ask for the AI conversation ID to troubleshoot the specific conversation. To gather the conversation ID, see [Gathering AI conversation ID](/support-and-community/troubleshooting-and-support/sending-us-feedback/#gathering-ai-conversation-id) for detailed steps.
# Bring Your Own API Key
Canonical page: [/agents/inference/bring-your-own-api-key/](https://docs.warp.dev/agents/inference/bring-your-own-api-key/)
> Warp lets you bring your own API keys (BYOK) for OpenAI, Anthropic, and Google AI models.
Warp supports **Bring Your Own API Key (BYOK)** for users who want to connect agents to their own Anthropic, OpenAI, or Google API accounts. This lets you use your own API keys for model access, giving you control over model selection, billing, and data routing. See [Model Choice](/agents/inference/model-choice/) for a list of supported models. You can also connect a [ChatGPT subscription](/agents/inference/chatgpt-subscription/) for eligible OpenAI models or a [SuperGrok subscription](/agents/inference/grok-subscription/) for Grok models. BYOK provides greater flexibility in model access and ensures Warp **never consumes your** [AI credits](/support-and-community/plans-and-billing/credits/) for requests routed through your own keys.  ## How BYOK differs from custom inference endpoints and BYOLLM [Section titled “How BYOK differs from custom inference endpoints and BYOLLM”](#how-byok-differs-from-custom-inference-endpoints-and-byollm) Warp offers several ways to bring your own AI infrastructure. Use this table to pick the right one, and follow the links for full details. | Name | Meaning | Plans | | -------------------------------------------------------------------------------------- | ----------------------------------------------------------------------------------------------------------------------------------------------------------------------------------------------------------------------------------- | ------------------------------------------------ | | **Bring Your Own API Key** (BYOK) | Use your own API key for OpenAI, Anthropic, or Google models. Keys are stored locally on your device. | Free and all eligible paid plans | | **[Custom inference endpoint](/agents/inference/custom-inference-endpoint/)** | Connect Warp to an OpenAI-compatible endpoint such as OpenRouter, LiteLLM, z.ai, or an internal gateway. | Free and all eligible paid plans | | **[Bring Your Own LLM](/enterprise/enterprise-features/bring-your-own-llm/)** (BYOLLM) | Enterprise-managed inference through your cloud provider (AWS Bedrock and Gemini Enterprise Agent Platform (Vertex AI) today; Azure Foundry coming soon), with Warp handling routing, orchestration, governance, and observability. | Enterprise only | | **[SuperGrok subscription](/agents/inference/grok-subscription/)** | Connect your SuperGrok subscription to use Grok models through your xAI account. Tokens are stored locally on your device. | Free and all eligible paid plans | | **[ChatGPT subscription](/agents/inference/chatgpt-subscription/)** | Connect your ChatGPT plan to use eligible OpenAI models with the Warp Agent in the Warp app. | See [Warp pricing](https://www.warp.dev/pricing) | See [Warp pricing](https://www.warp.dev/pricing) for current plan availability. Platform credits apply to every cloud agent run on any plan, and to local agent runs on Business and Enterprise when using BYOK, a custom inference endpoint, BYOLLM, or a connected ChatGPT plan. See [platform credits](/support-and-community/plans-and-billing/platform-credits/) for the full breakdown. ## How BYOK works [Section titled “How BYOK works”](#how-byok-works) When you add your own model API keys in Warp, those keys are stored **only on your device** (in your OS keychain or equivalent secure storage), never on Warp’s servers. They’re used to make requests to your chosen model provider. When you send a prompt using a model with the **key icon**: 1. Your local Warp client pulls your API key from your device’s secure storage and sends it up to Warp’s backend along with your prompt. 2. The Warp Agent harness, which runs on Warp’s backend, assembles the full request (system instructions, conversation context, tools) and uses your key in-flight to call your chosen model provider (Anthropic, OpenAI, or Google). 3. The provider’s response streams back through Warp’s backend to your client. Your API key passes through Warp’s servers each time you send a request, but Warp never stores it there — it’s used only in-flight to call the provider, then discarded. Caution BYOK does not apply to [Cloud Agents](/platform/). Because your API keys are stored locally on your device, they are not available to cloud-hosted agent runs, which consume [Warp credits](/support-and-community/plans-and-billing/credits/). Business and Enterprise teams that need their own keys to work with cloud agents can use [team-managed API keys and endpoints](/enterprise/enterprise-features/team-managed-keys-and-endpoints/), which Warp stores server-side. When a model is selected using your own key: * Warp **does not consume** any of your [credits](/support-and-community/plans-and-billing/credits/). * Costs are billed directly through your model provider account. * Warp does not retain or store your API key on any of its servers. 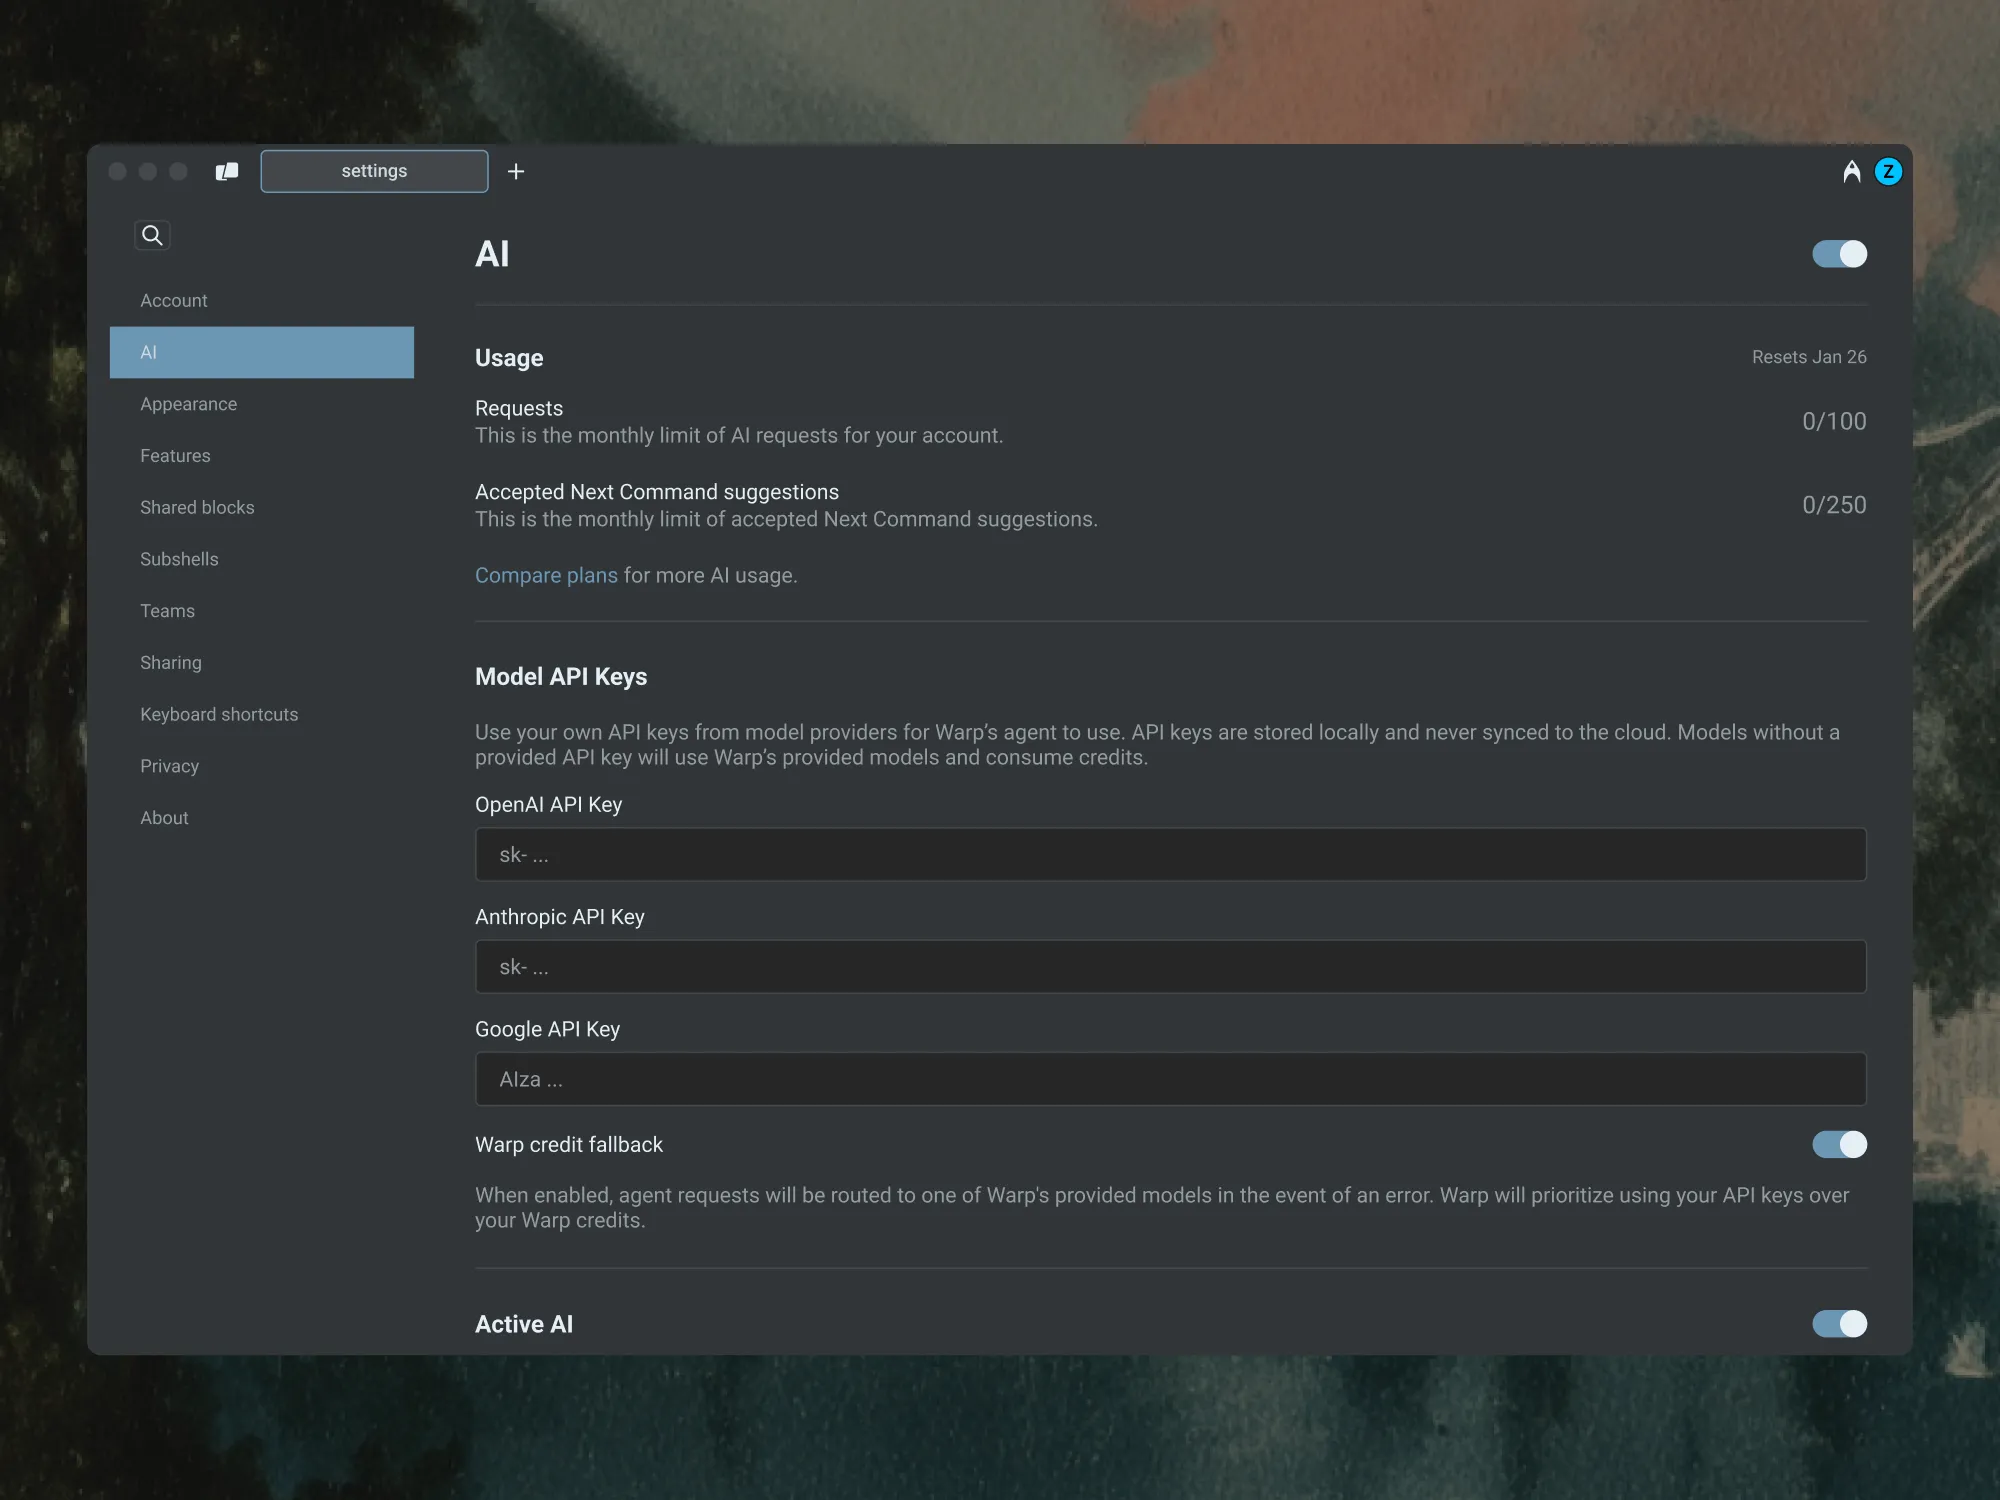 ## Enabling BYOK [Section titled “Enabling BYOK”](#enabling-byok) To enable and configure your API keys: 1. Open **Settings** and search for `API keys` to jump to the BYOK configuration. 2. Add your API key(s) for Anthropic, OpenAI, or Google. 3. Once added, you’ll see a **key icon** next to supported models in the model picker. 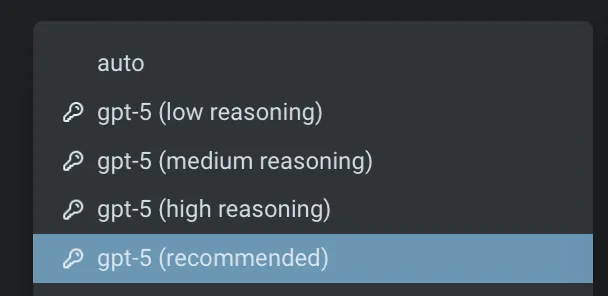 When you explicitly select a model with a key icon, Warp routes requests through your own API key instead of consuming Warp’s credits. ## BYOK usage and billing behavior [Section titled “BYOK usage and billing behavior”](#byok-usage-and-billing-behavior) ### Auto Model [Section titled “Auto Model”](#auto-model) Warp’s **Auto** models dynamically route requests across different models based on context and performance. Because this routing logic depends on Warp’s infrastructure, **Auto always consumes Warp’s credits**, even if you’ve configured your own API keys. To use your own key, select a specific provider model (for example, Claude Opus 4.7, Claude Sonnet 4.6, GPT-5.5, or Gemini 3.1 Pro) directly from the model picker with a key icon. [Custom routers](/agents/inference/custom-routers/) behave differently: a router resolves each task to a concrete model you chose, and Warp then applies your API keys to that model. Requests that resolve to a model covered by one of your keys are billed through your provider account instead of consuming Warp credits. See [Credits and model availability](/agents/inference/custom-routers/#credits-and-model-availability) for details. ### Credit usage [Section titled “Credit usage”](#credit-usage) When you select a model with the key icon in your model picker, Warp routes the request through your API key. In that case: * Inference is billed directly through your provider account rather than drawing from your AI credits. * Agent Mode prioritizes BYOK over any available Warp credits. **Other AI features in Warp** Some AI-powered features are not affected by BYOK and are included as part of Warp’s paid plans. | Feature | Uses Warp’s credits | Description | | ------------------------------------------------------------ | ------------------- | -------------------------------------------------------------------- | | [Active AI Recommendations](/agents/local-agents/active-ai/) | No | Always included with Build and higher plans. | | [Codebase Context](/agents/capabilities/codebase-context/) | Yes | Uses Warp’s AI infrastructure and consumes credits. | | [Cloud Agents](/platform/) | Yes | BYOK keys are stored locally and not available to cloud-hosted runs. | These features will continue to function normally regardless of whether you’ve configured BYOK. ### Failover and fallback behavior [Section titled “Failover and fallback behavior”](#failover-and-fallback-behavior) If Warp detects an issue with your API key, you’ll see a clear error message corresponding with the AI request. If your key: * Is invalid: Warp notifies you and halts the request. * Hits usage or rate limits: Warp will not retry using credits. You can update or replace your keys anytime by opening **Settings** and searching for `API keys`. **Failover and fallback:** By default, Warp does not fall back to your credits when a BYOK request fails. You can choose to enable **Warp credit fallback**. When enabled, if an agent request fails with your BYOK model (for example, due to an API error or quota limit), Warp will automatically route the request to one of Warp’s provided models. Warp always prioritizes your API keys first and only uses Warp credits when necessary.  ### Zero Data Retention (ZDR) and BYOK [Section titled “Zero Data Retention (ZDR) and BYOK”](#zero-data-retention-zdr-and-byok) Warp is **SOC 2 compliant** and has **Zero Data Retention (ZDR)** policies with all of its contracted LLM providers. No customer AI data is retained, stored, or used for training by the model providers. BYOK prompts and responses transit Warp’s backend (see [How BYOK works](#how-byok-works)). Warp does not use this content for training; retention and analytics handling follow the same account-level privacy and telemetry settings that apply to Warp-billed traffic. However, when you use your own API key: * Data retention policies on the **provider side** depend on your provider’s account settings. * Warp cannot enforce ZDR for requests sent through your API keys. * If your Anthropic, OpenAI, or Google account does not have ZDR enabled, your requests may be retained by the provider according to their terms. Warp itself never stores your LLM API keys. ### BYOK on Business and Enterprise plans [Section titled “BYOK on Business and Enterprise plans”](#byok-on-business-and-enterprise-plans) The BYOK described on this page is configured at the **user level** on every plan, including Business and Enterprise. Each team member adds and manages their own API keys locally on their device, and those keys work only for interactive requests, not [cloud agents](/platform/). Business and Enterprise teams can also configure **team-managed API keys** centrally: an admin sets shared keys in the [Admin Panel](/enterprise/team-management/admin-panel/), and they work for both interactive requests and cloud agents. See [Team-managed API keys and endpoints](/enterprise/enterprise-features/team-managed-keys-and-endpoints/) for details, or [contact sales](https://www.warp.dev/contact-sales). ## Related resources [Section titled “Related resources”](#related-resources) * [Custom inference endpoint](/agents/inference/custom-inference-endpoint/) — Route Warp through any OpenAI-compatible endpoint, such as OpenRouter, LiteLLM, z.ai, or an internal gateway. * [Bring Your Own LLM](/enterprise/enterprise-features/bring-your-own-llm/) — Enterprise-managed inference through your cloud provider or approved infrastructure. * [SuperGrok subscription](/agents/inference/grok-subscription/) — Use Grok models through your xAI account instead of Warp credits. * [ChatGPT subscription](/agents/inference/chatgpt-subscription/) — Use eligible OpenAI models in Warp Agent conversations in the Warp app through your ChatGPT plan. * [Model Choice](/agents/inference/model-choice/) — Full list of supported models and `model_id` values. * [Credits](/support-and-community/plans-and-billing/credits/) — How Warp credits work and when they’re consumed.
# Connecting a ChatGPT subscription
Canonical page: [/agents/inference/chatgpt-subscription/](https://docs.warp.dev/agents/inference/chatgpt-subscription/)
> Connect a ChatGPT subscription to use eligible OpenAI models with the Warp Agent in the Warp app.
Connect a ChatGPT subscription to use eligible OpenAI models with the Warp Agent in the Warp app. Requests made through the connection count toward your ChatGPT usage limits instead of consuming Warp credits for inference. You can connect during Warp sign-up or sign-in, or link ChatGPT to an existing Warp account from Settings. ## Connect during sign-up or sign-in [Section titled “Connect during sign-up or sign-in”](#connect-during-sign-up-or-sign-in) Use **Continue with ChatGPT** to create a Warp account or sign in to an existing account with the same verified email address. 1. Open the [Warp sign-in page](https://app.warp.dev/login). 2. Click **Continue with ChatGPT**. 3. Sign in to ChatGPT and approve the connection. 4. Return to Warp. Warp signs you in and links the ChatGPT subscription to your account.  ChatGPT on the Warp sign-in form. ## Link an existing Warp account [Section titled “Link an existing Warp account”](#link-an-existing-warp-account) Connect from Settings when you already use a different sign-in method for Warp. 1. In the Warp app, go to **Settings** > **Agents** > **Warp Agent**. 2. In the “OpenAI ChatGPT plan” row, click **Continue with ChatGPT**. 3. Sign in to ChatGPT and approve the connection in your browser. 4. Return to Warp. Settings shows the email address for the connected ChatGPT account. If the setting isn’t available, your workspace admin may have disabled member-provided inference. See [Warp pricing](https://www.warp.dev/pricing) for current plan availability. ## Use your ChatGPT subscription [Section titled “Use your ChatGPT subscription”](#use-your-chatgpt-subscription) Choose a specific OpenAI model from the model picker. OpenAI determines which models and capabilities your ChatGPT plan can use. * Requests made through the connection count toward your ChatGPT usage limits. Review your usage in [ChatGPT settings](https://chatgpt.com/settings/usage). * A saved OpenAI API key takes precedence over the ChatGPT connection. * **Auto** models use Warp-managed inference and consume Warp credits. * A ChatGPT subscription doesn’t fund cloud agent runs. On Business and Enterprise plans, local agent runs that use a ChatGPT subscription also consume [platform credits](/support-and-community/plans-and-billing/platform-credits/). If OpenAI rejects a request, Warp may offer **Try again**, **Manage ChatGPT usage**, or **Continue with Warp credits**. Choosing **Continue with Warp credits** uses Warp-managed inference for the rest of that conversation. ## Disconnect your subscription [Section titled “Disconnect your subscription”](#disconnect-your-subscription) In the Warp app, go to **Settings** > **Agents** > **Warp Agent**. In the “OpenAI ChatGPT plan” row, click **Disconnect**. After you disconnect, eligible OpenAI requests use your saved OpenAI API key, if you have one. Otherwise, they use Warp-managed inference and consume Warp credits. ## Troubleshoot the connection [Section titled “Troubleshoot the connection”](#troubleshoot-the-connection) ### ”That ChatGPT account is already connected to a different Warp account” [Section titled “”That ChatGPT account is already connected to a different Warp account””](#that-chatgpt-account-is-already-connected-to-a-different-warp-account) Disconnect the existing link before connecting another ChatGPT or Warp account. ### ”Verify the email on your ChatGPT account with OpenAI, then try again” [Section titled “”Verify the email on your ChatGPT account with OpenAI, then try again””](#verify-the-email-on-your-chatgpt-account-with-openai-then-try-again) Verify the email with OpenAI, then click **Continue with ChatGPT** again. ### ”Reconnect to use your plan for requests” [Section titled “”Reconnect to use your plan for requests””](#reconnect-to-use-your-plan-for-requests) Disconnect the ChatGPT subscription, then connect it again. ## Related pages [Section titled “Related pages”](#related-pages) * [Bring Your Own API Key](/agents/inference/bring-your-own-api-key/) — Use your own Anthropic, OpenAI, or Google API key. * [Model choice](/agents/inference/model-choice/) — Review the models available in Warp. * [Warp credits and billing](/support-and-community/plans-and-billing/credits/) — See when Warp credits are consumed.
# Custom inference endpoint
Canonical page: [/agents/inference/custom-inference-endpoint/](https://docs.warp.dev/agents/inference/custom-inference-endpoint/)
> Connect agents to any OpenAI-compatible inference endpoint — OpenRouter, LiteLLM, z.ai, or an internal gateway exposed at a public URL.
Warp supports **custom inference endpoints** for users who want to power agents with any OpenAI-compatible inference endpoint — a model router, hosted gateway, or internal infrastructure they already run. This lets you route AI requests through your preferred provider, run inference behind your own gateway, or use a router like OpenRouter or LiteLLM, while keeping the agent experience inside Warp. **Your endpoint must be reachable at a public URL.** Requests route through Warp’s servers (see [How it works](#how-it-works)), so Warp must be able to reach your endpoint over the public internet. `localhost`, private or internal network addresses, and internal-only services — such as a LiteLLM proxy that’s only reachable inside your network — are rejected. To use an internal or local endpoint, first expose it at a public HTTPS URL. See [Network requirements](#network-requirements) for details. ## Key features [Section titled “Key features”](#key-features) * **OpenAI-compatible** - Works with any endpoint that implements the OpenAI Chat Completions API. * **Provider flexibility** - Use a model router (OpenRouter, LiteLLM), a model provider with an OpenAI-compatible surface (z.ai), or your own internal gateway exposed at a public URL. * **No AI credits consumed for inference** - Inference is billed directly by your endpoint provider. On Business and Enterprise, local agent runs that route through a custom inference endpoint still consume [platform credits](/support-and-community/plans-and-billing/platform-credits/) for Warp’s platform infrastructure. * **Local API key storage** - Your endpoint API key is stored **only on your device** (in your OS keychain or equivalent secure storage), never on Warp’s servers. It’s used to make requests to your configured endpoint. ## How it works [Section titled “How it works”](#how-it-works) A custom inference endpoint expects your endpoint to implement the **OpenAI Chat Completions API** (`POST /v1/chat/completions`). Any service that exposes a compatible surface can be used as a target: * **OpenRouter** - Aggregates many model providers behind a single OpenAI-compatible API and consolidated billing. * **LiteLLM** - A self-hosted proxy that exposes a unified, OpenAI-compatible API across providers. * **z.ai** - A model provider with an OpenAI-compatible API surface for its models. * **Internal gateways (exposed at a public URL)** - An in-house service that fronts model providers behind an OpenAI-compatible endpoint (for example, a corporate AI gateway with logging, redaction, or access control). The gateway must be reachable from the public internet — an internal-only service, such as a LiteLLM proxy that only resolves inside your network or VPN, won’t work until it’s exposed at a public URL (see [Network requirements](#network-requirements)). When you configure a custom inference endpoint, your endpoint URL, model identifiers, and API key are stored **only on your device**, never on Warp’s servers. Your API key is used to make requests to your configured endpoint. When you send a prompt using an endpoint-routed model: 1. Your local Warp client pulls your endpoint URL and API key from your device’s secure storage and sends them up to Warp’s backend along with your prompt. 2. The Warp Agent harness, which runs on Warp’s backend, assembles the full request (system instructions, conversation context, tools) and uses your key in-flight to call your configured endpoint. 3. Your endpoint’s response streams back through Warp’s backend to your client. Your API key passes through Warp’s servers each time you send a request, but Warp never stores it there — it’s used only in-flight to call your endpoint, then discarded. Caution Custom inference endpoints don’t apply to [Cloud Agents](/platform/). Because the configuration is stored locally, it isn’t available to cloud-hosted agent runs. Cloud agent runs always consume [Warp credits](/support-and-community/plans-and-billing/credits/). When a model routed through your endpoint is selected: * Warp **doesn’t consume** your [AI credits](/support-and-community/plans-and-billing/credits/) for that request. * Costs are billed directly by your endpoint provider. * Warp doesn’t retain or store your API key on any of its servers. ## Enabling a custom inference endpoint [Section titled “Enabling a custom inference endpoint”](#enabling-a-custom-inference-endpoint) To enable and configure a custom inference endpoint: 1. In Warp, open **Settings** and search for `inference endpoint` to jump to the configuration. 2. Add your endpoint URL (the base URL that exposes `/v1/chat/completions`) and any required credentials (typically an API key). 3. Specify the model identifier(s) you want to route through this endpoint. 4. Save the configuration. Once added, you’ll see your custom models appear in the model picker. When you explicitly select an endpoint-routed model from the model picker, Warp routes the request through your endpoint instead of consuming Warp’s AI credits. The configuration flow mirrors the [Bring Your Own API Key](/agents/inference/bring-your-own-api-key/) setup, so the steps will feel familiar if you’ve already configured BYOK. ## Network requirements [Section titled “Network requirements”](#network-requirements) Warp routes inference requests through its servers, so **your endpoint must be reachable from the public internet**. `localhost`, `127.0.0.1`, and other private or local network URLs are rejected when configuring a custom inference endpoint. This requirement applies to any endpoint that isn’t already publicly accessible: * **Internal gateways and proxies** - An internal LiteLLM proxy, corporate AI gateway, or other service that only resolves inside your private network or VPN can’t be reached by Warp. Expose it at a public HTTPS URL — for example, through a load balancer, an API gateway, or a tunneling service — before configuring it in Warp. * **Local models** - To route through a model running on your own machine (for example, Ollama, LM Studio, vLLM, or llama.cpp), expose it through a tunneling service like [ngrok](https://ngrok.com/) and use the public tunnel URL as the base URL in your endpoint configuration. For example, with a default Ollama install listening on port `11434`, run `ngrok http 11434` and use the resulting `https://*.ngrok-free.app/v1` URL as your endpoint. Other tunneling services that produce a publicly reachable HTTPS URL (Cloudflare Tunnel, Tailscale Funnel, and similar) work the same way. ## Billing behavior [Section titled “Billing behavior”](#billing-behavior) ### AI credits [Section titled “AI credits”](#ai-credits) When you select an endpoint-routed model from the model picker, inference is billed directly by your endpoint provider, according to their pricing, rather than drawing from your AI credits. ### Auto routing still uses Warp credits [Section titled “Auto routing still uses Warp credits”](#auto-routing-still-uses-warp-credits) Warp’s **Auto** models dynamically route across providers using Warp’s infrastructure. Because Auto routing depends on Warp, **Auto always consumes Warp’s credits**, even if you’ve configured a custom inference endpoint. To use your endpoint, select the specific endpoint-routed model from the model picker rather than an Auto option. [Custom routers](/agents/inference/custom-routers/) can’t use your endpoint either: routing targets must be Warp-supported models, so a router never resolves to an endpoint-routed model. Custom routers do apply [BYOK](/agents/inference/bring-your-own-api-key/) provider keys after resolving a model. ### Other AI features in Warp [Section titled “Other AI features in Warp”](#other-ai-features-in-warp) Some AI-powered features (Codebase Context, Active AI recommendations, cloud agent runs) rely on Warp’s infrastructure and are unaffected by a custom inference endpoint. See the [feature breakdown on the BYOK page](/agents/inference/bring-your-own-api-key/#byok-usage-and-billing-behavior) for which features still consume Warp credits. ## Zero Data Retention (ZDR) [Section titled “Zero Data Retention (ZDR)”](#zero-data-retention-zdr) Warp is **SOC 2 compliant** and has **Zero Data Retention (ZDR)** agreements with all of its contracted LLM providers. Custom inference endpoint prompts and responses transit Warp’s backend (see [How it works](#how-it-works)). Warp does not use this content for training; retention and analytics handling follow the same account-level privacy and telemetry settings that apply to Warp-billed traffic. When you use a custom inference endpoint: * Data retention on the **provider side** is determined by your endpoint provider and any upstream model providers they route to. * Warp **cannot enforce ZDR** for requests sent through a custom inference endpoint. * If your endpoint provider does not have ZDR with the underlying model provider, your requests may be retained according to their terms. Warp itself never stores your endpoint API key. Review your endpoint provider’s data handling and retention policies before routing sensitive prompts through a custom inference endpoint. ## Centrally managed configuration [Section titled “Centrally managed configuration”](#centrally-managed-configuration) The custom inference endpoints described on this page are configured at the **user level** on every plan. Each user adds their own endpoint locally, and it works only for interactive requests, not [cloud agents](/platform/). Business and Enterprise teams can also configure **team-managed custom endpoints** centrally: an admin sets shared endpoints in the [Admin Panel](/enterprise/team-management/admin-panel/), and they work for both interactive requests and cloud agents. See [Team-managed API keys and endpoints](/enterprise/enterprise-features/team-managed-keys-and-endpoints/), or [Bring Your Own LLM](/enterprise/enterprise-features/bring-your-own-llm/) for Enterprise AWS Bedrock or Gemini Enterprise (Vertex AI) routing. ## How custom inference endpoints differ from BYOK and BYOLLM [Section titled “How custom inference endpoints differ from BYOK and BYOLLM”](#how-custom-inference-endpoints-differ-from-byok-and-byollm) Warp offers three ways to bring your own AI infrastructure. Use this table to pick the right one, and follow the links for full details. | Name | Meaning | Plans | | -------------------------------------------------------------------------------------- | ----------------------------------------------------------------------------------------------------------------------------------------------------------------------------------------------------------------------------------- | -------------------------------- | | **[Bring Your Own API Key](/agents/inference/bring-your-own-api-key/)** (BYOK) | Use your own API key for OpenAI, Anthropic, or Google models. Keys are stored locally on your device. | Free and all eligible paid plans | | **Custom inference endpoint** | Connect Warp to an OpenAI-compatible endpoint such as OpenRouter, LiteLLM, z.ai, or an internal gateway. | Free and all eligible paid plans | | **[Bring Your Own LLM](/enterprise/enterprise-features/bring-your-own-llm/)** (BYOLLM) | Enterprise-managed inference through your cloud provider (AWS Bedrock and Gemini Enterprise Agent Platform (Vertex AI) today; Azure Foundry coming soon), with Warp handling routing, orchestration, governance, and observability. | Enterprise only | Platform credits may apply for local agent runs on Business and Enterprise when using BYOK, a custom inference endpoint, or BYOLLM. See [platform credits](/support-and-community/plans-and-billing/platform-credits/). ## Related resources [Section titled “Related resources”](#related-resources) * [Bring Your Own API Key](/agents/inference/bring-your-own-api-key/) — Use your own OpenAI, Anthropic, or Google API keys. * [Bring Your Own LLM](/enterprise/enterprise-features/bring-your-own-llm/) — Enterprise-managed inference through your cloud provider or approved infrastructure. * [Model Choice](/agents/inference/model-choice/) — Full list of supported models and `model_id` values. * [Credits](/support-and-community/plans-and-billing/credits/) — How Warp credits work and when they’re consumed.
# Custom routers
Canonical page: [/agents/inference/custom-routers/](https://docs.warp.dev/agents/inference/custom-routers/)
> Define a custom router that automatically picks the right model for each task, based on task complexity or rules you write, and use it from the model picker.
Custom routers automatically pick the right model for each task, using routing logic you define. Instead of committing to a single model up front, you set the logic once, and Warp resolves a concrete model each time you send a prompt, based on either task complexity or rules you write. ## Key features [Section titled “Key features”](#key-features) * **Complexity-based routing** - Warp classifies each task’s difficulty and routes to the model you mapped to that level. * **Rule-based routing** - Write natural-language rules that describe when to use each model. * **Any supported model** - Route to any concrete model you have access to, across providers. * **BYOK support** - With [your own API keys](/agents/inference/bring-your-own-api-key/) configured, requests that resolve to a model covered by one of your keys bill through your provider account instead of Warp credits. * **Settings or file** - Create a router in settings, or author it as a YAML file that Warp loads automatically. * **Team-synced routers** - Admins can share a router with an entire team (Enterprise). ## How it works [Section titled “How it works”](#how-it-works) A custom router appears in the [model picker](/agents/inference/model-choice/#how-to-change-models) as its own entry, alongside Warp’s built-in Auto models and individual models. You select it like any other model. When you send a prompt, the router resolves to a single concrete model and runs the task on it, just like Warp’s built-in Auto models. You can always see which model actually ran. Warp chooses a model when you start a conversation and keeps using it for the rest of that conversation. Very short, trivial prompts (like a quick “hello”) don’t lock in the choice. ## Routing types [Section titled “Routing types”](#routing-types) A router uses one of two routing types. You choose the type when you create the router. ### Complexity-based routing [Section titled “Complexity-based routing”](#complexity-based-routing) Warp classifies each task as easy, medium, or hard and routes to the model you assigned to that level. You also set a default model, which Warp uses for any level you leave unset or when it can’t determine complexity. Use complexity-based routing to put lower-cost models on simple work and more capable models on harder tasks, without describing tasks yourself. ### Rule-based routing [Section titled “Rule-based routing”](#rule-based-routing) Rule-based routing routes each task using rules you write. Each rule pairs a classification prompt (a natural-language description of when to use a model, such as “debugging or fixing failing tests”) with the model to use when that rule matches. * Warp evaluates rules from top to bottom, and the first rule that matches wins. Rules higher in the list take precedence over those below. * If no rule matches, Warp uses the required default model. ## Create a router in Warp [Section titled “Create a router in Warp”](#create-a-router-in-warp) 1. Open **Settings** > **Agents** > **Warp Agent** and find the **Custom Routers** section. 2. Click **Add router** and enter a name. 3. Under **Routing type**, choose **Complexity-based** or **Rule-based**. 4. Configure the routing: * **Complexity-based** - Select a **Default** model, then assign models to **Easy**, **Medium**, and **Hard**. * **Rule-based** - Select a **Default model**, then click **Add rule** for each rule, write a **Classification prompt** describing when to use the model, and select the model. Rules are matched top to bottom, so order them by precedence. 5. Click **Save**. Your router now appears in the model picker. Saving also writes a file: use **Open file** to edit it directly, or **Delete** to remove the router. ## Author a router as a file [Section titled “Author a router as a file”](#author-a-router-as-a-file) Custom routers are stored as YAML files in `~/.warp/custom_model_routers/`, with one router per file. Warp loads every file in that directory and reloads automatically when you add, edit, or remove one, with no restart required. Routers you create in settings are saved here too. Routing targets use the same `model_id` values listed on the [Model choice](/agents/inference/model-choice/#available-models) page. Every target must be a concrete, Warp-supported model. You can’t route to an Auto model, another router, or a model from a [custom inference endpoint](/agents/inference/custom-inference-endpoint/). A complexity router uses `type: complexity`. `default` is required and is used for any bucket you omit: \~/.warp/custom\_model\_routers/cost-saver.yaml
```yaml
name: Cost saver
type: complexity
default: glm-5.3-fireworks
routing:
easy: minimax-3-fireworks
medium: glm-5.3-fireworks
hard: deepseek-v4.1-flash-fireworks
```
A rule-based router uses `type: prompt`. `default` is the required catch-all used when no rule matches, and `routing` is the ordered list of rules. Rules can describe your team’s specific workflows, so you can send routine work to cheaper models and reserve a frontier model for the tasks that need it: \~/.warp/custom\_model\_routers/by-task.yaml
```yaml
name: By task
type: prompt
default: claude-4-6-sonnet-high
routing:
- description: writing or reviewing database migrations for the acme-payments service
model: glm-5.3-fireworks
- description: debugging production incidents or fixing failing CI tests
model: claude-4-8-opus-high
- description: scaffolding new services or boilerplate from our internal templates
model: kimi-k3-fireworks
- description: drafting release notes, runbooks, or API documentation
model: qwen-3.8-max-fireworks
```
If a file can’t be parsed, Warp shows a non-blocking error identifying the file and skips it; your other routers keep working. ## Use a router [Section titled “Use a router”](#use-a-router) 1. In the prompt input, open the model picker by clicking the current model name. 2. Choose your router from the list. Your selection persists for future prompts, like any other model choice. ## Team-synced routers [Section titled “Team-synced routers”](#team-synced-routers) Team admins can create routers that are shared with the whole team, so everyone can use the same routing strategy. Team-synced routers are an Enterprise feature, and only admins can create or edit them. To create one, an admin: 1. Opens the [Admin Panel](https://app.warp.dev/admin/) and goes to **Models**. 2. Finds the **Custom Routers** section and clicks **New router**. 3. Chooses **Complexity-based** or **Rule-based**, sets the models or rules, and clicks **Create**. Team-synced routers appear in the model picker for every team member, who can select them like any other router. ## Credits and model availability [Section titled “Credits and model availability”](#credits-and-model-availability) A custom router resolves to a concrete model, so credit usage matches whichever model the router selects for each task. See [Credits](/support-and-community/plans-and-billing/credits/) for how credits are consumed. ### Using your own API keys (BYOK) [Section titled “Using your own API keys (BYOK)”](#using-your-own-api-keys-byok) Custom routers work with [Bring Your Own API Key (BYOK)](/agents/inference/bring-your-own-api-key/). After the router resolves a task to a concrete model, Warp applies your API keys to that model — the same as selecting that model directly from the picker. Requests that resolve to a model covered by one of your keys are billed through your provider account and don’t consume Warp credits; requests that resolve to a model without a matching key consume Warp credits as usual. This is different from Warp’s built-in Auto models, which always consume Warp credits even when BYOK is configured. * **Running a router entirely on your own keys** - To use a router with no Warp credits available, your keys must cover every model the router references. If only some models are covered, you still need Warp credits for the requests that resolve to the uncovered models. * **Team-managed keys (Business and Enterprise)** - [Team-managed API keys](/enterprise/enterprise-features/team-managed-keys-and-endpoints/) apply to custom routers the same way; a member’s own key for a provider takes precedence over the team’s. * **No custom inference endpoints** - Routing targets must be Warp-supported models, so a router can’t resolve to a model from a [custom inference endpoint](/agents/inference/custom-inference-endpoint/) and never draws on your endpoint. ### Model availability and fallback [Section titled “Model availability and fallback”](#model-availability-and-fallback) If a router targets a model you don’t have access to or that’s disabled for your organization, Warp falls back to the router’s default model. If no usable model remains, Warp falls back to a built-in default and tells you. ## Related resources [Section titled “Related resources”](#related-resources) * [Model choice](/agents/inference/model-choice/) — Supported models and `model_id` values, including Warp’s built-in Auto models. * [Bring Your Own API Key](/agents/inference/bring-your-own-api-key/) — Use your own OpenAI, Anthropic, or Google API keys. * [Custom inference endpoint](/agents/inference/custom-inference-endpoint/) — Route Warp through any OpenAI-compatible endpoint. * [Team-managed API keys and endpoints](/enterprise/enterprise-features/team-managed-keys-and-endpoints/) — Business and Enterprise admins configure shared provider keys and custom endpoints from the same Admin Panel Models page. * [Admin Panel for teams](/enterprise/team-management/admin-panel/) — Manage team-wide settings, including team-synced routers.
# SuperGrok subscription
Canonical page: [/agents/inference/grok-subscription/](https://docs.warp.dev/agents/inference/grok-subscription/)
> Connect your SuperGrok or X Premium subscription to use Grok models in Warp through your xAI account. Usage draws from the same weekly pool as Grok Build.
Warp lets you connect your **SuperGrok subscription** to use Grok models with agents in Warp through your xAI account. If you already subscribe to Grok, you can run Grok models in Warp without consuming your Warp [credits](/support-and-community/plans-and-billing/credits/). X Premium subscriptions that include Grok access work the same way: you sign in to your xAI account, and xAI determines which subscription tiers are eligible and how much usage they include. Connecting a subscription works like [Bring Your Own API Key (BYOK)](/agents/inference/bring-your-own-api-key/), except you sign in to your xAI account instead of pasting an API key. There is no xAI API key field in Warp today — the subscription is the way to bring your own Grok access. ## How it works [Section titled “How it works”](#how-it-works) When you connect your subscription, Warp opens your browser to xAI’s consent screen and completes a standard OAuth login. Warp receives OAuth tokens for your xAI account and stores them **only on your device** (in your OS keychain or equivalent secure storage), never on Warp’s servers. Warp refreshes the tokens automatically in the background, so you typically only need to connect once. When you send a prompt with a Grok model selected and a subscription connected: 1. Your local Warp client sends the access token to Warp’s backend along with your prompt. 2. The Warp Agent harness assembles the full request and uses your token in-flight to call xAI, authenticating as your xAI account instead of Warp’s. 3. xAI’s response streams back through Warp’s backend to your client. Your token passes through Warp’s servers on each request but is used only in-flight to call xAI, then discarded — the same model as [BYOK](/agents/inference/bring-your-own-api-key/#how-byok-works). Once connected, supported Grok models show a **key icon** in the model picker, indicating requests will route through your xAI account. Usage and rate limits for these requests are governed by your xAI subscription — see [How usage counts against your xAI subscription](#how-usage-counts-against-your-xai-subscription). ## Connecting your SuperGrok subscription [Section titled “Connecting your SuperGrok subscription”](#connecting-your-supergrok-subscription) 1. In the Warp app, open **Settings** and search for `SuperGrok` to jump to the **Connect SuperGrok subscription** row in your AI settings. 2. Click **Connect**. Warp opens your browser to xAI’s consent screen and shows a toast with a **Copy URL** fallback in case the browser doesn’t open. 3. Approve the connection in your browser. The page confirms with “Grok connected,” and back in Warp the row shows a “Connected on…” timestamp. 4. Select a Grok model with the key icon from the model picker in your prompt input. Connecting a subscription doesn’t change your selected model, so this last step is what actually routes your requests through your subscription. See [Model choice](/agents/inference/model-choice/) for the list of available models. In the [Warp Agent CLI](/agents/cli/), run `/connect-grok` instead. It starts the same xAI sign-in from your session, and `/api-keys` shows the connection state afterward. See [models and usage in the Warp Agent CLI](/agents/cli/models-and-usage/#bring-your-own-api-key). ## Usage and billing behavior [Section titled “Usage and billing behavior”](#usage-and-billing-behavior) When a Grok model with the key icon is selected: * Warp **does not consume** any of your [credits](/support-and-community/plans-and-billing/credits/) for the request. * Inference runs through your xAI account, within your xAI subscription’s usage limits. * If a request fails because your subscription hits a limit, Warp does not retry with Warp credits unless you enable **Warp credit fallback** in the same settings section. See [failover and fallback behavior](/agents/inference/bring-your-own-api-key/#failover-and-fallback-behavior). ### How usage counts against your xAI subscription [Section titled “How usage counts against your xAI subscription”](#how-usage-counts-against-your-xai-subscription) xAI gives every paid Grok subscription one weekly usage pool that is shared across all Grok products — Grok chat, [Grok Build](https://docs.x.ai/build/overview) (xAI’s own coding agent), and API access all draw down the same pool. Requests you send from Warp count against that same pool. In xAI’s usage dashboard on grok.com (the Usage section in Settings), requests from Warp appear under the **API** product label because Warp calls xAI’s API on your behalf. The label reflects where the usage came from, not a separate quota: API and Grok Build usage share the same pool, so you get the same amount of usage running Grok models in Warp as you would using Grok Build directly. When you use up your weekly pool, xAI pauses paid usage until the reset time shown in its Usage tab. Extra Usage Credits and plan upgrades for the pool are managed through your xAI account, not Warp. ### Auto models [Section titled “Auto models”](#auto-models) Warp’s **Auto** models always use Warp’s own inference and **always consume Warp credits**, even with a SuperGrok subscription connected. Auto never routes requests through your subscription. To use your subscription, select a specific Grok model from the model picker. Caution A connected SuperGrok subscription does not apply to [Cloud Agents](/platform/). Because tokens are stored locally on your device, they are not available to cloud-hosted agent runs, which always consume [Warp credits](/support-and-community/plans-and-billing/credits/). ### Zero data retention (ZDR) [Section titled “Zero data retention (ZDR)”](#zero-data-retention-zdr) Warp has Zero Data Retention agreements with its contracted LLM providers, including xAI, for Warp-managed inference. When you connect your own subscription, data retention on xAI’s side is governed by your own xAI account and its terms — Warp cannot enforce ZDR for requests sent through your subscription. Warp itself never stores your tokens on its servers. ## Disconnecting [Section titled “Disconnecting”](#disconnecting) To disconnect, open **Settings**, search for `SuperGrok`, and click **Disconnect**. Warp removes the tokens from your device’s secure storage, and Grok models go back to running on Warp credits. ## Troubleshooting [Section titled “Troubleshooting”](#troubleshooting) ### ”Couldn’t start Grok login” [Section titled “”Couldn’t start Grok login””](#couldnt-start-grok-login) Warp listens on a fixed local port for the browser to complete the connection. This error means the port is busy: usually another connection attempt is still in progress, or another app that uses the same xAI login flow (like Grok CLI) is running. Close the other app or wait for the other attempt to finish, then click **Connect** again. ### The browser never opened [Section titled “The browser never opened”](#the-browser-never-opened) Click **Copy URL** on the toast that appears after clicking **Connect**, then paste the URL into your browser manually. ### ”Couldn’t connect SuperGrok: timed out waiting for the Grok authorization callback” [Section titled “”Couldn’t connect SuperGrok: timed out waiting for the Grok authorization callback””](#couldnt-connect-supergrok-timed-out-waiting-for-the-grok-authorization-callback) Warp waits 5 minutes for you to approve the connection in your browser. Click **Connect** and approve the consent screen within that window. ## Related resources [Section titled “Related resources”](#related-resources) * [Model choice](/agents/inference/model-choice/) — Full list of supported models and `model_id` values. * [Bring Your Own API Key](/agents/inference/bring-your-own-api-key/) — Use your own Anthropic, OpenAI, or Google API keys. * [Custom inference endpoint](/agents/inference/custom-inference-endpoint/) — Route Warp through any OpenAI-compatible endpoint. * [Credits](/support-and-community/plans-and-billing/credits/) — How Warp credits work and when they’re consumed.
# Agent model choice
Canonical page: [/agents/inference/model-choice/](https://docs.warp.dev/agents/inference/model-choice/)
> Choose from a curated set of top LLMs for Warp's Agents (or let Warp auto-select the best model).
Warp lets you choose from a curated set of large language models to power your agents, or let Warp auto-select the best model for each task. Models from OpenAI, Anthropic, Google, and open source providers are available, with configurable reasoning levels and per-profile defaults. You can also define [custom routers](/agents/inference/custom-routers/) that pick a model for each task using your own logic. ## Available models [Section titled “Available models”](#available-models) Warp lets you choose from a curated set of large language models (LLMs) to power your Agentic Development Environment. **Warp supports the following models.** The `model_id` values shown below can be used when configuring models via the [Automation Platform](/platform/overview/) or [CLI](/agents/cli/oz-cli/). ### Auto models [Section titled “Auto models”](#auto-models) | Model | `model_id` | Description | | --------------------- | ---------------- | ---------------------------------------------------------------------------------------------------------------------------------------------------------- | | Auto (Responsive) | `auto` | Selects the highest-quality, fastest available model. May consume credits more quickly. | | Auto (Cost-efficient) | `auto-efficient` | Optimizes for lower credit consumption while maintaining strong output quality. | | Auto (Genius) | `auto-genius` | Adapts to task complexity and selects Warp’s most capable model when it’s worth it. Best for deep debugging, architecture decisions, and `/plan` sessions. | | Auto (Open-weights) | `auto-open` | Routes between the best open-source models available in Warp. Optimizes for low cost and fast speed using open-weights models. | All Auto models perform well across all agent workflows and are ideal if you prefer Warp to manage model selection dynamically. #### OpenAI [Section titled “OpenAI”](#openai) The `low`, `medium`, `high`, `xhigh`, and `max` suffixes select increasing reasoning levels. | Model | Supported `model_id` values | | ------------- | --------------------------------------------------------------------------------------------------- | | GPT-6 Astra | `gpt-6-astra-low`, `gpt-6-astra-medium`, `gpt-6-astra-high`, `gpt-6-astra-xhigh`, `gpt-6-astra-max` | | GPT-6.1 Sol | `gpt-6-1-sol-low`, `gpt-6-1-sol-medium`, `gpt-6-1-sol-high`, `gpt-6-1-sol-xhigh`, `gpt-6-1-sol-max` | | GPT-6 Sol | `gpt-6-sol-low`, `gpt-6-sol-medium`, `gpt-6-sol-high`, `gpt-6-sol-xhigh`, `gpt-6-sol-max` | | GPT-6 Luna | `gpt-6-luna-low`, `gpt-6-luna-medium`, `gpt-6-luna-high`, `gpt-6-luna-xhigh`, `gpt-6-luna-max` | | GPT-5.6 Sol | `gpt-5-6-sol-low`, `gpt-5-6-sol-medium`, `gpt-5-6-sol-high`, `gpt-5-6-sol-xhigh` | | GPT-5.6 Terra | `gpt-5-6-terra-low`, `gpt-5-6-terra-medium`, `gpt-5-6-terra-high`, `gpt-5-6-terra-xhigh` | | GPT-5.6 Luna | `gpt-5-6-luna-low`, `gpt-5-6-luna-medium`, `gpt-5-6-luna-high`, `gpt-5-6-luna-xhigh` | | GPT-5.5 | `gpt-5-5-low`, `gpt-5-5-medium`, `gpt-5-5-high`, `gpt-5-5-xhigh` | | GPT-5.4 | `gpt-5-4-low`, `gpt-5-4-medium`, `gpt-5-4-high`, `gpt-5-4-xhigh` | To use eligible OpenAI models through your ChatGPT plan, [connect a ChatGPT subscription](/agents/inference/chatgpt-subscription/) and select a specific OpenAI model. #### Anthropic [Section titled “Anthropic”](#anthropic) Suffixes select effort level. `xhigh-fast` enables fast mode, and `thinking` enables thinking. The default ID for each family is listed separately where one exists. | Model | Supported `model_id` values | Default `model_id` | | ----------------- | ----------------------------------------------------------------------------------------------------------------------------------------------------- | ------------------------- | | Claude Opus 5.5 | `claude-5-5-opus-low`, `claude-5-5-opus-medium`, `claude-5-5-opus-high`, `claude-5-5-opus-xhigh`, `claude-5-5-opus-xhigh-fast`, `claude-5-5-opus-max` | `claude-5-5-opus-high` | | Claude Opus 5 | `claude-5-opus-low`, `claude-5-opus-medium`, `claude-5-opus-high`, `claude-5-opus-xhigh`, `claude-5-opus-xhigh-fast`, `claude-5-opus-max` | `claude-5-opus-high` | | Claude Fable 5.1 | `claude-5-1-fable-low`, `claude-5-1-fable-medium`, `claude-5-1-fable-high`, `claude-5-1-fable-xhigh`, `claude-5-1-fable-max` | `claude-5-1-fable-high` | | Claude Fable 5 | `claude-5-fable-low`, `claude-5-fable-medium`, `claude-5-fable-high`, `claude-5-fable-xhigh`, `claude-5-fable-max` | `claude-5-fable-high` | | Claude Sonnet 5.5 | `claude-5-5-sonnet-low`, `claude-5-5-sonnet-medium`, `claude-5-5-sonnet-high`, `claude-5-5-sonnet-xhigh`, `claude-5-5-sonnet-max` | `claude-5-5-sonnet-xhigh` | | Claude Sonnet 5 | `claude-5-sonnet-low`, `claude-5-sonnet-medium`, `claude-5-sonnet-high`, `claude-5-sonnet-xhigh`, `claude-5-sonnet-max` | `claude-5-sonnet-xhigh` | | Claude Opus 4.8 | `claude-4-8-opus-low`, `claude-4-8-opus-medium`, `claude-4-8-opus-high`, `claude-4-8-opus-xhigh`, `claude-4-8-opus-xhigh-fast`, `claude-4-8-opus-max` | `claude-4-8-opus-xhigh` | | Claude Opus 4.7 | `claude-4-7-opus-high`, `claude-4-7-opus-xhigh`, `claude-4-7-opus-max` | `claude-4-7-opus-xhigh` | | Claude Opus 4.6 | `claude-4-6-opus-high`, `claude-4-6-opus-max` | `claude-4-6-opus-high` | | Claude Sonnet 4.6 | `claude-4-6-sonnet-high`, `claude-4-6-sonnet-max` | `claude-4-6-sonnet-high` | | Claude Opus 4.5 | `claude-4-5-opus`, `claude-4-5-opus-thinking` | `claude-4-5-opus` | | Claude Sonnet 4.5 | `claude-4-5-sonnet`, `claude-4-5-sonnet-thinking` | `claude-4-5-sonnet` | | Claude Haiku 5.5 | `claude-5-5-haiku-low`, `claude-5-5-haiku-medium`, `claude-5-5-haiku-high`, `claude-5-5-haiku-xhigh`, `claude-5-5-haiku-max` | — | | Claude Haiku 4.5 | `claude-4-5-haiku` | `claude-4-5-haiku` | Claude Haiku 5.5 has no fixed default `model_id`; choose one of its effort-specific IDs. Caution Anthropic requires data retention for Claude Fable 5 and Claude Fable 5.1 for safety, abuse monitoring, and compliance reasons, so these models are **not available under Zero Data Retention (ZDR)**. This requirement is specific to the Claude Fable models and doesn’t change the ZDR behavior of any other supported model. For Enterprise teams, these models are off by default and a workspace admin must enable them — see the [Admin Panel](/enterprise/team-management/admin-panel/#models-settings) and the [Security overview](/enterprise/security-and-compliance/security-overview/#zero-data-retention-zdr). #### Google [Section titled “Google”](#google) | Model | `model_id` | | ---------------- | ------------------ | | Gemini 3.1 Pro | `gemini-3.1-pro` | | Gemini 3.8 Flash | `gemini-3.8-flash` | | Gemini 3.7 Flash | `gemini-3.7-flash` | | Gemini 3.6 Flash | `gemini-3.6-flash` | | Gemini 3.5 Flash | `gemini-3.5-flash` | #### xAI [Section titled “xAI”](#xai) | Model | `model_id` | Reasoning Level | | -------------- | ----------------- | --------------- | | Grok 4.7 | `grok-4-7-low` | Low | | Grok 4.7 | `grok-4-7-medium` | Medium | | Grok 4.7 | `grok-4-7-high` | High | | Grok 4.7 | `grok-4-7-xhigh` | Extra High | | Grok 4.6 | `grok-4-6-low` | Low | | Grok 4.6 | `grok-4-6-medium` | Medium | | Grok 4.6 | `grok-4-6-high` | High | | Grok 4.6 | `grok-4-6-xhigh` | Extra High | | Grok 4.5 | `grok-4-5-low` | Low | | Grok 4.5 | `grok-4-5-medium` | Medium | | Grok 4.5 | `grok-4-5-high` | High | | Grok 4.3 | `grok-4-3-low` | Low | | Grok 4.3 | `grok-4-3-medium` | Medium | | Grok 4.3 | `grok-4-3-high` | High | | Grok Build 0.1 | `grok-build-0.1` | — | You can run Grok models through your own SuperGrok subscription instead of Warp credits by connecting your xAI account. See [SuperGrok subscription](/agents/inference/grok-subscription/). #### Hosted models (via [Fireworks AI](https://fireworks.ai)) [Section titled “Hosted models (via Fireworks AI)”](#hosted-models-via-fireworks-ai) Warp also supports leading open source models hosted via Fireworks AI, so you can run them from inside Warp without setting up your own inference infrastructure. | Model | `model_id` | | ------------------- | ------------------------------- | | GLM 5.3 | `glm-5.3-fireworks` | | GLM 5.3 Flash | `glm-5.3-flash-fireworks` | | Kimi K3 | `kimi-k3-fireworks` | | Minimax 3 | `minimax-3-fireworks` | | Qwen 3.8 Max | `qwen-3.8-max-fireworks` | | DeepSeek V4.1 Flash | `deepseek-v4.1-flash-fireworks` | ### How to change models [Section titled “How to change models”](#how-to-change-models) You can use the model picker in your prompt input to quickly switch between models. The currently active model appears directly in the input editor. 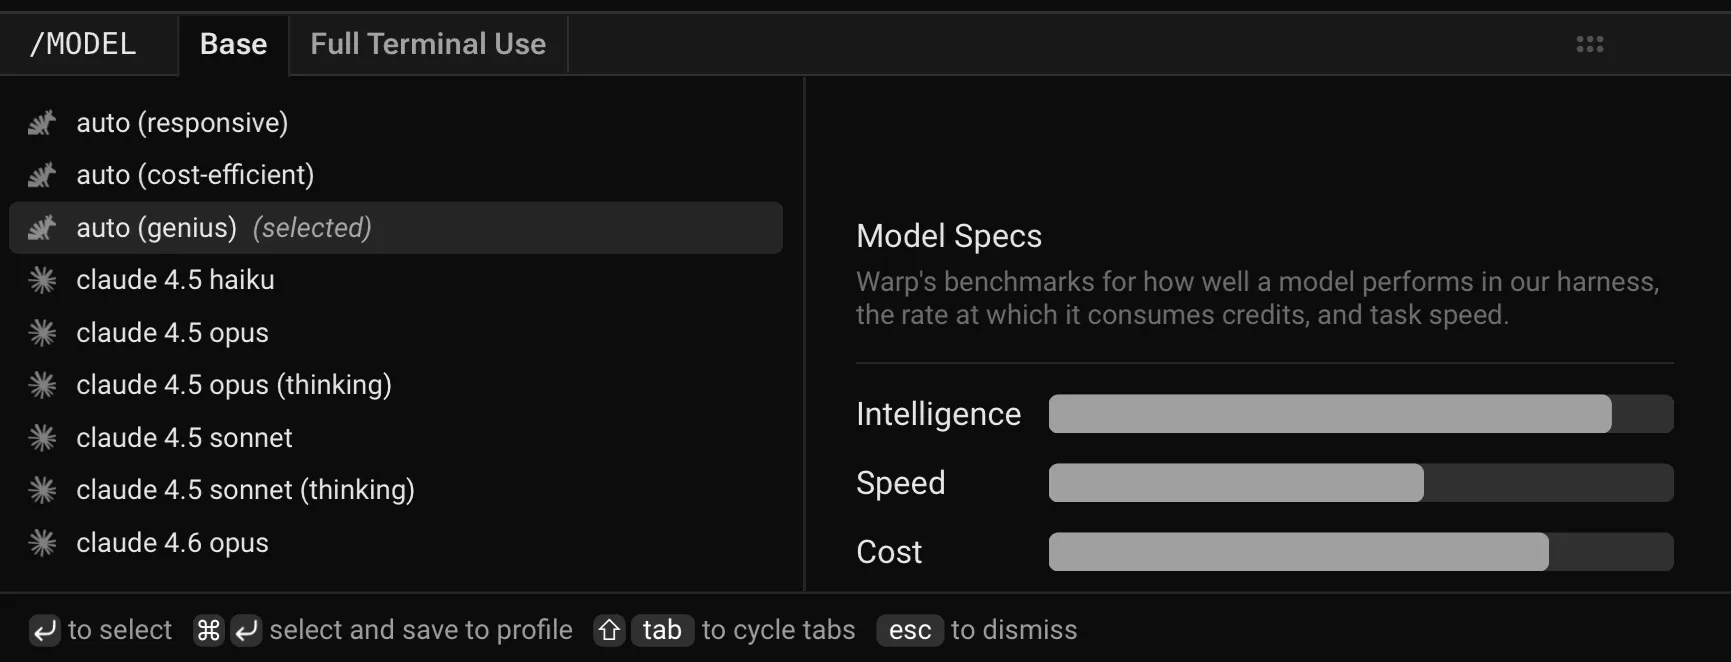 Model selector in Warp’s input. To change models, click the displayed model name (for example, *Claude Sonnet 5*) to open a dropdown with all supported options. Your selection will automatically persist for future prompts. ### Custom routers [Section titled “Custom routers”](#custom-routers) Beyond the built-in Auto models, you can define your own custom routers that automatically route each task to a concrete model based on task complexity or rules you write. Custom routers appear in the model picker alongside Auto and individual models. Add and manage custom routers in **Settings** > **Agents** > **Warp Agent** > **Custom Routers**. See [Custom routers](/agents/inference/custom-routers/) for details on creating one. ### Model fallback [Section titled “Model fallback”](#model-fallback) Warp uses a model fallback system to ensure uninterrupted service if your selected model becomes temporarily unavailable due to provider outages or capacity issues. **How it works:** * If your selected model isn’t available, Warp automatically uses a fallback model from a predefined chain to continue your conversation without errors. * As soon as your originally selected model becomes available again, Warp automatically switches back to it. * The fallback model is selected to provide comparable quality and capabilities to your original choice. ### Configuring models per Agent Profile [Section titled “Configuring models per Agent Profile”](#configuring-models-per-agent-profile) You can configure the base model for each [Agent Profile](/agents/capabilities/agent-profiles-permissions/), alongside the Agent’s autonomy, tool access, and other permissions. The base model is also used for [Planning](/agents/capabilities/planning/). Edit your default profile or any other profile directly in **Settings** > **Agents** > **Profiles**. ### Zero data retention policies [Section titled “Zero data retention policies”](#zero-data-retention-policies) Warp integrates with multiple large language model (LLM) providers to power its AI-driven features. **These providers include, but are not limited to:** * OpenAI * Anthropic * Google * xAI * Fireworks AI Warp has executed **Zero Data Retention (ZDR)** agreements with these providers. This means that, by default across all plans: * LLM providers commit not to train their models on any customer-generated data processed through Warp’s services. * LLM providers commit to delete inputs and outputs after generating the relevant output, within a fixed time period. Warp enforces these commitments through both technical measures and contractual safeguards with the LLM providers. Zero data retention is available for supported models. Model availability may vary where providers require data retention for safety, abuse monitoring, or compliance reasons.
# Active AI Recommendations
Canonical page: [/agents/local-agents/active-ai/](https://docs.warp.dev/agents/local-agents/active-ai/)
> Active AI Recommendations proactively suggest fixes and next actions based on your command line errors, inputs, and outputs.
Active AI Recommendations proactively suggest fixes and next actions based on your terminal errors, inputs, and outputs. Features include Prompt Suggestions that activate Agent Mode, Next Command predictions from your shell history, and Suggested Code Diffs that automatically surface fixes for command-line errors. ### Prompt Suggestions [Section titled “Prompt Suggestions”](#prompt-suggestions) Prompt Suggestions are contextual, AI-powered suggestions that activate Agent Mode. These banners will provide suggestions for what to ask Agent Mode in specific scenarios, similar to how Warp already suggests commands to run. To disable, go to **Settings** > **Agents** > **Warp Agent** > **Active AI** > **Prompt Suggestions**. 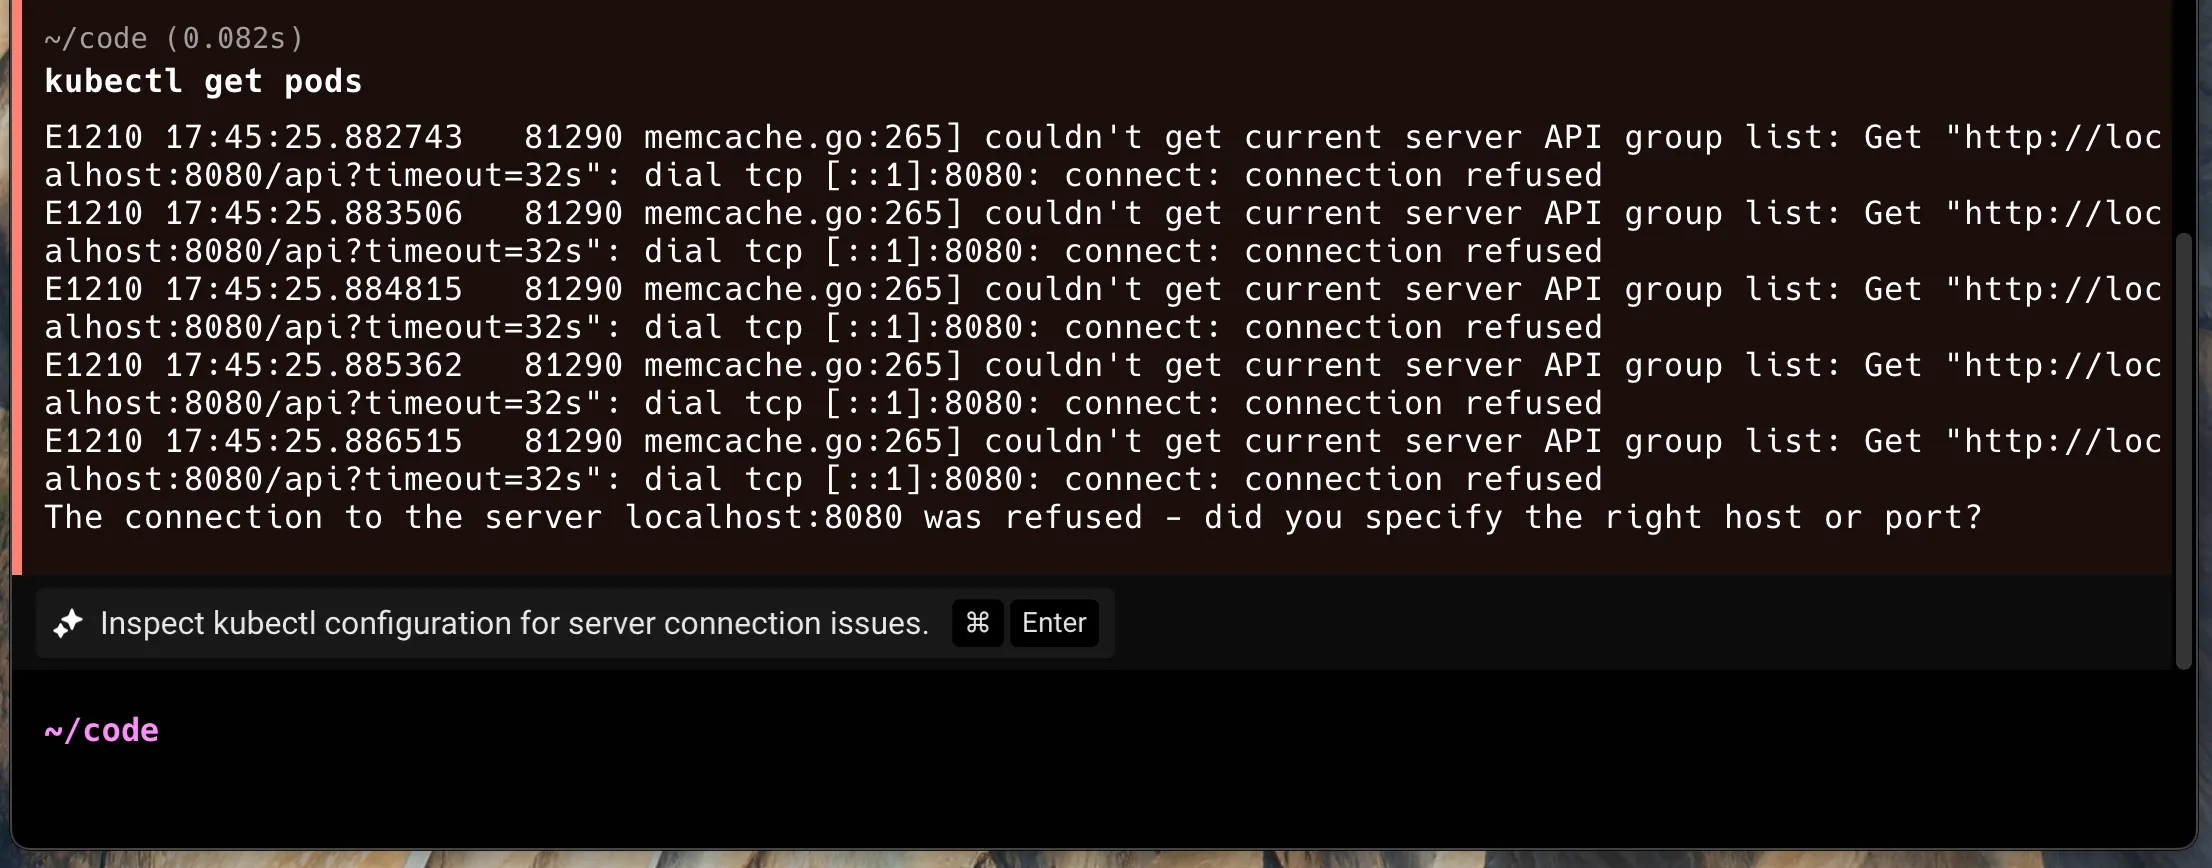 #### Accepting a prompt suggestion [Section titled “Accepting a prompt suggestion”](#accepting-a-prompt-suggestion) If you press `Ctrl+Enter` (on macOS), `Alt+Shift+Enter` (on Linux/Windows), or click on the chip, the suggestion will auto-populate into your input and run against [Agent Mode](/agents/local-agents/interacting-with-agents/) (with the most recent block attached).  ### Next Command [Section titled “Next Command”](#next-command) Next Command uses AI to suggest the next command to run based on your active terminal session and command history. It uses your active terminal session contents and an LLM to generate commands. To disable, go to **Settings** > **Agents** > **Warp Agent** > **Active AI** > **Next Command**. 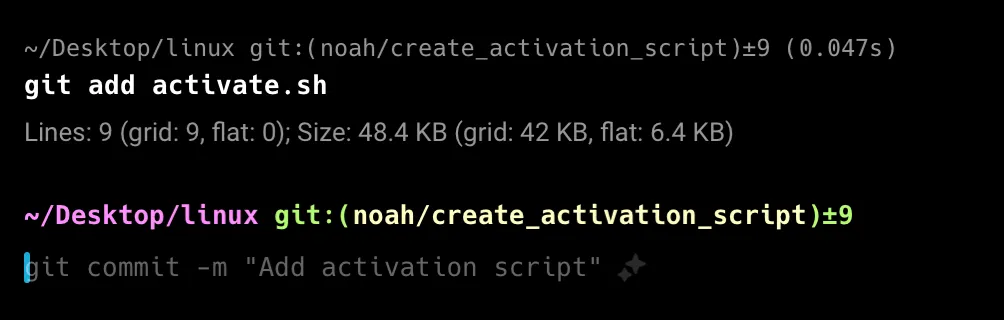 #### Accepting Next Command suggestions [Section titled “Accepting Next Command suggestions”](#accepting-next-command-suggestions) Press `→` or `Ctrl+F` to accept a Next Command suggestion into your input buffer, then press `Enter` to execute it. You can change the accept keybinding (for example, to `Tab`) via the inline keybinding picker that appears next to the suggestion. #### Billing [Section titled “Billing”](#billing) Next Commands are unlimited across all of Warp’s plans, including the Free plan. For the latest information on other AI limits and other pricing details, see [Warp pricing](https://www.warp.dev/pricing). ### Suggested Code Diffs [Section titled “Suggested Code Diffs”](#suggested-code-diffs) Suggested Code Diffs automatically surface potential fixes for command-line errors encountered within Warp. These are most often compiler errors, but they may also include other situations where Warp can confidently predict a straightforward resolution, such as simple merge conflicts. 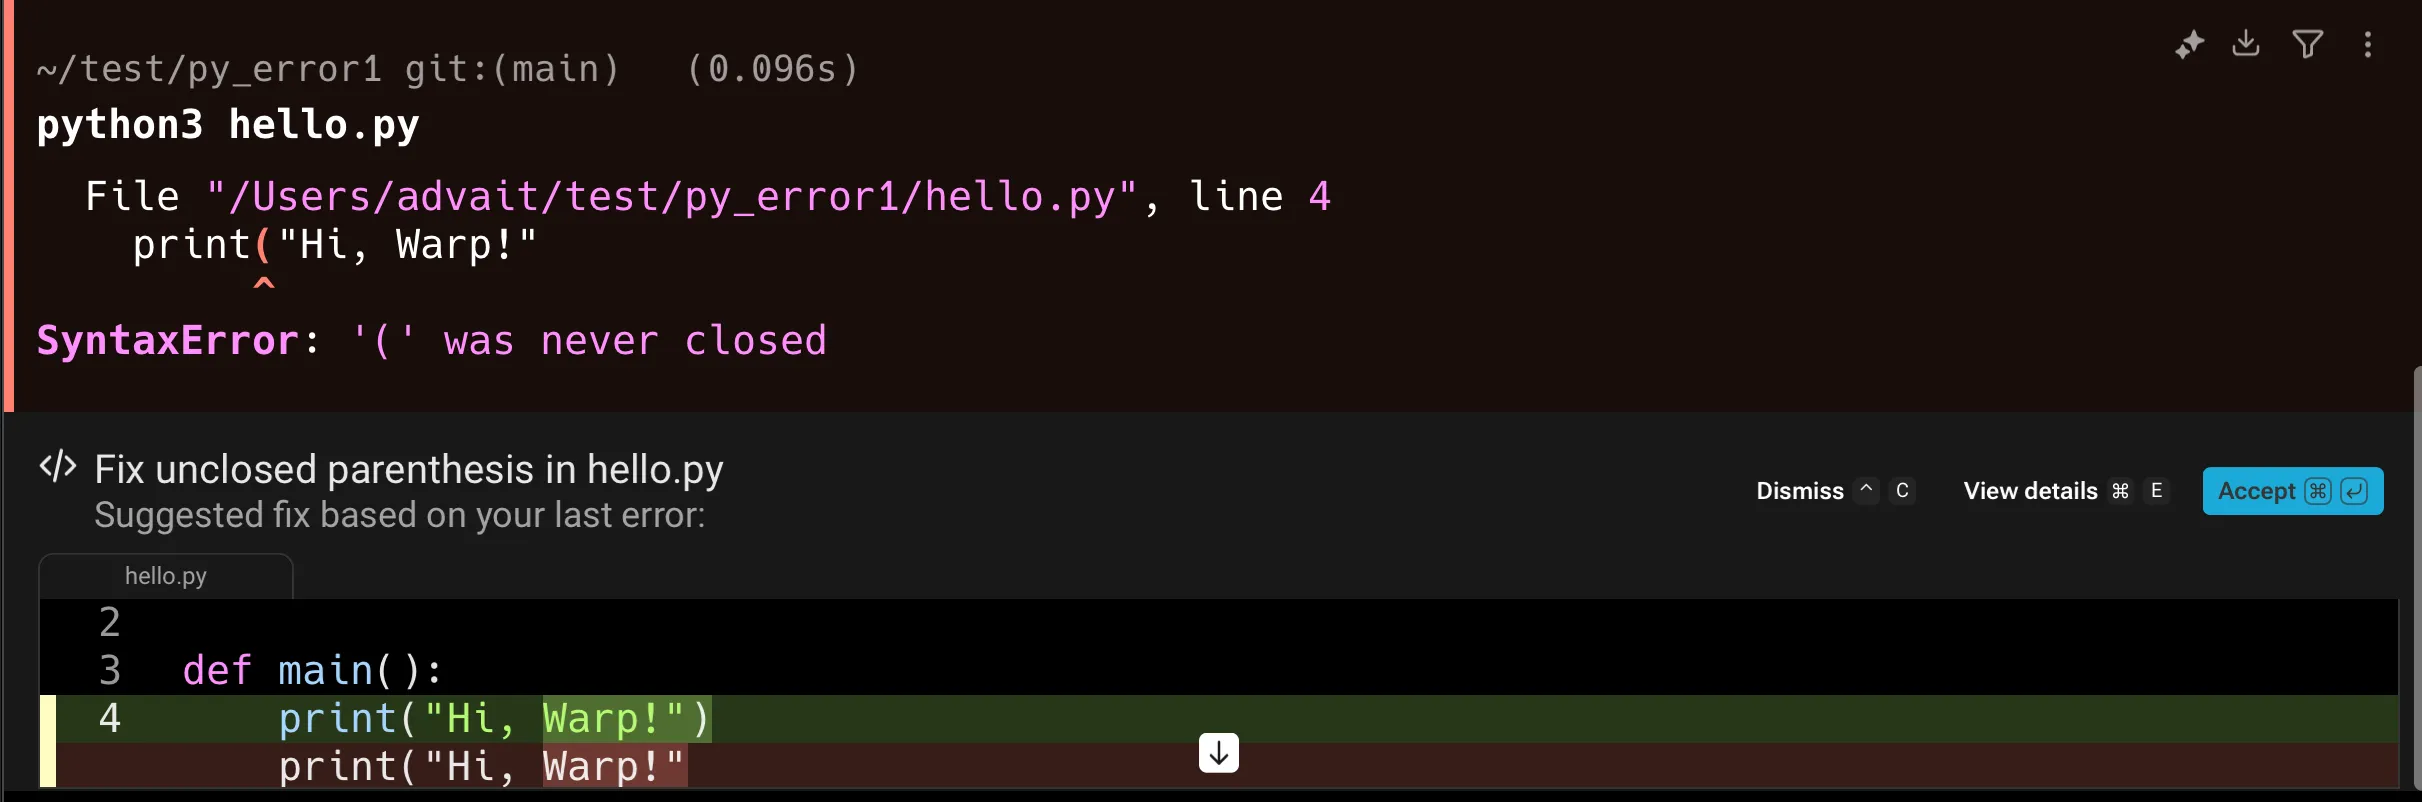 When an error occurs, Warp evaluates whether it is appropriate for an LLM to generate a fix. If so, a “Generating fix” banner will appear while Warp prepares a proposed diff. You can stop this process at any time by pressing `Ctrl+C` or the stop button.  #### Using a suggested code diff [Section titled “Using a suggested code diff”](#using-a-suggested-code-diff) Once the diff is generated, you can either dismiss it or accept it. Acceptance can be done directly via the buttons in the diff view, or with `⌘+Enter` on macOS and `Ctrl+Enter` on Windows/Linux. You can also view additional details of the diff by pressing `⌘+E` (macOS) or `Ctrl+E` (Windows/Linux), which expands the view to allow further inspection (including refining or editing it). You can also use `↓` to view the entire diff. **Billing** Suggested Code Diffs do not count toward your AI request limits. There are maximum limits to the number of code diffs surfaced per month, which scales based on your plan tier. For the latest details on plan limits and pricing, see [Warp pricing](https://www.warp.dev/pricing). ## Active AI privacy [Section titled “Active AI privacy”](#active-ai-privacy) See our [Privacy page](/support-and-community/privacy-and-security/privacy/) for more information on how we handle data with Active AI.
# Agent context overview
Canonical page: [/agents/local-agents/agent-context/](https://docs.warp.dev/agents/local-agents/agent-context/)
> How to attach various forms of multi-modal context directly to Warp's Agent within a prompt.
In Warp, you can pass different types of input directly to the Agent to guide its behavior and improve response quality. These inputs are known as **Agent Context**: ad-hoc pieces of information you manually supply during a session. **You can attach context in several ways:** * [Blocks as Context](/agents/local-agents/agent-context/blocks-as-context/) - share output from your terminal to help the Agent understand errors, logs, or previous commands. * [Images as Context](/agents/local-agents/agent-context/images-as-context/) - include screenshots, diagrams, or other visuals to provide additional clarity. * [URLs as Context](/agents/local-agents/agent-context/urls-as-context/) - attach public webpages so the Agent can extract and reference their content. * [Selection as Context](/agents/local-agents/agent-context/selection-as-context/) - attach code snippets from the editor or review panel to enrich your prompts with precise context. * [Using @ to Add Context](/agents/local-agents/agent-context/using-to-add-context/) - reference files, folders, code symbols, or Warp Drive objects directly in your prompts. Commands you run inside an agent conversation are automatically included as context for your next prompt. For details, see [Blocks as Context](/agents/local-agents/agent-context/blocks-as-context/). *** This is distinct from other persistent or automatic sources of context, such as [Rules](/agents/capabilities/rules/), [Warp Drive as Agent Mode Context](/knowledge-and-collaboration/warp-drive/agent-mode-context/), and [Model Context Protocol (MCP)](/agents/capabilities/mcp/), which the Agent also uses when available.
# Blocks as Context
Canonical page: [/agents/local-agents/agent-context/blocks-as-context/](https://docs.warp.dev/agents/local-agents/agent-context/blocks-as-context/)
> Attach blocks from your terminal as context so Warp’s Agent can understand errors, outputs, or previous commands when responding to your queries.
Attach terminal output blocks to your agent prompts so the agent can understand errors, commands, and outputs from your current or previous sessions. Blocks can be attached with keyboard shortcuts, mouse clicks, or automatically within agent conversations. ## Attaching blocks as context [Section titled “Attaching blocks as context”](#attaching-blocks-as-context) Warp’s Agent can use blocks from your Agent conversations as context to better understand your queries and generate more relevant responses. You can attach a block directly from the terminal block list by clicking the AI sparkles icon on it and selecting “Attach as context.” 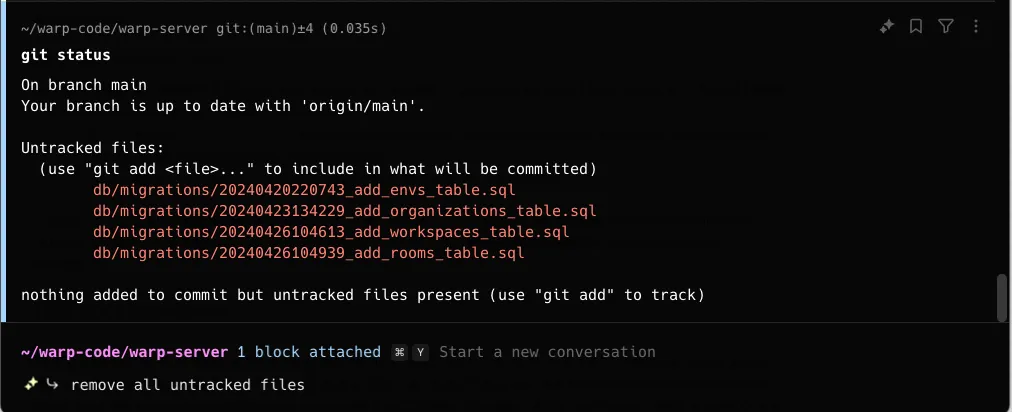 Attaching a block as agent context. The most common use case is to ask the AI to fix an error. You can attach the error in a query to Agent Mode and type “fix it.” **If you’re already in Agent Mode, use the following ways to attach or clear context from your query:** * macOS **Attach a previous block** * To attach blocks to a query, you can use `⌘+↑` to attach the previous block as context to the query. While holding `⌘`, you can then use your `↑/↓` keys to pick another block to attach. * You can also use your mouse to attach blocks in your session. Hold `⌘` as you click on other blocks to extend your block selection. **Clear a previous block** * To clear blocks from a query, you can use `⌘+↓` until the blocks are removed from context. * You can also use your mouse to clear blocks in your session. Hold `⌘` as you click on an attached block to clear it. * Windows **Attach a previous block** * To attach blocks to a query, you can use `Ctrl+↑` to attach the previous block as context to the query. While holding `Ctrl`, you can then use your `↑/↓` keys to pick another block to attach. * You can also use your mouse to select blocks in your session. Hold `Ctrl` as you click on other blocks to extend your block selection. **Clear a previous block** * To clear blocks from a query, you can use `Ctrl+↓` until the blocks are removed from context. * You can also use your mouse to clear blocks in your session. Hold `Ctrl` as you click on an attached block to clear it. * Linux **Attach a previous block** * To attach blocks to a query, you can use `Ctrl+↑` to attach the previous block as context to the query. While holding `Ctrl`, you can then use your `↑/↓` keys to pick another block to attach. * You can also use your mouse to select blocks in your session. Hold `Ctrl` as you click on other blocks to extend your block selection. **Clear a previous block** * To clear blocks from a query, you can use `Ctrl+↓` until the blocks are removed from context. * You can also use your mouse to clear blocks in your session. Hold `Ctrl` as you click on an attached block to clear it. *** ## Block visibility across views [Section titled “Block visibility across views”](#block-visibility-across-views) Blocks in Warp belong to either the terminal view or a specific agent conversation: * **Terminal blocks** - Commands you run directly in the terminal. These always appear in your terminal block list and can be attached as context to multiple conversations. * **Agent conversation blocks** - Commands executed within an agent conversation (either by you or the agent). These only appear within that specific conversation and don’t clutter your terminal block list. This separation keeps your terminal view clean while preserving full context within each conversation. *** ## Automatic context in agent conversations [Section titled “Automatic context in agent conversations”](#automatic-context-in-agent-conversations) When you’re working inside an agent conversation, any shell commands you run are automatically included as context for your next query. This means you can: 1. Run a command to see its output 2. Ask the agent about the results without manually attaching the block For example, in an agent conversation, run `npm test` and then ask “why did these tests fail?”—the test output is already part of the conversation context. You can also manually attach terminal view blocks to add additional context from commands you ran outside the conversation. *** ## Pending and attached context [Section titled “Pending and attached context”](#pending-and-attached-context) When you select blocks in terminal view and start a new conversation, those blocks become **pending context**: * **Pending context** - Blocks are selected but the conversation hasn’t started yet. If you deselect the blocks (`Esc` or `⌘+K` on macOS, `Esc` or `Ctrl+K` on Windows/Linux), they’re removed from the agent view. * **Attached context** - Once you submit your first query, the pending blocks become attached to the conversation and remain part of the context.
# Images as Context
Canonical page: [/agents/local-agents/agent-context/images-as-context/](https://docs.warp.dev/agents/local-agents/agent-context/images-as-context/)
> Attach screenshots, diagrams, or other images to your prompt so Warp’s Agent can use visual context when generating responses.
Attach screenshots, diagrams, or other images directly to agent prompts so the agent can use visual context when generating responses. Warp supports drag-and-drop, copy-paste, and file upload in local and cloud conversations. ## **Attaching images as context** [Section titled “Attaching images as context”](#attaching-images-as-context) To provide visual context, you can attach images directly to an agent prompt. This is useful for including screenshots, diagrams, or other visual references alongside your query. You can attach images in the following ways: * Select the **image upload button** in the agent input. * Copy and paste images directly (e.g. right-click an image > “Copy image” or copy from a file manager) into Warp. * Drag and drop images, such as from a file manager or screenshot utility. ## Images in cloud conversations [Section titled “Images in cloud conversations”](#images-in-cloud-conversations) In an interactive cloud conversation, attach an image with the file button in the input footer, paste an image from your clipboard, or drag and drop an image into the input. Legacy `oz agent run-cloud --attach` task creation uses separate file-attachment limits. See [running agents remotely](/agents/cli/oz-cli/#running-agents-remotely-oz-agent-run-cloud) for those limits. ### Model behavior and image handling [Section titled “Model behavior and image handling”](#model-behavior-and-image-handling) All supported models listed in [Model Choice](/agents/inference/model-choice/) can interpret image input. Attaching images will consume additional requests, proportional to the number of images added. To stay within model limits, Warp will intelligently resize images before passing them as context, minimizing token usage and respecting the model’s maximum image dimensions.
# Selection as Context
Canonical page: [/agents/local-agents/agent-context/selection-as-context/](https://docs.warp.dev/agents/local-agents/agent-context/selection-as-context/)
> Attach text or diffs directly from Warp’s editor or Code Review panel as context for your Agent prompts.
Attach text selections or diff hunks directly from Warp’s code editor or Code Review panel as context for agent prompts. Select code, press a keyboard shortcut, and Warp inserts the file path, line numbers, and content into your prompt automatically. ### Attaching selections from Warp’s native code editor [Section titled “Attaching selections from Warp’s native code editor”](#attaching-selections-from-warps-native-code-editor) When you have Warp’s [native code editor](/code/code-editor/) open beside a regular pane, you can easily attach specific lines of code as context: 1. **Select text** in the editor. A tooltip will appear in the bottom-right corner of the selection. 2. **Add as context** by clicking the tooltip or using the keyboard shortcuts `⌘+L` (macOS) or `Ctrl+Shift+L` (Windows or Linux). 3. Warp automatically adds the relative file path and context, in addition to the line numbers of the hunk, as a formatted string into the prompt. This makes it easy to highlight just the lines you want the Agent to analyze or modify. 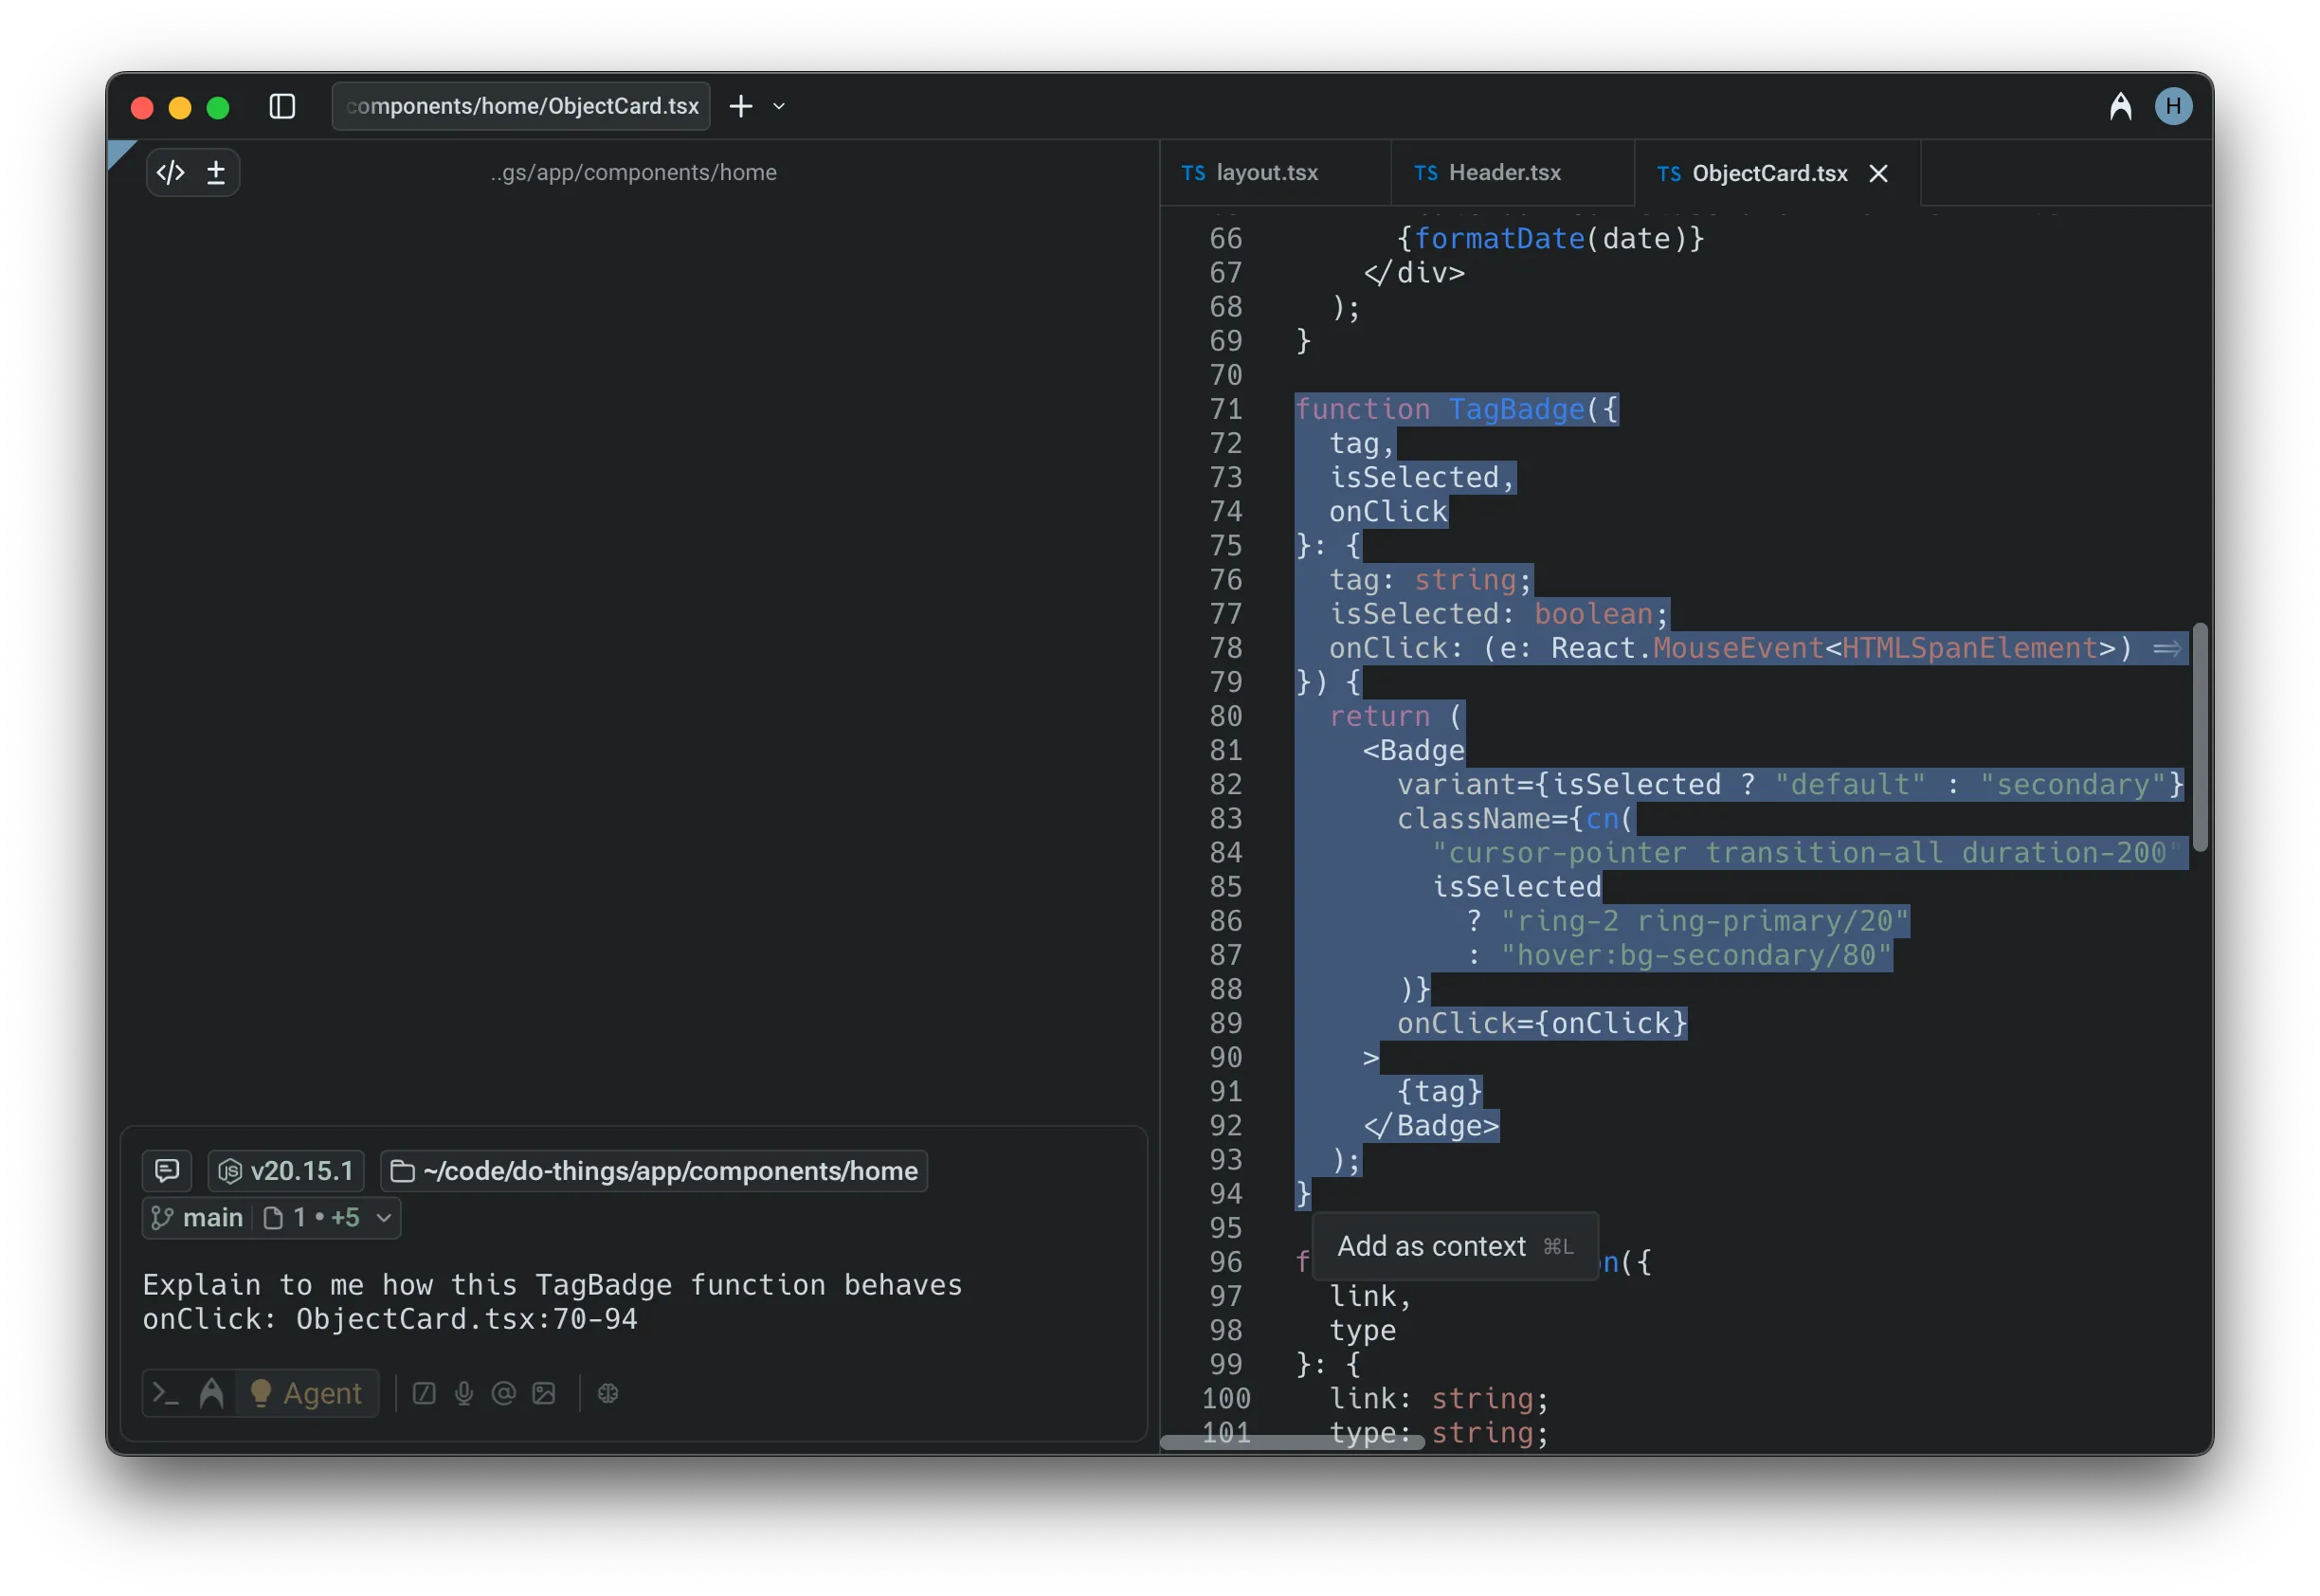 Selecting code as agent context. ### Attaching selections from Warp’s Code Review panel [Section titled “Attaching selections from Warp’s Code Review panel”](#attaching-selections-from-warps-code-review-panel) You can also directly attach context from the [Code Review panel](/code/code-review/): 1. Hover over any **diff hunk** to reveal the option to attach it as context. 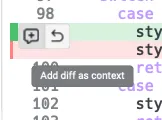 2. Attaching a diff will automatically insert the relevant file path and changed lines into your prompt. This helps the Agent understand exactly what has been modified, making it easier to request explanations, feedback, or follow-up edits. 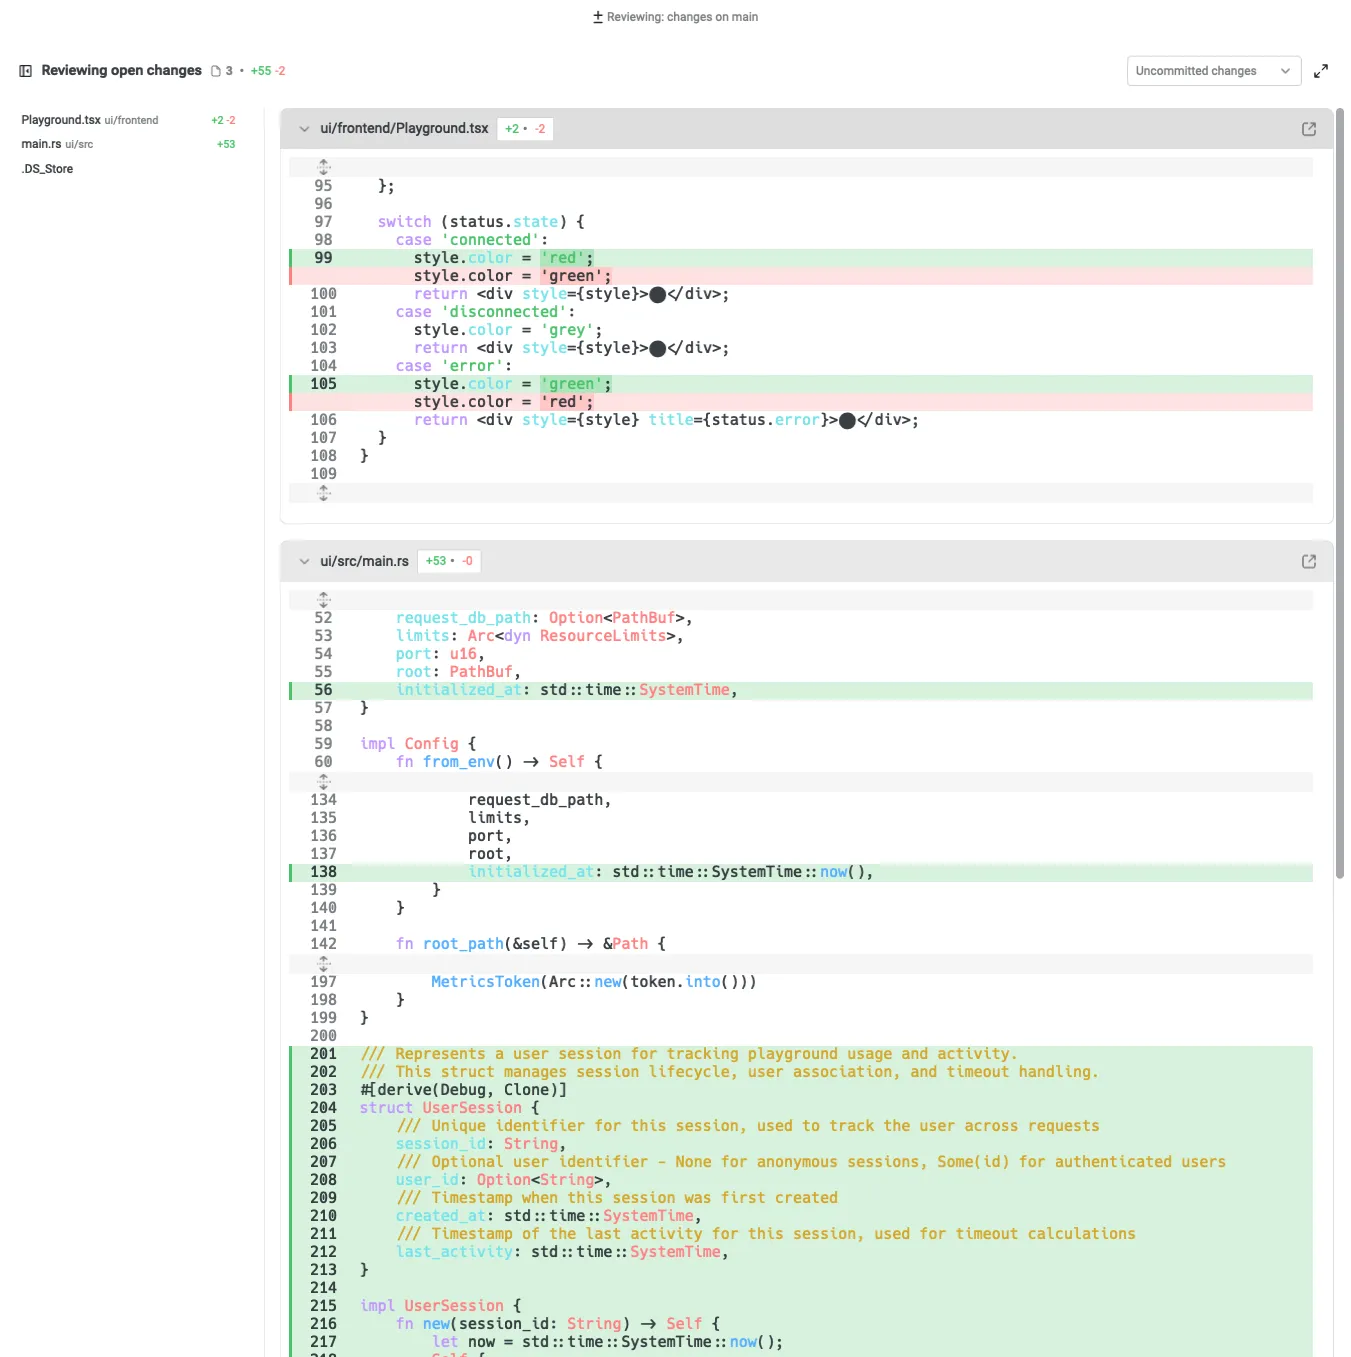 ### Attaching code to a third-party agent session [Section titled “Attaching code to a third-party agent session”](#attaching-code-to-a-third-party-agent-session) You can select code, files, or snippets and feed them directly to a running third-party CLI agent session without copy-pasting or switching tools. When a third-party agent (Claude Code, Codex, OpenCode, etc.) is running in a Warp tab, select text in Warp’s code editor or Code Review panel and attach it as context to that agent’s session using `⌘+L` (macOS) or `Ctrl+Shift+L` (Windows/Linux). This works the same way as attaching context to Warp’s built-in Agent. For more on third-party agent support, see [Third-party CLI agents](/agents/cli-agents/overview/).
# URLs as Context
Canonical page: [/agents/local-agents/agent-context/urls-as-context/](https://docs.warp.dev/agents/local-agents/agent-context/urls-as-context/)
> Attach a public URL to your prompt so the agent can reference that page's content.
Attach a public URL to any agent prompt to provide page content as context. Warp scrapes the page and surfaces the extracted text directly to the model, giving the agent access to documentation, references, or any publicly accessible web content. ## Referencing websites via URLs [Section titled “Referencing websites via URLs”](#referencing-websites-via-urls) You can attach a public URL to any prompt to provide page content as context. Warp will scrape the page and surface the extracted text directly to the model. * Only publicly accessible pages are supported. * The full page is added to the model’s context, which may increase credit usage for long documents. * Only the specific URL you provide is processed. The agent won’t explore the site, follow links, or crawl beyond that page. 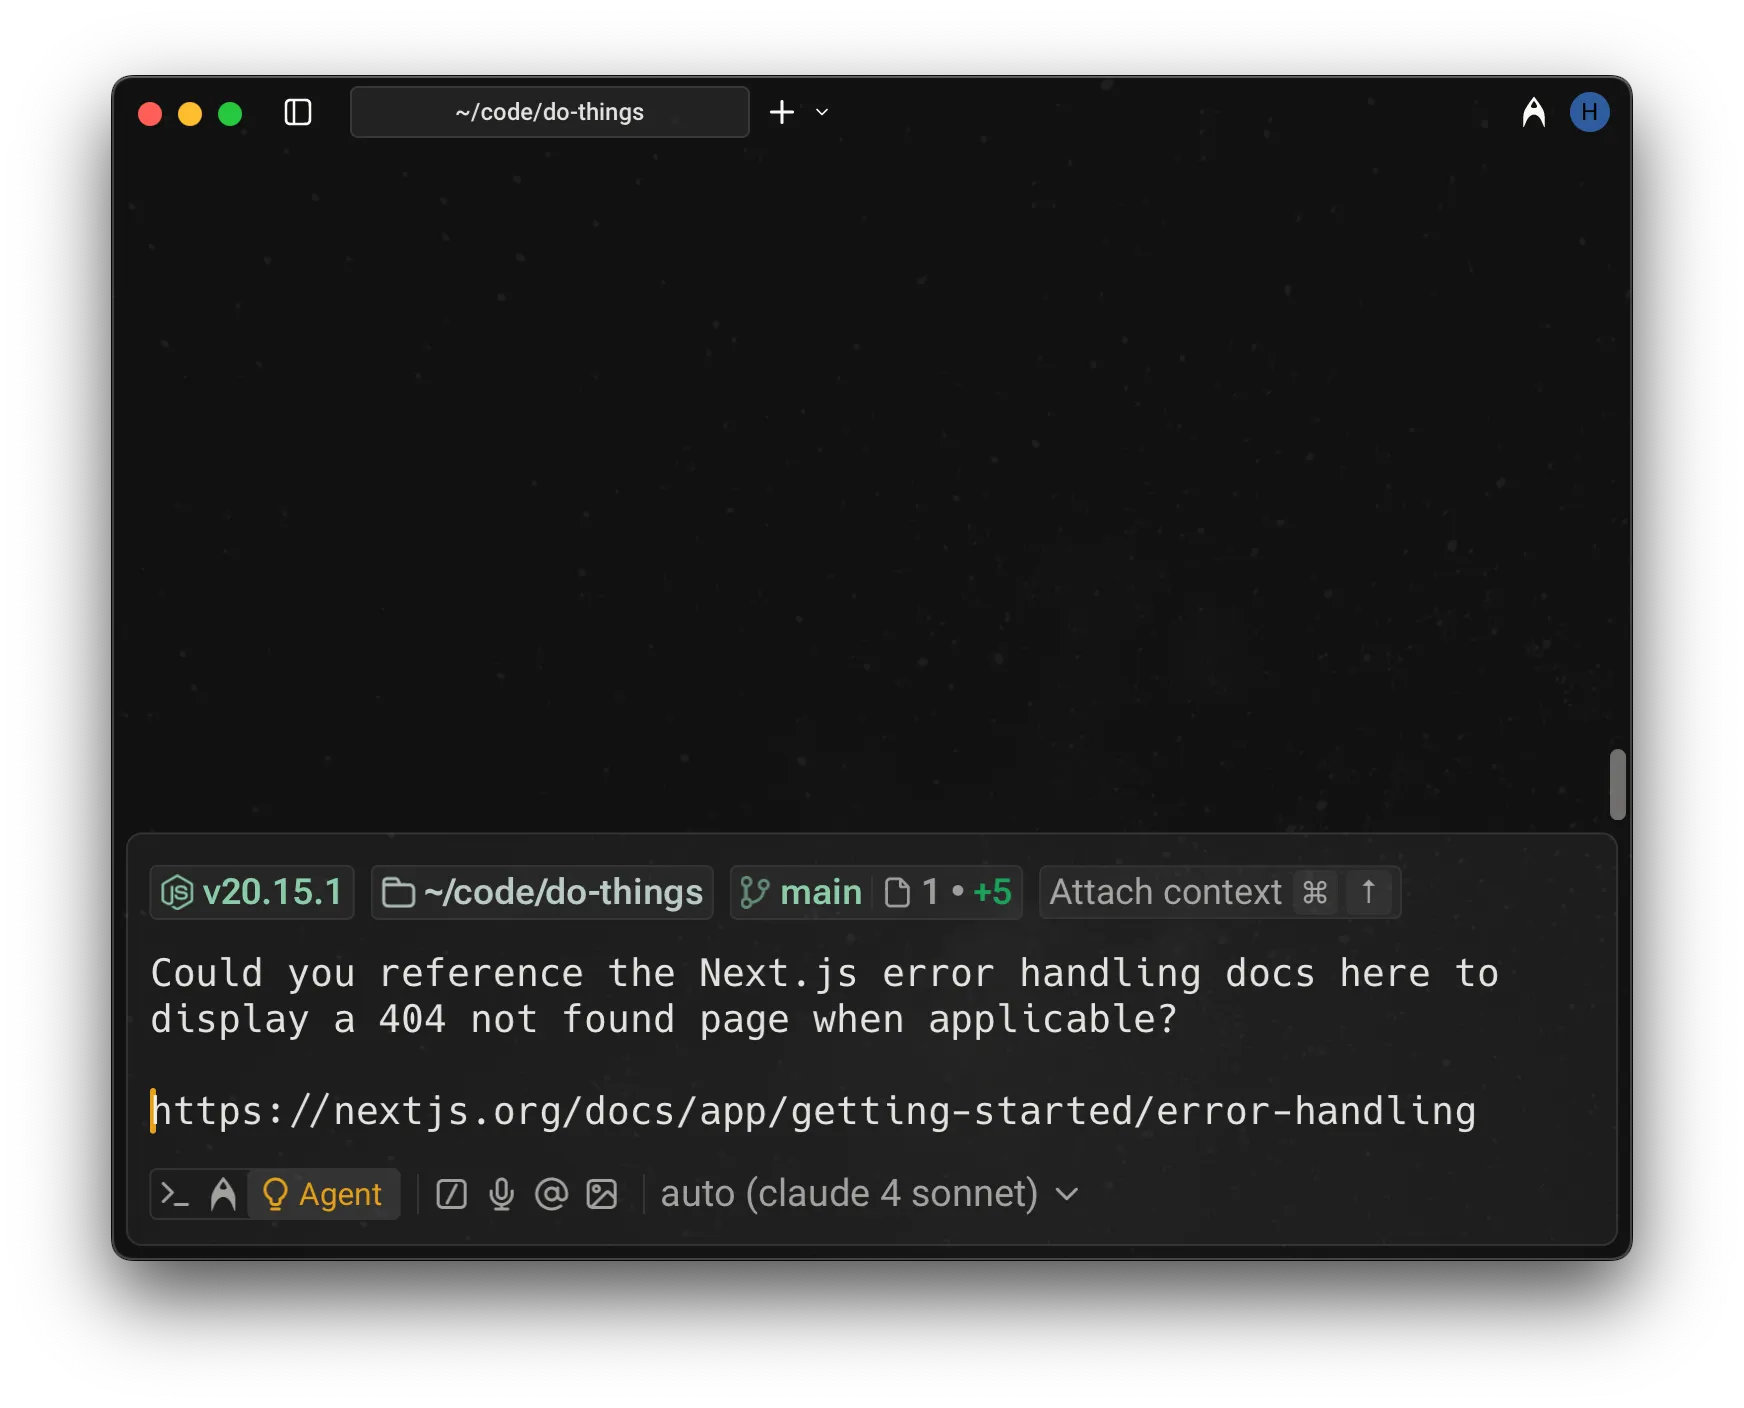 Example of referencing docs via a URL.
# Using @ to Add Context
Canonical page: [/agents/local-agents/agent-context/using-to-add-context/](https://docs.warp.dev/agents/local-agents/agent-context/using-to-add-context/)
> Use @ to reference files, folders, code symbols, and Warp Drive objects as agent context.
Use the @ symbol in agent prompts to reference files, folders, code symbols, Warp Drive objects, and blocks from other sessions as context. The @ menu searches your entire Git repository from the project root and works immediately without codebase indexing. ## How the @ context menu works [Section titled “How the @ context menu works”](#how-the--context-menu-works) You can attach specific files, folders, code symbols, Warp Drive objects, and blocks from other sessions as context to a prompt using the @ symbol. When you’re inside a **Git repository**, typing @ opens a context menu that allows you to search for and select files or directories to include. **Note**: the search in the @-context menu is always relative to the root of the Git repository, even when you’re working in a subdirectory. This means you can reference *any* file or folder tracked in the repo, regardless of the current working directory. 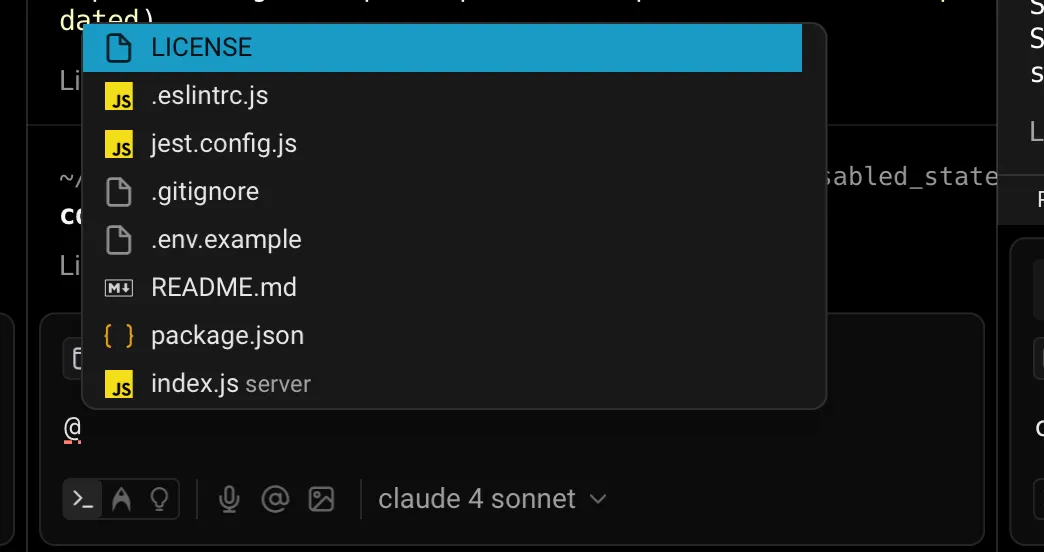 File search using the @ symbol. Additionally, no codebase indexing (via [Codebase Context](/agents/capabilities/codebase-context/)) is required — file search is available immediately in any Git-initialized directory. The search also respects `.gitignore` rules and will exclude ignored files from the results. 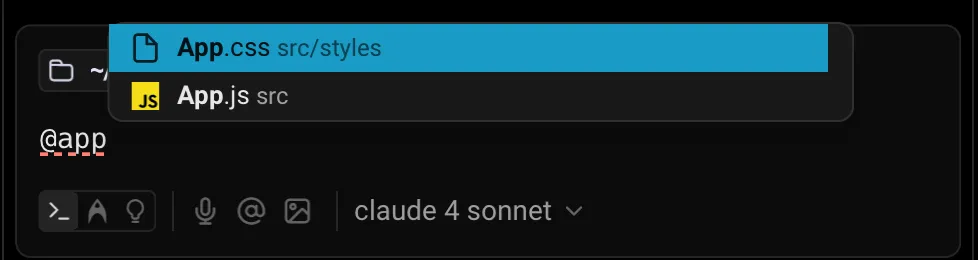 Filtering files with @app. 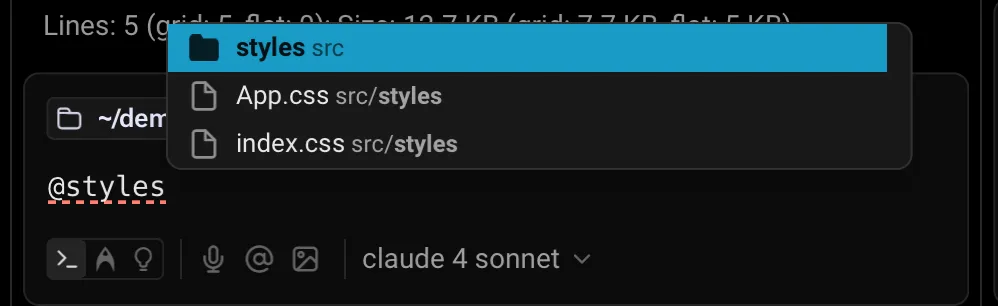 Referencing a folder with @styles. ### Referencing code symbols [Section titled “Referencing code symbols”](#referencing-code-symbols) The @ menu can also be used to fuzzy-search for code symbols in your codebase. This includes functions, classes, interfaces, etc. If you type something like `@main`, Warp will surface a matching `main()` function and insert it into your prompt as a reference with the line number. By pointing the Agent to a specific symbol, you can give it exactly the context it needs to make a targeted edit or explanation. [Referencing code symbols with @ context video](https://www.loom.com/embed/da0c491bd2a44ed58d4fbdf2c260b019) ### Referencing Warp Drive objects [Section titled “Referencing Warp Drive objects”](#referencing-warp-drive-objects) Warp Drive objects are another way to attach context with **@**. You can reference: * [Workflows](/knowledge-and-collaboration/warp-drive/workflows/) — parameterized commands you can name and save in Warp with descriptions and arguments. * [Notebooks](/knowledge-and-collaboration/warp-drive/notebooks/) — runnable documentation consisting of markdown text and list elements, code blocks, and runnable shell snippets that can be automatically executed in your terminal session. * [Rules](/agents/capabilities/rules/) — reusable guidelines and constraints that inform how Agents respond to your prompts. When you select one of these objects, Warp inserts a reference token into your prompt. The contents of the object are then automatically passed as context to the Agent. [Referencing Warp Drive objects with @ context video](https://www.loom.com/embed/abd065af9fea421d925664135341c682) ### Referencing blocks from other sessions [Section titled “Referencing blocks from other sessions”](#referencing-blocks-from-other-sessions) You are not limited to the current terminal session. With @, you can also bring in blocks of output from earlier sessions. In the demo below, Ian shows how he previously ran `cargo clippy` and now wants help fixing the reported errors. Typing `@cargo clippy` surfaces the relevant block, which you can insert into your prompt. Once added, the Agent parses the output and generates fixes or explanations directly. You can also reference live blocks, not just those that have already completed execution. [Referencing blocks with @ context video](https://www.loom.com/embed/a4e72847341044cca2fed59a6299e1b7) ### Why @ to reference context? [Section titled “Why @ to reference context?”](#why--to-reference-context) Attaching context with @ helps you: * Reference exact outputs instead of copy-pasting entire logs * Attach relevant files or directories without leaving Warp * Reuse existing context and knowledge in Warp Drive This makes Agent interactions more accurate, clearer, and efficient, without additional setup.
# Cloud-synced conversations
Canonical page: [/agents/local-agents/cloud-conversations/](https://docs.warp.dev/agents/local-agents/cloud-conversations/)
> Sync agent conversations to the cloud to access them across devices, share with teammates, and continue past conversations from anywhere.
Warp can sync your [agent conversations](/agents/local-agents/interacting-with-agents/) to the cloud, making them accessible across devices, shareable with teammates, and persistent even after logging out. This enables you to pick up where you left off on any machine, share context with collaborators, and access past [cloud agent](/platform/) conversations. ## Key capabilities [Section titled “Key capabilities”](#key-capabilities) * **Persistence across devices** - Your conversations remain available when you log out and back in, or switch to a different machine. * **Access to past cloud agent conversations** - View and restore cloud agent conversations after they complete. * **Link sharing with access controls** - Share conversations with specific teammates or your team, with configurable permissions. * **Web viewing** - View shared conversations in a browser without installing Warp. * **Local continuation** - Restore any cloud conversation and continue it locally on your machine. [Cloud-synced conversations](https://www.loom.com/embed/54038cf41219485dad3adb1d811e7e9a) ## Enabling cloud conversations [Section titled “Enabling cloud conversations”](#enabling-cloud-conversations) Cloud conversation sync is controlled by a setting in Warp: 1. Open **Settings** > **Privacy** 2. Enable **Store AI conversations in the cloud** When enabled, your Agent conversations automatically sync to the cloud as you interact with the Agent. When disabled, conversations are stored locally on your machine only. Caution If cloud conversations are disabled, conversation data is lost when you log out and cannot be shared with others. Cloud agent conversations are always stored in the cloud regardless of this setting. ## How it works [Section titled “How it works”](#how-it-works) ### Conversation syncing [Section titled “Conversation syncing”](#conversation-syncing) When cloud conversations are enabled, Warp automatically syncs your conversation data after each Agent interaction. This happens in the background and does not affect your workflow. Cloud conversations store a snapshot of the conversation state at each sync point. If you open the same conversation on two different machines, each continues independently from that snapshot—changes on one machine do not sync to the other in real time. ### Continuing vs. forking [Section titled “Continuing vs. forking”](#continuing-vs-forking) When you restore a cloud conversation: * **Your own conversations** - You can continue the conversation directly, and updates sync back to the cloud. * **Shared conversations from others** - Continuing creates a fork, giving you a new conversation that starts with the shared context but does not modify the original. This behavior mirrors [Conversation Forking](/agents/local-agents/interacting-with-agents/conversation-forking/), where you branch off to explore a different direction without affecting the source conversation. ## Managing cloud-synced conversations [Section titled “Managing cloud-synced conversations”](#managing-cloud-synced-conversations) Cloud-synced conversations appear in all the usual conversation management entrypoints alongside your local conversations. You can browse, search, restore, and delete them just like any other conversation. See [Interacting with Agents](/agents/local-agents/interacting-with-agents/) for detailed information on navigating and managing conversations, including keyboard shortcuts and the Conversation Panel in [Terminal and Agent modes](/agents/local-agents/interacting-with-agents/terminal-and-agent-modes/). * **Browse** - View all your local and cloud-synced conversations in one place. * **Search** - Find conversations by title or content. * **Restore** - Click a conversation to load it into your current session and continue where you left off. * **Delete** - Remove conversations you no longer need. Deletion is permanent and immediate. *** ## Sharing conversations [Section titled “Sharing conversations”](#sharing-conversations) You can share any cloud conversation with teammates via a link. ### Creating a share link [Section titled “Creating a share link”](#creating-a-share-link) To share a conversation: 1. Open the conversation you want to share 2. Access the share options through the conversation menu 3. Configure access permissions: * **Anyone on your team** (default) - All team members can view * **Specific people** - Enter email addresses to grant access * **Anyone with the link** - No authentication required By default, shared conversations are visible to anyone on your team. ### Viewing shared conversations [Section titled “Viewing shared conversations”](#viewing-shared-conversations) Recipients can view shared conversations in two ways: * **On the web** - Open the link in a browser to view the conversation transcript without installing Warp. * **In Warp** - Click “Open in Warp” to load the conversation in the desktop app, where you can continue it locally. When you continue a shared conversation from someone else, Warp creates a fork so you can build on the shared context without modifying the original. ## Cloud agent conversations [Section titled “Cloud agent conversations”](#cloud-agent-conversations) [Cloud agents](/platform/) run in the cloud, and their conversations are automatically stored regardless of your local cloud conversations setting. ### Accessing cloud agent conversations [Section titled “Accessing cloud agent conversations”](#accessing-cloud-agent-conversations) You can access any past cloud agent conversation: * **View transcripts** - Access the full conversation history of any past cloud agent run. * **Restore locally** - Load a cloud agent conversation into your local Warp session to review or continue the work. This is useful when a cloud agent completes a task and you want to review what it did or continue from where it left off. *** ## Privacy and data [Section titled “Privacy and data”](#privacy-and-data) ### Enterprise controls [Section titled “Enterprise controls”](#enterprise-controls) Enterprise administrators can disable cloud conversation storage for their organization through the [Admin Panel](/knowledge-and-collaboration/admin-panel/). When cloud conversation storage is disabled by your organization: * Conversations are stored locally only and not synced to the cloud * You cannot share conversations or access them across devices * Cloud agent conversations are still accessible through the Warp dashboard ### Storage limits [Section titled “Storage limits”](#storage-limits) Cloud conversation storage limits vary by plan. For free users, Warp automatically removes the oldest cloud conversations when you reach your limit to make room for new ones. Your conversations are always preserved locally on your machine—only the cloud-synced copies are removed. For current storage limits by plan, see our [pricing page](https://www.warp.dev/pricing). ### Deleting conversations [Section titled “Deleting conversations”](#deleting-conversations) When you delete a conversation, it is removed permanently and immediately. Make sure you no longer need a conversation before deleting it. *** ## Related features [Section titled “Related features”](#related-features) * [Interacting with Agents](/agents/local-agents/interacting-with-agents/) - Learn about conversation mechanics, follow-ups, and context windows. * [Conversation Forking](/agents/local-agents/interacting-with-agents/conversation-forking/) - Branch conversations to explore different directions. * [Session Sharing](/agents/local-agents/session-sharing/) - Collaborate in real time on a live Agent session. * [Cloud Agents overview](/platform/) - Run agents in the cloud from triggers, schedules, or integrations. * [Handoff between local and cloud agents](/platform/handoff/) - Promote a local conversation to a cloud agent run, or continue a finished cloud run.
# Agent code diffs and review
Canonical page: [/agents/local-agents/code-diffs/](https://docs.warp.dev/agents/local-agents/code-diffs/)
> How to review, refine, and apply code changes generated by Warp’s Agents with the built-in diff editor in Agent Conversations.
When the Warp Agent generates code changes, they appear as visual diffs in a built-in editor. Review proposed changes line by line, refine them with natural language, make manual edits, or accept them to apply the modifications to your files. ## Reviewing code diffs [Section titled “Reviewing code diffs”](#reviewing-code-diffs) During an Agent Conversation, Warp can generate code diffs that open directly in a built-in diff editor. This lets you review proposed changes line by line, refine them with natural language, or make manual edits before choosing whether to apply them. It’s a fast, transparent way to stay in control of agent-generated code. Caution If the `Apply Code Diffs` permission is set to `Always allow` in [Agent Profiles & Permissions](/agents/capabilities/agent-profiles-permissions/), code diffs are applied automatically without being surfaced for review. If it’s set to `Agent decides` or `Always ask`, you’ll always be prompted to review diffs before they’re applied. 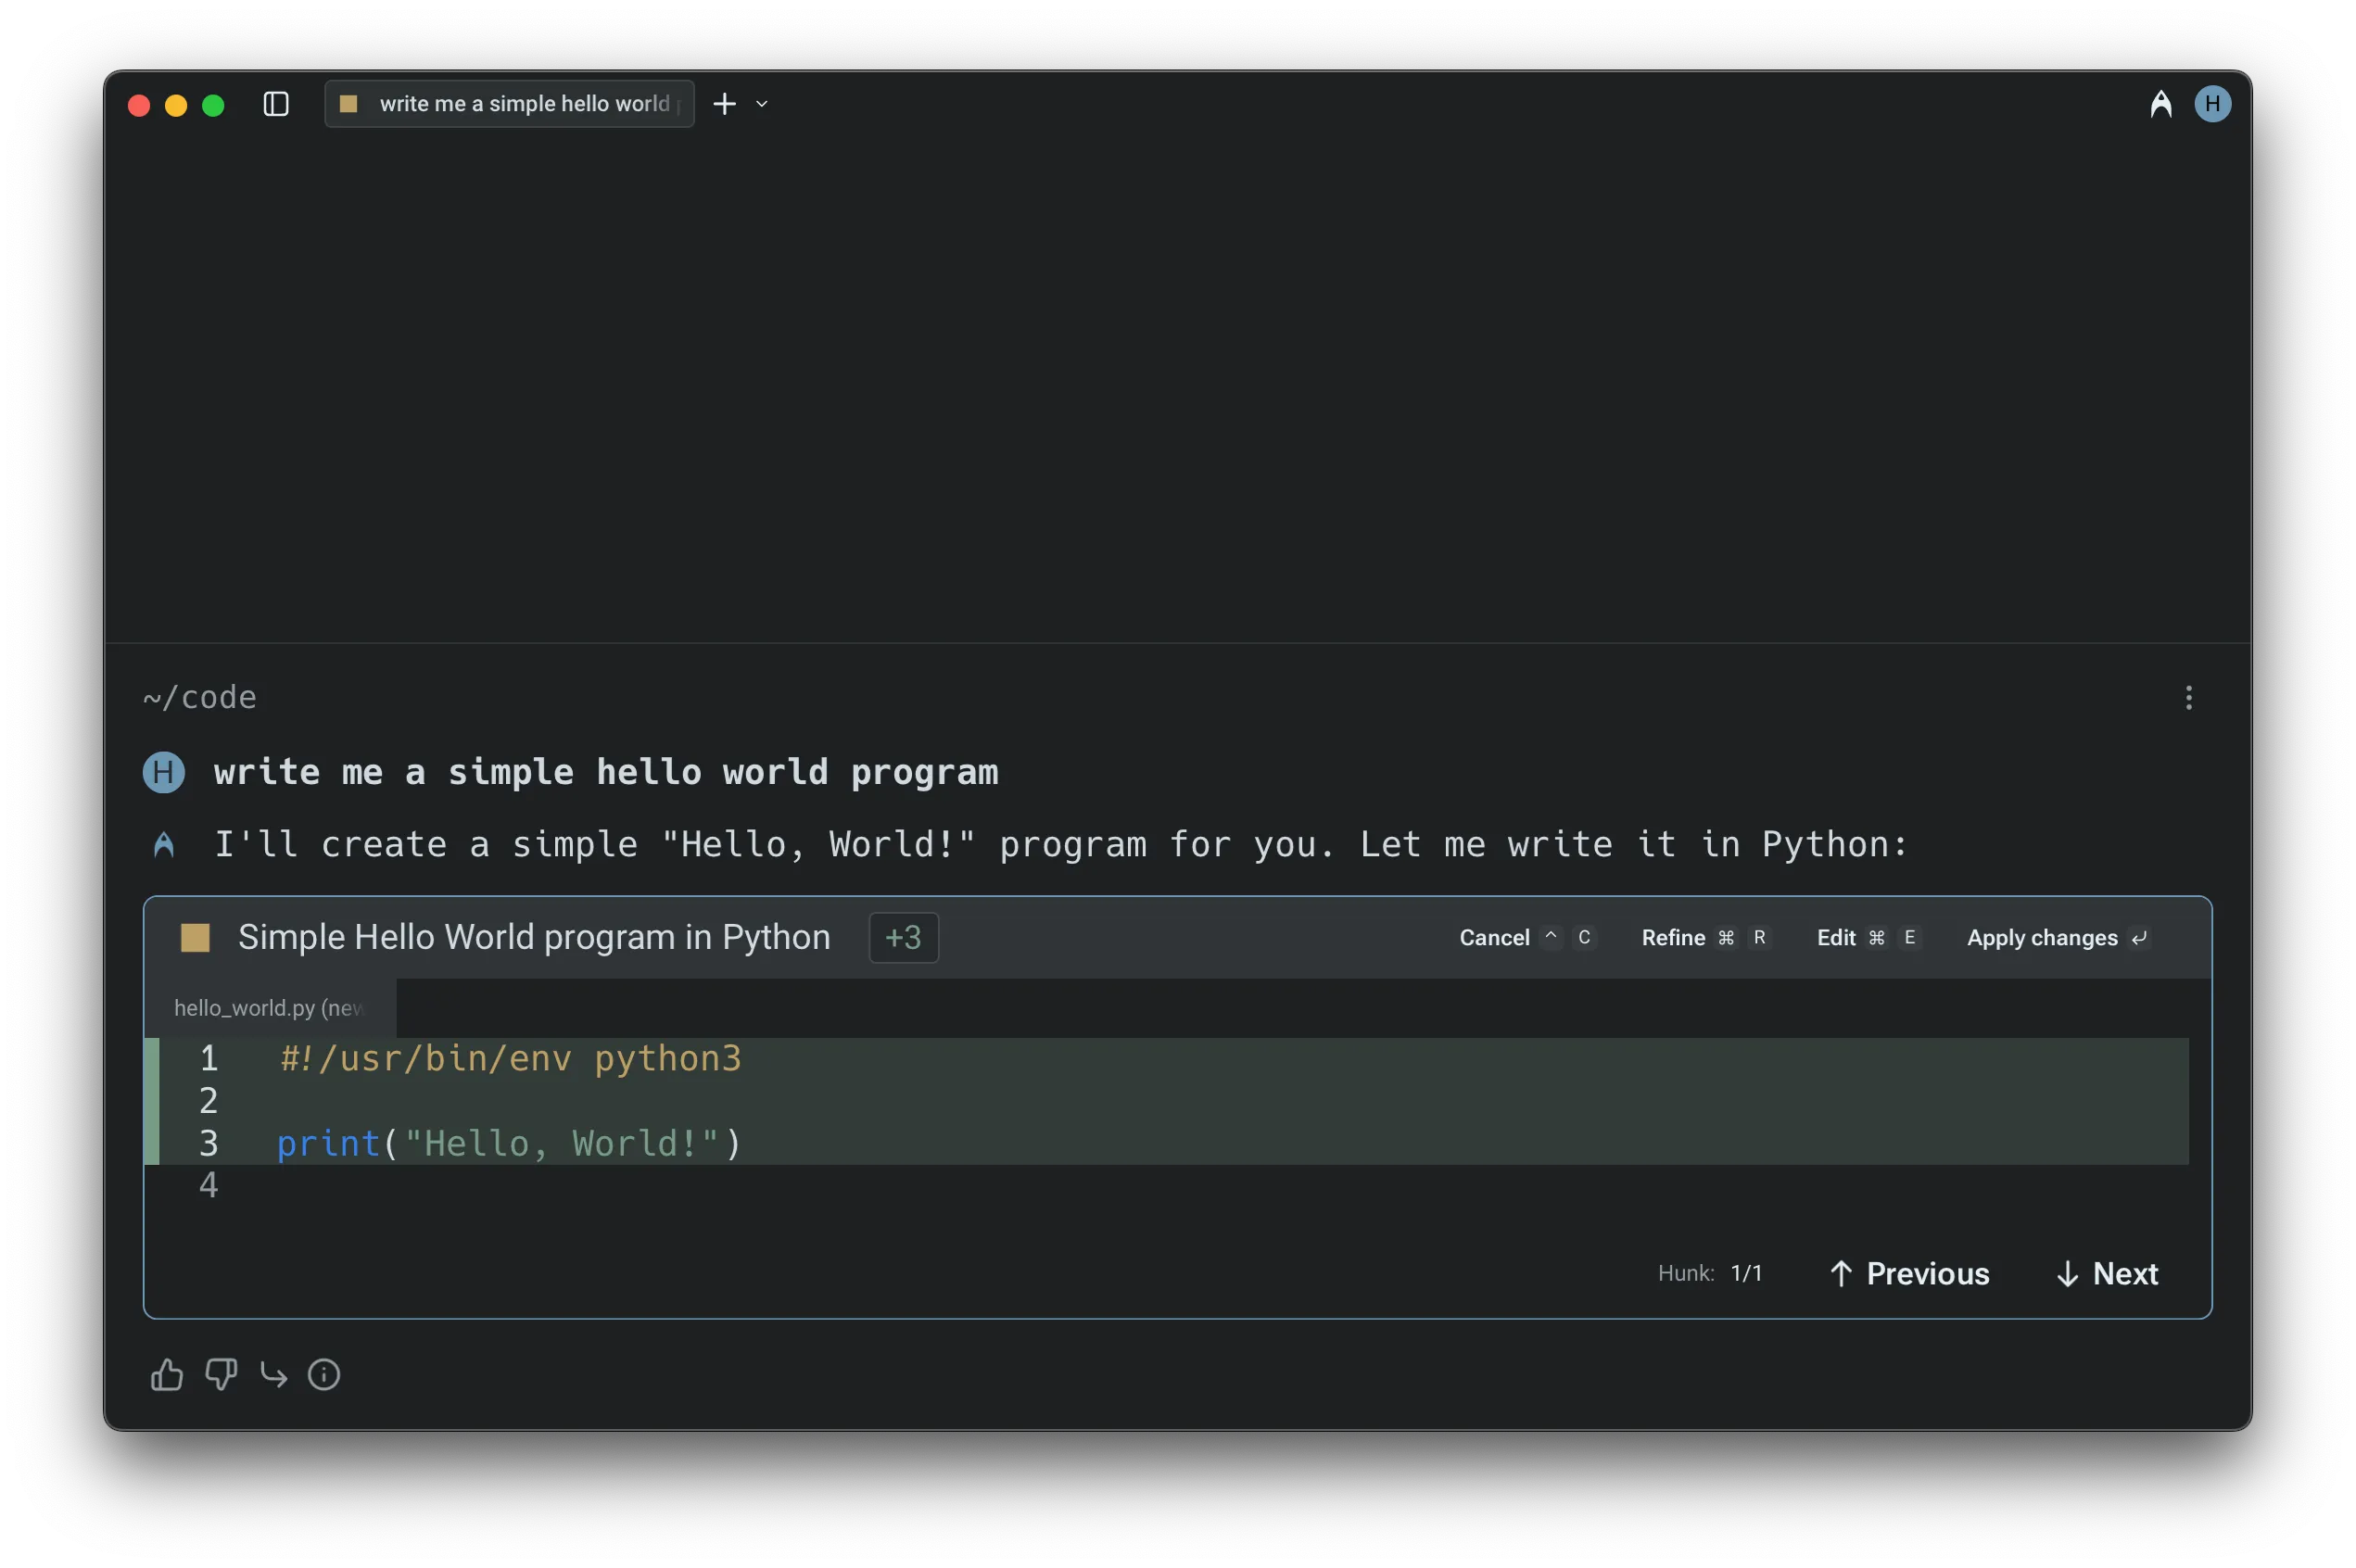 A code diff surfaced in an Agent Conversation. You can also choose whether Warp automatically opens the [Code Review](/code/code-review/) panel the first time you accept a diff in a conversation. ## Navigating and applying diffs [Section titled “Navigating and applying diffs”](#navigating-and-applying-diffs) When an Agent generates a code diff, Warp opens it in a built-in text editor with a visual diff view. Changes are grouped into clear hunks for easy inspection. * Use the `↑` and `↓` arrow keys (or mouse clicks) to move between hunks. * For multi-file changes, use `←` and `→` arrow keys to switch between files. * Once satisfied with the changes, you can apply the diffs using `Enter` or clicking “**Accept Changes**” to apply the modifications. Caution These modifications will not be applied to the files unless you explicitly accept them. ## Refining or editing the diffs [Section titled “Refining or editing the diffs”](#refining-or-editing-the-diffs) If the initial suggestion needs more work: * Press `R` or select the “**Refine**” button to provide follow-up instructions in natural language. The agent will regenerate the diff based on your input. * To manually adjust the code, press `E` or click “**Edit**” to switch into an editable view. * To cancel a pending operation, use `Ctrl+C` (on macOS, Windows, or Linux). Similarly, you can exit the editor at any time with `Esc`. 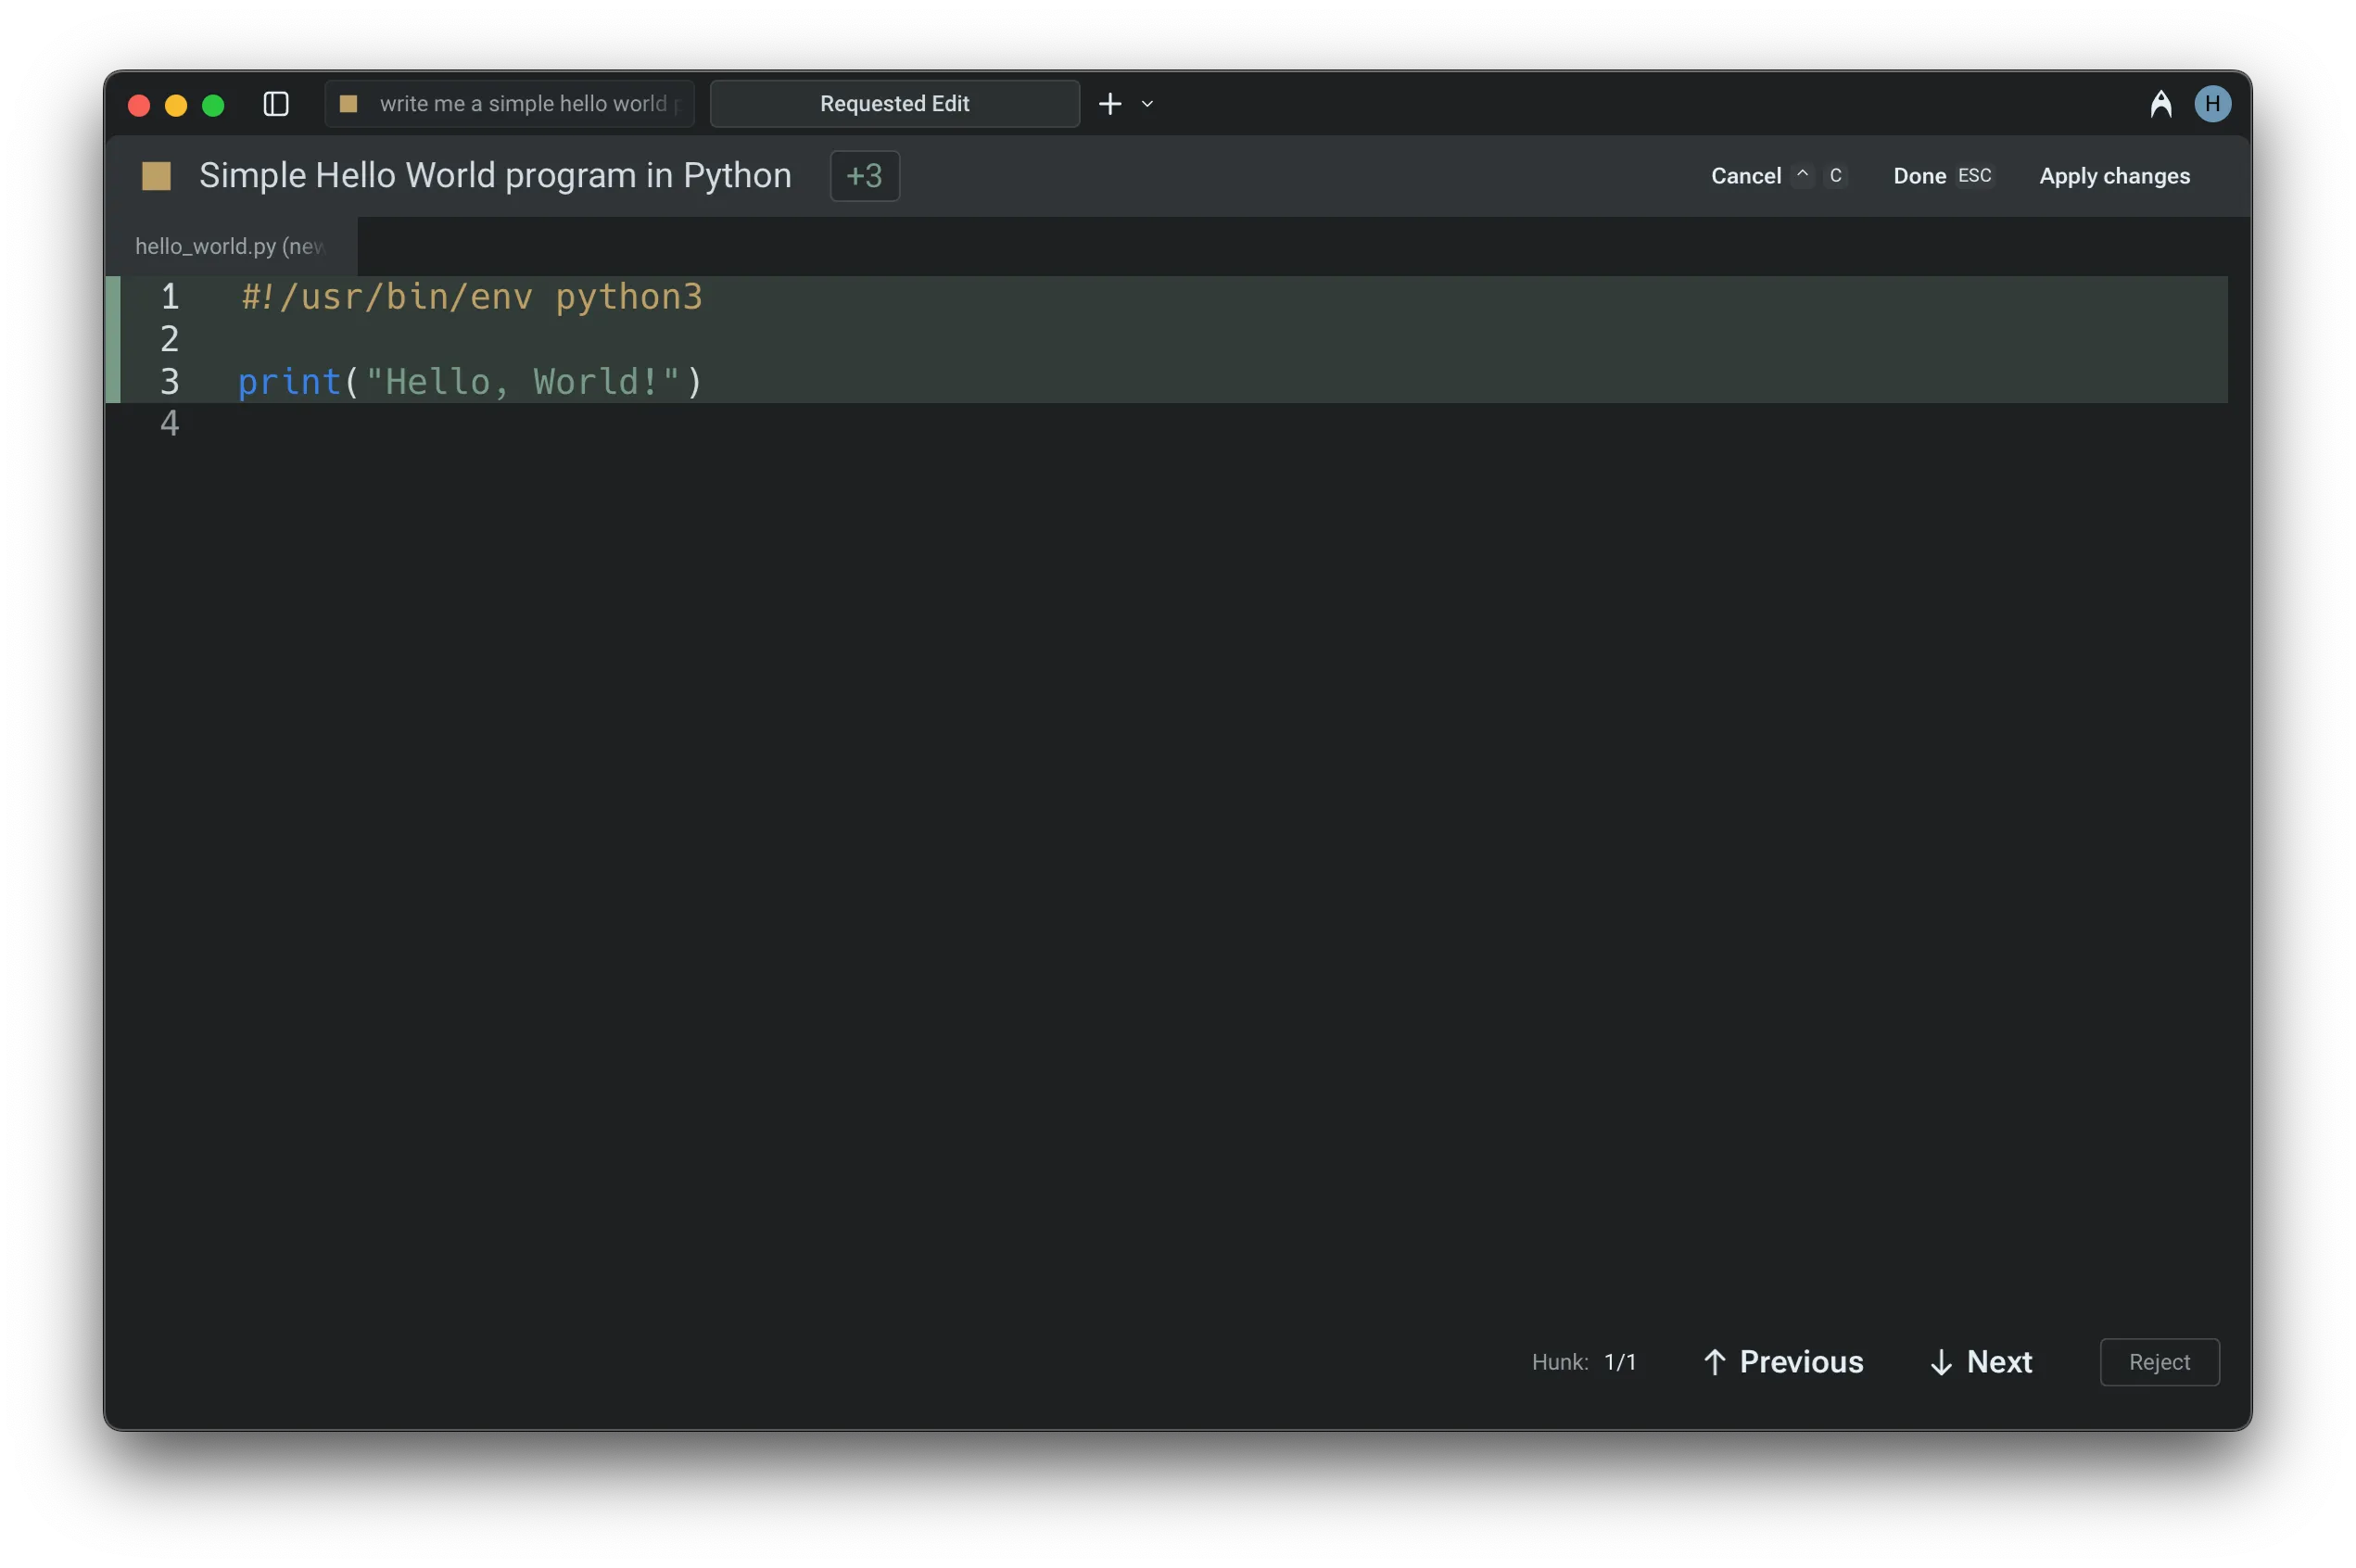 Editing a code diff in Warp’s code editor. ## Accepting diffs and continuing in Agent Mode [Section titled “Accepting diffs and continuing in Agent Mode”](#accepting-diffs-and-continuing-in-agent-mode) When the Agent generates a code diff outside of an active conversation — for example, from a suggested code banner or a passive recommendation — you can accept the diff and seamlessly continue in Agent Mode. After accepting, Warp opens (or returns to) the Agent conversation with the applied changes as context, so you can immediately ask follow-up questions or request further modifications without starting a new conversation. ### Demo: Editing Agent Code in Warp [Section titled “Demo: Editing Agent Code in Warp”](#demo-editing-agent-code-in-warp) Here’s an example from [Warp Guides](/guides/), where Zach demonstrates how to review and edit Agent code diffs natively in Warp: 
# Generate (Legacy)
Canonical page: [/agents/local-agents/generate/](https://docs.warp.dev/agents/local-agents/generate/)
> Use natural language to look up commands or input, accessible either directly from the command-line input or inside any interactive command or program.
Generate (Legacy) turns natural language queries into precise terminal commands or contextual suggestions inside interactive CLI tools. Type `#` in the command line to describe what you want, and Warp generates the matching command in real time. ## What is Generate? [Section titled “What is Generate?”](#what-is-generate) Generate helps turn natural language queries into precise commands as terminal input or contextual suggestions inside interactive commands and programs, whether you’re using psql, gdb, git, mysql, or any other CLI tool. Generate is backed by large language models from API providers like OpenAI and Anthropic, and is completely opt-in. ## Ways to Generate with AI [Section titled “Ways to Generate with AI”](#ways-to-generate-with-ai) ### Generate commands as command-line input [Section titled “Generate commands as command-line input”](#generate-commands-as-command-line-input) Type `#` on the command-line input to generate command suggestions.  Typing ’#’ on the command line opens the suggestions interface. [Generating commands as command-line input demo](https://www.loom.com/embed/424a763ef0c8455e8269e541301968f2) 1. Press `` Ctrl+` `` or type `#` into the text input editor to search using natural language. 2. Type in the input box what you’d like to do. For example, “replace a string in a file.” 3. Results are generated in real-time, and you can keep the current prompt or modify the prompt to generate new commands. 4. When you’ve found the command you want to execute, it can be run or saved as a Workflow onto Warp Drive to easily recall it in the future. ### \[Legacy] Generate text and contextual suggestions in interactive CLIs [Section titled “\[Legacy\] Generate text and contextual suggestions in interactive CLIs”](#legacy-generate-text-and-contextual-suggestions-in-interactive-clis) Caution **Our legacy Generate feature which works in interactive CLIs has been replaced by** [Full Terminal Use](/agents/capabilities/full-terminal-use/)**, where the Warp Agent can now run and control long-running or full-screen terminal applications**.\ The agent can provide input when prompted, navigate interactive screens, and continue execution without stalling. In interactive CLI applications, you can generate input using natural language. 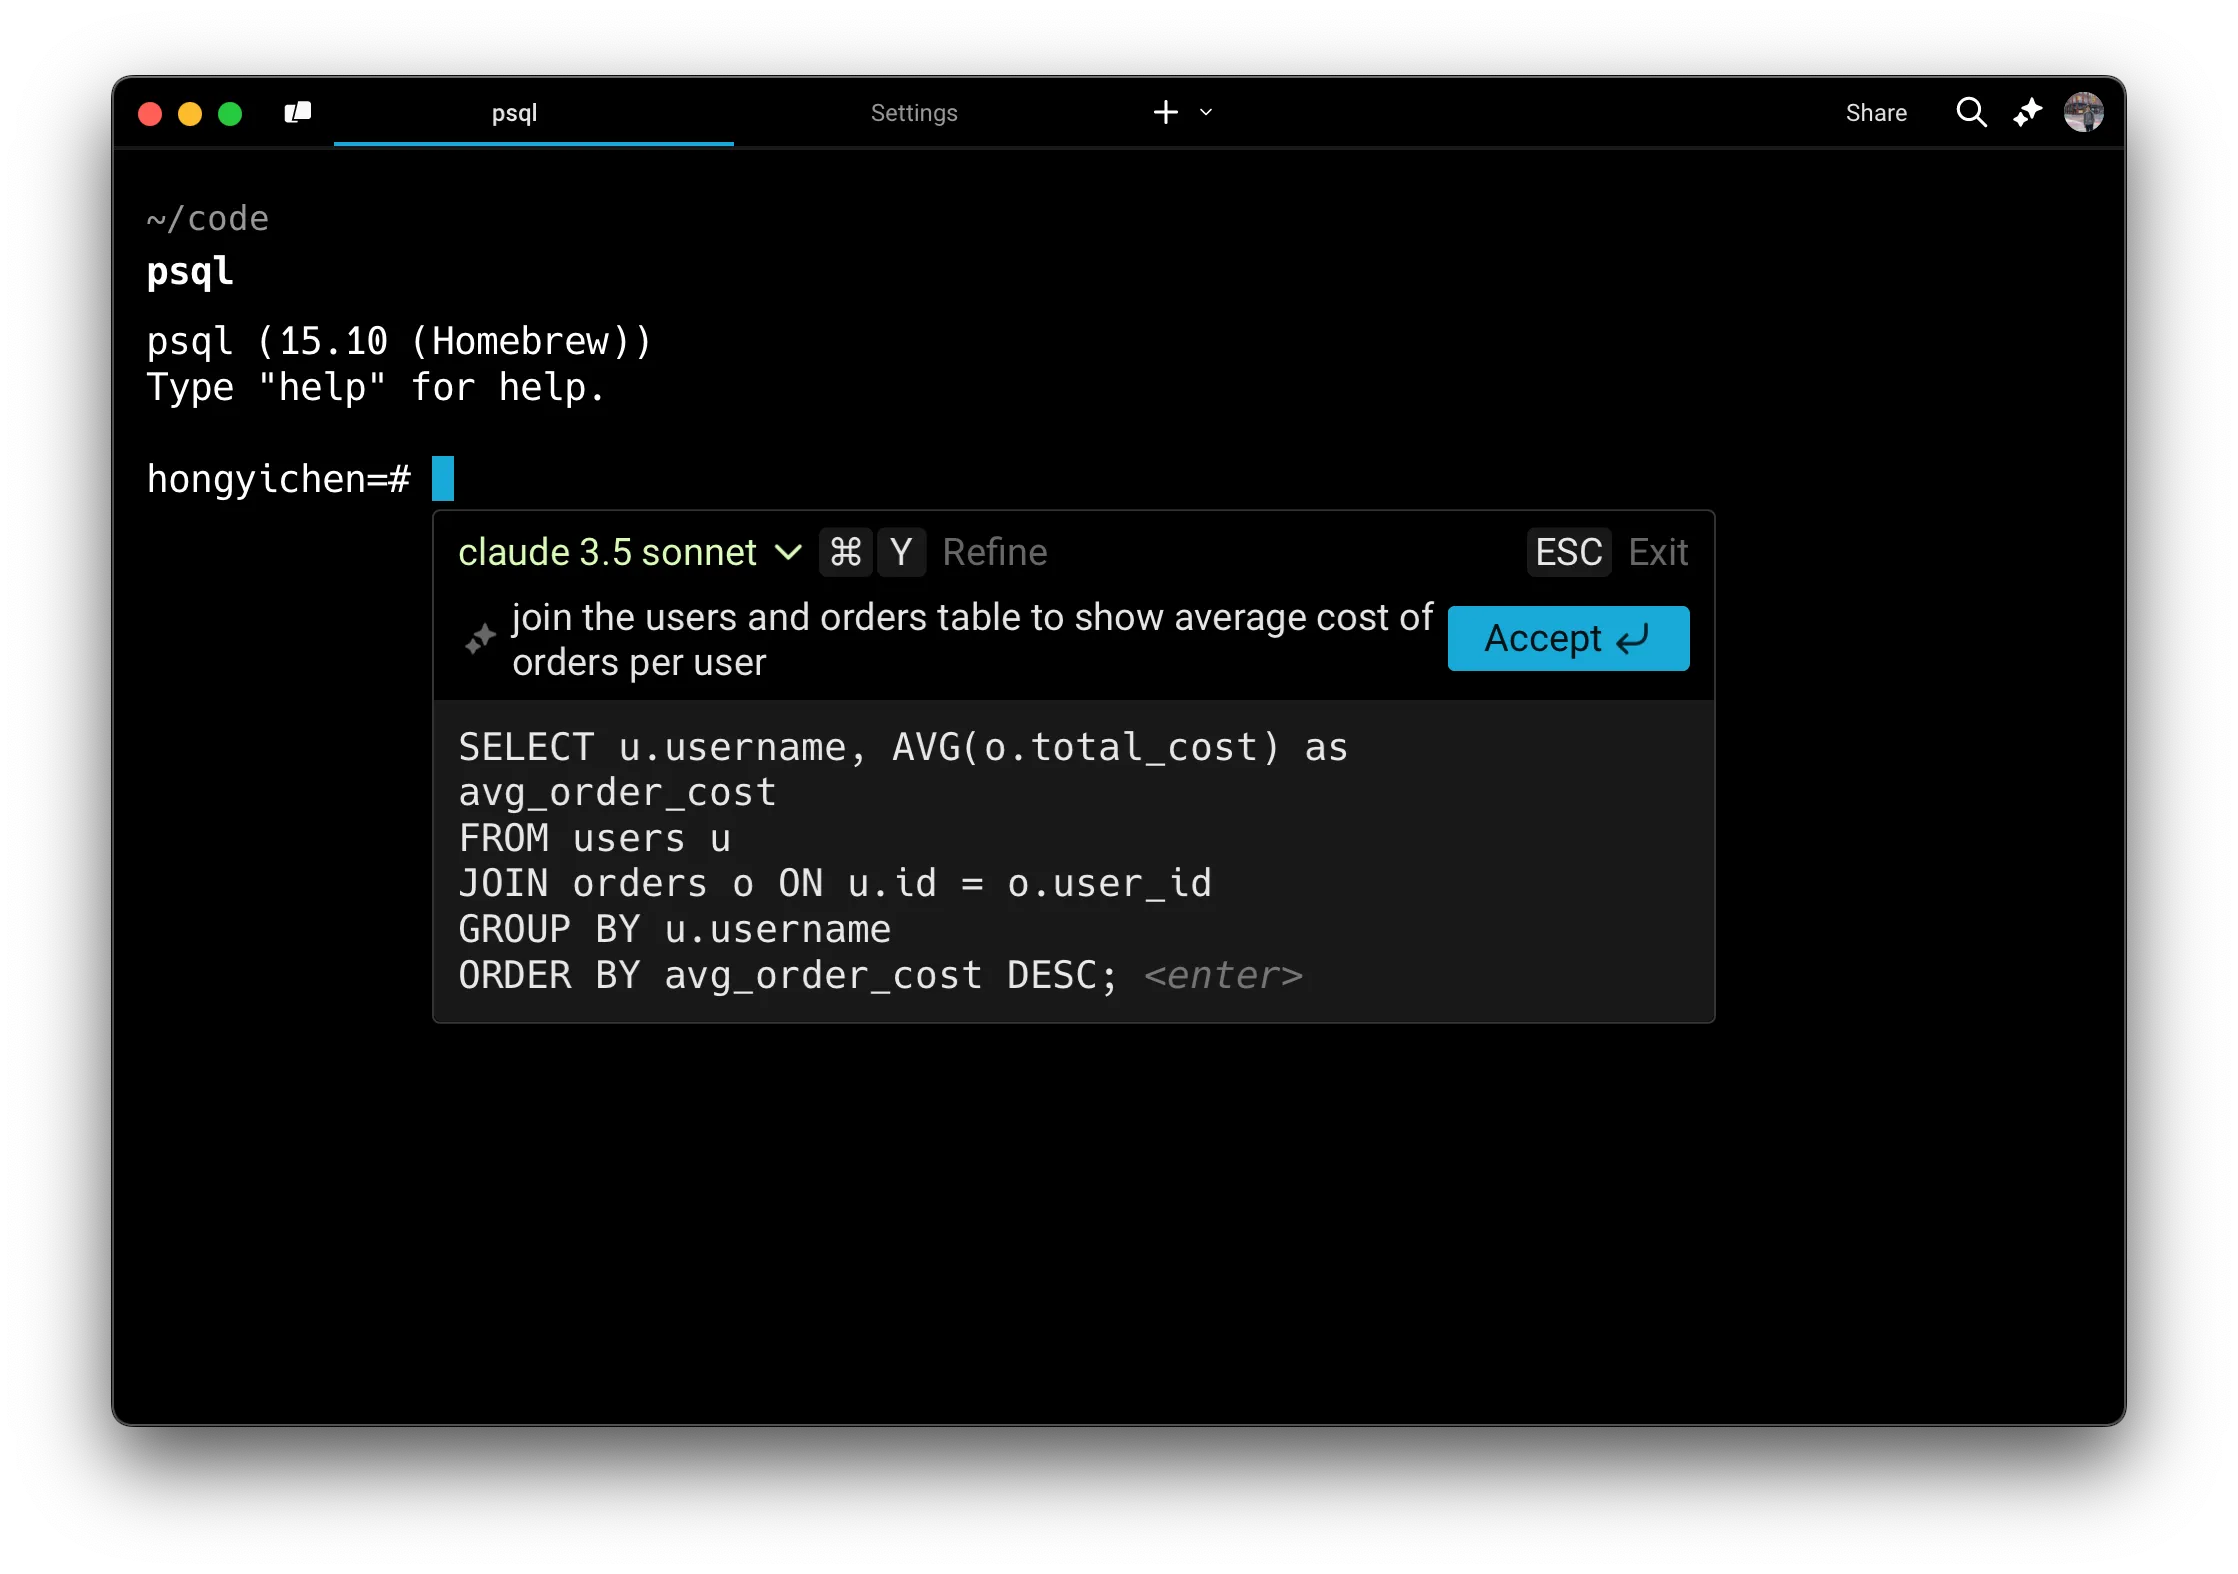 Generating a SQL query using natural language. 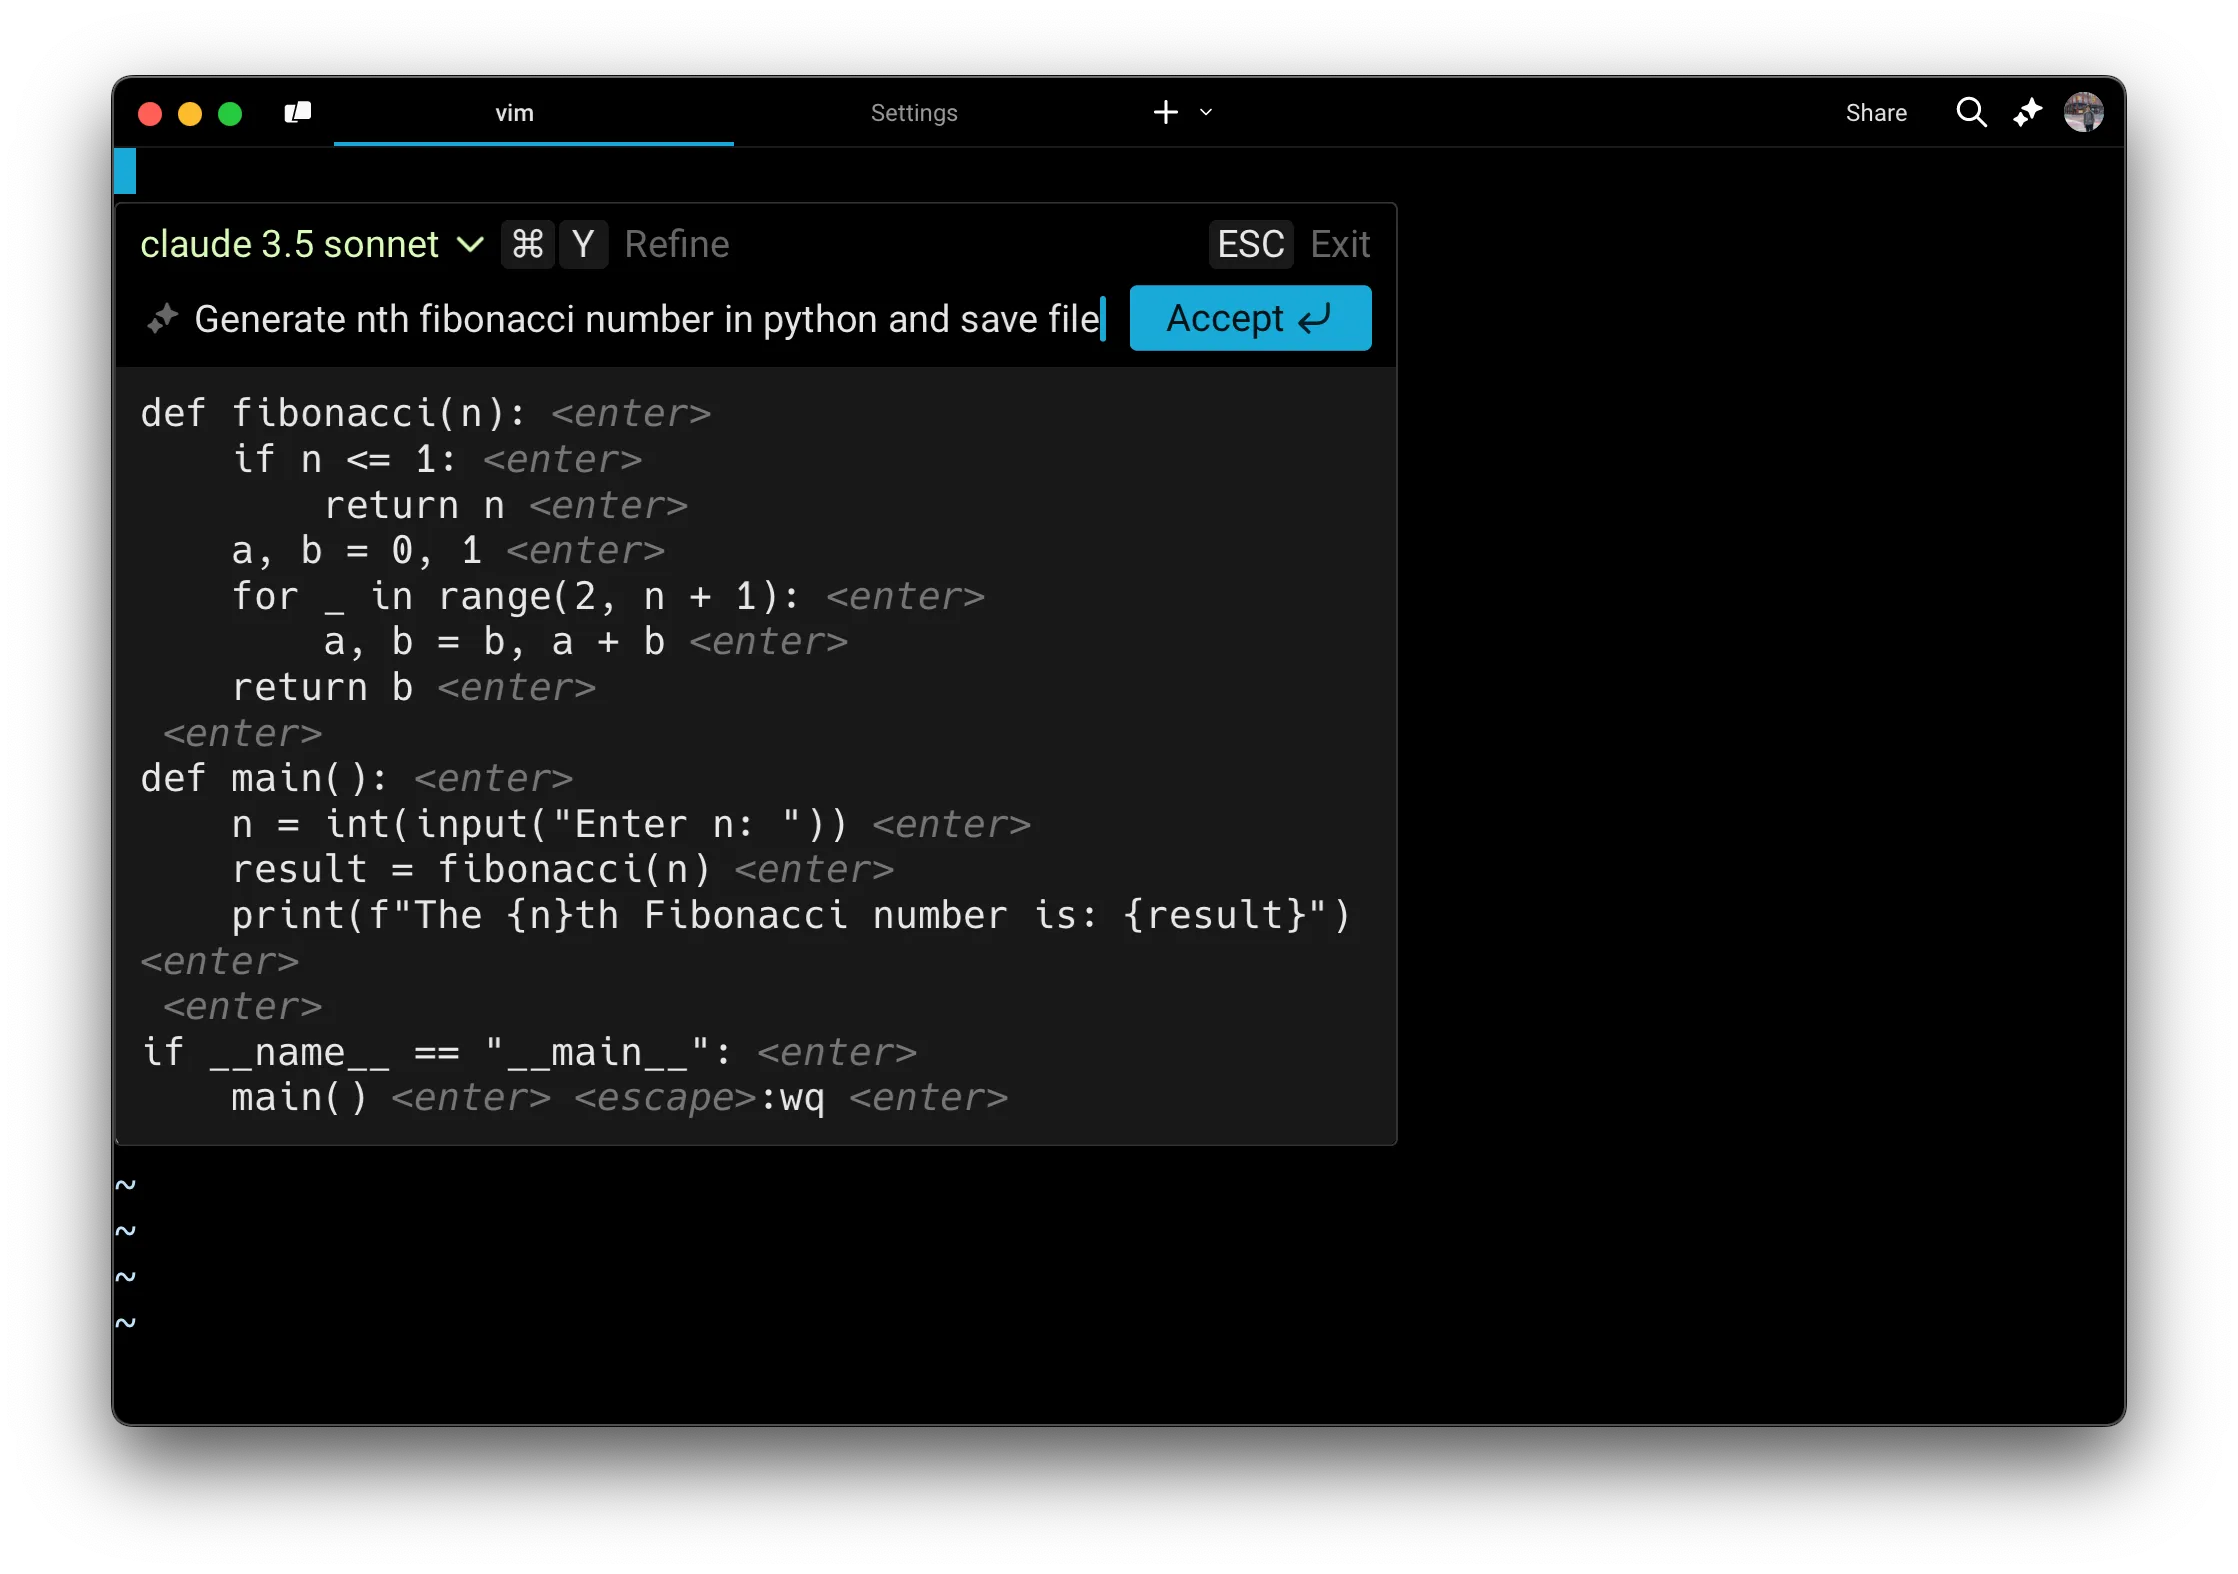 Generating Vim commands using natural language. * macOS 1. Inside a long-running, interactive command, press `⌘+I` when you see the hint text appear. 2. Type what you would like to generate in the input box. For example, “show me all tables in my Postgres database” or in Vim, “generate a recursive Fibonacci function and save it to the file.” 3. Results are generated in real time using the [LLM of your choice](/agents/inference/model-choice/). 4. To refine or follow up on your query, press `⌘+Y`. You can then either edit your last message by pressing `↑` or add a follow-up by typing in new text. 5. When you’ve found the text you want to add or execute, press `Enter` or click the Accept button. * Windows 1. Inside a long-running, interactive command, press `Ctrl+Shift+I` when you see the hint text appear. 2. Type what you would like to generate in the input box. For example, “show me all tables in my Postgres database” or in Vim, “generate a recursive Fibonacci function and save it to the file.” 3. Results are generated in real time using the [LLM of your choice](/agents/inference/model-choice/) 4. To refine or follow up on your query, press `Ctrl+Shift+Y`. You can then either edit your last message by pressing `↑` or add a follow-up by typing in new text. 5. When you’ve found the text you want to add or execute, press `Enter` or click the Accept button. * Linux 1. Inside a long-running, interactive command, press `Ctrl+Shift+I` when you see the hint text appear. 2. Type what you would like to generate in the input box. For example, “show me all tables in my Postgres database” or in Vim, “generate a recursive Fibonacci function and save it to the file.” 3. Results are generated in real time using the [LLM of your choice](/agents/inference/model-choice/) 4. To refine or follow up on your query, press `Ctrl+Shift+Y`. You can then either edit your last message by pressing `↑` or add a follow-up by typing in new text. 5. When you’ve found the text you want to add or execute, press `Enter` or click the Accept button. A couple of other examples of interactive CLIs where you can invoke Generate: * **Database REPL** (e.g. `psql`, `mysql`, `sqlite`): Generate SQL queries such as “create a table to store user data” or “show me all the rows in orders for the last month” * **Text editors** (e.g. `vim`, `nano`): Quickly generate text such as a markdown header, a code block comment, or a boilerplate CSS class. * **Python REPL** (e.g. `ipython`, `python`): Quickly generate Python snippets such as “create a simple plot of x” or “write a unit test for this function” * **Debugger tools** (e.g. `gdb`, `lldb`): Get commands for setting breakpoints or inspecting memory * **Version control** (e.g. `git rebase -i`): Speed up complex git commands by describing your goal such as “interactively rebase master onto feature-branch” * **Cloud provider shells** (e.g. `gcloud`, `aws cli`): faster setup or resource management such as “create a new Kubernetes cluster” or “provision a new RDS instance” Caution If you experience any issues with Generate, see known issues for [troubleshooting steps](/support-and-community/troubleshooting-and-support/known-issues/#online-features-dont-work).
# Interacting with agents
Canonical page: [/agents/local-agents/interacting-with-agents/](https://docs.warp.dev/agents/local-agents/interacting-with-agents/)
> Manage agent conversations across sessions with follow-ups, context blocks, and multi-thread support.
Agent conversations in Warp are multi-turn interactions tied to terminal sessions. Continue previous threads with follow-ups, manage conversation history, attach context from blocks and files, and run multiple conversations simultaneously across windows, tabs, or panes. ## Conversations with Warp’s Agent [Section titled “Conversations with Warp’s Agent”](#conversations-with-warps-agent) Conceptually, a conversation is a sequence of AI queries and blocks. Conversations are tied to sessions and you can run multiple Agent Mode conversations simultaneously in different windows, tabs, or panes. Conversations work best when the queries are related. If your new question builds on the last one, continue in the same conversation. If it is unrelated, it is better to start a new one so that the context remains relevant. ### Staying in a conversation (follow-ups) [Section titled “Staying in a conversation (follow-ups)”](#staying-in-a-conversation-follow-ups) By default, if you ask an AI query immediately after interacting in Agent Mode, your query is sent as a **follow-up** to the current conversation. The conversation view provides a dedicated space for multi-turn interactions, and the conversation panel shows which conversation you are in. **To follow-up on a previous conversation:** * Simply continue prompting the agent if you are already in an active conversation. * Open the **Conversations menu** (`⌘+Y` on macOS, `Ctrl+Shift+Y` on Windows/Linux), select a conversation, and then enter your query. You don’t have to wait for the agent to finish before lining up your next prompt. With [prompt queueing](/agents/local-agents/interacting-with-agents/prompt-queueing/), you can queue follow-ups while the agent is still responding and have them send automatically in order. #### Agent tips in the input [Section titled “Agent tips in the input”](#agent-tips-in-the-input) While the Warp Agent is thinking and processing your request, Warp may surface short tips with helpful workflows and ways to use Warp. These tips appear under the Warping indicator. 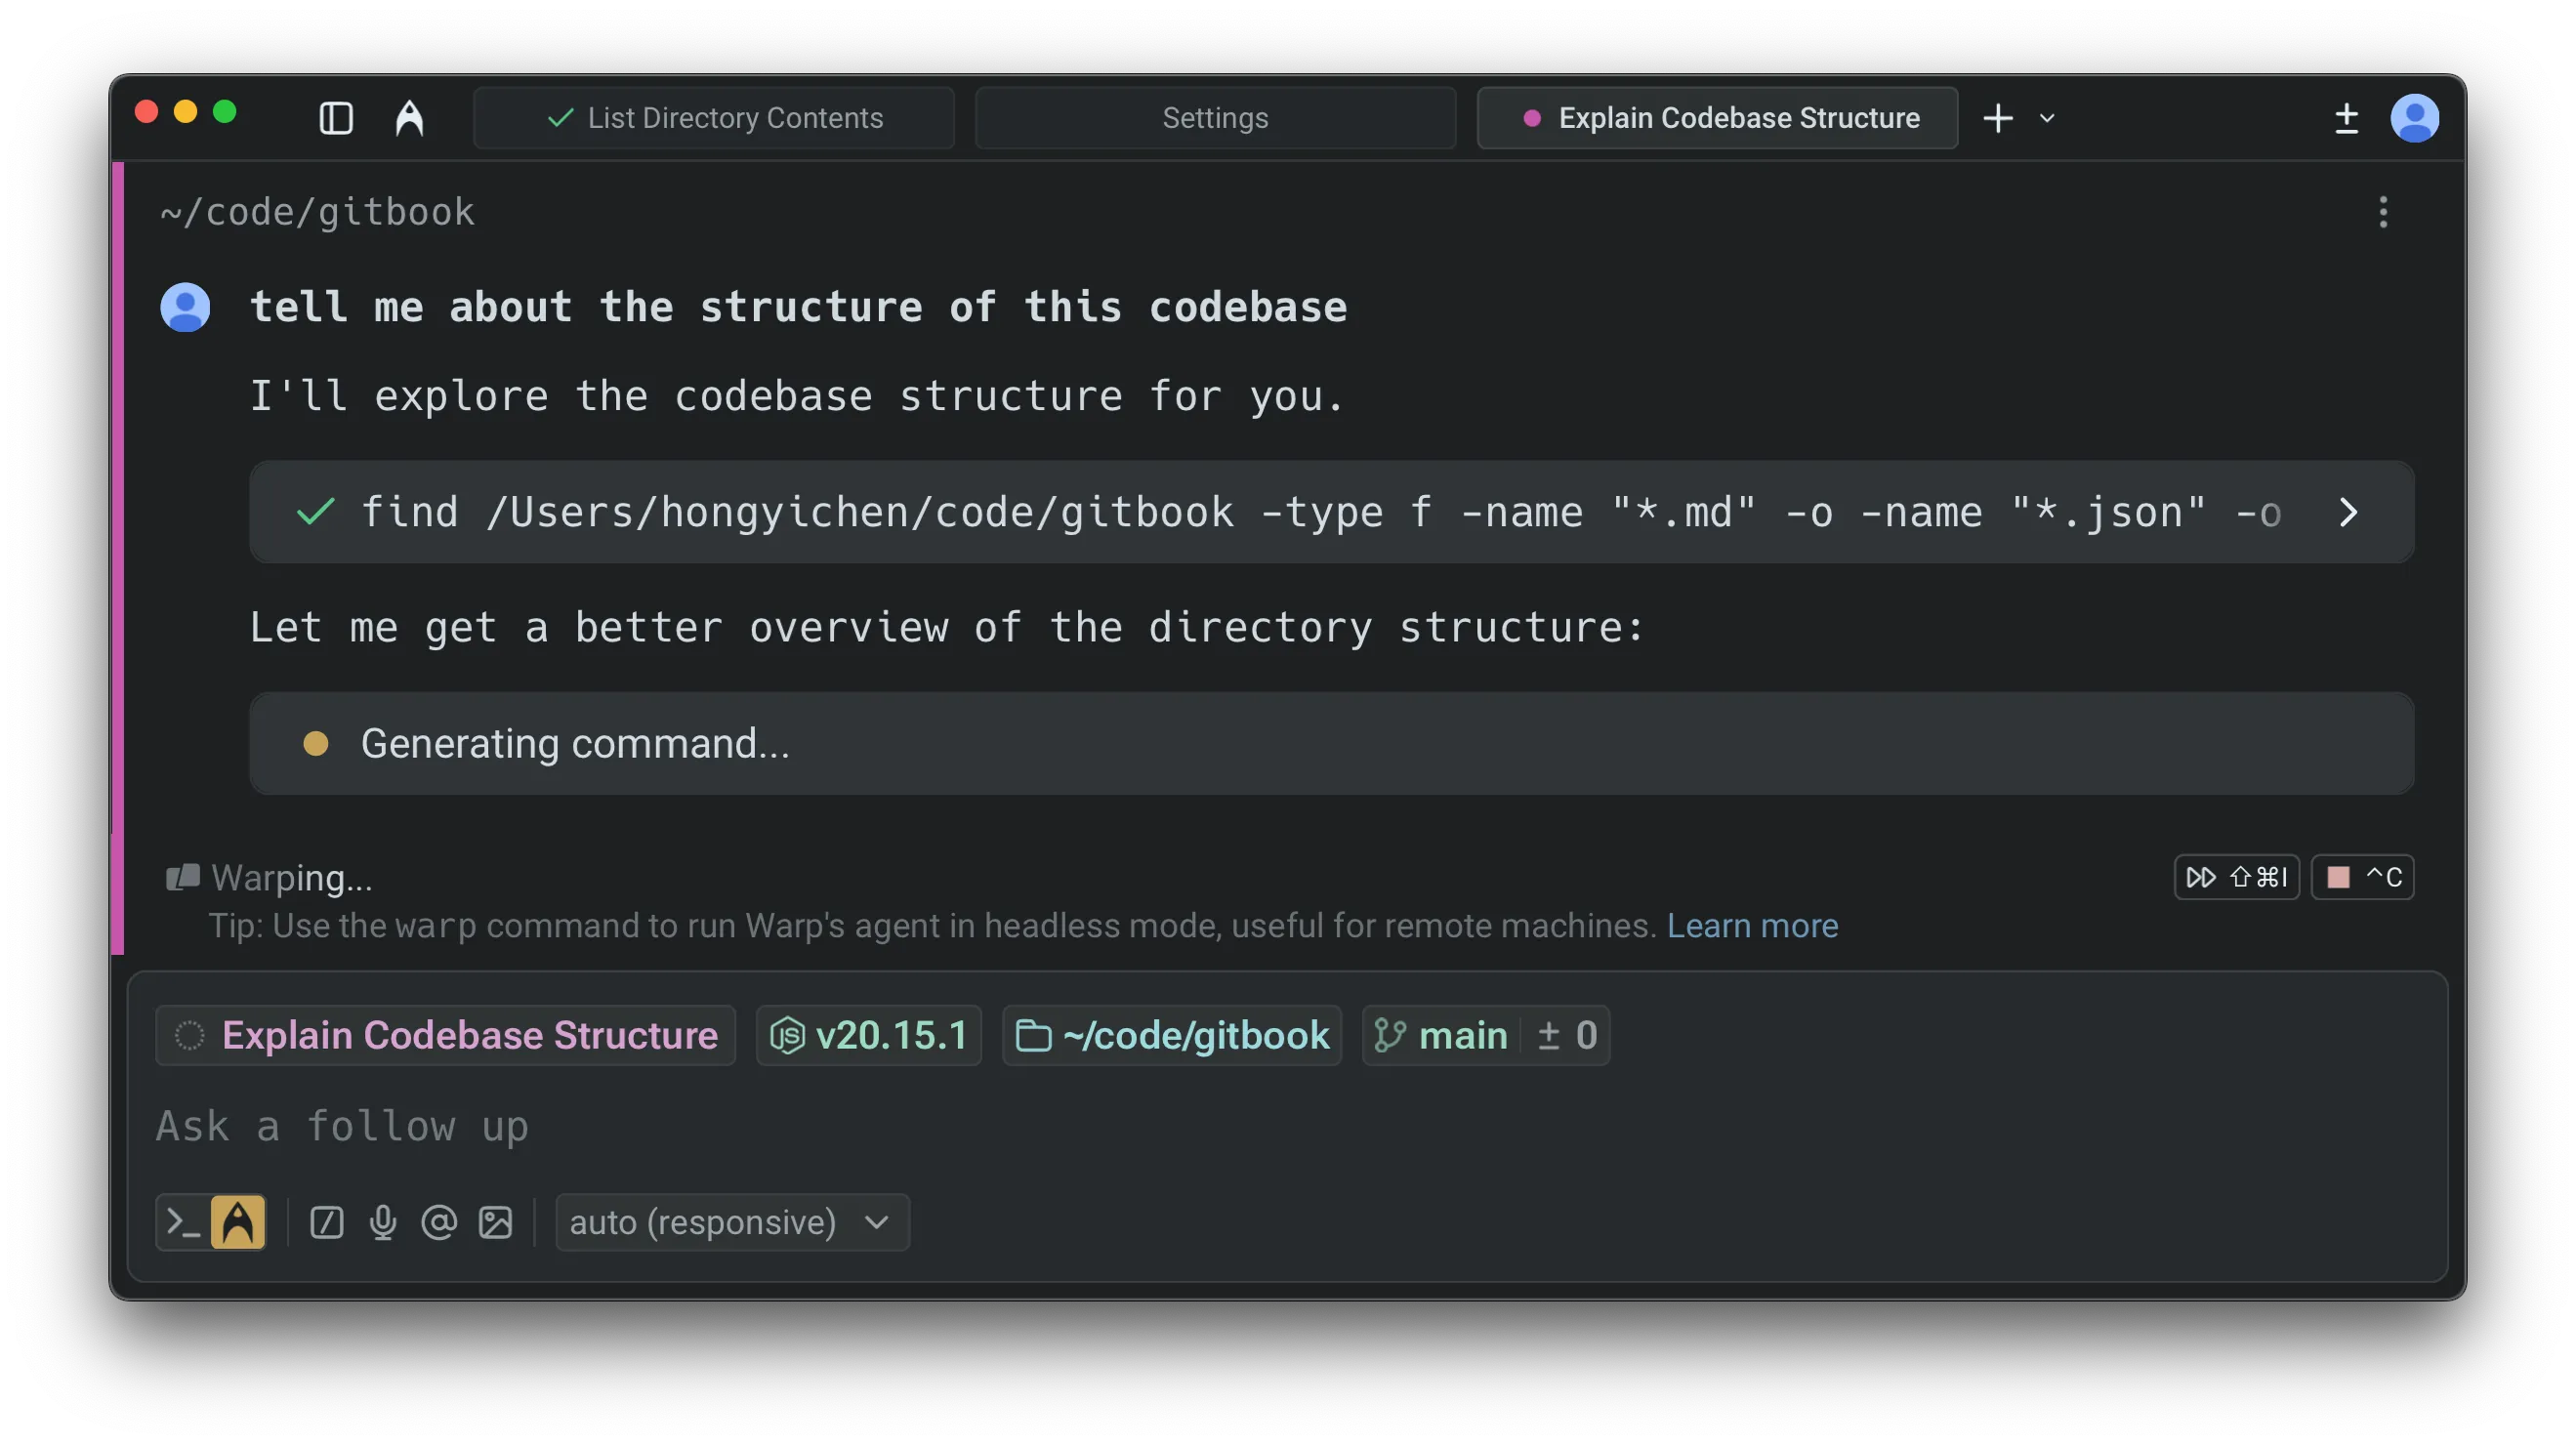 You can enable or disable these tips in two places: * **Settings**: **Settings** > **Agents** > **Warp Agent** > **Input** > **Show agent tips** * **Command Palette**: Open the Command Palette (`⌘+P` on macOS, `Ctrl+Shift+P` on Windows/Linux), then select “**Show Agent Tips**” or “**Hide Agent Tips**” ### Managing conversations [Section titled “Managing conversations”](#managing-conversations) You can view previous conversations or start a new conversation via the **Conversations Menu** (`⌘+Y` on macOS, `Ctrl+Shift+Y` on Windows/Linux). [Agent interaction controls walkthrough](https://www.loom.com/embed/9cc2451412be43e389a6b1414ea185e4) ### Starting a new conversation [Section titled “Starting a new conversation”](#starting-a-new-conversation) Warp automatically creates a new conversation in a few situations. For example, if you ask an AI query after running a shell command or if three hours pass without activity, Agent Mode will start a fresh conversation. Starting a new conversation opens a fresh conversation view. Use the conversation panel to see all active and past conversations. * macOS You can also start a new conversation manually at any time: * Press `⌘+Enter` to start a new conversation, or use the `/new` slash command. * Open the **Conversations Menu** using `⌘+Y` and select “New Conversation”. * Windows You can also start a new conversation manually at any time: * Press `Ctrl+Shift+Enter` to start a new conversation, or use the `/new` slash command. * Open the **Conversations Menu** using `Ctrl+Shift+Y` and select “New Conversation”. * Linux You can also start a new conversation manually at any time: * Press `Ctrl+Shift+Enter` to start a new conversation, or use the `/new` slash command. * Open the **Conversations Menu** using `Ctrl+Shift+Y` and select “New Conversation”. ## Context window management [Section titled “Context window management”](#context-window-management) Every conversation with an agent consumes tokens stored in a **context window**. The context window (sometimes called *context length*) is the amount of text (measured in tokens) that a large language model (LLM) can process at one time. **The size of the context window depends on the model you are using.** As tokens accumulate and exceed the context window, performance and response quality may degrade. If the context window is exceeded, the model may lose track of earlier parts of the conversation, and **Warp will automatically summarize the conversation to free up space**. ### Warp provides a **context window usage indicator** to help you track this: [Section titled “Warp provides a context window usage indicator to help you track this:”](#warp-provides-a-context-window-usage-indicator-to-help-you-track-this) When less than 20% of the window is used, no indicator is shown. As more tokens accumulate, the usage bar progresses to reflect how much of the context window has been consumed.   As you approach the limit, the indicator turns red to warn that the context window is nearly full.  Once the limit is exceeded, Warp automatically summarizes the conversation so you can continue without losing important context.  The context window usage indicator is available in agent conversation views. ### Context window usage breakdown [Section titled “Context window usage breakdown”](#context-window-usage-breakdown) To see what is filling the context window, open the conversation usage card and click **View breakdown** in the **Context window used** row. The row expands into a per-segment breakdown, with each segment’s share of the window shown as a percentage: * **System Prompt** - Warp’s instructions to the model, including your [rules](/agents/capabilities/rules/). * **Tool Definitions** - Descriptions of the tools available to the agent, including any [MCP servers](/agents/capabilities/mcp/). * **Conversation History** - Previous queries, responses, and tool results in the conversation. * **Latest Input** - Your most recent query and the context attached to it. * **Images** - Any [images](/agents/local-agents/agent-context/images-as-context/) attached to the conversation. * **Other** - Everything not covered by the segments above. Use the breakdown to decide what to trim: a large **Conversation History** segment is a good signal to start a new conversation or summarize, while a large **Tool Definitions** segment suggests turning off MCP servers you aren’t using. ## Conversation segmentation [Section titled “Conversation segmentation”](#conversation-segmentation) Warp automatically detects when your query has shifted to a new topic. When this happens, it suggests starting a new conversation instead of continuing in the same context. These options appear in the block list, where you can decide whether to branch off into a new conversation or keep going with the current one. 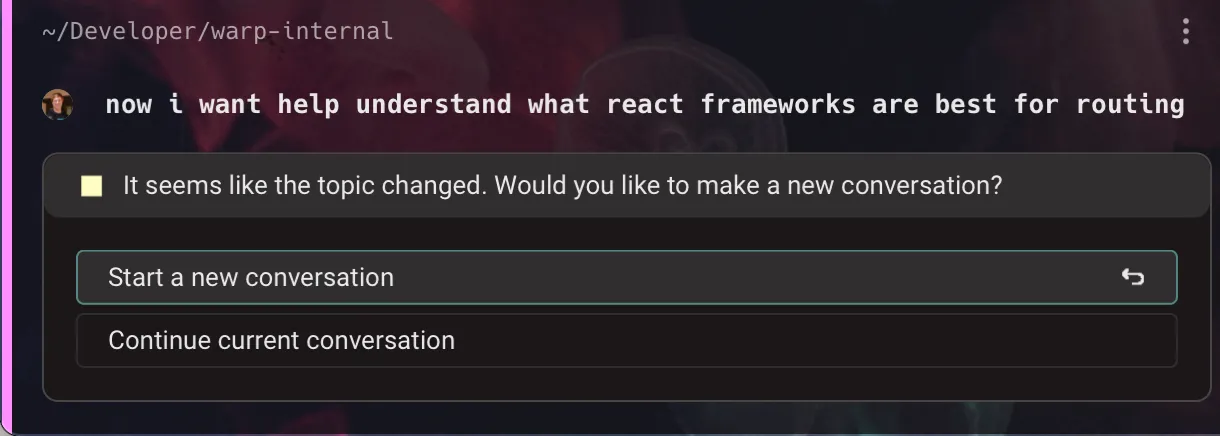 You can also create a new conversation manually at any time by using the keyboard shortcut, opening a new tab, or opening a new pane. * macOS * Start a new conversation: `⌘+Shift+N` * Open a new tab: `⌘+T` * Open a new pane: `⌘+D` * Windows * Start a new conversation: `Ctrl+Shift+N` * Open a new tab: `Ctrl+Shift+T` * Open a new pane: `Ctrl+Shift+D` * Linux * Start a new conversation: `Ctrl+Shift+N` * Open a new tab: `Ctrl+Shift+T` * Open a new pane: `Ctrl+Shift+D` ## Conversation Panel [Section titled “Conversation Panel”](#conversation-panel) The **Conversation Panel** on the left side of the window is the home for browsing and switching between agent conversations. It’s designed to make multi-threaded work obvious: you can see what’s active, what you ran recently, and jump back into any thread without guessing where your context went. 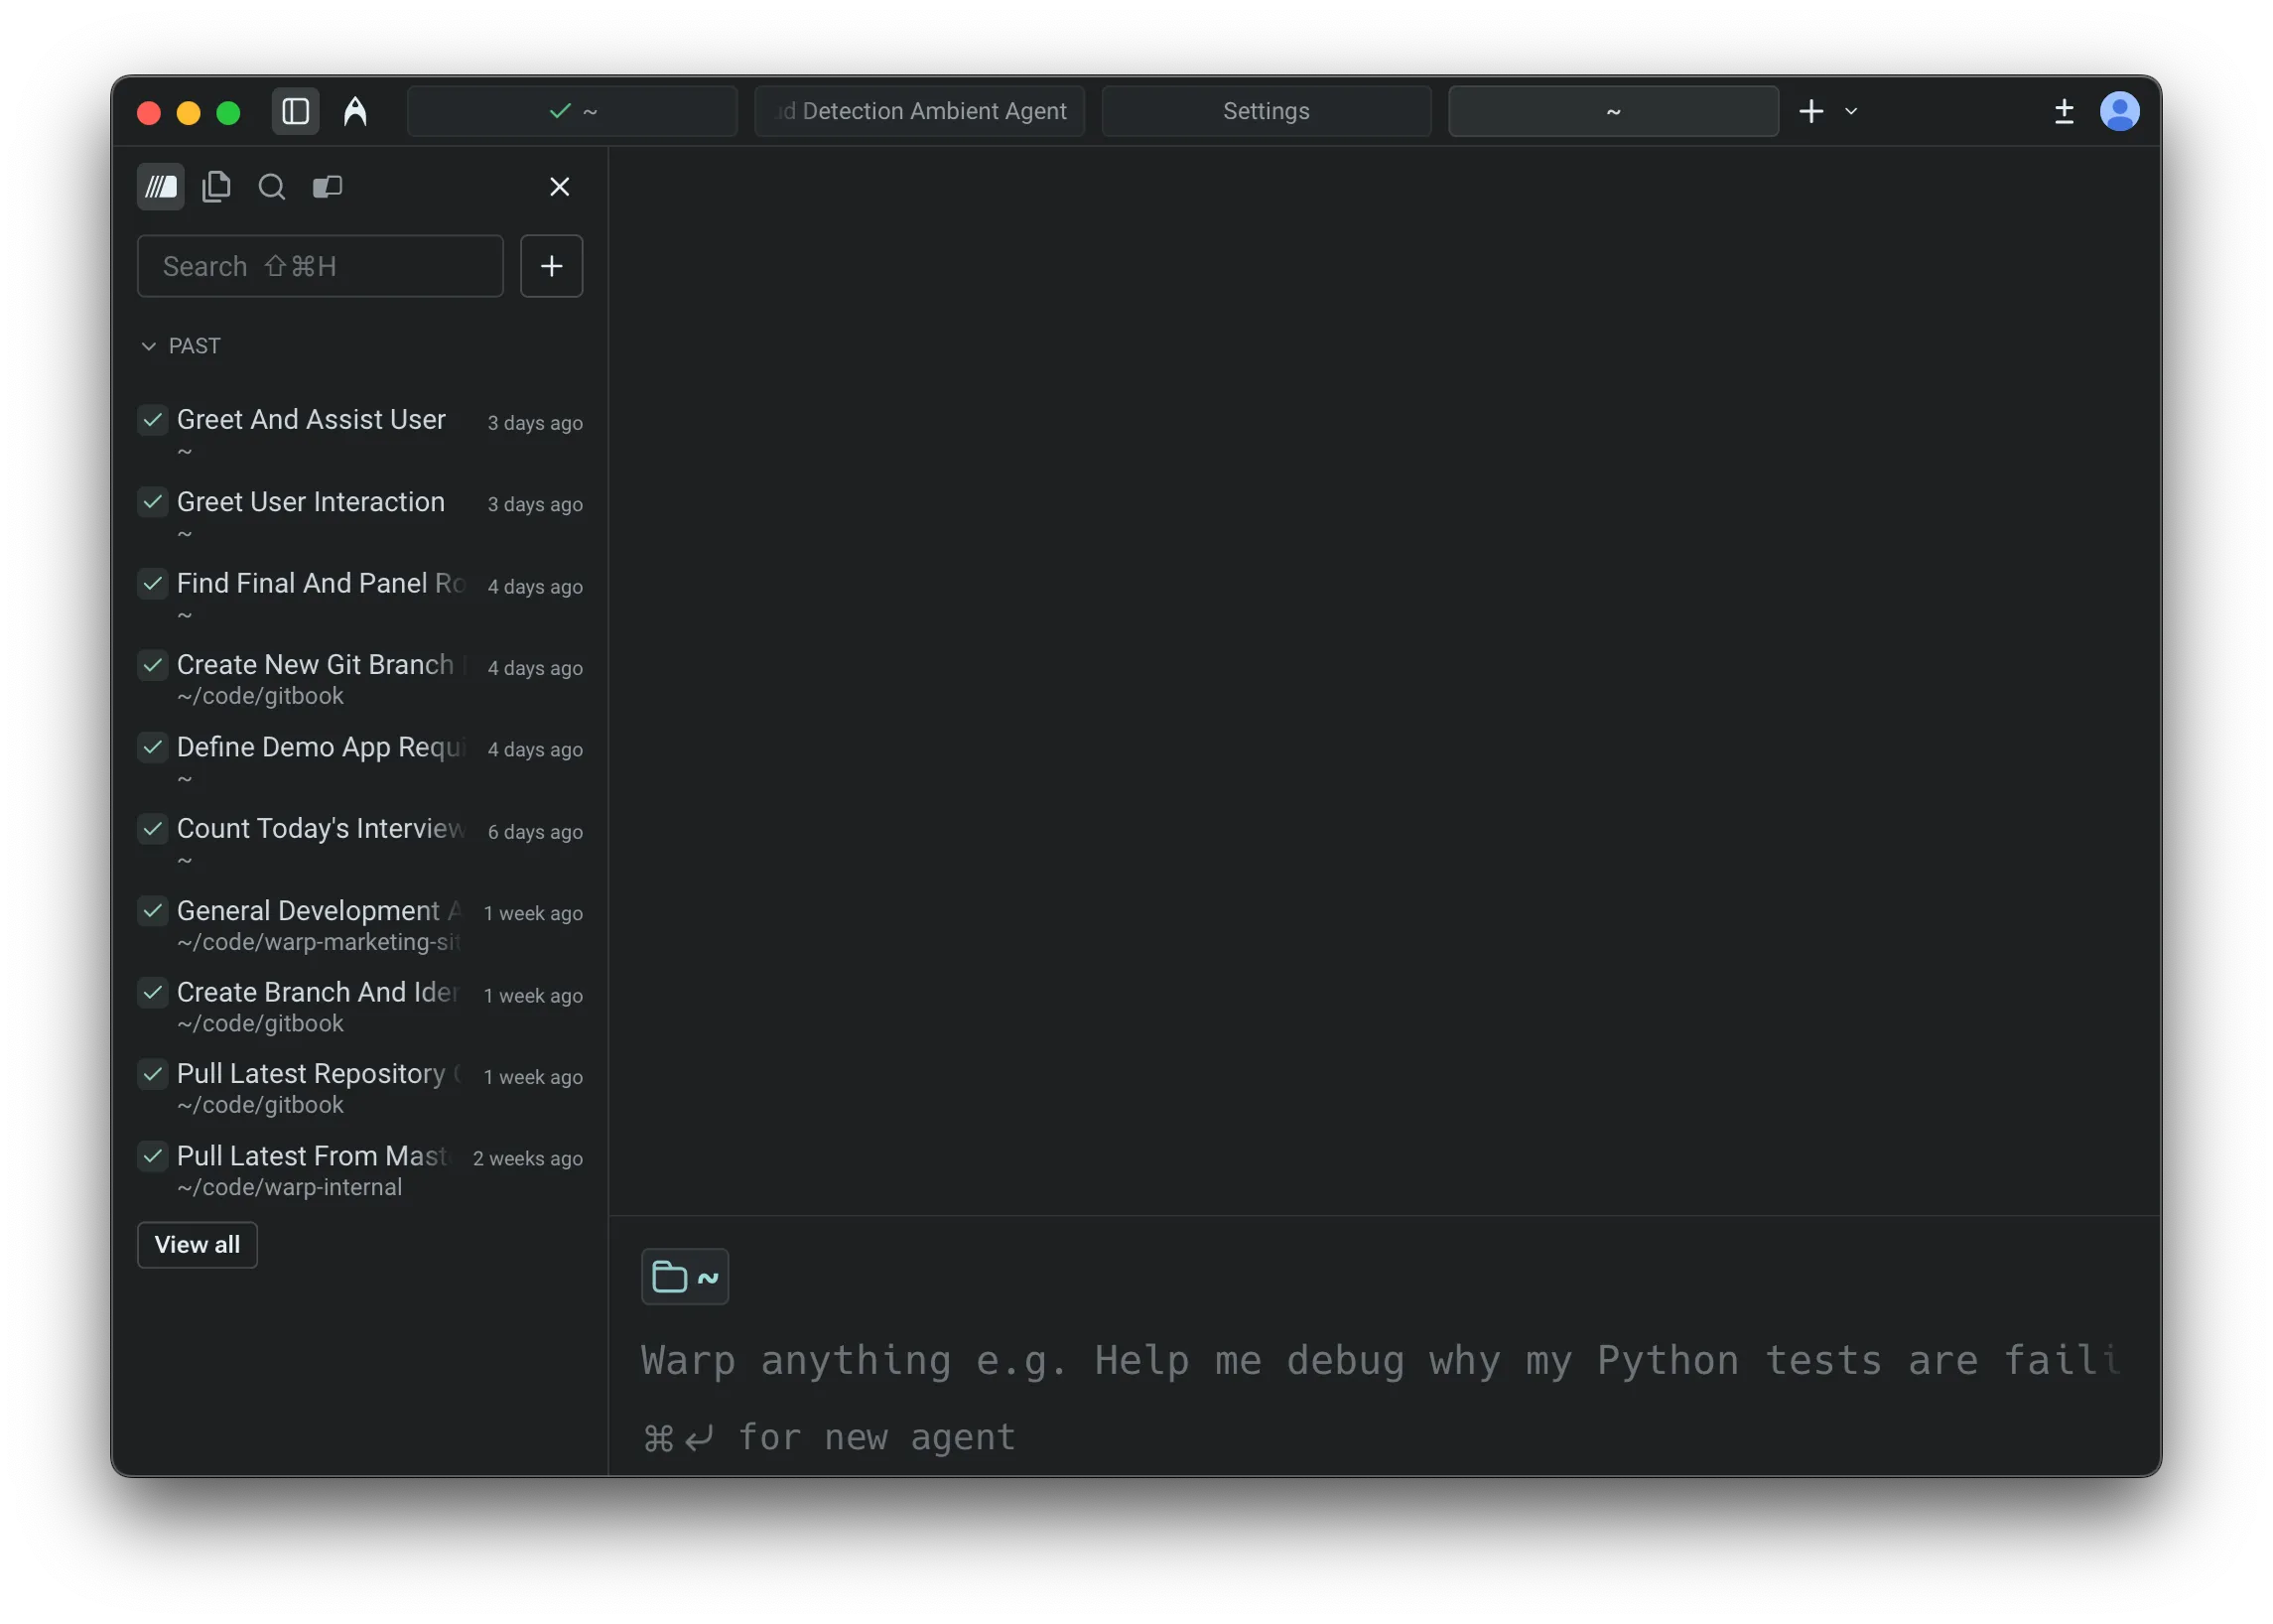 ### Panel layout [Section titled “Panel layout”](#panel-layout) The conversation panel is split into two dropdowns (collapsible sections) that help you navigate between conversations: #### Active [Section titled “Active”](#active) The **Active** dropdown lists conversations where you have sent at least one query since opening them. Simply expanding a conversation does not make it active—you need to interact with the Agent first. * Select a conversation to switch to it immediately. * The conversation you’re currently viewing is highlighted. * Cloud agent conversations and runs always appear in **Active** while they are open. #### Past [Section titled “Past”](#past) The **Past** dropdown lists your recent conversation history. Each row typically shows: * Conversation title * When it happened (for example, “8 min ago”, “3 days ago”) * Working directory (when relevant) Use **Past** to restore a previous conversation. When you select a past conversation, Warp reopens it in a new tab or your active pane, letting you continue where you left off. ### Conversation storage [Section titled “Conversation storage”](#conversation-storage) By default, your agent conversations are stored locally on your machine. You can optionally enable **cloud-synced conversations** to: * Access your conversation history across different devices * Share conversations with teammates * Retain conversations when you log out or switch machines For full details on enabling cloud sync, sharing conversations, and accessing cloud agent conversations, see [Cloud-synced Conversations](/agents/local-agents/cloud-conversations/). ### Search [Section titled “Search”](#search) Use the search field at the top of the conversation panel to quickly find your conversation. * Type to filter conversations by title (and, in some builds, by directory/context). * Useful when you have many threads and want to jump directly to one. ### New conversation [Section titled “New conversation”](#new-conversation) Click the **New conversation** button at the bottom of the **Active** conversation list to start a new conversation. Starting a new conversation creates a fresh thread in the **Active** dropdown, without deleting or overwriting your previous ones. ### Navigation behavior [Section titled “Navigation behavior”](#navigation-behavior) Navigation between [Terminal and Agent modes](/agents/local-agents/interacting-with-agents/terminal-and-agent-modes/) is designed to be direct: * **Clicking an active conversation** - Takes you directly to that conversation view. * **Clicking a past conversation** - Opens the conversation in a **new pane**, preserving your current context. * **Command Palette** - Open the Command Palette and type `conversations:` to filter and navigate directly to any conversation. * **`⌘Y` conversation selector** - Opens a dedicated menu showing your existing and past conversations. This works in both terminal view and agent view. * **Up-arrow history** - Shows both past shell commands and past prompts you’ve sent in recent conversations. The behavior differs by context: * **In terminal view** - Shows both past shell commands and recent conversations. * **In agent view** - Shows past prompts you’ve sent in conversations. *** ### Ways to move around [Section titled “Ways to move around”](#ways-to-move-around) Use `esc` or the back button to return to terminal mode, `⌘Y` to open the conversation selector, or `⌘↩` to start a new conversation. For a complete list of keyboard shortcuts and slash commands, see [Terminal and Agent modes - Keyboard shortcuts](/agents/local-agents/interacting-with-agents/terminal-and-agent-modes/#keyboard-shortcuts-quick-reference). ### Exit confirmation for in-progress conversations [Section titled “Exit confirmation for in-progress conversations”](#exit-confirmation-for-in-progress-conversations) Exiting a conversation that is still in progress will **cancel** the agent’s current work. To prevent accidental cancellations, Warp shows a confirmation hint: * **First exit attempt** - The hint changes to “Press again to exit” (or similar). * **Confirmation window** - You have about 2 seconds to press `esc` or `^C` again to confirm. * **After confirmation** - Warp exits the conversation and cancels the in-progress request. This confirmation step ensures you don’t accidentally lose work when the agent is mid-task.
# Agent questions
Canonical page: [/agents/local-agents/interacting-with-agents/agent-questions/](https://docs.warp.dev/agents/local-agents/interacting-with-agents/agent-questions/)
> Learn how Warp's Agent asks questions for clarification, how to answer or skip them, and how to interact with them when the Agent asks.
Agent questions let Warp’s Agent pause to ask for your input when it needs a decision before continuing. Instead of guessing, the Agent presents a few options in an **Agent questions** card right inside the conversation and waits for your answer. ## Key features [Section titled “Key features”](#key-features) * **Multiple-choice questions** - The Agent presents options for you to choose from instead of asking a freeform question. * **Single-select and multi-select answers** - Some questions accept one answer, while others let you select all options that apply. * **Other answers** - When the Agent enables an **Other** option, you can type your own answer and submit it from the card. * **Multiple questions** - A single card can contain multiple questions, with navigation controls for moving between them. * **Skip support** - You can skip questions. The Agent receives the skipped state and continues with its best judgment. * **Permission controls** - Agent Profiles include an **Ask questions** permission that controls whether the Agent pauses for your answer. ## How it works [Section titled “How it works”](#how-it-works) When the Agent needs a decision from you before it can continue confidently, it pauses and shows an **Agent questions** card in the conversation instead of guessing. Each question comes with a set list of options. Questions can accept single or multiple answers. The Agent can flag a recommended option, or let you add your own answer under **Other**. When you answer or skip a question, Warp passes that back to the Agent so it can keep going with your response in mind. The Agent saves questions for moments when it genuinely can’t move forward safely or accurately on its own. If you skip a question, Warp sends the skipped state to the Agent so it can continue with the context it already has. ## Answering Agent questions [Section titled “Answering Agent questions”](#answering-agent-questions) When an **Agent questions** card appears, choose the option or options that best match your intent. 1. Select one or more options in the card. Options are numbered, so press the matching number key (`1`, `2`, `3`, and so on) or click an option to select it. Multi-select questions show “select all that apply” next to the question text. 2. If available, click **Other** or press its number key to enter your own answer, then press `Enter`. 3. Click **Next** or press `Enter` to continue. For a single-select question, Warp automatically advances to the next question after you choose an option. 4. When a card contains more than one question, press `←` to revisit the previous question or `→` to move to the next one. A question counter and **prev** / **next** controls appear at the bottom of the card. 5. To skip the remaining questions, click **Skip all** or press `Ctrl+C`. After you answer or skip the questions, Warp summarizes the result in the conversation. You can expand the completed card to review the answers that were sent to the Agent. ## Controlling when the Agent asks questions [Section titled “Controlling when the Agent asks questions”](#controlling-when-the-agent-asks-questions) The **Ask questions** permission is part of each Agent Profile. To change it, open the Warp app and go to **Settings** > **Agents** > **Profiles** > **Permissions**, then edit the active profile. The available settings are: * **Never ask** - The Agent does not pause for clarifying questions. Warp skips the question and the Agent continues with its best judgment. * **Ask unless auto-approve** - The Agent can pause for your answer during normal conversations, but Warp skips questions while auto-approve is on. * **Always ask** - The Agent can pause for your answer even when auto-approve is on. Auto-approve is designed for unattended execution. If you want the Agent to keep running without pausing for clarifying questions, use **Ask unless auto-approve** or **Never ask**. ## Related pages [Section titled “Related pages”](#related-pages) * [Terminal and Agent modes](/agents/local-agents/interacting-with-agents/terminal-and-agent-modes/) - Start and navigate Agent conversations in Warp. * [Profiles & permissions](/agents/capabilities/agent-profiles-permissions/) - Configure Agent Profile permissions and autonomy settings. * [Agent notifications](/agents/capabilities/agent-notifications/) - Learn how Warp notifies you when an Agent needs your input.
# Conversation Forking
Canonical page: [/agents/local-agents/interacting-with-agents/conversation-forking/](https://docs.warp.dev/agents/local-agents/interacting-with-agents/conversation-forking/)
> Branch into a new agent thread with full context to explore alternatives without altering the original conversation.
Warp allows you to **fork conversations** to create a new thread that inherits all of the context, messages, and history from an existing conversation. This is useful when you want to branch off in a new direction without affecting the original conversation. [Forking a conversation from a previous point video](https://www.loom.com/embed/15164f2abc19437ebefb47a8c6b52eb8) ### How conversation forking works [Section titled “How conversation forking works”](#how-conversation-forking-works) * When you fork a conversation, the new thread starts with the same context and history as the original. * Any follow-ups in the forked conversation do **not** impact the original. Likewise, continuing in the original conversation does not change the fork. * Forked conversations behave just like any other conversation: you can move them into new windows, panes, or tabs. * Your selected model and execution profile are preserved in the forked conversation. *Example*: You can fork a conversation to explore an alternate solution, ask “what if” questions, or continue down two separate paths in parallel. ### How to fork a conversation [Section titled “How to fork a conversation”](#how-to-fork-a-conversation) There are five ways to fork an existing conversation: #### 1. From the Command Palette [Section titled “1. From the Command Palette”](#1-from-the-command-palette) Open the menu using the Command Palette (`⌘+Y` on macOS / `Ctrl+Shift+Y` on Windows/Linux). Select **Fork current conversation** to fork your current conversation, or fork a specific conversation from open conversations. 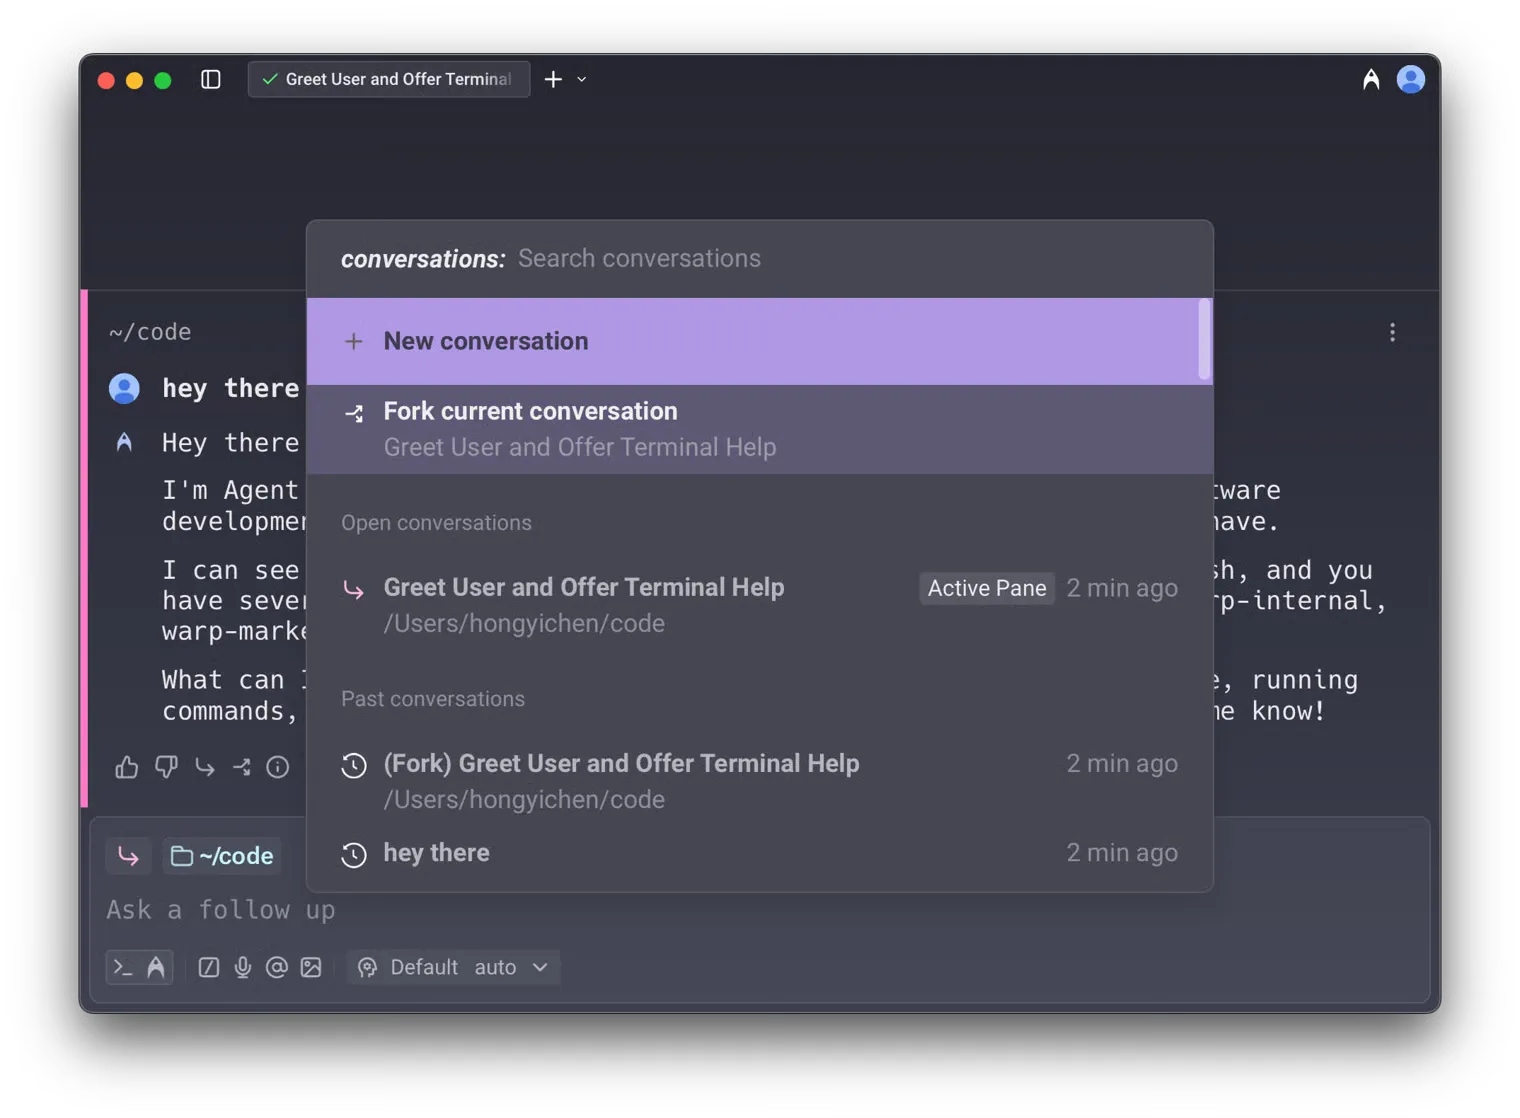 In addition, when you hover over any open conversation in the Command Palette, you’ll see a **fork button**. This lets you fork not only active conversations, but also inactive and historical ones. 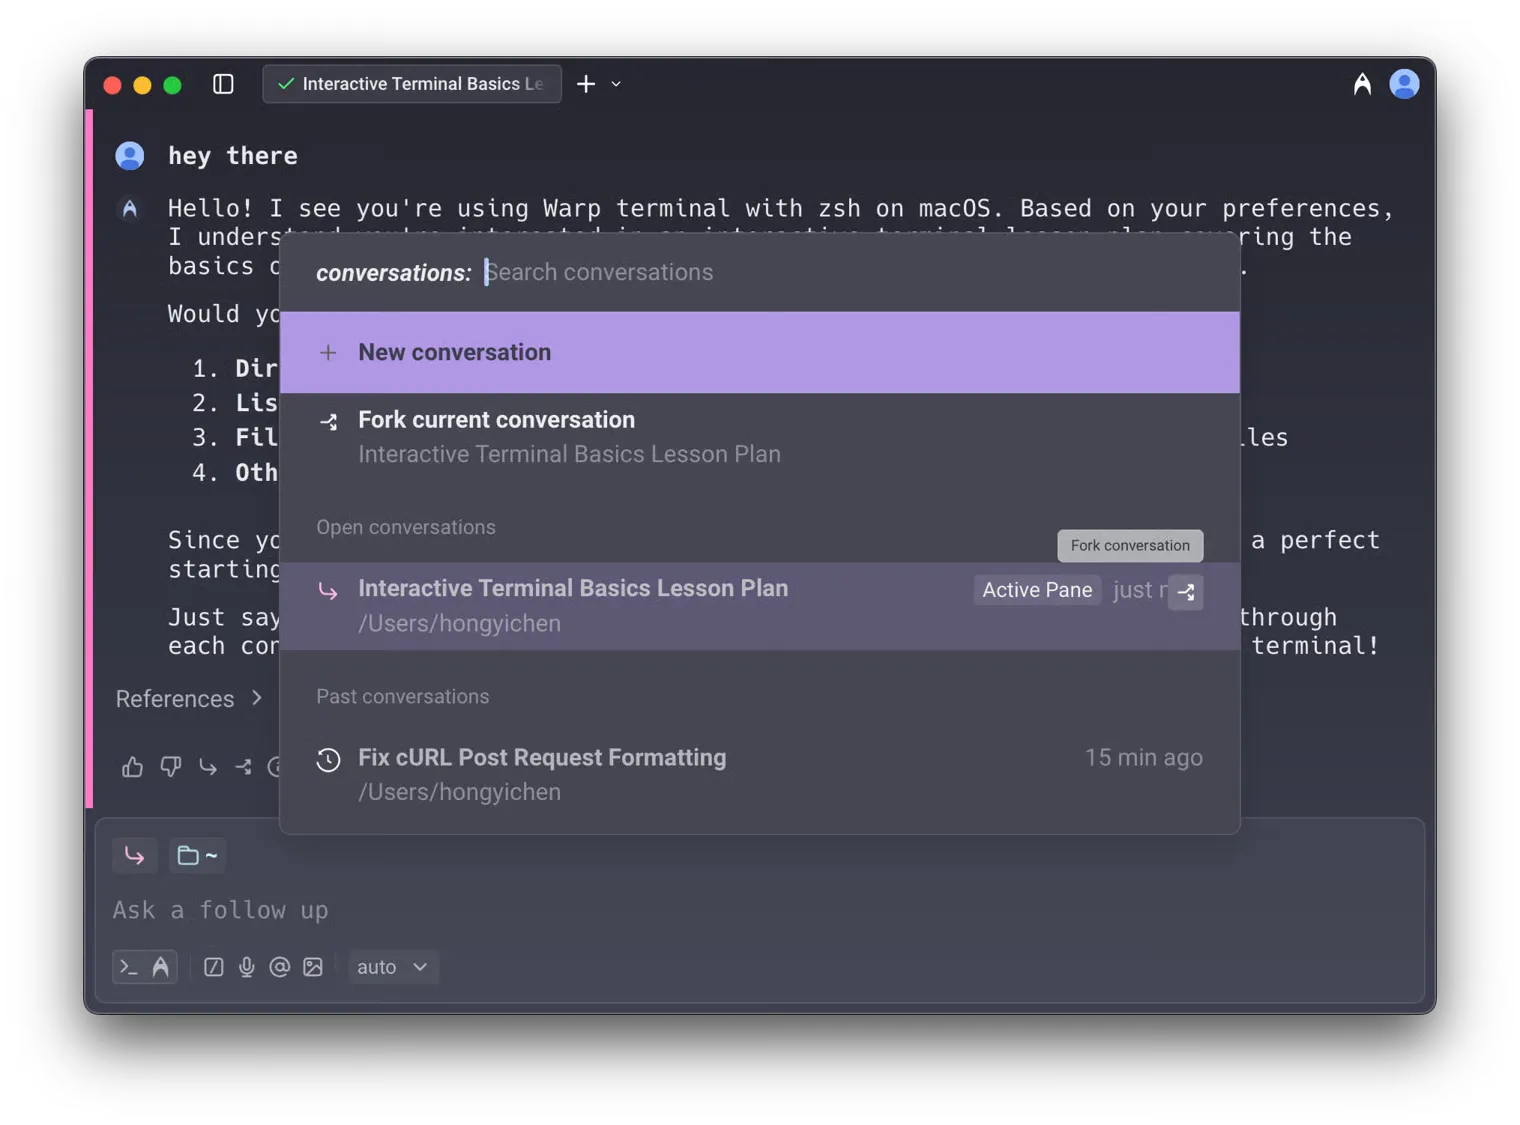 You can also access this conversation view from the conversation chip in the current conversation. 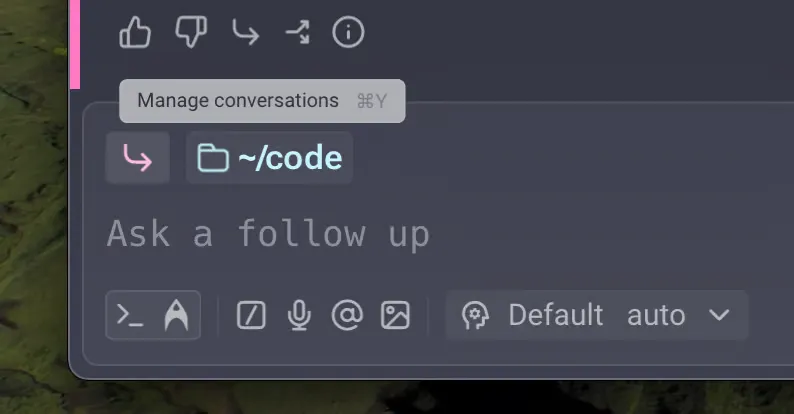 #### 2. From the footer of the most recent AI response block [Section titled “2. From the footer of the most recent AI response block”](#2-from-the-footer-of-the-most-recent-ai-response-block) In any conversation in the block list, click the **fork button** in the footer of the most recent AI block. A new conversation opens in a separate pane with the full context of the original. 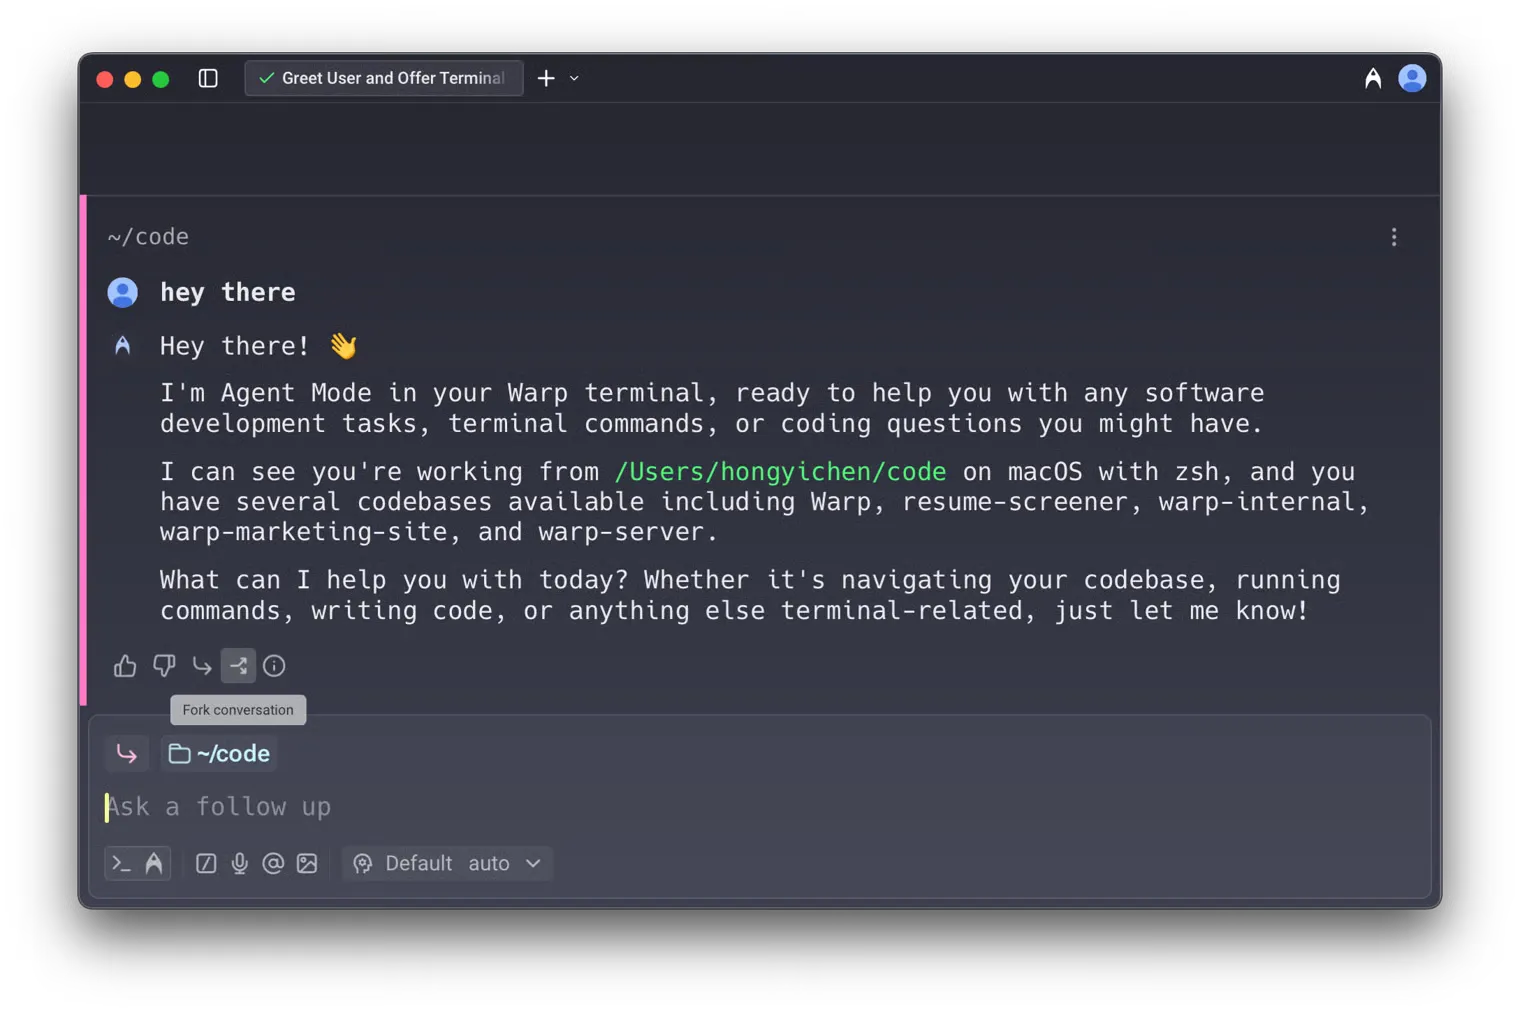 #### 3. Using the `/fork` slash command [Section titled “3. Using the /fork slash command”](#3-using-the-fork-slash-command) Type `/fork` in the input to fork the current conversation. You can optionally include a prompt after the command, and Warp will send that prompt in the newly forked conversation. * Press `Enter` to open the fork in a new pane (default) * Press `⌘+Enter` (macOS) or `Ctrl+Enter` (Windows/Linux) to open the fork in the current pane *Example*: `/fork Can you try a different approach?` Forks the selected conversation and immediately sends `Can you try a different approach?` in the forked conversation. #### 4. Using the `/fork-and-compact` slash command [Section titled “4. Using the /fork-and-compact slash command”](#4-using-the-fork-and-compact-slash-command) Type `/fork-and-compact` to fork the current conversation and automatically compact the forked version. This combines forking with [context window management](/agents/local-agents/interacting-with-agents/#context-window-management), giving you a fresh start with a summarized context. * Press `Enter` to open the fork in a new pane (default) * Press `⌘+Enter` (macOS) or `Ctrl+Enter` (Windows/Linux) to open the fork in the current pane 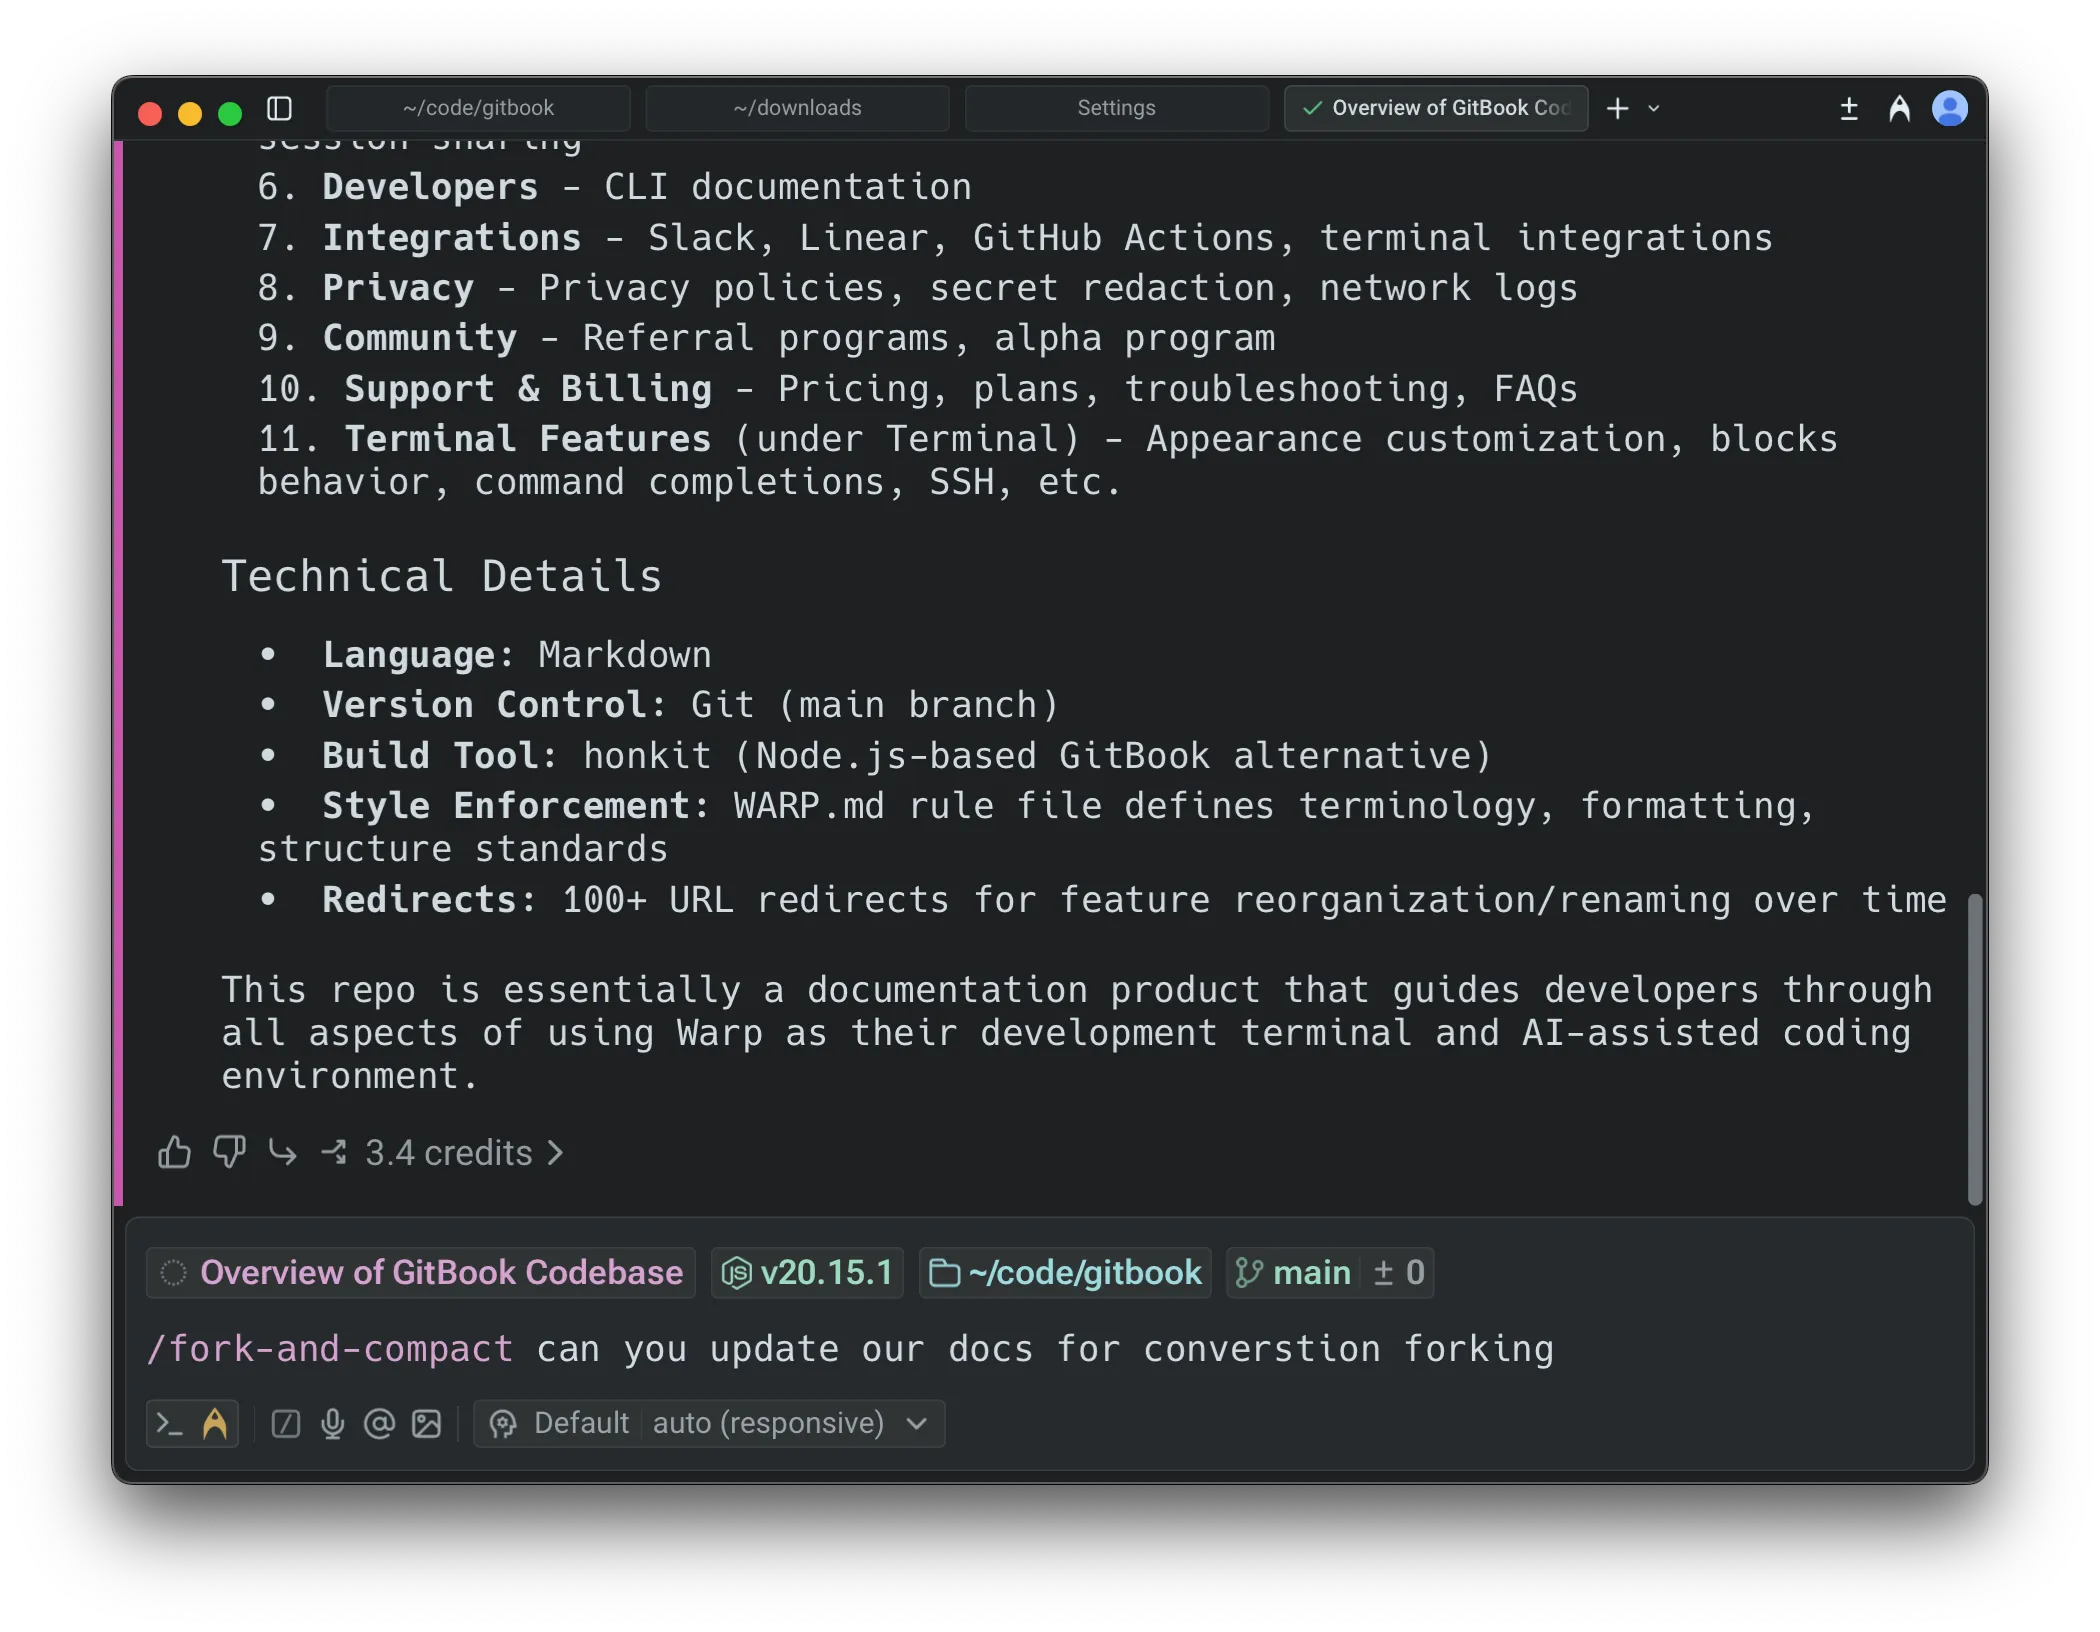 #### 5. Using the `/fork-from` slash command [Section titled “5. Using the /fork-from slash command”](#5-using-the-fork-from-slash-command) Type `/fork-from` to open a searchable menu of all queries in the current conversation. Select a query to fork the conversation from that specific point—everything up to and including that exchange is included in the fork, but subsequent messages are excluded. This is a more discoverable alternative to right-clicking on an agent response block. ### Fork from anywhere in a conversation [Section titled “Fork from anywhere in a conversation”](#fork-from-anywhere-in-a-conversation) In addition to forking from the end of a conversation, you can fork from any point in the conversation history. This lets you return to an earlier agent response and branch off in a new direction from there. 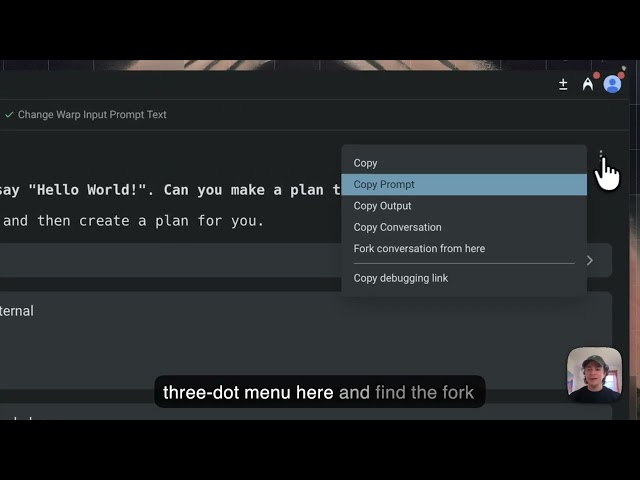 To fork from a specific point, **right-click** on any agent response block or click the three-dot menu in the top-right corner of the block. * Select **Fork conversation from here** to create a new conversation that includes everything up to and including that response, but excludes any queries or responses that came after it. **This is particularly useful for:** * **Exploring alternate paths** - Go back to a point where the conversation was on track and try a different approach. * **Managing your context window** - If a conversation has grown too long, fork from an earlier point to continue with only the relevant context. * **Preventing context pollution** - When a conversation has accumulated errors or gone off track, fork from before those issues occurred to start fresh. ### Settings [Section titled “Settings”](#settings) You can configure the default layout for forked conversations in **Settings** > **Features** > **Open forked conversation layout**: * **Split Pane** (default): Opens the forked conversation in a new pane alongside your current view. * **New Tab**: Opens the forked conversation in a new tab. This setting controls the default behavior when forking via the Command Palette, AI block footer button, or slash commands (when pressing `Enter`). ### Using forked conversations [Section titled “Using forked conversations”](#using-forked-conversations) * Once forked, you can continue prompting as if you were still in the original conversation. The original conversation remains unchanged, allowing you to reference or continue both in parallel. * For example, after forking you can ask *“Could you explain more?”* and Warp responds using the inherited context. **Forking is especially useful when:** * You want to explore different approaches without losing the original thread. * You need to keep one conversation “clean” while experimenting in another. * You want to reuse context or specific blocks from older conversations.
# Prompt queueing
Canonical page: [/agents/local-agents/interacting-with-agents/prompt-queueing/](https://docs.warp.dev/agents/local-agents/interacting-with-agents/prompt-queueing/)
> Queue follow-up prompts while an agent is still responding, then have Warp send them automatically and in order as each response finishes.
Prompt queueing lets you line up follow-up prompts while an agent is still working. Instead of waiting for the agent to finish—or interrupting it to send your next idea—you queue prompts and Warp sends them automatically, one at a time, as each response completes. 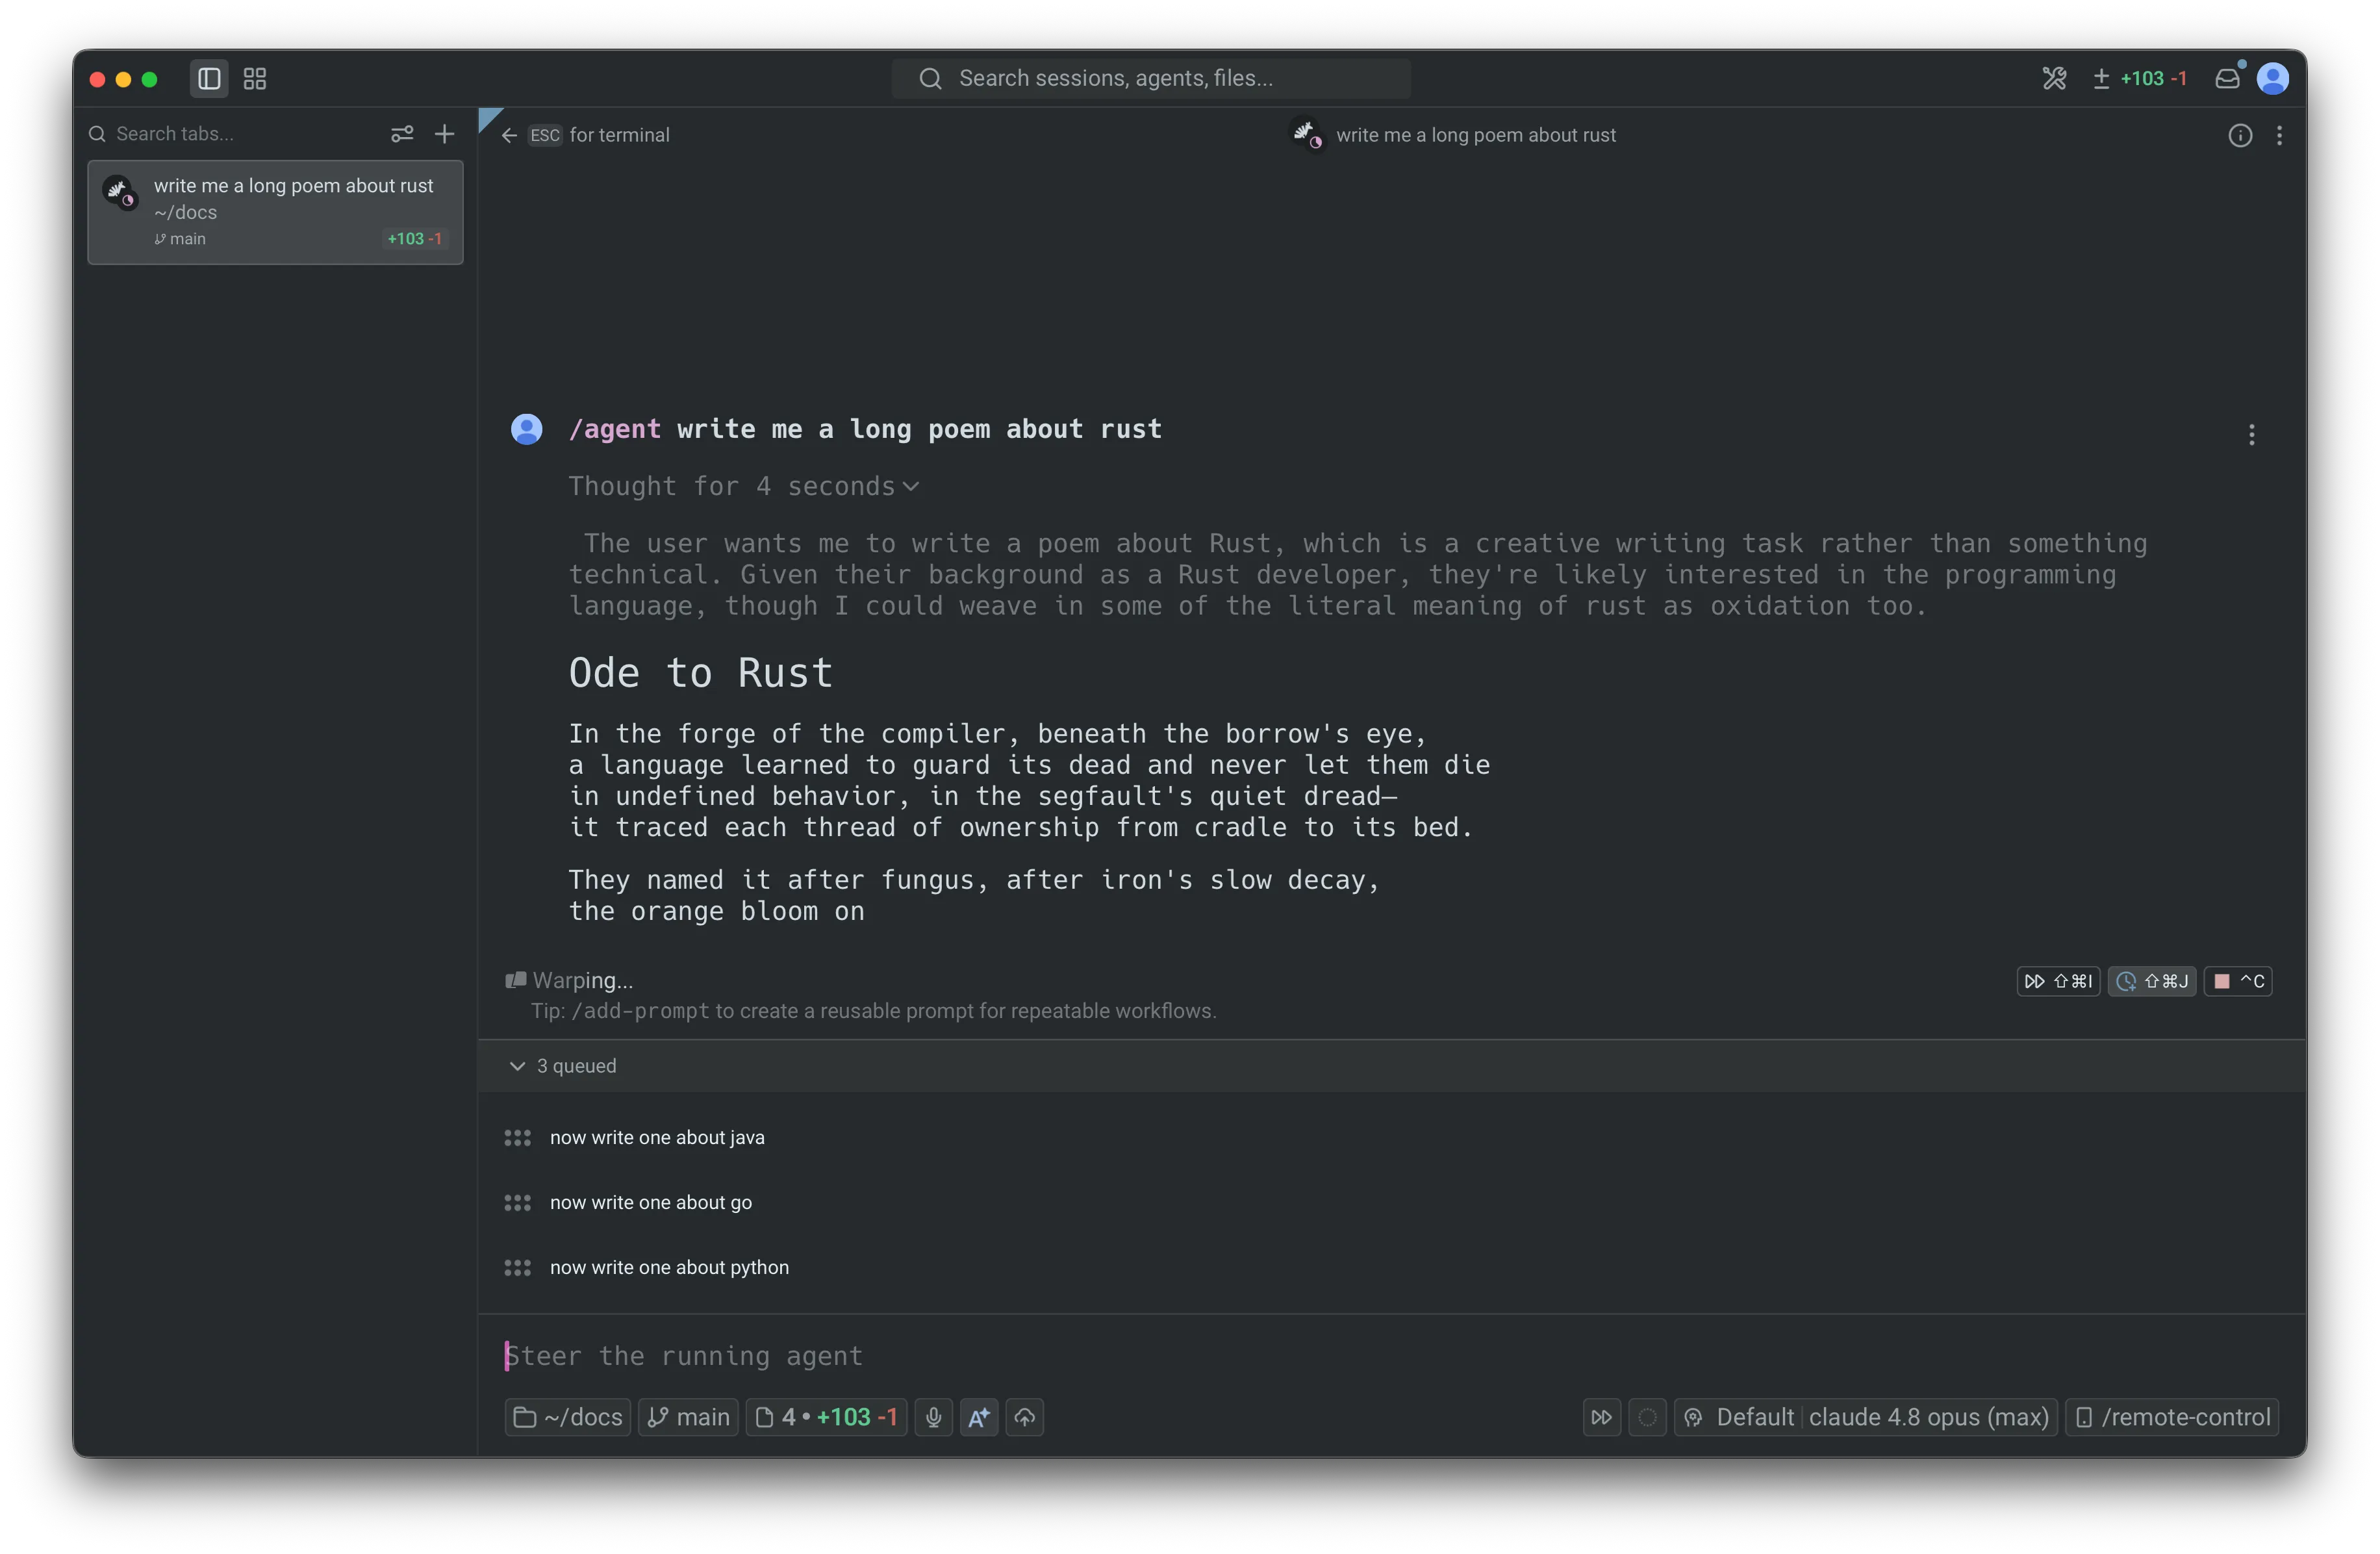 The queued prompts panel, with three prompts queued while the agent responds. ## Key features [Section titled “Key features”](#key-features) * **Auto-queue toggle** - Turn on auto-queue so every prompt you submit while the agent is busy joins the queue instead of interrupting the current response. * **`/queue` slash command** - Queue a single follow-up prompt inline, without switching modes. * **Queued prompts panel** - View, reorder, edit, and remove every pending prompt from one collapsible panel above the input. * **Automatic sequential sending** - Queued prompts fire one at a time as the agent finishes each response, in the order you set. * **Send the next prompt with Enter** - When the input is empty, press `Enter` to send the top queued row immediately. * **Auto-queue during long-running commands** - By default, prompts submitted while an agent is driving a long-running command it started are queued and sent when the command finishes. * **Per-conversation queues** - Each conversation keeps its own queue and auto-queue state, which persist when you leave and re-enter the conversation. * **Cloud agent support** - Queue follow-ups for cloud agents, even while the environment is still setting up. ## How it works [Section titled “How it works”](#how-it-works) Each agent conversation has its own queue. When the current response finishes successfully, Warp sends the next prompt in the queue. This continues one prompt at a time until the queue is empty. Queued prompts use the same submission flow as prompts you send manually, so slash commands, skills, and other input behave the same way. A few things to know: * **Shell commands are never queued.** If you submit in shell mode, Warp runs the command in the terminal immediately, regardless of your auto-queue setting. The exception is while an agent is driving a long-running command. See [Queueing during long-running commands](#queueing-during-long-running-commands). * **Queues don’t persist across restarts.** A conversation’s queue is cleared when the conversation is deleted or cleared, and queues do not persist after an app restart. * **One prompt is in flight at a time.** Warp waits for the current response to finish before sending the next queued prompt. ## Queueing a prompt [Section titled “Queueing a prompt”](#queueing-a-prompt) There are three ways to queue prompts yourself. The auto-queue toggle and `/queue` act on the active conversation; the default submission mode setting controls what happens app-wide. Warp also queues prompts automatically while an agent is driving a long-running command. See [Queueing during long-running commands](#queueing-during-long-running-commands). ### Auto-queue toggle [Section titled “Auto-queue toggle”](#auto-queue-toggle) The auto-queue toggle is the fastest way to queue several prompts in a row. While the agent is responding, a clock-plus icon appears in the warping indicator (the status bar above the input). 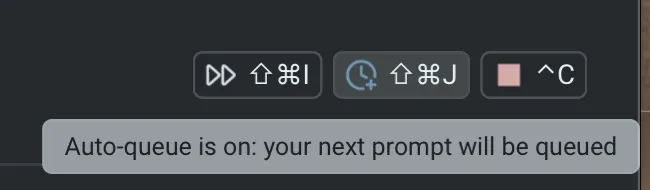 The auto-queue toggle in the warping indicator. 1. Click the clock-plus icon, or press `⌘+Shift+J` (macOS) or `Ctrl+Shift+J` (Windows/Linux). The icon turns the accent color to show auto-queue is on. 2. Type a prompt and press `Enter`. Because the conversation is in progress, the prompt is added to the queue instead of interrupting the current response. The input refocuses so you can keep queuing. The toggle is per-conversation and stays on across responses until you turn it off, so you can queue as many prompts as you like. Switching to another conversation shows that conversation’s own toggle state. ### `/queue` slash command [Section titled “/queue slash command”](#queue-slash-command) Use `/queue` to add one follow-up prompt without turning on auto-queue. 1. In an agent conversation, type `/queue` followed by the prompt—for example, `/queue run the tests and fix any failures`. 2. Press `Enter`. The prompt is added to the queue and the input clears. `/queue` requires an active conversation and a prompt. If you run `/queue` without a prompt, Warp shows an error. Note: If the agent is idle, `/queue` sends the prompt immediately. It only queues prompts while a response is in progress. ### Set the default submission mode [Section titled “Set the default submission mode”](#set-the-default-submission-mode) By default, submitting a prompt while the agent is responding interrupts the current response and sends your new prompt right away. You can change this default so new conversations queue instead. 1. In the Warp app, go to **Settings** > **Agents** > **Warp Agent** > **Input**. 2. For **Default prompt submission mode**, choose one of: * **Interrupt response** - Cancel the in-flight response and send the new prompt immediately (the default). * **Queue until response finishes** - Hold the new prompt until the current response finishes, then send it. This setting is the default for conversations that you haven’t explicitly toggled. The per-conversation auto-queue toggle always overrides it for that conversation. When **Interrupt response** is selected, a second dropdown, **Default long-running command submission mode**, appears directly below it. It controls what happens while an agent is driving a long-running command. See [Queueing during long-running commands](#queueing-during-long-running-commands). 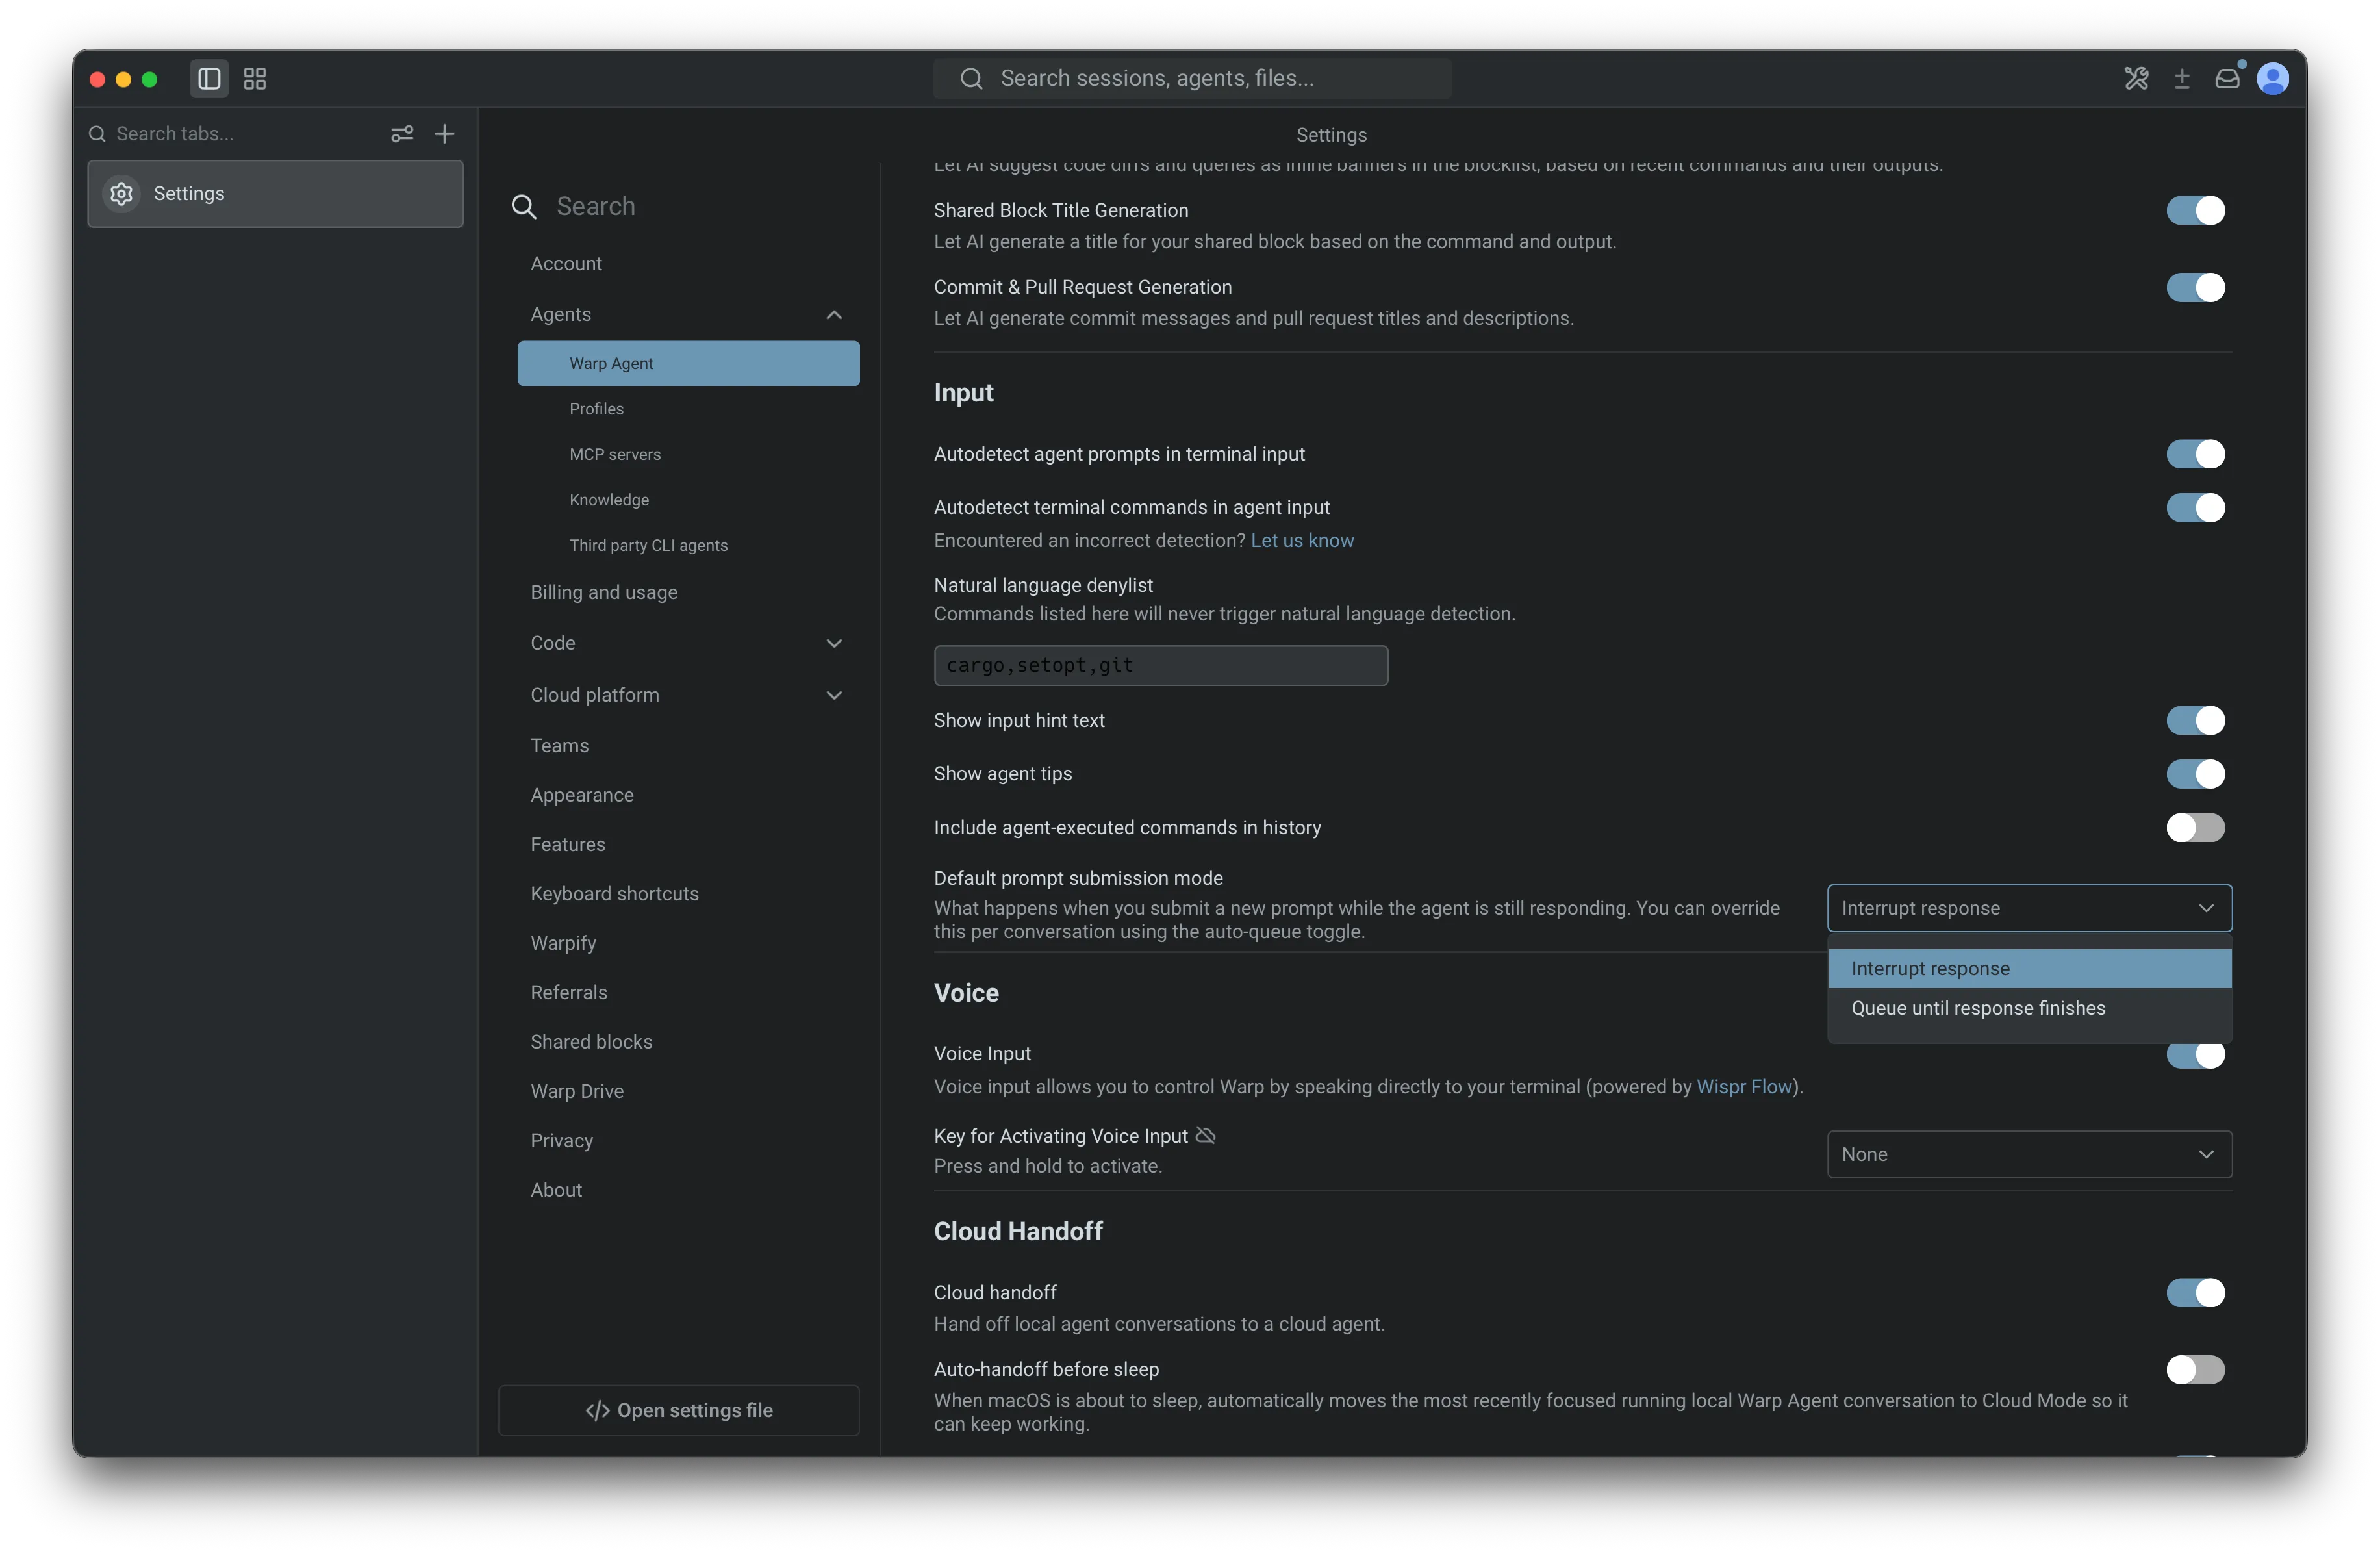 The Default prompt submission mode setting under Agent input settings. ## Queueing during long-running commands [Section titled “Queueing during long-running commands”](#queueing-during-long-running-commands) When an agent is driving a long-running command it started (a dev server, REPL, database shell, or other interactive program it launched through [Full Terminal Use](/agents/capabilities/full-terminal-use/)), prompts you submit are queued by default instead of steering the agent mid-command. Warp sends them to the agent automatically when the command finishes. This auto-queueing applies only to commands the agent started; if you start a command yourself and tag the agent in, your prompts keep steering the agent immediately. While the agent is in control of the command (including while it’s blocked waiting for an approval): * **Prompts queue instead of interrupting.** Submitting a prompt adds it to the conversation’s queue and clears the input so you can keep typing. These rows show an italic *(queued until the command finishes)* suffix after the prompt text, indicating they fire when the command ends rather than when the full response finishes. * **Suffixed prompts send when the command finishes.** When the command finishes, Warp sends the suffixed prompts at the front of the queue, in order, even if you manually took over the command first. A suffixed prompt sends this way only while it stays at the front: if you reorder a prompt queued another way ahead of it, that suffixed prompt waits and sends later under the normal end-of-response rules. Prompts queued in other ways (`/queue`, the auto-queue toggle, or the queue default mode) always follow those normal rules. * **Shell commands queue as regular commands.** Shell commands you submit during a long-running command are queued without the suffix and run in the terminal as usual; they are not sent to the agent when the command ends. * **The UI reflects the queue state.** The auto-queue toggle in the warping indicator appears in its active, accent-colored state, and the empty input’s ghost text shows the queue hint instead of the steer hint. * **All queue interactions still work.** You can reorder, edit, delete, use send now, or press `Enter` on an empty input to send the top row early. This queueing is per-conversation and derived from the running command rather than a sticky toggle: when the command ends or control transfers back to you, the conversation reverts to whatever queue state it had before the command (its own toggle state, or the app-wide default). It applies only while the agent is in control of the command, not while you are. To steer the agent mid-command instead, turn the auto-queue toggle off: click the clock-plus icon, or press `⌘+Shift+J` (macOS) or `Ctrl+Shift+J` (Windows/Linux). Prompts then send immediately for the remainder of that command only; the override doesn’t change the conversation’s persistent toggle state, and the next command the agent starts auto-queues again. Toggling it back on re-enables queueing for the rest of the command. ### Change the long-running command submission mode [Section titled “Change the long-running command submission mode”](#change-the-long-running-command-submission-mode) You can change this behavior app-wide: 1. In the Warp app, go to **Settings** > **Agents** > **Warp Agent** > **Input**. 2. For **Default long-running command submission mode**, choose one of: * **Queue until command finishes** - Queue prompts submitted while an agent is driving a long-running command it started, and send them to the agent when the command finishes (the default). * **Send immediately** - Send the prompt to the agent right away, steering it mid-command. The dropdown appears directly below **Default prompt submission mode**, and only when that setting is **Interrupt response**. When the default prompt submission mode is **Queue until response finishes**, this setting is hidden and ignored, because prompts already queue until the entire response finishes. Changing the setting takes effect immediately, including in the middle of a running command. You can also change it from the Command Palette using **Set long-running command submission: send immediately** or **Set long-running command submission: queue until command finishes**, which are available while the default prompt submission mode is **Interrupt response**. ## Managing queued prompts [Section titled “Managing queued prompts”](#managing-queued-prompts) When a conversation has at least one queued prompt, the queued prompts panel appears between the warping indicator and the input box. Its header shows the count, such as **2 queued**, with a chevron to collapse or expand the list. The panel is expanded by default, and prompts are listed from top (next to send) to bottom (last to send). Hovering a row reveals controls for that prompt: * **Reorder** - Drag a row up or down by its handle to change the order. The row at the top of the list always sends next. * **Send now** - Click the up-arrow icon to send that prompt immediately instead of waiting for the agent to finish the current response. You can also press `Enter` while the input box is empty to send the top row. See [Send the next prompt with Enter](#send-the-next-prompt-with-enter) below. * **Edit** - Click the pencil icon to edit the prompt inline. Press `Enter` to save your changes or `Esc` to cancel. * **Delete** - Click the trash icon to remove the prompt from the queue. If the input is empty, Warp moves the deleted prompt into the input so you can revise and resend it. If the input already has text, the deleted prompt is discarded. 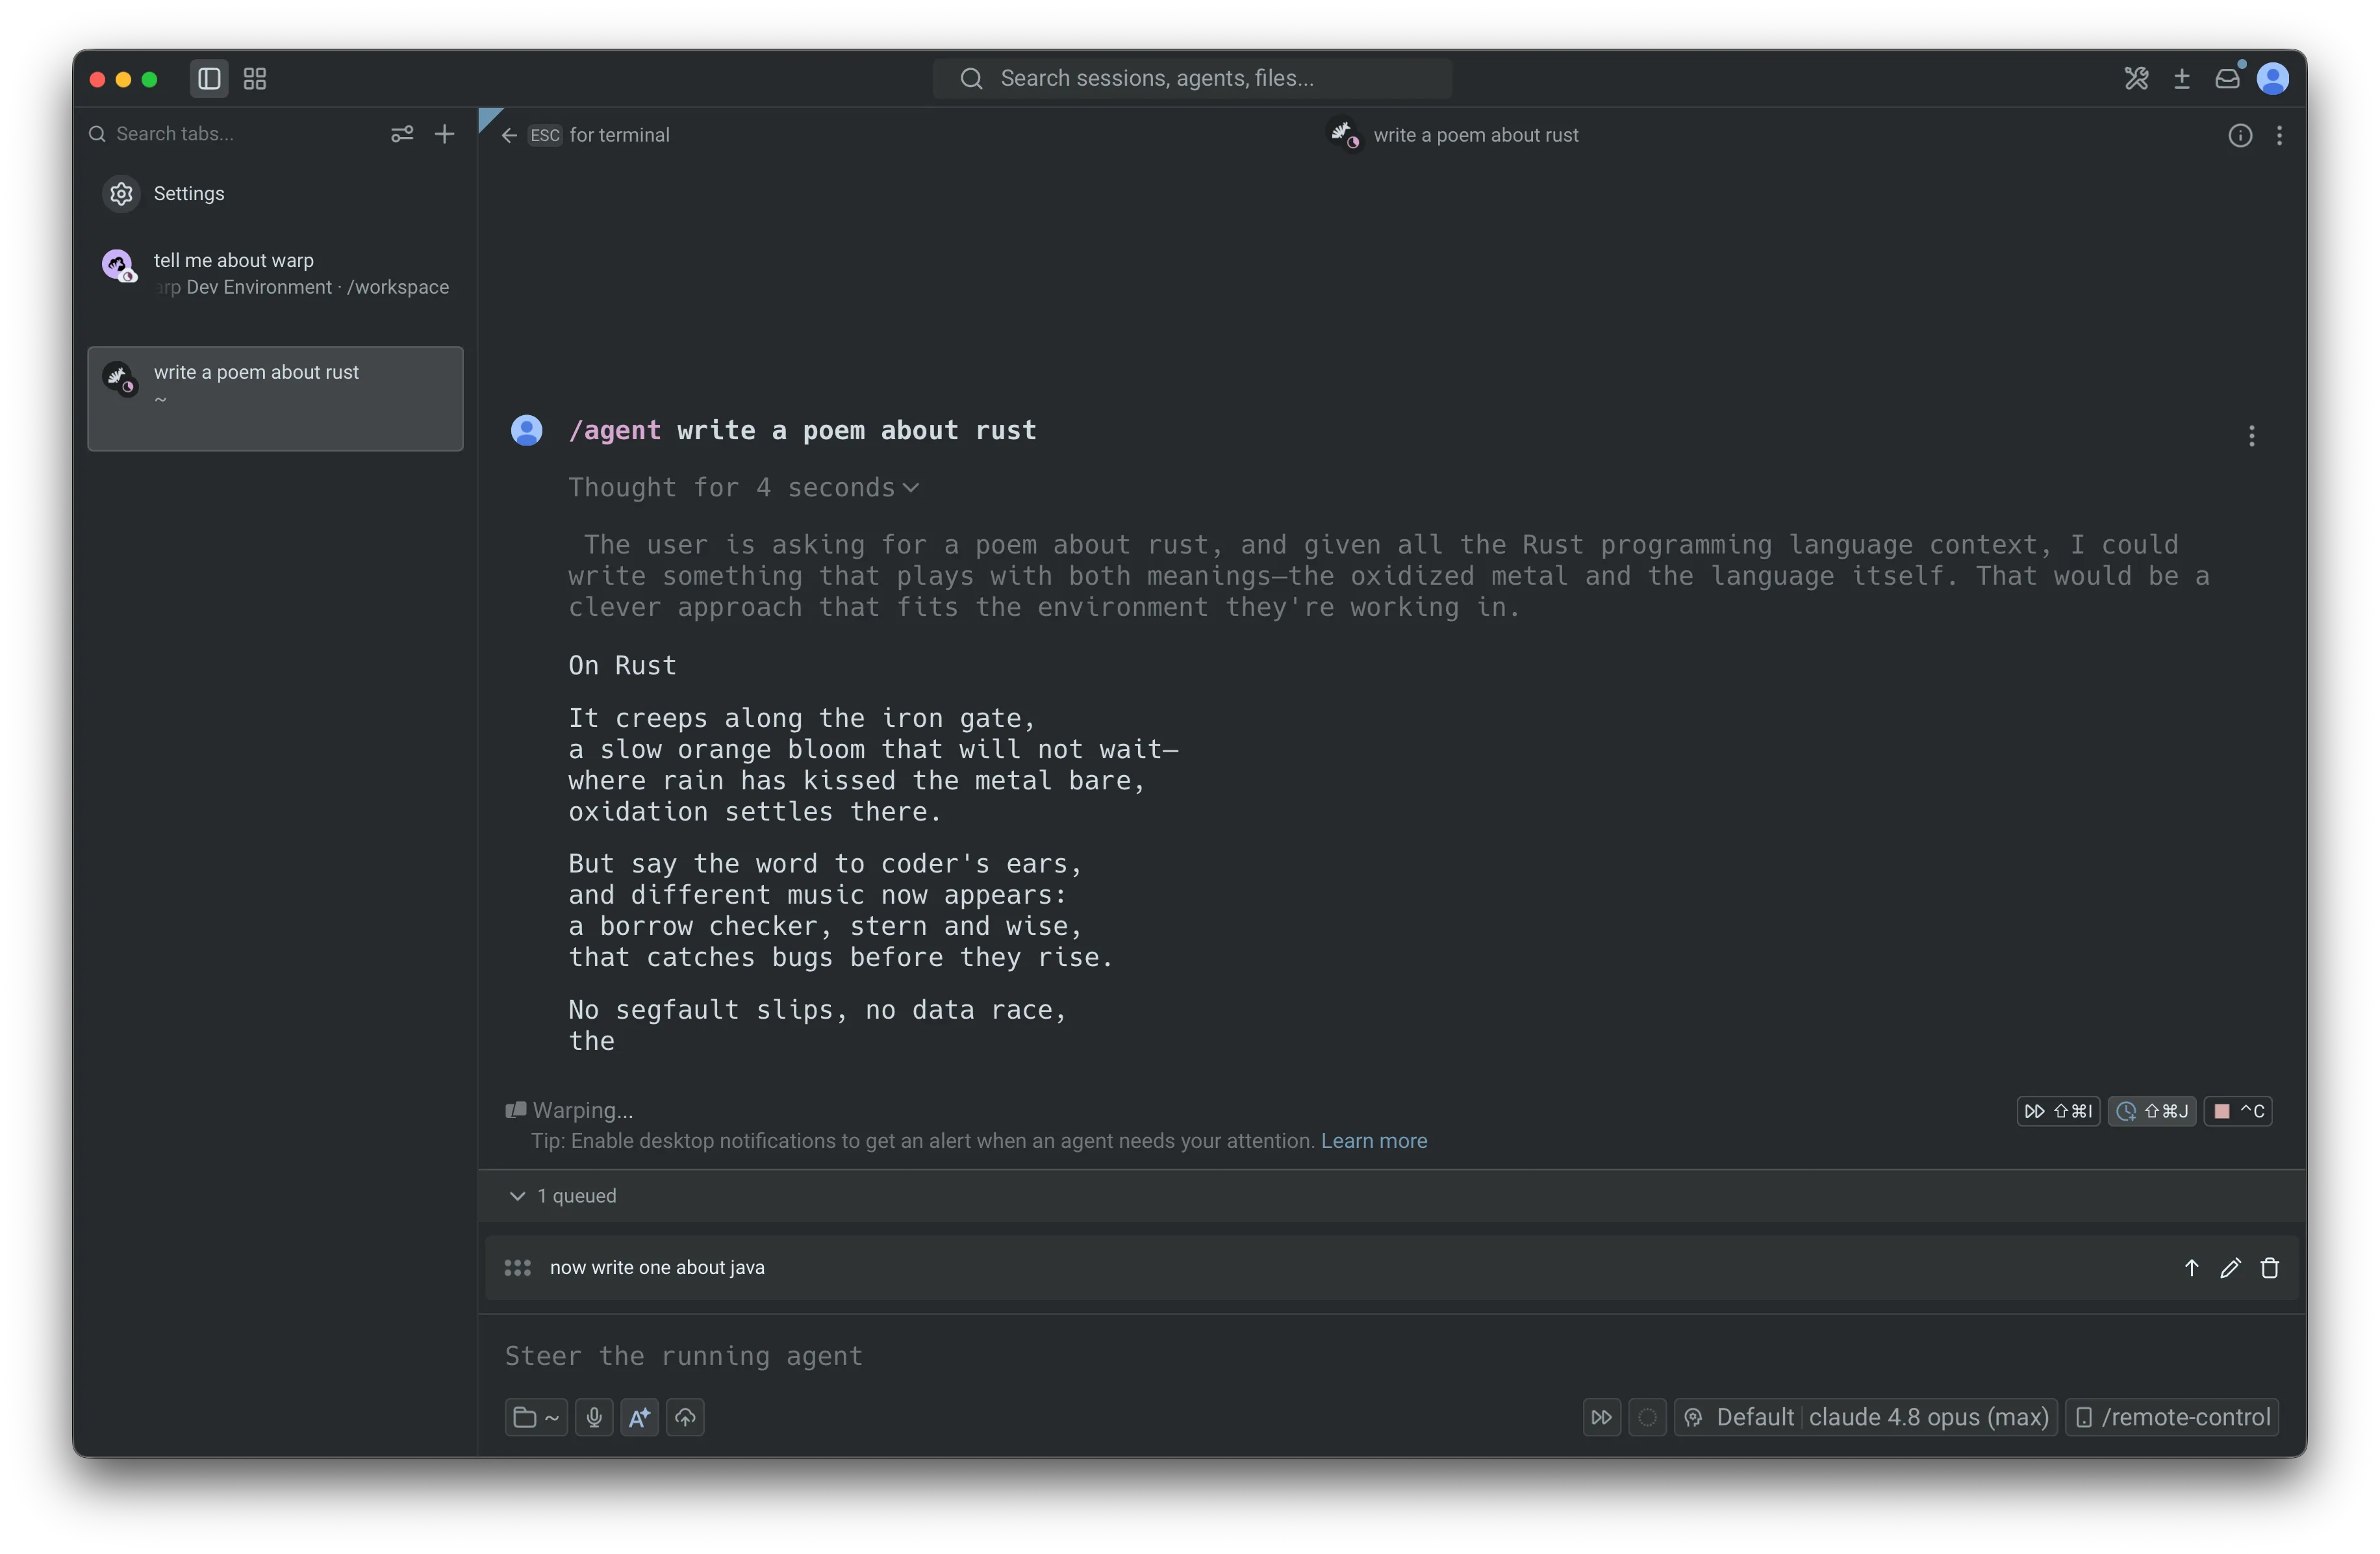 A queued row with its send now, edit, and delete controls revealed on hover. Deleting the last prompt removes the panel, since the queue is now empty. ### Send the next prompt with Enter [Section titled “Send the next prompt with Enter”](#send-the-next-prompt-with-enter) When the queued prompts panel is showing and the input box is empty, pressing `Enter` sends the row at the top of the queue immediately, exactly like clicking that row’s send now button. Each press sends one row: the remaining rows stay queued, and pressing `Enter` again sends the new top row, until the queue is empty. The input stays empty throughout. This works for both row types: queued prompts are sent to the agent, and queued shell commands run in the terminal. If the input has any text, `Enter` keeps its normal behavior and submits the typed input, leaving the queue untouched. `Enter` also keeps its normal behavior while the CLI agent Rich Input composer is open. The panel header shows this shortcut: next to the queued count, an **⏎ to send** hint appears whenever pressing `Enter` would send the top row. The hint is hidden when it wouldn’t, for example while you’re editing a row inline, while the input has text, or when the top row is a cloud run’s locked initial prompt. That locked prompt can never be sent this way; `Enter` does nothing while it sits at the head of the queue, and the rows behind it wait until it’s removed. ## When sending pauses [Section titled “When sending pauses”](#when-sending-pauses) Queued prompts only continue after a response finishes successfully. If the response errors, is stopped, or is interrupted with `Ctrl+C`, Warp pauses the queue so you can review what should happen next. The queue stays intact, and no queued prompts are discarded. When sending pauses and you’re viewing that conversation, Warp helps you pick up where you left off: * If the input box is empty, the first queued prompt is removed from the queue and its text is placed in the input so you can review and resend it. * If the input box already has text, the queue is left untouched. Any remaining prompts stay in the panel so you can review, edit, reorder, or delete them. Sending resumes automatically the next time the conversation completes a response cleanly. ## Prompt queueing with cloud agents [Section titled “Prompt queueing with cloud agents”](#prompt-queueing-with-cloud-agents) Prompt queueing also works for [cloud agents](/platform/), including while a cloud environment is still setting up. You can queue follow-up work before the agent is live, and Warp sends those prompts once the agent is ready and the current response finishes. For cloud agents, the prompt that started the run appears as a locked first row in the queue because it has already been accepted by the agent. You can’t edit, reorder, or delete that first prompt, but any follow-up prompts queued behind it remain editable. 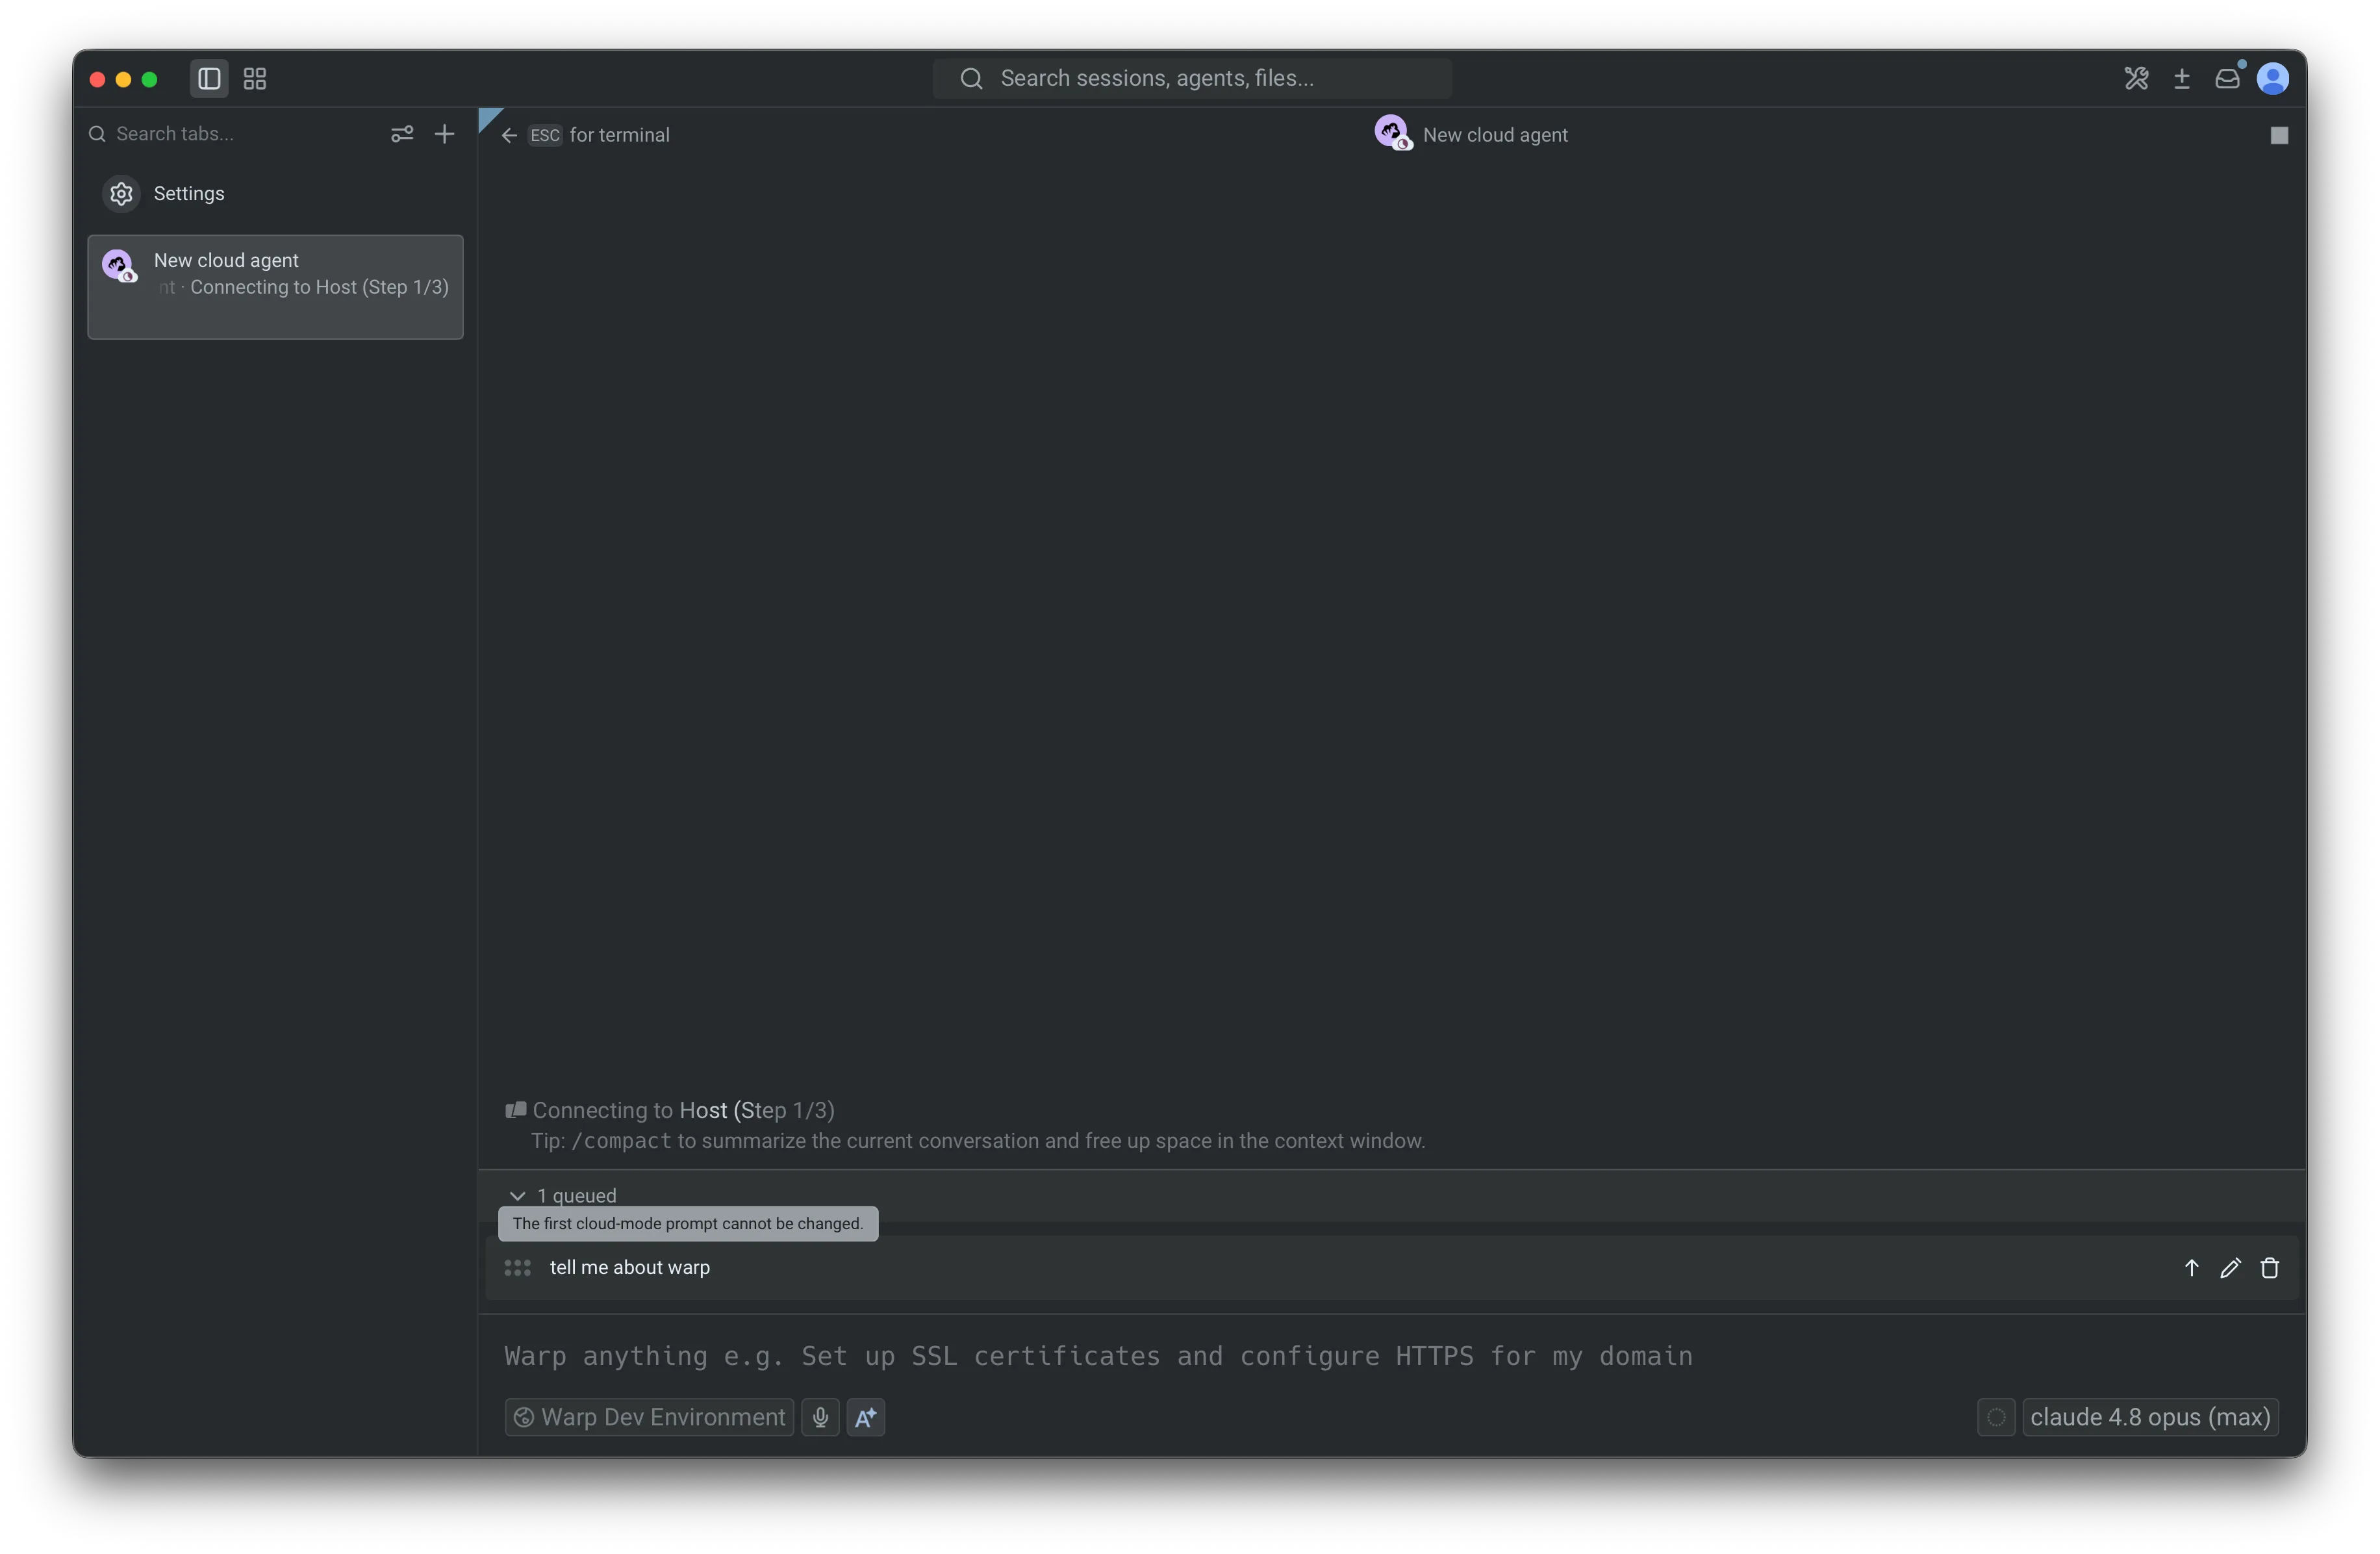 A cloud run’s locked initial prompt during environment setup. While the environment is setting up, queued prompts wait until the cloud agent is live. After setup, the locked row is removed and the rest of the queue sends in order as each response completes. Because cloud conversations keep running after you leave the agent view, their queues continue to send in the background and are restored when you return. ## Related pages [Section titled “Related pages”](#related-pages) * [Slash Commands](/agents/capabilities/slash-commands/) - The full list of built-in commands, including `/queue`. * [Full Terminal Use](/agents/capabilities/full-terminal-use/) - How agents attach to and drive interactive long-running commands. * [Terminal and Agent modes](/agents/local-agents/interacting-with-agents/terminal-and-agent-modes/) - How input is routed between the terminal and the agent. * [Cloud agents overview](/platform/) - Run agents in the cloud from any trigger.
# Terminal and Agent modes
Canonical page: [/agents/local-agents/interacting-with-agents/terminal-and-agent-modes/](https://docs.warp.dev/agents/local-agents/interacting-with-agents/terminal-and-agent-modes/)
> Warp provides two distinct modes: a clean terminal for commands, and a dedicated conversation view for multi-turn agent workflows.
Warp provides two distinct modes: a clean terminal for running shell commands, and a dedicated conversation view for multi-turn interactions with the Warp Agent. Terminal mode keeps the interface minimal by default, while Agent Mode surfaces full controls for model selection, voice input, image attachments, and conversation management. 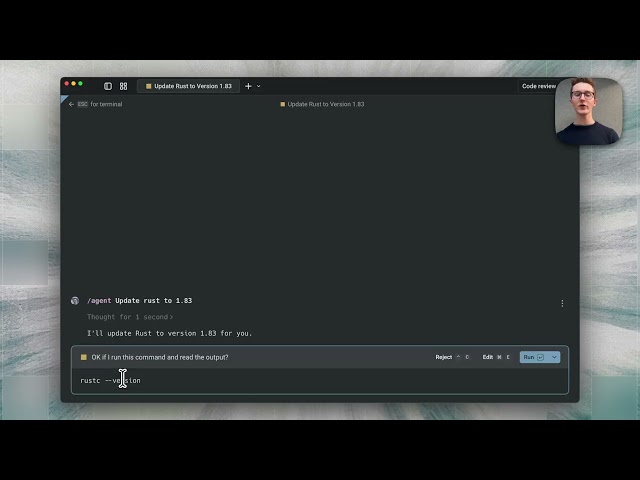 *** ## Key terminology [Section titled “Key terminology”](#key-terminology) Before diving in, here are two key concepts: * **Terminal session** - Your shell environment where you run commands. This is the default mode when you open Warp—a clean, traditional terminal input. * **Agent conversation** - A multi-turn interaction with the Automation Platform. Conversations maintain context across exchanges and have their own dedicated view with richer controls. Terminal and Agent modes make switching between these two contexts seamless while keeping them visually distinct. *** ## Why two modes [Section titled “Why two modes”](#why-two-modes) Terminal and Agent modes separate your terminal and agent workflows into distinct contexts: * **Clean terminal by default** - Minimal input when you’re running commands. Agent controls appear only when you need them. * **Dedicated conversation view** - Multi-turn agent workflow spaces have full controls like model select, voice input, image attachments, and conversation history. * **Explicit mode switching** - The current mode is clearly visible, enabling better workflow organization—you can separate, minimize, and expand different conversations. *** ## Two distinct modes [Section titled “Two distinct modes”](#two-distinct-modes) ### Terminal mode (default) [Section titled “Terminal mode (default)”](#terminal-mode-default) Terminal mode is the default when you open a new tab or pane. * Looks and behaves like a traditional terminal input. * Agent controls are not always visible, keeping the interface clean. * A message bar shows contextual hints for interacting with agents. 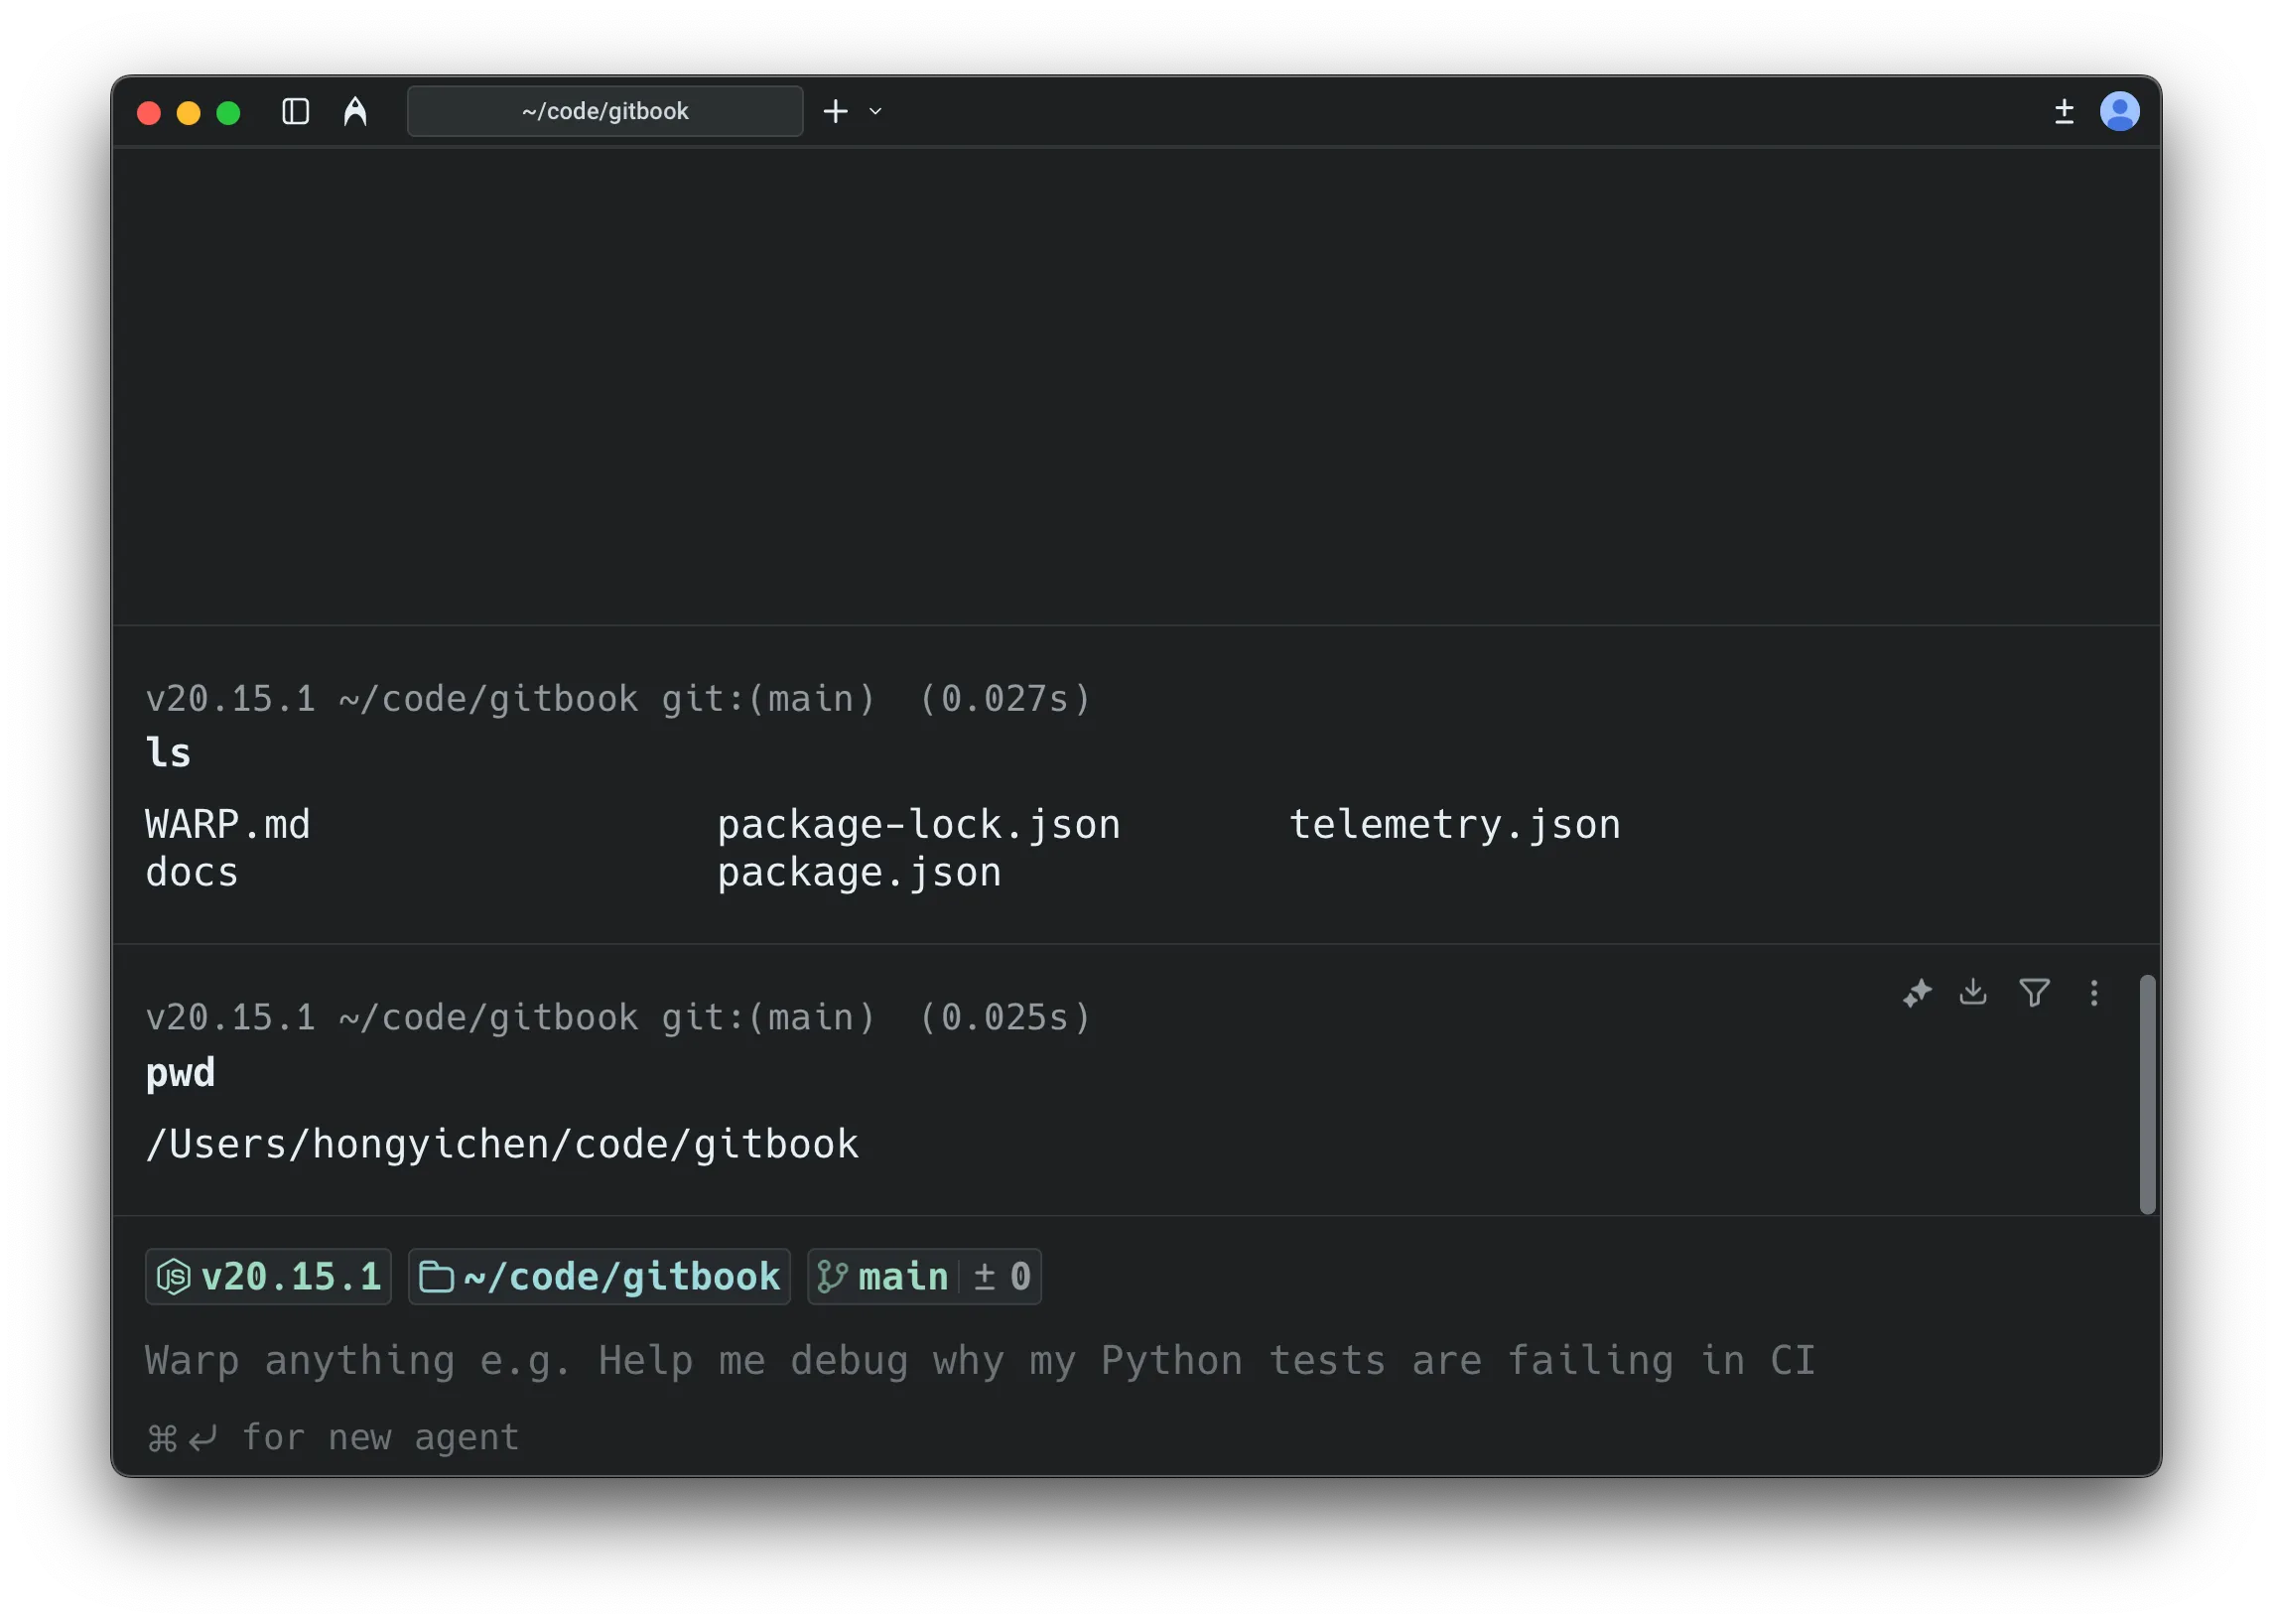 **Terminal mode hints** The message bar at the bottom of the terminal provides contextual guidance: * **Default hint** - Shows `⌘↩ for new agent` when the input is empty. * **Send to agent** - Shows `⌘↩ to send to agent` when you have text that could be a prompt. * **Error block attachment** - When the last command failed, shows a hint to attach the output as agent context (e.g., `⌘↑ attach 'npm install...' output as agent context`). * **Attached context indicator** - Shows when you have blocks or text selections attached (e.g., `⌘↩ to send to agent with 'git status' attached`). * **Continue conversation** - When your last visible item is an agent conversation block, shows `⌘Y to continue conversation`. If auto-detection is enabled, Warp labels your input as “agent” or “shell” before you submit, showing “(autodetected)” in magenta. See [Understanding auto-detection](#understanding-auto-detection) for configuration and override methods. **Disabling the message bar:** To hide the terminal mode hint bar while keeping AI features enabled, go to **Settings** > **Features** > **Terminal Input** and toggle off **Show terminal input message line**. This only hides the contextual hints—it does not disable any AI functionality. Caution If you disable the message bar while auto-detection is enabled, you won’t see the visual indicator that tells you whether Warp detected your input as a shell command or an agent prompt. Consider also disabling auto-detection (**Settings** > **Agents** > **Warp Agent** > **Input**) if you turn off the message bar. ### Agent conversation view (expanded UI) [Section titled “Agent conversation view (expanded UI)”](#agent-conversation-view-expanded-ui) * A dedicated conversation view with richer agent controls including model select, voice input, image attachments, and conversation management. * Familiar “charms” (current directory, git branch, diff view entry point, etc.) are still available. * Designed for multi-turn workflows and managing multiple conversations. 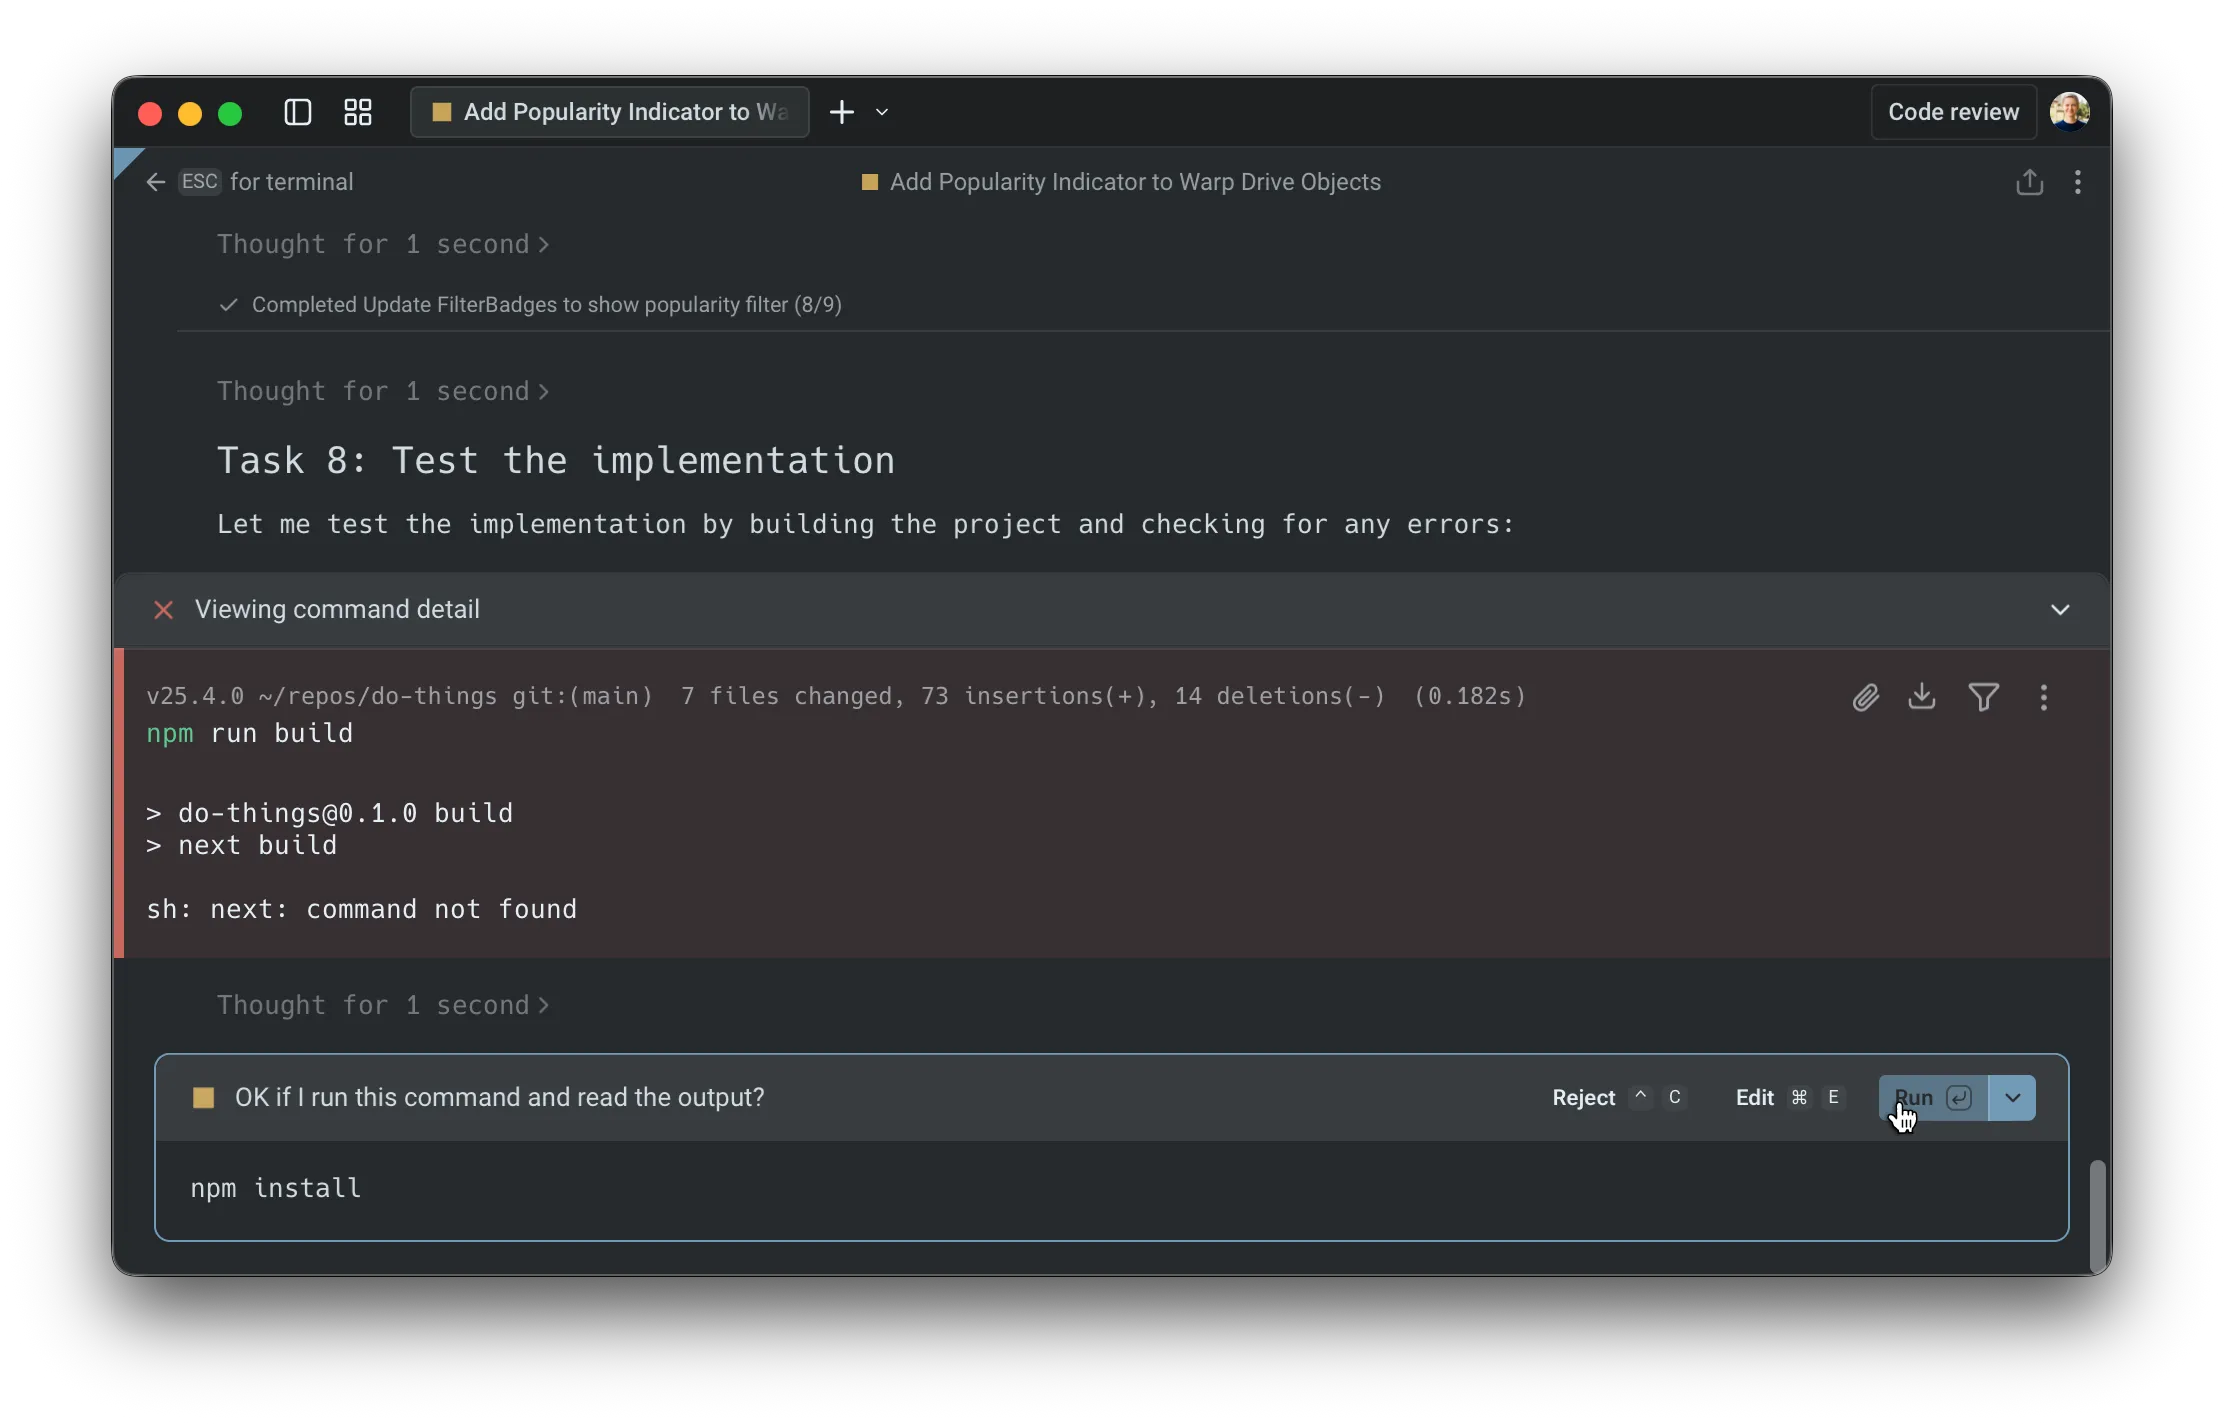 The dedicated Agent Conversation View. **Key difference** Agent controls appear only when you’re in a conversation, keeping your terminal clean otherwise. #### Customizing the input toolbelt [Section titled “Customizing the input toolbelt”](#customizing-the-input-toolbelt) The chips and buttons on the agent input toolbelt can be reordered, hidden, or moved between the left and right sides of the input. Right-click the input in an agent conversation and select **Edit agent toolbelt** to open the editor. Your layout persists across app restarts. Agent Mode-specific items include the model selector, autodetection toggle, Context Usage, and fast forward toggle. Shared items like voice input, file attachment, and context chips appear in both the Agent Mode toolbelt and the [CLI coding agent toolbelt](/agents/cli-agents/overview/#customizing-the-toolbelt). **Block origin and visibility** Blocks in Warp belong to either the terminal view or a specific agent conversation: * **Terminal blocks** - Commands you run directly in the terminal always appear in your terminal block list and can be attached as context to any conversation. * **Agent conversation blocks** - Commands executed within an agent conversation (either by you or the agent) only appear within that specific conversation and don’t appear in the terminal block list. In agent conversations, context is managed automatically, with optional manual attachment from terminal view: * **Automatic context** - Commands executed within an agent conversation are included as context for subsequent prompts. * **Manual attachment** - You can attach terminal blocks to bring in outputs from outside the conversation. * **Conversation scope** - Agent conversation blocks stay scoped to that conversation, while terminal blocks remain in the terminal block list. This separation keeps your terminal view clean while preserving full context within each conversation. For shortcuts, pending vs. attached context, and block selection behavior, see [Blocks as Context](/agents/local-agents/agent-context/blocks-as-context/). #### Cloud agent conversations [Section titled “Cloud agent conversations”](#cloud-agent-conversations) In addition to local agent conversations, you can start **cloud agent conversations** that run in an isolated cloud environment. Cloud agents are useful for: * Running parallel agents across multiple tasks * Running agents remotely on hosted computers (offloading compute from your local machine) * Running agents autonomously in the cloud * Checking in on your agents from anywhere To start a cloud agent conversation, press `⌥⌘↩` (Option+Command+Enter on macOS, or `Ctrl+Alt+Enter` on Windows/Linux) from terminal mode. You can also use the welcome block’s “Start cloud project” action. Cloud agent conversations have a few differences from local conversations: * **Environment selector** - Choose which [Warp Environment](/platform/environments/) to run in * **Credits indicator** - Shows your remaining cloud agent credits * **Different zero state** - The conversation header indicates “New cloud agent conversation” Cloud agent conversations are always stored in the cloud. For more details on accessing and sharing cloud conversations, see [Cloud-synced Conversations](/agents/local-agents/cloud-conversations/). **Accessing running or past cloud conversations:** * **From the conversation list panel** - Cloud conversations appear alongside local conversations. Click to open. * **From the management view** - Use the [Agent Management view](/platform/managing-cloud-agents/) to see all cloud agent runs, filter by status, and click any row to open the conversation. * **From the Oz web app** - Access your cloud agents from the [Oz web app](https://oz.warp.dev) to manage runs from any browser. For more on cloud agents, see [Cloud Agents overview](/platform/). *** ## Understanding auto-detection [Section titled “Understanding auto-detection”](#understanding-auto-detection) Auto-detection (which detects whether you’re typing natural language or a shell command) helps Warp interpret each input as either a shell command or an agent request. When auto-detection is enabled, Warp shows an **inline indicator** in the prompt (for example, “(autodetected)” in magenta).  ### How it works [Section titled “How it works”](#how-it-works) **In terminal mode:** When you type text that appears to be a natural language request (e.g., “Summarize the dependencies in this project”), Warp labels it as “agent” and displays the “(autodetected)” indicator. Pressing Enter will send your input directly to the agent in a new conversation, creating a “quicksend” workflow for text-only requests. **In agent conversation view:** When auto-detection identifies your input as a shell command, Warp displays a distinct UI border around the input to indicate the mode switch. This helps you understand that your input will run as a command rather than being sent to the agent. ### Settings [Section titled “Settings”](#settings) ### Override methods [Section titled “Override methods”](#override-methods) There are multiple ways to override auto-detection: * **Keyboard shortcut** - Press `⌘I` to switch between command and Agent Mode. * **`!` prefix** - In agent view, prepend `!` to your input to force it to run as a shell command (e.g., `!ls` or `!git status`). Common examples: * You typed something that looks like a command, but you intended an agent request. * You typed a sentence, but you intended it to run as a command (rare, but it happens). ### Defaults for new vs existing users [Section titled “Defaults for new vs existing users”](#defaults-for-new-vs-existing-users) Auto-detection is enabled by default for new Warp users. For users who had Warp before Terminal and Agent modes were introduced, auto-detection is disabled by default to preserve their existing workflows. *** ## Entering and navigating conversations [Section titled “Entering and navigating conversations”](#entering-and-navigating-conversations) ### How to enter a conversation [Section titled “How to enter a conversation”](#how-to-enter-a-conversation) There are several ways to start or enter an agent conversation: #### A) Use the `/agent` or `/new` slash command [Section titled “A) Use the /agent or /new slash command”](#a-use-the-agent-or-new-slash-command) Type `/agent` or `/new` in terminal mode to enter the agent conversation view. This is the recommended way to explicitly switch to Agent Mode. * `/agent` or `/new` - Opens a new agent conversation view with full controls * `/agent <prompt>` - Sends your prompt directly to the agent in a new conversation #### B) Use the keyboard shortcut [Section titled “B) Use the keyboard shortcut”](#b-use-the-keyboard-shortcut) Press `⌘↩` (Command+Enter on macOS, or `Ctrl+Shift+Enter` on Windows/Linux) to enter the conversation view immediately. This is a shortcut for `/agent`. **Use this when you want to:** * attach an image * use voice input * access other conversation-only controls before sending your first message #### C) Quicksend with auto-detection [Section titled “C) Quicksend with auto-detection”](#c-quicksend-with-auto-detection) When auto-detection is enabled in terminal mode, you can start a conversation immediately: 1. Type a natural language request (e.g., “Summarize the dependencies in this project”). 2. If Warp detects it as an agent request, it shows an “(autodetected)” indicator. 3. Press Enter to send directly to the agent in a new conversation. This “quicksend” method is useful for quick, text-only requests when you don’t need conversation-only controls like voice input or image attachments. #### D) Continue from the up-arrow history menu [Section titled “D) Continue from the up-arrow history menu”](#d-continue-from-the-up-arrow-history-menu) Press `↑` (up arrow) to open an inline history menu. The menu contents vary by context—see [Navigation behavior](/agents/local-agents/interacting-with-agents/#navigation-behavior) for details on how up-arrow works in terminal view vs. agent view. #### E) Click an active AI suggestion [Section titled “E) Click an active AI suggestion”](#e-click-an-active-ai-suggestion) When [Active AI Recommendations](/agents/local-agents/active-ai/) is enabled, Warp displays contextual prompt suggestions based on your recent activity. Clicking any of these suggestions opens the agent conversation view and sends that prompt immediately. *** ### Navigating conversations [Section titled “Navigating conversations”](#navigating-conversations) Warp includes a **Conversation Panel** for browsing and managing your agent conversations. For details on the panel layout, navigation, and conversation storage, see [Agent Conversations](/agents/local-agents/interacting-with-agents/). ### Using slash commands [Section titled “Using slash commands”](#using-slash-commands) **In an agent conversation** 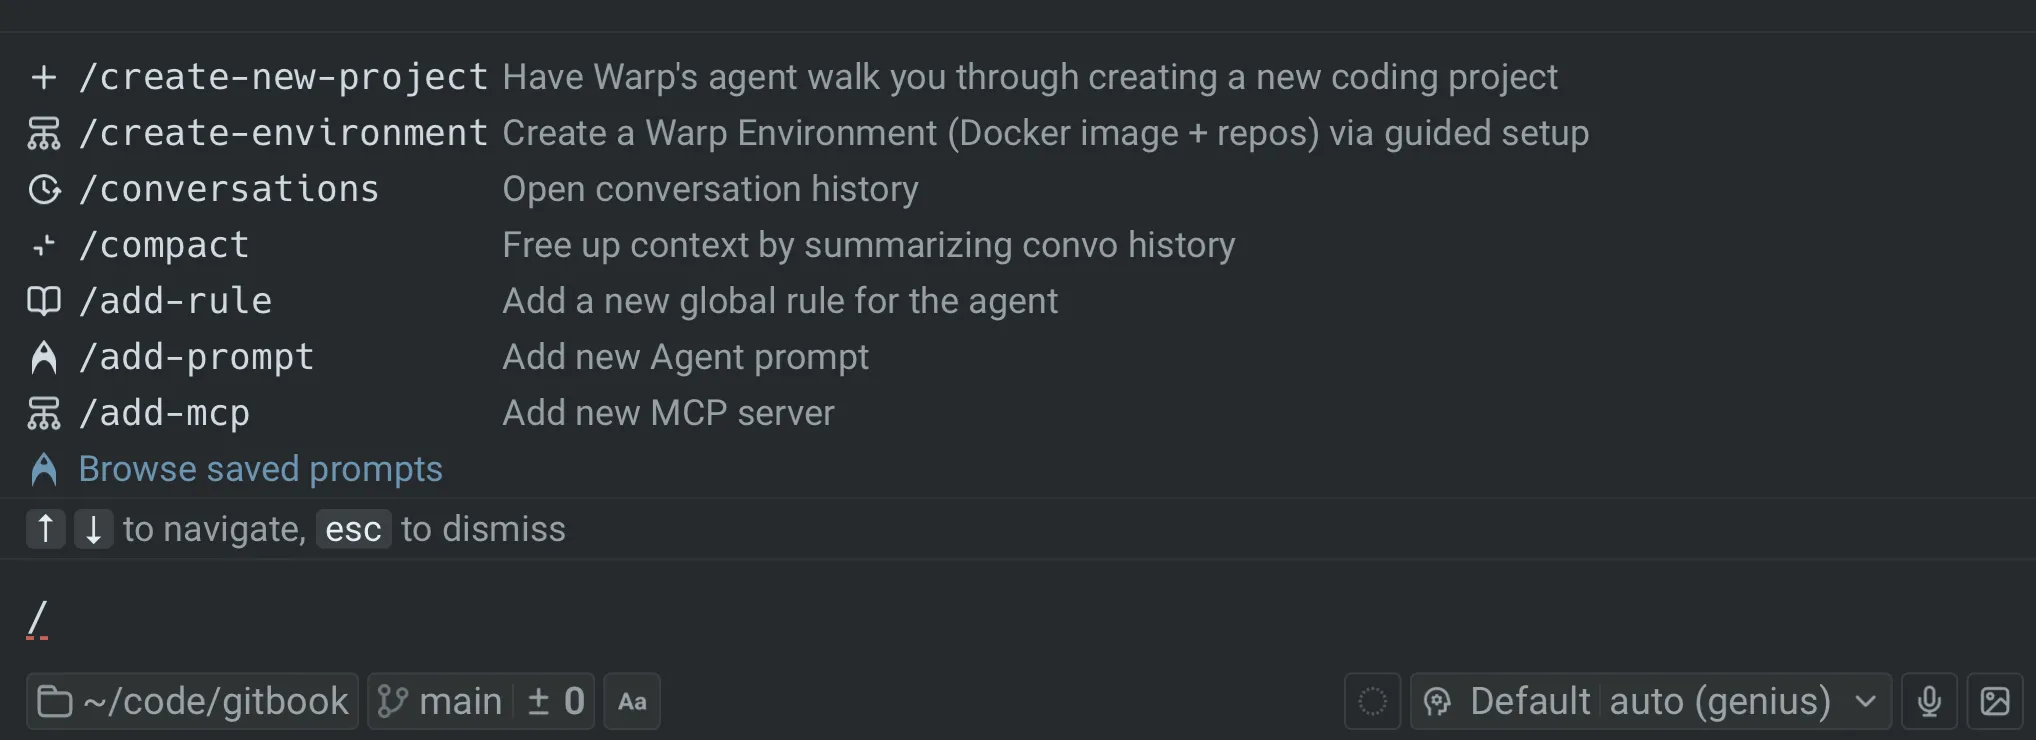 While you’re in an agent conversation, you can access Warp’s [slash commands](/agents/capabilities/slash-commands/) any time by typing `/` in the input. * Type `/` to open the command menu * Keep typing to filter commands (for example: `/conversations`, `/compact`) * Use `↑` / `↓` to navigate and `Enter` to run * Press `esc` to dismiss the menu **Key slash commands in Agent Mode:** * `/new` or `/agent` - Start a new conversation. * `/plan` or `/plan <prompt>` - Enter agent view and start a planning conversation. The agent will create an implementation plan before making changes. * `/conversations` - Open the conversation list panel. * `/compact` - Summarize and compact the current conversation to free up context window space. * `/fork` - Fork the current conversation into a new thread. Press `Enter` to fork in the existing pane, or `⌘↩` (`Ctrl+Shift+Enter` on Windows/Linux) to fork in a new pane. * `/fork-and-compact` - Fork the conversation and automatically summarize it. * `/fork from` - Choose a specific point in the conversation to fork from. A menu appears showing your previous queries—select one to fork from that point. * `/model` - Select or change the AI model for the conversation. Slash commands are a quick way to take common actions without leaving the keyboard. **In terminal mode** 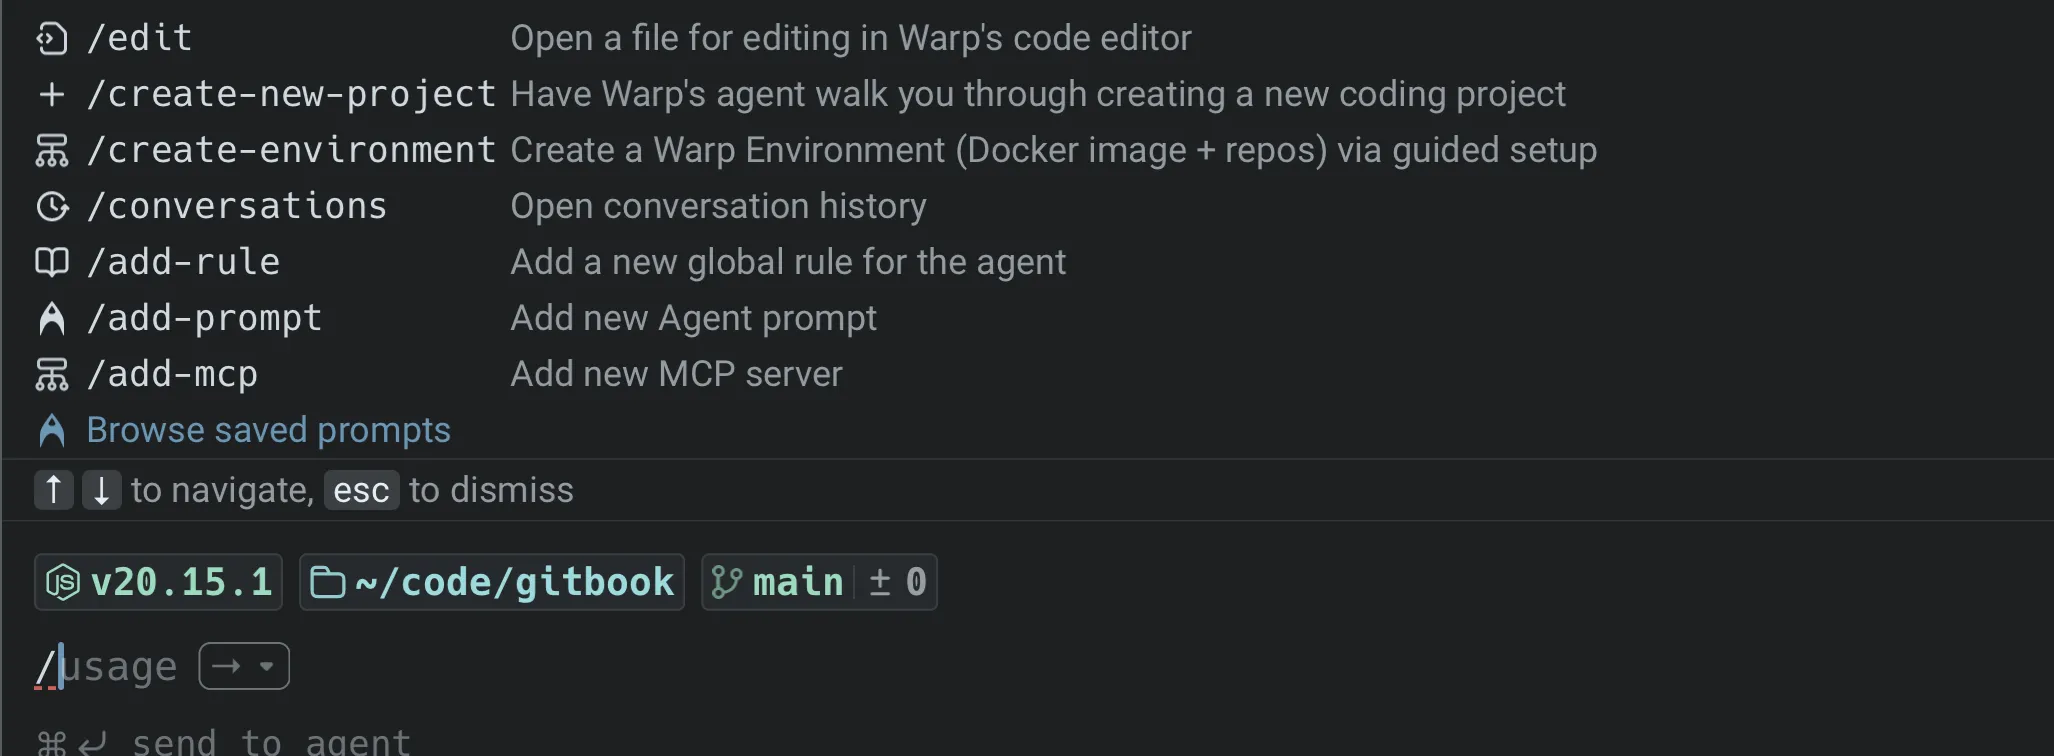 Slash commands aren’t just for agent conversations. You can also type `/` in terminal mode to open a limited set of commands. For the complete list of available slash commands, see [Slash Commands](/agents/capabilities/slash-commands/). ### Forking conversations [Section titled “Forking conversations”](#forking-conversations) Forking lets you branch off from an existing conversation to explore a different direction without losing your original thread. **How to fork:** 1. In an agent conversation, type `/fork` and press `Enter`. 2. Choose where to open the forked conversation: * `Enter` - Fork in the current pane (replaces the current view). * `⌘↩` (`Ctrl+Shift+Enter` on Windows/Linux) - Fork in a new pane (keeps the original visible). **Fork and compact:** Use `/fork-and-compact` to fork and automatically summarize the conversation. This is useful when your context window is getting full but you want to continue building on the same work. **Fork from a specific point:** Use `/fork from` to choose exactly where in the conversation you want to branch from: 1. Type `/fork from` and press `Enter`. 2. A menu shows your previous queries in the conversation. 3. Select the query you want to fork from. 4. Choose `Enter` (existing pane) or `⌘↩` / `Ctrl+Shift+Enter` (new pane). This is helpful when you want to go back to an earlier point and try a different approach. For more forking methods and use cases, see [Conversation Forking](/agents/local-agents/interacting-with-agents/conversation-forking/). *** ## Using Agent Mode as the default experience [Section titled “Using Agent Mode as the default experience”](#using-agent-mode-as-the-default-experience) If you prefer to type natural language at any point in a terminal session and have it automatically routed to an agent, you can configure this using the “default mode for new sessions” setting. ### 1. Set new tabs to open in agent view [Section titled “1. Set new tabs to open in agent view”](#1-set-new-tabs-to-open-in-agent-view) By default, new tabs and panes open in terminal mode. To launch directly into an agent conversation instead: 1. Go to **Settings** > **Features** > **General**. 2. Change **Default mode for new sessions** to **Agent**. ### 2. Enable auto-detection in Agent Mode [Section titled “2. Enable auto-detection in Agent Mode”](#2-enable-auto-detection-in-agent-mode) With auto-detection enabled in agent view, Warp automatically detects whether your input is natural language or a shell command, routing it to the agent or running it in the terminal accordingly. You can also use the “toggle input mode” keyboard shortcut to override auto-detection and force either “shell” or “agent” mode. 1. Go to **Settings** > **Agents** > **Warp Agent** > **Input**. 2. Toggle on **Autodetect terminal commands in agent input**. Press `⌘I` (macOS) or `Ctrl+I` (Windows/Linux) to manually toggle between shell and Agent Mode at any time, overriding auto-detection. *** ## Keyboard shortcuts (quick reference) [Section titled “Keyboard shortcuts (quick reference)”](#keyboard-shortcuts-quick-reference) In conversation view, press `?` to show/hide the full shortcuts panel. Here are the key shortcuts: ### Navigation and mode switching [Section titled “Navigation and mode switching”](#navigation-and-mode-switching) * **Start new agent conversation** (from terminal mode) - `⌘↩` (macOS) / `Ctrl+Shift+Enter` (Windows/Linux) * **Start new cloud agent conversation** (from terminal mode) - `⌥⌘↩` (macOS) / `Ctrl+Alt+Enter` (Windows/Linux) * **Send to agent with attached context** (from terminal mode) - `⌘↩` (macOS) / `Ctrl+Shift+Enter` (Windows/Linux) when blocks are selected * **Tag agent into long-running command** - `⌘↩` (macOS) / `Ctrl+Shift+Enter` (Windows/Linux) while an interactive command is running * **Exit conversation** (back to terminal mode) - `esc` * **Stop agent / exit on empty input** - `^C` / `Ctrl+C` * **Open conversation selector** - `⌘Y` (macOS) / `Ctrl+Y` (Windows/Linux) * **Toggle conversation list panel** - `⌘⇧H` (macOS) / `Ctrl+Shift+H` (Windows/Linux) * **Override auto-detection** (switch shell ↔ agent) - `⌘I` (macOS) / `Ctrl+I` (Windows/Linux) ### Input modifiers [Section titled “Input modifiers”](#input-modifiers) * **`!`** - Prepend to force shell mode (e.g., `!ls`) * **`/`** - Open slash command menu * **`@`** - Open context menu (attach files, symbols, etc.) * **`?`** - Show/hide keyboard shortcuts panel ### Conversation actions [Section titled “Conversation actions”](#conversation-actions) * **Resume a paused/cancelled conversation** - `⌘⇧R` (macOS) / `Ctrl+Alt+R` (Windows/Linux) * **Toggle auto-accept** (for agent tool executions) - `⌘⇧I` (macOS) / `Ctrl+Shift+I` (Windows/Linux) * **Open code review pane** - `⌘⇧+` (macOS) / `Ctrl+Shift++` (Windows/Linux) * **Toggle plan panel** (if a plan exists) - `⌘⌥P` (macOS) / `Ctrl+Alt+P` (Windows/Linux) ### In slash command / fork menus [Section titled “In slash command / fork menus”](#in-slash-command--fork-menus) * **Navigate menu items** - `↑` / `↓` * **Select** (fork in existing pane) - `Enter` * **Select and open in new pane** - `⌘↩` (macOS) / `Ctrl+Shift+Enter` (Windows/Linux) * **Dismiss menu** - `esc` ### Customizing keybindings [Section titled “Customizing keybindings”](#customizing-keybindings) You can customize keyboard shortcuts for slash commands and other actions in **Settings** > **Keyboard shortcuts**. This lets you assign your preferred key combinations to frequently used commands. For example, to bind a keyboard shortcut to the `/agent` slash command: 1. Open **Settings** > **Keyboard shortcuts** 2. Search for “agent” or the slash command you want to bind 3. Click the shortcut field and press your desired key combination 4. The shortcut is saved automatically This is useful for actions you perform frequently, like starting a new conversation or opening the conversation list.
# Voice input for agents
Canonical page: [/agents/local-agents/interacting-with-agents/voice/](https://docs.warp.dev/agents/local-agents/interacting-with-agents/voice/)
> Voice enables natural language interaction with Warp, letting you speak commands and queries directly to your terminal.
Warp’s Voice feature transforms how you interact with your terminal, letting you naturally speak commands and questions instead of typing them. This is especially powerful when combined with Agent Mode for complex operations or when you need to explain longer scenarios. [Voice Demo](https://www.loom.com/embed/77399be4e434443488bbe267b3548552) ## Getting started with voice [Section titled “Getting started with voice”](#getting-started-with-voice) ### Initial setup [Section titled “Initial setup”](#initial-setup) First-time users will need to grant microphone permissions: * On macOS: Accept the system permission prompt or allow Warp microphone access in > **System Settings** > **Privacy & Security** > **Microphone** * On Windows: Allow Warp microphone access in **Settings** > **Privacy & Security** > **Microphone** * On Linux: Configure through system sound settings ### Using voice [Section titled “Using voice”](#using-voice) There are two ways to activate Voice: 1. **Microphone Button in Agent Mode** * Click the microphone icon in Agent Mode * Start speaking when the indicator shows it’s listening * Click again to stop recording 2. **Hotkey Method** * macOS * Press and hold the `Fn` key (configurable) to start recording * Speak your command or query while holding the key * Release the `Fn` key to stop recording and transcribe * Windows * Press and hold the `Alt+→` key (configurable) to start recording * Speak your command or query while holding the key * Release the `Alt+→` key to stop recording and transcribe * Linux * Press and hold the `Alt+→` key (configurable) to start recording * Speak your command or query while holding the key * Release the `Alt+→` key to stop recording and transcribe 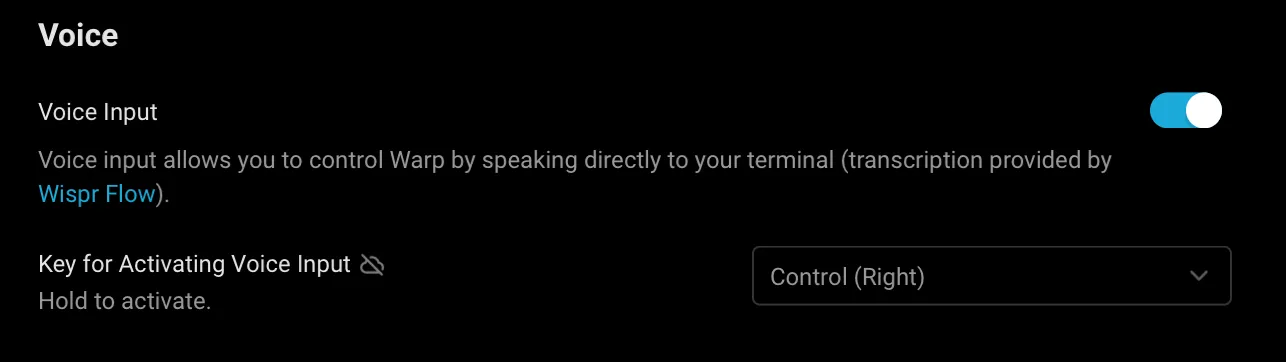 Voice input settings. ### Sample use cases [Section titled “Sample use cases”](#sample-use-cases) Voice input makes complex interactions with Agent Mode more natural and efficient. Instead of typing lengthy queries, you can speak naturally to accomplish various tasks. For example, you can say “Create a new Node.js project, install Express and MongoDB, then set up a basic server with a health check endpoint,” or “What’s the difference between chmod and chown? Give me examples of when to use each one.” You can also describe multi-step system tasks like “Find all log files in my project that contain errors from the last 24 hours, create a summary of the errors, and email it to me.” Agent Mode breaks down these requests into the necessary commands and provides detailed explanations. Voice input is not limited to just Agent Mode - it works across all of Warp’s input interfaces. Whether you’re using the Find dialog to search through text, entering commands in the terminal, or working with other input editors, you can use voice commands to quickly input your text.  Voice input in a Warp editor. ## Privacy & security [Section titled “Privacy & security”](#privacy--security) The transcription is powered by [Wispr Flow](https://wisprflow.ai/). Voice data is processed in real-time by Wispr Flow and is not retained as a recording after transcription. ## Usage limits [Section titled “Usage limits”](#usage-limits) Voice features have anti-abuse limits in place to ensure fair usage. These limits are subject to change as we continue to improve the service. ## Troubleshooting [Section titled “Troubleshooting”](#troubleshooting) ### Common issues [Section titled “Common issues”](#common-issues) 1. **Microphone not detected** If your microphone isn’t being detected, first check your system permissions to ensure Warp has access. You should also verify that your microphone is properly connected to your system. If issues persist, try restarting Warp to reset the connection. 2. **Poor transcription quality** To improve transcription quality, try to minimize background noise in your environment. Position yourself closer to the microphone while speaking, and verify that your microphone input levels are properly adjusted in your system settings. For best results, speak clearly at a natural pace and use complete sentences to provide better context. When referring to specific file names or commands, enunciate them clearly. It’s also recommended to review the transcription before sending to ensure accuracy. 3. **Feature not activating** If the Voice feature isn’t activating, confirm that your hotkey settings are correctly configured in Warp. Check for any conflicting keyboard shortcuts that might interfere with Voice activation. Also ensure that you’re running the latest version of Warp, as older versions can have compatibility issues. If you are on an Enterprise plan, your administrator may have disabled Voice functionality, or it may be pending approval.
# Interactive Code Review
Canonical page: [/agents/local-agents/interactive-code-review/](https://docs.warp.dev/agents/local-agents/interactive-code-review/)
> Review agent-generated code, leave inline comments, and have Warp's native agent or any supported third-party CLI agent apply your feedback.
Interactive Code Review lets you review agent-generated code, leave inline comments on specific lines, batch your feedback, and send all requested changes to the agent in a single pass. It works with Warp’s native agent and supported third-party CLI agents like Claude Code and Codex. ### Overview [Section titled “Overview”](#overview) Interactive Code Review lets you review, annotate, and refine code generated by any supported agent, whether that’s Warp’s native Agent or a third-party CLI agent running in Warp. Instead of relying on an AI to review another AI’s output, Warp keeps the developer in control. You can inspect diffs, leave inline comments, batch feedback, and send all requested changes back to the agent in a single pass.  **Interactive Code Review builds on Warp’s existing** [Code Review](/code/code-review/) **panel.** For details on diff views, reverting hunks, opening files, and all available entry points, see the Code Review documentation. ### Supported agents [Section titled “Supported agents”](#supported-agents) Interactive Code Review works with any supported agent running in Warp: * **Warp’s native Agent** — the built-in agent in Agent Mode * **Third-party CLI agents** — Claude Code, OpenAI Codex, OpenCode, Amp, Auggie, Copilot CLI, Cursor CLI, Gemini CLI, Droid, Pi, and Grok Build For the full feature matrix and setup details for each CLI agent, see [Third-party CLI agents](/agents/cli-agents/overview/). *** When an agent modifies files, Warp automatically gathers those edits into a diff. Opening the Code Review panel shows you every change the agent made. From there, you can leave comments on specific lines or blocks, review your comment list, and submit all feedback to the agent at once. The agent applies the requested updates and returns an updated diff for further review. This gives you a familiar pull-request style workflow inside Warp without switching editors or tools. ### Leave inline comments [Section titled “Leave inline comments”](#leave-inline-comments) Select any changed line or block and add a comment describing what you want adjusted. Warp anchors each comment to the relevant file and line so the agent understands exactly what to fix. 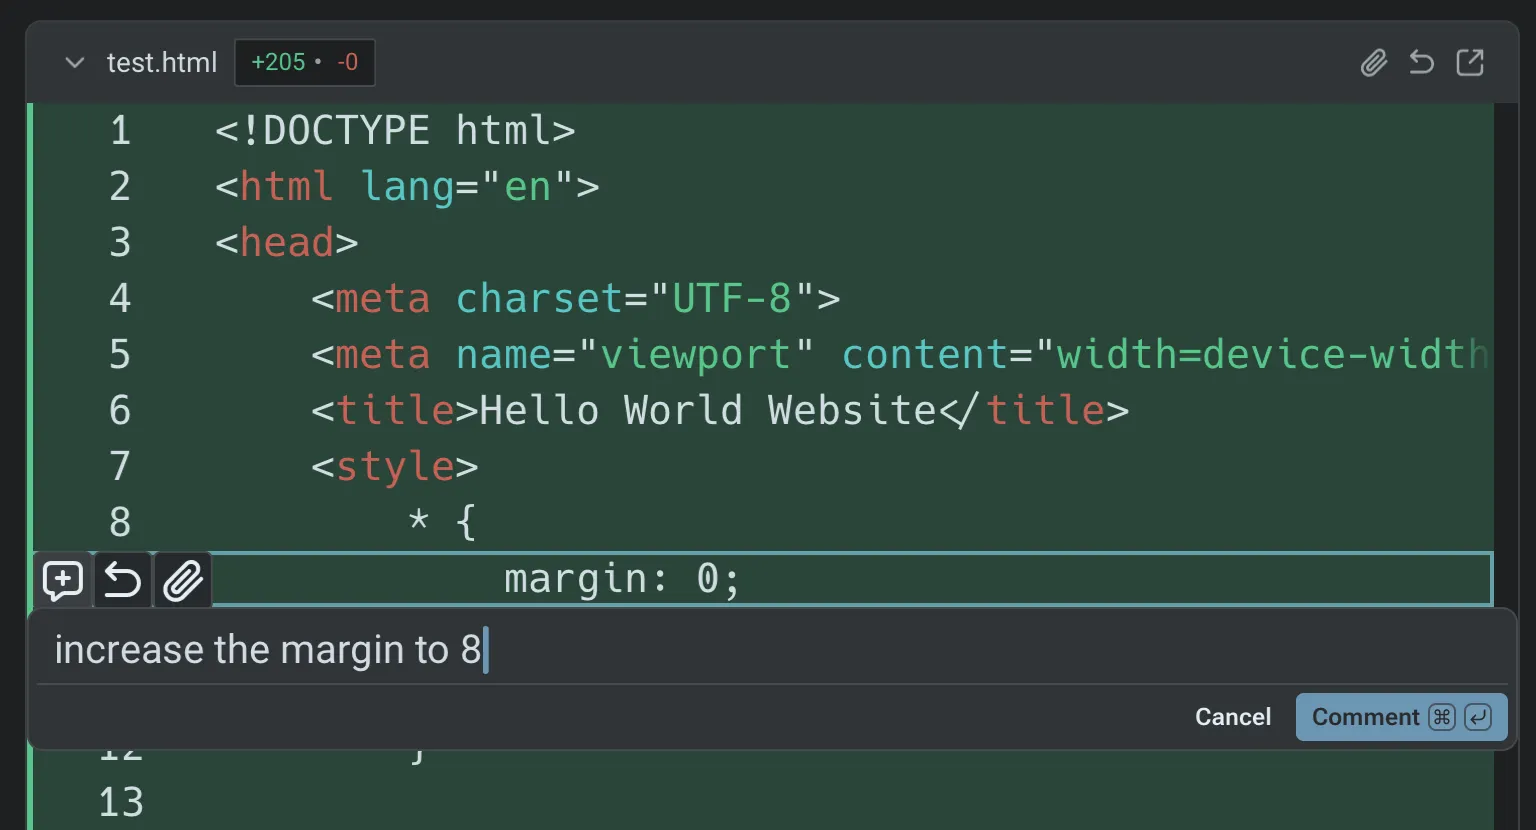 Inline comments in the Code Review panel. ### Batch comments and submit once [Section titled “Batch comments and submit once”](#batch-comments-and-submit-once) Add as many comments as you need before submitting them. The agent receives your entire batch of feedback, applies the changes in one iteration, and returns an updated diff for verification. 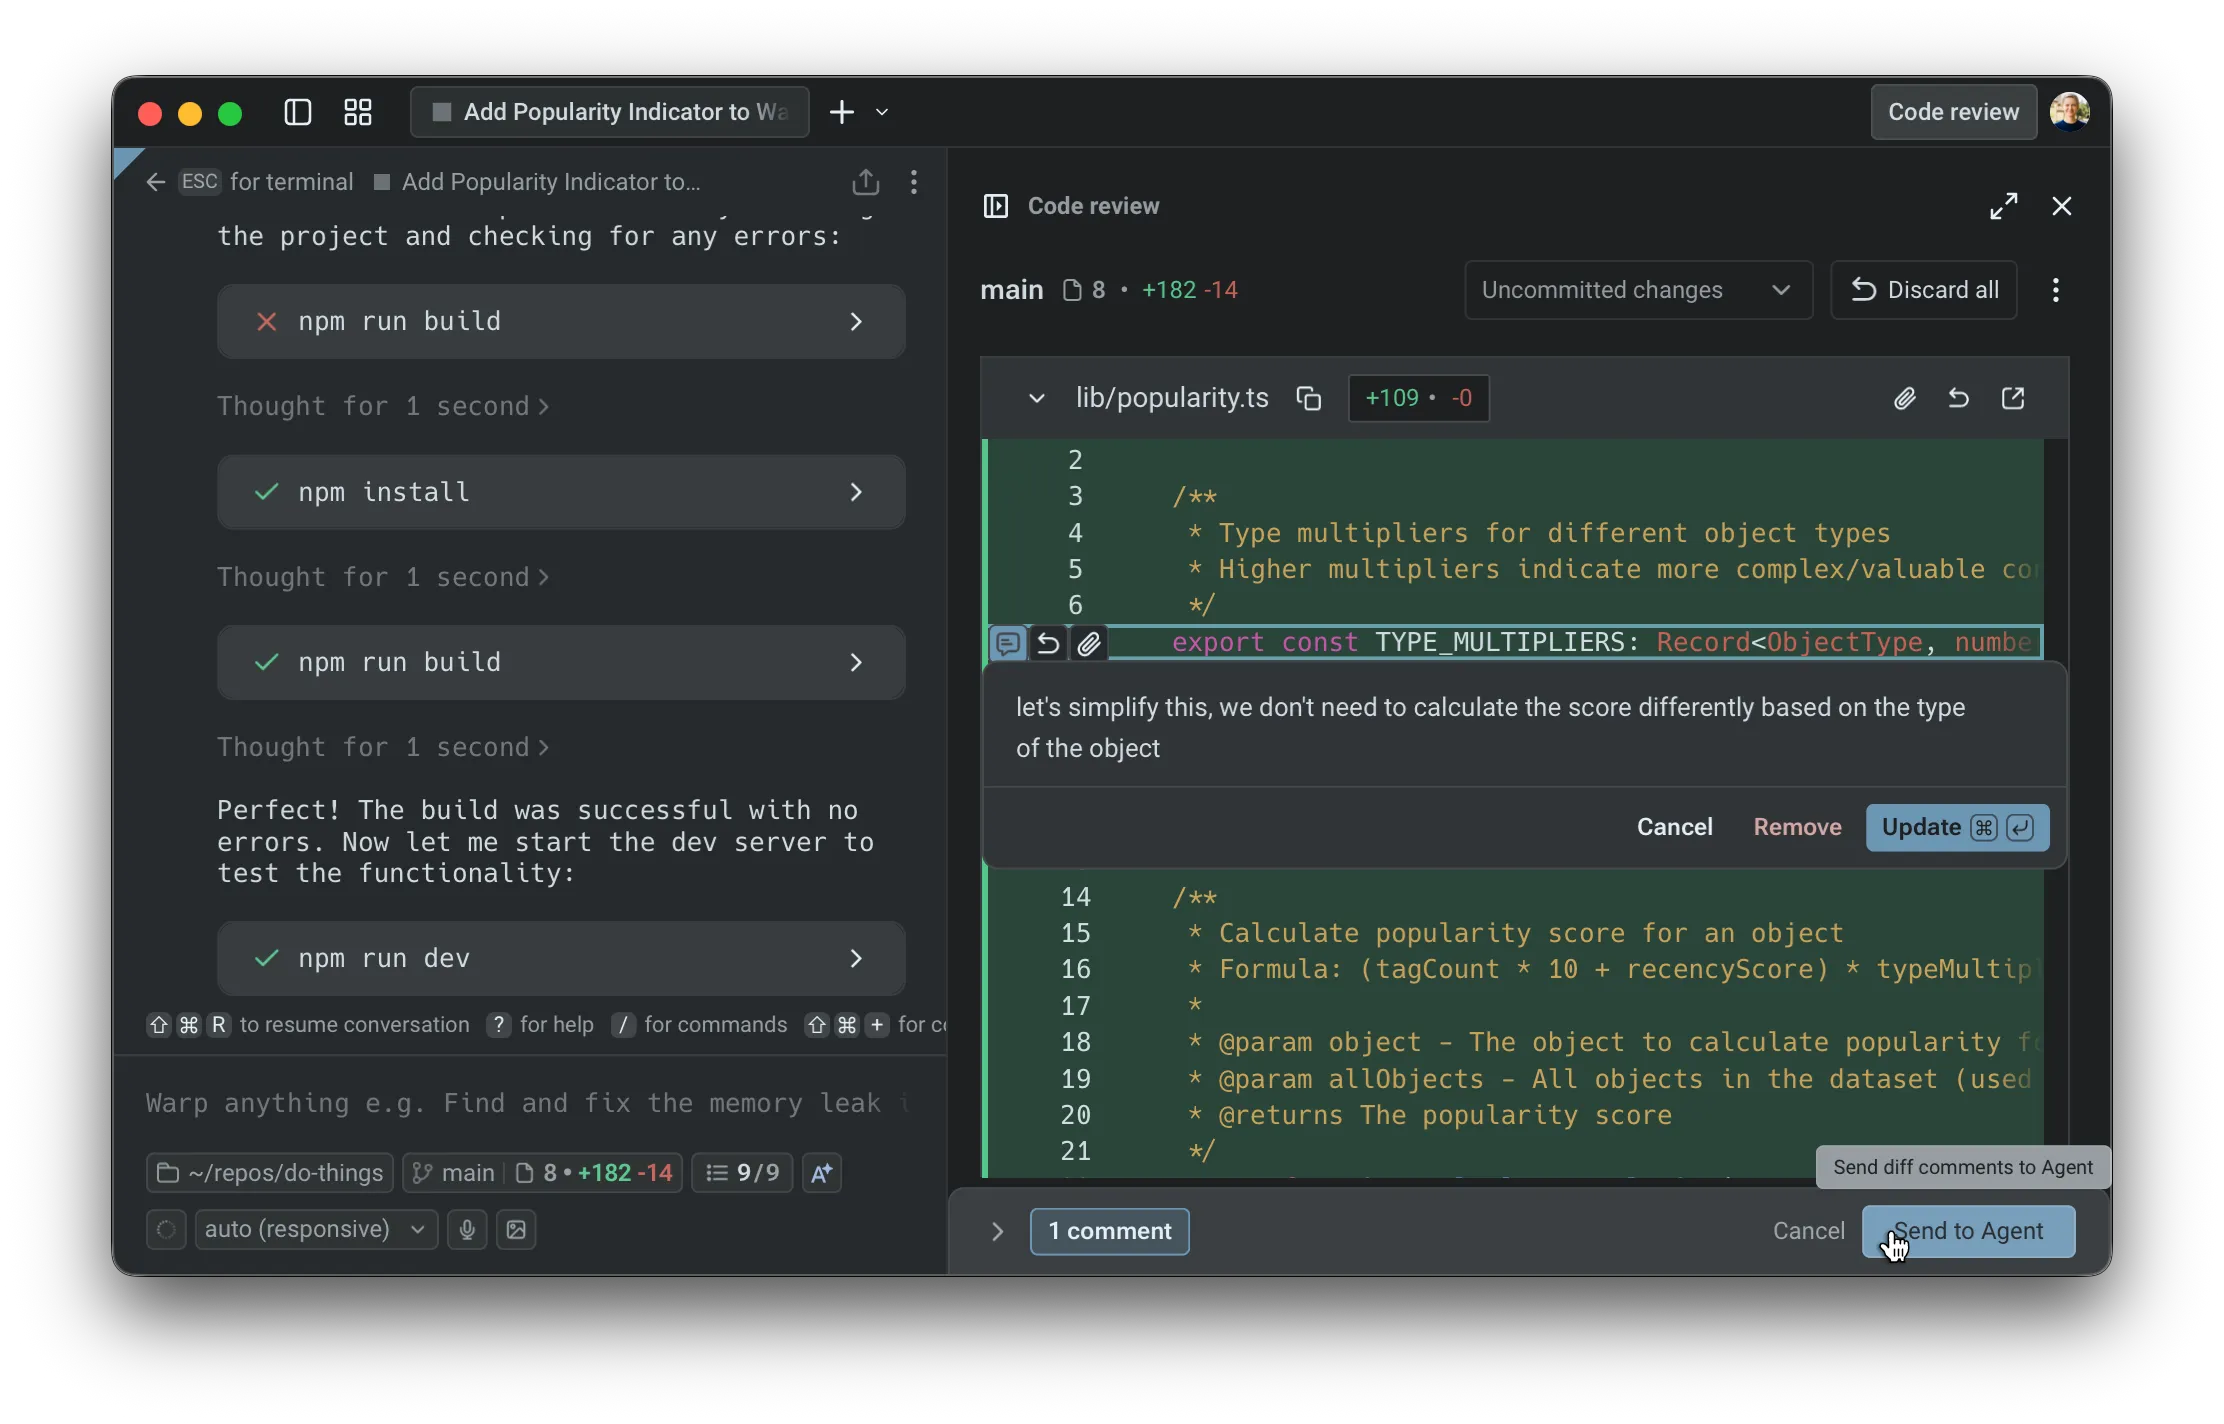 Adding comments directly in the Code Review view. ### Example demo [Section titled “Example demo”](#example-demo) In the example from Kevin on the Warp team, you’ll see how to: * open the Code Review panel after an agent produces changes * browse the diffs for each edited file * add multiple inline comments * review all comments in the list view * send those comments to the agent for resolution * inspect the updated diffs once the agent applies the changes This workflow can be repeated until the code matches your expectations. [Submitting inline code review feedback to an agent video](https://www.loom.com/embed/bdeb2eb1ff3640faa2cbacda9420c3a8) *** ## Next steps [Section titled “Next steps”](#next-steps) Once you’re comfortable reviewing agent code locally, try running agents in the cloud for longer or parallel tasks. * **[Cloud Agents quickstart](/platform/quickstart/)** - Run agents on Warp’s infrastructure for background tasks like PR review, issue triage, and dependency updates. * **[Attach agent session context to GitHub PRs](/guides/agent-workflows/how-to-attach-agent-session-context-to-github-prs/)** - Share the agent’s prompt, plan, commands, logs, validation, and reviewer asks with the PR. * **[Skills](/agents/capabilities/skills/)** - Turn successful agent workflows into reusable, shareable instructions.
# Agent Session Sharing
Canonical page: [/agents/local-agents/session-sharing/](https://docs.warp.dev/agents/local-agents/session-sharing/)
> Share live agent sessions so collaborators can view, steer, and interact with agent activity from any device — in real time or asynchronously.
Agent Session Sharing includes full visibility and control over agent activity. Share any agent session — Automation Platform or third-party — so collaborators can watch progress, review output, and steer the agent from the Warp app, a web browser, or a mobile device. Use Agent Session Sharing when teammates need the execution context behind an agent’s work, not just the final answer or code diff. A shared agent session can show the prompt, responses, thinking states, tool use, planning steps, terminal output, and follow-up messages in one reviewable link. [Agent Session Sharing in action — sharing a live session and collaborating across devices.](https://www.loom.com/embed/89e0e99c9bbf463a8a5e5bc2e96dabe4) ## Key capabilities [Section titled “Key capabilities”](#key-capabilities) * **Full Agent visibility** - Viewers see Agent prompts, responses, thinking states, tool use, planning steps, and [credit](/support-and-community/plans-and-billing/credits/) consumption in real time * **Cross-device access** - Open shared sessions from the Warp app, any web browser, or a mobile device. No install required for web viewers. * **Collaborative editing** - Grant edit access so collaborators can send their own Agent queries, execute commands, and start new conversations * **Multi-viewer support** - Multiple participants can observe and interact with the same session simultaneously, each with their own cursor and avatar * **Remote Control** - Publish third-party agent sessions to the cloud for persistent, asynchronous monitoring and steering from anywhere. See [Remote Control](/agents/cli-agents/remote-control/). ## Review agent work with a shared session [Section titled “Review agent work with a shared session”](#review-agent-work-with-a-shared-session) When you share an agent session, collaborators can inspect the work at the same level of detail you saw while the agent was running. This is useful when: * A teammate wants to review how an agent reached a conclusion * A reviewer needs the agent’s execution context alongside a PR or code diff * An agent used a third-party CLI tool and you want a persistent record of the terminal session * A workflow needs asynchronous review from a teammate on another machine or mobile device Share the link only with collaborators who should be able to see the session contents, including prompts, terminal output, and any context visible in the scrollback. ## How it works [Section titled “How it works”](#how-it-works) When you share an agent session, Warp uploads the session’s scrollback and live output to Warp’s servers and generates a shareable link. Session Sharing works through Warp’s servers rather than as a direct, peer-to-peer connection between devices, so the session stays in sync — any new agent output or terminal activity appears for all viewers in real time. The person who shares the session controls who can view and who can interact. ## Data retention and access [Section titled “Data retention and access”](#data-retention-and-access) Understanding how long shared data sticks around, how to stop sharing it, and who can see it helps you decide what’s safe to share. ### How long shared data is kept [Section titled “How long shared data is kept”](#how-long-shared-data-is-kept) Shared session data expires automatically about one week after you create the share. After that, the link can no longer be opened. This matches the message Warp shows when you try to open an expired link: “Sessions expire after one week and cannot be opened.” ### Stopping a share [Section titled “Stopping a share”](#stopping-a-share) Stopping a share immediately ends live access for every participant — no one can continue watching or interacting once you stop it. The share link can no longer be opened after the one-week expiry. There’s currently no separate control to delete a single shared session’s data before that expiry. To remove all of your shared session data through account deletion rather than waiting for the shared-session expiry, delete your Warp account and data. Deletion jobs run every 24 hours, so removal is not immediate. See [Delete your account and data](/support-and-community/privacy-and-security/privacy/#delete-your-account-and-data). ### Who can access a shared session [Section titled “Who can access a shared session”](#who-can-access-a-shared-session) Access to a shared session is based on who you grant it to, not just who has the link: * **Owner** - You, the person who started the share, control who can view and interact * **Invited collaborators** - People you explicitly invite to the session * **Your team** - Optionally, you can extend access to your whole team * **Anyone with the link** - Available as a setting when you want broader access Viewers must sign in to a Warp account to open a shared session. Workspace admins can disable invites and link sharing for the team by policy. Roles determine what a participant can do once they have access — some participants can only view the session, while others can also steer it by sending commands or agent queries. See [Collaboration and steering](#collaboration-and-steering) below. ### Secrets in shared sessions [Section titled “Secrets in shared sessions”](#secrets-in-shared-sessions) Caution [Secret Redaction](/support-and-community/privacy-and-security/secret-redaction/) isn’t applied to Session Sharing. Anything visible in a shared session’s scrollback, including values that Secret Redaction would otherwise redact elsewhere, is visible to everyone who can access the share. Treat sharing a session like sharing your screen: review what’s in the scrollback before you share it. ### AI and shared sessions [Section titled “AI and shared sessions”](#ai-and-shared-sessions) Sharing a session doesn’t, by itself, send its contents to a model. Shared sessions are excluded from Warp Drive’s AI indexing, so a shared session’s contents aren’t made searchable or citable by agents just because it was shared. An agent only sees a shared session’s terminal content when someone actually uses an AI feature inside that session — either you, or a collaborator you’ve granted edit access to. ## Sharing a session [Section titled “Sharing a session”](#sharing-a-session) 1. Start or open an agent session in Warp. The agent can be Warp’s built-in agent, a third-party coding agent, or any interactive agent running in your terminal. 2. Open the share action from any of these entry points: * **Command Palette** - Search for “Share current session” * **Pane header** - Click the overflow menu in the pane header * **Right-click context menu** - Right-click inside the session pane * **`/remote-control` chip** - For third-party agent sessions, click the `/remote-control` chip in the agent view footer or the CLI footer to publish and share instantly. See [Remote Control](/agents/cli-agents/remote-control/) for details. 3. Choose your starting point (full scrollback, no scrollback, or a specific block). 4. Confirm the share. Warp uploads the session to the cloud and generates a shareable link. 5. Copy the link and share it with teammates, or open it on another device. 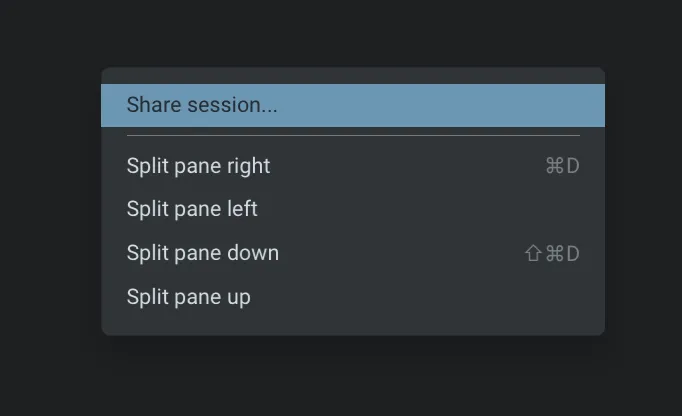 Start a shared session via the right click menu. 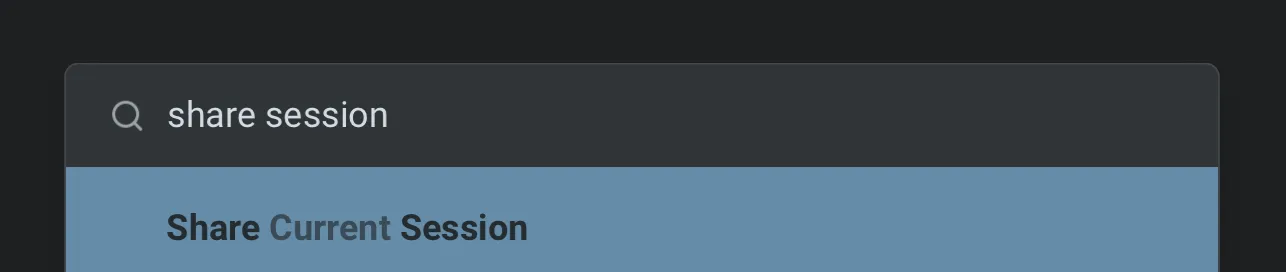 Start a shared session via the Command Palette. ## Viewing shared sessions [Section titled “Viewing shared sessions”](#viewing-shared-sessions) Shared sessions are accessible from: * **Warp app** - Paste the link into Warp on a different machine for the full app experience * **Web browser** - Open the shared link in any browser. No app install required. * **Mobile** - Open the link on a phone or tablet browser to check on progress while away from your desk The web experience mirrors the desktop view, showing complete Agent activity including thinking steps, tool use, and terminal output. ## Collaboration and steering [Section titled “Collaboration and steering”](#collaboration-and-steering) ### Watching Agent activity [Section titled “Watching Agent activity”](#watching-agent-activity) Viewers see Agent actions unfold live as the sharer interacts with the Agent: * **Thinking animations** - Real-time indicators of Agent reasoning * **Tool use and planning** - Visible tool calls and planning steps * **Credit consumption** - Live credit usage for the session * **Final responses** - Completed Agent output ### Edit access [Section titled “Edit access”](#edit-access) If a viewer requests edit access, the sharer can approve it. Once approved, collaborators can: * Send new Agent queries * Type directly into the prompt * Execute commands * Start and switch Agent conversations * Run terminal commands alongside Agent queries ### Multi-viewer sessions [Section titled “Multi-viewer sessions”](#multi-viewer-sessions) Multiple participants can join the same session from different machines, browsers, or environments. All participants: * See each other’s avatars and cursors * Watch Agent activity in sync * Edit together when granted access * Run terminal or Agent commands concurrently ## Related pages [Section titled “Related pages”](#related-pages) * [Remote Control](/agents/cli-agents/remote-control/) * [Third-party CLI agents](/agents/cli-agents/overview/) * [Cloud Agent Session Sharing](/platform/viewing-cloud-agent-runs/) * [Attach agent session context to GitHub PRs](/guides/agent-workflows/how-to-attach-agent-session-context-to-github-prs/) * [Secret Redaction](/support-and-community/privacy-and-security/secret-redaction/) * [Privacy and data control](/support-and-community/privacy-and-security/privacy/)